How to Fix Error Code HPQTRA08.exe

How to Fix Error Code HPQTRA08.exe

HPQTRA08.exe - What is it?

HPQTRA08.exe (Hewlett Packard Tray 08) is the Hewlett Packard Digital Imaging Monitor task. It is installed with the drivers of HP imaging products like PhotoSmart Printers.

It incessantly monitors and indicates the connectivity status with any recognizable HP product.

Simply put, HPQTRA08.exe is an exe (executable) file that contains step-by-step instructions that a computer follows to carry out a function.

HPQTRA08.exe error code is displayed in any of the following formats:

  • "Hpqtra08.exe Application Error."
  • "Cannot find hpqtra08.exe."
  • "Hpqtra08.exe not found."
  • "Error starting program: hpqtra08.exe."
  • "Hpqtra08.exe is not a valid Win32 application."
  • "Hpqtra08.exe failed."
  • "Faulting Application Path: hpqtra08.exe."
  • "Hpqtra08.exe has encountered a problem and needs to close. We are sorry for the inconvenience."
  • "Hpqtra08.exe is not running."

Solution

Restoro box imageError Causes

Error code HPQTRA08.exe can be triggered for several reasons. However, some of the most common causes include:

  • Corrupt Windows registry keys
  • Virus infection
  • Deleted, damaged, or corrupted HPQTRA08.exe file
  • HPQTRA08.exe file conflict
  • Corrupt or incomplete installation of Hp Digital Imaging

It is advisable to repair the error code HPQTRA08.exe on your PC immediately. Delays can lead to serious problems especially if the underlying cause of the error is related to registry corruption.

Further Information and Manual Repair

To resolve this error on your PC, you don’t need to hire a professional and pay hundreds of dollars for the repair. Simply try the DIY methods listed below to fix the problem right away.

Method 1 - Download and Install HPQTRA08.exe File

If the error cause is related to deleted, corrupted, or damaged HPQTRA08.exe file, then the best way to fix the problem is to install the HPQTRA08.exe file on your PC.

However, first, make sure the site you select to download the file from is reliable and trusted.

By downloading from an unreliable website you can expose your PC to potential malicious programs and risk your data security.

Method 2 - Remove all Viruses

Sometimes viruses and malware tend to disguise in the form of exe files such as the HPQTRA08.exe file.

In such a situation scan your entire PC for viruses and malware using a powerful antivirus. Remove all the malicious programs found to fix the issue.

Method 3 - Clean and Repair the Registry

The registry saves all PC-related activities and information including both important and obsolete files such as cookies, bad registry entries, invalid keys, internet history, and junk files.

If these files are not removed from the registry frequently, these accumulate in the registry and corrupt thereby triggering error codes. Error code HPQTRA08.exe is generated when the corrupt Windows registry keys are associated with the HPQTRA08.exe file.

To resolve, clean the registry and repair it. Although this can be done manually it can be time-consuming and tricky especially if you are not technically sound, therefore it is advisable to download Restoro.

Click here to download Restoro and resolve error HPQTRA08.exe.

Method 4 - Locate and Install the Driver

As was pointed out, you might need to reinstall the printer driver again. Using DriverFIX, you’ll be able to automatically update your computer system and install the drivers your computer needs to operate smoothly.

If you like to learn and find out more about various Windows errors, and how to repair them go to our vast archive or use search to find articles that will explain and help you in solving your issue.
However, if you prefer to do things fast and with automatization then we are proposing to use an automated solution for your issues. The application that we are recommending is Advanced System Repair Pro
Advanced System Repair utilizes multiple tools all in one to give you a quick, simple, reliable, and very thorough diagnosis of your PC. It brings you all the tools you need in one program to clean, fix, protect, optimize and boost your PC!
1-Click Maintenance
All the tools to make it simple and easy! It's like having a professional technician at the click of a mouse.

Junk Cleaner
Keeping your computer free from unnecessary clutter also helps make your computer last longer. Like any other machine, if you keep it clean and take care of it, it will serve you better for longer!

Optimize background apps
Optimize applications background activity with the built-in Application Optimizer feature.

Disk Defrag
With a simple 1-click, Advanced System Repair speeds up your PC by assembling fragmented files on your machine and organizing them more efficiently.

Malware Removal
Finds and removes all types of harmful malware including trojans, worms, bots, adware, spyware, PUPs, and more!

Privacy Cleaner
The all-in-one privacy suite to Clean Your Tracks & Protect Your Privacy! Make your computer safe, secure, and more efficient!

System Tweak/Optimizer
ASR will analyze your complete system and settings to adjust your PC to function at its maximum performance.

Registry Cleaner
Over time, as you install and uninstall applications, the registry can become cluttered with old entries and broken settings which can result in program crashes, and annoying messages and slow the computer down.
Visit our Advanced System Repair Pro Download page to inform yourself about all the benefits of this software and get a free trial copy of it.
advanced system repair pro

Advanced System Repair Pro

One-click automated PC repair solution
ASR logo
With Advanced System Repair Pro you can easily
Replace damaged files
Restore performance
Free disk space
Remove Malware
Protects WEB browser
Remove Viruses
Stop PC freezing
DOWNLOAD
Privacy Policy | Terms of Use | Uinstall
Advanced System Repair Pro is compatible with all versions of Microsoft Windows including Windows 11

Share this article:

You might also like

Should you buy used GPU in current market?
Things have stirred lately with Chinas ban on crypto mining and many used GPUs will flow the market probably. But should you buy a used GPU? Short answer: NO, long answer: keep on reading to find out why.

GPU 1080ti
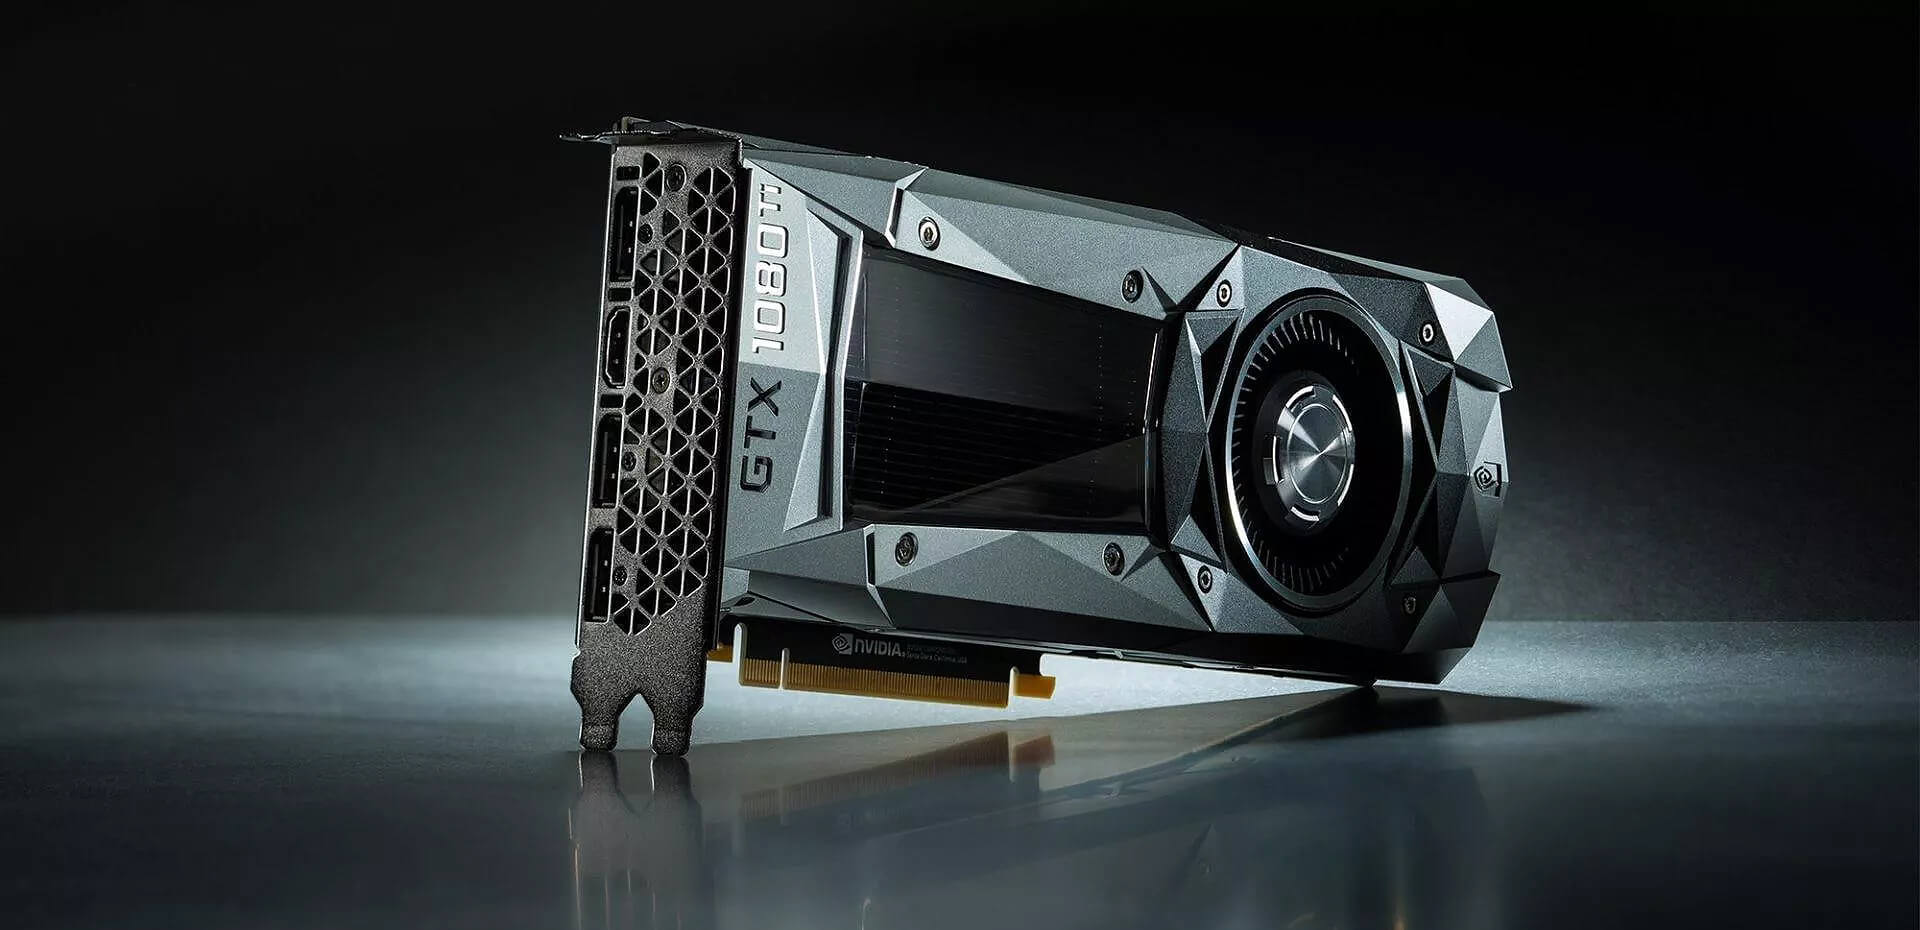
GPU shortage and its cause

As you all know by now, we live sadly in a world struck by a global Pandemic. Due to this awful disease and measures taken against it, many people are either working from home or are at home making the manufacturing of new chips problematic while demand on the market has raised. Throw into that mix crypto mining which has raised in popularity and you have, well today's market where we have GPU shortage. Now with the latest news that China has banned the mining of cryptocurrency, there is to be expected that at some point in time mining cards used there will fit the market in the whole world. Sadly even with a large quantity of GPUs that will become available, the overall price of cards will not be much lowered I am afraid since demand is still very high and many people would not want to purchase used mining cards and neither should you.

Be prepared for the worst scenario

Although this sounds very pessimistic and in most cases, it will not turn out to be true, you should always prepare yourself mentally that you might be in that lower percentage that will end up with a really bad GPU. What has come up to be absolutely true when considering GPU that were mining is that if anything at all can be done to GPU in order to increase performance, it has been done. Miners want to optimize and almost every GPU if could be overclocked, it was overclocked. Extensive mining also means that thermal paste has been dried and it is pretty useless at this point and there is a very high chance that fans and heat sinks will need much cleaning or even replacement raising the price of the card itself for mentioned paste, fans, and heat sinks. There's no way to tell what the previous owner might have done with a graphics card when you're shopping online, so our advice is to assume the worst. Don't trust the seller to give truthful information. Any listing that says it was "never used for mining" at this point is probably a lie.

Age of the GPU matters

Date when GPU itself has manufactured really matters. Newer cards even if used extensively have been used for a much shorter period of time and are not so damaged were ones produced a few years ago have seen a lot of action. Let’s say that you get RTX 3060, In the worst-case scenario it has been mining since late February of 2021 and basically, it is still under warranty so it should behave OK and put some good work in gaming even in that state. On another hand, if we take for example GTX 1080Ti which is 4 years old GPU things start to change drastically. 4 years GPU could be worn out even if it was used just for extensive gaming sessions let alone for mining.

No return policy and seller rating

Most of the time you will run into a product that cannot be returned or no refunds policy. This should bring a red flag right away and deter you from purchase. Sellers with the highest ratings are more trustworthy since many of them will not want to destroy their reputation but these will probably not even have these kinds of merchandise in their store. Buying with a poor rating seller and no return policy on a product is just asking for trouble. And although some stores do have arbitration and will stand on the customer side there is no guarantee for that and it will take too much time to process.

If you really must buy a second-hand GPU

Of course in these troubled times sometimes due to malfunction or any other reason, there would not be another choice than to buy a second-hand GPU. In this case, if there is no other option consider sellers with many positive ratings. If you can buy locally that would even be better or the best-case scenario would be if you could visually see and inspect GPU itself in order to see in what state it is. Look for warranty stickers to see if they are thorn and the card has been tampered with. Also take a good look at screws, if they have scratches card has been opened, probably to replace fan or heating sinks which means that it has worked a lot.

Conclusion

It is very difficult to give the best possible advice on this situation since of GPU shortage, but I would much prefer a new GPU with lower performance than a hi-performance one which was mining.
Read More
How to Remove FileShareFanatic

FileShareFanatic is a browser extension developed by Mindspark Inc. This extension offers users the ability to quickly access some of the most popular file-sharing websites. While this may sound tempting and useful at start, using this extension might prove more annoying then useful.

When installed FileShareFanatic hijacks your new tab page changing your default search engine to search.myway.com. Additionally it monitors user activity, recording visited websites, clicked links, viewed products, and whatever other information that can be used by the Ad network to display targeted Ads.

While browsing the internet with this extension you will notice an increase of ads on pages, especially in search results. This extension injects additional ads, sponsored links, and even displays pop-up ads in order to gain revenue.

FileShareFanatic has been marked as a Browser Hijacker by several top anti-virus scanners, and is scheduled for deletion.

About Browser Hijackers

Browser hijacking is considered the web’s constant danger that targets browsers. It is a kind of malicious software that modifies your internet browser’s configuration settings so that you are redirected to websites or pages that you had no intention of visiting. Browser hijackers can do more than simply modifying homepages. It redirects you to the sponsored sites and inserts advertisements on your browser which helps its developer generate earnings. It might appear naive, but most of these websites are not legitimate and will pose a major risk to your online safety. Browser hijackers can even let other vicious programs without your knowledge to further damage your PC.

Symptoms of browser hijack

There are numerous symptoms of browser hijacking: 1. you see unauthorized modifications to your internet browser’s homepage 2. you get re-directed to internet sites you never meant to visit 3. default online search engine is modified 4. discover new toolbars which you did not add 5. you observe lots of pop-ups on your screen 6. your web browser gets slow, buggy, and crashes frequently 7. Inability to navigate to certain sites, especially anti-malware as well as other security software webpages.

How they infect computers

Browser hijackers attack computers via malicious email attachments, downloaded infected documents, or by visiting infected internet sites. Many internet browser hijackings originate from add-on software, i.e., browser helper objects (BHO), toolbars, or extensions added to browsers to give them extra features. A browser hijacker could also be installed as a part of freeware, demoware, shareware and pirated programs. Browser hijackers can interrupt the user’s web browsing experience significantly, track the websites visited by users and steal sensitive information, cause difficulty in connecting to the internet, and eventually create stability problems, making software programs and computer to crash.

Removal

The one thing you can try to get rid of a browser hijacker is to find the malware within the “Add or Remove Programs” list in the Microsoft Windows Control Panel. It may or may not be there. If it is, try to uninstall it. But, most hijacking codes aren’t very easy to eliminate manually, as they go deeper into your operating system. Besides, browser hijackers could modify the Computer registry so that it could be very hard to repair manually, especially when you’re not a very tech-savvy individual. You can choose automatic browser hijacker removal by just installing and running reliable anti-malware software. If you need to get rid of persistent browser hijackers effectively, install the top-rated Anti-Malware software Safebytes Anti-Malware.

Find Out How To Install Safebytes Anti-Malware On An Infected PC

Malware can cause a lot of damage to your PC. Some malware types alter internet browser settings by including a proxy server or change the PC’s DNS configuration settings. When this happens, you’ll be unable to visit certain or all of the sites, and thus unable to download or install the required security software to remove the infection. If you are reading this, you may have infected by a virus that prevents you from downloading a security program such as Safebytes Antimalware on your PC. There are some actions you can take to circumvent this issue.

Download the application in Safe Mode with Networking

If the virus is set to load immediately when Microsoft Windows starts, entering Safe Mode could very well block the attempt. Since only the bare minimum programs and services launch in safe mode, there are hardly any reasons for conflicts to occur. To start your Windows XP, Vista or 7 computer in Safe Mode with Networking, please do as instructed below. 1) At power on, hit the F8 key before the Windows splash screen starts to load. This will bring up the Advanced Boot Options menu. 2) Choose Safe Mode with Networking with arrow keys and hit ENTER. 3) Once this mode loads, you will have the internet. Now, utilize your browser to download and install Safebytes Anti-malware. 4) As soon as the application is installed, allow the scan run to eliminate viruses and other malware automatically.

Switch to an alternate internet browser

Web-based viruses can be environment-specific, aiming for a particular web browser or attacking specific versions of the browser. The best solution to avoid this problem is to opt for a browser that is known for their security measures. Firefox comprises built-in Phishing and Malware Protection to keep you safe online.

Run antivirus from a USB drive

Another option is to make a portable antivirus program onto your USB thumb drive. To run antivirus from a thumb drive, follow these simple steps: 1) Download Safebytes Anti-Malware or Microsoft Windows Defender Offline onto a clean computer system. 2) Plug the Thumb drive into the uninfected computer. 3) Double-click the Setup icon of the anti-malware software to run the Installation Wizard. 4) Select the drive letter of the USB drive as the place when the wizard asks you exactly where you would like to install the anti-virus. Follow the directions to finish the installation process. 5) Unplug the pen drive. Now you can utilize this portable antivirus on the affected computer. 6) Double-click the anti-malware program EXE file on the thumb drive. 7) Simply click “Scan Now” to run a complete scan on the infected computer for malware.

SafeBytes Anti-Malware Features

To protect your personal computer from many different internet-based threats, it’s important to install an anti-malware application on your computer system. However, with countless numbers of anti-malware companies in the marketplace, nowadays it is challenging to decide which one you should purchase for your PC. Some are good ones, some are decent, and some are simply just fake anti-malware applications that could harm your personal computer themselves! You should choose one that is trustworthy, practical and has a strong reputation for its malware source protection. On the list of strongly recommended software by industry analysts is SafeBytes Anti-Malware, the most dependable program for Windows computers. SafeBytes anti-malware is a powerful, very effective protection application made to help users of all levels of computer literacy in finding and eliminating malicious threats from their computer. Once you’ve installed this program, SafeBytes state-of-the-art protection system will ensure that absolutely no viruses or malware can seep through your PC.

SafeBytes anti-malware takes PC protection to a totally new level with its enhanced features. These are some of the highlighted features included in the software.

World-class AntiMalware Protection: Built on a greatly acclaimed anti-virus engine, this malware removal tool can identify and get rid of several obstinate malware threats such as browser hijackers, potentially unwanted programs, and ransomware that other typical antivirus programs will miss. Real-time Threat Response: Malware programs attempting to get into the computer are discovered and stopped as and when detected by the SafeBytes active protection shields. It’ll examine your PC for suspicious activity at all times and its unrivaled firewall protects your computer from unauthorized access by the outside world. Safe Browsing: Safebytes assigns all sites a unique safety ranking that helps you to get an idea of whether the webpage you’re just about to visit is safe to browse or known to be a phishing site. Lowest Memory/CPU Usage: SafeBytes is a lightweight tool. It consumes a really small amount of processing power as it operates in the background therefore you will not see any computer performance difficulties. 24/7 Guidance: SafeBytes provides 24/7 technical support, automatic maintenance and updates for best user experience. All in all, SafeBytes Anti-Malware is a solid program as it has lots of features and could identify and remove any potential threats. Once you have downloaded and installed this software, you no longer need to worry about malware or any other security worries. So if you’re searching for the best anti-malware subscription for your Windows-based computer, we recommend SafeBytes Anti-Malware tool.

Technical Details and Manual Removal (Advanced Users)

If you wish to carry out the removal of FileShareFanatic manually instead of using an automated software tool, you may follow these measures: Proceed to the Windows Control Panel, click the “Add or Remove Programs” and there, choose the offending application to uninstall. In cases of suspicious versions of web browser plug-ins, you can easily get rid of it via your web browser’s extension manager. You’ll probably also want to reset your browser. To be certain of complete removal, find the following registry entries on your computer and remove it or reset the values appropriately. Having said that, editing the registry can be a complicated job that only advanced users and professionals should try to fix it. Furthermore, some malware is capable of replicating or preventing removal. It is advisable that you carry out the removal process in Windows Safe Mode.
Files: %UserProfile%\Local Settings\Application Data\FileShareFanaticTooltab %LOCALAPPDATA%\FileShareFanaticTooltab Registry: HKEY_LOCAL_MACHINE\Software\Microsoft\Internet Explorer\Approved Extensions, value: FB8C7587-6C03-425D-821D-65339B3E249E HKEY_CURRENT_USER\SOFTWARE\Wow6432Node\Microsoft\Windows\CurrentVersion\explorer\Browser Helper Objects\FB8C7587-6C03-425D-821D-65339B3E249E HKEY_CURRENT_USER\SOFTWARE\Microsoft\Windows\CurrentVersion\explorer\Browser Helper Objects\FB8C7587-6C03-425D-821D-65339B3E249E HKEY_CURRENT_USER\SOFTWARE\Wow6432Node\Microsoft\Windows\CurrentVersion\explorer\Browser Helper Objects\EA89EC10-2255-42A6-9AA7-84B4441C2DCA HKEY_CURRENT_USER\SOFTWARE\Microsoft\Windows\CurrentVersion\explorer\Browser Helper Objects\EA89EC10-2255-42A6-9AA7-84B4441C2DCA HKEY_LOCAL_MACHINE\Software\Microsoft\Windows\CurrentVersion\Ext\Stats\FB8C7587-6C03-425D-821D-65339B3E249E HKEY_LOCAL_MACHINE\Software\Microsoft\Windows\CurrentVersion\Ext\Stats\EA89EC10-2255-42A6-9AA7-84B4441C2DCA HKEY_LOCAL_MACHINE\Software\Microsoft\Windows\CurrentVersion\Ext\Settings\6E4DF5E6-A1D8-48E0-BA5A-91C5DBD6AAF1 HKEY_CURRENT_USER\SOFTWARE\Wow6432Node\Microsoft\Internet Explorer\SearchScopes\BDF4A303-E4F0-42F0-B235-351F6C8F6C1A HKEY_LOCAL_MACHINE\Software\Microsoft\Internet Explorer\SearchScopes\BDF4A303-E4F0-42F0-B235-351F6C8F6C1A HKEY_CURRENT_USER\SOFTWARE\Wow6432Node\Microsoft\Tracing\FileShareFanatic_RASMANCS HKEY_CURRENT_USER\SOFTWARE\Microsoft\Tracing\FileShareFanatic_RASMANCS HKEY_CURRENT_USER\SOFTWARE\Wow6432Node\Microsoft\Tracing\FileShareFanatic_RASAPI32 HKEY_CURRENT_USER\SOFTWARE\Microsoft\Tracing\FileShareFanatic_RASAPI32 HKEY_CURRENT_USER\SOFTWARE\Microsoft\Internet Explorer\DOMStorage\filesharefanatic.dl.myway.com HKEY_LOCAL_MACHINE\Software\FileShareFanatic
Read More
How to Get Rid of Email Access Online

Email Access Online is a browser extension published by Polarity Technologies Ltd. That offers users quick and easy access to emails and weather reports. While this might sound interesting and useful, there is nothing this extension offers that cannot be solved with a few simple bookmarks.

While installed Email Access Online monitors the user's browser activity and records visited websites, clicked links, and bought products, this data is later used to serve partner ads if the user looks for the covered categories, additionally, it will hijack your new tab page, changing your search engine to Yahoo to allow easier ad placement.

Browsing the internet with this extension enabled will result in additional ad placement, pop-up ads, and sponsored links throughout your browsing sessions.

Upon further investigation, it was discovered that this extension is a repack of MyEmailXP, which was a repack of Fast Email Checker. Due to its suspicious delivery methods and information gathering, several anti-virus scanners have marked this extension as a browser hijacker and it is recommended to remove it from your computer.

About Browser Hijackers

Browser hijacking means that a malicious code has taken control over and modified the settings of your web browser, without your consent. Browser hijacker malware is designed for many different reasons. The idea is to force users to visit specific websites which are aiming to increase their visitor traffic and generate higher advertisement income. It may appear naive, but the majority of such websites are not legitimate and can present a significant risk to your online safety. In a worst-case scenario, your internet browser could be hi-jacked to download malicious software that can do a lot of damage to your PC.

Major signs that your internet browser has been highjacked

There are many signs that could indicate a browser hijacking: 1. the home page of the web browser is changed suddenly 2. you observe new unwanted bookmarks or favorites added, usually directed to ad-filled or porn websites 3. the default search engine is changed and the web browser security settings have been brought down without your knowledge 4. you see unwanted new toolbars added 5. your internet browser will display constant pop-up windows 6. your web browser starts running sluggishly or presents frequent errors 7. Inability to navigate to particular sites, especially anti-malware and other computer security software websites.

So how does a computer get infected with a browser hijacker

There are a number of ways your computer can get infected by a browser hijacker. They usually arrive through spam e-mail, via file sharing websites, or by a drive-by-download. They could also come from add-on software, also referred to as browser helper objects (BHO), web browser extensions, or toolbars. Browser hijackers sneak to your computer in addition to free software application downloads that you unintentionally install along with the original. The presence of any browser hijacker on your system could substantially diminish the web browsing experience, monitor your internet activities that lead to critical privacy concerns, create system stability problems and finally cause your PC to slow down or to a practically unusable condition.

How to repair a browser hijack

Certain kinds of browser hijackers can be effortlessly removed from your PC by deleting malicious software programs or any other recently installed shareware. However, most hijacking codes are certainly not very easy to remove manually, as they go deeper into your operating system. And there’s no denying the very fact that manual repairs and removal methods can certainly be a difficult job for an inexperienced PC user. Besides, there are several risks connected with fiddling around with the system registry files. Anti-malware program is incredibly effective when it comes to discovering and removing browser hijackers that regular anti-virus application has missed. To get rid of any kind of browser hijacker from your computer, you can download the following certified malware removal application – SafeBytes Anti-Malware.

What you can do if Virus Stops You From Downloading Antivirus?

Practically all malware is bad, but certain kinds of malicious software do much more damage to your PC than others. Some malware goes to great lengths to stop you from downloading or installing anything on your personal computer, especially anti-malware software. If you are reading this right now, you’ve probably realized that virus infection is the reason behind your blocked net traffic. So what to do when you want to install an anti-malware application such as Safebytes? There are a few actions you can take to circumvent this issue.

Make use of Safe Mode to fix the issue

If the malware is set to run automatically when Windows starts, getting into safe mode may block this attempt. Since only the bare minimum programs and services start-up in “Safe Mode”, there are rarely any reasons for conflicts to happen. You will need to do the following to remove malware in Safe mode. 1) At power on/start-up, tap the F8 key in one-second intervals. This will bring up the Advanced Boot Options menu. 2) Use the arrow keys to choose Safe Mode with Networking and press ENTER. 3) When you are into this mode, you will have access to the internet again. Now, use your internet browser normally and navigate to https://safebytes.com/products/anti-malware/ to download Safebytes Anti-Malware. 4) Once the software is installed, let the diagnostic scan run to remove viruses and other threats automatically.

Obtain the antivirus software in an alternate browser

Certain viruses may target vulnerabilities of a particular web browser that obstruct the downloading process. If you seem to have a virus attached to Internet Explorer, then switch to an alternate browser with built-in safety features, such as Firefox or Chrome, to download your favorite antivirus program – Safebytes.

Run anti-virus from a pen drive

Here’s yet another solution which is using a portable USB anti-malware software package that can scan your computer for viruses without needing installation. Follow these steps to run the anti-malware on the infected PC. 1) Make use of another virus-free computer to download Safebytes Anti-Malware. 2) Plug the Flash drive into the uninfected computer. 3) Double-click on the downloaded file to run the installation wizard. 4) Choose the drive letter of the USB drive as the location when the wizard asks you exactly where you want to install the anti-virus. Follow activation instructions. 5) Now, insert the USB drive into the infected system. 6) Double click the Safebytes Anti-malware icon on the thumb drive to run the software. 7) Click on “Scan Now” to run a complete scan on the infected computer for malware.

Let's Talk About SafeBytes Anti-Malware!

Nowadays, anti-malware software can protect your PC from different forms of internet threats. But wait, how to select the right one among plenty of malware protection application that is available on the market? As you may be aware, there are numerous anti-malware companies and tools for you to consider. Some of them are good, some are ok types, while some will affect your computer themselves! When looking for an antivirus program, select one which gives solid, efficient, and full protection against all known computer viruses and malware. On the list of the recommended tool by industry experts is SafeBytes Anti-Malware, well-known security software for Microsoft Windows. SafeBytes anti-malware is really a powerful, highly effective protection software intended to help end-users of all levels of IT literacy in identifying and removing malicious threats from their computers. Once you have installed this tool, SafeBytes advanced protection system will ensure that absolutely no viruses or malware can seep through your personal computer.

SafeBytes possesses a plethora of amazing features that can help you protect your computer from malware attacks and damage. The following are some of the great features included in the application.

Real-time Active Protection: SafeBytes offers a totally hands-free active protection and is set to observe, prevent and wipe out all threats at its first encounter. It’ll constantly monitor your pc for hacker activity and also gives users superior firewall protection. Anti-Malware Protection: Using its advanced and sophisticated algorithm, this malware removal tool can detect and remove the malware threats hiding in your PC effectively. High-Speed Malware Scanning Engine: This computer software has got one of the fastest and most efficient virus scanning engines in the industry. The scans are extremely accurate and take a short amount of time to complete. Web Security: SafeBytes gives an instant safety rating on the pages you are about to check out, automatically blocking risky sites and making sure that you’re certain of your online safety while browsing the web. Lowest Memory/CPU Usage: SafeBytes gives you complete protection from online threats at a fraction of the CPU load due to its enhanced detection engine and algorithms. Fantastic Tech Support Team: For any technical inquiries or product guidance, you could get 24/7 expert assistance through chat and email. SafeBytes will keep your personal computer protected from most advanced malware threats automatically, thus keeping your online experience safe and secure. You now may know that this particular software does more than just scan and delete threats on your computer. If you want advanced forms of protection features and threat detections, buying SafeBytes Anti-Malware could be well worth the dollars!

Technical Details and Manual Removal (Advanced Users)

To remove Email Access Online manually, navigate to the Add/Remove programs list in the Windows Control Panel and choose the program you want to remove. For browser plug-ins, go to your browser’s Addon/Extension manager and choose the plug-in you want to remove or disable. You will probably also want to reset your internet browser. To make sure of complete removal, find the following Windows registry entries on your system and eliminate it or reset the values accordingly. However, this is a difficult task and only computer professionals can perform it safely. Additionally, certain malware is capable of replicating itself or preventing deletion. You’re suggested to do this process in Windows Safe Mode.
Registry: HKEY LOCAL MACHINE\SOFTWARE\Microsoft\Internet Explorer\SearchScopes\675942D5-E956-4670-9ADE-6982CF23558F
Read More
OneDrive thumbnails are not showing
A lot of users prefer to use Microsoft OneDrive when it comes down to cloud storage as it does not only come with the seal of approval from Microsoft but it’s also primarily good and better compared to other cloud storage services. However, that doesn’t mean that OneDrive isn’t without any issues. For one, you might encounter an issue where the OneDrive thumbnails do not show in File Explorer in Windows 10. If you are currently experiencing this problem, read on as this post will help you fix it. As you know, you can add OneDrive to your Windows 10 computer and have all the files locally synchronize to the cloud and so on. This means that whatever is available in the cloud will be seen on your computer. It is smooth and definitely saves you a lot of time which is why a lot of users prefer to use it. So if you suddenly not see any thumbnails in OneDrive, then that would be a problem. You are actually not the only one having this problem as there are other users who reported getting the same issue recently about the picture thumbnails that no longer show up in the OneDrive folders in the File Explorer. At the time of writing, it isn’t clear yet what the cause of the issue really is. Even so, there are still potential fixes you can check out to resolve it, and the sooner you do it, the better as this can be a major problem. To get started, refer to the instructions given below.

Option 1 – Try to disable Files on Demand

The first thing you can do to fix the problem is to disable the Files on Demand. This is what you have to do to get things under control.
  • First, right-click on the OneDrive icon located in the taskbar and go-to of OneDrive.
  • After that, click on More and Settings. This will open a new window where you have to click on the Settings tab and uncheck the “Files on Demand” service.
  • Once done, restart your computer and check if you can now see the thumbnails in the OneDrive folder. However, if it didn’t work, then proceed to the next given option below.

Option 2 – Try to change the icon view

The next thing you can do to fix the problem is to change the icon view. It is possible that the problem might have something to do with the size of the icons than anything else. So you have to change the icon view and to do that, follow these steps:
  • First, open Control Panel in Windows 10.
  • Next, in the search box, type “folder” and then click on the File Explorer Options.
  • From there, click on the View tab and uncheck the “Always show icons” option, and make sure that showing thumbnails is active.
  • Now go back to Control Panel and type “system” in the search box. This will open a new window where you have to select the “View advanced system settings” option.
  • Then under the Performance section, click on Settings and click on the option that allows you to show the thumbnails instead of icons.
Read More
Moving Start Menu to the Second Monitor
One of the most important User Interface elements in a Windows 10 operating system is the Start Menu. Not too long ago, Microsoft has added some new features and redesigned the Start Menu a couple of times as well. Thus, it is not uncommon for Windows 10 users to use several monitors. That’s why in this post, you will be guided on how you can move the Start Menu to your second monitor in Windows 10. There are a lot of advantages in using more than one monitor like a better and widescreen as well as help in improving and increasing productivity. Usually, the Start Menu and the taskbar is present in the original monitor only. In most cases, it helps users in moving the Start Menu to the second monitor and helps users in segregating tasks, and uses separate monitors for each kind of task. There are two simple steps to move the Start Menu to the second monitor. You have the option to unlock and drag the taskbar, as well as make adjustments in the settings. To get started, refer to each one of the following options to move the Start Menu to the second monitor.

Option 1 – Move the second monitor by unlocking and dragging the taskbar

The first option you can try to move the Start Menu to the second display is to simply unlock and then drag the taskbar. To do so, follow these steps:
  • First, click on the Taskbar and unlock it.
  • Next, uncheck the Lock the taskbar feature in the menu of the Taskbar Settings. This will free the taskbar so you can move or drag it around.
  • After that, push the Start Menu to the furthermost corner of the screen and then transfer it to the second monitor.

Option 2 – Move the second monitor using the keyboard

  • The first thing you have to do is to tap the Windows key to open the Start Menu.
  • Next, close the Start Menu by tapping the Esc key.
  • After that, the controls will shift back to the taskbar.
  • Now open the context menu of the taskbar by tapping the Alt + space bar together. This will move the Start Menu to the second monitor.

Option 3 – Move the Start Menu to the second monitor via Settings

If you find that the Taskbar is moving to the wrong monitor automatically or if the program does not start on the same monitor as the taskbar, then you can try this option.
  • Click on Start first and click Run.
  • Then type “desk.cpl” in the field and click OK.
  • Alternatively, you could also right-click on the desktop and select the Screen Resolution option from the drop-down menu.
  • After that, click on the monitor that you want to use as the primary monitor and select the checkbox labeled “Make this my main display”.
  • Once done, you have to choose the “Show desktop” on only 1 from the drop-down menu of Multiple displays.
  • Now click the Keep Changes option and select the Extend these displays from the Multiple displays drop-down menu and then click on the Apply button to save the changes made.
  • Afterward, click the Keep changes option once the dialog box pops up.
Read More
Installing Wi-Fi drivers in Windows
If you don’t have the required drivers installed in your computer, the hardware that you try to connect to your computer will most likely fail. In order to keep the operating system running on your computer, manufacturers develop drivers that can work harmoniously with your devices and applications. However, internet Wi-Fi connections can fail if suitable drivers are not installed. Worry not though for this post will guide you in installing Wi-Fi drivers on your Windows 10 computer. As you know, a driver is an essential piece of software designed for a specific operating system like Windows 10, Linux, and many more. The operating system uses it to communicate with other hardware devices such as printers and mice. Most hardware manufacturers feature a support page of their own product where you can look for the necessary drivers available for download. You will see that the Windows operating system has a set of drivers that are already installed and you do not have to do anything except plug in the device. So if the driver is not locally available, it will pull it down from its web server and automatically install it for you after you connect the device. However, there are instances when you might encounter some issues while using your Wi-Fi and during these times, you might have to reinstall your Wi-Fi drivers so read on as this post will provide you guidelines in installing Wi-Fi drivers in Windows 10. Refer to the steps below to do so. Step 1: First, go to your manufacturer’s website and look for the right driver you want to install to download your Wi-Fi driver. Step 2: After that, you have to download the correct Wi-Fi driver if it’s available. You have to know the exact name and version of the driver so that you can download it and this information can be found from the Device Manager. Just make sure that you have the right wireless adapter driver downloaded. Step 3: Once done, open the setup of the new driver that you’ve downloaded earlier and run the file and then follow the next on-screen instructions that appear right after. Step 4: You’re not done yet as you need to verify if you have downloaded and installed the correct Wi-Fi driver. Refer to the sub-steps below to do so:
  • First, right-click on the Start button and select the Device Manager to open it.
  • From there, look for the Network Adapters and expand its category to make all the network adapters visible including the wireless adapter.
  • You can easily spot the wireless adapter as it has the “wireless” term in its entry.
  • Next, right-click on the wireless driver entry in the Device Manager and select Network adapters, and then click on Properties to check the version number of the driver.
  • Now select the Driver tab and view the details. If it looks well then it means that you have the right version of the driver installed.
Step 5: Restart your computer.
Read More
How to remove Fooriza from your PC

Fooriza is a browser extension for Google Chrome. This extension offers users the latest trending news from the internet. These news widgets are usually sponsored content that the application displays based on your search history or visited links. While this extension is not that dangerous on its own, it usually comes bundled with other Potentially Unwanted Programs and Browser Hijackers that could pose a security risk.

When installed this extension changes your default search engine to yahoo. And while active you might see some additional ads injected into the search results. Due to its bundled nature with other PUP-s and the potential dangers that might come with them, several anti-virus scanners have detected this extension as a Browser Hijacker and are marked for removal.

About Browser Hijackers

Browser hijackers (also called hijackware) are a kind of malware that alters internet browser configurations without the user’s knowledge or consent. These kinds of hijacks appear to be increasing at a worrying rate around the world, and it could be really nefarious and often dangerous too. They’re made to interfere with browser functions for many different purposes. In general, hijackers are programmed for the benefit of internet hackers often through revenue generation from forced advert clicks and site visits. However, it isn’t that harmless. Your internet safety is compromised and it is extremely irritating. Additionally, hijackers can make the whole infected system vulnerable – other destructive malware and viruses would seize these opportunities to get into your PC effortlessly.

Indications of browser hijack

Signs that your web browser is hi-jacked include: 1. your browser’s home page is suddenly different 2. you find yourself constantly directed to a different web page than the one you actually intended 3. default web engine is changed 4. you’re getting new toolbars you haven’t seen before 5. you may find numerous pop-up ads on your computer screen 6. your web browser gets sluggish, buggy, and crashes frequently 7. you are blocked to access those sites of anti-malware solution providers.

Exactly how browser hijacker finds its way to your computer

Browser hijackers infect computer systems in numerous ways, including via a file-share, a drive-by download, or an infected e-mail attachment. They are usually included with toolbars, BHO, add-ons, plug-ins, or browser extensions. Also, some freeware and shareware can put the hijacker in your PC through “bundling”. Some of the most well-known hijackers are Fooriza, Babylon Toolbar, Conduit Search, OneWebSearch, Sweet Page, and CoolWebSearch. Browser hijacking could lead to serious privacy issues and even identity theft, disrupt your web browsing experience by taking control over outbound traffic, drastically slows down your personal computer by consuming lots of resources, and cause system instability also.

Browser Hijacker Malware – Removal

Some hijackers can be simply removed by deleting the freeware they came with or by deleting any add-ons you have recently added to your system. At times, it can be a challenging task to discover and remove the malicious program since the associated file will be running as part of the operating system process. You should think of carrying out manual repairs only if you happen to be a tech-savvy person since there are potential risks associated with messing around with the computer registry and HOSTS file. Installing and running antivirus software on the affected system can automatically erase browser hijackers and other malicious applications. SafeBytes Anti-Malware detects all kinds of hijackers – such as Fooriza – and eliminates every trace quickly and efficiently.

What To Do If You Cannot Install Safebytes Anti-Malware?

Every malware is bad and the degree of the damage will vary greatly with regards to the type of infection. Some malware is designed to interfere with or prevent things that you wish to do on your personal computer. It may not allow you to download anything from the internet or prevent you from accessing some or all of the websites, in particular the antivirus websites. If you are reading this, you probably have infected by malware that prevents you from installing a computer security application like Safebytes Anti-Malware. There are a few actions you can take to get around this problem.

Get rid of malware in Safe Mode

If the malware is set to load at Windows start-up, then booting in Safe Mode should avoid it. Just minimal required programs and services are loaded when you boot your PC in Safe Mode. The following are the steps you should follow to eliminate malware in Safemode. 1) At power on, press the F8 key while the Windows splash screen starts to load. This will bring up the Advanced Boot Options menu. 2) Choose Safe Mode with Networking with arrow keys and press Enter. 3) When you are into this mode, you should have access to the internet again. Now, obtain the malware removal program you need by using the internet browser. To install the software, follow the guidelines within the installation wizard. 4) Once the software is installed, allow the diagnostic scan to run to eliminate viruses and other malware automatically.

Use an alternate web browser to download the anti-malware application

Some malware might target vulnerabilities of a specific web browser that block the downloading process. The ideal way to overcome this problem is to select an internet browser that is known for its security measures. Firefox contains built-in Malware and Phishing Protection to help keep you secure online.

Run anti-malware from your USB drive

Another option is to make a portable anti-malware program on your USB stick. Do these simple actions to clean up your affected PC using a portable antivirus. 1) On a clean PC, install Safebytes Anti-Malware. 2) Put the USB drive into the clean PC. 3) Double-click the executable file to run the installation wizard. 4) When asked, choose the location of the USB drive as the place in which you would like to put the software files. Follow the instructions on the computer screen to finish off the installation process. 5) Disconnect the USB drive. You may now use this portable anti-virus on the affected computer. 6) Double-click the antivirus program EXE file on the pen drive. 7) Press the “Scan” button to run a full system scan and remove malware automatically.

How SafeBytes Anti-Malware Keep your Machine Virus Free

Nowadays, an anti-malware program can protect your PC from different types of internet threats. But how to decide on the best one amongst plenty of malware protection application that’s available out there? As you might be aware, there are many anti-malware companies and tools for you to consider. A few of them do a good job in removing malware threats while many will ruin your computer by themselves. When searching for an antimalware program, purchase one that gives dependable, efficient, and complete protection against all known viruses and malware. Among few good applications, SafeBytes Anti-Malware is the highly recommended program for the security-conscious individual. SafeBytes anti-malware is a very effective and easy-to-use protection tool that is designed for end-users of all levels of IT literacy. With its cutting-edge technology, this application will assist you to get rid of several types of malware including computer viruses, trojans, PUPs, worms, adware, ransomware, and browser hijackers.

SafeBytes anti-malware takes computer protection to a whole new level with its enhanced features. These are some of the great features included in the software.

Active Protection: SafeBytes provides real-time active checking and protection against all known computer viruses and malware. This utility will constantly monitor your PC for any suspicious activity and updates itself regularly to keep abreast of the latest threats. Robust, Anti-malware Protection: Using its advanced and sophisticated algorithm, this malware elimination tool can detect and remove the malware threats hiding in the computer system effectively. Extremely Speed Scanning: This application has got one of the fastest and most efficient virus scanning engines in the industry. The scans are highly accurate and take a short amount of time to complete. Web Filtering: SafeBytes checks the links present on a web page for possible threats and alerts you whether the website is safe to explore or not, through its unique safety rating system. Light-weight: SafeBytes gives total protection from online threats at a fraction of the CPU load because of its enhanced detection engine and algorithms. 24/7 Assistance: You may get high levels of support round the clock if you’re using their paid software. All in all, SafeBytes Anti-Malware is a solid program as it has lots of features and can identify and remove any potential threats. You now may understand that this particular software does more than just scan and delete threats on your computer. So if you’re trying to find a comprehensive antivirus program that’s still simple enough to use, SafeBytes Anti-Malware is just what you need!

Technical Details and Manual Removal (Advanced Users)

If you want to perform the removal of Fooriza manually rather than employing an automated software tool, you may follow these steps: Go to the Windows Control Panel, click the “Add or Remove Programs” and there, choose the offending program to remove. In case of suspicious versions of browser plug-ins, you can easily remove them through your web browser’s extension manager. It is also advised to factory reset your browser to its default condition to fix corrupt settings. Finally, examine your hard disk for all of the following and clean your computer registry manually to remove leftover application entries following uninstalls. Please note that only experienced computer users should try to manually edit the system files mainly because deleting any single vital registry entry leads to a major problem or even a computer crash. Moreover, some malware keeps replicating which makes it tough to remove. Doing this malware-removal process in Safe Mode is recommended.
Files: %LOCALAPPDATA%\Google\Chrome\User Data\Default\Extensions\nnamllomkmngnaklpijbbaokmonnkcne %UserProfile%\Local Settings\Application Data\Google\Chrome\User Data\Default\Extensions\nnamllomkmngnaklpijbbaokmonnkcne
Read More
How to remove AnytimeAstrology

AnytimeAstrology is a browser extension for Google Chrome developed by Mindspark Inc. When installed, this extension will change your default new tab page to a custom search provider called MyWay (search.myway.com).

While browsing the internet with this extension installed, you will see additional ads through your browsing sessions, including but not limited to Sponsored Content, Injected Ads and Pop-up Ads.

While AnytimeAstrology is active it will monitor your browsing habits, recording website visits, clicked links, viewed products, etc. This information is later sent back to Mindspark Ad network servers where it is used to better target additional injected ads into your web pages.

Several anti-virus applications have marked this extension as a Browser Hijacker and it is recommended to remove it from your computer.

About Browser Hijackers

Browser hijackers (also known as hijackware) are a kind of malicious software that modifies web browser configuration settings without the computer owner’s knowledge or approval. These hijacks are raising at an alarming rate globally, and it can be actually nefarious and often harmful too. Browser hijackers could do more than just changing homepages. In most cases, hijackers are created for the benefit of online hackers usually through income generation that comes from forced ad clicks and site visits. While it might seem harmless, these tools are made by malicious people who always try to take advantage of you, so that they can earn money from your naive and distraction. Browser hijackers can also permit other vicious programs without your knowledge to further damage your computer.

Key symptoms that your browser has been hijacked

The following are some symptoms that indicate you’ve been hijacked: 1. your homepage has been reset to some unfamiliar site 2. your browser is constantly being redirected to porn sites 3. default internet search engine is modified 4. you find unwanted new toolbars added 5. you observe a lot of pop-up ads on your screen 6. your browser has become unstable or starts running slowly 7. you can’t visit certain websites such as homepages of antivirus software.

How browser hijacker finds its way to your computer

Browser hijackers could use drive-by downloads or file-sharing websites or perhaps an e-mail attachment in order to reach a targeted computer. They could also come from add-on software, also referred to as browser helper objects (BHO), web browser extensions or toolbars. Browser hijackers sneak into your computer along with free software downloads that you unwittingly install along with the original. An example of some well known browser hijacker includes Conduit, Anyprotect, Babylon, SweetPage, DefaultTab, RocketTab, and Delta Search, but the names are constantly changing. The existence of any browser hijacker on your computer might considerably diminish the web browsing experience, monitor your internet activities that result in serious privacy issues, produce system stability issues and ultimately cause your PC to slowdown or to an almost unusable condition.

The best ways to remove a browser hijacker

Some hijackers can be simply removed by deleting the free software they came with or by eliminating any extension you have recently added to your system. The sad thing is, the majority of the software applications used to hijack a internet browser are deliberately built to be hard to eliminate or detect. Novice computer users should never attempt for the manual form of removal methods, since it calls for thorough computer knowledge to carry out repairs on the computer registry and HOSTS file. Installing and running anti-malware application on the affected system will automatically erase browser hijackers and other unwanted applications. SafeBytes Anti-Malware could counter persistent hijackers and give you proactive computer protection against all kinds of malware. Together with the anti-virus tool, a system optimizer, such as SafeBytes’s Total System Care, could help you in removing all linked files and modifications in the registry automatically.

How to Get rid of Malware that is Blocking Websites or Preventing Downloads

Malware could potentially cause a great deal of damage to your PC. Some malware sits in between the computer and the internet connection and blocks some or all websites that you really want to visit. It might also prevent you from adding anything to your PC, especially anti-malware software. If you’re reading this article, you may have got affected by a virus that prevents you from installing a security software like Safebytes Anti-Malware. Follow the instructions below to get rid of malware through alternate methods.

Eliminate malware in Safe Mode

If the malware is set to run immediately when Windows starts, entering safe mode could very well block the attempt. Just the minimum required programs and services are loaded when you start your PC in Safe Mode. To launch your Windows XP, Vista or 7 computer in Safe Mode with Networking, do as instructed below. 1) At power-on/startup, press the F8 key in 1-second intervals. This will invoke the Advanced Boot Options menu. 2) Select Safe Mode with Networking using arrow keys and press ENTER. 3) Once this mode loads, you will have an internet connection. Now, use your internet browser normally and navigate to https://safebytes.com/products/anti-malware/ to download Safebytes Anti-Malware. 4) As soon as the software program is installed, allow the scan run to eliminate trojans and other threats automatically.

Use an alternate web browser to download an antivirus application

Some malware mainly targets particular internet browsers. If this is your case, make use of another browser as it might circumvent the computer virus. If you suspect that your Internet Explorer happens to be hijacked by a virus or otherwise compromised by online hackers, the best plan of action is to switch to a different browser such as Mozilla Firefox, Google Chrome, or Apple Safari to download your favorite security application – Safebytes Anti-Malware.

Make a bootable USB anti-virus drive

To successfully eliminate the malware, you will need to approach the problem of running antivirus program on the affected PC from a different angle. Follow these steps to employ a USB flash drive to fix your infected PC. 1) Download the anti-malware program on a virus-free PC. 2) Insert the pen drive on the same system. 3) Run the setup program by double-clicking the executable file of the downloaded application, which has an .exe file extension. 4) When asked, select the location of the USB drive as the place where you want to put the software files. Follow the onscreen instructions to finish the installation. 5) Remove the pen drive. You can now use this portable antivirus on the affected computer. 6) Double-click the antivirus program EXE file on the thumb drive. 7) Run Full System Scan to detect and clean-up up all types of malware.

Protect Your Computer Against Viruses and Malware With SafeBytes Anti-Malware

Would you like to download the best anti-malware software program for your desktop? There are numerous applications in the market that comes in free and paid versions for Microsoft Windows computers. Some are good ones, some are ok types, while some are simply just bogus anti-malware software which will damage your personal computer themselves! You must pick one that is dependable, practical and has a strong reputation for its malware protection. On the list of recommended software programs is SafeBytes AntiMalware. SafeBytes has a really good history of excellent service, and customers appear to be very happy with it. SafeBytes antimalware is a highly effective and easy-to-use protection tool which is created for users of all levels of IT literacy. Through its cutting-edge technology, this software will help you protect your PC against infections brought on by different kinds of malware and similar threats, including adware, spyware, computer viruses, worms, trojan horses, keyloggers, potentially unwanted program (PUPs), and ransomware.

There are plenty of amazing features you will get with this security product. Listed below are some of the great features included in the application.

World-class AntiMalware Protection: This deep-cleaning antimalware program goes much deeper than most antivirus tools to clean out your computer system. Its critically acclaimed virus engine detects and disables hard to remove malware that conceals deep within your personal computer. Active Protection: SafeBytes delivers complete and real-time security for your computer system. They are highly effective in screening and removing numerous threats since they’re continuously improved with new updates and alerts. Safe Web Browsing: Through its unique safety ranking, SafeBytes tells you whether a site is safe or not to visit it. This will ensure that you’re always certain of your online safety when browsing the web. Faster Scanning: SafeBytes’s virus scan engine is among the fastest and most efficient within the industry. It's targeted scanning considerably increases the catch rate for malware that is embedded in various PC files. Lightweight Application: SafeBytes is a lightweight application. It consume a really small amount of processing power as it works in the background so you’re free to use your Windows-based PC the way you really want. 24/7 Premium Support: You can get absolutely free 24/7 technical support from their IT experts on any product queries or PC security concerns. SafeBytes has created a fantastic anti-malware solution to help you conquer the latest malware threats and virus attacks. You can be sure that your computer system will be protected in real-time as soon as you put this software to use. So if you are searching for the best anti-malware subscription for your Windows-based PC, we suggest the SafeBytes Anti-Malware application.

Technical Details and Manual Removal (Advanced Users)

If you wish to manually get rid of AnytimeAstrology without the use of an automated tool, it may be possible to do so by removing the program from the Windows Add/Remove Programs menu, or in cases of web browser plug-ins, going to the browser’s AddOn/Extension manager and removing it. You will most probably also want to totally reset your browser to its default configuration settings. Finally, examine your hard disk for all of the following and clean your computer registry manually to get rid of leftover application entries after uninstallation. Please remember that this is for professional users only and may be difficult, with wrong file removal leading to additional system errors. Additionally, some malicious programs have the capability to defend against its removal. You are urged to do this procedure in Windows Safe Mode.
Folders: C:\USERS\username\APPDATA\LOCAL\AnytimeAstrologyTooltab C:\Users\username\AppData\Local\Google\Chrome\User Data\Default\Extensions\bdcnkkhncapfcngcjkmfkikanomkgnmb\
Read More
Fixing “The .NET Framework 4.7 is not supported on this operating system” Error in Windows 10
In case you don’t know, the .Net Framework is a programming infrastructure introduced by Microsoft. You will need it to run on lots of services and applications. Note that most of the applications that require the .Net Framework are packed with their installation files which is why it will be installed automatically on your computer when you install an application. However, there are instances when you’ll get an error message saying, “The .NET Framework 4.7 is not supported on this operating system” while trying to install the .NET Framework as a standalone service. The very reason why this error message appears is stated in the error message itself. Although the .Net Framework is supported on Windows 10, it is not actually compatible with some other Windows 10 versions. So it is most likely that you are seeing this error message because the .Net Framework in your computer is not compatible with the Windows 10 version you are running. Since that’s the case, you need to update Windows 10 to fix the problem. Updating your Windows 10 computer is the only solution you can try to fix this problem. Thus, it is advised that you check for Windows Updates even if you are now using the latest version of Windows 10. And since the issue is caused by an incompatible operating system version, once you install the exact version of Windows 10 required by the .Net Framework, the problem will be fixed. Simply follow the steps given below to do so.
  • Step 1: Tap the Win + R keys to open the Run dialog box.
  • Step 2: After that, type in “winver” in the field and tap Enter.
  • Step 3: Next, your Windows 10 version should be given in the new window that appears. Take note that the number after the Version which is in the second line is your version number of Windows 10. And that the number must be 1507 or 1709. The first two digits in these numbers are the year while the second two represent the month when the update was released. So if you are running a 1709 version, this means that the Windows 10 version you are using was released in September 2017.
  • Step 4: The next thing you have to do is to make sure that you have the Windows 10 version that’s compatible with the .Net Framework. To verify, you need to click here and click on the System Requirements.
After opening the link, take a look at the Supported Operating System section where it says, “Windows 10 Anniversary Update” and “Windows 10 Creators Update”. Since there are users who are not familiar with the version numbers related to both the Anniversary and Creators updates, refer to the list given below.
  • November Update (1511)
  • Anniversary Update (14393)
  • Creators Update (1703)
  • Fall Creators Update (1709)
  • Spring Creators Update (1803)
As you can see, the Creators Update has version 1703 while the Anniversary Update has version number 14393 so if you are using a version lower than the 14393 version then it’s no wonder you aren’t able to install the .Net Framework 4.7 on your Windows 10 PC. Now all that’s left to do is to update your Windows 10 version and make sure that you will be updating it to the latest version available and then try installing the .Net Framework again.
Read More
How to Fix dxgmms2.sys BSOD in Windows
The dxgmms2.sys file is a system driver file in Windows that is associated with the Graphics Rendering capabilities of a computer. However, this file is known to cause various Blue Screen of Death errors. Some of the culprits for these errors include issues with RAM, hard disk issues, corrupted drivers, and incompatible firmware. Despite its many causes, fixing this issue is quite straightforward so it should be easier for you to fix it. Here are some of the Blue Screen errors related to the dxgmms2.sys file:
  • SYSTEM_THREAD_EXCEPTION_NOT_HANDLED
  • SYSTEM_SERVICE_EXCEPTION
  • KMODE EXCEPTION NOT HANDLED
  • PAGE FAULT IN A NONPAGED AREA
  • IRQL NOT LESS OR EQUAL
If you have recently created a System Restore point prior to getting the dxgmms2.sys Blue Screen error, then you need to perform System Restore first before you further troubleshoot the problem as it might help in resolving the Blue Screen error. Refer to the steps below to perform System Restore.
  • First, press the Win + R keys to open the Run dialog box.
  • After that, type in “sysdm.cpl” in the field and tap Enter.
  • Next, go to the System Protection tab then click the System Restore button. This will open a new window where you have to select your preferred System Restore point.
  • After that, follow the on-screen instructions to finish the process and then restart your computer and check if the problem is fixed or not.
If System Restore didn’t help in fixing the Blue Screen error, now’s the time for you to resort to the troubleshooting tips provided below but before you get started, make sure that you create a System Restore point first.

Option 1 – Reinstall the Graphics Card drivers

  • Tap the Win + R keys to launch Run.
  • Type in devmgmt.msc into the box and tap Enter or click OK to open the Device Manager.
  • After that, a list of device drivers will be displayed. From there, look for the Graphics Card drivers listed under Display Adapters.
  • Right-click on each one of the Graphics Card drivers and select Uninstall device and then follow the next on-screen instructions given to uninstall the driver.
  • Now reboot your computer. During this time, your system will automatically reinstall the Graphics card drivers.
Note: You also have the option to go directly to the website of your graphics card manufacturer and check if there’s a new update – if there is, download it. After that, you could also check if there’s a new update of the game you’re getting the issue of the black bar.

Option 2 – Try running the DirectX Diagnostic Tool

Since the dxgmms2.sys Stop error has something to do with the DirectX Graphics APIs, you can run the DirectX Diagnostic tool to resolve the problem.

Option 3 – Try updating or re-installing DirectX

If the DirectX Diagnostic tool didn’t work, you can try to update or reinstall DirectX instead. This can help in fixing the problem because when you reinstall or update DirectX, it will replace the incompatible or corrupted components of DirectX from your computer.

Option 4 – Try to update the BIOS

Updating the BIOS can help you fix the Blue Screen error related to the dxgmms2.sys file but as you know, BIOS is a sensitive part of a computer. Even though it is a software component, the functioning of the hardware depends on it largely. Thus, you must be careful when modifying something in the BIOS. So if you don’t know much about it, it’s best if you skip on this option and try the other ones instead. However, if you are well-versed in navigating the BIOS, then follow the steps below.
  • Tap the Win + R keys to open the Run dialog box.
  • Next, type “msinfo32” in the field and press Enter to open System Information.
  • From there, you should find a search field on the bottom where you have to search for the BIOS version and then press Enter.
  • After that, you should see the developer and version of the BIOS installed on your PC.
  • Go to your manufacturer’s website and then download the latest version of BIOS on your computer.
  • If you are using a laptop, make sure that you keep it plugged in until you have updated the BIOS.
  • Now double click on the downloaded file and install the new BIOS version on your computer.
  • Now restart your computer to apply the changes made.

Option 5 – Use some registry tweaks

  • Tap the Win + R keys to launch the Run utility.
  • Then type “Regedit” in the field and hit Enter to open the Registry Editor.
  • Next, navigate to this registry key: HKEY_LOCAL_MACHINESYSTEMCurrentControlSetControlGraphicsDrivers
  • From there, right-click on the right-side panel and click on New > DWORD (32-bit) Value.
  • Then set the name of the new DWORD to “TdrDelay”.
  • After that, use the next set of instructions and select the one for the Windows version you are using.

32-bit Windows:

  • Choose the DWORD (32-bit) value.
  • Then type in “TdrDelay” as the name and hit Enter.
  • After that, double click on TdrDelay and add “10” as its value and click OK. This will set the response time for your GPU to be 10 seconds.

64-bit Windows:

  • Select the QWORD (64-bit) value.
  • Next, type in “TdrDelay” as the name and hit Enter.
  • Double click on TdrDelay and type in “10” as its value data and click OK.
  • Restart your computer to apply the changes made.

Option 6 – Disable the Sleep Functionality

You might also want to disable the Sleep Functionality as it could be the reason why you’re getting the Blue Screen error. There are times when the graphics card’s drivers are being used in the background and if the display goes to sleep and is awakened, it may cause a Blue Screen error. To fix it, you can prevent your computer from going into Sleep mode.

Option 7 – Try to run the Blue Screen Troubleshooter

The Blue Screen troubleshooter is a built-in tool in Windows 10 that might help you fix any Blue Screen errors related to the dxgmms2.sys file. It can be found on the Settings Troubleshooters page. To use it, refer to these steps:
  • Tap the Win + I keys to open the Settings panel.
  • Then go to Update & Security > Troubleshoot.
  • From there, look for the option called “Blue Screen” on your right-hand side and then click the “Run the troubleshooter” button to run the Blue Screen Troubleshooter and then follow the next on-screen options. Note that you might have to boot your PC into Safe Mode.
Read More
1 2 3 162
Logo
Copyright © 2022, ErrorTools. All Rights Reserved
Trademarks: Microsoft Windows logos are registered trademarks of Microsoft. Disclaimer: ErrorTools.com is not affiliated with Microsoft, nor claim direct affiliation.
The information on this page is provided for information purposes only.
DMCA.com Protection Status