A Quick Guide to Fix Error 0x0000001e

Correct Error 0x0000001e

What is Error 0x0000001e?

Error 0x0000001e is when you start the Windows XP Setup and you see a message which says something like:

STOP: 0x0000001E (0x80000003, 0xBFC0304, 0x0000000, 0x0000001)

Solution

Restoro box imageError Causes

You are most likely to face this error if you restart your PC while the Windows Setup is still under process and yet to complete.

Other causes of this error include any of the following conditions:

  1. The drive on which you are installing Windows has insufficient disk space to accommodate the installation.
  2. An incompatible or outdated third-party driver (or more) is installed on your PC which is conflicting with the installation. For instance, this could be a problematic video driver.
  3. The system BIOS has incompatibilities with the installation.

Further Information and Manual Repair

This error is also called the “Bug check code”.

The STOP 0x1E signifies that there was an unknown or illegal processor instruction detected by the Windows XP kernel. You will see the exception address which shows up to indicate the root of the problem which is usually a driver or faulty hardware.

You should note this address down as well as the link date of the faulty driver or image which includes it.

If at any point it becomes impossible for you to handle and you end up contacting the Windows support center to help you out with the process then this information will help you out in making things a lot easier while the support team tries to troubleshoot the problem.

The parameters included in the STOP 0x1E error message are the following:

  1. is the exception code which couldn’t be handled.
  2. shows the module’s address where the exception took place.
  3. signifies the exception’s parameter 0.
  4. represents the exception’s parameter 1.

You can use this information which usually is provided in error 0x0000001e message to pinpoint the root cause of the problem and troubleshoot it.

In order to fix this error, you need to follow either one of the following procedures as needed according to your situation.

Clean Up Your Disk

local disk propertiesIf your disk doesn’t have ample space to accommodate the installation then you should free up some of the space on your disk to make sure the Windows can be installed on it.

You can also reinstall the Windows on another disk that has sufficient space.

Get Rid of the Third Party Driver

If the error 0x0000001e message gives you the name of the driver due to which the installation process is being halted, then get rid of that driver by disabling it or removing it.

If the problem is resolved by this then you should contact the manufacturer of the third-party driver and ask them about any newer versions of the driver that wouldn’t conflict with the installation of Windows.

Upgrade System BIOS

Upgrading your system BIOS is something that you can’t do on your own. You will need to find out more about how you can upgrade. For this, you should contact either your PC’s manufacturer or your motherboard’s manufacturer.

If nothing else works, you can always make use of the Microsoft Debugging Tools which will provide you ample information about the error message.

You will find the Debugging Tools and further information about them including the downloading and installation process on Microsoft’s website.

If you like to learn and find out more about various Windows errors, and how to repair them go to our vast archive or use search to find articles that will explain and help you in solving your issue.
However, if you prefer to do things fast and with automatization then we are proposing to use an automated solution for your issues. The application that we are recommending is Advanced System Repair Pro
Advanced System Repair utilizes multiple tools all in one to give you a quick, simple, reliable, and very thorough diagnosis of your PC. It brings you all the tools you need in one program to clean, fix, protect, optimize and boost your PC!
1-Click Maintenance
All the tools to make it simple and easy! It's like having a professional technician at the click of a mouse.

Junk Cleaner
Keeping your computer free from unnecessary clutter also helps make your computer last longer. Like any other machine, if you keep it clean and take care of it, it will serve you better for longer!

Optimize background apps
Optimize applications background activity with the built-in Application Optimizer feature.

Disk Defrag
With a simple 1-click, Advanced System Repair speeds up your PC by assembling fragmented files on your machine and organizing them more efficiently.

Malware Removal
Finds and removes all types of harmful malware including trojans, worms, bots, adware, spyware, PUPs, and more!

Privacy Cleaner
The all-in-one privacy suite to Clean Your Tracks & Protect Your Privacy! Make your computer safe, secure, and more efficient!

System Tweak/Optimizer
ASR will analyze your complete system and settings to adjust your PC to function at its maximum performance.

Registry Cleaner
Over time, as you install and uninstall applications, the registry can become cluttered with old entries and broken settings which can result in program crashes, and annoying messages and slow the computer down.
Visit our Advanced System Repair Pro Download page to inform yourself about all the benefits of this software and get a free trial copy of it.
advanced system repair pro

Advanced System Repair Pro

One-click automated PC repair solution
ASR logo
With Advanced System Repair Pro you can easily
Replace damaged files
Restore performance
Free disk space
Remove Malware
Protects WEB browser
Remove Viruses
Stop PC freezing
DOWNLOAD
Privacy Policy | Terms of Use | Uinstall
Advanced System Repair Pro is compatible with all versions of Microsoft Windows including Windows 11

Share this article:

You might also like

Computer won’t upload Pictures to websites
Windows 10 is undeniably one of the great operating systems and the same thing can be said about a lot of computers that are running it. However, there are instances when things don’t go as you expect them to be. One of the many issues you might face when using Windows 10 is the inability to upload any pictures over the web. If you are facing this issue right now, you are not alone for a lot of users have suffered from the same problem at least once. Even though it might seem like a minor problem, some users find it inconvenient especially the ones who often upload pictures online. Worry not though for this post will guide you on what you can do if you aren’t able to upload any images to websites on your Windows 10 computer. To get started in troubleshooting the problem, here are some suggestions that might help:

Option 1 – Try to clear browser cache and try downloading again

There are times when some data in the browser is conflicting with the loading of the website and triggers some problems like not being able to upload pictures to websites. And so you can try to clear your browser’s data. This might be a very basic solution but oftentimes it works in fixing this kind of odd problem in your browser.

Option 2 – Open your browser in Incognito Mode

The next thing you can do to fix the problem is to try opening the web page in Incognito Mode. When your browser is in this mode, it will work without extensions. This would help in fixing the problem especially if it was caused by some extension or toolbar in your browser. All you have to do is open any web page in Chrome and tap the Ctrl + Shift + N key combination to open a window in Incognito Mode.

Option 3 – Try to disable and get rid of the problematic extension

The next thing you can do after trying the Incognito mode in your browser is to see if a browser extension is the one that’s causing the problem. And if you have installed a lot of browser extensions, then identifying which one is the culprit may take a while but not too long. Once you’ve identified the culprit, you can get rid of that browser extension and see if you can now upload pictures on websites.

Option 4 – Try to reset your browser

You might also want to reset your browser as it could also help in resolving the issue. To reset your browser, here’s what you have to do:

Google Chrome

  • Open Google Chrome, then tap the Alt + F keys.
  • After that, click on Settings.
  • Next, scroll down until you see the Advanced option, once you see it, click on it.
  • After clicking the Advanced option, go to the “Restore and clean up option and click on the “Restore settings to their original defaults” option to reset Google Chrome.
  • Now restart Google Chrome.

Mozilla Firefox

  • Open Mozilla Firefox and tap Ctrl + Shift + A to access the Add-ons Manager.
  • In the Extensions, menu Remove the unwanted extension.
  • Restart the browser and tap keys Alt + T.
  • Select Options and then move to the General menu.
  • Overwrite the URL in the Home Page section and then restart the browser.

Internet Explorer

  • Launch Internet Explorer.
  • Next, click the wrench icon for Settings.
  • Then click Internet Options.
  • After that, go to the Advanced tab.
  • From there, click the Reset button. This will reset Internet Explorer’s settings to their default condition.
  • Now click OK to save the changes made.
  • Restart your computer.

Option 5 – Update your browser or switch to another one

The last option you can try is to update your browser. You can do it by checking for any available updates from its official site and then install it. However, if updating the browser did not help, you might want to consider switching to another browser.
Read More
Windows 365, what it is, and how you can get it
Windows 365Microsoft has announced Windows 365, a new cloud-based operating system aimed mainly at businesses of all sizes. Just after Windows 11 announcement and presentation, we are seeing another Windows announcement from Microsoft. Dive into the following text in order to find out what exactly is new Windows 365, its role in today's IT world, and do you need it?

What is Windows 365 and when it is coming out?

Windows 365 is planned to be released this year (2021) on August 2nd. It is the first Microsoft cloud-based operating system meaning that OS itself will be installed on the cloud server and it will be accessed by the user via a web browser. Essentially you are accessing a remote PC with Windows on it, you can install whatever Windows application you want and use it as it was on your computer. When you disconnect from the cloud computing and reconnect again from the same or another device you will continue exactly where you left off. Cloud PC will remember the state it was left off and will greet you in that same state once it is awakened again. This of course offers some great benefits like moving from laptop to desktop and continuing exactly where you left off.

How can I access Windows 365?

Any device which has a web browser will be able to access Windows 365 making it a really great solution for business on the move or for anyone who switches devices during the day. That being said it is clear to see that Windows 365 can be accessed via Linux, macOS, iOS, Android, or any other operating system on any computer, tablet or phone.

Who is this OS made for?

Microsoft’s general idea is that Windows 365 is primarily made for business which in their minds can benefit most out of it. So far it is not made for a single user although there is a possibility that even a one-man business can subscribe and create accounts for it.

Price and technical characteristic

Microsoft will bill Windows 365 on a per-user, per-month basis. In other words, businesses will pay a fixed amount per employee every month. There will be two tiers: Windows 365 Business and Windows 365 Enterprise. Microsoft also said it will offer different performance tiers. Businesses can choose to pay for more CPU, RAM, and storage resources for certain cloud PCs depending on their needs. Microsoft told me the smallest configuration would be one CPU, 2GB of RAM, and 64GB of storage. The largest will be eight CPUs, 32GB of RAM, and 512GB of storage. After a business has chosen its plan tier and performance options, that business will pay a fixed amount every month. This is unlike Azure Virtual Desktop, which Windows 365 is built on. With Azure Virtual Desktop, companies pay on a usage model, depending on how much the remote system is used every month.

Conclusion

Windows 365 is around the corner and if you are a business no matter small or large with the need for software on the go, Windows 365 might be a worthwhile investment and a great asset to your business.
Read More
New Snipping tool redesigned in Windows 11
Windows 11 Snipping tool
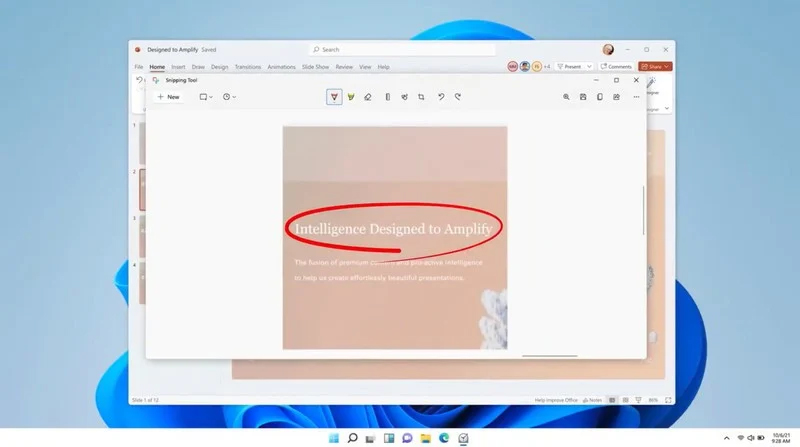
The latest update from Panos Panay on Twitter is including New and redesigned Snipping tool inside Windows 11. From the shared video, we can see that it includes modern Windows 11 UI redesign and it looks and feels like a part of Windows 11. More things that can be seen from the shared video is that it looks like the new snipping tool is a merged version of the old with snip & sketch. It is good to see that it is still possible to capture screen with easier way natively inside Windows 11 but some more functionality would be more welcome I guess. Users were asking for added functions for a long time like adding simple text for example but from shared video, no new features were presented so for some users 3rd party solutions will still be the way to go. The new and redesigned Snipping tool will roll out with the next update and we will see then about all new features inside it firsthand. Until then, take care.
Read More
Five Ways of Fixing Error Code 37

Repair Device Manager Error Code 37

What is Error Code 37?

Error Code 37 is a Device Manager Error Code that you may come across when you are unable to use an installed hardware device on your PC. It will pop up on your screen with the following display:

“Windows cannot initialize the device driver for this hardware. (Code 37)”

If you receive the above message, it means that your operating system was unable to acknowledge the drivers for a particular peripheral device.

Solution

driverfix boxError Causes

Error Code 37 mainly occurs due to device driver corruption. However, there are other factors that can trigger this error code, some of which are the following:

  • Missing device drivers
  • Out-of-date device drivers
  • Presence of malware or spyware in the system
  • The particular device is not compatible with your PC

Device driver corruption or other data corruption is not uncommon and part of everyday PC use.

From an installation gone wrong to an unexpected shutdown, commonly generated data errors are considered the main culprit behind error codes.

Further Information and Manual Repair

Just like most PC error codes, Error Code 37 isn’t that difficult to get rid of. There are many DIY methods you can try to have your PC running smoothly in no time. Here are a few methods to resolve this issue:

Method 1: Restart your PC

It is possible that the display of the error code is merely due to a temporary issue with your peripheral device and not anything serious.

Therefore, the quickest and easiest method to solve the error code 37 is to simply restart your PC.

Method 2: Scan for Viruses

If restarting does not do the trick, a quick scan for viruses and removing them is another simple method you can follow to fix your PC.

Since the error code is due to corruption of data, viruses such as malware or spyware create error in your PC’s registry and eliminating them can help restore some of the corrupt data, which also speeds up your PC.

Method 3: Undo recent changes

A possible explanation for the error code may be the recent changes in your Device Manager or due to the peripheral device installation. You can thus undo the changes by either:

  • Remove or change settings of the installed peripheral device
  • Roll back the version of the driver to the one before the update.
  • Use System Restore to reverse the changes made in the Device Manager

Method 4: Manually uninstall and reinstall the drivers

If the above stated methods do not help in speeding up your PC and is still giving you an error code, you may want to manually uninstall and reinstall the corrupt or missing drivers. Here are the following steps:

  • Double-check if the installed external device is properly connected and working smoothly
  • Open Device Manager and double click on the device that is causing problems
  • When it opens, click on the ‘Driver’ tab and click ‘Update Driver’

Method 5: Use DriverFIX

However, updating the missing or corrupt drivers can be time consuming and may also require having a hardware documentation ready that contains specific details about the driver that you should download.

To avoid this time-consuming process, you can use DriverFIX software.

DriverFIX will help you to download the required driver without you having to waste your precious time and effort looking it up in a user manual. This latest software technology is embedded with its own database that tracks the missing or corrupt driver according to your PC’s motherboard version and specific details.

It is user-friendly, which means that it will relieve you from the frustration of such PC error codes appearing from time to time and enable your PC to work efficiently in no time.

Click here to download DriverFIX to resolve Device Manager error code 37 today!

Read More
Fix Call of Duty 4 crashes in Windows 10
Call of Duty is a fun and good game, a great time killer with a squad of friends, however sometimes the game crashes, and fun is interrupted. In this guide, we will address and solve this unpleasant issue.
  1. Scan game files

    inside launcher choose options and under them, choose scan and repair game files This process can take 5-30 minutes, as the game is 60GB large. This will look through all your game files and make sure they’re all valid and that none are corrupted, which may cause crashes. When it’s complete, you’ll get a notification that the game is now playable. Try again and see if your crashes continue.
  2. Update drivers

    Keeping drivers updated is crucial for the game to run smoothly, GPU drivers are possibly important. Go to your GPU manufacturer's website and get the latest drivers.
  3. Lower graphic settings

    Intensive graphic requirements can overload GPU and cause crashes, try lowering details in-game and see if this will fix the issue.
  4. Disable overlays

    If you’re using a program like Discordthat has an overlay, you’ll want to disable it as it may be causing the graphic error
Read More
What is HEIF file format and how to use it?
High Efficiency Image File Format (HEIF) is a container format for individual images and image sequences. The standard covers multimedia files that can also include other media streams, such as timed text, audio, and video. A HEIF image using High-Efficiency Video Coding, HEVC, requires only about half the storage space as the equivalent quality JPEG. HEIF also supports animation and is capable of storing more information than an animated GIF or APNG at a small fraction of the size. HEIF files are a special case of the ISO Base Media File Format (ISOBMFF, ISO/IEC 14496-12), first defined in 2001 as a shared part of MP4 and JPEG 2000. Introduced in 2015, it was developed by the Moving Picture Experts Group (MPEG) and is defined as Part 12 within the MPEG-H media suite (ISO/IEC 23008-12). HEIF was adopted by Apple in 2017 with the introduction of iOS 11, and support on other platforms is growing.

HEIF files can store the following types of data:

Image items
Storage of individual images, image properties, and thumbnails.
Image derivations
Derived images enable non-destructive image editing and are created on the fly by the rendering software using editing instructions stored separately in the HEIF file. These instructions (rectangular cropping, rotation by one, two or three quarter-turns, timed graphic overlays, etc.) and images are stored separately in the HEIF file, and describe specific transformations to be applied to the input images. The storage overhead of derived images is small.
Image sequences
Storage of multiple time-related and/or temporally predicted images (like a burst-photo shot or cinemagraph animation), their properties, and thumbnails. Different prediction options can be used in order to exploit the temporal and spatial similarities between the images. Hence, file sizes can be drastically reduced when many images are stored in the same HEIF file.
Auxiliary image items
Storage of image data, such as an alpha plane or a depth map, which complements another image item. These data are not displayed as such but used in various forms to complement another image item.
Image metadata
Storage of EXIF, XMP and similar metadata which accompany the images stored in the HEIF file.
Read More
Fix DISM Error: The scratch directory size ...
One of the most useful and powerful built-in utility in Windows 10 is the DISM tool. This tool can be used with the Command Prompt command line as well as for other purposes. However, it is not without flaws and there are times when you may encounter some issues while using it. One of the problems you can get while using the DISM tool is the following error:
“The scratch directory size might be insufficient to perform this operation”
This kind of error in DISM occurs when the DISM command is executed from the Windows Recovery Environment due to the limited size permissions of a delivery where the operating is being performed. To fix this DISM error, you need to follow the instructions laid out below. Step 1: First, tap the Win + R keys to open the Run utility and then type “cmd” in the field and tap Enter to open Command Prompt. Step 2: Next, you have to specify a scratch directory that contains the Windows folder and to do that, you can either use the DIR command or the BCEDIT command. So in the elevated command prompt type and enter “dir” or “bcedit”. Step 3: After that, you will see a list of folders inside the C: partition. Now you have to create a folder named “scratch” inside the partition. To do so, execute the following command:
mkdir C:Scratch
Note: The command you just entered will create a directory inside the root of the C: partition named Scratch. Step 4: Now that you’ve created the Scratch folder, note that each time you run any of the DISM commands, you have to enter the following code snippet in them:
/ScratchDir:C:Scratch
 Note: For instance, if you are using the DISM tool to repair the offline Windows image, instead of executing the “Dism /Online /Cleanup-Image /RestoreHealth” command, you now have to execute the “DISM /Image:C: /ScratchDir:C: Scratch /Cleanup-Image /Restorehealth” command. And if you want to remove a selected installed update package, you can use the “DISM /image:C: /ScratchDir:C:Scratch /Remove-Package /PackageName:Package_for_RollupFix~31bf3856ad364e75~amd64~~16299.196.4.9” command. Keep in mind that the mentioned package is only an example. And lastly, you also have to replace the drive letter in the new code snippet when you execute the commands given above.
Read More
Fix Windows Update Error 0x8024000B
As you know, Windows Updates are essential for your operating system as it keeps it protected from potential threats, fixes bugs and improves your experience in using Windows 10. However, there are instances when Windows Updates also cause errors and one of them is the Windows Update Error 0x8024000B. One of the causes of this particular Windows Update error is that Windows was not able to read the Update Manifest file which is needed to install the Windows Updates. This means that the operation was canceled by either the service or the user. On the other hand, this error could also occur if you are not able to filter the results. When you encounter this error, you will see an error message that says, “WU_E_CALL_CANCELLED: Operation was canceled”. This indicates that the operation was canceled by the operating system itself. To resolve the Windows Update Error 0x8024000B, here are some suggestions you need to check out.

Option 1 – Try to run the Cleanup (Decline) Superseded updates PowerShell script

The first thing you can do to fix the Windows Update Error 0x8024000B is to run the Cleanup (Decline) Superseded updates PowerShell script. This is actually an easy fix since all you have to do is download and run it from the Microsoft Technet site. Once you’re done downloading and running the file, restart your computer and see if the error is fixed or not.

Option 2 – Try to rename the Spupdsvc.exe file

If the first option didn’t work, you can try renaming the Spupdsvc.exe file which is one of the reasons why you’re getting the Windows Update Error 0x8024000B.
  • First, tap the Win + R keys to launch the Run utility.
  • Next, type the following command and hit Enter to execute it in cmd:
 /c ren %systemroot%System32Spupdsvc.exe Spupdsvc.old
  • The command you entered will rename the troublesome “Spupdsvc(.)exe” file to “Spupdsvc(.)old”.
  • Now restart your computer after the command has been executed.

Option 3 – Try to restart various Windows Update-related services and components

You could also try to restart some Windows Update-related services to resolve the Windows Update error. Refer to the following steps to do so:
  • Tap the Win + X key combination and select Command Prompt (Admin) to open Command Prompt with admin privileges.
  • After opening Command Prompt, copy and paste each one of the commands listed below one by one and tap Enter right after you enter each command.
    • net stop wuauserv
    • net stop bits
    • net stop appidsvc
    • ren %systemroot%SoftwareDistribution SoftwareDistribution.bak
    • ren %systemroot%system32catroot2 catroot2.bak
  • Once you’ve entered all the commands given above, they will stop all the Windows Update services that are running on your computer as well as clear the SoftwareDistribution folder, and reset the Catroot2 folder. Now you have to start all these Windows Update services you’ve just stopped by executing the following commands:
    • net start wuauserv
    • net start bits
    • net start appidsvc
    • net start cryptsvc
  • After that, restart your computer and try to run the setup again, and see if the error is now fixed.

Option 4 – Try to run the Windows Update Troubleshooter

You should also try to run the built-in Windows Update troubleshooter as it could help you resolve the Windows Update Error 0x8024000B. To run it refer to these steps:
  • Go to Settings and then click on Windows Update from the given menu.
  • Next, click on the Troubleshoot option and select Windows Update from the given options to run the Windows Update troubleshooter.
  • After that, follow the next on-screen instructions and wait until the process is completed, and check if the Windows Update Error 0x8024000B is fixed or not.
Read More
Fix ATTEMPTED_WRITE_TO_READONLY_MEMORY
This post will help you fix the ATTEMPTED_WRITE_TO_READONLY_MEMORY Blue Screen issue with an error code 0x000000BE. If you encounter this kind of BSOD error when you try to boot into your Windows 10 computer, note that there are various possible causes for this error. It could be caused by an error with a device driver, hardware issues, or some error in the BIOS of your computer. The ATTEMPTED_WRITE_TO_READONLY_MEMORY Blue Screen error with a bug check of 0x000000BE appears when a driver tries to write a read-only memory segment. You’ll be able to see the name of the driver in the Blue Screen error if the driver that’s causing the error can be identified. You can also see it in memory at the location (PUNICODE_STRING) KiBugCheckDriver. In most cases, this kind of error is usually caused by various files such as iusb3hub.sys, ntkrnlpa exe or vhdmp.sys, ntoskrnl.exe, ntfs.sys, dxgkrnl.sys, tcpip.sys, atikmdag.sys, and win32k.sys. There are several possible fixes you can try to fix this issue but the main issue lies within booting into Windows since the error occurs as soon as you boot into your Windows 10 computer. Refer to each one of the options provided below to resolve the ATTEMPTED_WRITE_TO_READONLY_MEMORY Blue Screen error.

Option 1 – Try to rollback, update or disable drivers

The first thing you can do to fix the ATTEMPTED_WRITE_TO_READONLY_MEMORY Stop error is to roll back, or update, or disable device drivers. It is most likely that after you updated your Windows computer that your driver also needs a refresh. On the other hand, if you have just updated your device drivers then you need to roll back the drivers to their previous versions. Whichever applies to you, refer to the steps below.
  • Open the Devices Manager from the Win X Menu.
  • Then locate the device drivers and right-click on them to open the Properties.
  • After that, switch to the Driver tab and click on the Uninstall Device button.
  • Follow the screen option to completely uninstall it.
  • Finally, restart your computer. It will just reinstall the device drivers automatically.
Note: You can install a dedicated driver on your computer in case you have it or you could also look for it directly from the website of the manufacturer.

Option 2 – Try running the Memory Diagnostic Tool

The Memory Diagnostic tool in windows can help resolve the ATTEMPTED_WRITE_TO_READONLY_MEMORY Blue Screen error by checking and automatically fixing any memory-based issues. To run it, refer to these steps:
  • Tap the Win + R keys to open Run and type exe and hit Enter to open the Windows Memory Diagnostic Tool.
  • After that, it will give two options such as:
    • Restart now and check for problems (Recommended)
    • Check for problems the next time I start my computer
  • Once your computer has restarted, perform a basic scan or you could also go for the “Advanced” options such as “Test mix” or “Pass count”. Simply tap the F10 key to start the test.
Note: After you select your preferred option, your computer will restart and check for memory-based issues. If it finds any issues, it will automatically fix them and if there’s no issue found, then it’s most likely not a memory-based issue so you should try the other options given below.

Option 3 – Try to update the BIOS

Updating the BIOS can help you fix the ATTEMPTED_WRITE_TO_READONLY_MEMORY BSOD error but as you know, BIOS is a sensitive part of a computer. Even though it is a software component, the functioning of the hardware depends on it largely. Thus, you must be careful when modifying something in the BIOS. So if you don’t know much about it, it’s best if you skip on this option and try the other ones instead. However, if you are well-versed in navigating the BIOS, then follow the steps below.
  • Tap the Win + R keys to open the Run dialog box.
  • Next, type “msinfo32” in the field and press Enter to open System Information.
  • From there, you should find a search field on the bottom where you have to search for the BIOS version and then press Enter.
  • After that, you should see the developer and version of the BIOS installed on your PC.
  • Go to your manufacturer’s website and then download the latest version of BIOS on your computer.
  • If you are using a laptop, make sure that you keep it plugged in until you have updated the BIOS.
  • Now double click on the downloaded file and install the new BIOS version on your computer.
  • Now restart your computer to apply the changes made.

Option 4 – Try disabling BIOS Memory Options

Disabling the BIOS Memory options such as Caching and Shadowing can help you in fixing the ATTEMPTED_WRITE_TO_READONLY_MEMORY Stop error. All you have to do is enter the BIOS first and then use the Arrow and Enter keys to select your choices. And if you can’t seem to find it, look for specific instructions from your OEM or you could also look out for instructions from the manufacturer of your motherboard.

Option 5 – Try running the Blue Screen Troubleshooter

The Blue Screen troubleshooter is a built-in tool in Windows 10 that helps users in fixing BSOD errors like ATTEMPTED_WRITE_TO_READONLY_MEMORY. It can be found on the Settings Troubleshooters page. To use it, refer to these steps:
  • Tap the Win + I keys to open the Settings panel.
  • Then go to Update & Security > Troubleshoot.
  • From there, look for the option called “Blue Screen” on your right-hand side and then click the “Run the troubleshooter” button to run the Blue Screen Troubleshooter and then follow the next on-screen options. Note that you might have to boot your PC into Safe Mode.
Read More
Activision Blizzard Sued by California
blizzard hq
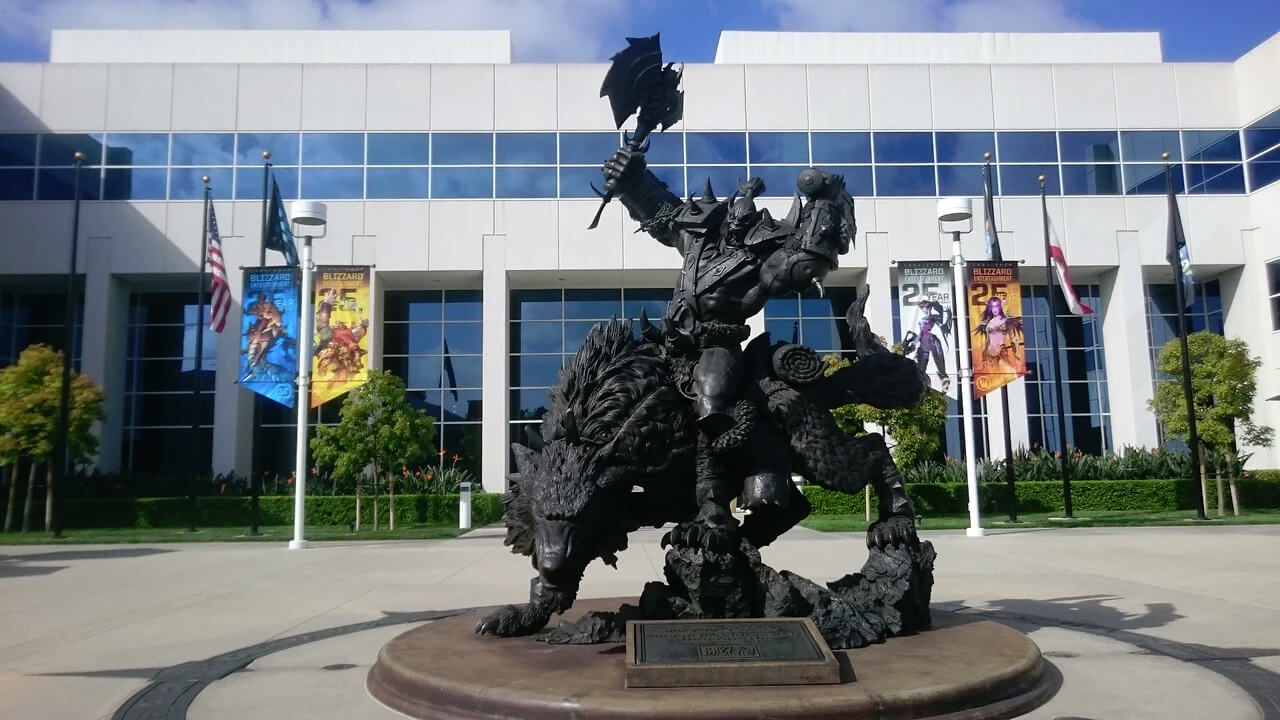
Following a two-year investigation by the California Department of Fair Employment and Housing, the state has filed a lawsuit against Activision Blizzard for fostering a "frat boy" culture in which female employees are allegedly subjected to unequal pay and sexual harassment. As reported by Bloomberg, Activision Blizzard is being accused by the state of California of discriminating against female employees at nearly all levels of employment, including in regards to compensation, promotion, assignments, and termination. The state alleges Activision Blizzard’s leadership has failed to address any of these outstanding issues or prevent them from occurring within the workplace. You can read the full details of the lawsuit here. The suit, filed Tuesday in the Los Angeles Superior Court, says Activision Blizzard, which is made up of about 20 percent women, assigns women, and women of color, to "lower paid and lower opportunity levels" with lower starting pay for similar work as their male counterparts. The documents also accuse Activision Blizzard of fostering a "pervasive 'frat boy' workplace culture in the office. Male employees are said to drink "copious amounts of alcohol" as they make their way through cubicles and "often engage in inappropriate behavior toward female employees." Male employees are said to come to work hungover, play video games during work "while delegating their responsibilities to female employees, engage in banter about their sexual encounters, talk openly about female bodies, and joke about rape." The lawsuit also cites one particular incident where a female employee, who was already subjected to intense sexual harassment at the company, committed suicide during a work trip with a male supervisor who allegedly brought inappropriate, sexual items with him on the trip. The lawsuit is asking for an injunction that will force Activision Blizzard to comply with workplace protections, as well as deliver unpaid wages, pay adjustments, back pay, and lost wages and benefits for female employees.

An Activision Blizzard spokesperson sent the following statement in response to the allegations:

We value diversity and strive to foster a workplace that offers inclusivity for everyone. There is no place in our company or industry, or any industry, for sexual misconduct or harassment of any kind. We take every allegation seriously and investigate all claims. In cases related to misconduct, the action was taken to address the issue. The DFEH includes distorted, and in many cases false, descriptions of Blizzard’s past. We have been extremely cooperative with the DFEH throughout their investigation, including providing them with extensive data and ample documentation, but they refused to inform us what issues they perceived. They were required by law to adequately investigate and to have good faith discussions with us to better understand and to resolve any claims or concerns before going to litigation, but they failed to do so. Instead, they rushed to file an inaccurate complaint, as we will demonstrate in court. We are sickened by the reprehensible conduct of the DFEH to drag into the complaint the tragic suicide of an employee whose passing has no bearing whatsoever on this case and with no regard for her grieving family. While we find this behavior to be disgraceful and unprofessional, it is, unfortunately, an example of how they have conducted themselves throughout the course of their investigation. It is this type of irresponsible behavior from unaccountable State bureaucrats that are driving many of the State’s best businesses out of California. The picture the DFEH paints is not the Blizzard workplace of today. Over the past several years and continuing since the initial investigation started, we’ve made significant changes to address company culture and reflect more diversity within our leadership teams. We’ve updated our Code of Conduct to emphasize a strict non-retaliation focus, amplified internal programs and channels for employees to report violations, including the “ASK List” with a confidential integrity hotline, and introduced an Employee Relations team dedicated to investigating employee concerns. We have strengthened our commitment to diversity, equity, and inclusion and combined our Employee Networks at a global level, to provide additional support. Employees must also undergo regular anti-harassment training and have done so for many years. We put tremendous effort into creating fair and rewarding compensation packages and policies that reflect our culture and business, and we strive to pay all employees fairly for equal or substantially similar work. We take a variety of proactive steps to ensure that pay is driven by non-discriminatory factors. For example, we reward and compensate employees based on their performance, and we conduct extensive anti-discrimination training including for those who are part of the compensation process. We are confident in our ability to demonstrate our practices as an equal opportunity employer that fosters a supportive, diverse, and inclusive workplace for our people, and we are committed to continuing this effort in the years to come. It is a shame that the DFEH did not want to engage with us on what they thought they were seeing in their investigation.

Conclusion

We will see how things work out, but I am not too optimistic for Activision Blizzard, truth to be told these reports are really bringing up some disturbing news on the sunlight. I just hope that all responsible will be brought to justice.
Read More
1 2 3 162
Logo
Copyright © 2022, ErrorTools. All Rights Reserved
Trademarks: Microsoft Windows logos are registered trademarks of Microsoft. Disclaimer: ErrorTools.com is not affiliated with Microsoft, nor claim direct affiliation.
The information on this page is provided for information purposes only.
DMCA.com Protection Status