Backup all drivers in Windows 10

When Windows is installed on a clean hard drive it usually finds most of the needed drivers for our computer to run, but if we by any chance have any old unsupported hardware or some exotic one chance are very high that Windows will not be able to locate and install drivers for it.

And sometimes we do not even have drivers from where to download them, let's say for example you have purchased a second-hand laptop with Windows on it, you wish to create a clean and fresh copy of new Windows installation but you do not have drivers, and let us say the model is not supported so you can not download them. In this case, this shown method will help you a ton and save you a lot of time and frustration.

So, in order to back all of your drivers from your Windows follow this simple guide step by step. Note please that this method will backup drivers themselves, you will not backup installation packages of drivers or similar stuff, only drivers installed in Windows itself.

Backing up the drivers

First thing first, create a folder where you want your drivers to be backed up somewhere in your HD and give it any name.

Second, press ⊞ WINDOWS + X to open the secret Windows menu.

keyboard with windows and x markedFrom the menu choose Command Prompt (administrator)

Windows menu command prompt adminWhen the command prompt is active type the next command in it:
DISM /online /export-driver /destination:C:\DriverBackup

where: C:\DriverBackup is the folder and the hard drive where you want to store your backed-up drivers.

Press ENTER

That's it, you have now successfully backed-up all of your installed Windows drivers.

Now, save all of your drivers on USB and reinstall Windows.

In order to now return backed drivers do the following:

Press again ⊞ WINDOWS + X to open the secret Windows menu.

keyboard with windows and x markedbut this time choose Device manager

Windows menu device managerFrom decide, manager right-click on any device Windows has not been able to install appropriate driver and choose update driver

  • Click on the Browse my computer for driver software option.
  • Click the Browse button.
  • Select the folder with the driver backup.
  • Check the Include subfolders option.
  • Click the Next button.
  • Click the Close button.
If you like to learn and find out more about various Windows errors, and how to repair them go to our vast archive or use search to find articles that will explain and help you in solving your issue.
However, if you prefer to do things fast and with automatization then we are proposing to use an automated solution for your issues. The application that we are recommending is Advanced System Repair Pro
Advanced System Repair utilizes multiple tools all in one to give you a quick, simple, reliable, and very thorough diagnosis of your PC. It brings you all the tools you need in one program to clean, fix, protect, optimize and boost your PC!
1-Click Maintenance
All the tools to make it simple and easy! It's like having a professional technician at the click of a mouse.

Junk Cleaner
Keeping your computer free from unnecessary clutter also helps make your computer last longer. Like any other machine, if you keep it clean and take care of it, it will serve you better for longer!

Optimize background apps
Optimize applications background activity with the built-in Application Optimizer feature.

Disk Defrag
With a simple 1-click, Advanced System Repair speeds up your PC by assembling fragmented files on your machine and organizing them more efficiently.

Malware Removal
Finds and removes all types of harmful malware including trojans, worms, bots, adware, spyware, PUPs, and more!

Privacy Cleaner
The all-in-one privacy suite to Clean Your Tracks & Protect Your Privacy! Make your computer safe, secure, and more efficient!

System Tweak/Optimizer
ASR will analyze your complete system and settings to adjust your PC to function at its maximum performance.

Registry Cleaner
Over time, as you install and uninstall applications, the registry can become cluttered with old entries and broken settings which can result in program crashes, and annoying messages and slow the computer down.
Visit our Advanced System Repair Pro Download page to inform yourself about all the benefits of this software and get a free trial copy of it.
advanced system repair pro

Advanced System Repair Pro

One-click automated PC repair solution
ASR logo
With Advanced System Repair Pro you can easily
Replace damaged files
Restore performance
Free disk space
Remove Malware
Protects WEB browser
Remove Viruses
Stop PC freezing
DOWNLOAD
Privacy Policy | Terms of Use | Uinstall
Advanced System Repair Pro is compatible with all versions of Microsoft Windows including Windows 11

Share this article:

You might also like

How to choose default applications in Windows
Hello everyone and welcome to another tutorial on errortools.com, Windows itself when it is installed has a general idea about certain file types and how to open them, for example, image files would be opened with application photos, web links with the edge, etc. So when we double click on the known file type, Windows will start the default application for that type and open the file in it. But what if we do not want to open files in applications Microsoft thinks we should? What if we want to open the website in firefox or images in photoshop, or whatever. Luckily we can easily change which application Windows uses for which file type. Click on ⊞ WINDOWS to open the start menu and choose settings. Windows 10 Star menu with marked settings iconOn the settings screen, choose Apps. Windows settings apps section markedWhen the Apps screen opens on the left click on Default apps. Windows settings default apps markedOn right, you will get a list of Windows default applications for certain types of files. Click on any application you would like to change and choose from the drop-down list a new one. Click on it and you are done.
Read More
Best VR headsets in 2021 so far
Virtual Reality is slowly becoming standard in gaming. More and more affordable headsets are coming out lowering entry prices and making them affordable for all. But in a sea of new VR headsets, it is important to at least purchase a decent one that will perform nicely and hopefully last longer. Therefore in today’s article, we will address some of the best options currently available on the market,

Oculus Quest 2

occulus quest 2 VR
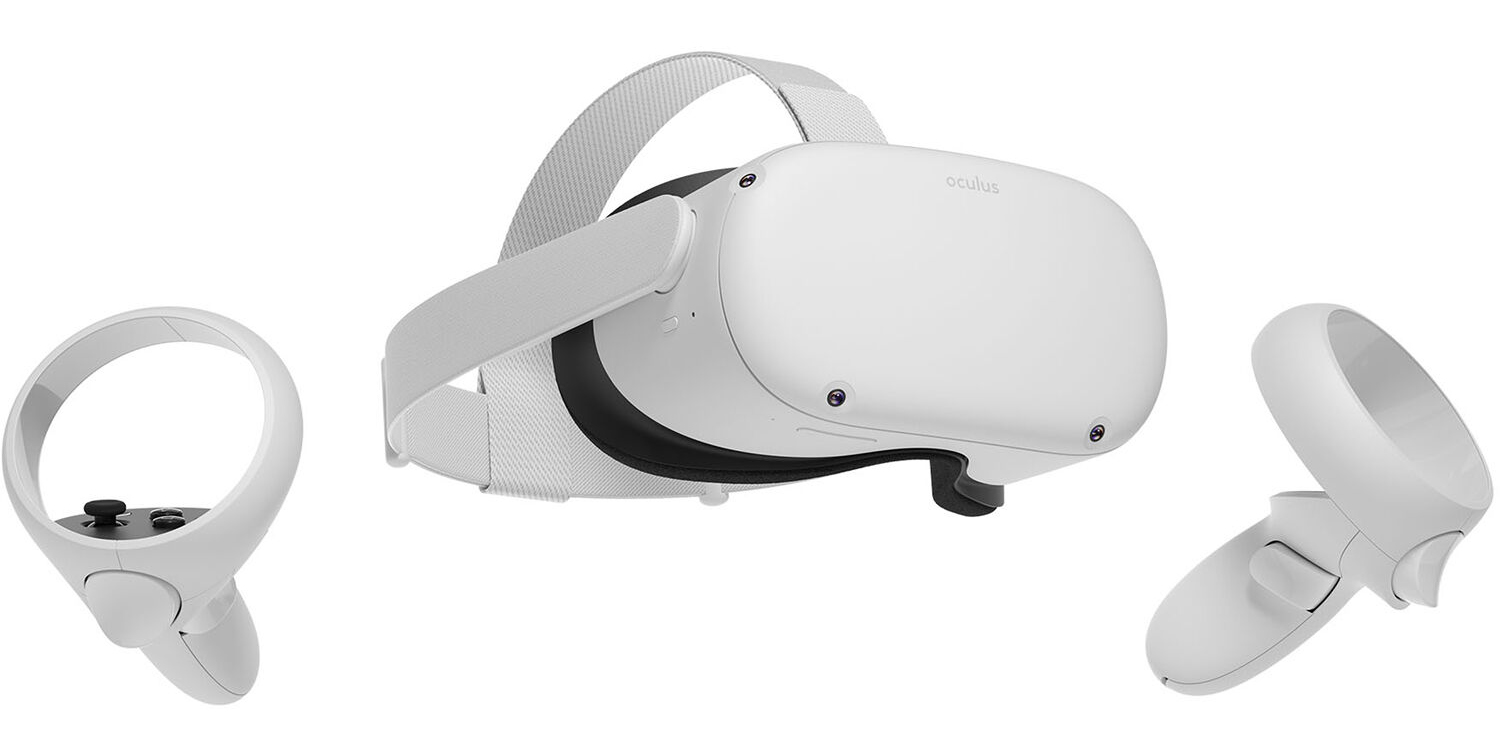
With its Rift model, Oculus set itself as a big player in VR. Now the company is slowly bowing out of the dedicated, tethered VR headset with its latest Quest 2 designed to primarily be a standalone headset. In case you do not know, tethered headset means that the headset itself is connected to your PC and is using its power to drive your VR experience. Now technical specifications of Quest 2 are pretty OK and it can drive stuff pretty decently and if you want you can purchase the dedicated cable to connect it to your PC for the full experience of games requiring more capable hardware. Oculus Quest 2 is the cheapest headset on this list and with its stable performance, is highly recommended.

Valve Index VR

valve index vr
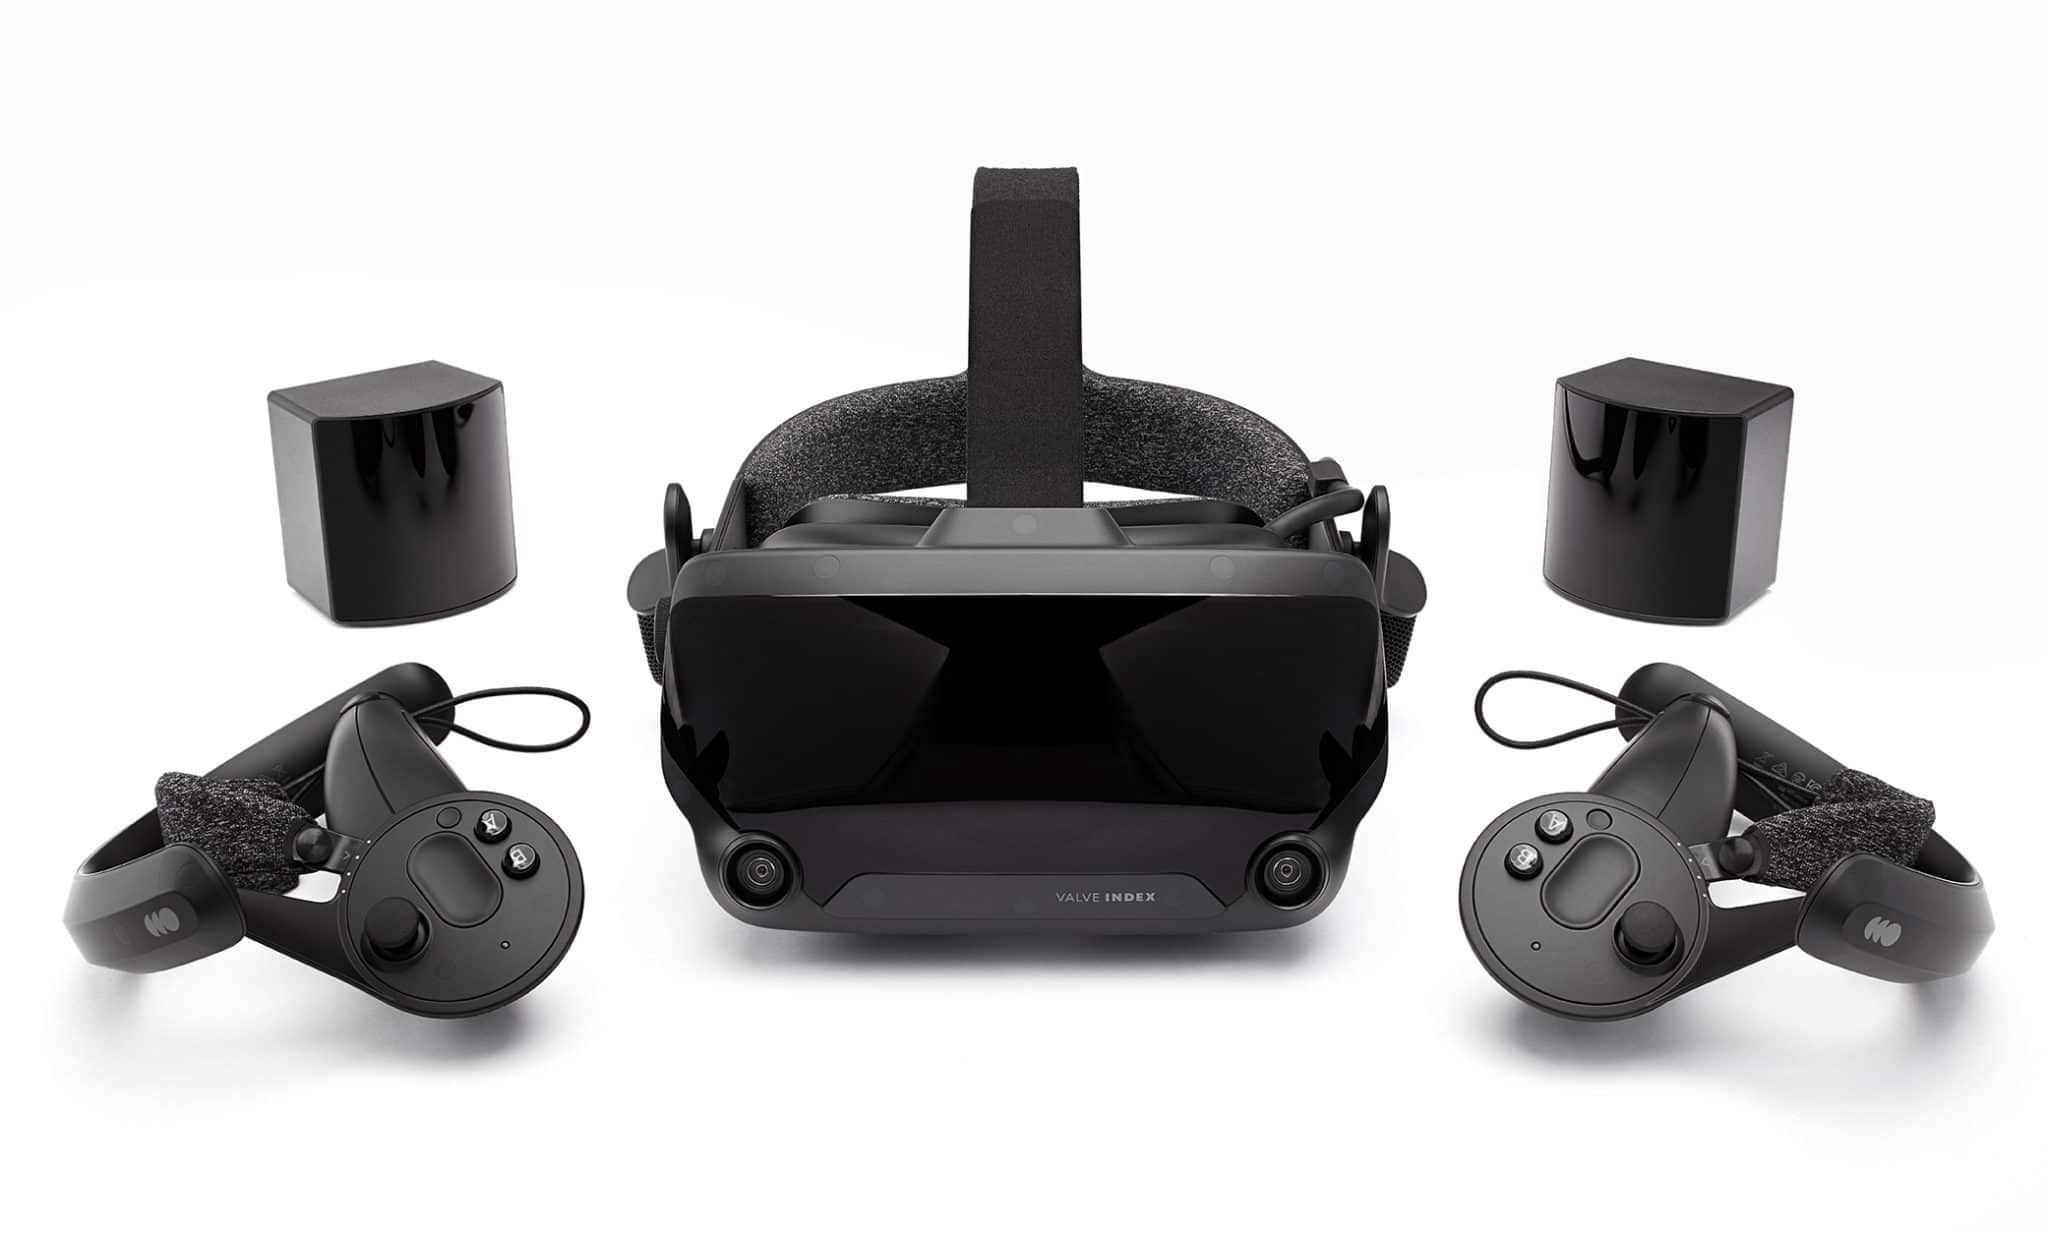
Although the headset itself is nothing revolutionary or special its controllers are. They can track individual finger movements, making games (that take advantage of them) much more immersive than the standard trigger grips on other controllers. The Index's higher refresh rate makes for smoother action, as well, which is another nice bonus. If you already have an HTC Vive or Vive Cosmos Elite, and their base stations (not the regular Cosmos), you can buy only the controllers.

Sony PlayStation VR

playstation vr
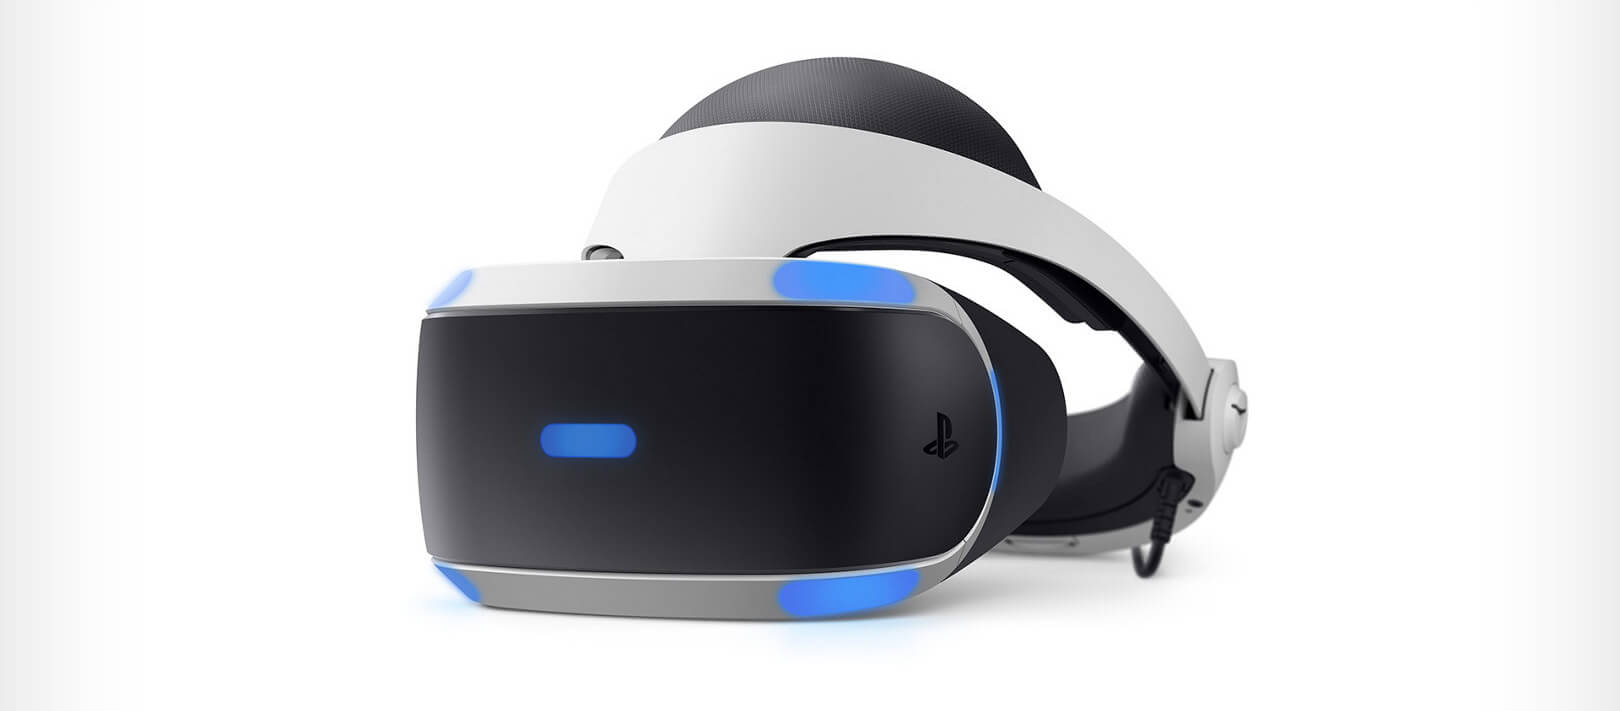
The PlayStation VR is compelling thanks to Sony backing its development, plus the PlayStation 4's affordability and availability compared with gaming PCs. All you need is the headset, a PlayStation 4, and a PlayStation Camera (now included with most PlayStation VR bundles). Not really the best of the bunch but still one of the top ones for console gaming. Sony is working on a new PlayStation VR system for the PlayStation 5, with redesigned controllers. The new headset hasn't been revealed yet, but the company has released a preview of the new controllers.

HP Reverb G2 VR

HP Reverb G2
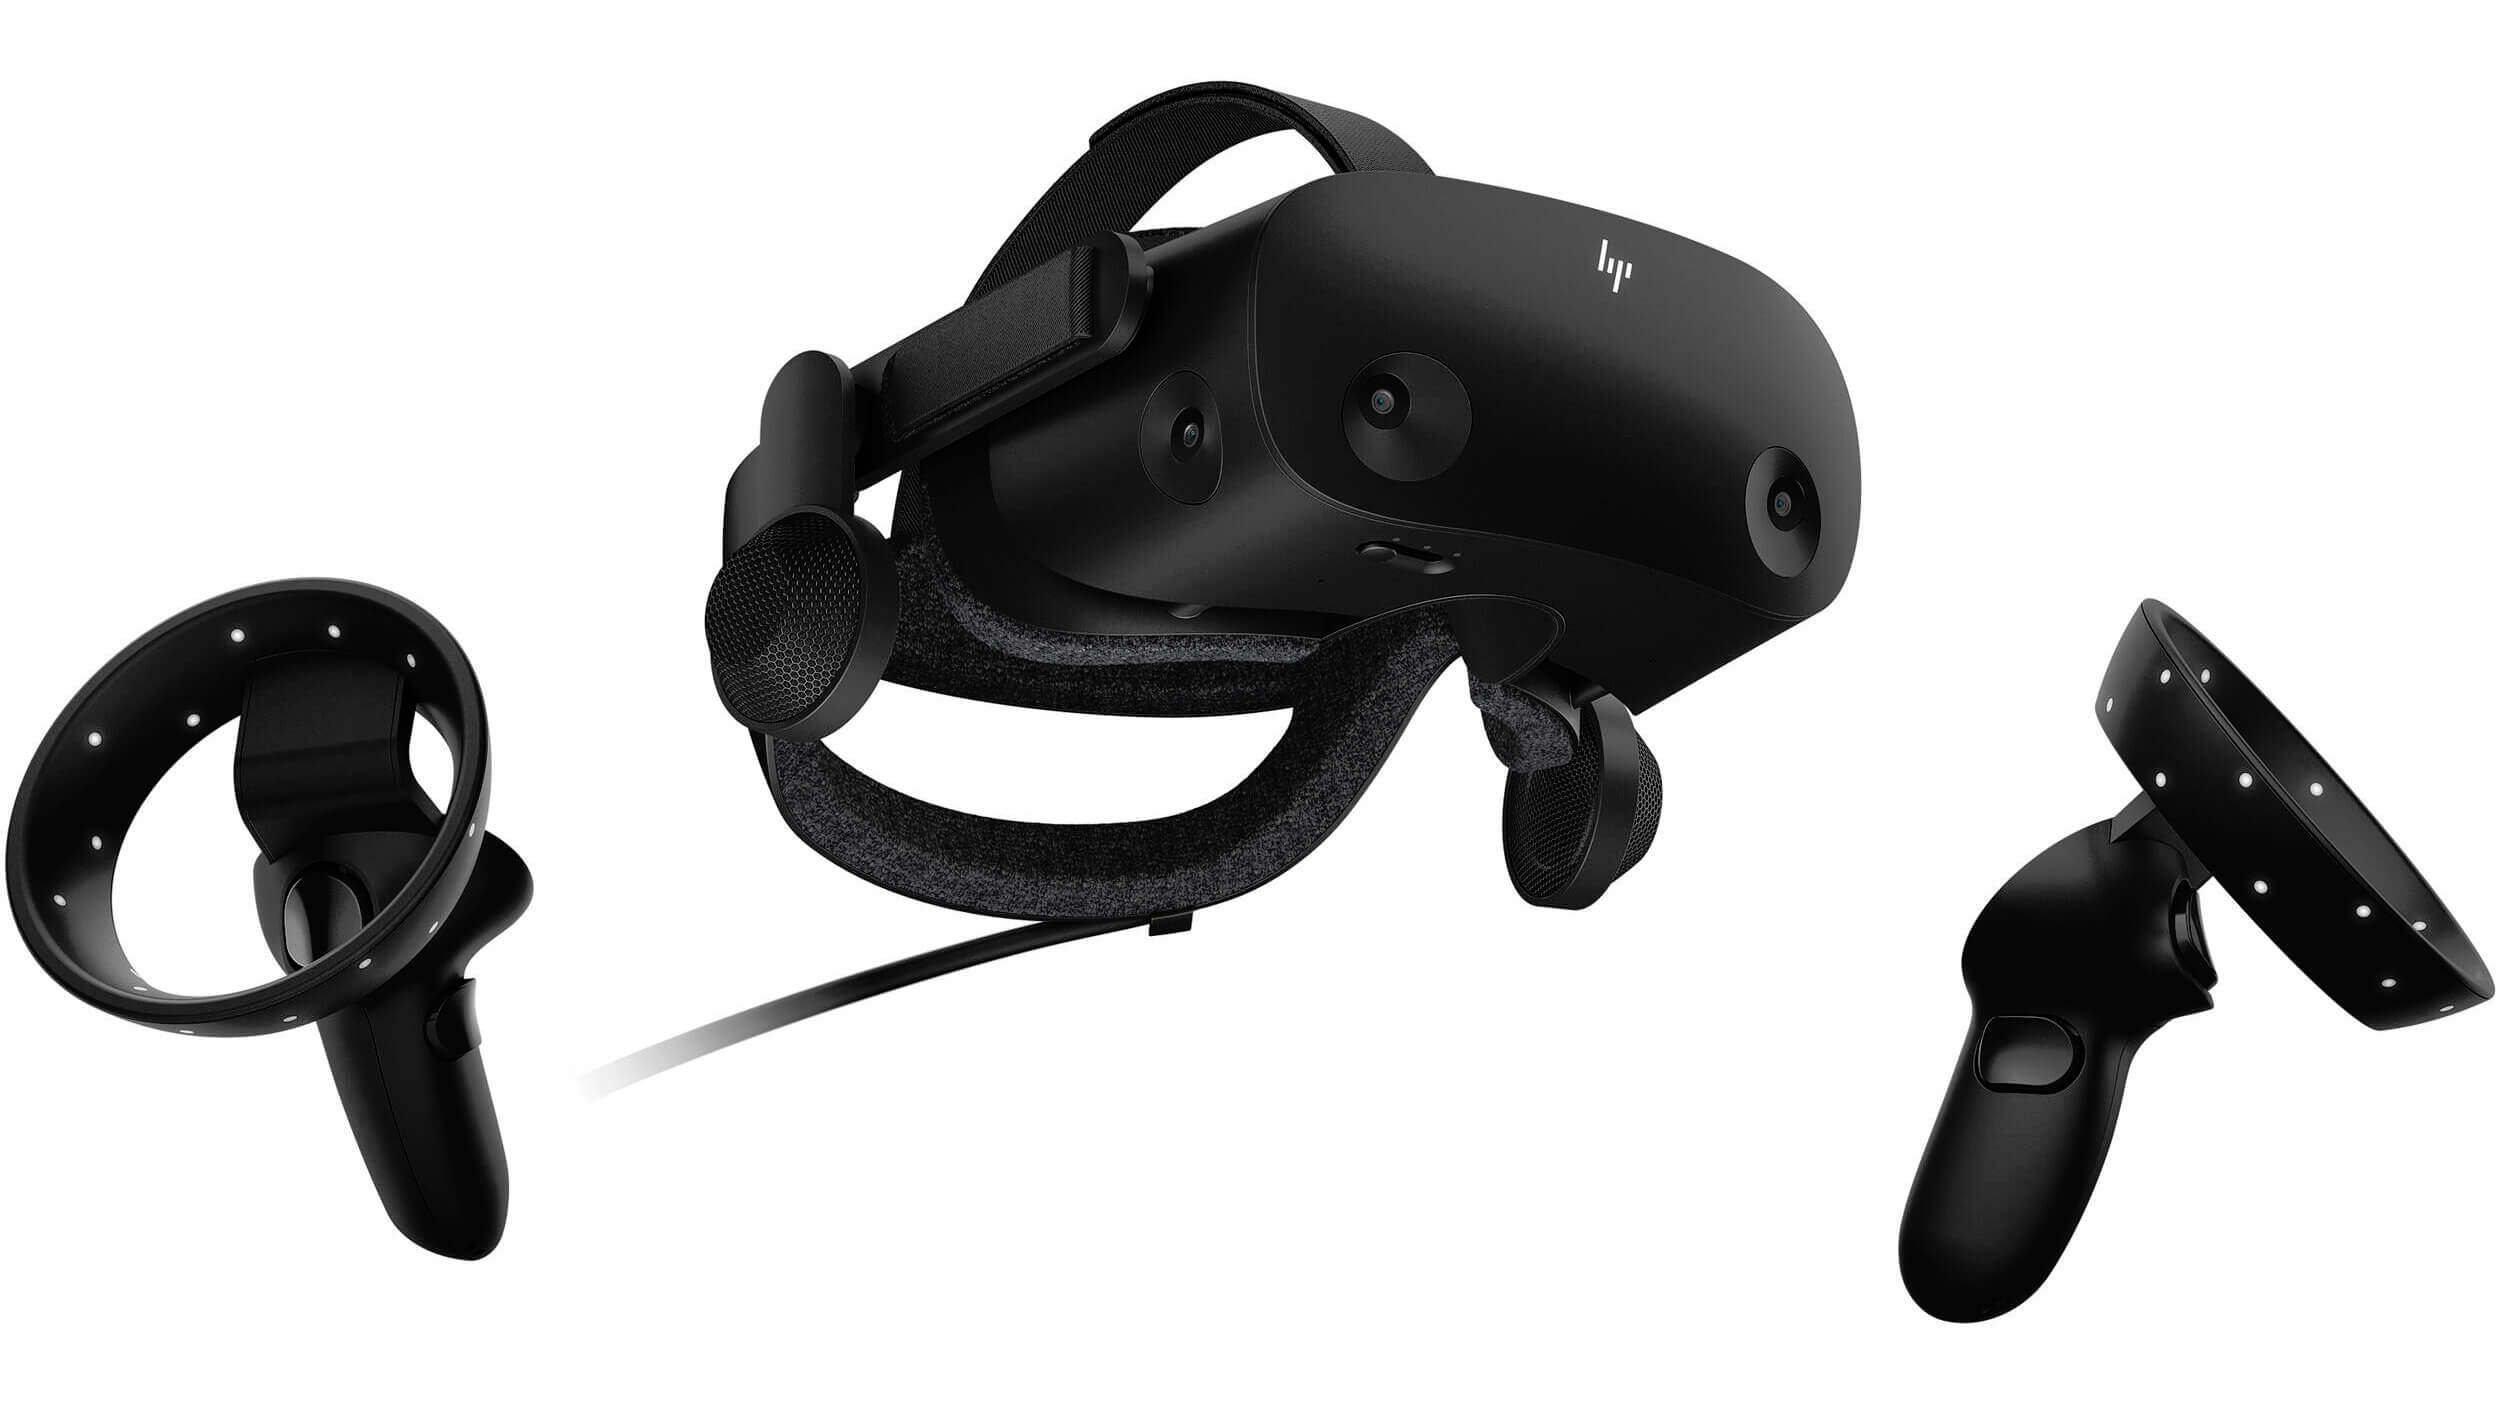
HP headset is one which you get if you want the best image quality in VR headset, sadly controllers did not follow the same quality of headset itself. But this is still a pretty decent headset overall and worth the purchase.

HTC Vive Cosmos

HTC Vive Cosmos
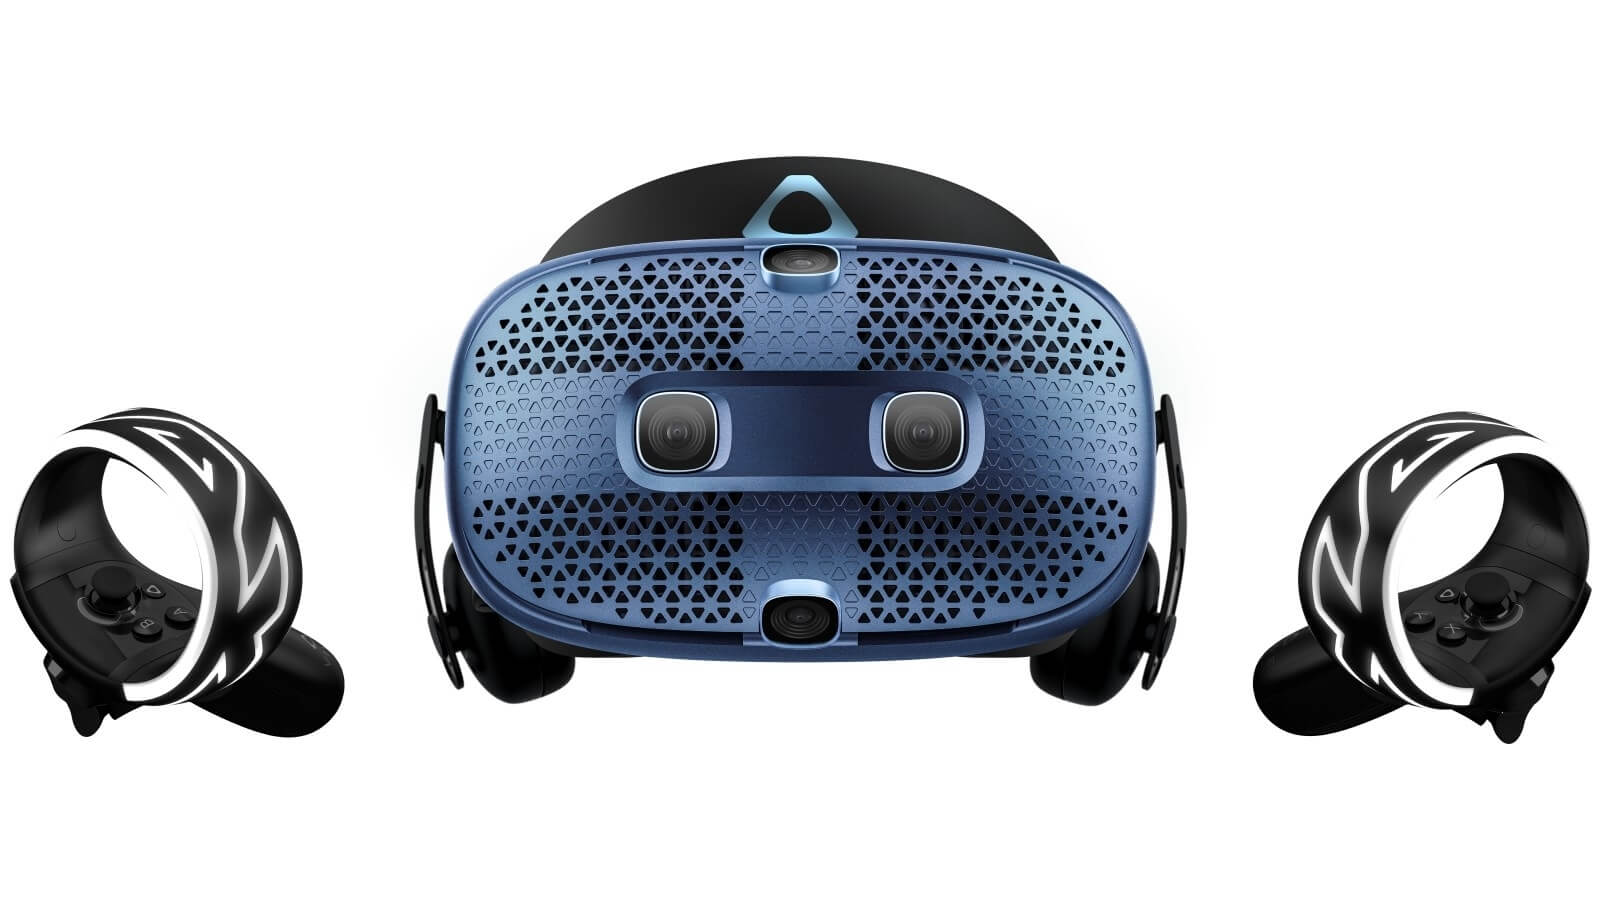
HTC's Vive Cosmos is the upgraded version of the Vive. It features a higher resolution and replaces the external base stations with outward-facing cameras for motion tracking. It's a comprehensive package for whole-room VR. HTC recently released the Vive Pro 2, a high-end VR headset targeting both enterprise users and consumers. This new headset features a 2,448-by-2,448 resolution display for each eye, making it the highest-resolution headset currently available. It's also more expensive than the Cosmos Elite. Sadly one thing that is bringing this headset down is the price.
Read More
Problem prevented document from being scanned
If an error suddenly pops up that states, “A problem prevented the document from being scanned” when you’re scanning a document in your computer, then you’ve come to the right place as this post will guide you on how exactly you can fix the problem. A lot of users have reported that they receive a two-layer error message when they try to scan their documents – the first screen throws an error message that says, “Error applying Settings to Driver” while the next error message states, “A problem prevented the document from being scanned”. As a result, the scanning won’t be completed which defeats the whole process of buying a printer with a scanner. As you can see the two error messages point to two different situations, while the other one is pointing at the driver, the second one points to the scanning problem. To resolve these issues, there are several suggestions you need to check such as follows:

Option 1 – Run the Printer Troubleshooter

One of the first basic troubleshooting you can perform to resolve the printer issue is running the Printer Troubleshooter. This built-in troubleshooter can detect and automatically fix the problem for you. To use it, follow these steps:
  • Tap the Win + R keys to open the Run dialog box.
  • Next, type “msdt.exe /id PrinterDiagnostic” in the field and click OK or hit Enter to open the Printer Troubleshooter.
  • Then click the Next button and follow the next on-screen instructions to fix the issue with the printer.

Option 2 – Try updating the Printer drivers

You might also want to try updating your printer drivers. All you have to do is locate the USB Composite Device. For complete details, follow the steps below.
  • First, click the Start button and type “device manager”.
  • Then click on the “Device Manager” from the search results to open it.
  • From there, look for the USB Composite Device option and right-click on it, and select the Update Driver from the options.
  • Restart your PC and then click the “Search automatically for updated driver software” option.
Note: You also have the option to download the latest version of your Printer from the manufacturer’s website.

Option 3 – Try to reset the settings of the Printer or reinstall it

If none of the two options given above worked, you can try to either reset the printer settings or reinstall the printer so that it can go back to its default state. However, if it doesn’t work, you can try to uninstall the printer as well as its related drivers. To do so, follow these steps:
  • First, go to Settings > Devices > Printer and Scanners.
  • After that, select the printer and select the Remove Device option.
  • Once done, restart your computer and check again and see if the error is now fixed.

Option 4 – Try to modify the Registry settings for the Still Image devices

In case you don’t know, Windows has Registry settings for the Still Image devices like Scanners and Printers. And these devices have vendor-specific settings that if ended up getting corrupted or misconfigured then you will most likely encounter errors like “A problem prevented the document from being scanned”. Thus, to fix this error, you can try modifying the Still Image devices registry settings, and to do that, you need to follow the instructions below but before that, make sure that you create a System Restore Point first.
  • Once you’ve created a System Restore point, tap the Win + R keys to open the Run dialog box and type “Regedit” in the field, and then hit Enter to open the Registry Editor.
  • Next, navigate to this registry key: HKEY_LOCAL_MACHINESYSTEMCurrentControlSetControlStillImage
  • From there, right-click on the “StillImage” registry key and delete it.
  • After that, exit the Registry Editor and restart your computer.
  • Once your computer has restarted, Windows will recreate the settings of the Still Image devices back to their default settings.
Read More
Delete last 15 min of browsing history on phone
google browsing 15min history delete
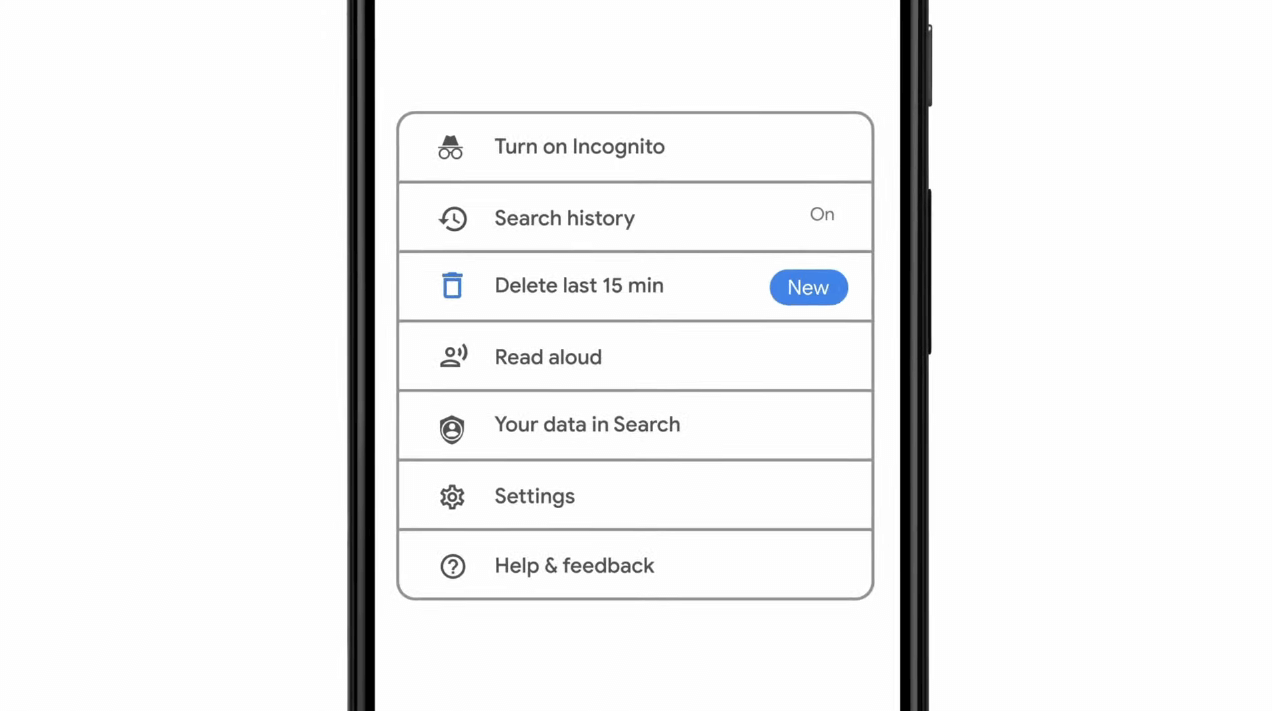
As previously announced by Google feature to quickly delete the last 15min of browsing history via one button is rolling out now. For now, only Apple users will be available to use this feature but the Android update is scheduled for later this year, a strange move by Google but it is what it is. For anyone who is unfamiliar with this feature, basically, Google wants a quick way to remove the last 15min of browsing history as a supposedly stated request to make deleting browsing history much easier. Google came up with this idea so you can keep the previous history intact but remove just 15min time frame, no additional explanation was given on why 15 but I presume it is some round number that came up as the middle one with research, read telemetry info. Using quick delete requires being signed into Search with a Google account. Users can access the option by simply tapping on the avatar icon to access the settings then choosing "Delete last 15 minutes."
Read More
DNS_PROBE_FINISHED_BAD_CONFIG error in Chrome
If you always use Google Chrome when browsing the internet, then you might have come across an error saying, “This webpage is not available, DNS PROBE FINISHED BAD CONFIG”. If you do, then this problem certainly has something to do with the DNS since any error code which has “DNS” in it points out a network issue in the computer. Getting the DNS_PROBE_FINISHED_BAD_CONFIG error indicates that your computer is not able to connect the website because the Domain Name Server or DNS wasn’t able to resolve the website name into IP address or it is not available at all. So in this guide, we’ll help you sort out this issue in Chrome on your Windows 10 PC.

Option 1 – Check the Network Cables and restart your router then reconnect

The most obvious thing you can do first is to try checking if the network cables connected to your computer or router are properly connected or not. If it turns out that some network cables are not connected properly, then it’s probably why you’re getting the DNS_PROBE_FINISHED_BAD_CONFIG error in Chrome. And if your computer is connected via Wi-Fi, you need to make sure to restart your router once. In addition, you can also forget the Wi-Fi your computer is currently connected to and then try reconnecting again to see if it would work.

Option 2 – Flush the DNS and reset TCP/IP

Flushing the DNS and reset TCP/IP could also help in fixing the DNS_PROBE_FINISHED_BAD_CONFIG error in Chrome. To do so, refer to these steps:
  • Click the Start button and type in “command prompt” in the field.
  • From the search results that appear, right-click on Command Prompt and select the “Run as administrator” option.
  • After opening Command Prompt, you have to type each one of the commands listed below. Just make sure that after you type each command, you hit Enter
    • ipconfig /release
    • ipconfig /all
    • ipconfig /flushdns
    • ipconfig /renew
    • netsh int ip set dns
    • netsh winsock reset
After you key in the commands listed above, the DNS cache will be flushed and the Winsock, as well as the TCP/IP, will reset.

Option 3 – Try to remove the Proxy

You can also try to remove the Proxy as it might also help you in fixing the DNS_PROBE_FINISHED_BAD_CONFIG error. Here’s how you can do it:
  • Tap the Win + R keys to open the Run dialog box.
  • Then type “inetcpl.cpl” in the field and hit Enter to pull up the Internet Properties.
  • After that, go to the Connections tab and select the LAN settings.
  • From there. Uncheck the “Use a Proxy Server” option for your LAN and then make sure that the “Automatically detect settings” option is checked.
  • Now click the OK and the Apply buttons.
  • Restart your PC.
Note: If you are using a third-party proxy service, you have to disable it.

Option 4 – Change the DNS

Try to use the Google Public DNS If the first option didn’t work, you can try to use the Public DNS by Google and see if it can help fix the DNS error. You have to modify the DNS settings in your system explicitly and use the DNS IP addresses.
  • The first thing you have to do is right-click on the network icon in the Taskbar and select Network and Sharing Center.
  • Next, click on the “Change Adapter Settings” option.
  • After that, search for the network connection that you are using to connect to the internet. Note that the option might be “Wireless Connection” or “Local Area Connection”.
  • Right-click on your network connection and click on Properties.
  • Then select the new window to choose the “Internet Protocol 4 (TCP/IPv4)” option.
  • After that, click on the Properties button and click the checkbox in the new window for the option “Use the following DNS server addresses”.
  • Type in “8.8.8” and “8.8.4.4” and click OK and exit.

Option 5 – Clear Chrome’s browsing data

If your browsing data in Chrome hasn’t been cleared for some time now then that might be the reason why you’re suddenly getting the DNS_PROBE_FINISHED_BAD_CONFIG error when you browse the web. To fix this error, you need to clear your web browsing data. Refer to the following steps to do so.
  • Tap the Ctrl + Shift + Delete buttons to go to the Clear browsing data section in Chrome.
  • Next, set the time range to “All time” and tick all the boxes and then click on the Clear data button.
  • After that, restart the Chrome browser and try to open the website you were trying to open earlier.

Option 6 – Try running the Chrome Cleanup tool

In case you don’t know, there is actually a built-in malware scanner and cleanup tool in Chrome that helps you get rid of any unwanted ads, pop-ups, and even malware, as well as unusual startup pages, toolbars, and other things that could affect the performance of the browser.
Read More
A Guide to Quick Fixing Error 10013

Repair Error 10013

Error 10013 - What is it?

Error 10013 is a type of Socket Windows PC error. Socket error 10013 occurs when the attempt to access the server is denied. This indicates that the needed socket connection is denied which further implies that a port is blocked or unreachable.

Solution

Restoro box imageError Causes

The socket error 10013 can occur due to multiple reasons:
  • Antivirus or firewall software
  • Incompatible drivers
  • Registry corruption
  • Misconfigured files

Further Information and Manual Repair

To resolve the socket error 10013 on your PC, here are some methods that you can try:

1. Disable Firewall

To resolve this issue on your PC, you may have to temporarily disable Firewall. Sometimes Firewall can stop you from connecting to the server. Try doing this; it is most likely to resolve the error. If the Firewall is the reason for the denied access, turning it off will surely help.

2. Disable your Antivirus Software

If disabling the Firewall doesn’t resolve the issue, try disabling your antivirus software temporarily. If the error still persists, then try other solutions listed below.

3. Upgrade Drivers

Incompatible drivers could be a reason too for denied server access. Your server may no longer be using the drivers that you have on your PC which is why you may not be getting permission to access it. If this is the cause, then the best way to resolve it is to upgrade drivers. To find out about new drivers, visit the software manufacturer’s website for new drivers and then download them to your PC.

4. Registry Issues

Sometimes the underlying cause of the error could be registry issues and misconfigured files. If you don’t wipe out unnecessary and obsolete files from your systems like junk files, cookies, internet history, temporary files, and other files from your PC, it can damage and corrupt the registry and misconfigured files thereby causing socket error 10013 on your system. To resolve registry issues and repair your PC, download Restoro. It is an advanced, easy to use, and highly functional PC fixer embedded with multiple utilities including a powerful registry cleaner. It is deployed with an intuitive algorithm that scans and detects all registry issues in seconds. It removes all the unnecessary and obsolete files stored in your PC overloading your registry. This registry cleaner repairs the damaged and misconfigured files and restores the registry, thereby resolving socket error 10013 on your system right away. It has simple navigations and a user-friendly interface which makes it very easy for all levels of users to work around and use it to its maximum advantage.  Furthermore, it can be installed on all Windows PC. Restoro is compatible with all Windows versions. In addition to this, it also includes several other value-added features such as an antivirus, a system optimizer, and an Active X controls and class scanner. These utilities can be used to resolve numerous other PC-related errors. Click here to download Restoro today and resolve socket error 10013 on your PC right away.
Read More
How to Turn off Advertising ID in Windows
In case you don’t know, Microsoft hooks up every machine that is running Windows 10 with an Advertising ID which helps them in providing Windows 10 users with relevant ads. These ads are delivered to users in the Action Center, Start Menu as well as the ads inside the UWP Applications. What makes these advertisements relevant is that they keep track of your browsing trends, likes and dislikes, with the help of the Advertising ID. However, if you are not fond of advertisements and you do not want this feature of Microsoft to track your usage, worry not for you actually have the option to disable targeted ads on your Windows 10 computer by turning off the Advertising ID. And you can do that during Windows 10 Setup or using the Group Policy Editor. For more details, refer to the instructions provided below for each one of the methods.

Option 1 – Turn off Advertising ID during Windows 10 setup

If you are about to install Windows 10, then during the installation process, your computer boots into the Install and Configure Windows 10 screen with Cortana that assist you during the setup. Once you reach the last page which is “Choose privacy settings for your device”, you will see the Advertising ID of your computer. Under the Advertising ID, you have to disable or toggle off the “Apps can use advertising ID to provide more personalized advertising in accordance with the privacy policy of the app provider” option. After you disable it, click on the Accept button to proceed with the installation. After that, the copy of your Windows 10 you are using will have the Advertising ID disabled by default.

Option 2 – Turn off Advertising ID via Group Policy Editor

  • First, tap the Win + R keys to launch the Run utility.
  • Then, type “gpedit.msc” in the field and click OK or tap Enter to open the Group Policy Editor.
  • Next, navigate to this group policy setting: Computer Configuration > Administrative Templates > System > User Profiles
  • Now double click on the “Turn off the advertising ID” option and set the radio button to Enabled. Once you do, you will see the following description on your screen:
“This policy setting turns off the advertising ID, preventing apps from using the ID for experiences across apps. If you enable this policy setting, the advertising ID is turned off. Apps can’t use the ID for experiences across apps. If you disable or do not configure this policy setting, users can control whether apps can use the advertising ID for experiences across apps.” Note that setting the radio button to Enabled or Not Configured will turn off the data collection of the Advertising ID.
  • Finally, exit the Group Policy Editor and then restart your computer to apply the changes made successfully.
Read More
How to Fix Windows 8 Error Code 0xc004f034

Error Code 0xc004f034 – What is it?

Error code 0xc004f034 occurs when Windows users are unable to activate their operating system. It affects Windows 8 and Windows 10 users and features common symptoms which include the following:
  • Inability to activate Windows
  • Message box with error code 0xc004f034

Solution

Restoro box imageError Causes

Error code 0xc004f034 often occurs due to an issue with the Windows product key. This may occur when users enter an invalid product key or use one that is appropriate for use on a different version of Windows. To correct the issue, users will need to use the correct product key for their system or contact an IT professional if their device is connected to a Key Management Service (KMS).  Windows users affected by this error code may also need to check their system for viruses or missing system files since these issues can result in error codes on Windows devices.

Further Information and Manual Repair

Manual repair methods enable users to fix problems related to error codes. Though some manual repair methods require the use of Command Prompt and utility tools like the System File Checker, even non-technical Windows users can find success simply by following the instructions provided below.

However, note that some issues can be complex, thus requiring the use of an automated tool or help from a Windows repair technician. Consider these options if the manual repair methods below do not resolve error code 0xc004f034 on your Windows 8 device.

Method One: Enter Valid Windows Product Key

Microsoft currently offers several ways for customers to activate their Windows operating system, the most common of which is the product key. This 25-character code verifies that users have access to an authorized version of Windows.

You may get a valid product key from an authorized dealer, a new PC with Windows, or access a digital copy from a Windows website when you purchase your Windows operating system online. Once you have a valid product key, use it to activate Windows and resolve error code 0xc004f034 in Windows 8. Follow the steps below to access the Product Activation Wizard.

  • Step one: Click or tab Start button then select Settings
  • Step two: Tap or click PC Settings, then select Activate Windows
  • Step three: Type invalid product key

Once a valid product key is used, the Product Activation Wizard should complete the activation process. If you are unable to complete the process, however, and error code 0xc004f034 remains unresolved, click the link or instructions the Product Activation Wizard provides regarding activation via phone or customer support.

Method Two: Run System File Checker

Another option available to Windows 8 users is System File Checker (SFC). This tool enables Windows users to scan and repair corrupted or missing system files. Follow the steps below to access SFC.

  • Step one: Go to Start and type Command Prompt or CMD.
  • Step two: Run as Administrator
  • Step three: Type sfc /scannow ensuring a space is between “sfc” and “/scannow”.

System File Checker will repair any corruptions found on system files within your machine once you successfully follow the instructions provided. The tool will also replace missing files which will lead to better performance on your PC.

When the process is complete, restart your device then check if you are able to activate Windows. If error code 0xc004f034 is still present, you will need to find another solution via repair method three.

Method Three: Scan for Viruses and other Malware

Viruses and other forms of malware are one of the main issues resulting in poor PC performance and Windows error codes. To fix this issue on your PC, scan your machine for signs of these malicious programs. If you do not have anti-malware software and would like to download one from the Internet, ensure the software you choose is effective before attempting to download it.

Once you have powerful antimalware software on your PC, begin a scan for viruses, Trojan horses, and other forms of malware. If the Windows error code occurred due to issues related to malicious programs, you will be able to resolve the issue. If, however, this manual repair method proves ineffective in resolving error code 0xc004f034, download a powerful automated tool or contact a Windows repair technician to assist you.

Method Four: Use an Automated Tool

If you wish to always have at your disposal a utility tool to fix these Windows 8 and other related issues when they do arise, download and install a powerful automated tool.
Read More
How to Repair BSOD Stop Error code 0xc000021a in Windows 10

Error code 0xc000021a - What is it?

Error code 0xc000021a occurs when the system is unable to start or there’s a failure in critical system processes. Normally, it would take about several seconds for the system to boot and while on the startup process, error code 0xc000021a may take place to block the system to boot up. Users will get a blue screen of death (BOSD) when this error occurs. When upgrading to Windows 10, be careful; you might encounter other error messages such as error code 8007002c

Solution

Restoro box imageError Causes

There are several reasons why error code 0xc000021a occurs. It is important to have a full understanding of what caused the blue screen of death before attempting to fix the error by yourself. See below for a few common causes:

Computer malware has infiltrated your device.

• Important files such as Winlogon.exe and Csrss.exe are damaged. Winlogon.exe file is responsible for handling the login and logout processes while Csrss.exe is a vital part of Microsoft Client or Server ‘Runtime Server Subsystem’. Once one of these files is damaged or deleted, a stop error will occur.

• When there are mismatched system files installed or system upgrading process failed or still incomplete.

• Premature unloading of Wbemprox.dll

• Newly installed third-party software is not compatible with the operating system.

• There are corrupted, outdated, or incorrectly configured device drivers.

• There’s insufficient space in the system partition. Once the system partition is full, certain errors such as error code 0xc000021a will manifest.

• Windows registry is corrupted or damaged due to a software or system change. This means there are registry entries that are not cleared after uninstalling an application.

Further Information and Manual Repair

In fixing error code 0xc000021a, you might want to try and manually do so. Manual repair methods can give users effective and efficient solutions, addressing the root problems in relation to Windows error codes. Once the manual repair method is correctly implemented, users will be able to resolve issues immediately. However, there might be instances when a Windows professional is needed. In such cases, seek help from a certified Windows expert or you might want to consider using an automated tool whenever necessary.

Method One: Convert the Drive or Partition from NTFS to GPT

In order to fix Error code 0xc000021a in Windows 10, you might need to convert the partition or drive from NTFS to GPT. See below for the procedure: 1. Shut down your device then put in the Windows installation USB key or DVD. 2. Boot your device to the USB key or DVD in UEFI mode. 3. Inside the Windows Setup, open a Command Prompt window by pressing Shift + F10. 4. Type diskpart in the Command Prompt window to open the diskpart tool. 5. Type list disk to identify which drive to reformat. 6. Select which drive to reformat by typing select disk in the command prompt. Afterward, type clean then hit Enter. Once done, type convert gpt to be able to convert the drive from NTFS to GPT. Finally, type exit and press Enter. You can now close the Command Prompt window. 7. Once the partition or drive is converted from NTFS to GPT, the user can now continue the Windows Setup installation. NOTE: Select Custom in choosing which installation type to use. The drive will then appear as a single area of unallocated space. Choose that unallocated space then select Next. At this point, Windows will now begin the installation.

Method Two: Fix System File Errors

There are times when system files get corrupted or damaged which will result in system failure. If this is the case, you can use a Windows free tool to repair corrupted or damaged system files. 1. Right-click on the Start button then selects Command Prompt (Admin) from the list to open a Command Prompt window. 2. Once the Command Prompt appears, type sfc /scannow then hit Enter. Wait until the process completes. If the process is completed and it doesn’t report any error or issues that remain unsolved, you might want to employ the next method.

Method Three: Reset Windows 10

Resetting Windows will delete all software and user accounts installed in the operating system and will reinstall a fresh Windows. 1. Boot your device using a Windows installation USB key or DVD. Select Repair your computer to locate the Troubleshoot option. Afterward, choose Reset this PC. NOTE: If the device is able to boot the system, you can reset Windows without using a Windows installation USB key or DVD. You just have to boot the device then navigate to Settings in the Start button. Choose Update & Recovery then select Recovery found on the left pane. Choose Reset this PC option then select Go back to an earlier build and Advanced startup. Select Get Started button found in the Reset this PC tab. 2. Depending on your device’s condition, you can either select Keep my files or Remove everything. Both options will remove all applications installed in the device and will revert to default settings. 3. Choose either Just remove my files or Remove files and clean the drive depending on the situation. If you choose the Remove files and clean the drive option, the procedure will take longer as it will erase all the files permanently. In this case, deleted files cannot be recovered. However, if you don’t want to remove files permanently, select Just remove my files. 4. Once you’ve decided how to reset your system, click on Next once the Warning screen appears. Afterward, choose Reset once prompted. When the process completed, click on Continue.

Method Four: Download an Automated Tool

Can’t seem to put up with the long and technical manual repair process? You can still fix this error by downloading and installing a powerful automated tool that will surely get the job done in a jiffy!
Read More
How to Repair Missing MSVCR100.dll Error

Fix Missing MSVCR100.dll Error

What is MSVCR100.dll Error?

Msvcr100.dll is a dynamic link library file. This file is loaded into the memory at runtime for successful program execution. This process is also referred to as runtime dynamic linking. The Msvcr100.dll belongs to the Microsoft Visual C++ Runtime Library. It is a core Windows component used by numerous Windows-based applications to load and run smoothly on Windows PC. Msvcr100.dll error occurs when the process of runtime dynamic linking fails. Due to this error, you are unable to access the desired application. The error code is displayed in either of the following formats:
  • “Msvcr100.dll Not Found"
  • "This application failed to start because msvcr100.dll was not found. Re-installing the application may fix this problem."
  • "Cannot find [PATH]msvcr100.dll"
  • "msvcr100.dll  is missing from your computer"
  • "XXX.exe - System Error - MSVCR100.dll is missing from your computer."

Solution

Restoro box imageError Causes

Narrowing down the cause of the Msvcr100.dll error is not possible as this error can occur on your PC due to multiple reasons. However, here are some of the most common causes of Msvcr100.dll error code on Windows PC:
  • Msvcr100.dll file corrupt and damaged
  • Missing Msvcr100.dll file
  • Corrupt runtime code library
  • Registry issues
  • Malware attack and viral infection

Further Information and Manual Repair

Here are some of the best ways to resolve this error on your system:

Reinstall the application causing the error

As dll are shared files used by multiple programs to load and run, there is the possibility of it getting deleted when uninstalling a certain program. If so, then the best way to fix it is to reinstall the application that is causing the error to pop up on your screen. This way you’ll be able to set up the program again and install the Msvcr100.dll file back on your system.

Download Microsoft Visual C++ 2010 Redistributable Package

Another way to resolve this error is to download Microsoft Visual C++ 2010 Redistributable Package. To do this, first, see if you are running a 32 bit or 64-bit copy of Windows. XP users go to the start menu and click run then type winver and press enter. In Vista and Windows 7, go to the start menu and type computer and click properties. The information you require is under Windows Edition. Once you find out whether you are using a 32 bit or a 64-bit version, accordingly, download the correct version of Microsoft Visual C++ 2010 Redistributable Package directly from Microsoft’s official website. Simply download and install the software. Then follow the prompts to add the toolbox to your PC. After that, restart your computer; most likely the error message will be gone. If it still persists, then this means the error is either related to the registry or malware.

Download and Run Restoro

Restoro can be used to resolve both malware infection and registry issues on your PC that could be triggering Msvcr100.dll errors. Restoro is a next-generation and multi-functional PC repair tool embedded with powerful utilities like an antivirus, a registry cleaner, and a system optimizer. The registry cleaning feature detects all registry issues and Msvcr100.dll errors. It removes unnecessary and obsolete files on the disk, like junk files, cookies, internet history, and temporary files cluttering the disk and damaging dll files. It repairs the damaged and corrupt dll files and restores the registry. Simultaneously the antivirus feature scans and removes all malicious software on your system. These include spyware, viruses, Trojans, adware, and malware that can damage dll files. This software is efficient and resolves the Msvcr100.dll error in seconds. It is easy to use and has a simple navigation. It is compatible with all Windows versions. Click here to download Restoro on your PC and resolve the Msvcr100.dll error today!
Read More
1 2 3 162
Logo
Copyright © 2022, ErrorTools. All Rights Reserved
Trademarks: Microsoft Windows logos are registered trademarks of Microsoft. Disclaimer: ErrorTools.com is not affiliated with Microsoft, nor claim direct affiliation.
The information on this page is provided for information purposes only.
DMCA.com Protection Status