Transferring characters in diablo 2 remake

Diablo 2 resurrected has hit official release and servers seem to be finally taken care of and everything seems to be running smoothly now. The game also received great praise from gamers and attracted old players of the original Diablo 2 game.

diablo 2 gameplay
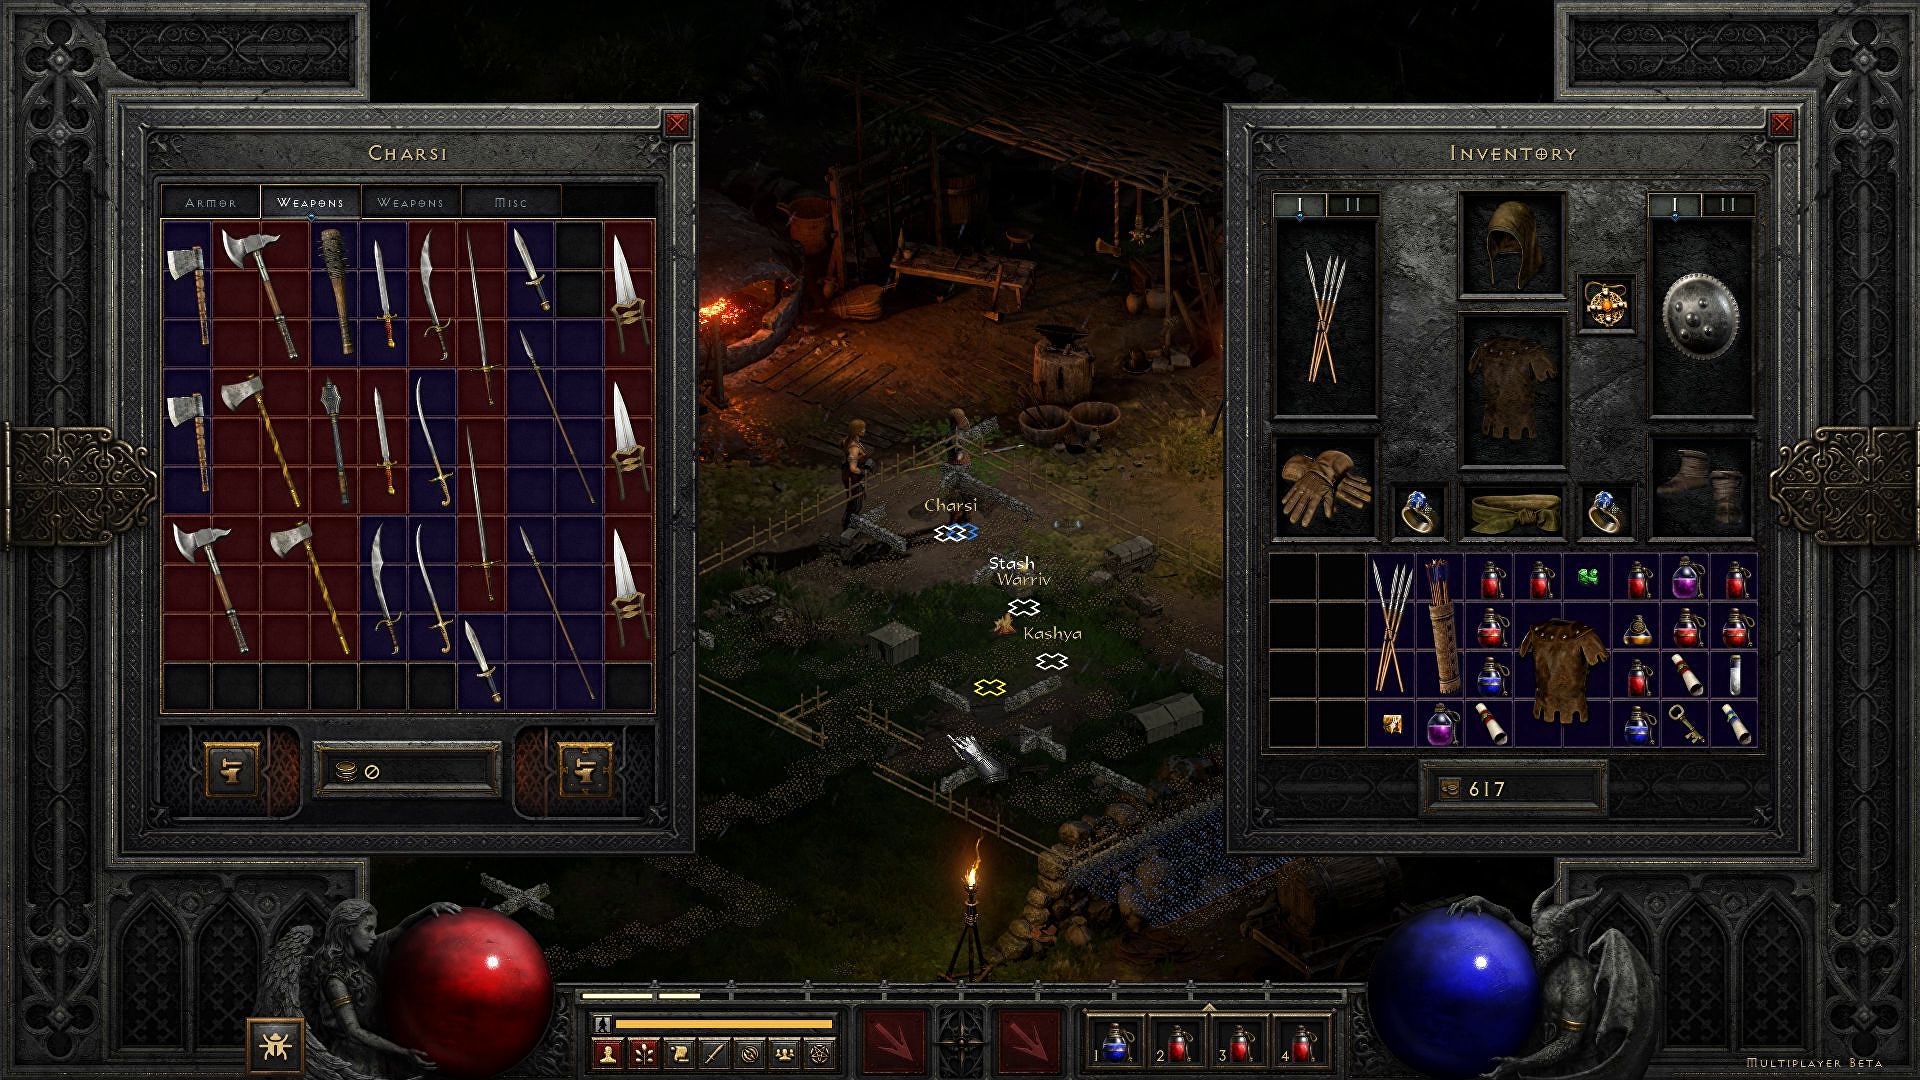
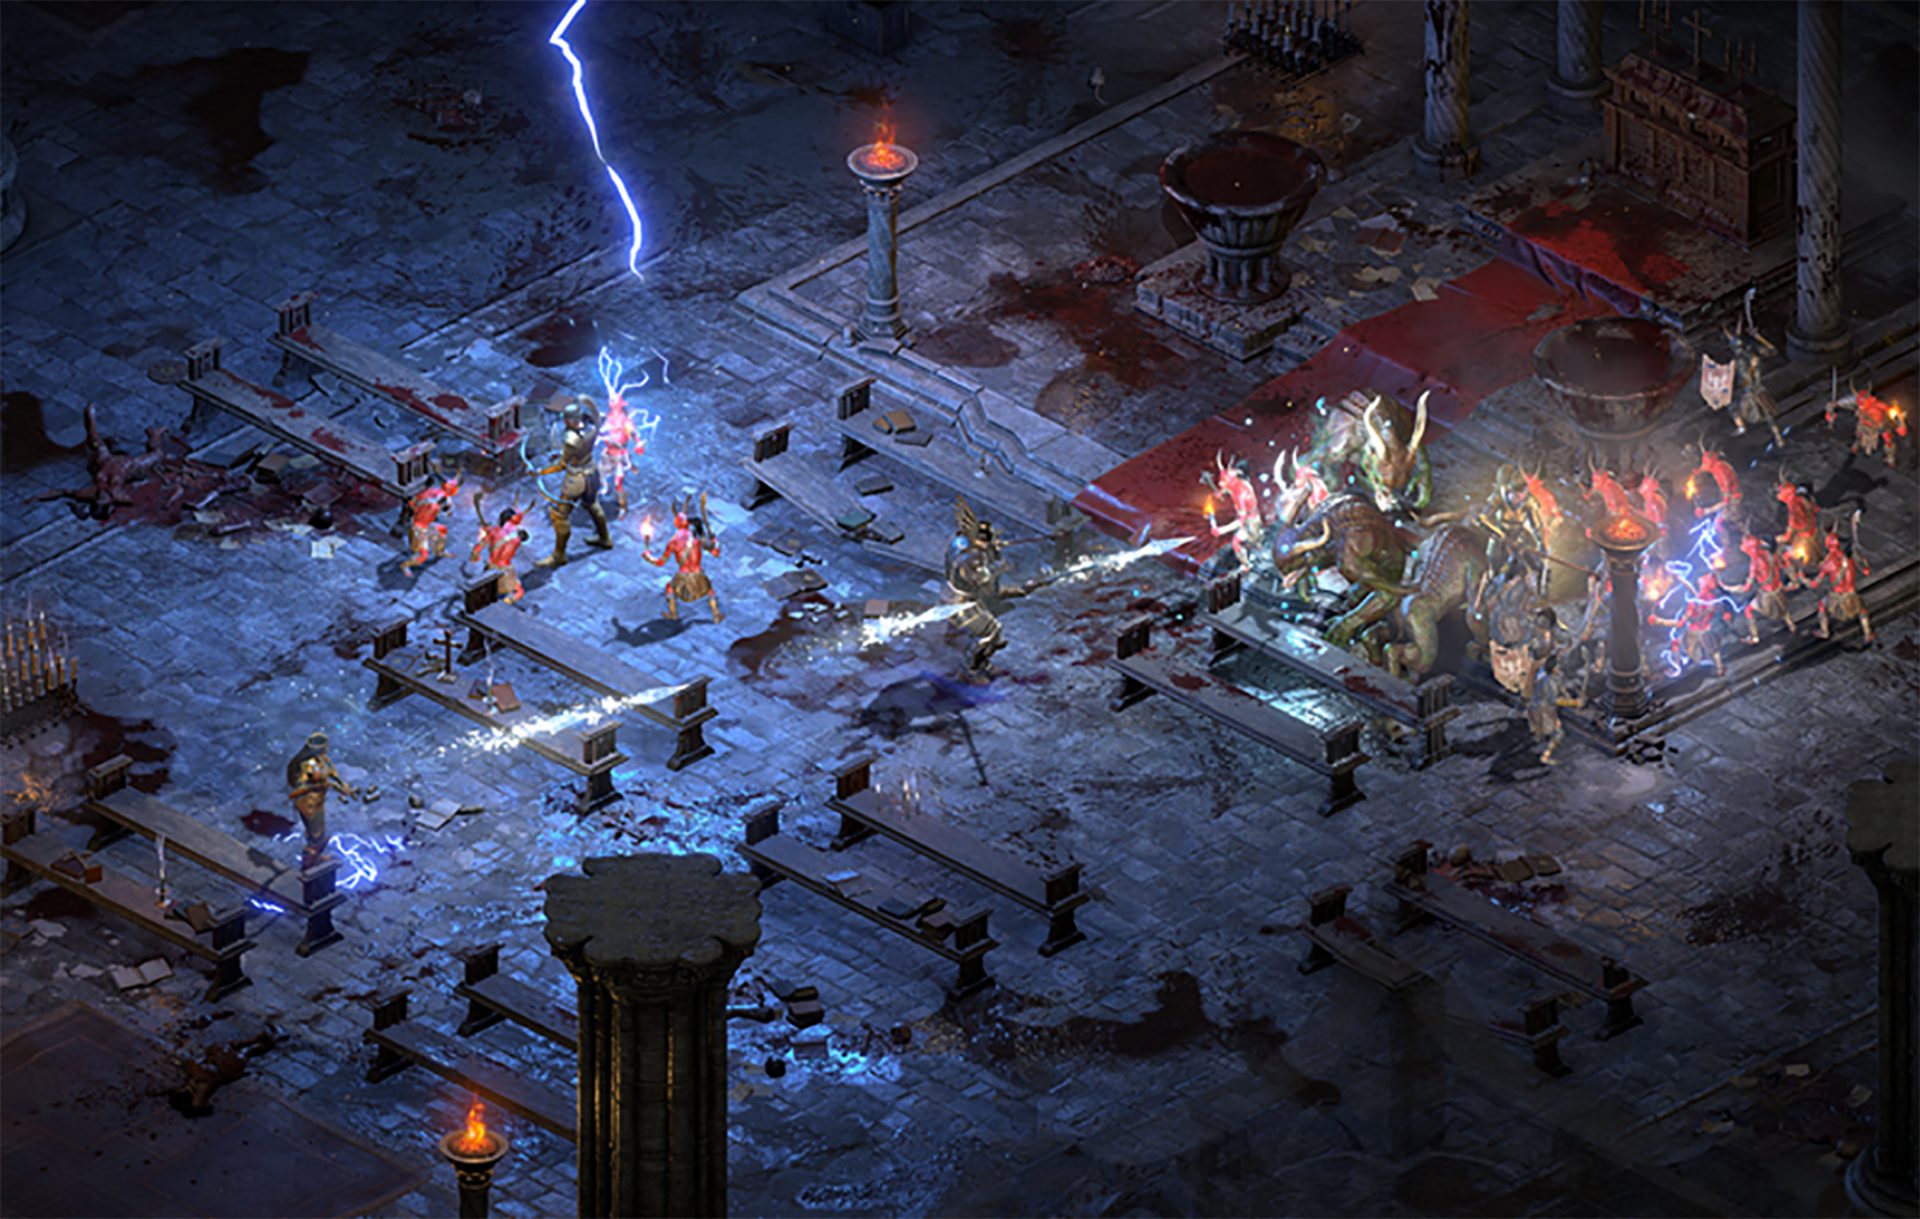
Speaking of old players of old Diablo 2, they can transfer their old characters into remaster and continue playing them within this new great HD environment. There are some steps and requirements but we are here to help and transferred characters will bring full stash, inventory, and equipped items with them.

Requirements

There are not many requirements for this transfer to occur but they must be respected in order to be successful. The first thing is a minor requirement and somewhat annoying but it needs to be done, firstly fire up Diablo 2 resurrected and create a character, any kind of character with any kind of name, any kind of class. This strange requirement is to actually create a character folder and register it inside D2 resurrected so we can copy old ones there.

The second requirement will be that characters that you wish to be transferred must be offline characters. Old battle net online characters cannot be transferred at this moment and probably will not be in the future as well. So for all of you that wish to transfer online characters, bad luck, for the rest of us casuals playing offline single-player mode, we can enjoy our characters.

Process of diablo 2 character trasfer

The process itself of transferring characters when previously mentioned requirements are met is just a simple and copy operation. If you have somewhere backed your characters go into your backup folder and copy files in c:\users\*current user*\saved games\*diablo 2 resurrected folder*

If you do not have characters backed up and just have old Diablo 2 installed and playing it, you can go to c:\users\*current user*\saved games\*diablo 2 folder* and just copy all characters files into c:\users\*current user*\saved games\*diablo 2 resurrected folder*

Your old characters end with .d2s extension, grab all that you want to transfer, and copy them into D2R. Take note that copied characters cannot be brought back into Diablo 2, once they are copied into Diablo 2 resurrected all further progress on them will be tied to the new game.

Conclusion

That’s it about the transfer process and requirements for it. Fire up the new game version and enjoy.

If you like to learn and find out more about various Windows errors, and how to repair them go to our vast archive or use search to find articles that will explain and help you in solving your issue.
However, if you prefer to do things fast and with automatization then we are proposing to use an automated solution for your issues. The application that we are recommending is Advanced System Repair Pro
Advanced System Repair utilizes multiple tools all in one to give you a quick, simple, reliable, and very thorough diagnosis of your PC. It brings you all the tools you need in one program to clean, fix, protect, optimize and boost your PC!
1-Click Maintenance
All the tools to make it simple and easy! It's like having a professional technician at the click of a mouse.

Junk Cleaner
Keeping your computer free from unnecessary clutter also helps make your computer last longer. Like any other machine, if you keep it clean and take care of it, it will serve you better for longer!

Optimize background apps
Optimize applications background activity with the built-in Application Optimizer feature.

Disk Defrag
With a simple 1-click, Advanced System Repair speeds up your PC by assembling fragmented files on your machine and organizing them more efficiently.

Malware Removal
Finds and removes all types of harmful malware including trojans, worms, bots, adware, spyware, PUPs, and more!

Privacy Cleaner
The all-in-one privacy suite to Clean Your Tracks & Protect Your Privacy! Make your computer safe, secure, and more efficient!

System Tweak/Optimizer
ASR will analyze your complete system and settings to adjust your PC to function at its maximum performance.

Registry Cleaner
Over time, as you install and uninstall applications, the registry can become cluttered with old entries and broken settings which can result in program crashes, and annoying messages and slow the computer down.
Visit our Advanced System Repair Pro Download page to inform yourself about all the benefits of this software and get a free trial copy of it.
advanced system repair pro

Advanced System Repair Pro

One-click automated PC repair solution
ASR logo
With Advanced System Repair Pro you can easily
Replace damaged files
Restore performance
Free disk space
Remove Malware
Protects WEB browser
Remove Viruses
Stop PC freezing
DOWNLOAD
Privacy Policy | Terms of Use | Uinstall
Advanced System Repair Pro is compatible with all versions of Microsoft Windows including Windows 11

Share this article:

You might also like

An Easy Guide to Repairing Error Code 0x000000A5

Troubleshoot Error Code 0x000000A5

0x000000A5 - What is this Error Code?

0x000000A5 is a stop error code also referred to as a blue screen of death error code. It is related to Advanced Configuration and Power Interface basic input/output system in Windows. It often leads to a sudden system shut down or your system may restart unexpectedly. Blue error codes like 0x000000A5 are the most severe and dangerous types of errors Windows can encounter. Ignoring 0x000000A5 error pop-ups and not repairing it timely can result in system crashes, valuable data loss and system failure.

Solution

Restoro box imageError Causes

The 0x000000A5 error code occurs particularly because of the ACPI BIOS error. This error message on your computer screen indicates that the Advanced Configuration and Power Interface (ACPI) BIOS of the computer is not compatible with your Windows system and is not fully compliant with the ACPI specifications. BIOS is a set of software. Through this software, the operating system communicates with the computer’s hardware devices. The ACPI is a part of BIOS and the Windows operating system. It is the standard for the way BIOS works. The presence of ACPI in the BIOS on a given Windows system determines whether the system can make full use of features such as Power Management or Plug and Play. Here’s what happens: traditionally, ACPI BIOS implementation tries to manipulate hardware resources directly through BIOS code for hardware functionality nonetheless if the ACPI-based BIOS is not compliant with the ACPI standard on your system, it may not support workable communication between the operating system and the hardware. This results in imbalance as the operations cannot be synchronized which results in system shut down, system instability, and machine failure. As a warning stop error 0x0000000A5 is displayed on the screen.

Further Information and Manual Repair

To fix the error message 0x0000005A on your PC you don’t need any professional assistance. Solving such blue screen errors in just a couple of clicks is not possible with Restoro This is a multi-functional and feature-filled registry cleaner and system optimizer that helps PC users resolve practically every type of system instability issues and registry errors including BSoD errors like 0x000000A5. It offers a comprehensive suite of utilities including registry cleaning, privacy issue detection and repair, system stability error identification, and Active X and Class issues detection. This innovative and advanced PC fixer is designed to ensure and deliver optimum system performance. It scans and detects causes for 0x000000A5 error code and repairs them in seconds. It has a neat and intuitive layout and easy navigation which makes this repair tool extremely user-friendly. Users of all levels are it novice or experienced can use it with ease and fix all types of PC-related errors like 0x000000A5 right away with no hassle. ACPI BIOS Error can be quickly resolved with this tool. This error tool offers outstanding compatibility. It is practically compatible with all Windows versions.

Restoro download

To get started all you have to do is click here to install the Restoro on your computer. Once it is installed, run it to scan for 0x000000A5 error code. After scanning is complete, click the repair button to repair this issue immediately. For user safety and data security, Restoro also creates backup files. This ensures that no valuable data is lost during system repair. So, don’t delay in resolving error 0x000000A5 error code; install Restoro on your system today!
Read More
Stop showing browser tabs when alt+tab, Win11
windows browser tabs removed alt tab
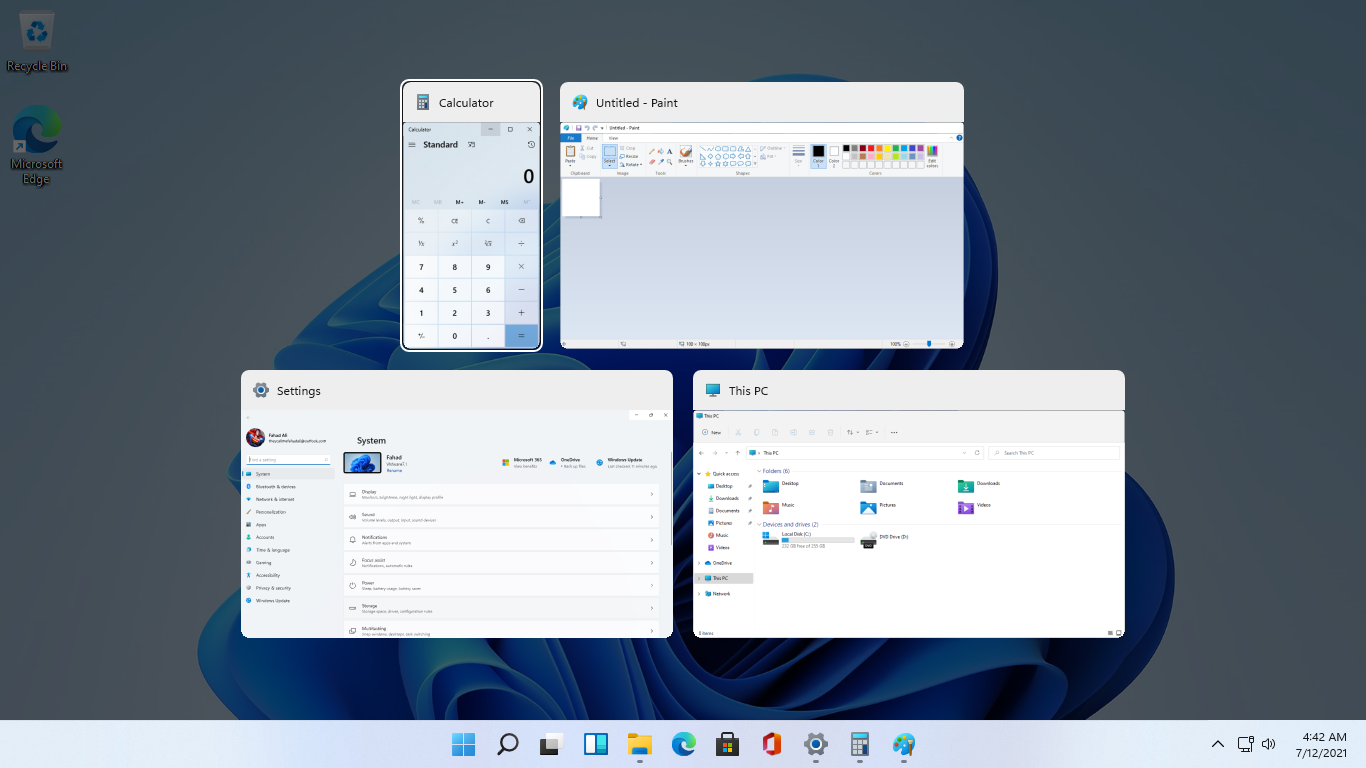
As in previous Windows 10, inside Windows 11 also when you press the ALT + TAB key combination you will get a preview of all running applications along with all Browser tabs so you can go through them and pick the one you want to switch to. Alto, I personally am a big fan of alt-tabbing, I must admit that I am not a big fan of having multiple browsers tabs on screen when I do press key combo. Luckily there is a very easy way to turn this feature off. Turning browsers tabs thumbnails off
  1. Press ⊞ WINDOWS + I to open settings
  2. Click on System in the sidebar
  3. Scroll down and select Multitasking
  4. Find Alt + Tab section and click on the drop-down menu
  5. Pick Open Windows Only
  6. Close settings
Now when you press the ALT + TAB key combination you will still see your browser but only an active tab in it instead of all tabs as different preview thumbnails.
Read More
Windows 11 slows down some SSD drives
In the latest Windows 11 fiasco, it is reported that the operating system is slowing down some SSD drives. Good thing is that it does not affect all of SSD on the market but the ones which it is affecting can see even a 45% of speed drop. ssd drive
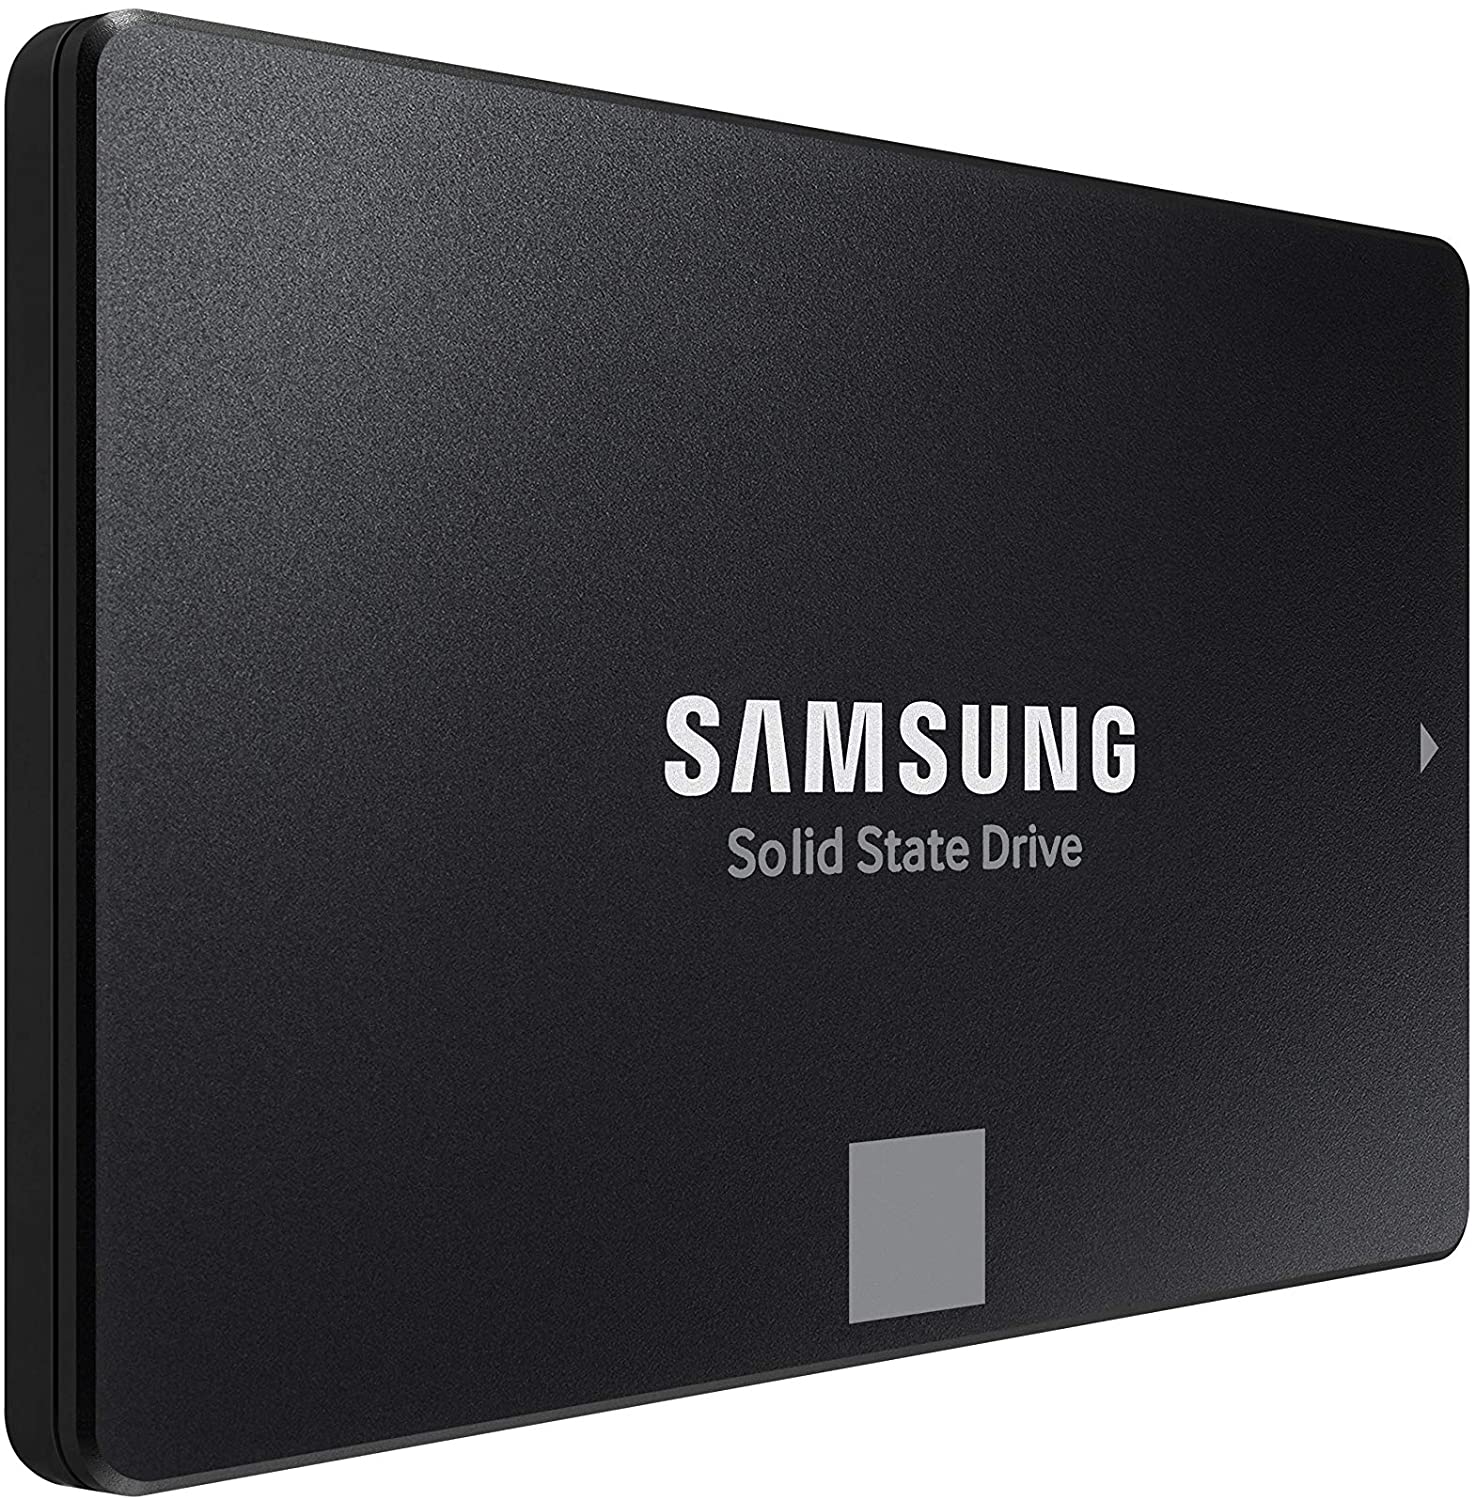
Microsoft has not published a solution to this issue, but users point out two potential problems. The first is a security mechanism based on disk virtualization, which is supposed to slow down the performance of SSDs. The second, in turn, is related to the place of installation of Windows 11 – users indicate that if the performance test is performed on a medium with no files associated with the system, its performance results are similar to the parameters given by the manufacturer. Transfer speeds were to be slightly improved with the latest Windows 11 update 22000.348. However, users are still waiting for a solution to the problem that significantly reduces the efficiency of SSD media.

More information

The details described leading to speculation that the problem could be related to drivers that Microsoft is providing. On further tests, all Nvme drives that use the Microsoft driver have this problem, but Intel 905P, which has its own driver provided by Intel, is working at full power,”.
Read More
Fix Error 0x8000704ec in Windows 10
Universal Windows Platform (UWP) applications are the modern application in the windows store that can be used in all the Window devices like Xbox, Hololens, Tablet, PC or Phone. Basically, UWP provides a common platform for every device that runs Windows 10. When attempting to login into these applications and receive this error:
Can’t sign in with a Microsoft account This program is blocked by group policy. For more information, contact your system administrator. 0x8000704ec
Then this post is for you. We will guide you on how to easily resolve issues, please follow the steps provided.
  1. Local group policy editor solution

    • Press ⊞ WINDOWS + R to open the Run dialog.
    • In the Run dialog box type gpedit.msc and press ENTER to open Group Policy Editor.
    • Inside the Local Group Policy Editor, navigate to the path below:
    Computer Configuration > Windows Settings > Security Settings > Local Polices > Security Options
    • On the right pane, double-click on Accounts: Block Microsoft accounts to edit its properties.
    • Under Local Security Setting tab, click on the drop-down and select This policy is disabled.
    • Click Apply > OK to save the changes.
    • Exit Group Policy Editor.
  2. Registry editor solution

    As always, it is highly recommended to make a backup of the registry editor just in case that something goes wrong.
    • Press ⊞ WINDOWS + R to open the Run dialog.
    • In the Run dialog box, type regedit and hit ENTER to open Registry Editor.
    • Navigate to the registry key path below:
    HKEY_LOCAL_MACHINE\SOFTWARE\Microsoft\Windows\CurrentVersion\Policies\System
    • At the location, on the right pane, identify the NoConnectedUser key. The key value might be set to either 1 or 3.
    • Now, double-click the NoConnectedUser entry to edit its properties.
    • Input 0 in the Value data field and hit Enter to save the change.
Read More
Diablo 2 is trending after launch looking good
Finally, some good news for Blizzard entertainment after tons of bad stuff happening around it regarding lawsuits and people layoffs. Diablo 2 has become the most-watched game on Twitch after its official release and sold copies are on a satisfactory level. Diablo 2 resurrectedFor people not familiar with recent events, the state of California has sued Blizzard for various things including discrimination and offensive behavior. Later Blizzard executives were caught shredding some evidence and things just started to go to worse from there. After much drama, many people believed that this is the end for Blizzard entertainment and that they would not be able to recover from this since the community has sided with California and Blizzard has received a large punch as many subscribed WOW players have left the game. Things are not so grim as they were looking as their Diablo 2 remake has made moderate success despite being released in these troubling times and there are rumors of Overwatch 2 planned release date as of the first quarter of 2022. overwatch 2
Read More
Fix ERR TUNNEL CONNECTION FAILED error
One of the errors you can encounter while browsing the web using your Google Chrome browser is the ERR_TUNNEL_CONNECTION_FAILED error. If you happen to encounter this error, then this post could help you resolve it. This kind of error in Chrome can occur due to incorrect website domain configuration, conflicting browser data, incorrect proxy settings, and DNS connection issues. To resolve the ERR_TUNNEL_CONNECTION_FAILED error in Chrome, here are some suggestions you can check out.

Option 1 – Try disabling the proxy server for your LAN

If your PC was just attacked by some adware or malware as of late, it is possible that it has changed the network settings in the system and might display spam advertisements. Thus, you have to disable the proxy server for your LAN. To do that, refer to these steps:
  • Tap the Win + R keys to open the Run dialog box.
  • Then type “inetcpl.cpl” in the field and hit Enter to pull up the Internet Properties.
  • After that, go to the Connections tab and select the LAN settings.
  • From there. Uncheck the “Use a Proxy Server” option for your LAN and then make sure that the “Automatically detect settings” option is checked.
  • Now click the OK and the Apply buttons.
  • Restart your PC.
Note: If you are using a third-party proxy service, you have to disable it.

Option 2 – Try to reset Winsock, TCP/IP & Flush DNS

Resetting Winsock, TCP/IP, and flushing DNS might help you resolve the ERR_TUNNEL_CONNECTION_FAILED error. To do so, follow these steps:
  • Right-click on the Start button and click on Command Prompt (administrator) so you can pull up an elevated Command Prompt.
  • After that, execute each one of the commands listed below. And after you typed in one after the other, you have to hit Enter.
  1. netsh winsock reset – type in this command to reset Winsock
  2. netsh int ip reset resettcpip.txt – type in this command to reset TCP/IP
  3. ipconfig /flushdns – type in this command to flush the DNS cache
  • Next, restart your PC and check if the problem’s fixed.

Option 3 – Try using a VPN connection

There are instances when the network that your computer is logged on might have blocked your access to the website you are trying to open and so to fix it, you can try to use a VPN connection. Once you’ve connected using VPN, try to open the website again and see if you can now access it.

Option 4 – Try clearing browser data

There are times when some data in the browser is conflicting with the loading of the website and triggers errors like ERR_TUNNEL_CONNECTION_FAILED. And so you can try to clear your browser’s data. This might be a very basic solution but oftentimes it works in fixing this kind of error in Google Chrome. Follow the steps below to clear the data in your browser.
  • Open your Google Chrome browser.
  • After that, tap the Ctrl + H keys. Doing so will open a new panel that allows you to delete the browsing history and other data in your browser.
  • Now select every checkbox that you see and click on the Clear browsing data button.
  • Then restart your Chrome browser and check if you can now open any website or not.

Option 5 – Get rid of any conflicting browser extensions

  • Open Chrome and press Alt + F keys.
  • Go to More tools and click Extensions to look for any suspicious browser extensions or toolbars.
  • Click the Recycle bin and select Remove.
  • Restart Chrome and press Alt + F keys again.
  • Proceed to On Startup and mark Open a specific page or set of pages.
  • To check if the browser hijacker is still active, click Set pages, if it is active, overwrite the URL.
Note: If removing the browser extensions or toolbars didn’t work, you can also try to reset your Google Chrome browser.
  • Open Google Chrome, then tap the Alt + F keys.
  • After that, click on Settings.
  • Next, scroll down until you see the Advanced option, once you see it, click on it.
  • After clicking the Advanced option, go to the “Restore and clean up option and click on the “Restore settings to their original defaults” option to reset Google Chrome.
  • Now restart Google Chrome.
Read More
Windows installation stuck on Set up a Pin
After you fresh install Windows 10 on your computer, it allows you to set up a PIN just before you can start using it. However, a number of users reported that the Windows 10 installation gets stuck on the “Set up a Pin” phase. If you are one of the users who experience the same thing, then read on as this post will walk you through fixing the problem. As users start to use their newly installed Windows 10 computer, they reported that the screen is still stuck even after they enter the correct PIN twice and there is no way for them to go forward or backward. Note that this is a part of the account setup and that your computer must stay connected to your internet connection before you finalize everything. And even though the PIN works when the computer is offline, the account setup still needs an internet connection, at least for a fresh installation. The solution for this kind of issue is quite easy and there won’t be any problem even if your computer shuts down or restarts since the installation is already complete and all that’s left is the account setup. To fix this problem, follow the steps given below. Step 1: The first thing you have to do is to turn off your internet connection or disable all connectivity from your computer. Note: If you are using either an Ethernet cable or a Wi-Fi switch to connect to the internet, you have to disable or remove them. But if you don’t have any options, just completely turn off your internet connection. Step 2: The next thing you have to do is to force your computer to shut down and then restart your computer. The setup process will eventually pick up exactly where it left off. The only difference is that there is no connection to the internet and your screen will no longer be stuck on the PIN setup screen so you now have the option to skip it and wait until you’re logged in for the first time. Step 3: Once you’re done, you can then you can choose to Setup Pin later on and turn your internet connection back on or connect your computer with an internet connection.
Read More
Completely Remove MySearchDial Tutorial

MySearchDial is a browser hijacker that typically comes bundled with free software on the internet. This web platform designed for searching the internet and offers the installation of its software. This software injects itself into browsers and gains access to your settings, browsing data & user information. This data is distributed to the ad providers without limitation. While covered by their EULA, most users will be unaware of what they agree to with checkboxes selected by default. The software also adds a huge amount of registry keys and links throughout the operating system. Since the software injects itself into many personal files, removing the software results in a total reset of your browser settings. For these reasons MySearchDial is classified as potentially unwanted and is flagged for removal by a number of internet security utilities.

About Browser Hijackers

Browser hijacking is a common type of online fraud where your internet browser configuration settings are altered to allow it to carry out things you do not intend. Practically the majority of browser hijackers are created for marketing or advertising purposes. Usually, hijackers are designed for the benefit of online hackers usually through income generation that comes from forced ad clicks and website visits. Even though it may seem naive, these tools are designed by vicious individuals who always look to take full advantage of you, so that hackers can make money from your naive and distraction. Some browser hijackers are designed to make certain modifications beyond the browsers, like altering entries on the computer registry and letting other types of malware further damage your computer.

How you can know if your internet browser is hijacked

There are several symptoms that point to browser hijacking: 1. your browser’s home page has been reset to some unfamiliar website 2. your web browser is constantly being redirected to pornography websites 3. default online search engine is changed 4. discover new toolbars that you simply didn’t add 5. you observe lots of pop-ups on your computer screen 6. your internet browser has become unstable or starts running slowly 7. you’re blocked to access the websites of security solution providers.

So how exactly does a browser hijacker infect a PC

Browser hijackers can enter a computer in some way or other, including via file sharing, downloads, and e-mail also. They could also come from add-on applications, also called browser helper objects (BHO), web browser extensions, or toolbars. Other times you may have inadvertently accepted a browser hijacker as part of an application package (generally freeware or shareware). Examples of popular browser hijackers are Fireball, Ask Toolbar, GoSave, CoolWebSearch, Babylon Toolbar, and RocketTab. The existence of any browser hijacker malware on your system might significantly diminish the web browsing experience, track your internet activities that lead to severe privacy concerns, degrade overall system efficiency, and lead to software instability as well.

Getting rid of browser hijackers

Some hijackers could be removed by deleting the free software they were included with or by removing any add-ons you have recently added to your computer system. But, most hijackers are hard to remove manually. Regardless of how much you attempt to get rid of it, it can return over and over again. On top of that, manual removal needs you to execute many time-consuming and complicated actions which are very difficult to carry out for rookie computer users.

Can't Install Safebytes Anti-malware because of a Virus? Do This!

All malware is bad and the effects of the damage could differ based on the specific type of malicious software. Certain malware types alter web browser settings by adding a proxy server or change the PC’s DNS configurations. When this happens, you’ll be unable to visit certain or all sites, and therefore not able to download or install the required security software to remove the malware. If you’re reading this now, you may have probably recognized that virus infection is the reason for your blocked web traffic. So what do if you need to download and install an antivirus application like Safebytes? Although this kind of problem can be difficult to circumvent, there are a few actions you can take.

Install the anti-virus in Safe Mode

If the malware is set to run at Windows startup, then booting in Safe Mode should prevent it. Only minimal required programs and services are loaded when you start your computer or laptop in Safe Mode. To launch your Windows XP, Vista, or 7 PCs in Safe Mode with Networking, do as instructed below. 1) Press the F8 key repeatedly as soon as your computer boots, but before the big Windows logo or black screen with white texts shows up. This will bring up the Advanced Boot Options menu. 2) Use the arrow keys to choose Safe Mode with Networking and press ENTER. 3) Once you get into this mode, you should have access to the internet once again. Now, get the virus removal application you need by using the internet browser. To install the application, follow the guidelines in the installation wizard. 4) As soon as the application is installed, let the scan run to remove viruses and other malware automatically.

Utilize an alternate web browser to download an anti-malware program

Malicious program code might exploit vulnerabilities on a specific internet browser and block access to all anti-virus software websites. If you appear to have a virus attached to Internet Explorer, then switch over to an alternate browser with built-in security features, such as Chrome or Firefox, to download your favorite anti-malware program – Safebytes.

Run antivirus from a pen drive

Another approach is to download and transfer antivirus software from a clean computer to run a virus scan on the affected system. Abide by these steps to run the anti-virus on the affected computer system. 1) Make use of another virus-free computer to download Safebytes Anti-Malware. 2) Plug the Flash drive into the clean computer. 3) Run the setup program by double-clicking the executable file of the downloaded software, with a .exe file extension. 4) When asked, select the location of the USB drive as the place where you would like to store the software files. Follow the on-screen instructions to finish the installation. 5) Transfer the USB drive from the clean computer to the infected computer. 6) Double click the Safebytes Anti-malware icon on the thumb drive to run the application. 7) Click on the “Scan Now” button to start the virus scan.

SafeBytes Anti-Malware Features

In order to protect your computer or laptop from many different internet-based threats, it is very important to install an anti-malware application on your PC. However, with countless numbers anti-malware companies in the market, nowadays it is actually difficult to decide which one you should purchase for your PC. Some of them do a good job in getting rid of threats while some will damage your PC themselves. You have to choose a product that has got a good reputation and detects not just computer viruses but other sorts of malware too. When considering commercial antimalware software options, most people choose well-known brands, such as SafeBytes, and are very happy with it. SafeBytes antimalware is a highly effective and easy-to-use protection tool that is ideal for end-users of all levels of IT literacy. Using its outstanding protection system, this tool will instantly detect and remove most of the security threats, including viruses, adware, browser hijackers, PUPs, trojans, worms, and ransomware. SafeBytes carries a plethora of amazing features which can help you protect your laptop or computer from malware attack and damage. The following are some popular features found in this software program: Real-time Active Protection: SafeBytes gives complete and real-time security for your personal machine. They’re highly effective in screening and getting rid of various threats because they’re constantly revised with the latest updates and safety measures. Most Reliable AntiMalware Protection: Safebytes is made on the very best virus engine in the industry. These engines will identify and remove threats even during the early stages of a malware outbreak. Internet Security: SafeBytes gives an instant safety rating on the pages you’re going to visit, automatically blocking risky sites and making sure that you’re certain of your safety while browsing the net. Lightweight: SafeBytes provides total protection from internet threats at a fraction of the CPU load because of its advanced detection engine and algorithms. 24/7 Online Tech Support: Support service is readily available for 24 x 7 x 365 days through email and chats to answer your queries.

Technical Details and Manual Removal (Advanced Users)

If you wish to manually remove MySearchDial without the use of an automated tool, it may be possible to do so by removing the program from the Windows Add/Remove Programs menu, or in cases of browser extensions, going to the browsers AddOn/Extension manager and removing it. You will likely also want to reset your browser. To ensure the complete removal, manually check your hard drive and registry for all of the following and remove or reset the values accordingly. Please note that this is for advanced users only and may be difficult, with incorrect file removal causing additional PC errors. In addition, some malware is capable of replicating or preventing deletion. Doing this in Safe Mode is advised.

The following files, folders, and registry entries are created or modified by MySearchDial

Files: %PROGRAMFILES%Mysearchdialbhmysearchdial.dll. %PROGRAMFILES%MysearchdialescortShld.dll. %PROGRAMFILES%MysearchdialmysearchdialApp.dll. %PROGRAMFILES%MysearchdialmysearchdialEng.dll. %PROGRAMFILES%Mysearchdialmysearchdialsrv.exe. %PROGRAMFILES%MysearchdialmysearchdialTlbr.dll. %PROGRAMFILES%MysearchdialSqlite3.dll. %APPDATA%MozillaFirefoxProfilesENV(mysearchdial_path)[email protected]. %APPDATA%mysearchdialmysearchdial. %APPDATA%mysearchdial. %PROGRAMFILES%Mysearchdialbh. %PROGRAMFILES%Mysearchdial. Registry: Key HKEY_CLASSES_ROOT named esrv.mysearchdialESrvc.1 Key HKEY_CLASSES_ROOT named esrv.mysearchdialESrvc Key HKEY_CLASSES_ROOT named mysearchdial.mysearchdialappCore.1 Key HKEY_CLASSES_ROOT named mysearchdial.mysearchdialappCore Key HKEY_CLASSES_ROOT named mysearchdial.mysearchdialdskBnd.1 Key HKEY_CLASSES_ROOT named mysearchdial.mysearchdialdskBnd Key HKEY_CLASSES_ROOT named mysearchdial.mysearchdialHlpr.1 Key HKEY_CLASSES_ROOT named mysearchdial.mysearchdialHlpr Key 0400EBCA-042C-4000-AA89-9713FBEDB671 at HKEY_CLASSES_ROOTInterface. Key 0BD19251-4B4B-4B94-AB16-617106245BB7 at HKEY_CLASSES_ROOTInterface. Key 219046AE-358F-4CF1-B1FD-2B4DE83642A8 at HKEY_LOCAL_MACHINESOFTWAREMicrosoftInternet ExplorerLow RightsElevationPolicy. Key 3004627E-F8E9-4E8B-909D-316753CBA923 at HKEY_CLASSES_ROOTCLSID. Key 3281114F-BCAB-45E3-80D9-A6CD64D4E636 at HKEY_CLASSES_ROOTInterface. Key 44533FCB-F9FB-436A-8B6B-CF637B2D465A at HKEY_CLASSES_ROOTInterface. Key 44B29DDD-CF7A-454A-A275-A322A398D93F at HKEY_CLASSES_ROOTInterface. Key 4ED063C9-4A0B-4B44-A9DC-23AFF424A0D3 at HKEY_CLASSES_ROOTCLSID. Key 82E74373-58AB-47EB-B0F0-A1D82BB8EB5C at HKEY_CLASSES_ROOTCLSID. Key A4DE94DB-DF03-45A3-8A5D-D1B7464B242D at HKEY_CLASSES_ROOTInterface. Key AA0F50A8-2618-4AE4-A779-9F7378555A8F at HKEY_CLASSES_ROOTInterface. Key B2DB115C-8278-4947-9A07-57B53D1C4215 at HKEY_CLASSES_ROOTInterface. Key B97FC455-DB33-431D-84DB-6F1514110BD5 at HKEY_CLASSES_ROOTInterface. Key C67281E0-78F5-4E49-9FAE-4B1B2ADAF17B at HKEY_CLASSES_ROOTInterface. Key D40753C7-8A59-4C1F-BE88-C300F4624D5B at HKEY_CLASSES_ROOTCLSID. Key E72E9312-0367-4216-BFC7-21485FA8390B at HKEY_CLASSES_ROOTInterface. Key EF5625A3-37AB-4BDB-9875-2A3D91CD0DFD at HKEY_CLASSES_ROOTCLSID. Key EF5625A3-37AB-4BDB-9875-2A3D91CD0DFD at HKEY_LOCAL_MACHINESOFTWAREMicrosoftWindowsCurrentVersionExplorerBrowser Helper Objects. Key F6CCB6C9-127E-44AE-8552-B94356F39FFE at HKEY_CLASSES_ROOTInterface. Key FBC322D5-407E-4854-8C0B-555B951FD8E3 at HKEY_CLASSES_ROOTTypeLib. Key FFD25630-2734-4AE9-88E6-21BF6525F3FE at HKEY_CLASSES_ROOTInterface. Key mysearchdial at HKEY_CURRENT_USERSoftware. Key mysearchdial at HKEY_CURRENT_USERSoftwareInstallCore. Key mysearchdial at HKEY_LOCAL_MACHINESOFTWARE. Key mysearchdial at HKEY_LOCAL_MACHINESOFTWAREInstallCore. Value 3004627E-F8E9-4E8B-909D-316753CBA923 at HKEY_LOCAL_MACHINESOFTWAREMicrosoftInternet ExplorerToolbar.
Read More
Calculator is not working in Windows
As you know, one of the basic apps in the Windows 10 operating system is the calculator and it can even be extended to a scientific calculator which makes it really useful for users. However, there are instances when you might encounter some issues while using this app. One of the issues about the Calculator app that’s been reported recently is that the Calculator app is not working. If you encounter the same problem, then you’ve come to the right place as this post will guide you on what you can do to fix the problem. Based on the reports, users claimed that the issue with the Calculator app occurred right after they’ve installed a feature update, while other users claimed that the Calculator app never really worked on their computers and there are also cases where the app opens but it either freezes or crashes. According to researchers, the main causes of the problem include a feature update that could’ve altered the settings. It could also be due to problems with the login account or corrupted and missing files, or the problem could also with the calculate app itself. To resolve this problem, here are some suggestions you can follow.

Option 1 – Run the System File Checker Scan

System File Checker or SFC is a built-in command utility that helps in restoring corrupted files as well as missing files. It replaces bad and corrupted system files to good system files that might be the reason why the calculator app is not working properly. To run the SFC command, follow the steps given below.
  • Tap Win + R to launch Run.
  • Type in cmd in the field and tap Enter.
  • After opening Command Prompt, type in sfc /scannow
The command will start a system scan which will take a few whiles before it finishes. Once it’s done, you could get the following results:
  1. Windows Resource Protection did not find any integrity violations.
  2. Windows Resource Protection found corrupt files and successfully repaired them.
  3. Windows Resource Protection found corrupt files but was unable to fix some of them.
  • Reboot your computer.

Option 2 – Run the DISM tool

You can also run the DISM Tool as it helps in repairing the Windows System Image as well as the Windows Component Store in Windows 10. Using this built-in tool, you have various options such as the “/ScanHealth”, “/CheckHealth”, and “/RestoreHealth” that could help in fixing the Calculator app.
  • Open the Command Prompt with admin privileges.
  • Then type in the following commands and make sure to hit Enter right after you type each one of them:
    • Dism /Online /Cleanup-Image /CheckHealth
    • Dism /Online /Cleanup-Image /ScanHealth
    • Dism (.)exe /Online /Cleanup-image /Restorehealth
  • Do not close the window if the process takes a while as it will probably take a few minutes to finish.

Option 3 – Try logging into your computer using a different User Account

You might want to try logging into a different User Account since it is possible that the issue could have something to do with your log-in account. Thus, you can isolate this possibility by logging into a different user account. If you don’t have any other user account, simply create a new one by clicking on the Start icon and then go to Settings > Account > Family & other users. From there, go to the Other user's section and click on the Add someone else to this PC option, and then inputs all the needed information and restarts your computer. Once your computer has restarted, log into your computer using the newly created user account.

Option 4 – Try to reset or reinstall the Calculator app

If the first three given options didn’t work, you might want to reset or reinstall the Calculator app. To do that, follow these steps:
  • Click on the Start button and go to Settings > Apps > Apps and features.
  • Next, look for the Calculator app from the app list and click on it to see its other options.
  • After that, select the Advanced options and go to the Reset section and then click on the Reset button to reset the Calculator app.
Note: You also have the option to reinstall the Calculator app. All you have the option to visit Microsoft Store and from there, uninstall the Calculator app.
Read More
Manually cleaning your PC registry
[vc_row][vc_column][vc_column_text]

Manually cleaning your PC registry

Manually cleaning your PC registry may be the worst or best thing you ever decide to do. Registry keys that lie around on your computer, unused, can cause your computer to lag. This can end up in your computer not being able to load the easiest of programs and being slow at loading anything, let alone something that would take up a decent amount of memory. If your computer has slowed to almost an absolute stop, it is most probably the registry’s fault and the only option then is to clean it. You can get programs to do this for you, but they can be riddled with inaccuracies and viruses that could harm your computer even more. This is why some people choose to manually edit their computer. However, this is not without its flaws.

Registry Keys

Registry keys tend to have really long names. These names will be full of numbers and hyphens and will most likely give you no indication of what they do. Even some computer experts find it hard to understand what every computer’s registry keys do. This can make it very hard to see which ones are causing the problem; and if you don’t know what’s causing the problem, then there is no way you will be able to fix it. Some registry keys will be completely menial in what they do but some could be vital to even allow Windows to work on your computer.

Manual Registry Repair

Registry keys can also cause huge problems if you manually delete the wrong one. A lot of registry cleaners have the option to revive a key that they have deleted on you, which means that fixing an error that they made would be easy enough to do. However, when you manually delete registry keys, it will be an awful lot harder to get them back to work again afterward. This can cause your computer many problems and if you delete even one wrong key it is possible your computer will not even start. With the horrid naming system they have as well, it makes it very hard to determine what is important and what is not, which means it is all too likely that you will delete something important. However, those are the risks you have to take when you are cleaning out your registry. A registry cleaner has the same likelihood of messing with your computer and deleting something wrong that you have, so it is the same either way however a registry cleaner will do it with less hassle. But, some people say that if you do it yourself, it’s more likely to be right; that is why they prefer to do it manually and that is alright.

Conclusion

So, if you are manually deleting your registry keys that are unused, you’ll have to use a program that comes with Windows known as ‘regedit.exe’ which is incredibly difficult to use but may just be worth the hassle in the end. So, you don’t really need to put up with a slow computer, but be careful when messing with your registry manually! To repair and resolve this and other PC-related issues Click Here to download Restoro.[/vc_column_text][/vc_column][/vc_row]
Read More
1 2 3 162
Logo
Copyright © 2022, ErrorTools. All Rights Reserved
Trademarks: Microsoft Windows logos are registered trademarks of Microsoft. Disclaimer: ErrorTools.com is not affiliated with Microsoft, nor claim direct affiliation.
The information on this page is provided for information purposes only.
DMCA.com Protection Status