SMB which stands for “Server Message Block”, is a protocol used for file sharing. It provides the Read and Writes operating on network devices. Thus, it is why it is widely used when accessing a server-based in Linux. Its latest version is the SMB2 which follows after SMB1. The SMB2 contains more fixes to vulnerabilities that were found in SMB1. The predecessor was vulnerable since it served as a gateway to various modern ransomware which is why Microsoft disabled it by default starting with Windows 10 v1709.
When you try to share a file, you will get the following error message:
“Microsoft Windows Network: You can’t connect to the file share because it is not secure. This share requires the obsolete SMB1 protocol, which is unsafe and could expose your system to attack. Your system requires SMB2 or higher.”
In this post, you will be guided on how to check if the SMB2.0 version can be installed on your Windows 10 computer. To get started, follow the steps below.
Step 1: Tap the Win + X keys to open the Device Manager.
Step 2: After that, click on the Windows PowerShell (Admin) option.
Step 3: In the Windows PowerShell window, type the following command and hit Enter:
Get-SmbServerConfiguration | Select EnableSMB2Protocol
Note: After entering the command, you will see the following content on your screen which means that your Windows 10 computer is now capable of running the SMB2 protocol
Now all that’s left for you to do is to enable the SMB 2 protocol on your Windows computer by enabling the SMB 1 protocol first and then upgrading it to SMB 2 afterward. Refer to the steps below for more details.
Step 1: Tap the Win + I keys to open the Settings app.
Step 2: Then type in “control panel” in the search area and click on Control Panel from the search results.
Step 3: After opening Control Panel, click on Programs. From there, select the “Turn Windows features on or off” option under the larger menu of Programs and Features.
Step 4: After that, Windows Features will appear on your screen. And from there, make sure that you select SMB 1.0/CIFS File Sharing Support and then click on OK.
Step 5: Now let it install all the required files and then restart your computer to apply the changes made successfully. After your computer has restarted, the SMB 2 protocol should now be supported on your Windows 10 computer.
Note: On the other hand, you can also enter the following command in the Windows PowerShell window. Just make sure you have admin rights to enable it.
Set-SmbServerConfiguration –EnableSMB2Protocol $true
 Storage management Page update
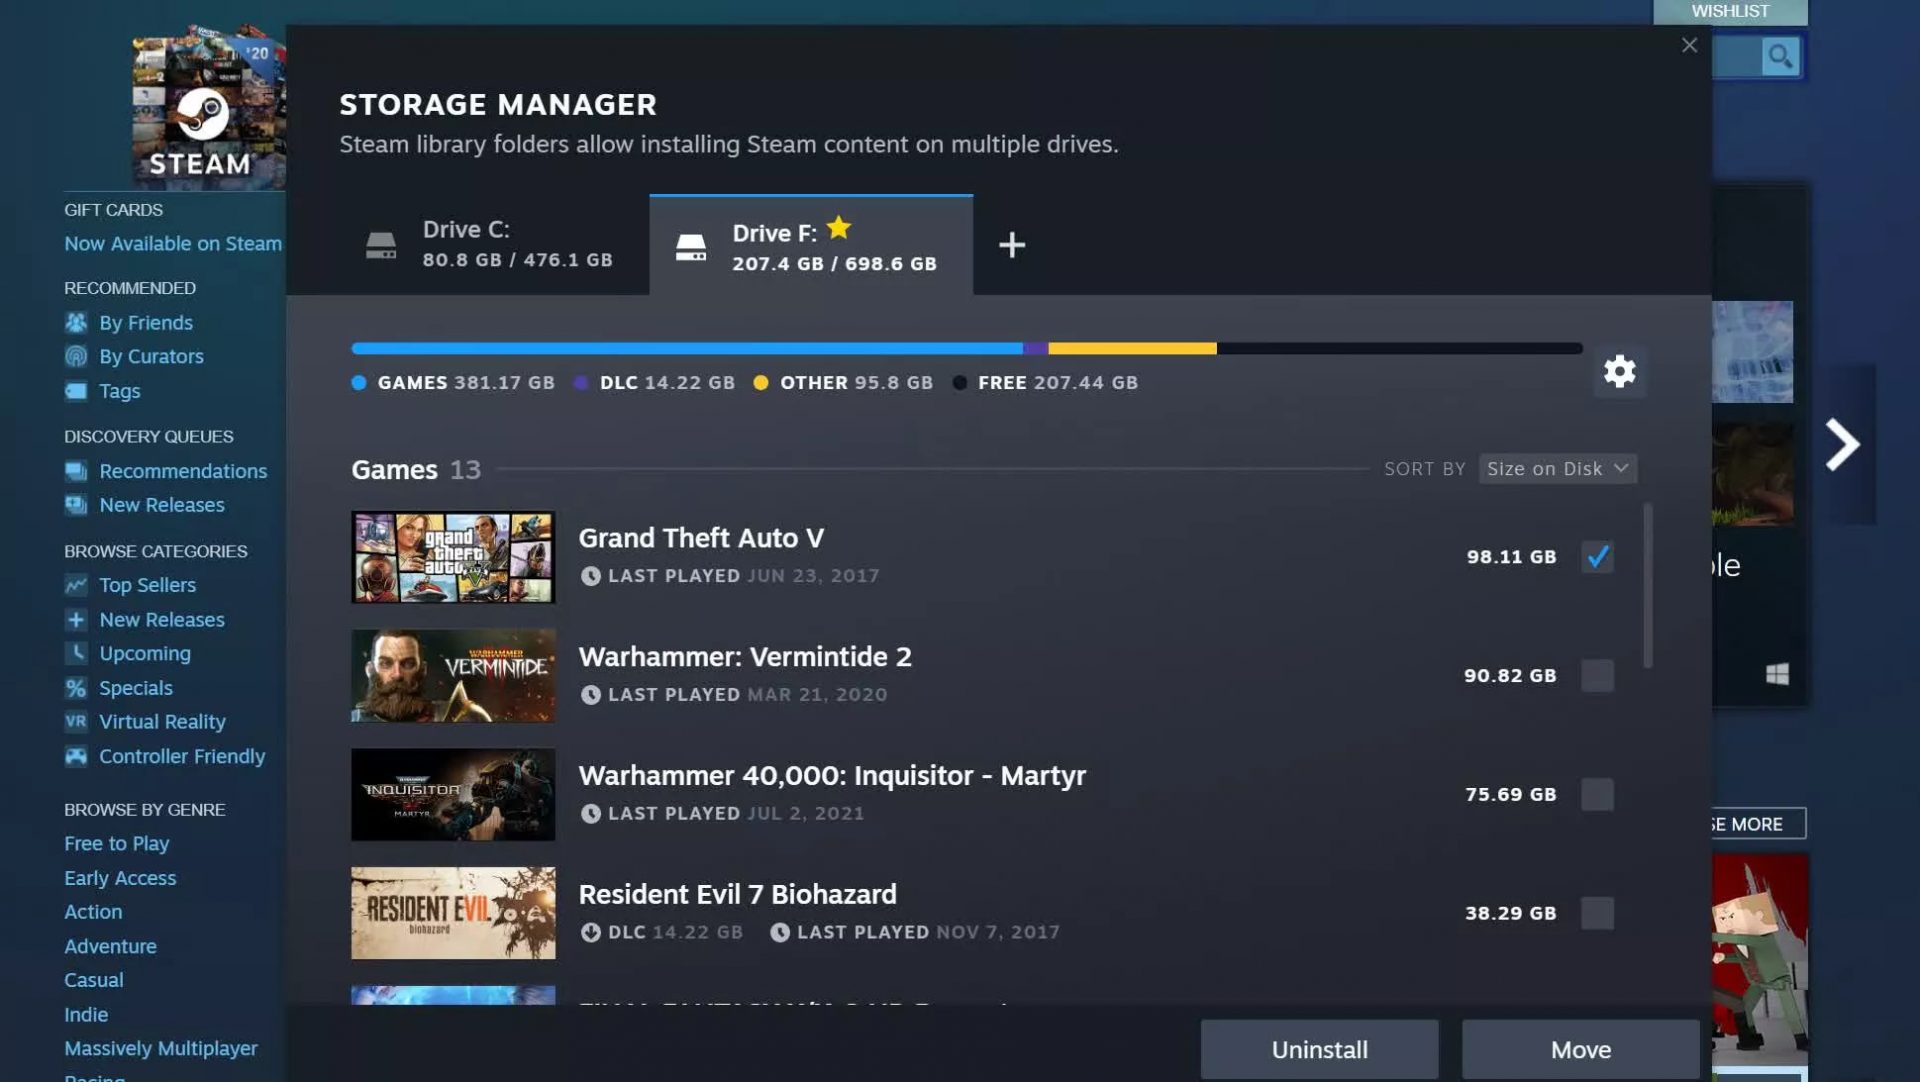 Another thing with the Steam store management page is the ability to move installation files from one location to another. Let’s say that you have two or more hard disk drivers in your machine and that you have SSD that you use for running stuff since it is fast and larger and slower one for storage. Now you can easily and quickly move one installation from one to another in order to take advantage of your faster SSD for quicker LOAD game times without making a new installation.
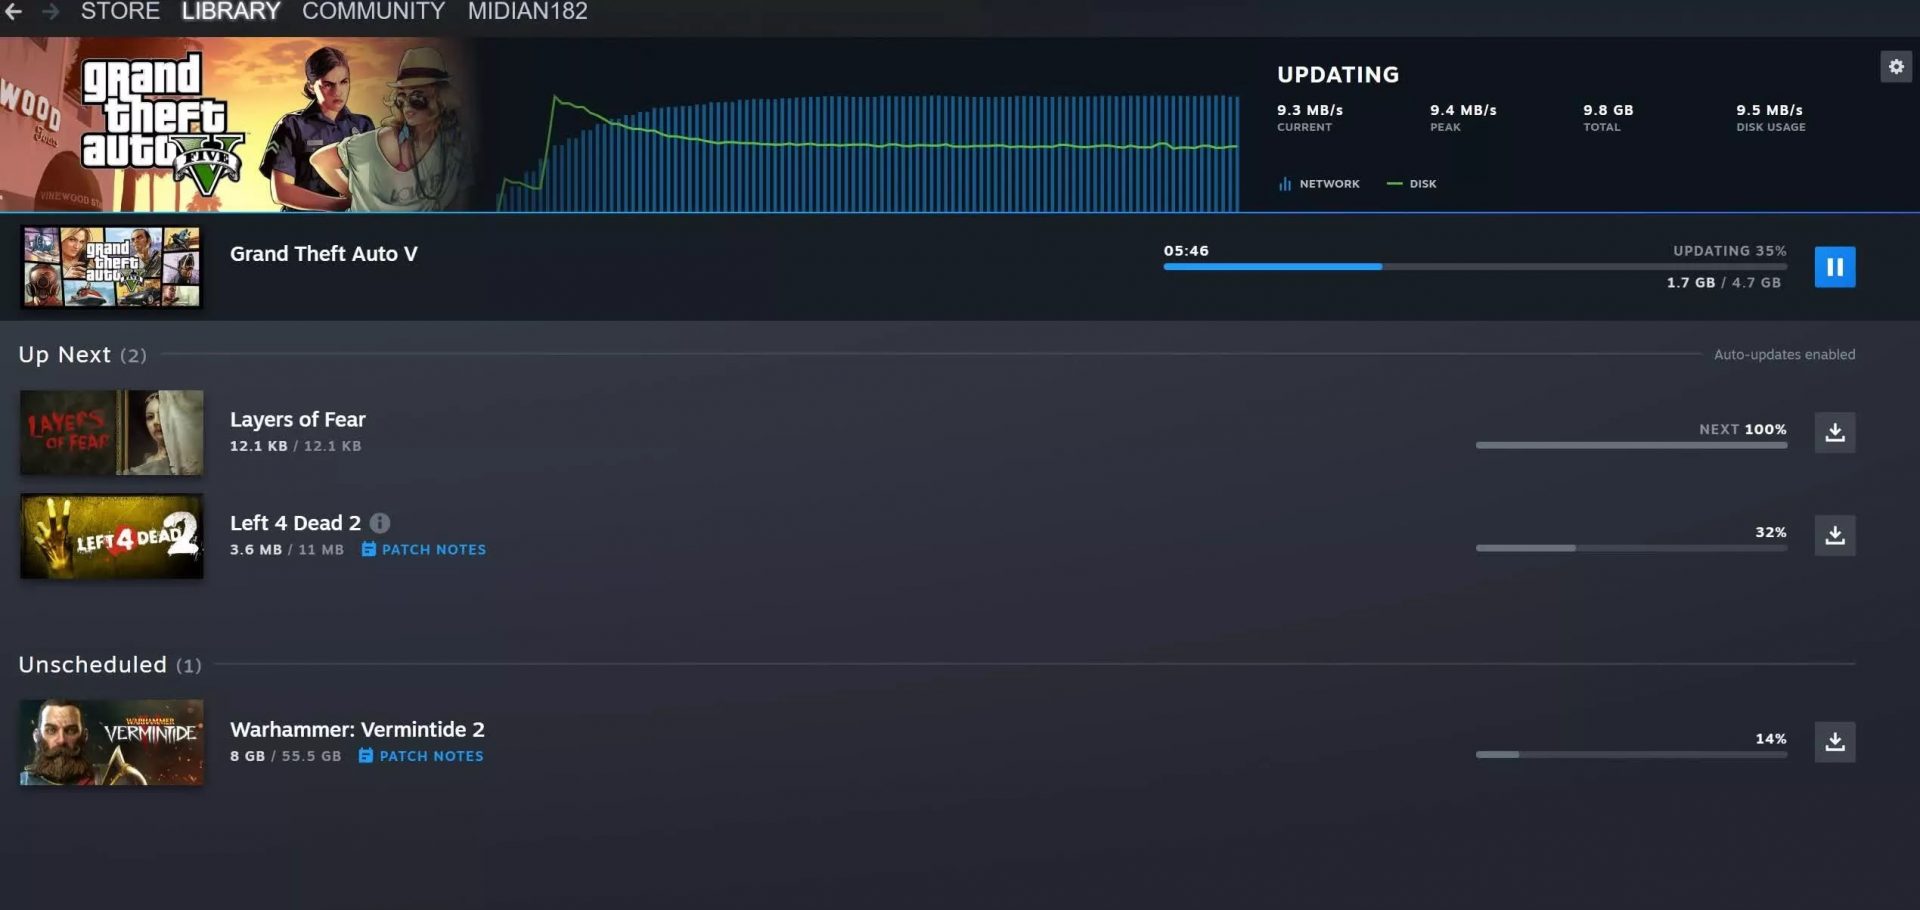 Also, you can now drag and drop items in the download bracket to reorder download orders or place them as active downloads to start downloading right away.
 A stop error or exception error commonly called the blue screen of death (BSoD) or blue screen, is an error screen displayed on Windows computers following a fatal system error. It indicates a system crash, in which the operating system has reached a condition where it can no longer operate safely. This is caused by many different problems, such as a general hardware failure or a crucial process terminating unexpectedly.
 On Windows 10 systems, a Black Screen of Death can be caused by an unfinished Windows Update. To resolve this problem, simply hold the power button down on your PC or laptop to switch off the computer. A cold start should result in the system booting properly.
 It is a diagnostic screen with a white type on a pink background. Pink Screen is mainly seen when the VMkernel of an ESX/ESXi host experiences a critical error, becomes inoperative, and terminates any virtual machines that are running. It is not fatal and generally considered more of a developer testing issue. When encountered, it can be fixed quickly by following the simple action of pressing and holding your computer’s power button to shut down the device.
 The Microsoft Windows 10 Operating System Brown Screen of Death is an on-screen fatal error notification with bug check codes which is seen when a computer crashes due to graphics hardware or software-related problems (failing graphics drivers).
 It affects the functioning of a browser, particularly Mozilla Firefox. The Yellow Screen of Death makes the appearance with a weird buzzing sound in the background when the XML parser refuses to process an XML document causing a parsing error and a weird buzzing sound. The issue persists unless the computer is manually rebooted.
 Commonly the Windows 10 red screen is caused due to the hardware error, particularly if you overclock your Windows PC/laptop. Despite this, sometimes the red screen of death is also caused by outdated or incompatible drivers or due to BIOS issues.
 The Orange Screen of Death on Windows occurs due to fatal hardware errors. Multiple reasons have been reported for the Orange Screen of Death. Some had this issue when watching a YouTube video, some were not able to boot into Windows. It can even occur when waking up from Sleep.
 The green screen of death only appears when you're running an Insider Preview version of Windows 10. It's the same as the blue screen of death, and it will show the same error messages. ... If you see a green screen of death (GSOD) on your PC, that's a sign you're using an Insider Preview build of Windows 10.
 The White Screen on Windows is also an error where the screen of the computer just turns white and freezes. There can be several things that can cause the white screen to appear on the Windows laptop monitor. But the main issue could be because of malfunctioning of the graphics hardware.
  Windows 11 has brought some bad reviews for its inability to change the taskbar location to the screen. Luckily we can still hide it if needed.
In order to hide the taskbar from the screen follow these simple instructions:
Windows 11 has brought some bad reviews for its inability to change the taskbar location to the screen. Luckily we can still hide it if needed.
In order to hide the taskbar from the screen follow these simple instructions: