Intel to reveal roadmap during July 26 webcast

intel graphics
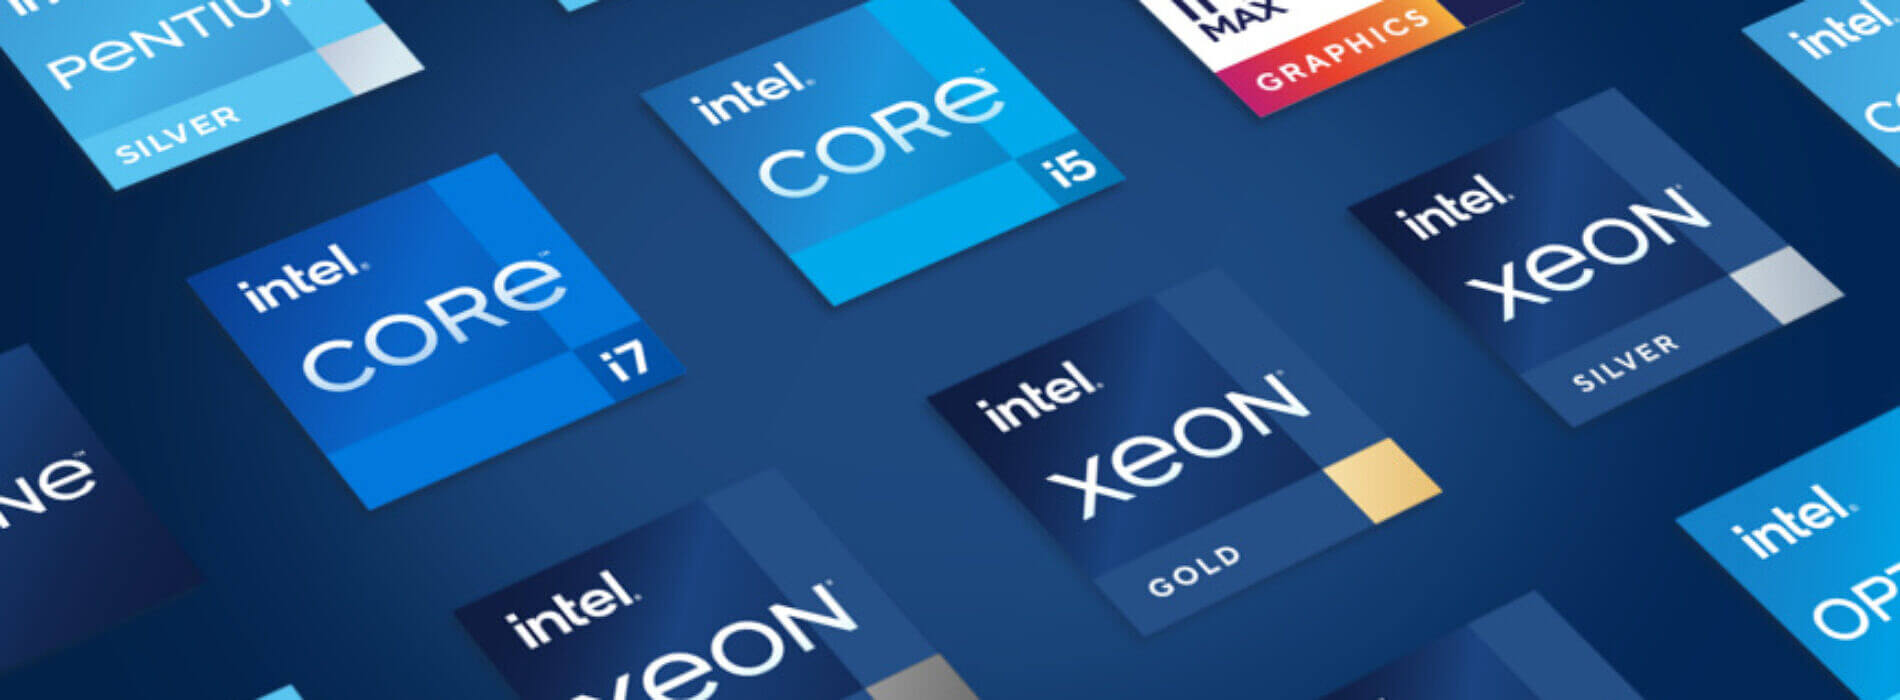
Intel announced that Pat Gelsinger (CEO) and Dr. Ann Kelleher  (technology Department head) will discuss Intel’s process and packaging innovations on an upcoming webcast that will happen on July 26th.

The spokesman will talk and provide a deeper look at the process and packaging roadmaps for Intel. As we know Intel is planning to expand its production capabilities, outsource some of its technologies and offer foundry services to other chip design companies.

The strategy will also include a shift to a 7nm process and Intel’s effort to set itself again as leader of CPU performance by 2024.

There is also a chance that we will hear exact plans for Intel in the next three or four years.

Intel didn't reveal much else about what Gelsinger and Kelleher plan to discuss during the webcast. The event will be streamed on July 26 at 2 pm PT via the Intel Newsroom; it will also be available to watch on-demand after the stream ends.

If you like to learn and find out more about various Windows errors, and how to repair them go to our vast archive or use search to find articles that will explain and help you in solving your issue.
However, if you prefer to do things fast and with automatization then we are proposing to use an automated solution for your issues. The application that we are recommending is Advanced System Repair Pro
Advanced System Repair utilizes multiple tools all in one to give you a quick, simple, reliable, and very thorough diagnosis of your PC. It brings you all the tools you need in one program to clean, fix, protect, optimize and boost your PC!
1-Click Maintenance
All the tools to make it simple and easy! It's like having a professional technician at the click of a mouse.

Junk Cleaner
Keeping your computer free from unnecessary clutter also helps make your computer last longer. Like any other machine, if you keep it clean and take care of it, it will serve you better for longer!

Optimize background apps
Optimize applications background activity with the built-in Application Optimizer feature.

Disk Defrag
With a simple 1-click, Advanced System Repair speeds up your PC by assembling fragmented files on your machine and organizing them more efficiently.

Malware Removal
Finds and removes all types of harmful malware including trojans, worms, bots, adware, spyware, PUPs, and more!

Privacy Cleaner
The all-in-one privacy suite to Clean Your Tracks & Protect Your Privacy! Make your computer safe, secure, and more efficient!

System Tweak/Optimizer
ASR will analyze your complete system and settings to adjust your PC to function at its maximum performance.

Registry Cleaner
Over time, as you install and uninstall applications, the registry can become cluttered with old entries and broken settings which can result in program crashes, and annoying messages and slow the computer down.
Visit our Advanced System Repair Pro Download page to inform yourself about all the benefits of this software and get a free trial copy of it.
advanced system repair pro

Advanced System Repair Pro

One-click automated PC repair solution
ASR logo
With Advanced System Repair Pro you can easily
Replace damaged files
Restore performance
Free disk space
Remove Malware
Protects WEB browser
Remove Viruses
Stop PC freezing
DOWNLOAD
Privacy Policy | Terms of Use | Uinstall
Advanced System Repair Pro is compatible with all versions of Microsoft Windows including Windows 11

Share this article:

You might also like

Business Email Etiquette
[vc_row][vc_column][vc_column_text]

Business Email Etiquette

Hello and welcome to our Business Email Etiquette. Most people have experience in writing emails at some point before in their lives. However, the emails an average person writes are probably personal emails and not mails for work purposes. Emails you send to friends are incredibly different in content and context to business emails you would send to customers or employers or even other colleagues in your workforce. So, if you have a job that involves you writing emails to people in business style, learning business email etiquette is an absolute must for you.

 1. Heading layouts

When you are sending emails to friends, you generally lay them out like a memo. This means there is very little detail in the layout besides basic greetings and paragraphs, usually starting with the greetings. However, with a business email, it is best to lay it out exactly like you would lay out a formal letter. You need to put the company’s address in the right-hand corner and the date as well. Only then must you go on to the greetings. This will make your email look more formal, making you seem like a professional who knows what they are doing as opposed to someone who just couldn’t be bothered spending the extra time to get the layout right.

 2. Proper greetings

 When you are sending an email to a friend, you usually greet them informally. If their name was Mary Johnson, you’d probably start your letter with a ‘Hey Mary’ or a ‘Hello Mary.’ However, this is not considered a professional way to write an email to a customer or other important person in your business. Again, you must use the proper method that you would greet someone with were you writing them a formal letter instead. If your customer is Mary Johnson again, you should greet her with respect. ‘Dear Ms. Johnson’ would be the most appropriate way to start off your letter’s actual body in this case. If you do not know the recipient’s name, then you should start with a simple ‘Dear Sir or Madam.’ Politeness will always get you incredibly far, no matter what line of work you are in.

 3. Informal language

 You should get straight to the point with your email. Don’t dawdle on with it like you would if chatting to a friend and don’t write it how you would speak either. You use language that sounds impressive and smart while not using such obscure language that your recipient doesn’t know what you are saying. All the time, you must keep it informal where possible, possible even impersonal as well. It will make you seem very professional in the long run.

 4. Signing off

When you are ending your email, you must end it as you would with a letter also. Don’t just say ‘Bye’ and your first name; that is too personal. You need to say ‘yours sincerely if you know the name of the recipient and ‘yours faithfully’ if you do not. Then you should end with your full name and whatever position you have at the company. (CEO, technical staff etc.) So there you have it! All you need to do now is to show your boss that you can handle the emails from now on![/vc_column_text][/vc_column][/vc_row]
Read More
How Critical is the Toolbar.Dll Error?

Fix Toolbar.Dll Error

What Exactly Is Toolbar.Dll?

Toolbar.Dll is one of the most destructive software you will encounter on your Personal Computer. For every report out there you read about threats to your Windows PC, a significant number speak about Toolbar.Dll. Technically, this is non-essential to the functioning of your computer yet poses great dangers to your computer's security. It can cause massive destruction if not properly resolved.

Solution

Restoro box imageError Causes

As suggested below, the sources of Toolbar.Dll are many and broad: a) Misconfigured System: Nothing causes this malfunction on your own Computer a lot more than having a misconfigured system. You ought to anticipate this malfunction and repair the situation before it gets worse. Especially if you have Toolbar.Dll files on your computer. More often than not the situation can only get worse. b) Broken Windows OS File: the 2nd trigger of Toolbar.Dll, and that is linked to the primary aforementioned one, is a broken Windows OS file. Fix it as soon as you realize its existence. c) Installation Issues: If you poorly install Windows on your PC, you generate a loophole by which Toolbar.Dll malfunction might appear. You essentially provide a massive possibility to the Toolbar.dll error to affect your Computer, if you neglect to finish an install or uninstall procedure. d) Removing Programs and Hardware Incorrectly: When you decide to remove programs and hardware, you need to exercise caution. Should you be rash with this specific procedure, you raise the odds of striking the Toolbar.Dll malfunction on your Personal Computer. e) Incorrect Shut-Down: unless you want to strike this malfunction, ensure that you shut down your Computer procedurally. Regardless of what hurry you might be in, always power down your computer correctly.

Further Information and Manual Repair

In the event you strike the Toolbar.Dll malfunction on your Personal Computer, you shouldn't get frightened. But, prior to starting considering of ways that to fix this malfunction, you should look for the signs, to be able to recognize it. The malfunction exists in your Computer in circumstances where software programs can't load properly. The situation might be repaired in numerous methods, as revealed below:
  • Switch on your computer, and log in as the superuser/admin. Next, select All Programs, subsequently go to Accessories. Under Accessories, choose System Tools. Click on System Restore from the menu.
  • A fresh window will appear. In the new window, find the choice designated "Restore My Pc To An Earlier Time", before you click next.
  • Search for the newest System Restore update from "On This List, Click a Restore Point" before you click Next once more.
  • Pick Next when a verification window appears on the screen. After the complete procedure is done, reboot the pc and the Toolbar.Dll malfunction will soon be no further.
Each of the measures suggested previously, are for advanced pc users. You must obtain the very best software on the web to eliminate this malfunction, in case you are a non-techie. Alternately, contact a tech to help fixing the problem.
Read More
How to Fix Failed to load DLL file Error
If your operating system cannot or is not able to load a required DLL file on your Windows startup and you encounter a message saying, “Failed to load DLL”, then you’ve come to the right place as this post will guide you in fixing this problem. When you encounter this kind of issue, you will see either of the following error messages on your screen:
“The dynamic library dll failed to load.” “Failed to load dll library.”
This kind of error can occur when your Windows operating system fails to locate the DLL library which the system needs to access during startup. It can also occur when the DLL file is not in a directory specified in the path or when the DLL file is corrupted or has gone missing. Moreover, you can also encounter this error if the DLL file is infected with some malware. Whatever the case is, here are some suggestions you have to check out to resolve the problem.

Option 1 – Try to reinstall the program

The first thing you can do is to reinstall the program that’s giving you this error. Once you’ve uninstalled the program, download its latest setup file from its official site and then install it again.

Option 2 – Try checking the startup programs

You might also want to check the startup programs on your computer, especially the Windows Registry startup paths, and then remove the startup entry to the concerned DLL file.

Option 3 – Try to re-register the problematic DLL file

You may have to re-register the ntdll.dll file using the regsvr32.exe before you can successfully install the program and fix the ntdll.dll file crash error. The Regsvr32 tool is a command-line utility that can be used to register and unregister OLE controls like DLL and ActiveX (OCX) control in the Windows operating system. Follow the steps below to use it.
  • Open Command Prompt as admin from the WinX menu.
  • Next, type the following commands in the elevated Command Prompt and hit Enter to execute the command. This will re-register the affected DLL file using the Windows operating system tool, regsvr32.exe.
    • exe /[DLL file]
    • exe [DLL file]
Note: Replace “[DLL file]” with the name of the DLL file that was pointed out in the error.
  • After you execute the given commands, you should see a message saying, “DllRegisterServer in vbscript.dll succeeded” if the Regsvr32 tool was able to run successfully. After that, try to install the program again and see if it now works.

Option 4 – Try to replace the DLL file with a trusted source

  • First, you need to get the new DLL file from another computer with preferably the same file version number.
  • After that, you need to boot your PC into Safe Mode and navigate to the paths listed below and then replace the file using a USB drive or other external storage devices.
    • x86: This PC > C:/Windows/System32
    • x64: This PC > C:/Windows/SysWOW64
  • Next, type “cmd” in the Cortana search box and right-click on Command Prompt, and select “Run as administrator” to open it with administrator privileges.
  • Now type the “regsvr32 ntdll.dll” command and hit Enter.
  • Restart your PC and check if the error is now fixed.

Option 5 – Try checking the details in the Event Viewer

Checking the details in the Event Viewer can also help you find out the root cause of the problem as the Event Viewer usually contains detailed information about the error.

Option 6 – Try running the DISM tool

You might want to repair potentially corrupted files in your system as having them could also trigger the “Failed to load DLL” error. To repair these corrupted system files, you can run the DISM commands:
  • Tap the Win + X keys and click on the “Command Prompt (Admin)” option.
  • After that, input each one of the commands listed below sequentially to execute them:
    • Dism /Online /Cleanup-Image /CheckHealth
    • Dism /Online /Cleanup-Image /ScanHealth
    • Dism /Online /Cleanup-Image /RestoreHealth
  • Once you’ve executed the commands given above, restart your computer and check if the “Failed to load DLL” error is now fixed.

Option 7 – Try scanning your computer using Windows Defender

The DLL file might also be infected with malware or virus and to eliminate it which could explain why you’re getting the “Failed to load DLL” error. Thus, you have to scan your computer using security programs like Windows Defender.
  • Tap the Win + I keys to open Update & Security.
  • Then click on the Windows Security option and open Windows Defender Security Center.
  • Next, click on Virus & threat protection > Run a new advanced scan.
  • Now make sure that Full Scan is selected from the menu and then click the Scan Now button to get started.
Read More
Turn off transparency inside your Windows 11
windows 11 transparency offWindows 11 comes with glass and transparency effects by default once it is installed. The transparency effect looks really good but if in any case, you do not like them, you can easily turn them off very easily
  1. Open settings inside Windows 11
  2. Inside settings click on Accessibility in the sidebar
  3. Click on Visual Effects on far-right
  4. Inside Visual effects, settings click on the switch beside Transparency effects to OFF
Windows will automatically save settings and apply changes right away. Just close your settings application and continue with work. You can always turn it back ON if you change your mind.
Read More
Internet disconnected when VPN is connected
If your VPN software blocks and disconnects the Internet or Wi-Fi connection as soon as it is connected, read on as this post will give you fixes to resolve the problem. This kind of issue is odd but not unheard of. Many users use VPN for privacy and security but if it causes internet connection problems, you have to pin down the root cause of the problem and fix it in order to continue browsing the internet with privacy and security. Here are some suggestions you need to check out to resolve the issue between your VPN software and network.

Option 1 – Try installing the latest version of the TAP adapter

Since all VPN software uses a TAP adapter which is mostly from OpenVPN, you might want to download and install the TAP adapter driver to resolve the problem.

Option 2 – Run the Network Adapter Troubleshooter

  • Open the Search bar on your computer and type in “troubleshoot” to open the Troubleshoot settings.
  • Next, scroll down and select the “Network Adapter” option from the right pane.
  • Then click on the Run Troubleshooter” button.
  • After that, your computer will check for any possible errors and will pinpoint the root cause of the problem if possible.

Option 3 – Configure the client computer to use the default gateway

This kind of connection problem can occur when you configure the VPN connection as the default gateway on the remote network. In such a case, the VPN settings override the default gateway settings (TCP/IP settings). Thus, you have to configure the client computers in order to use the default gateway setting on your local network for internet traffic as well as a static route on the remote network for VPN-based traffic.

Option 4 – Try to use the Google Public DNS

You might want to change your DNS to Google Public DNS as it could help you resolve the internet connection problem caused by your VPN. To do so, follow the steps below.
  • The first thing you have to do is right-click on the network icon in the Taskbar and select Network and Sharing Center.
  • Next, click on the “Change Adapter Settings” option.
  • After that, search for the network connection that you are using to connect to the internet. Note that the option might be “Wireless Connection” or “Local Area Connection”.
  • Right-click on your network connection and click on Properties.
  • Then select the new window to choose the “Internet Protocol 4 (TCP/IPv4)” option.
  • After that, click on the Properties button and click the checkbox in the new window for the option “Use the following DNS server addresses”.
  • Type in “8.8.8.8” and “8.8.4.4” and click OK and exit.

Option 5 – Try checking the settings of your VPN software

If your VPN software has a built-in “kill switch” it prevents any internet usage every time there is a problem in connecting with the VPN server which explains why your internet connection is disconnected when your VPN software is connected. In addition, you could also try to change your VPN software’s protocol since all VPNs support multiple protocols. It could be that the protocol your VPN uses is blocked so try changing to another protocol and see if it fixes the problem.

Option 6 – Update the Network Adapter drivers

You might also want to update the Network Adapter drivers by following these steps:

  • Tap the Win + R keys to launch the Run window and then type in the “devmgmt.msc” command and hit Enter to open the Device Manager window.
  • Under the Device Manager, you will see a list of drivers. From there, look for the Network Adapters and expand it.
  • Then right-click on each one of the Network drivers and update them all.
  • Restart your PC and see if it helped in fixing the BSOD error.
Note: If updating the network drivers didn’t help in fixing the “Windows could not find a driver for your network adapter” error, you can also try to uninstall the very same drivers and restart your Windows 10 PC. After that, the system itself will reinstall the drivers you just uninstalled. Alternatively, you can also download and install the drivers from the manufacturer’s website directly.

To reinstall the network adapter driver, refer to these steps:

  • Open the Devices Manager from the Win X Menu.
  • Then locate the device drivers and right-click on them to open the Properties.
  • After that, switch to the Driver tab and click on the Uninstall Device button.
  • Follow the screen option to completely uninstall it.
  • Finally, restart your computer. It will just reinstall the device drivers automatically.
Read More
A Guide to Fixing Error Code 0x8007007b in Windows 8

Error Code 0x8007007b – What is it?

This error code occurs when users fail to activate their Windows operating system. It is one of the more popular Windows error codes since it affects many versions of Windows including Windows 7, Windows 8.1, and Windows 10. Error code 0x8007007b has common symptoms which include the following:

  • Inability to activate a Windows installation
  • Message box highlighting error code 0x8007007b

Solution

Restoro box imageError Causes

Error code 0x8007007b in Windows 8.1 usually results due to one or more main clauses. Windows 8.1 users may experience this error due to the use of volume-licensed media. The error code may also arise if the activation wizard is unable to connect to Key Management Service (KMS) host computer or if corrupted system files are present on your computer.

Further Information and Manual Repair

Windows error codes such as Error code 0x8007007b can be a complicated issue, requiring the use of technical knowledge and skills. For this reason, we have listed instructions in the simplest of forms to enable even average users to successfully complete manual repair methods that will resolve error code 0x8007007b.

The same approach has been applied to all our error code solutions. See also Error Code 0x00000024 and Error Code 0x80004005.

Below are the two main methods for correcting this issue.

Method One: Use Multiple Activation Key (MAK) to Activate Windows

This method involves the use of a Multiple Activation Key (MAK) instead of the Key Management Service (KMS) to activate the Windows operating system you intend to use on your PC. This manual repair method requires the use of Command Prompt so ensure you follow the instructions provided carefully so as to avoid the risks of causing harm to your system.

  • Step one: Select Windows log key + X.
  • Step two: Click Command Prompt, then Admin
  • Step three: Type in admin password if Command Prompt requests it
  • Step four: Type slmgr -ipk followed by the MAK product key. Note that the product key should have 25 characters with dashes between them like this xxxxx-xxxxx-xxxxx-xxxxx-xxxxx

Attempt to activate your Windows installation once you’ve completed the exact instructions above. If you are unable to complete this process, consider getting help from a Windows repair technician or simply move to the next manual repair method listed below.

Method Two: Run System File Checker

System File Checker (SFC) enables Windows users to scan and repair errors or corruption on system files. Since such errors within your system files can cause error code 0x8007007b to occur, follow the steps below to fix this error code.

  • Step One: Go to Start and type Command Prompt or CMD.
  • Step Two: Run as Administrator
  • Step Three: Type sfc /scannow with a space between “sfc” and “/scannow”.

The System File Checker tool will begin scanning your machine for corrupted or missing files in need of repair. If these files are found on your system, the tool will repair and replace them. Once this is done, restart your computer then check to see if you can now activate your Windows operating system.

Method Three: Use an Automated Tool

If you wish to always have at your disposal a utility tool to fix these Windows 8 and other related issues when they do arise, download and install a powerful automated tool.

Read More
Fix Windows Update Install Error 0x80070005
If you are checking for an update on your Windows 10 PC and you got the error 0x80070005 due to some ACCESS DENIED permissions issue, then read on as this post will show you what you can do to fix the problem. For some reason, the Windows Update does not have enough rights or permissions to continue further which is why you’re getting an error instead. Thus, the first thing you can do before you troubleshoot further is to make sure that you’re logged in as admin. However, if you’re already logged in as one, then here are some suggestions that might help you fix the Windows Update Install Error 0x80070005.

Option 1 – Restart your computer and try installing the Updates again

You can restart your computer and then try installing the updates once again. There are instances when a simple restart resolves Windows Update errors. Thus, after you restart your computer, check for updates once again and see if you’re still getting the error or not.

Option 2 – Delete the contents in the Software Distribution folder and Catroot2 folder

  • Open the WinX Menu.
  • From there, open Command Prompt as admin.
  • Then type in the following command – don’t forget to hit Enter right after typing each one of them.
net stop wuauserv net start cryptSvc net start bits net start msiserver
  • After entering these commands, it will stop the Windows Update Service, Background Intelligent Transfer Service (BITS), Cryptographic, and the MSI Installer
  • Next, go to the C:/Windows/SoftwareDistribution folder and get rid of all the folders and files thereby tapping the Ctrl + A keys to select them all and then click on Delete. Note that if the files are in use, you won’t be able to delete them.
After resetting the SoftwareDistribution folder, you need to reset the Catroot2 folder to restart the services you just stopped. To do that, follow these steps:
  • Type each one of the following commands.
net start wuauserv net start cryptSvc net start bits net start msiserver
  • After that, exit Command Prompt and restart your computer, and then try to run Windows Update once more.

Option 3 – Try running the Windows Update Troubleshooter

Running the built-in Windows Update troubleshooter is one of the things you can first check out as it is known to automatically resolve any Windows Update errors like error 0x80070005. To run it, go to Settings and then select Troubleshoot from the options. From there, click on Windows Update and then click the “Run the troubleshooter” button. After that, follow the next on-screen instructions and you should be good to go.

Option 4 – Take control of the User App Data

There are times when permission to access the files is not configured correctly. As a result, it blocks the downloading of the updates. Thus, you have to take full control of the User App Data which is placed at C:/Users/USERNAME/AppData.
  • First, go to C:/Users/USERNAME/AppData and right-click on it then select Properties.
  • Next, click on the Edit button in the Properties window and click OK to confirm if you got a User Account Control elevation request.
  • After that, select user/group from the permission windows or click on the Add button to add another user or group. It would be best if you add “Everyone” to give permission.
  • Then check “Full Control” under the “Allow” column to assign full access rights control permissions.
  • Now edit the permission to Full Control for “Everyone”.
  • Click OK to save the changes made and then exit.

Option 5 – Try to update Windows after a couple of minutes or an hour

There are times when the issue is from Microsoft’s end. It could be that there’s some issue with Microsoft’s server so it would be better if you give it a couple of minutes or an hour or so before trying to run Windows Update again.
Read More
How to Fix Error 0x00000643

Repair Error 0x00000643

Error 0x00000643 - What is it?

This is a Windows Vista printer error. It occurs when you try to use the plug-and-play service to install a WSD printer on your PC. WSD is the abbreviation for Web Services for Devices. It is a Microsoft API to simply programming connections to web service enabled devices such as printers, file shares and scanners.  The error 0x00000643 code is displayed in the following format:
“Operation could not be completed (error 0x00000643)”

Solution

Restoro box imageError Causes

The error 0x00000643 may occur due to multiple reasons, including:
  • No suitable driver installed for your printer
  • A firewall or other security program is too restrictive
  • Registry file has invalid entries
  • Virus and Trojan
  • Outdated system drivers

Further Information and Manual Repair

To resolve this error code on your PC, you don’t have to hire a professional technician and spend hundreds of dollars to perform system repair. You can resolve it all by yourself, even if you are not a computer programmer or lack technical expertise. Here are some of the easiest and proven methods to fix the error 0x00000643 on your PC:

1. Update Outdated Drivers

This can be done by accessing the ‘Device Manager’. All you have to do is, go to the start menu and type Device Manager in the start search box. Then click on the Device Manager in the list. On the action menu, click the scan for hardware changes or update the driver.

2. Delete the WSD Port to Resolve Error

Go to the start menu and type printers in the search box. Click printers in the given program list and then click the option add a new printer. After that, select the existing WSD port and any printer driver. Now delete the printer. The WSD will be deleted automatically. Once this is done, connect the printer to your computer. You will see the plug-and-play service will begin to install the printer again. This process is most likely to resolve the issue and reinstall your printer.

3. Disable Firewall

Sometimes the error may occur if the security programs are too restrictive such as the Firewall. To fix the problem simply disable Firewall.

4. Viral Infection

If the underlying cause of the error is a viral infection, then download a powerful antivirus and run it on your PC. Scan for viruses and delete them.

5. Registry Invalid Entries

If you don’t clean the registry regularly, this overloads with unnecessary, redundant and obsolete files like cookies, internet history, junk files, bad registry keys and invalid entries. This damages the registry and generates such error codes. Although you can resolve and repair the registry manually, but that method is slight tricky and time consuming. It may require technical expertise. However, another quick and easy way to clean and restore the registry and resolve error 0x00000643 on your system is to download Restoro. This is a next-generation, advanced, and highly functional PC Repair Tool. It is deployed with an intuitive algorithm and multiple utilities such as a smart registry cleaner, a powerful antivirus, and a system optimizer. The registry cleaning utility detects all registry issues on your PC, removes invalid entries cluttering the registry, and repairs it right away thereby resolving error 0x00000643. The antivirus simultaneously detects malware on your PC and removes them while the system optimizer boosts the speed of your computer significantly. Restoro is bug-free, safe, and efficient. It has simple navigations and a user-friendly interface. This software is compatible with all Windows versions including Vista. To fix error 0x00000643 on your system in seconds, click here to download Restoro now!
Read More
Fixing the We can’t find a USB flash drive
One of the preferred ways to upgrade Windows 10 is by creating a bootable USB drive. However, you might change your mind when you encounter an error during the Windows 10 Setup that says, “We can’t find a USB flash drive”. Worry not for this error can be fixed using some suggestions that will be provided in this post. The funning thing about this error in Windows setup is that the computer says it’s not there when it’s clearly there. To fix this problem, you need to check if the USB device is accessible on your computer or you can also try a different USB device. In addition, you could check if there are any issues with both the USB 3.0 and USB 2.0 ports as it could be the reason why you’re getting the error or fix the bad sectors in the USB drive as well as see if the USB drive is set as the primary drive.

Option 1 – Try to check if the USB is accessible on your PC

The first thing you can do to resolve the problem is to check if you can access your USB device from your computer. All you have to do is open File Explorer and check if the USB device is listed there or not.

Option 2 – Try to connect a different USB device

The next thing you can do to fix the error is to try connecting a different USB device, specifically the one that has more significant storage space. You also have to make sure that it’s working on a different PC.

Option 3 – Fix any issues with the USB 3.0 and 2.0 ports

Although the USB 3.0 ports are compatible with the USB 2.0 ports, it does not necessarily mean that there wouldn’t be any problem when you use them which is why it’s best to fix any issues in them or better yet, use a compatible drive.

Option 4 – Try to fix the bad sectors in the USB drive via CHKDSK

When it comes to some issues concerning the hard drive or removable devices, there is a utility in Windows that might help which is called “chkdsk”. To use it, follow the steps below.
  • Tap the Win + S keys to open the Search box.
  • Then type “command prompt” in the field and from the search results that appear, right-click on Command Prompt and select “Run as administrator”.
  • After opening an elevated command prompt, copy and paste the following command and hit Enter:
CHKDSK [volume [[path] filename]] [/F] [/V] [/R] [/X] [/C] [: size]]
Note: In the command given above, “[/F]” will try to fix the system errors while “[/R]” will be the one to fix the bad sectors.
  • Now if you are prompted to run CHKDSK after your reboot your PC, just tap Y and reboot your PC.
  • If CHKDSK is not able to find any errors, tap the Win + E keys and navigate the access window. From there, right-click on the concerned drive and click on Properties.
  • After opening Properties, click on the tab Tools and then click on the “Check” button under the Error-checking section.
  • Wait until the process is completed and then restart your computer.

Option 5 – Try checking if the USB is set as the primary drive

You might also want to check if the USB drive is set as the primary drive because if it is, then it won’t appear on the list. It could also be that the USB drive has a primary disk in it. To undo it, you need to use the DISKPART utility.
  • In the Start Search, type “command prompt” and right-click on Command Prompt from the search results, and then select the “Run as administrator” option.
  • Next, execute the “diskpart” command to initiate the DISKPART utility.
  • After that, type the “list disk” command and tap Enter to display the list of disks on the computer. You have to take note of the drive number or letter of the concerned USB drive.
  • Once done, type the “select disk <X>” command where X is the drive letter or number and tap Enter.
  • Then execute the “list partition” command to see the list of all the partitions in your computer. It should be listed as 0, 1, or 2. 0 is the primary partition.
  • Now type the “select partition 0” command and tap Enter and then type “delete partition” to delete the selected partition.
  • You can do the same to the other partitions as well and when you’re done, execute the format command to turn the USB drive into a standard one.
Read More
Some update files aren’t signed, 0x800b0109
Windows Updates are checked for their validity every time they are downloaded from Microsoft servers just like how browsers check websites for a valid certificate. And so if you got an error message saying, “ Some update files aren’t signed correctly, error code 0x800b0109 ” while trying to update your computer, it indicates that the Windows service was unable to verify the validity of the Windows Update. To fix this error, you can try out the options prepared in this post.

Option 1 – Reboot your computer and try again

Save your work and reboot your computer and then try checking for updates again. In some cases, all you need is a restart to fix errors like error code 0x800b0109.

Option 2 – Try to update Windows after an hour or so

There are times when the issue is from Microsoft’s end. It could be that there’s some issue with Microsoft’s server so it would be better if you give it an hour or so before trying to run Windows Update again.

Option 3 – Try running the Windows Update Troubleshooter

Running the built-in Windows Update troubleshooter is one of the things you can first check out as it is known to automatically resolve any Windows Update errors like Error 0x8007001E. To run it, go to Settings and then select Troubleshoot from the options. From there, click on Windows Update and then click the “Run the troubleshooter” button. After that, follow the next on-screen instructions and you should be good to go.

Option 4 – Delete the contents in the Temporary folder

You can also try deleting the contents in the Temporary folder – all the downloaded, pending, or failed Windows 10 updates. You can do that using the simple and easy steps below.
  • Tap the Win + R keys to open the Run dialog box.
  • Then type “%temp%” in the field and press Enter to open the Temporary folder.
  • After that, select all the folders and files within the Temp folder and delete all of them.

Option 5 – Clear the contents in the Software distribution and Catroot2 folders

  • Open the WinX Menu.
  • From there, open Command Prompt as admin.
  • Then type in the following command – don’t forget to hit Enter right after typing each one of them.
net stop wuauserv net start cryptSvc net start bits net start msiserver
  • After entering these commands, it will stop the Windows Update Service, Background Intelligent Transfer Service (BITS), Cryptographic, and the MSI Installer
  • Next, go to the C:/Windows/SoftwareDistribution folder and get rid of all the folders and files thereby tapping the Ctrl + A keys to select them all and then click on Delete. Note that if the files are in use, you won’t be able to delete them.
After resetting the SoftwareDistribution folder, you need to reset the Catroot2 folder to restart the services you just stopped. To do that, follow these steps:
  • Type each one of the following commands.
net start wuauserv net start cryptSvc net start bits net start msiserver
  • After that, exit Command Prompt and restart your computer, and then try to run Windows Update once more.

Option 6 – Install the updates in a Clean Boot State

You might want to try putting your computer in a Clean Boot state and then install Windows Updates again without any trouble. During this state, you can start the system with a minimum number of drivers and startup programs that will surely help you in isolating the root cause of the issue.
  • Log onto your PC as an administrator.
  • Type in MSConfig in the Start Search to open the System Configuration utility.
  • From there, go to the General tab and click “Selective startup”.
  • Clear the “Load Startup items” check box and make sure that the “Load System Services” and “Use Original boot configuration” options are checked.
  • Next, click the Services tab and select the “Hide All Microsoft Services” check box.
  • Click Disable all.
  • Click on Apply/OK and restart your PC. (This will put your PC into a Clean Boot State. And configure Windows to use the usual startup, just simply undo the changes.)
  • After that, try to install the Windows Updates or upgrade again.
Read More
1 2 3 162
Logo
Copyright © 2022, ErrorTools. All Rights Reserved
Trademarks: Microsoft Windows logos are registered trademarks of Microsoft. Disclaimer: ErrorTools.com is not affiliated with Microsoft, nor claim direct affiliation.
The information on this page is provided for information purposes only.
DMCA.com Protection Status