Common Outlook Errors

Most Common Microsoft Outlook errors

When you have a program, you know before you even start to use it or even know how that you are going to have problems with it.

There are always going to be error messages and things that don’t work on any program you buy or download; guaranteed.

Even some of the most famous program developers in the world make mistakes from time to time and it is a small price to pay for the programs you get and that is a fact. Microsoft Outlook is like any other program; it has its errors. Here are some of the most common errors for Microsoft Outlook on your computer.

1. Problem receiving emails

Sometimes you can be waiting on really important emails. It is really infuriating when you know that they have been sent, however every time you check your email box, there is nothing there!

Your inbox is empty and your patience is wearing thin, so could it possibly be an error with Microsoft Outlook? There is a high probability that this is the problem. The program can be a bit slow on receiving emails sometimes, often even by days.

This can be caused by any number of things, from having too many emails coming through or having too many emails in your inbox.

If you click ‘send and receive’ at the top, it should speed up your emails coming through, however, so give that a try if you’re waiting on anything to come through. If this doesn’t work, however, your inbox may be full.

Try permanently deleting some useless messages and then click ‘send and receive’ again. All your emails should come through then!

2. General slow performance

Outlook, while it has its advantages, can often be very slow. It is probably slower than some other email programs that require a browser but it is quicker to access, which may make up for this fact.

However, sometimes sluggish performance can be really irritating, so it may be wise to try and fix it if you can. One of the reasons it may be acting slow is if you have too many other Windows applications open.

Applications that may interfere with your Outlook’s speed could be anything from Microsoft Word to Windows Live Messenger. If any of these are open, try closing them and see if that helps with the speed problem.

3. Corrupt files

.dbx files are not accessible by Microsoft Outlook. Therefore, they can cause problems with your emails if you have them within them.

To solve this problem, you may have to delete all of your attached email accounts and then reattach them before you can open your emails again.

These corrupt files can also cause you to be unable to delete emails. You will need to transfer these deleted corrupt files into a separate deletion folder as this is usually caused by the folder being corrupt.

Of all the other most frequent problems with Microsoft Outlook, however, this is probably the least likely to happen, which shows how few problems there actually are with this application after all that!

Conclusion

So there are the most common problems with Microsoft Outlook! Not much wrong at all, is there?

If you like to learn and find out more about various Windows errors, and how to repair them go to our vast archive or use search to find articles that will explain and help you in solving your issue.
However, if you prefer to do things fast and with automatization then we are proposing to use an automated solution for your issues. The application that we are recommending is Advanced System Repair Pro
Advanced System Repair utilizes multiple tools all in one to give you a quick, simple, reliable, and very thorough diagnosis of your PC. It brings you all the tools you need in one program to clean, fix, protect, optimize and boost your PC!
1-Click Maintenance
All the tools to make it simple and easy! It's like having a professional technician at the click of a mouse.

Junk Cleaner
Keeping your computer free from unnecessary clutter also helps make your computer last longer. Like any other machine, if you keep it clean and take care of it, it will serve you better for longer!

Optimize background apps
Optimize applications background activity with the built-in Application Optimizer feature.

Disk Defrag
With a simple 1-click, Advanced System Repair speeds up your PC by assembling fragmented files on your machine and organizing them more efficiently.

Malware Removal
Finds and removes all types of harmful malware including trojans, worms, bots, adware, spyware, PUPs, and more!

Privacy Cleaner
The all-in-one privacy suite to Clean Your Tracks & Protect Your Privacy! Make your computer safe, secure, and more efficient!

System Tweak/Optimizer
ASR will analyze your complete system and settings to adjust your PC to function at its maximum performance.

Registry Cleaner
Over time, as you install and uninstall applications, the registry can become cluttered with old entries and broken settings which can result in program crashes, and annoying messages and slow the computer down.
Visit our Advanced System Repair Pro Download page to inform yourself about all the benefits of this software and get a free trial copy of it.
advanced system repair pro

Advanced System Repair Pro

One-click automated PC repair solution
ASR logo
With Advanced System Repair Pro you can easily
Replace damaged files
Restore performance
Free disk space
Remove Malware
Protects WEB browser
Remove Viruses
Stop PC freezing
DOWNLOAD
Privacy Policy | Terms of Use | Uinstall
Advanced System Repair Pro is compatible with all versions of Microsoft Windows including Windows 11

Share this article:

You might also like

Fix error code 16 in Windows 10
Access denied error code 16 is tied to websites, it is an error which you will encounter when trying to visit some specific website or if you are unlucky on all of the websites. Lucky for us this error is fixable and in order for us to do this, follow this guide for possible solutions.
  1. Check Date and Time, Incorrect date and time can often interfere with services in your Windows, browsers are not different and this can cause some websites not to be shown. Check your date and time and set it correctly if needed.
  2. Try to access the website from another device. If you manage to open a website on another PC or some other device then keep reading in order to find the solution, if you can not, then the problem is on the website itself.
  3. Turn off Firewall or antivirus. New antivirus and firewall applications can sometimes mark certain websites as malicious and will cut contact with them rendering them unable to be accessed or opened. Try turning the firewall and antivirus temporarily off and then try to access the website.
  4. Try opening web site in another browser. To eliminate browser-specific issues and their configuration, try opening the website in another browser.
  5. Disable PROXI server. Some applications, especially malicious ones can change your proxi setting in LAN. go to your LAN settings and turn off proxi if it is enabled.
  6. Reset your Browser. If this issue is caused by bad data in your browser or by its settings and preferences, resetting the complete browser will solve the issue.
  7. Use VPN. Sometimes the reason for you was not able to access some website might be because the site is not available for your region, to bypass this issue use VPN and reroute your location.
Read More
Fix Steam stuck on Allocating disk space
If you have been stuck on allocating disk space on steam you know how annoying this error could be. Here you are, with your new game eager to play it and relax a little and all of the sudden steam gets stuck on allocating disc space. Luckily this error is fixable, follow provided guide to fix the error and continue with installing the game.
  1. Restart computer

    An old age solution of turning it off and turning it back on but in this case, it works 90% of the time.
  2. Run Steam as administrator

    Allocating disk space when done by a third-party application can be a task that requires privileges higher than the normal user. Find the steam executable file in the installation folder, right-click on it and run it as an administrator
  3. Clear Steam cache

    Launch Steam in admin mode. Once in the client, click on Steam at the top left corner of the screen. From the drop-down box, click on Settings. Once in the Settings, navigate to the Downloads tab. Click the Clear Download Cache option. Click OK on the prompt to confirm your action. Wait for the process to complete. When done, save changes and exit the client.
  4. Change download server

    Launch Steam client in admin mode. Once in the client, click on Steam at the top left corner of the screen. From the drop-down box, click on Settings. Once in the Settings, navigate to the Downloads tab. Click the drop-down menu under the Download Region. Choose a different server to download from. Exit the Steam client.
  5. Refresh installation files

    • Kill a Steam process in Task Manager.
    • Navigate to your Steam folder
    • Inside the Steam folder, select everything except the steamapps folder and the Steam.exe executable file.
    • Tap the Delete key on your keyboard.
  6. Turn off firewall

    Firewall can prevent steam and cut access to system operations, disable firewall to fix this issue.
  7. Stop overclocking

    If you have overclocked your PC, you can simply reverse the change. The steps you will need to take depends on the overclocking software. Launch the software and look for the option to stop the overclocking. Once done, restart your computer, rerun the game installation.
Read More
Application side-by-side configuration ...
A lot of users lately reported getting an error that says, “The application has failed to start because its side-by-side configuration is incorrect”. This kind of error can pop up when you try to open a number of programs, regardless of their origin, the developer, and compatibility. Here’s the full context of the error message:
“<PATH OF THE EXECUTABLE FILE>, This application has failed to start because its side-by0side configuration is incorrect. Please see the application event log or use the command-line sxstrace.exe tool for more detail”.
This kind of problem has something to do with the C++ runtime package in the background. It could also be related to an error for a registry value. Whatever the cause is, you can fix this error with the help of some suggestions provided in this post. You can try to reinstall the application or check the registry setting or reinstall the suitable Visual C++ Runtimes or re-enable the Microsoft .NET Framework. For more details, refer to the instructions given below.

Option 1 – Try to reinstall the application

There are times when some supporting module for your application under the hood could have messed up the application. And so to fix that, you need to uninstall the concerned application and then try reinstalling it again. Once you’re done, check if it fixed the problem or not.

Option 2 – Try to change the Registry setting

  • Tap the Win + R key combination to open the Run dialog box.
  • Then type “Regedit” in the fields and tap Enter to open the Registry Editor.
  • Next, navigate to this registry key: Computer HKEY_LOCAL_MACHINE SOFTWARE Microsoft Windows NT CurrentVersion SideBySide Winners x86_policy.9.0.microsoft.vc90.crt_1fc8b3b9a1e18e3b_none_02d0010672fd8219 9.0
  • From there, look for a String value named “default” and double click on it.
  • After that, change its Value data to match the one as the third value in BINARY.
  • Now restart your computer to successfully apply the changes made.

Option 3 – Try reinstalling the appropriate Visual C++ Runtime

  • You need to open the Event Viewer first by searching for it in the Windows Search box.
  • After opening Event Viewer, look for the error events that are sourced by SideBySide.
  • Next, look for the actual Visual C++ Runtime module that’s causing the error.
  • Now download the module from the official website of Microsoft Support and then install it and see if it fixed the problem.

Option 4 – Re-enable the Microsoft .NET Framework

You could also try to disable the Microsoft .NET Framework then enable the latest version of the .NET Framework on your PC and check if the error is fixed.
Read More
Intel i9 Alder Lake better than AMD Ryzen 9
Alder Lake
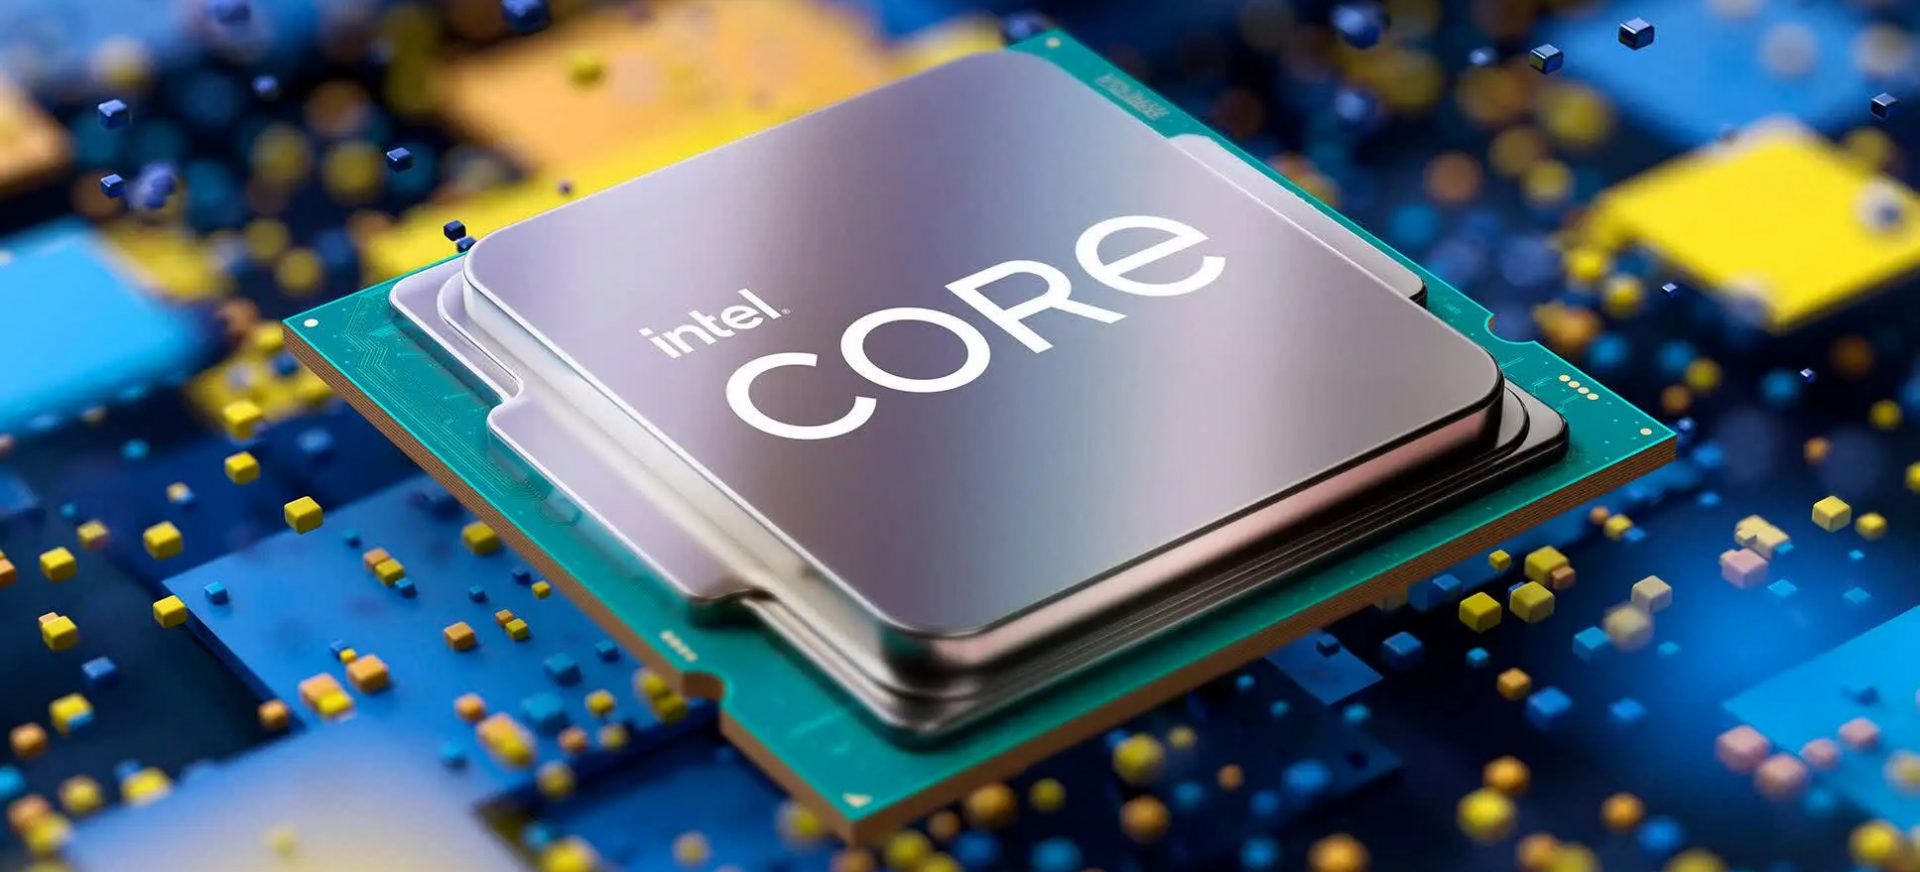
If we are to believe news from Intel, new series of processors based on Alder Lake architecture are about to be released somewhere in October. Alder Lake is the 12th Generation Core of Intel processors and it is meant to have all advantages of the current CPU structure. I9 is aimed to pack a punch against its competitors with technology including eight high-performance Golden Cove cores (P-cores) with Hyper-Threading and eight energy-efficient Goldmont (E-cores) equipped with a 30MB L3 cache and operating at high clock speeds. During the benchmark test, the new CPU outperformed all of Intel’s previous Rocket Lake structure processors which is logically expected but the big surprise came from results that indicate better performance than Apple’s new M1 processor even in single-threaded performance which is supposed to be best in that field. Another surprise was really beating AMD Ryzen 9 in each field. If we take into account that i9 has 16 cores in total and can process 24 threads against Ryzen 9 with 16 Cores and 32 threads this is an impressive feature. Now truth to be told Alder lake has massive L3 cache and microarchitectural advantages and consumes much more power but the results of performance are high. Also, note that this early CPU is not really a mass production one and maybe some things will still change but early results are very satisfactory. We will see what will price tag be since in this age of shortage and competition that will also play a big role in its overall success. Speaking of competition I eagerly await AMD’s response to this, in any way it seems that the CPU market is for some turbulence which is always a good thing for the final customer and I welcome it.
Read More
Fix Minecraft Won’t Launch in Windows 10
Minecraft has taken the world by the storm, it was an indie project game and it went mainstream. Dream of every game developer I guess. The dream of every gamer on the other hand is to double click on the game and to play it and not to deal with various issues, especially if they are launch issues. Luckily for all of you gamers, here at errortools we game as well and we are happy to bring you a solution on how to fix Minecraft won't launch issue. So sit back, relax and keep on reading, and hopefully enough you will be gaming again in no time. Follow the guide presented step by step, point by point how it is presented for the quickest way to get back in Minecraft. This guide also presumes that your hardware configurations meet at least the minimum system requirements for running Minecraft.
  1. Disable antivirus and firewall

    90% of the time this is the issue why Minecraft is not working, your antivirus or firewall has detected it as a false positive, and access to system internet, etc has been cut. Try disabling it and if everything is working fine add it to the antivirus or the firewall exception list.
  2. Run Minecraft as admin

    Minecraft will sometimes refuse to run if it does not has administrator privileges. To make sure this is the case locate the Minecraft executable, right-click on it and choose properties. Go to the compatibility tab and check Run as Administrator box.
  3. End Minecraft process

    It came to knowledge that even if Minecraft is not running it can have its processes active in the background. Press CTRL + SHIFT + ESC to open task manager Locate if Minecraft has a process running If you find the Minecraft process right-click on it and choose End Task
  4. Run Minecraft in compatibility mode

    If Minecraft still refuses to start try running it in compatibility mode in the previous Windows version Locate Minecraft executable file in its install location Right-click on it and choose properties In the properties, windows go to the compatibility tab Check run this program in compatibility mode for: Select previous version of the operating system, try Windows 8 or Windows 7
  5. Update graphic card driver

    The best bet is to go to your GPU manufacturer's website and download the latest version of the driver of your GPU.
  6. Remove mods, plugins, texture packs

    Mods, plugins, texture packs are all great but sometimes they can cause GPU overloads and other issues to see if this is the case try running Minecraft in Vannila mode without anything installed, just pure and clean Minecraft as it was just downloaded and installed.
  7. Reinstall Minecraft

    If everything else failed, reinstall Minecraft. There might be a chance that some DLL file was deleted or corrupted by mistake or that some crucial files are missing. Clean reinstallation will fix all of these issues.
Read More
Word icon is not showing on .doc & .docx
Recently, a number of users reported seeing plain white icons on their “.docx” files instead of the Word icon. This kind of issue is mostly caused by a conflict with the default program settings in Windows which is why you may not see any Microsoft Word icon on your .docx files. So if you suddenly find that the Microsoft Word icon is either blank or missing and does not show properly on .doc and .docx document files of Office on your Windows 10 computer, then you can check out the potential solutions outlined below. Before you proceed, you can try to restart your computer as there are instances when a simple system restart can resolve some issues like this one. However, if it does not help, create a System Restore point first. This is to ensure that you can always undo the changes you are about to make in case something goes wrong. Once you have that covered, proceed to the following options.

Option 1 – Try to configure .docx files to open with “winword.exe”

You can try configuring the .docx files to open with the winword.exe in order to fix the problem.
  • Right-click on a .docx file and select the “Open with…” option.
  • After that, if a prompt appears with a message saying, “How do you want to open this file”, select the “More apps” option to proceed.
  • Next, scroll down and check the checkbox that says, “Always use this app to open .docx files” option.
  • Then click on the “Look for another app on this PC” link and choose the WINWORD.exe application from one of the following paths based on the installed Office version in your computer and click Open:
    • Word 2016 (64-bit): C:/Program Files/Microsoft Office/root/Office16
    • Word 2016 (32-bit): C:/Program Files (x86)/Microsoft Office/root/Office16
  • Now check if you can now see the Word icon on the .doc or .docx files.

Option 2 – Try changing the default Word icon via Registry Editor

  • Tap the Win + R keys to open the Run utility.
  • Then type “Regedit” in the field and hit Enter to open the Registry Editor.
  • Next, navigate to this path located in the left pane: HKEY_CLASSES_ROOTWord.Document.12DefaultIcon
  • From there, double click on the default value at the right pane and based on the Word version you are using as well as the architecture (32 bit or 64 bit) and then copy-paste the corresponding value in the Value data box:
    • For Word 2016 (64-bit) keep it as C:/Program Files/Microsoft Office/root/Office16/wordicon.exe,13
    • For Word 2016 (32-bit) Keep it as C:/Program Files (x86)/Microsoft Office/root/Office16/wordicon.exe,13
  • Once you’re done, tap Enter and then close the Registry Editor.
  • Restart your computer and see if the problem’s fixed.

Option 3 – Try to rebuild the Icon cache

You may want to rebuild the Icon cache as it could also help fix the issue.
  • Tap Win + E to open File Explorer and then click Folder Options and click Views to show Hidden System Files.
  • After that, go to C:Users%username%AppDataLocal folder and look for a file named Iconcache.db and delete it.
  • Next, go to C:Users%username%AppDataLocalMicrosoftWindowsExplorer.
  • From there, look for the following files and delete them.
    • iconcache_32.db
    • iconcache_48.db
    • iconcache_96.db
    • iconcache_256.db
    • iconcache_1024.db
    • iconcache_1280.db
    • iconcache_1600.db
    • iconcache_1920.db
    • iconcache_2560.db
    • iconcache_exif.db
    • iconcache_idx.db
    • iconcache_sr.db
    • iconcache_wide.dd
    • iconcache_wide_alternate.db
  • Restart your computer. This will purge and rebuild the icon cache.

Option 4 – Try fixing Office apps

Fixing the Office apps can help you resolve the Word icon issue. All you have to do is open Settings > Apps. From the app list, look for the Microsoft Office Desktop apps and select it and then click on the Advanced options and click Fix. After that, wait until the process is completed and restart your PC. However, if the problem still persists, repeat the steps again but this time, click on Reset instead of Fix.

Option 5 – Try to repair Office Installation

If the options given above didn’t work, you can try to repair the Office installation and see if it can fix the problem.
  • Open Control Panel and click on Programs and Features.
  • Next, right-click on the Office program that you want to repair which in this case is, Word.
  • Select Change and click Repair > Continue. After that, Office will start to repair Microsoft Word.
  • Wait until the process is done and then reboot your computer.
Read More
Fix UTCSVC high CPU and Disk usage in Windows
There is a lot of high resource utilization by any process that slows down a Windows operating system and one of the services that could cause such a thing is the utcsvc.exe process. This particular process at times can cause high CPU and disk usage. So if you are currently facing this problem, read on as this post will guide you on how you can resolve the problem. UTC which stands for Universal Telemetry Client is a software that runs a service named Diagnostic Tracking Service or DiagTrak. This service is used by Microsoft to collect customer feedback, analyze customer’s problems, and push resolution via updates in order to make the Windows 10 operating system better. This service is an executable file that could be translated to Service Host and even though the process does not usually cause problems, there are actually times when it does especially if it results in high resource utilization. In such cases, you might want to consider disabling it to fix its high CPU and disk usage.

According to Microsoft:

“We collect information about you, your devices, applications and networks, and your use of those devices, applications, and networks. Examples of data we collect include your name, email address, preferences, and interests; browsing, search and file history; phone call and SMS data; device configuration and sensor data; and application usage.”
There are several ways you can disable the utcsvc.exe process. You can disable it using the Service Manager, Registry Editor, and Group Policy Editor. For more details, refer to the instructions laid out below.

Option 1 – Disable the Connected User Experience & Telemetry Service via Service Manager

Note that this option is for standalone systems, so if you’re not using one, refer to the next given options below.
  • Tap the Win + R keys to open the Run dialog box.
  • Then type “services.msc” in the field and tap Enter or click OK to open the Services Manager.
  • From the given list of services, look for the Connected User Experience service. Once you found it, click on it and you’ll see its description which states:
“The Connected User Experiences and Telemetry service enables features that support in-application and connected user experiences. Additionally, this service manages the event-driven collection and transmission of diagnostic and usage information (used to improve the experience and quality of the Windows Platform) when the diagnostics and usage privacy option settings are enabled under Feedback and Diagnostics.”
  • Next, right-click on it and select Properties.
  • Now, change its Startup Type to Disabled and click on the Apply and OK buttons to save the changes made.

Option 2 – Disable the Connected User Experience & Telemetry Service via Registry Editor

  • Tap the Win + R keys to launch the Run utility and type “Regedit” in the field and click OK to open the Registry Editor.
  • Next, navigate to this registry path: HKEY_LOCAL_MACHINESOFTWAREPoliciesMicrosoftWindowsDataCollection
  • After that, right-click on the folder named “DataCollection” and select New > DWORD (32-bit) Value.
  • Now name the new value “AllowTelemetry” and make sure that its Value data is “0” and then click on OK to save the changes made.
  • Restart your computer.

Option 3 – Disable the Connected User Experience & Telemetry Service via Group Policy Editor

If you have to disable the service related to the Universal Telemetry Client for company-managed systems, then you can do that using the Group Policy Editor.
  • Tap the Win + R keys to open the Run utility and type “gpedit.msc” in the field and hit Enter to open the Group Policy Editor.
  • Next, navigate to this path: Computer Configuration > Administrative Templates > Windows Components> Data Collection and Preview Build
  • After that, double-click on Data Collection and Preview Build to open its settings.
  • From there, look for the “Allow Telemetry” item and double click on it to open its Properties.
  • Next, set the radio button to Disabled and then click on the Apply button to save the changes made.
  • Restart your computer.

Option 4 – Run the Hardware and Devices Troubleshooter or the Performance Troubleshooter

Hardware and Devices Troubleshooter:

  • The first thing you need to do is click on Start and then on the gear-like icon to pull up the window for Settings.
  • After opening Settings, look for the Update and Security option and select it.
  • From there, go to the Troubleshoot option located on the left-hand side of the list.
  • Next, select Hardware and Devices from the list and open the Troubleshooter and run it. Once it is doing its job, wait for it to complete the process and then restart the system.
  • After the system restarts, check if the problem’s now fixed. If not, refer to the next option given below.

Performance Troubleshooter:

  • Tap the Win + R keys to open the Run dialog box.
  • Type “exe /id PerformanceDiagnostic” in the field and hit Enter to open the Performance troubleshooter.
  • Then click on Next to get started. Wait until the process is completed.
Read More
Software review series: HWiNFO
HWiNFO (Hardware Information) is a professional hardware information and diagnostic tool supporting the latest components, industry technologies, and standards. It's targeted to recognize and extract the most possible amount of information about computer hardware which makes it suitable for users searching for driver updates, computer manufactures, system integrators, and technical experts too. Retrieved information is presented in a logical and easily understandable form and can be exported into various types of reports. System health monitoring and basic benchmarking available too. If you would like to read more helpful articles and tips about various software and hardware visit errortools.com daily.
Read More
Installing Windows 11 on Raspberry Pi 4
A lot of controversies and mixed emotions have come from statements about Windows 11 minimum system requirements, especially ones linked to TPM. Naturally, each time some software company giant announces how things are must have there are people who go out and prove them wrong. This time Raspberry Pi community was one which demonstrated that not only Raspberry Pi does not have a TPM module, it can run the full desktop version of Windows 11

Windows 11 on Raspberry Pi 4
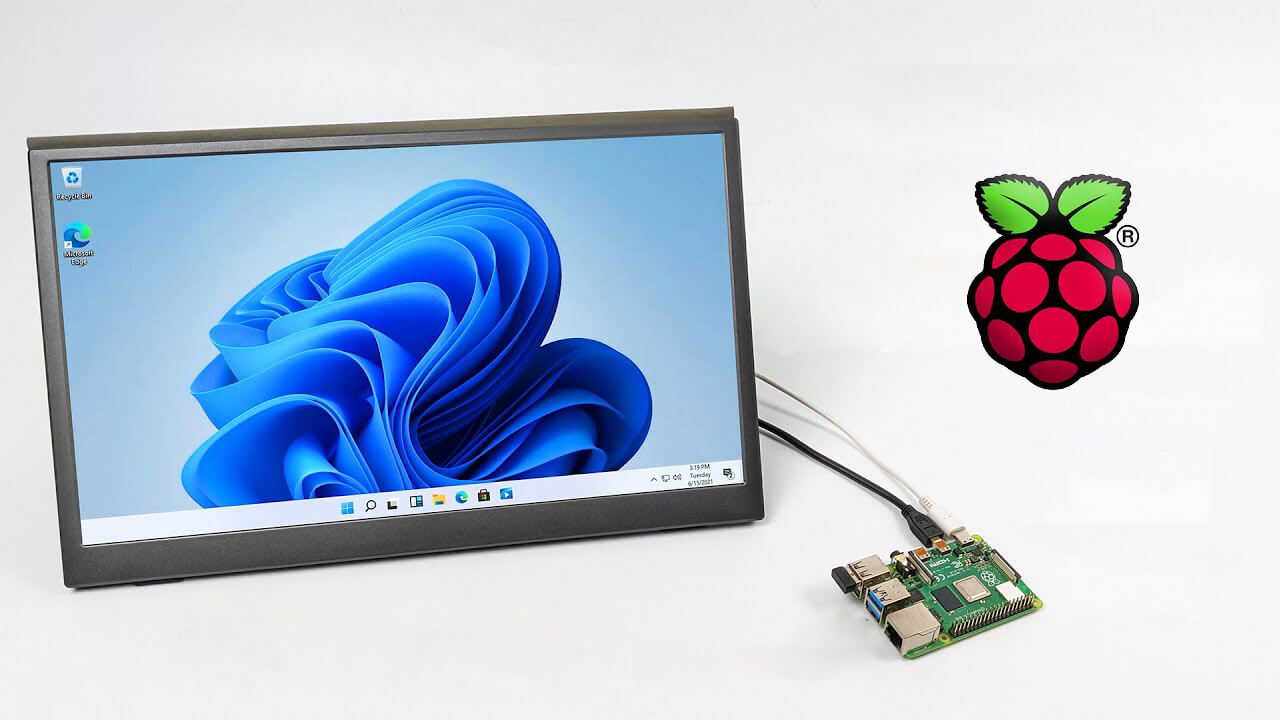
Raspberry Pi 4 and things you need for Windows 11 installation

In order to actually install Windows 11 on your Pi, there are certain things that you will need. Check out the below list and prepare everything.
  • Raspberry Pi 4 4GB or 8GB
  • A 32GB or larger SSD via a USB 3 caddy. Best for performance or 16GB or larger microSD card
  • USB boot enabled, see below.
  • A micro SD card with the latest Raspberry Pi OS
  • Windows 10 PC
  • USB to Ethernet or WiFi dongle
  • Bluetooth dongle (if you want Bluetooth)
  • Keyboard, mouse, HDMI, and power for your Raspberry Pi

Configuring Pi to boot from SSD

In order to boot from SSD be sure that firmware and bootloader are up to date on the latest version and upgrade if needed. Be aware that this firmware update can only be performed using the official Raspberry Pi OS. Also if you are eager and want to use a standard microSSD card instead of an SSD to run Windows 11 feel free to skip this entire section.
  1. Boot from microSSD with the latest Raspberry Pi OS on it.
  2. Update firmware and OS using the terminal by typing sudo apt update sudo apt full-upgrade sudo rpi-update
  3. Reboot your Pi
  4. Install the latest version of bootloader again using the terminal with the command sudo rpi-eeprom-update -d – a
  5. Reboot Pi
  6. Launch raspi-config on your Pi via terminal with sudo raspi-config
  7. Select option 3 (Boot options – Configure options for start-up) from boot options
  8. Select Boot ROM version and press ENTER
  9. Select latest and then OK
  10. Select NO when prompted to reset boot ROM to defaults on the latest version boot ROM selected screen. Press OK
  11. Select Boot order and press ENTER
  12. Select USB Boot and click on OK and remove microSD card from Pi
  13. Select Finish and click on NO when prompted to reboot

Creating Windows 11 installation image for Pi 4

In order to install Windows 11 on our Pi, we must create an installation image, follow the steps below explaining the process.
  1. Go to https://uupdump.net/
  2. Search for Windows 11 Arm
  3. Select the latest build for arm64
  4. Select Language on which you would like installer and Windows
  5. Pick Windows edition you would like
  6. Set download method to Download and convert to ISO and click on Create download package
  7. Extract downloaded content into win11 folder and go into it
  8. Double click on uup_download_windows.cmd
  9. On the security warning screen click on More info and then on Run anyway
  10. Wait for the process to finish completely
  11. Once the process is finished, press 0 to close the prompt

Installing image on microSSD or SSD

If previous steps of instruction were follower precisely you now have an ISO image that can be installed onto microSSD or SSD
  1. Connect SSD or insert microSSD card into your PC
  2. Go to https://www.worproject.ml/downloads
  3. Download Windows on Raspberry imager and extract it into the win11 folder
  4. Open Imager and allow it to make changes to your computer, set your language, and click on next
  5. Select storage drive where you would like to install Windows
  6. Set device type and click on next
  7. Select our Windows 11 ISO image we created and click on next
  8. On the drivers screen select Use the latest driver package available on the server
  9. On UEFI firmware select screen choose Use the latest firmware available on the server
  10. On configuration screen click on next
  11. Check your setting on the installation overview and if everything is ok click on install
  12. Wait for the whole process to be finished
  13. Once the process is completed, close Windows on Raspberry imager, take out SSD or microSSD card from PC and connect it on your Pi along with Pi peripherals.

Setting Windows 11 on Pi

In order to actually use Windows 11 on our Raspberry Pi we now have to set up the Windows 11 install using the standard post-installation setup sequence.
  1. Power up Pi and press ESC when prompted
  2. Go to Device manager and press ENTER
  3. Select Raspberry Pi Configuration
  4. Select Advanced configuration
  5. Set Limit RAM to 3GB to a disabled state, press F10 to save, and ESC to exit.
  6. Select Display configuration
  7. Set the resolution to desired option and press ENTER, F10 to save, and ESC to exit
  8. Go to CPU configuration
  9. Check if the CPU clock is set to default, if not set it
  10. Press ESC to go back all the way to the main menu
  11. Select Continue to exit BIOS and boot your Raspberry Pi with Windows 11 on it
And there you have it, fully working Windows 11 OS on Raspberry Pi despite what Microsoft says Note that due to lack of some drivers performance can be less than optimal, for example, full HD videos will not work since there are no compatible graphic drivers for Pi and some other stuff like Wi-Fi will also cause some issues but overall Windows 11 is working pretty well.
Read More
Taskbar has disappeared from the Desktop
As you know, the Taskbar is one of the integral parts of the Windows desktop and it has been there since the release of Windows 1.0 and up until now with Windows 10. Since then, Microsoft has been modifying the Taskbar with a new design which makes it a home for new features such as Windows Search, Task View, and many more. However, there are times when you may that the Taskbar has disappeared or has stopped responding. If you experience either one of these scenarios, read on as this post will walk you through what you can do to resolve the problem. Here are some suggestions you can check out to resolve the issue with the Taskbar in Windows 10 but before you proceed, make sure that you create a System Restore point first. To do that, follow these steps:
  • In the Start search, type in “create a restore point” and click the entry “System Properties”.
  • Next, select the main system drive under Protection Settings and click on the Configure button.
  • After that, select the “Turn on system protection” option and then click on the Apply and OK buttons to save the changes made.
Once you’ve created a System Restore point, refer to the troubleshooting steps below to fix the Taskbar in Windows 10.

Option 1 – Try to restart the Explorer process

This may sound really basic but it actually is a proven method to fix the Taskbar issue. So if anything gets stuck on the system tray or the Taskbar, you can always fix it by restarting the explorer.exe. How? Refer to these steps:
  • First, right-click on the Taskbar and select the Task Manager.
  • After opening the Task Manager, go to the Processes tab and look for the process named “Windows Explorer”.
  • Then right-click on that process and select the option to Restart. Afterward, you should now be seeing the Taskbar as this will reload the whole Windows Shell.

Option 2 – Unhide the Taskbar using the Settings app

It is possible that the Taskbar could be hidden so you can try to unhide it using the Settings app.
  • Tap the Win + I keys to open Settings.
  • After that, go to Personalization > Taskbar.
  • From the main section, make sure that the “Automatically hide the task in desktop mode” is toggled to the off position. However, if it’s already off then proceed to the next options below.

Option 3 – Make sure that you are not in Tablet Mode

Since Windows 10 is designed to work on both desktop and mobile devices, it could be that your computer has slipped into Tablet Mode which explains why you’re not seeing the Taskbar. To check if your computer is really in Tablet Mode, follow these steps:
  • Go to the Start menu and select Settings.
  • Next, select the System setting and from the left pane select the Tablet Mode.
  • From there, make sure that the buttons next to the options given below are set to the off position:
    • Hide app icons on the taskbar in tablet mode
    • Automatically hide the taskbar in tablet mode

Option 4 – Try to check the Projection Settings

You might also want to check the Projection settings as it could be the reason why Taskbar has disappeared.
  • Tap the Win + P keys to open the Windows Projection settings.
  • Next, make sure that you select the “PC screen only” option and then check if your Taskbar has now appeared or not.
Read More
1 2 3 162
Logo
Copyright © 2022, ErrorTools. All Rights Reserved
Trademarks: Microsoft Windows logos are registered trademarks of Microsoft. Disclaimer: ErrorTools.com is not affiliated with Microsoft, nor claim direct affiliation.
The information on this page is provided for information purposes only.
DMCA.com Protection Status