Best fitness trackers for your health needs

fitness trackerIf this unfortunate COVID-19 worldwide pandemic has managed to teach us, I would argue it is that our health is the most important thing. So in that spirit, we will continue in this article reviewing some of the best fitness trackers that can be found in the time of writing this article in 2021.

Now the market for fitness trackers is not small by any means and offerings are also not small, from no-name manufacturers costing only a few bucks to more serious one’s going slightly over 100 USD there is a fitness tracker for everyone.

In this particular article, we will not focus on cheap few dollars no-name ones, instead, we will be offering top ones in the field among some in the middle range simply because we can stand behind them considering quality and precision.

Fitbit Charge 4 fitness and activity tracker

Fitbit is not a pioneer company in the world of fitness trackers and it shows. Charge 4 model offers maybe the best quality, performance, and features for its price. It stands out with implemented GPS meaning that you will need your phone for tracking workouts. It also offers step tracking, sleep tracking, automatic workout-tracking, active zone minutes, etc.

It weighs 30g and has 1 inch grayscale OLED. Battery life is said to hold up to 4 days if you use built-in GPS regularly, if you decide to use GPS constantly device will last only 5 hours. Without GPS it can last up to 7 days and it is water-resistant and waterproof up to 50 meters.

Amazfit Band 5

Amazon’s offering of fitness tracker is aimed at beginners and as such, it is lacking some advanced features including an automated working tracker or GPS, also the model does not have replaceable bands so customization is not an option.

It does however offer activity and sleep tracking, heart rate monitoring and it is the only model that integrates with Alexa. The manufacturer states that the battery can last up to 15 days depending on usage which places Amazfit Band 5 as a device that has a longer life of use.

The device itself is packed with a 1.1-inch color OLED and it weights 12g. It is splash-resistant, not water-resistant.

Xiaomi Mi Band 6

Xiaomi tracker is the best budget version on this list including in it 30 sport modes like running, cycling, yoga, swimming, and more. Battery life is not bad also packing up to 14 days of life but only if the device is not used constantly.

It has activity and sleep tracking, a heart rate monitor, sleep tracking, customizable replicable bands and it is water-resistant up to 50m.

It comes in a 1.56 inch AMOLED color display and it weighs 63g. The device also has menstrual health tracking making it a great device for women.

Samsung Galaxy Fit 2 fitness tracker

Now we are getting into serious and little more expensive ones. Galaxy Fit 2 is among the top-notch trackers currently on the market. It of course can work along with Samsung’s smartwatches and mobile phones. Packed in the military-grade 1.1-inch casing with color AMOLED and weighing 91g with battery life up to 21 days and water resistance up to 50m this bracelet is an absolute beast.

It comes packed with features from standard sleep tracking to automated workout-tracking but it also has a connection to Samsung’s Health mobile app to choose from over 90 workouts, it monitors heart rate and stress levels making it really one of the complete solutions for serious fitness enthusiasts.

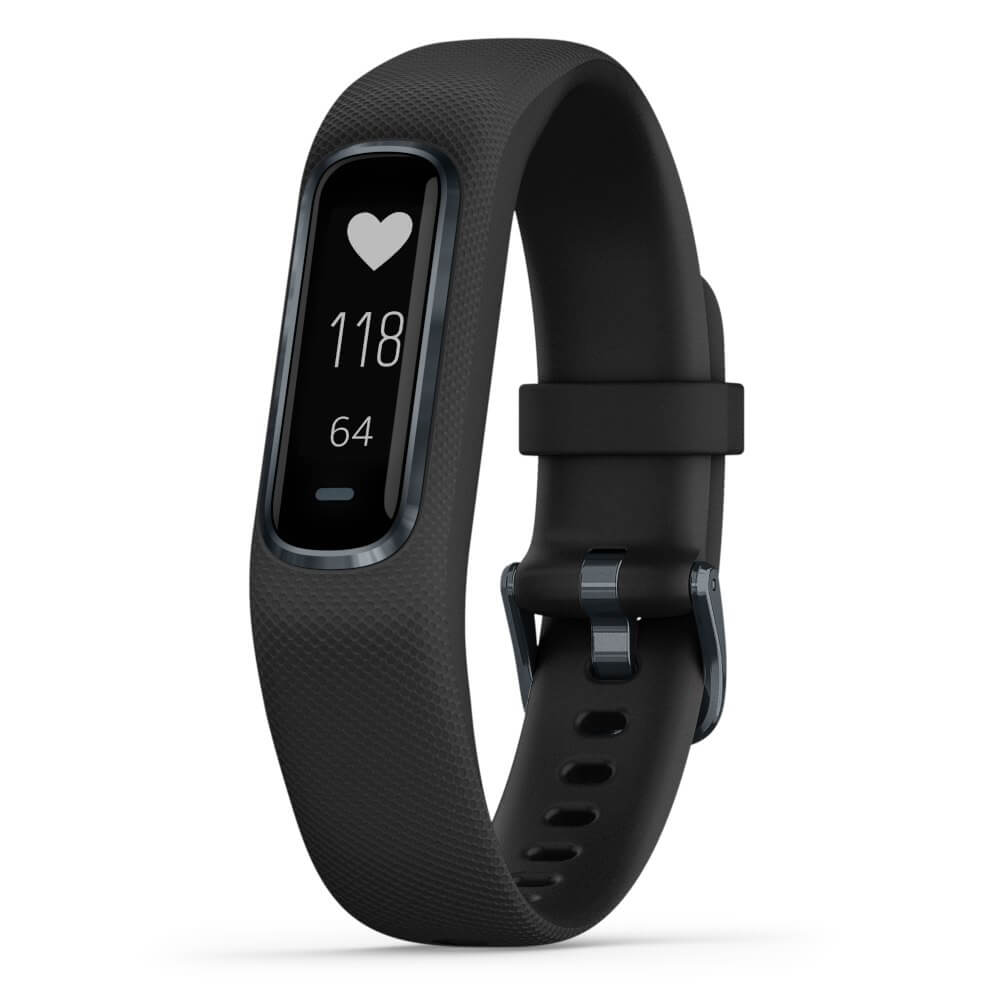
Garmin Vivosmart 4 fitness tracker

Last on our list is Garmin vivosmart 4. The device itself is not very impressive, 7 days battery life with 0.7 inch OLED display and 17g weight packed with 50m water resistance is nothing spectacular, Samsung’s model is packing better hardware and way more battery life but all of the mentioned devices fall flat if we compare software to Garvin.

Garvin’s Vivosmart 4 software is best on the list, it keeps track of your steps, sleep, calories burned, floors climbed, various exercises, and heart rate as standard features but you'll have advanced sleep tracking with REM sleep. It can also gauge blood oxygen saturation levels during the night with its wrist-based Pulse Ox sensor. In addition, a relaxation breathing timer complements the all-day stress tracking feature. Lastly, the "Body Battery" monitor helps optimize your daily activities based on your energy levels making it truly the only complete tracking solution on this list.

That's it for our review of fitness trackers of today, be sure to come back each day to find more interesting articles and tips for your everyday digital life.

If you like to learn and find out more about various Windows errors, and how to repair them go to our vast archive or use search to find articles that will explain and help you in solving your issue.
However, if you prefer to do things fast and with automatization then we are proposing to use an automated solution for your issues. The application that we are recommending is Advanced System Repair Pro
Advanced System Repair utilizes multiple tools all in one to give you a quick, simple, reliable, and very thorough diagnosis of your PC. It brings you all the tools you need in one program to clean, fix, protect, optimize and boost your PC!
1-Click Maintenance
All the tools to make it simple and easy! It's like having a professional technician at the click of a mouse.

Junk Cleaner
Keeping your computer free from unnecessary clutter also helps make your computer last longer. Like any other machine, if you keep it clean and take care of it, it will serve you better for longer!

Optimize background apps
Optimize applications background activity with the built-in Application Optimizer feature.

Disk Defrag
With a simple 1-click, Advanced System Repair speeds up your PC by assembling fragmented files on your machine and organizing them more efficiently.

Malware Removal
Finds and removes all types of harmful malware including trojans, worms, bots, adware, spyware, PUPs, and more!

Privacy Cleaner
The all-in-one privacy suite to Clean Your Tracks & Protect Your Privacy! Make your computer safe, secure, and more efficient!

System Tweak/Optimizer
ASR will analyze your complete system and settings to adjust your PC to function at its maximum performance.

Registry Cleaner
Over time, as you install and uninstall applications, the registry can become cluttered with old entries and broken settings which can result in program crashes, and annoying messages and slow the computer down.
Visit our Advanced System Repair Pro Download page to inform yourself about all the benefits of this software and get a free trial copy of it.
advanced system repair pro

Advanced System Repair Pro

One-click automated PC repair solution
ASR logo
With Advanced System Repair Pro you can easily
Replace damaged files
Restore performance
Free disk space
Remove Malware
Protects WEB browser
Remove Viruses
Stop PC freezing
DOWNLOAD
Privacy Policy | Terms of Use | Uinstall
Advanced System Repair Pro is compatible with all versions of Microsoft Windows including Windows 11

Share this article:

You might also like

How to Manually Fix 0x8004210A Error Code on Your System

Repair 0x8004210A Error Code

Error 0x8004210A - What is it?

0x8004210A is a typical POP3 email error message. This error may sometimes occur when you try to check your Post Office Protocol 3 (POP3) email account. 0x8004210A error code hampers your ability to both send and receive e-mails on your Outlook account. Error 0x8004210A is displayed in any one of the following formats on your PC:
The operation timed out waiting for a response from the receiving (POP) server 0x8004210a Task 'SMTP server name - Sending and Receiving reported error' (0x8004210A): 'The operation timed out waiting for a response from the receiving (POP) server. If you continue to receive this message, contact your server administrator or Internet service provider (ISP).'

Error Causes

Error 0x8004210A occurs due to several reasons. However, some of the most common reasons include:
  • Wrong port number for the POP incoming server
  • Your connection to the mail server is too slow
  • Incoming and outgoing emails are being scanned and stopped by an antivirus installed on your system
  • The Outlook send and receive job is being blocked by Firewall
  • You are sending and receiving large series of emails or large email attachments
  • Registry issues
No matter what the cause of this error is, to resume email communication via Outlook and to ensure your work productivity is not affected, it is recommended that you resolve this 0x8004210A error code on your PC immediately.

Further Information and Manual Repair

To fix error 0x8004210A, here are some of the most efficient and easy manual methods that you can try:

Method 1

If the cause of the error is related to the internet connection then here’s what you need to do. Try freeing up your internet connection by closing any other online activities in progress or downloads being carried on your system.

Method 2

Try to increase your server time-out periods. To do this, go to the Outlook File menu and choose account settings. Now double click on your email account and more settings. Now click advanced and increase your server timeout period to resolve.

Method 3

If you are trying to send or receive large and heavy emails on your Outlook account, the error 0x8004210A may pop up. This happens because when transferring heavy files the email account automatically locks until the task is complete, however, if it takes more time the next Send and Receive job starts while the first one is still not complete. In such an event, the email server then times out and shows you the error. Therefore to resolve, you will have to show patience. Simply wait for the large email to be sent or received before you start sending another email.

Method 4

If the antivirus installed on your system is the reason for the error pop up, then disable it for a while until the operation is complete. Then enable it once the task is performed successfully.

Method 5

Similarly, if the Firewall installed on your system is preventing Outlook from reaching your mail server, then simply disable the Firewall to resolve. Congratulations, you have just fixed 0x8004210A Error Code in Windows 10 all by yourself. If you would like to read more helpful articles and tips about various software and hardware visit errortools.com daily. Now that’s how you fix 0x8004210A Error Code in Windows 10 on a computer. On the other hand, if your computer is going through some system-related issues that have to get fixed, there is a one-click solution known as Restoro you could check out to resolve them. This program is a useful tool that could repair corrupted registries and optimize your PC’s overall performance. Aside from that, it also cleans out your computer for any junk or corrupted files that help you eliminate any unwanted files from your system. This is basically a solution that’s within your grasp with just a click. It’s easy to use as it is user-friendly. For a complete set of instructions in downloading and using it, refer to the steps below Perform a full system scan using Restoro. To do so, follow the instructions below.
      1. Download and install Restoro from the official site.
      2. Once the installation process is completed, run Restoro to perform a full system scan restoro application screen
      3. After the scan is completed click the “Start Repair” button. restoro application screen
Read More
How to Fix Run Time Error 429

Repair Run Time Error 429

Runtime Error 429 - What is it?

Error 429 is a type of runtime error. It sometimes occurs when you use the new operator or the CreateObject function in Microsoft Visual Basics to create an instance of a Microsoft Office application. The error code is displayed on your computer screen in the following format:

Runtime Error ‘429’: Active X component Can’t Create Object

Solution

Restoro box imageError Causes

The runtime error code 429 is triggered for several reasons. These include:
  • Mistake in the application
  • Incorrect system configuration
  • Missing ActiveX components in the application
  • Damaged Active X and class application components
  • DLL required by the application is damaged
  • Active X object was not registered properly
  • Corrupted applications
  • Corrupted Windows registry
  • Class ID issues
The runtime error code 429 not only causes you inconvenience as it hampers your ability to access programs but delays in repairing this error code can lead to serious PC damages such as system freezes, crashes, and failures.

Further Information and Manual Repair

To resolve the runtime error 429 on your PC, try the following recommended solutions:

1. Re-register the Application Causing the Error

Identify the Office application causing the error and re-register it. For instance, if Office Excel is the prime cause of the error message pop up, simply re-register it. Click on the start menu and then run. Then type this in “: C:/Program Files/Microsoft Office/Office/Excel.exe /regserver” and press OK. This will hopefully resolve the issue.

2. Go to The Microsoft Windows Script Update Page and Download Microsoft Updated Installation File

This will also assist you in repairing runtime error 429. Simply follow the installation wizard and update your MS Office Applications. The corrupted files and missing components in them would be easily corrected by the update file. However, if this doesn’t work, then this means that the cause is more crucial than you think. It is either related to damaged Active X objects or a corrupted Windows registry.

3. Repair the Active X objects and the Registry

To repair both the registry and the Active X objects in one go, it is advisable to download Restoro. This is an advanced, next-generation, highly and multi-functional PC repair tool. It is deployed with powerful and numerous utilities like a registry cleaner, Active X and class scanner, privacy error detector, and system stability module. The registry cleaner embedded in this repair tool enables you to wipe out obsolete, unnecessary, malicious, and invalid files and registry entries saved in the registry. It frees up your disk space, repairs damaged DLL files and the registry thus resolving the runtime error 429 on your system. The Active X object and Class feature identifies and scans Active X issues on your PC and resolves them right away. Besides this, with this error tool, you can also scan for viruses and also improve your PC performance.

Why Total System Care?

Total System Care is a one-stop solution to resolve all kinds of PC-related issues including the runtime error 429. To run it on your system, you don’t have to be a computer programmer. It is very easy to operate. It has easy navigation and a user-friendly interface. There is nothing complex about it. It is safe and efficient. It resolves all PC issues in a few seconds. You can run it in the background while performing other tasks on your system. Furthermore, it is compatible with all Windows versions. Click here to download Total System Care and resolve the Runtime Error 429 on your system today.
Read More
Fix Error Accessing the Registry in Windows
If you encounter an error saying, “error accessing the registry” when you try to merge a registry key on your Windows 10 computer, you’re not alone as some users also experienced the same problem. According to these users, they encounter the error after they’ve re-installed their Windows version and tried to open a .reg file. Based on the reports, this error could occur if the registry file does not have administrative privileges. Meaning to say, the program does not have the necessary permission to merge the .reg file. This is common with fresh installs as well as reinstalls. Moreover, this kind of issue could also occur due to system file corruption. Whichever the case may be, here are some troubleshooting tips you can check out to resolve the error.

Option 1 – Try to import the .reg file with admin privileges

As pointed out, the error may be due to a lack of admin privileges. It could be that the Registry Editor does not have admin privileges to merge the registry file. This is common with new Windows installations especially since the Registry Editor hasn’t been opened before. So you need to import the .reg file again and this time, with admin privileges.
  • Tap the Win + R keys to open the Run dialog box.
  • Then type “Regedit” in the field and tap the Ctrl + Shift + Enter keys to open the Registry Editor with admin privileges.
  • A User Account Control or UAC prompt will appear where you have to click Yes to proceed.
  • After opening the Registry Editor, go to File > Import using the ribbon bar at the top.
  • Next, use the import menu to go to the location of the file you were trying to merge. Once you’ve found it, click Open to merge it with your current registry. This should fix the problem. If not, refer to the next options below.

Option 2 – Try performing a System Restore

Running System Restore can also help you fix the error when accessing the Registry. You can do this option either by booting into Safe Mode or in System Restore. If you are already in the Advanced Startup Options, just directly select System Restore and proceed with the next steps. And if you have just booted your PC into Safe Mode, refer to the steps below.
  • Tap the Win + R keys to open the Run dialog box.
  • After that, type in “sysdm.cpl” in the field and tap Enter.
  • Next, go to the System Protection tab then click the System Restore button. This will open a new window where you have to select your preferred System Restore point.
  • After that, follow the on-screen instructions to finish the process and then restart your computer and check if the problem is fixed or not.
  • Once the next startup is complete, you have to merge or import the file again and see if the error is now fixed or not.

Option 3 – Try to perform repair install by creating a Windows 10 installation media

  • Click this link and then click the Download Tool Now button.
  • Next, click the “Use the tool to create installation media (USB flash drive, DVD, or ISO file)…” option and follow the next given instructions on the screen.
  • Now select the ISO file option in step 5.
  • After that, you should now have an ISO file.
  • Next, go to the location where you’ve downloaded the ISO file.
  • Then right-click on the Windows 10 ISO file and select the Open with option and then select File Explorer.
  • Now click on “setup.exe” and follow the next instructions that appear on the screen. When asked, you have to select either Nothing (clean install) or Keep personal files only option. Take note that you must not select the “Keep personal files, apps, and Windows settings since it doesn’t really work.

Option 4 – Try running the System File Checker Scan

As mentioned, the error when accessing the Registry might be caused by file corruption. And that’s where the SFC scan comes in. The SFC or System File Checker scan could detect and automatically repair damaged system files. SFC is a built-in command utility that helps in restoring corrupted files as well as missing files. It replaces bad and corrupted system files with good system files. To run the SFC command, follow the steps given below.
  • Tap Win + R to launch Run.
  • Type in cmd in the field and tap Enter.
  • After opening Command Prompt, type in sfc /scannow
The command will start a system scan which will take a few whiles before it finishes. Once it’s done, you could get the following results:
  1. Windows Resource Protection did not find any integrity violations.
  2. Windows Resource Protection found corrupt files and successfully repaired them.
  3. Windows Resource Protection found corrupt files but was unable to fix some of them.
  • Now restart your computer.
Read More
How to Fix 0x0000007B Error
[vc_row][vc_column][vc_column_text]

Troubleshoot 0x0000007B Error

What is 0x0000007B Error?

0x0000007B is the most common Windows stop error. The error is displayed on the blue-colored screen which is also called the blue screen of death. You may receive a 0x0000007B error message during Windows XP setup or while running the setup program. The message is often displayed as ‘a problem has been detected and Windows has been shut down to prevent damages’ or ‘inaccessible boot device error’.

Solution

Restoro box imageError Causes

The 0x0000007B error code is usually triggered by:
  • Poor Window XP installation
  • Registry corruption
  • Device Drivers Issues
  • Boot sector viruses

Further Information and Manual Repair

The 0x0000007B error makes your system vulnerable and reduces its speed significantly. And besides, you can’t run the programs smoothly on your PC either. Therefore, it’s advisable to fix the error right away. To fix and repair the 0x0000007B error successfully, you must first understand the cause of the error. Let’s take a look at all the solutions available to fix the 0x0000007B error.

Cause: Boot Sector Viruses

Solution: If your computer is infected with boot sector viruses, then you will first have to download a powerful antivirus. After downloading the antivirus program, run it on your PC to check your computer for viruses. Delete the viruses found and click the repair option. Sometimes even an antivirus program may fail to remove the virus and repair the system. In such cases, you must repartition and format your hard disk and also reinstall Windows XP.

Cause: Device Driver Issues

Solution: Device driver issues may occur if the boot controller is not properly configured or the driver is not up to date. If device driver configuration is the cause of the 0x0000007B error on your PC, then all you need to do is restart your PC, and while restarting press F8 to go to the advanced boot options. Now choose the ‘Last Known Good Configuration’ option. After selecting it, boot into windows and then perform a system restore. Now go to Device Manager and perform a driver rollback to reinstall the drivers. This will resolve the configuration issues. However, if you need an updated driver, all you need to do go on the web and download software to update the driver. It is advisable to download software from the manufacturer’s website in order to successfully update the device driver.

Cause: Poor Windows Installation

Solution: In this case, you will have to perform a Windows start-up repair. To do this: boot Windows XP from CD. Press ‘enter’ at setup Windows Screen when prompted. Then press R to repair Windows Installation. This procedure will not delete any user data and files. In fact, it will copy only the original Windows files over the bad or existing ones. Some of the best ways to avoid Ox0000007B blue screen error are
  • To scan for viruses every time you use your PC
  • Never open web pages, emails, or download content that you think looks suspicious because that’s probably a virus.
  • Always keep your computer updated.
[/vc_column_text][/vc_column][/vc_row]
Read More
Blu-ray player does not recognize the disc
So, you just made some popcorns, dimmed light, relaxed in from of the TV, pressed play on your application and Blu-ray drive can not read your movie. Your movie night failed sadly, but there is hope and in this article, we are going to explore and offer you solutions on what to do when something like this happens so you do not miss another movie night and some hard-earned relaxation. Please note that in this article we are assuming that you are using a Blu-ray player on your PC, so some of the solutions presented are meant only for this case. So the first thing that you are supposed to do is to check the disc itself. You can turn the disc around and visually check the disc for fingerprints and scratches which can be fatal for disc playing, alternatively, you can try to play the same disc on another device and if it fails there also it is not the disc, it is your drive. So if it is no issue with the disc let's see that seems to be a problem with the drive. The common thing that could stop disc reading are cables, check all connections and cables in the back of your device to be sure that everything is plugged in correctly and nicely. After checking cables if the issue persists lens cleaning is the next step. Over time lens from the Blu-ray, the device becomes dirty and dust accumulates on it, there are special cleaning discs on market made especially for this purpose, to clean the dirty lens of optical devices. If you have one put it in and clean your lens. After lens cleaning with a specialty disc, a good idea would be to use compressed air in a can to reduce the dust inside so no excess dust will accumulate quickly again on the lens itself.

So the device is cleaned and checked and still no disc playing?

Update firmware first. In order to accomplish this visit your device manufacturer's website and follow instructions there on how to upgrade firmware. If this did not helped also update or reinstall device drivers. Go to device manager and update drivers for your device by right-clicking on it and choosing update driver. If none of the things helped, go to command prompt as administrator and type in SFC /scannow, leave the process to finish, and reboot.
Read More
How to Fix Error 421

Repair Error 421

What is the Error 421?

Error 421 is a common SMTP (Simple Mail Transfer Protocol) Outlook error message. MS Outlook is one of the best and popular email applications widely used by PC Windows users for sending and receiving emails within and outside workplaces. It is most commonly used in offices by professionals for faster communication. This error may occur while sending and receiving emails on the server. The error 421 messages is displayed in either of the following formats:
“An unknown error has occurred: Server error 421” "Could not send your message. Error 421" 421 4.2.1 : (DYN:T1) http://postmaster.info.aol.com/errors/421dynt1.html 421 4.3.1 Out of disk space for temp file 421 4.3.2 All server ports are busy 421 Downstream server error 421 Fork failed 421 Greylisting enabled, please try later “An unknown error has occurred. Subject ‘Testing’, Account: ‘pop.charter.net’, Server: ‘mail.charter.net’, Protocol: SMTP, Server Response: ’421 Message rejected’, Port: 25, Secure(SSL): No, Server Error: 421, Error Number: 0x800CCC67”

Solution

Restoro box imageError Causes

Some common causes for this critical Outlook error are:
  • PST storage size exceeds 2GB file size
  • Improper ISP settings
  • Slow internet connection
  • PST file corruption
  • Trojan attack and viral infection
This is a critical Outlook error that should be resolved timely. If you delay, it may cause you a great deal of inconvenience. The error code 421 hampers your ability to access your email account, send and receive emails, add new contacts, view emails, calendar entries, and journals. In other words, it just brings your email activities to a standstill locking you out of the account.

Further Information and Manual Repair

To resolve this error code on your system, you don’t always have to hire a professional or call the network personnel to do the job. It may be a critical error but the good news is that it is quite easy to fix. Even if you don’t have technical expertise, you can still repair it. Here are some of the best methods to repair this issue on your system:

1. Change the Server Settings to its Maximum Limit

Try changing your server settings. Here set the inbound connections limit at the maximum limit.
  • To do this, open the Microsoft Exchange Server Administrator utility. The access path of this utility will vary depending on the installation procedure used to set up Exchange Server.
  • Once you open the MS Exchange Server Administrator utility, click the ‘Connections’ icon in the left side navigation pane. Now double click the internet mail service icon in the right side pane. As you click it, the Properties window will open.
  • Now click the ‘Connections’ tab in the Properties window and then click the ‘Advanced’ button. This will open the configuration window.
  • Here reset the number for ‘Maximum Number of Inbound Connections’ to a high number, its maximum limit. After changing the settings, close all open Exchange Server Administrator program windows to successfully complete the process.
After the process is complete, try accessing your Outlook email account again; if it works, then that’s great the error 421 is resolved. However, if it doesn’t, then the problem could be related to viral infection.

2. Download a PST Repair Tool

If the cause of the error is PST files corruption, then not only will you be locked out of your email account, you are also at risk of losing all the data stored in your email account. However, the best way to resolve the error and ensure full data recovery is to download a reliable PST repair tool. By running a PST repair tool on your system, you can resolve the error 421 right away. It recovers your data, repairs corrupt and damaged PST files.

3. Scan Your PC with Restoro.

If viral infection and Trojans are causing the error 421 to pop up on your system, then it is recommended to download and scan your PC with Restoro. This is an advanced, intuitive, and user-friendly PC fixer. It is not just an antivirus but also a system optimizer and a registry cleaner. Unlike common antivirus software that only removes viruses and simultaneously slows down the system’s speed, Restoro removes all types of malicious software on your PC including malware, spyware, Trojans, and viruses, and also boosts the speed of your PC significantly. It is safe, easy to operate, and a quick fixer. It is compatible with all Windows versions. Click here to download Restoro and resolve error 421 today!
Read More
How to Install SafeBytes Anti-Malware Software When Malware Blocks or Prevents the Process
All malware is detrimental and the magnitude of the damage will vary greatly depending on the type of infection. Some malware variants modify internet browser settings by adding a proxy server or modify the PC's DNS settings. When this happens, you'll be unable to visit certain or all the sites, and therefore not able to download or install the required security software to clear out the computer malware. If you’re reading this article, chances are, you’re stuck with a virus infection that is preventing you from downloading and/or installing the Safebytes Anti-Malware program on your computer. Refer to the instructions below to remove malware through alternate methods.

Method 1: Install Anti-Malware in Safe Mode with Networking

If the malware is set to load automatically when Microsoft Windows starts, entering safe mode may block the attempt. Since only the minimal applications and services start-up in safe mode, there are rarely any reasons for conflicts to happen. You will need to do the following to remove malware in Safe mode.
  • 1) Tap the F8 key continuously as soon as your computer boots, however, before the large Windows logo or black screen with white texts come up. This would invoke the Advanced Boot Options menu.
  • 2) Choose Safe Mode with Networking using arrow keys and press Enter.
  • 3) When you are into this mode, you will have access to the internet once again. Now, utilize your web browser normally and download Safebytes Anti-Malware.
  • 4) After installation, do a complete scan and allow the software to get rid of the threats it detects.

Method 2: Utilize An Alternate Internet Browser to Download Anti-Malware Software

Malicious program code may exploit vulnerabilities in a specific web browser and block access to all antivirus software sites. If you suspect that your Internet Explorer has been hijacked by computer malware or otherwise compromised by cybercriminals, the most effective plan of action is to switch to an alternate web browser such as Chrome, Firefox, or Safari to download your chosen security program - Safebytes Anti-Malware.

Download SafeBytes Anti-Malware for Malware Removal

Method 3: Install and Run Anti-Malware From a USB Drive

To effectively remove the malware, you might want to approach the problem of installing an antivirus software program on the affected computer from a different angle. Adopt these measures to employ a flash drive to fix your infected computer.
  • 1) Use another malware-free PC to download Safebytes Anti-Malware.
  • 2) Plug the thumb drive into the uninfected computer.
  • 3) Double click on the executable file to open the installation wizard.
  • 4) Choose the drive letter of the USB drive as the place when the wizard asks you exactly where you would like to install the anti-virus. Follow activation instructions.
  • 5) Now, transfer the thumb drive to the infected computer.
  • 6) Double-click the antivirus program EXE file on the USB flash drive.
  • 7) Click on the “Scan Now” button to start the malware scan.
If no other method of downloading and installing the antivirus software works, then you've no other option than to hit the last resort: a full Windows reinstallation, the only approach known to have a 100% rate of success at virus removal.
Read More
Patching Error Code 21

Fixing Error Code 21

Code 21 - What is it?

Code 21 is a Device Manager error code that appears when you try to use a hardware device attached to your computer and the Windows prohibits you from using it.

This is due to the Windows experiences problems loading the device driver. This error message is displayed in the following format:

“Windows is removing this device. (Code 21)”

Solution

driverfix boxError Causes

Error code 21 means that Windows is in the device removal process and the device has not been completely removed. It occurs when you set a device to be removed and then select the same device to run on your system.

Upon your instructions, Windows start to remove that device and when you on the other hand try to use/access the same device that you selected for removal, it kicks up Code 21.

Further Information and Manual Repair

If you are experiencing error code 21 on your PC, it is advisable to resolve it immediately.

Though this error will not damage your system, but will significantly lower the performance of your PC which is definitely something you don’t want especially if you work on your computer daily and use it to perform important time-sensitive errands.

To repair and resolve, try the methods given below:

Method 1 - Wait for a Few Seconds and Then Press F5

This is one of the best and easiest ways to resolve code 15 on your system. Wait for a few seconds, and then press the F5 key. This will update the Device Manager view and the error will most probably go away.

Method 2 - Restart Your PC

Sometimes error codes may pop up due to temporary glitches. To resolve such errors, a simple reboot of your PC is enough. Shut down Windows and then restart your system.

This is most likely to resolve Code 21. However, if the error still persists then this means the underlying problem for code 21 is deeper than you think. Try method 3 to resolve.

Method 3 - Install DriverFIX

As mentioned earlier, the error code 21 may occur if you have selected a device to remove and then you try to reuse it.

To resolve, you may have to install the device again and the driver for that the reinstalled device. To reinstall the driver without any hassle, simply download DriverFIX.

It is a smart, user-friendly, and intuitive software program designed to resolve driver problems. The program is embedded with intelligent device identification technology which:

  • Automatically detects all the appropriate system drivers
  • Matches them with the latest available versions
  • And then updates drivers according to their compatible versions on a regular basis

Furthermore, it enables accurate installation and ensures that your system is running at its optimal speed.

Other features that this program boasts are full backup and restoration, safe USB management, and ejection.

If nothing works, you can try the full backup and restoration feature and restore your PC to its previous state when it was functioning properly before the error occurred.

DriverFIX creates a backup of all your files and data hedging keeps you from disasters like data loss. It restores the system to the time when it was working properly.

Click here to download DriverFIX on your system and resolve error code 21 today.

Read More
System32 Folder Keeps Popping up at Startup
The System32 folder contains vital configuration and information that are essential to the operating system. It is located inside the “Windows” folder and it consists of important DLL files as well as executable files. You probably have noticed some errors that have the “System32” word in them but that does not necessarily mean that the System32 folder is the one that triggers them as these kinds of errors have only occurred when some important files are corrupted or missing. Some users recently reported that each time they start their computers, the System32 folder will automatically open up in the File Explorer. If you encounter the same problem, read on as this post will guide you on what to do to fix it. This kind of issue is most likely caused by service or application interference – it is possible that there is a third-party application installed in your computer or a Windows service that triggers the System32 to pop up during startup. It is also possible that this is a result of system modification. Thus, you need to identify the third-party program or restore your computer to its previous state.

Option 1 – Put your computer in a Clean Boot State

As pointed out, it is possible that some third-party program or service is the one that’s behind the problem. To isolate this possibility and to identify the culprit, you have to put your computer into a Clean Boot State. To do so, follow the steps below.
  • Log onto your PC as an administrator.
  • Type in MSConfig in the Start Search to open the System Configuration utility.
  • From there, go to the General tab and click “Selective startup”.
  • Clear the “Load Startup items” check box and make sure that the “Load System Services” and “Use Original boot configuration” options are checked.
  • Next, click the Services tab and select the “Hide All Microsoft Services” check box.
  • Click Disable all.
  • Click on Apply/OK and restart your PC. (This will put your PC into a Clean Boot State. And configure Windows to use the usual startup, just simply undo the changes.)
After putting your PC in a Clean Boot State, try creating a system restore point and see if the problem still occurs. Clean Boot troubleshooting is designed to help you isolate the problem. For you to execute a clean boot troubleshooting, you must do a couple of actions (the steps given above) and then restart your PC after every action. You might have to disable one third-party app after the other to really isolate the issue. And once you’ve narrowed down the problem, you can either disable the third-party app that’s causing the problem or remove it. Note that you must switch your PC back into the Normal Startup mode after you’re done troubleshooting the problem. Here’s how you can do it:
  • From the “Start” menu, go to System Configuration.
  • After that, switch to the General tab and click the option for “Normal Startup”.
  • Next, go to the Services tab and clear the checkbox for “Hide all Microsoft services”.
  • Then find and click “Enable all” and if prompted, you have to confirm.
  • Afterward, go to the Task Manager and enable all the Startup programs and confirm the action.
  • Restart your PC when prompted.

Option 2 – Perform System Restore

  • First, press the Win + R keys to open the Run dialog box.
  • After that, type in “sysdm.cpl” in the field and tap Enter.
  • Next, go to the System Protection tab then click the System Restore button. This will open a new window where you have to select your preferred System Restore point.
  • After that, follow the on-screen instructions to finish the process and then restart your computer and check if the problem is fixed or not.

Option 3 – Run System File Checker scan

You might also try running the System File Checker or SFC scan to fix the issue. System File Checker is a command utility built into your computer that helps restore corrupted files and missing files. Refer to the following steps to run it:
  • Hit the Win + R keys to launch Run.
  • Type in cmd in the field and tap Enter.
  • After opening Command Prompt, type in sfc /scannow
The command will start a system scan which will take a few whiles before it finishes. Once it’s done, you could get the following results:
  1. Windows Resource Protection did not find any integrity violations.
  2. Windows Resource Protection found corrupt files and successfully repaired them.
  3. Windows Resource Protection found corrupt files but was unable to fix some of them.
 Restart your computer and see if the System32 folder still pops up at startup or not.
Read More
Fix ATTEMPTED_WRITE_TO_READONLY_MEMORY
This post will help you fix the ATTEMPTED_WRITE_TO_READONLY_MEMORY Blue Screen issue with an error code 0x000000BE. If you encounter this kind of BSOD error when you try to boot into your Windows 10 computer, note that there are various possible causes for this error. It could be caused by an error with a device driver, hardware issues, or some error in the BIOS of your computer. The ATTEMPTED_WRITE_TO_READONLY_MEMORY Blue Screen error with a bug check of 0x000000BE appears when a driver tries to write a read-only memory segment. You’ll be able to see the name of the driver in the Blue Screen error if the driver that’s causing the error can be identified. You can also see it in memory at the location (PUNICODE_STRING) KiBugCheckDriver. In most cases, this kind of error is usually caused by various files such as iusb3hub.sys, ntkrnlpa exe or vhdmp.sys, ntoskrnl.exe, ntfs.sys, dxgkrnl.sys, tcpip.sys, atikmdag.sys, and win32k.sys. There are several possible fixes you can try to fix this issue but the main issue lies within booting into Windows since the error occurs as soon as you boot into your Windows 10 computer. Refer to each one of the options provided below to resolve the ATTEMPTED_WRITE_TO_READONLY_MEMORY Blue Screen error.

Option 1 – Try to rollback, update or disable drivers

The first thing you can do to fix the ATTEMPTED_WRITE_TO_READONLY_MEMORY Stop error is to roll back, or update, or disable device drivers. It is most likely that after you updated your Windows computer that your driver also needs a refresh. On the other hand, if you have just updated your device drivers then you need to roll back the drivers to their previous versions. Whichever applies to you, refer to the steps below.
  • Open the Devices Manager from the Win X Menu.
  • Then locate the device drivers and right-click on them to open the Properties.
  • After that, switch to the Driver tab and click on the Uninstall Device button.
  • Follow the screen option to completely uninstall it.
  • Finally, restart your computer. It will just reinstall the device drivers automatically.
Note: You can install a dedicated driver on your computer in case you have it or you could also look for it directly from the website of the manufacturer.

Option 2 – Try running the Memory Diagnostic Tool

The Memory Diagnostic tool in windows can help resolve the ATTEMPTED_WRITE_TO_READONLY_MEMORY Blue Screen error by checking and automatically fixing any memory-based issues. To run it, refer to these steps:
  • Tap the Win + R keys to open Run and type exe and hit Enter to open the Windows Memory Diagnostic Tool.
  • After that, it will give two options such as:
    • Restart now and check for problems (Recommended)
    • Check for problems the next time I start my computer
  • Once your computer has restarted, perform a basic scan or you could also go for the “Advanced” options such as “Test mix” or “Pass count”. Simply tap the F10 key to start the test.
Note: After you select your preferred option, your computer will restart and check for memory-based issues. If it finds any issues, it will automatically fix them and if there’s no issue found, then it’s most likely not a memory-based issue so you should try the other options given below.

Option 3 – Try to update the BIOS

Updating the BIOS can help you fix the ATTEMPTED_WRITE_TO_READONLY_MEMORY BSOD error but as you know, BIOS is a sensitive part of a computer. Even though it is a software component, the functioning of the hardware depends on it largely. Thus, you must be careful when modifying something in the BIOS. So if you don’t know much about it, it’s best if you skip on this option and try the other ones instead. However, if you are well-versed in navigating the BIOS, then follow the steps below.
  • Tap the Win + R keys to open the Run dialog box.
  • Next, type “msinfo32” in the field and press Enter to open System Information.
  • From there, you should find a search field on the bottom where you have to search for the BIOS version and then press Enter.
  • After that, you should see the developer and version of the BIOS installed on your PC.
  • Go to your manufacturer’s website and then download the latest version of BIOS on your computer.
  • If you are using a laptop, make sure that you keep it plugged in until you have updated the BIOS.
  • Now double click on the downloaded file and install the new BIOS version on your computer.
  • Now restart your computer to apply the changes made.

Option 4 – Try disabling BIOS Memory Options

Disabling the BIOS Memory options such as Caching and Shadowing can help you in fixing the ATTEMPTED_WRITE_TO_READONLY_MEMORY Stop error. All you have to do is enter the BIOS first and then use the Arrow and Enter keys to select your choices. And if you can’t seem to find it, look for specific instructions from your OEM or you could also look out for instructions from the manufacturer of your motherboard.

Option 5 – Try running the Blue Screen Troubleshooter

The Blue Screen troubleshooter is a built-in tool in Windows 10 that helps users in fixing BSOD errors like ATTEMPTED_WRITE_TO_READONLY_MEMORY. It can be found on the Settings Troubleshooters page. To use it, refer to these steps:
  • Tap the Win + I keys to open the Settings panel.
  • Then go to Update & Security > Troubleshoot.
  • From there, look for the option called “Blue Screen” on your right-hand side and then click the “Run the troubleshooter” button to run the Blue Screen Troubleshooter and then follow the next on-screen options. Note that you might have to boot your PC into Safe Mode.
Read More
1 2 3 162
Logo
Copyright © 2022, ErrorTools. All Rights Reserved
Trademarks: Microsoft Windows logos are registered trademarks of Microsoft. Disclaimer: ErrorTools.com is not affiliated with Microsoft, nor claim direct affiliation.
The information on this page is provided for information purposes only.
DMCA.com Protection Status