CHKDSK cannot open volume for direct access

One of the most useful built-in tools in Windows 10 is the Check Disk or CHKDSK utility. It is the one that maintains the integrity of the disk that’s connected to a computer which can be launched using the GUI or graphical user interface and using the command line.

There are a lot of things that warrant the running of this built-in utility and one of these things is the readability of the disk. Recently, a number of users reported that they encountered an error when they tried to run the CHKDSK utility – the error states, “Cannot open volume for direct access”. This kind of error in CHKDSK appears each time the command line is launched according to the affected users.

As per the users who encountered this issue, they receive the following error messages when they tried running a ChkDsk command:

“C:WINDOWSsystem32>chkdsk /f g:
Cannot open volume for direct access.

C:WINDOWSsystem32>chkdsk /f f:
The type of the file system is NTFS. Volume label is 0529357401.”

To fix the “Cannot open volume for direct user access” error, here are some suggestions that might help. Follow them carefully.

Option 1 – Try running the CHKDSK utility on Boot

On the other hand, you can also try to run the CHKDSK utility on Boot so you can fix the error and recover any damaged segments of the drive.

  • Open an elevated Command Prompt and enter this command: chkdsk /x /f /r
  • After that, you will a message that says, “Chkdsk cannot run because the volume is in use by another process. Would you like to schedule this volume to be checked the next time the system restarts? (Y/N)”
  • Type Y and tap Enter to schedule a CHKDSK scan once your computer reboots next time.

Option 2 – Try to run the Primary Hard Disk Self Test

The next thing you can do to fix the problem is to run the Primary Hard Disk Self Test by following the steps below.

  • You need to boot your computer into the BIOS first.
  • After that, go to the Diagnostics tab and select the “Primary Hard Disk Self Test” option. Note that it may be different depending on the motherboard with different manufacturers but they should imply the same thing.
  • Now, wait until the test is completed, and then boot your computer normally.

Option 3 – Try to check the hard drive’s health

The next thing you can do to resolve the issue is to check the health of your hard drive using the WMIC utility in the Windows Command Prompt. This utility will check if your hard drive has any problems which resulted in the “Cannot open volume for direct user access” error.

Option 4 – Try to disable various restrictions on your hard drive

You might also want to disable the various restrictions on your hard drive since it is possible that it is encrypted or restricted which explains why you are unable to perform any operations in it and throws the “Cannot open volume for direct user access” error instead. For instance, if you have BitLocker, you can try to disable it and see if it fixes the error or not.

Option 5 – Try to uninstall or disable the Drive Locking feature on your hard drive

You could also look for any Drive Locking feature on your hard drive that tricks disk changes as it might be the root cause of the problem. Thus, if you find one, you need to either uninstall or disable it and then execute a check disk command to resolve the problem.

Option 6 – Try to disable the application service

Disabling the application service can also help you fix the problem. How? Refer to these steps:

  • Tap the Win + R keys to launch the Run utility and type “services.msc” in the field and then hit Enter to open the Services Manager.
  • Next, scroll down among the list of services and look for the service related to the security software or disk checker software.
  • Once you find it, right-click on that service and select Properties.
  • After that, change its Startup type to Disabled and click on the OK and Apply buttons to save the changes made.
  • Now restart your computer and don’t forget to enable the service back once the disk check is completed.

Option 7 – Try to use Repair Volume via Windows PowerShell

You could also try to use the Repair Volume using Windows PowerShell. All you have to do is open PowerShell as admin and type the “repair-volume -drive letter <DRIVE LETTER>” command and then tap Enter to run Repair Volume. This should resolve the error.

If you like to learn and find out more about various Windows errors, and how to repair them go to our vast archive or use search to find articles that will explain and help you in solving your issue.
However, if you prefer to do things fast and with automatization then we are proposing to use an automated solution for your issues. The application that we are recommending is Advanced System Repair Pro
Advanced System Repair utilizes multiple tools all in one to give you a quick, simple, reliable, and very thorough diagnosis of your PC. It brings you all the tools you need in one program to clean, fix, protect, optimize and boost your PC!
1-Click Maintenance
All the tools to make it simple and easy! It's like having a professional technician at the click of a mouse.

Junk Cleaner
Keeping your computer free from unnecessary clutter also helps make your computer last longer. Like any other machine, if you keep it clean and take care of it, it will serve you better for longer!

Optimize background apps
Optimize applications background activity with the built-in Application Optimizer feature.

Disk Defrag
With a simple 1-click, Advanced System Repair speeds up your PC by assembling fragmented files on your machine and organizing them more efficiently.

Malware Removal
Finds and removes all types of harmful malware including trojans, worms, bots, adware, spyware, PUPs, and more!

Privacy Cleaner
The all-in-one privacy suite to Clean Your Tracks & Protect Your Privacy! Make your computer safe, secure, and more efficient!

System Tweak/Optimizer
ASR will analyze your complete system and settings to adjust your PC to function at its maximum performance.

Registry Cleaner
Over time, as you install and uninstall applications, the registry can become cluttered with old entries and broken settings which can result in program crashes, and annoying messages and slow the computer down.
Visit our Advanced System Repair Pro Download page to inform yourself about all the benefits of this software and get a free trial copy of it.
advanced system repair pro

Advanced System Repair Pro

One-click automated PC repair solution
ASR logo
With Advanced System Repair Pro you can easily
Replace damaged files
Restore performance
Free disk space
Remove Malware
Protects WEB browser
Remove Viruses
Stop PC freezing
DOWNLOAD
Privacy Policy | Terms of Use | Uinstall
Advanced System Repair Pro is compatible with all versions of Microsoft Windows including Windows 11

Share this article:

You might also like

APC_INDEX_MISMATCH  - What is it and how to fix it?
The error 0x0000001 also known as APC_INDEX_MISMATCH is one of the fatal errors that users encounter upon starting their computers. This error appears when there is a sequence mismatch in the driver or system file when it is disabling or re-enabling Asynchronous procedure calls. The mismatch happens maybe because of a virus or malware attack, not shutting down your computer properly and incomplete installation of the system files. There are many ways to fix this error. The easiest way is to download a repair utility program. The use of these programs perfectly fits those that are not so technical. All you have to do is download the program and install it on your computer. As soon as it is installed, the program will now scan and diagnose your computer for any errors. After it identifies the errors, it will then repair your PC through either manual or automatic tools. To those who are techie and enjoy the manual resolution, you may take advantage of Microsoft’s analyze debug extension which tells you the cause of the error. After determining the cause then you can now start fixing the error. Check if Hardware is functioning properly. If the cause is due to a hardware malfunction, you will have to make sure that all the pieces you are using are working. All the wires should be attached to their respective ports. Not only that, but you also must make sure that before installing the hardware, it is compatible with the Windows version that is installed into your computer. Use Compatible software. If the problem was caused by software or a driver, you can uninstall and reinstall it. Always make it a rule that whenever you install a program or new software to your computer, make sure it is compatible with your operating system and never skip a step during the installation process. You also have to see to it that the program you are installing does not contain any viruses, malware, or spyware that can be harmful to your computer. Update your Drivers Regularly. In most cases though, the cause of the APC_INDEX_MISMATCH error are outdated device drivers. To resolve this, you will have to go to your Control Panel then look for Device Manager. As soon as you are in the Device Manager window, you can now see the different devices running on your computer. You right-click on each device and check the Properties.  In the Properties window, click on the Driver Tab and look for the date when it was last updated. You can then go to the manufacturer’s website and compare the dates. For a new Windows operating system, you no longer have to go to the manufacturer's website though. All you have to do is click on Update Driver and it will automatically search for updates online. Use a Genuine Operating System. There are also cases where the 0x0000001 error won’t allow you to access your computer. In this case, we have to suspect that the problem could be in your Operating system. To resolve this, you can reinstall your Operating System or update your current operating system. Only use a genuine licensed Windows Operating System because this will not only protect you from Malware and Viruses but it allows you to get all the recent update available from Microsoft. Update your Windows 10 regularly by going to Settings > Windows Update > Check for Updates. You may also turn on the Automatic Update by going to the Advanced options is found on the Windows Update Page. You can always get help online but it really helps to know the basics and determining the root cause of the error.
Read More
Schedule restart update on Windows 11
windows 11 schedule update
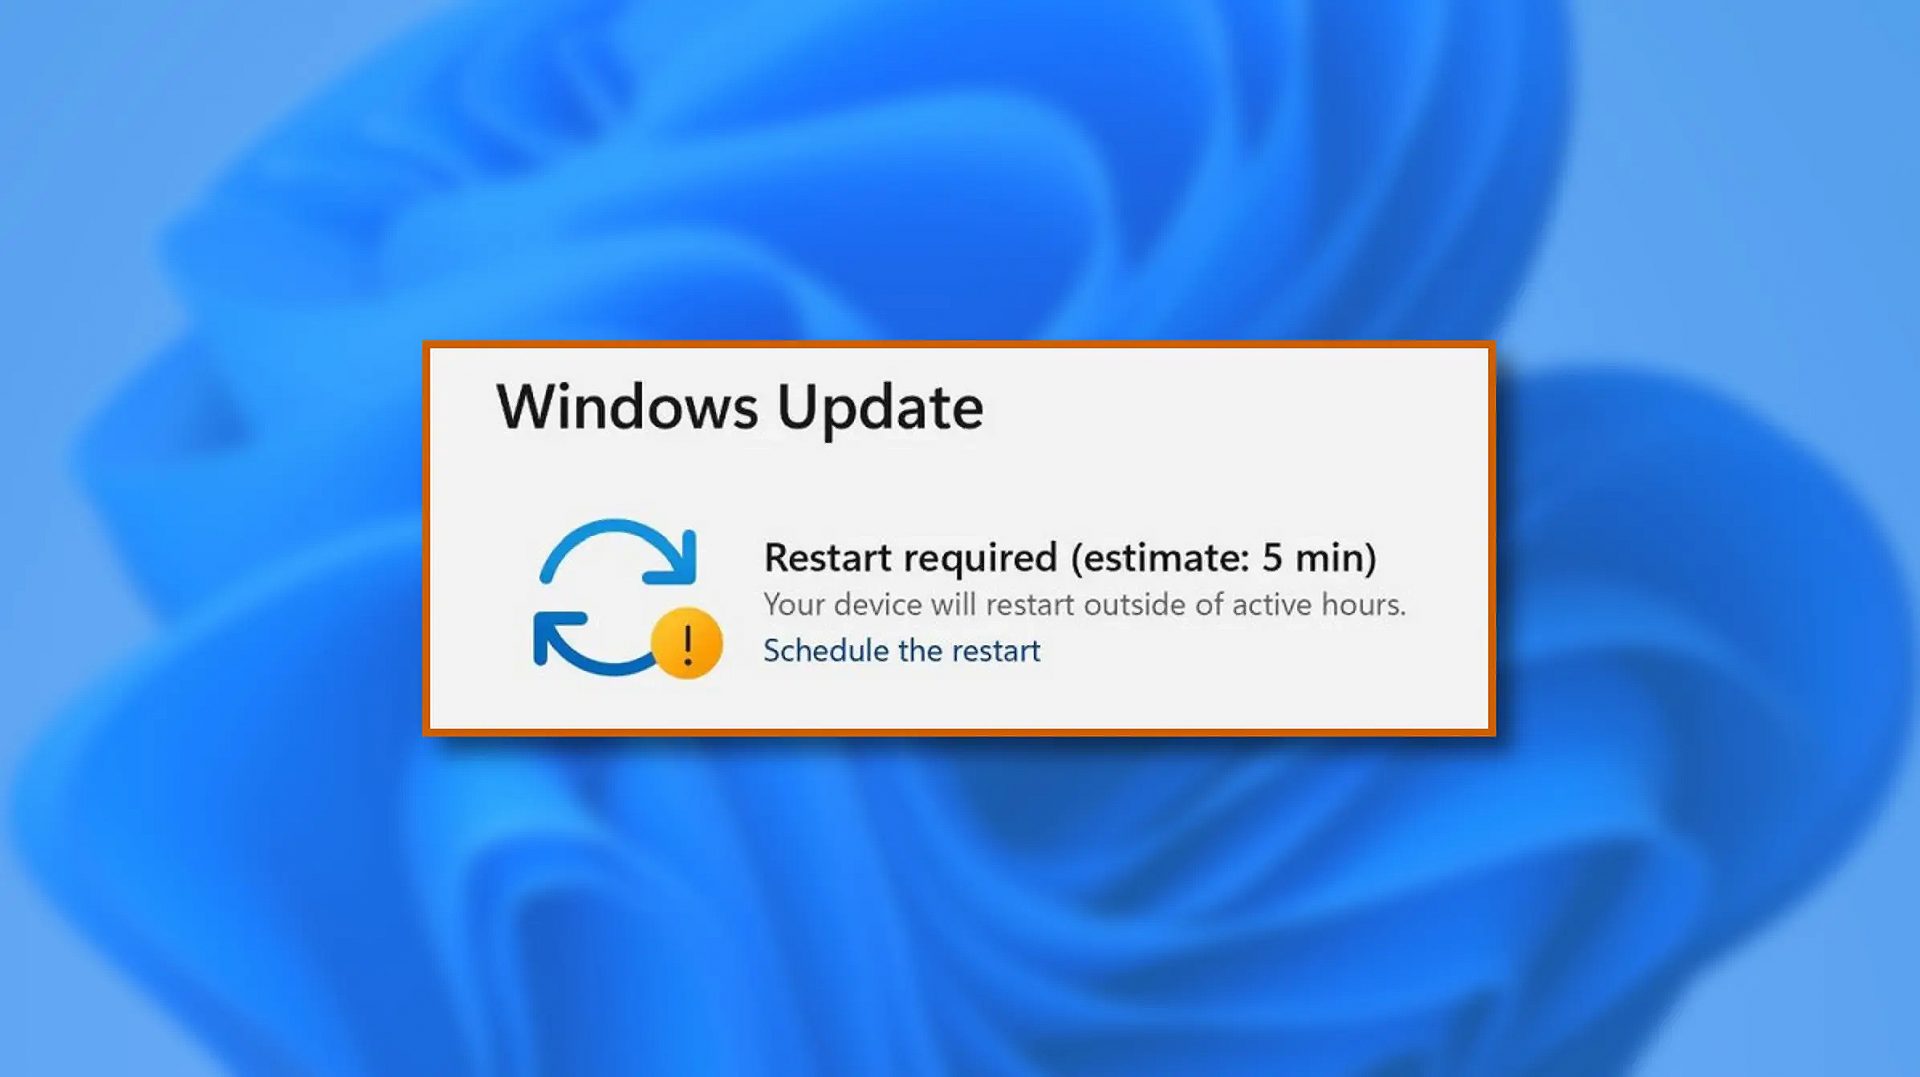
When Windows 11 update is available but you do not wish to restart right away because you are in the middle of using a computer, you can schedule a restart for up to 7 days. It is very easy and we will show you how to do it.
  1. Press ⊞ WINDOWS + I to open settings
  2. Click on Windows Update
  3. At the top, under the Restart required to click on Schedule the Restart
  4. Click the switch under Schedule a Time to turn it ON
  5. Use the Pick a Time and Pick a Day menu to set time and day when you want to update
  6. Go back to one screen and visually confirm that the date is set
  7. Close the settings
The scheduled restart will be confirmed in a message on the Windows Update page.
Read More
World of Warcraft lost connection to server
World of Warcraft had been released on November 23, 2004, and even today it is the most successful MMORPG ever made. Some say that it was the right timing, others say it was Blizzard's history and its fans, it is even spoken that marketing team has responsibility for WOW's success. Whatever the reason may be, the fact remains that WOW is a really fun game to play. In this article we will cover the annoying issue of World of Warcraft's lost connection to the game server and how can you fix it. Please be aware that before you try any fixes go to the official World of Warcraft website and check to see if the server maintenance is not underway. If this is the case, you will have to wait for servers to come back online after the maintenance. Keep reading and try provided solutions as they are presented to fix this issue and continue gaming.
Read More
Increasing Virtual Memory
[vc_row][vc_column][vc_column_text]

How to Raise Virtual Memory

Hello and welcome to our Increasing Virtual Memory tutorial. Before trying to raise the quantity of virtual memory in your pc system, it's important to get a comprehension of its goal and use. This leads to the constant use of high-performing tasks in addition to keeping multitasking capability. The downside to this process is the fact that relatively, the HDD accesses information slower than a RAM module. Taking into consideration its use in a computer program and how virtual memory works, there isn't any amount of virtual memory allocation. The quantity of virtual memory to be defined for a unique computer program would be determined by the kinds of programs that are started and the quantity of multitasking done. The Microsoft Windows operating system yet does supply a recommended baseline memory based on the number of RAM installed and storage space of the HDD. Virtual memory allocation really indicates the upsurge in how big the paging file is. This file provides the pc program with all the essential instructions on the best way to act once all the installed RAM has been allotted to the running applications. In both Microsoft Windows XP (all variants) and Windows Vista environments, the method to control the paging file size is basically the same. To increase the quantity of virtual memory:
  • Click on the Start menu and choose the "Control Panel" alternative. When the Control Panel window is started, choose the "Operation and Maintenance" class.
  • Click on the "System" choice to create the Device Properties Window.
  • Click the "Advanced" tab and choose the "Settings" button under Operation. In the Operation alternative window, select the "Change" button under the Virtual Memory class.
  • Choose the hard disk where the Windows operating system is now installed. That can be the same place where in fact the paging file will be saved.
  • Test on the checkbox for the "Custom Size" to enable you to determine the number of virtual memory you need to use for your device.
  • Click the "OK" button thrice to shut all of the windows. Click the Start button and restart your machine to enable the upsurge in the number of virtual memory to be finished.
In establishing the number of virtual memory, you'll have to place a maximum value along with an initial. It is suggested that both values be equivalent in order to achieve the finest performance on your pc system.[/vc_column_text][/vc_column][/vc_row]
Read More
DiskPart has encountered an error
As you know, Diskpart is a useful utility that helps in managing the disks in a computer. It is a very useful tool that even when the GUI-based disk management tools in Windows 10 operating system fails, the Diskpart utility still tends to work. However, it also does not mean that this utility does not experience issues as it still does, from time to time. One of the issues you may encounter when using the Diskpart utility is when you encounter an error message that says, “DiskPart has encountered an error, Access is denied”. This kind of error in the Diskpart utility could be caused by a number of factors. For one, it could be that the Write-Protection is enabled on the drive where the operating is being performed or it could also be that the Command Prompt terminal does not have administrator-level permissions to carry out the command. Thus, you can try to run the Diskpart utility again but this time with admin privileges or you could also remote the Write-Protection from the concerned drive. For more details, refer to the instructions given below.

Option 1 – Try running Command Prompt with Administrator-level permissions

  • In the Start Search, type “command prompt” and from the search results that appear, look for Command Prompt.
  • Once you found it, right-click on it and select the “Run as administrator” option.
  • After that, try to execute the Diskpart operation once again and see if you still encounter the same error.

Option 2 – Try to remove the Write Protection from the drive

As mentioned, removing the Write-Protection on the concerned drive could also help you fix the problem and there are two ways to get rid of the write protection – you can either use the Diskpart utility or the Registry Editor. How? Refer to the following steps.

Via Diskpart utility:

  • Open Command Prompt with admin privileges and then type the “diskpart” command and tap Enter to execute it.
  • Next, type “list disk” and tap Enter to get the list of all the Disk connects or all the partitions that are formed on those disks.
  • After that, you need to choose one command depending on the list of commands you entered. Type “select disk #” and tap Enter to select the disk or partition you want to select.
  • Then type “attribute disk clear readonly” and tap Enter to Disable the Write Protection on the selected disk or partition.

Via Registry Editor:

  • Tap the Win + R keys to open the Run utility and type “Regedit” in the field and then tap Enter to open the Registry Editor.
  • Next, navigate to the following registry key:
ComputerHKEY_LOCAL_MACHINESYSTEMCurrentControlSetControlStorageDevicePolicies
  • After that, look for the DWORD named “WriteProtect” and double click on it, and then set its Value Data to “0”.
  • Now restart your computer and see if the problem is now fixed or not.
Read More
How to Fix Error 0x80070057

Repair Error 0x80070057

Error Code 0x80070057 - What is it?

Error 0x80070057 is a typical Windows 7 error code. It may occur when you try to back up files by using Windows Backup on Windows 7 and the backup fails.  The error message is often displayed as the following:

“An internal error has occurred: The parameter is incorrect: (0x80070057)”

Besides this, you may also experience this error message when you format a hard disk drive to install Windows 7.

Solution

Restoro box imageError Causes

The error 0x8007005 occurs due to multiple reasons. However, the most common causes for this error code include:
  • The partition that is reserved for the system is damaged
  • Misconfigured registry keys
  • Misconfigured decimal symbol settings

Further Information and Manual Repair

Here are some of the best and easy DIY methods to resolve the error 0x80070057 on your PC.

Solution 1: Change the Decimal Symbol Setting

As mentioned above the error 0x80070057 sometimes can be triggered by misconfigured decimal symbol settings. Therefore, try changing the settings to fix the problem. The error is likely to occur if the decimal symbol is not set to ‘.’ (dot). This is common in languages and locales other than English such as German. Here’s what you need to do to change the decimal symbol setting:
  • First, open the Control Panel, click the clock, then language, and then region.
  • Now click the formats tab and go to the additional settings menu.
  • Here you will find the decimal symbol field, now type "." (dot) and then click OK twice.
  • After that, you must restart your PC to activate the changes.

Solution 2: Create a New Partition and Reinstall Windows 7

If the error 0x80070057 is linked to partition damage, then this method is the best way to resolve it. Here’s what you need to do:
  • Insert the Windows 7 DVD and start the installation.
  • Select your language preference to install. Here you will see a screen of the Microsoft License Agreement. Click on the I accept option to proceed with the installation process.
Then click next.
  • Choose a custom advance option and select the Disk O partition 1 option.
  • Once selected, click delete. When you do this you will be prompted if you want to confirm the deletion, click OK to continue.
  • Now repeat the same however now select Disk O partition 2.
Delete this partition as well. Now click New to create a new partition. Here define the disk size and then click apply. Please note, the size of the default value is the maximum size of the disk. After doing so, select disk 0 partition 2 and then click the formatting tab. Once the formatting is complete, click next to continue Now you will be able to complete the installation of Windows 7 on your PC without any problem.

Solution 3: Add a Registry Key Value

If the underlying cause of the error 0x80070057 is a registry issue, then it is serious as such issues can put your PC at serious risks like system failure, crash, and data loss. To resolve this error and add a registry key value here’s what you need to do: Go to the start menu and type Regedit.exe in the search bar and then press enter. Locate and click the following registry sub-key: HKEY_LOCAL_MACHINESOFTWAREPoliciesMicrosoftSystem. Once you locate it, now go to the edit menu and point to new, and then click DWORD Value. After that, type CopyFileBufferedSynchronousIo and press enter again. Right-click now on the text you just typed and then click Modify. In the Value data box, type 1 and then click ok and exit the registry editor. This will fix the error on a temporary basis but not permanently. However, a long-term solution is to clean and repair the registry.

Solution 4: Restoro

The registry gets cluttered with unnecessary and redundant files like junk files, cookies, internet history, and bad registry keys. If these are not removed timely, they can damage the registry and corrupt DLL files. It often leads to disk fragmentation (disk partition) too. To remove these files immediately, clean and restore the registry and repair the corrupt files, it is advisable to download Restoro.

Why Restoro

  • This is an advanced and highly functional Registry Cleaner. It is deployed with a cutting-edge and intuitive algorithm that scans your entire PC to detect all registry issues in seconds. It cleans the cluttered disk and restores the registry back to normal.
  • It is safe, bug-free, and efficient. This software is easy to use and compatible with all Windows versions.
  • In addition to this, it is also deployed with several other powerful utilities like an antivirus that detects all malicious software and removes them right away. It also functions as a system optimizer and boosts the speed of your PC significantly.
Click here to download Restoro and resolve error 0x80070057 now!
Read More
How to Fix Error Code 0x80072EE2 in Windows 10

Error Code 0x80072EE2 – What is it?

Windows 10 error code 0x80072EE2 usually occurs as a result of a disruption during the upgrade process when users attempt to upgrade their operating system using Windows Update. The disruption may be caused by a loss of Internet connection. Error code 0x80072EE2 may also occur due to problems related to one’s firewall. Common symptoms of this error code include the following:

  • Upgrade process fails to complete
  • A message box pops up highlighting the presence of error code 0x80072EE2

Solution

Restoro box imageError Causes

Upgrade error codes like error code 0x80072EE2 usually occur when disruptions or problems related to system files, or third-party apps prevent Windows Update from completing an upgrade. In the case of error code 0x80072EE2, the most likely cause is a bad Internet connection.

Further Information and Manual Repair

Windows 10 error codes are numerous and so are the solutions to fixing these problems. In most cases, Windows users have access to several manual repair solutions depending on the error code present on their device. These manual repair methods are usually easy to implement, with the exception of a few solutions that require technical knowledge and skills. In such cases, you may need to consider using an effective automated tool or you may contact a Windows repair technician to assist you.

In terms of error code 0x80072EE2, however, no technical skills are required. Manual repair solutions for this error code involve checking and troubleshoot network problems if your connection was disrupted. Also, you may need to check your firewall settings and disable it temporarily to verify whether or not your firewall is preventing you from accessing the upgrade. Further details are provided below.

Method One: Verify Internet Connection

If for whatever reason you lost Internet connection while attempting to upgrade your operating system via Windows Update, your upgrade will time out and error code 0x80072EE2 in Windows 10 may occur. For this reason, it is important for you to check your connection once you notice the presence of error code 0x80072EE2 on your device.

There are many ways you can verify your Internet connection but one of the simplest ways is to first open your preferred Internet browser and type the web address of a site you normally visit. Once you are able to access the website, you will know for sure that your connection is not an issue. Simply restart your PC and reattempt the upgrade.

If you are unable to complete the upgrade process, however, this simply means that there is another issue causing error code 0x80072EE2 to occur. Proceed to the next manual repair method. This method may also apply if you were unable to connect to the Internet.

Method Two: Troubleshoot Network Problems

Though you may be able to access a website or open your Internet browser, there may be other issues affecting your network that are causing the error code to occur. To verify for certain whether or not the issue causing error code 0x80072EE2 in Windows 10 is related to your network, troubleshoot your network using the Network Troubleshooter tool found on your PC.

  • Step one: Type Network Troubleshooter in the search box near the Start button
  • Step two: Select Identify and repair network problems
  • Step three: Wait until the troubleshooter has verified and fixed problems related to the network
  • Step four: Restart PC

Once the issue has been resolved, it is time to verify if the error code is fixed. Open Windows Update then select the option which enables you to access the latest upgrades to your machine. Wait to see if the error code reoccurs or if you can now access the upgrade to your operating system. If the error code reoccurs, move to the next manual repair method.

Method Three: Disable Firewall Settings

Another issue that may be causing an error code to occur is your firewall. To verify if your firewall is preventing you from accessing the upgrade, disable your firewall. If you are using third-party security software, simply open the security app and check its firewall settings. Select disable or turn off the firewall.

Restart your computer, then open Windows Update to reattempt to upgrade your device. If this proves successful, you will be able to access the upgrade. Error code 0x80072EE2 in Windows 10 will no longer be present.

Method Four: Download an Automated Tool

If you wish to always have at your disposal a utility tool to fix these Windows 10 and other related issues when they do arise, download and install a powerful automated tool.

Read More
Fix Error 30053-4 or 30053-39, language pack
As you know, the Office Language Packs need to be installed right after installing Office. It also has to be on the correct version of Office so if any of these conditions are not met, you will most likely get error codes 30053-4 or 30053-39 when you install a language pack in Microsoft Office. If you are currently facing this error, read on as this post will help you fix the problem. Here’s the full context of the error message:
“Something went wrong, Sorry, installation cannot continue because no compatible office products are detected.”
When you have to work on two different languages, that’s where the language packs come in handy. You might have to work on one language but when it comes to proofreading or help, you need another language. Note that some language accessory packs offer partial localization which is why some parts of the Office might show the default language. If you are using Office 365 or Office 2019, 2016, 2013, or 2010, you need to go to the language accessory pack page from office.com and select your language. Once you see the download link, click on it to start downloading the pack. It includes the display in the chosen language, proofing tools for the selected language, as well as the Help in the selected language. Once the installation is complete, follow each one of the given options below to configure the language accessory pack properly.

Option 1 – Select Editing and Proofing language

  • You need to open any Office program and navigate to File > Options > Language.
  • From there, you need to make sure that the language you want to use is in the list under the Choose Editing Languages section.
  • After that, you can add or remove the language that Office uses for editing and proofing tools.

Option 2 – Configure the Display and Help languages

In this option, you can change the default display and help languages for all the Office applications so whatever you choose will be used for all the buttons, menus, and support of all the programs. After you select the language, restart all the Office applications to apply the changes made successfully. On the other hand, if you are using Office volume license versions, note that only an administrator account can install this if you are using the Volume License version of Microsoft Office 2016. You have to download the ISO image of the language packs, language interface packs, and the proofing tools from the VLSC or Volume Licensing Service Center. This process can be quite complicated so you might have to go to the docs.microsoft.com page to be guided accordingly. After you installed everything correctly, the error code 30053-4 or 30053-39 should now be fixed.
Read More
How to remove Boost My PC From Your System

Boost My PC is a program developed by 1.0.2.6. During setup, a scheduled task is added to Windows Task Scheduler in order to launch the program at various scheduled times (the schedule varies depending on the version). When installed, it will add a context menu handler to the Windows shell in order to provide quick access to the program.

Boost My PC presents itself as a legit PC speed-up utility, it scans your computer for problems and displays errors that need to be fixed. Upon accepting to fix these alleged errors, you are asked for a Payment in order to activate this product for a few months.

Many anti-virus scanners have marked this application as a Potentially Unwanted Program, and while Boost My PC is not so harmful on its own, it comes bundled with other Potentially Unwanted Programs that might harm your computer.

About Potentially Unwanted Applications

If you’ve ever downloaded and installed a software package via the internet (shareware, freeware, etc,), odds are high you’ve unwittingly installed unwanted programs on your computer. Potentially Unwanted Programs (PUP), also referred to as Potentially Unwanted Applications (PUA), are programs that you never wanted in the first place and sometimes come bundled with freeware software. Once installed, most of these applications can be hard to remove and become more of a pain rather than a benefit. It’s clear by the name – unwanted applications – but did not really constitute “malware” in the traditional sense. Much like malware, PUPs create problems when downloaded and installed on your machine, but what makes a PUP different is that you grant consent to download it – though the truth is vastly different – the software installation bundle actually tricks you into agreeing to the installation. Regardless of whether it is considered malware or otherwise, PUPs are almost always detrimental to the user as they could bring on adware, spyware, keystroke logging, along other dangerous “crapware” features on your computer.

Exactly how do unwanted programs look like?

Potentially Unwanted Programs appear in different forms and varieties, however, most times, these are typically adware programs that show annoying pop-up adverts and advertisements on web pages you drop by. PUPs that come as browser add-ons and toolbars are widely identifiable. These toolbars change your homepage and your search engine in the installed web browser, track your web activities, influence your search results with redirects and sponsored links, and eventually slow down your web browser and diminish your browsing experience. PUPs lie inside the gray part of the software spectrum. They may carry keyloggers, dialers, along with other software built right into them that might monitor you or send out your sensitive information to 3rd parties. Even if the PUPs aren’t inherently malicious, these programs still do practically nothing good on your personal computer – they will take valuable resources, slow your PC, weaken your device’s security, making your PC more susceptible to malware.

Tips on protecting yourself from PUPs

• Read the EULA carefully. Look for clauses that say that you ought to accept advertising and pop-ups or bundled programs from the company. • Choose the “custom” install whenever downloading a program. In particular, look closely at those tiny boxes that have been checked as default, where you might ‘agree’ to receive ads or install software bundlers. • Use an ad blocker/pop-up blocker; Deploy anti-malware products such as Safebytes Anti-malware. These types of applications will establish a wall between the computer and cybercriminals. • Avoid installing freeware software you will not make use of. Avoid installing browser extensions and applications you aren’t knowledgeable about. • Only download software from the original providers’ sites. Stay away from download portals because they use their own download manager to pack additional programs together with the initial download.

What you can do if Malware Prevents You From Downloading Anything?

Malware could cause all sorts of damage after they invade your system, from stealing your private details to deleting files on your computer system. Certain malware types alter web browser settings by including a proxy server or change the computer’s DNS configuration settings. In these cases, you’ll be unable to visit certain or all websites, and therefore unable to download or install the required security software to remove the infection. So what you should do if malicious software prevents you from downloading or installing Anti-Malware? Even though this kind of problem can be difficult to get around, there are a few steps you can take.

Download the application in Safe Mode with Networking

If any virus is set to run immediately when Windows starts, stepping into safe mode could block this attempt. Just the minimum required applications and services are loaded whenever you start your PC in Safe Mode. To start your Windows XP, Vista, or 7 computers in Safe Mode with Networking, follow the instructions below. 1) Press the F8 key continuously as soon as your system boots, but before the large Windows logo shows up. This should bring up the Advanced Boot Options menu. 2) Select Safe Mode with Networking with arrow keys and hit ENTER. 3) Once you get into this mode, you should have online access once again. Now, use your internet browser normally and navigate to https://safebytes.com/products/anti-malware/ to download and install Safebytes Anti-Malware. 4) Immediately after installation, run a full scan and let the software remove the threats it discovers.

Switch over to a different web browser

Some malware only targets specific web browsers. If this sounds like your situation, employ another web browser as it may circumvent the computer virus. If you’re not able to download the security software using Internet Explorer, this means the virus may be targeting IE’s vulnerabilities. Here, you must switch to another internet browser like Chrome or Firefox to download the Safebytes program.

Install and run anti-virus from a USB drive

Another option is to store and operate an anti-malware program completely from a Flash drive. Try these simple steps to clear up your infected computer by using portable anti-malware. 1) Download the anti-malware on a virus-free computer. 2) Plug the Flash drive into the clean computer. 3) Run the setup program by double-clicking the executable file of the downloaded software, with a .exe file extension. 4) Select the drive letter of the flash drive as the place when the wizard asks you where you want to install the anti-malware. Do as instructed on the computer screen to finish off the installation process. 5) Transfer the pen drive from the uninfected computer to the infected computer. 6) Double-click the EXE file to open the Safebytes tool right from the thumb drive. 7) Click on “Scan Now” to run a scan on the affected computer for viruses.

Ensure the Safety of Your PC by Installing SafeBytes Anti-Malware

If you’re looking to buy anti-malware for your computer, there are numerous brands and packages for you to consider. A few are very good ones, some are ok types, and some are merely fake anti-malware programs that could damage your personal computer themselves! You have to be very careful not to pick the wrong product, especially if you purchase a paid application. On the list of strongly recommended software programs is SafeBytes Anti-Malware. SafeBytes carries a very good history of top-quality service, and clients appear to be happy with it. SafeBytes anti-malware is a trustworthy tool that not only secures your system completely but is also very easy to use for people of all ability levels. Through its cutting-edge technology, this software protects your personal computer against infections caused by various kinds of malware and other threats, including spyware, adware, computer viruses, worms, trojan horses, keyloggers, potentially unwanted programs (PUPs), and ransomware.

There are plenty of wonderful features you’ll get with this particular security product. These are some of the highlighted features included in the software.

World-class AntiMalware Protection: Built on a highly acclaimed anti-virus engine, this malware removal application has the capacity to detect and get rid of several stubborn malware threats like browser hijackers, PUPs, and ransomware that other common antivirus programs will miss. Live Protection: SafeBytes gives you round-the-clock protection for your PC restricting malware attacks in real-time. It will regularly monitor your pc for hacker activity and also provides users with advanced firewall protection. Safe Web Browsing: SafeBytes provides an instant safety rating about the web pages you’re going to visit, automatically blocking risky sites and making sure that you are certain of your online safety while browsing the world wide web. Low CPU Usage: This program is lightweight and can run silently in the background, and that does not impact your computer efficiency. 24/7 Customer Support: SafeBytes provides 24/7 technical support, automatic maintenance, and updates for the best user experience. To sum it up, SafeBytes has created a meaningful anti-malware solution that is aimed to protect your computer against various malware. Malware problems can become a thing of the past once you put this software program to use. For top protection and the best value for your money, you can’t get better than SafeBytes Anti-Malware.

Technical Details and Manual Removal (Advanced Users)

If you don’t wish to use an automated tool and like to eliminate Boost My PC manually, you could possibly do so by going to the Add/Remove Programs menu in the Control Panel and deleting the offending program; in cases of web browser add-ons, you could remove it by going to the browsers Add-on/Extension manager. You will definitely also want to reset your internet browser. If you opt to manually delete the system files and Windows registry entries, make use of the following list to ensure that you know precisely what files to remove before executing any actions. Please remember that this is for skilled users only and may be challenging, with wrong file removal leading to additional PC errors. In addition, certain malware is capable of replicating itself or preventing deletion. It is highly recommended that you carry out the removal procedure in Safe Mode.
Files: %PROGRAMFILES(x86)%\Boost My PC %PROGRAMFILES%\Boost My PC Registry: [HKEY_CURRENT_USER\Software\Microsoft\Windows\CurrentVersion\Run] [HKEY_LOCAL_MACHINE\SOFTWARE\Microsoft\Windows\CurrentVersion\Run] [HKEY_LOCAL_MACHINE\SOFTWARE\Wow6432Node\Microsoft\Windows\CurrentVersion\Run] delete the display Name: BoostMyPC
Read More
Fix Print Spooler Service Error 1068
There is one service in the Windows operating system that is responsible for managing all the print jobs as well as handles the interaction with the printer. This service is known as the Print Spooler service. However, if it stops running, then you won’t be able to print anything on your computer. In such a case, you can try to restart the Print Spooler service, and to do that, you have to open the Windows Services Manager and look for the Print Spooler Service. Once you found it, right-click on it and select Restart. If it isn’t running, select Start and if the Service starts working again, then good but if not and you got an error message instead that says, “Windows could not start the Print Spooler service on Local Computer, Error 1068, The dependency service or group failed to start”, then read on as this post will give you a couple of suggestions you can try to resolve the issue. The reason why you could not start the service is most likely because the Print Spooler service is dependent on other services which might not be properly running. If the following services are not running then it’s no wonder why you’re getting the error.
  • HTTP Service
  • Remote Procedure Control (RPC) Service
You might not see the RPC service which means that the Print Spooler Service does not recognize its dependency on the RPC service. In such a case, you have to manually configure the dependency by following the options given below.

Option 1 – Try configuring the dependency via CMD

The first thing you have to do is to configure the dependency using CMD. Refer to the steps below to do so:
  • Open an elevated Command Prompt.
  • Then type in “sc config spooler depend= RPCSS” and hit Enter.
  • After the command has been executed, restart your computer and then check if it fixed the problem. If not, proceed to the next given option below.

Option 2 – Fix dependency via the Registry Editor

You can also resolve dependency using the Registry Editor. How? Refer to these steps:
  • Tap the Win + R keys to open the Run dialog box.
  • Then type “Regedit” in the field and hit Enter to open the Registry Editor.
  • After that, navigate to this key: HKEY_LOCAL_MACHINESYSTEMCurrentControlSetServicesSpooler
  • Next, right-click on the “DependOnService” entry located on the right pane and select Modify.
  • Now change its value data to “RPCSS” and click OK to save the changes made and then exit the Registry Editor.
  • Reboot your computer and see if the issue is resolved.

Option 3 – Try running the Printer Troubleshooter

Another option you can check out is the Printer Troubleshooter. This built-in troubleshooter in Windows 10 can help you fix most print issues. It checks if you have the latest printer drivers and then tries to fix and update them automatically. Aside from that, it also checks if you have connectivity issues or if the Print Spooler and the required Services are running fine. To run it, follow the steps below.
  • Tap the Win + R keys to open the Run dialog box.
  • Next, type “exe /id PrinterDiagnostic” in the field and click OK or hit Enter to open the Printer Troubleshooter.
  • Then click the Next button and follow the next on-screen instructions to fix the issue with the printer.
Read More
1 2 3 162
Logo
Copyright © 2022, ErrorTools. All Rights Reserved
Trademarks: Microsoft Windows logos are registered trademarks of Microsoft. Disclaimer: ErrorTools.com is not affiliated with Microsoft, nor claim direct affiliation.
The information on this page is provided for information purposes only.
DMCA.com Protection Status