TitleBar, Minimize, Maximize and Close missing

In case you don’t know, the Title bar comes with the Maximize, Minimize, as well as the Close button. However, there are instances when you might notice that the Title bar, Maximize, Minimize and Close buttons are missing in the File Explorer. This kind of problem might be due to some glitch in the computer, or it could also be caused by some built-in tool or an installed program in your computer. Moreover, there are also other factors that you have to consider such as corruption in the system files as well as errors in the user profile which is generated on a domain network, and so on.

There are several suggestions you can check out to fix the problem. You can try to boot your computer in a Clean Boot State to see if a third-party program is the root cause of the problem. You can also try to run built-in tools like System File Checker and the DISM tool. You could also get the video buffer emptied, reset or reinstall the program, or recreate the User Profile.

Option 1 – Put your computer in a Clean Boot State

As pointed out, it is possible that some third-party program or service is the one that’s behind the problem. To isolate this possibility and to identify the culprit, you have to put your computer into a Clean Boot State. To do so, follow the steps below.

  • Log onto your PC as administrator.
  • Type in MSConfig in the Start Search to open the System Configuration utility.
  • From there, go to the General tab and click “Selective startup”.
  • Clear the “Load Startup items” check box and make sure that the “Load System Services” and “Use Original boot configuration” options are checked.
  • Next, click the Services tab and select the “Hide All Microsoft Services” check box.
  • Click Disable all.
  • Click on Apply/OK and restart your PC. (This will put your PC into a Clean Boot State. And configure Windows to use the usual startup, just simply undo the changes.)
  • You need to disable one third-party app after the other to really isolate the issue. And once you’ve narrowed down the problem, you can either disable the third-party app that’s causing the problem or remove it.

Option 2 – Run System File Checker scan

You might also try running the System File Checker or SFC scan to fix the issue. System File Checker is a command utility built into your computer that helps restore corrupted files and missing files. Refer to the following steps to run it:

  • Hit the Win + R keys to launch Run.
  • Type in cmd in the field and tap Enter.
  • After opening Command Prompt, type in sfc /scannow

The command will start a system scan which will take a few whiles before it finishes. Once it’s done, you could get the following results:

  1. Windows Resource Protection did not find any integrity violations.
  2. Windows Resource Protection found corrupt files and successfully repaired them.
  3. Windows Resource Protection found corrupt files but was unable to fix some of them.
  • Restart your computer and see if the System32 folder still pops up at startup or not.

Option 3 – Try running the DISM tool

You can try running the Deployment Imaging and Servicing Management or DISM tool to fix the Windows Upgrade problem. Using this built-in tool, you have various options such as the “/ScanHealth”, “/CheckHealth”, and “/RestoreHealth”.

  • Open the Command Prompt with admin privileges.
  • Then type in the following commands and make sure to hit Enter right after you type each one of them:
    • Dism /Online /Cleanup-Image /CheckHealth
    • Dism /Online /Cleanup-Image /ScanHealth
    • exe /Online /Cleanup-image /Restorehealth
  • Do not close the window if the process takes a while as it will probably take a few minutes to finish.

Option 4 – Try to empty the Vide buffer

These kinds of problems could also be due to bad data in the Video Buffer. Thus, you can try to empty the Video buffer to resolve the problem. All you have to do is tap the Shift + Ctrl + Win key + B keys on your keyboard. After that, leave your computer idle for about 10 seconds until you notice it blink once. Now you try using your computer as usual and see if the glitch is now fixed or not.

Option 5 – Try to reset or reinstall the program

Another thing you can do to fix the issue is to reset or reinstall the program where you encounter the problem. Chances are, you are running the application in the Full-screen mode but you can exit it by simply tapping the Esc or F11 key. However, if nothing changed, then consider resetting or reinstalling the program. Just go to the Windows 10 Settings app and navigate to Apps > Apps & Features. From there, look for the entry of the application you’re having problems with and select it and then click on the Advanced options. After that, click on the Reset button under the Reset section.

Option 6 – Try recreating the User Profile

You might also want to try recreating the User Profile on your computer since some errors in the creation of a User Profile can result in problems like this one. Thus, you have to try deleting the User Profile and then recreate it.

If you like to learn and find out more about various Windows errors, and how to repair them go to our vast archive or use search to find articles that will explain and help you in solving your issue.
However, if you prefer to do things fast and with automatization then we are proposing to use an automated solution for your issues. The application that we are recommending is Advanced System Repair Pro
Advanced System Repair utilizes multiple tools all in one to give you a quick, simple, reliable, and very thorough diagnosis of your PC. It brings you all the tools you need in one program to clean, fix, protect, optimize and boost your PC!
1-Click Maintenance
All the tools to make it simple and easy! It's like having a professional technician at the click of a mouse.

Junk Cleaner
Keeping your computer free from unnecessary clutter also helps make your computer last longer. Like any other machine, if you keep it clean and take care of it, it will serve you better for longer!

Optimize background apps
Optimize applications background activity with the built-in Application Optimizer feature.

Disk Defrag
With a simple 1-click, Advanced System Repair speeds up your PC by assembling fragmented files on your machine and organizing them more efficiently.

Malware Removal
Finds and removes all types of harmful malware including trojans, worms, bots, adware, spyware, PUPs, and more!

Privacy Cleaner
The all-in-one privacy suite to Clean Your Tracks & Protect Your Privacy! Make your computer safe, secure, and more efficient!

System Tweak/Optimizer
ASR will analyze your complete system and settings to adjust your PC to function at its maximum performance.

Registry Cleaner
Over time, as you install and uninstall applications, the registry can become cluttered with old entries and broken settings which can result in program crashes, and annoying messages and slow the computer down.
Visit our Advanced System Repair Pro Download page to inform yourself about all the benefits of this software and get a free trial copy of it.
advanced system repair pro

Advanced System Repair Pro

One-click automated PC repair solution
ASR logo
With Advanced System Repair Pro you can easily
Replace damaged files
Restore performance
Free disk space
Remove Malware
Protects WEB browser
Remove Viruses
Stop PC freezing
DOWNLOAD
Privacy Policy | Terms of Use | Uinstall
Advanced System Repair Pro is compatible with all versions of Microsoft Windows including Windows 11

Share this article:

You might also like

See if your Data is safe in Facebook breach
It is no secret that a few days ago Facebook has been breach and tons of user accounts have been compromised. These kinds of things are very unpleasant experiences for both users and the company itself. User trust lowers significantly in the company and it can greatly increase the chances of users migrating to another platform. This just shows how much a hacker or security breach can produce damage to the business. Sadly we can not offer you guidance or assistance in recovering your stolen data nor can we provide you with removing your data from the hands of the attacker. What we can do is to provide you with information has your data been stolen. Threat actor released the personal information for 533,313,128 Facebook users on a hacking forum, including mobile numbers, name, gender, location, relationship status, occupation, date of birth, and email addresses. This data was originally sold in private sales after being collected in 2019 using a bug in the 'Add Friend' feature on Facebook. Facebook had closed this vulnerability soon after it was discovered, but threat actors continued to circulate the data until it was finally released practically for free. Since then, Troy Hunt has added the leaked data to his Have I Been Pwned data breach notification service to help users determine if a Facebook member's data was exposed in the leak. Go to the site and enter your email address to check and see if your data has been compromised.
Read More
What is Windows Terminal and should you use it
Windows Terminal
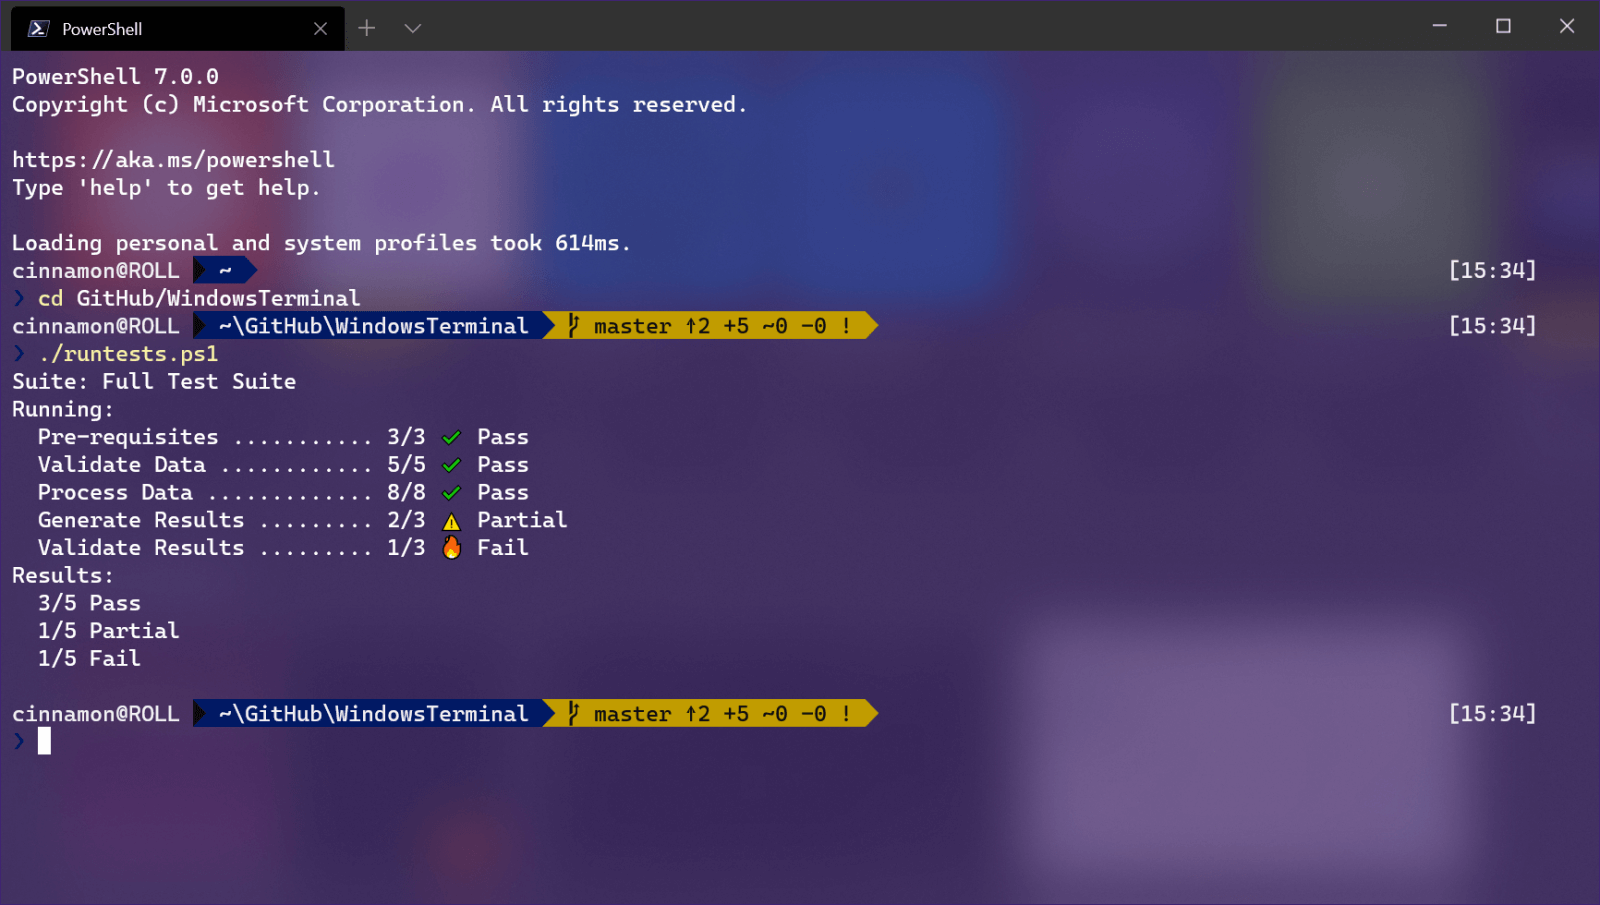
Windows Terminal is a new free Microsoft terminal sort of application. When you open either Power Shell or Command Prompt in Windows they will be opened in different windows, and if you want several of each you will have several windows of each on your screen. Windows Terminal fixes this by opening each of the Instances of Command Prompt and Power Shell as separate tabs inside itself making it much easier to manage multiple instances of named applications. You can also run both Power Shell and Command prompt tabs in the same Windows Terminal. Luckily running command prompt and power shell in different tabs is not the only thing you can do. Windows Terminal lets you choose your own theme, it has emoji support, GPU rendering, split panes, and many more customizable options. Windows 11 will have Terminal as the default command-line environment for opening Power Shell or Command prompt, even Windows Subsystem for Linux (WSL)

Setting Windows Terminal as the default application

If I was successful I have managed to show you that Windows Terminal is something that you should use even if you do not or cannot upgrade to Windows 11. You can use it inside Windows 10 also. First thing is to download and install it. You can get Windows Terminal from the official Microsoft website here: Windows Terminal page After download and installation are completed, open the Terminal app and select the down arrow menu, click Settings. Alternatively, you can use CTRL + + shortcut. Inside Settings by default Default Terminal application would be set to Windows Console Host Click on the Default Terminal application to bring a drop-down menu and choose Windows Terminal from the list. Now by default once opened Windows Terminal will use Power Shell as the default profile, however, you can change this by clicking on the drop-down for the default profile where you can choose between Command Prompt, Power Shell, Windows Power Shell, or Azure Cloud Shell. Pick one that you prefer, click on Save and it will be opened as default on the next run.
Read More
Bluetooth A2dp Source not working Code 52
A number of users have recently reported that they were going through an issue with their Bluetooth devices on their Windows 10 computers. This issue involves an error saying,
“Windows cannot verify the digital signature for the drivers required for this device. A recent hardware or software change might have installed a file that is signed incorrectly or damaged, or that might be malicious software from an unknown source. (Code 52).”
If you are one of the users who encountered this kind of error on your Windows 10 computer, read on as this post will guide you on how you can fix this Bluetooth error. According to security experts, the key to fixing this error is to sign the Bluetooth A2DP files with the built-in tool, System File Checker. Apart from that, you could also run the Hardware and Devices troubleshooter or perform System Restore, as well as update or reinstall the concerned drivers. For more details, refer to each one of the options provided below.

Option 1 – Try to check Bluetooth-related services

In Services, there is a Bluetooth-related service that helps users use Bluetooth so if that particular service suddenly malfunctions for some reason, you will most likely get the “Windows was unable to connect with your Bluetooth network device” error message. That’s why you need to check Services and to do that, refer to these steps:
  • Tap Win + R keys to open Run prompt and type in “services.msc” then tap Enter to open Services.
  • Next, look for the Bluetooth Support Service and double click on it to open Properties.
  • From there, verify if the Service status is showing “Running” or “Stopped”. If it’s the latter, you have to click the Start button.
  • Lastly, check if the Startup type is set to Manual.

Option 2 – Try running System File Checker or SFC scan

You could also run System File Checker or SFC scan to fix the Bluetooth error. It is a built-in command utility that helps in restoring corrupted files as well as missing files. It replaces bad and corrupted system files with good system files. To run the SFC command, follow the steps given below.
  • Tap Win + R to launch Run.
  • Type in cmd in the field and tap Enter.
  • After opening Command Prompt, type in sfc /scannow
The command will start a system scan which will take a few whiles before it finishes. Once it’s done, you could get the following results:
  1. Windows Resource Protection did not find any integrity violations.
  2. Windows Resource Protection found corrupt files and successfully repaired them.
  3. Windows Resource Protection found corrupt files but was unable to fix some of them.
  • Reboot your PC.

Option 3 – Try to perform System Restore

You might also want to perform System Restore as the error might be caused by system modifications. Thus, to undo them, you can use System Restore. Run it using these steps:
  • First, tap the Win + R keys to open the Run dialog box.
  • After that, type in “sysdm.cpl” in the field and tap Enter.
  • Next, go to the System Protection tab then click the System Restore button. This will open a new window where you have to select your preferred System Restore point.
  • After that, follow the on-screen instructions to finish the process and then restart your computer and check if the problem is fixed or not.

Option 4 – Try running the Hardware and Devices Troubleshooter

The next thing you can do to fix the problem is to run the Hardware and Devices troubleshooter. Although it won’t make much of a difference, there’s still a possibility that it could automatically fix the Bluetooth error. To use it, refer to these steps:
  • The first thing you need to do is click on Start and then on the gear-like icon to pull up the window for Settings.
  • After opening Settings, look for the Update and Security option and select it.
  • From there, go to the Troubleshoot option located on the left-hand side of the list.
  • Next, select Hardware and Devices from the list and open the Troubleshooter and run it. Once it is doing its job, wait for it to complete the process and then restart the system.
  • After the system restarts, check if the problem’s now fixed. If not, refer to the next option given below.

Option 5 – Try to reinstall or update the Bluetooth driver

The issue might have something to do with the Bluetooth drivers. It could be that it is outdated and needs to be updated or that you recently updated it and since then you have trouble removing the Bluetooth devices and so to fix the issue, you can update, roll back or uninstall the Bluetooth drivers. How? Follow the steps below.
  • Tap the Win + X keys to open the Device Manager.
  • Next, look for the Bluetooth device and right-click on it.
  • Select the option “Update driver”.
  • After that, a new popup window will appear. In there, select the option, “Search automatically for updated driver software”.
Note: Checking the update may take a few minutes so you’ll have to wait until it finishes. If it is able to find an update, you must install it. And if you want to reinstall the Bluetooth driver, just select the “Uninstall driver” option and follow the next on-screen instructions that follow.
Read More
DigiSmirkz Removal Tutorial For Windows

DigiSmirkz is a Browser Extension by Mindspark Inc. This extension offers users the ability to enrich their emails or chats with tons of new emojis. When installed it will replace your default new tab page with a variety of search.myway.com, hosted at hp.myway.com. This search engine uses information about you, collected by the extension to display unwanted targeted ads by Mindspark Partners and Ad Networks.

While surfing the internet with this extension installed and enabled, you will see additional pop-up ads, inserted ads into search results and sponsored content on web pages.

Several anti-virus applications have marked this extension as a Browser Hijacker and is therefore recommended to be removed from the Computer.

About Browser Hijackers

Browser hijackers (sometimes referred to as hijackware) are a kind of malicious software that modifies web browser settings without the computer owner’s knowledge or consent. These hijacks appear to be rising at an alarming rate worldwide, and it could be really nefarious and often harmful too. Browser hijacker malware is created for a variety of reasons. Typically, hijackers will force hits to sites of their choice either to get more traffic generating higher ad earnings or to obtain a commission for every user visiting there. Although it may seem harmless, these tools were created by vicious people who always look to take advantage of you, so that they can easily make money from your naive and distraction. They not only ruin your internet browsers, but browser hijackers can even modify the computer registry, making your PC vulnerable to other types of attacks.

Major signs that an internet browser has been hijacked

There are many symptoms that indicate your browser is highjacked: 1. your homepage is reset to some unfamiliar webpage 2. your internet browser is constantly being redirected to porn websites 3. the default web engine and/or the default browser settings are modified 4. unsolicited new toolbars are added to your web browser 5. your internet browser will display constant pop-up windows 6. your web browser starts running slowly or presents frequent errors 7. you can’t navigate to particular webpages, like security software-related websites.

How they get into your PC

Browser hijackers can enter a PC by some means or other, for example via file sharing, downloads, and e-mail too. They may also come from any BHO, extension, add-on, toolbar or plug-in with malicious purpose. A browser hijacker could also be installed as a part of freeware, shareware, demoware and fake programs. Some of the most popular hijackers are DigiSmirkz, Conduit Search, Babylon Toolbar, Sweet Page, OneWebSearch, and CoolWebSearch. Browser hijackers can interrupt the user’s web surfing experience severely, track the websites frequented by users and steal private information, cause difficulty in connecting to the web, and eventually create stability issues, causing applications and system to crash.

How you can fix a browser hijack

Certain hijackers could be removed simply by uninstalling the related freeware or add-ons through the Add or Remove Programs in the Windows control panel. But, many browser hijackers are hard to get rid of manually. Irrespective of how much you attempt to get rid of it, it may keep returning over and over again. You should think of undertaking manual repairs only if you are a tech-savvy person, as there are possible risks associated with tinkering around with the computer registry and HOSTS file. Industry experts always suggest users remove any malicious software including browser hijacker by using an automatic malware removal tool, which is better, safer, and faster than the manual removal method. To remove any type of browser hijacker from your system, you can download this particular top-notch malware removal software – SafeBytes Anti-Malware.

Virus Blocking Internet And All Antivirus Software? Do This!

Practically all malware is bad and the degree of the damage will vary greatly with regards to the type of infection. Certain malware types alter internet browser settings by adding a proxy server or change the PC’s DNS configurations. When this happens, you will be unable to visit some or all sites, and thus not able to download or install the necessary security software to clear out the computer virus. If you are reading this article, chances are you’re stuck with a malware infection which is preventing you to download and/or install Safebytes Anti-Malware program on your system. Follow the instructions below to get rid of malware by alternate ways.

Make use of Safe Mode to resolve the issue

If any malware is set to load immediately when Windows starts, stepping into safe mode may block this attempt. Since only the bare minimum programs and services start-up in Safe Mode, there are rarely any reasons for issues to happen. Below are the steps you should follow to take out viruses in Safemode. 1) Tap the F8 key repeatedly as soon as your system boots, however, before the big Windows logo or black screen with white texts appears. This should bring up the Advanced Boot Options menu. 2) Use the arrow keys to choose Safe Mode with Networking and press ENTER. 3) When you are into this mode, you will have an internet connection once again. Now, get the malware removal software you want by utilizing the browser. To install the software, follow the guidelines in the installation wizard. 4) Once the software is installed, let the scan run to eliminate viruses and other malware automatically.

Switch to an alternative browser

Malicious program code might exploit vulnerabilities in a specific internet browser and block access to all anti-virus software sites. The most effective solution to avoid this problem is to choose a web browser that is renowned for their security measures. Firefox has built-in Malware and Phishing Protection to keep you safe online.

Run anti-virus from a pen drive

Another solution is to create a portable anti-malware program on your USB stick. Adopt these measures to run the anti-malware on the affected computer. 1) Use another virus-free PC to download Safebytes Anti-Malware. 2) Mount the USB drive on the same system. 3) Run the setup program by double-clicking the executable file of the downloaded software, which has an .exe file format. 4) Select USB flash drive as the location when the wizard asks you where you want to install the application. Follow the on-screen instructions to complete the installation process. 5) Transfer the USB drive from the clean PC to the infected computer. 6) Run the Safebytes Anti-malware directly from the USB drive by double-clicking the icon. 7) Click the “Scan” button to run a full system scan and remove viruses automatically.

Protect Your Computer Against Malware and Viruses With SafeBytes Anti-Malware

If you are looking to purchase anti-malware for your computer system, there are lots of brands and packages for you to consider. Some of them are great while some are scamware applications that pretend as legitimate anti-malware software waiting around to wreak havoc on the computer. You need to select a company that creates industry-best anti-malware and it has got a reputation as reliable. On the list of highly recommended software programs is SafeBytes Anti-Malware. SafeBytes has a good track record of excellent service, and clients are very happy with it. SafeBytes anti-malware is a trustworthy software that not only secures your computer system completely but is also very user-friendly for people of all ability levels. Through its cutting-edge technology, this software protects your PC against infections brought on by various kinds of malware and similar internet threats, including spyware, adware, trojans, worms, computer viruses, keyloggers, potentially unwanted program (PUPs), and ransomware.

There are many wonderful features you will get with this particular security product. These are some of the highlighted features included in the product.

World-class AntiMalware Protection: This deep-cleaning antimalware application goes much deeper than most antivirus tools to clean out your personal computer. Its critically acclaimed virus engine detects and disables hard to remove malware that conceals deep inside your personal computer. Live Protection: SafeBytes provides real-time active checking and protection against all of known viruses and malware. This utility will always monitor your PC for any suspicious activity and updates itself regularly to keep current with the latest threats. Web Protection: Safebytes allots all sites a unique safety rating that helps you to have an idea of whether the webpage you are going to visit is safe to view or known to be a phishing site. Faster Scanning: SafeBytes’s very fast malware scanning engine reduces scan times and extends battery life. Simultaneously, it will effectively detect and remove infected files or any online threat. Low CPU and RAM Usage: SafeBytes gives you total protection from internet threats at a fraction of the CPU load because of its advanced detection engine and algorithms. Fantastic Tech Support Team: You can obtain absolutely free 24/7 technical assistance from their computer experts on any product queries or PC security issues. SafeBytes will keep your computer safe from latest malware threats automatically with hardly any input needed from you again. You now may realize that this particular tool does more than just scan and eliminate threats from your PC. You will get the very best all-around protection for the money you spend on SafeBytes Anti-Malware subscription, there is no doubt about it.

Technical Details and Manual Removal (Advanced Users)

If you want to do the removal of DigiSmirkz manually rather than employing an automated software tool, you can follow these simple steps: Go to the Windows Control Panel, click on the “Add or Remove Programs” and there, select the offending program to remove. In case of suspicious versions of web browser extensions, you can actually remove it through your browser’s extension manager. You may also want to reset your home page and search engine providers, and also clear your web browser cache and cookies. In order to ensure complete removal, manually examine your hard drive and registry for all of the following and remove or reset the values accordingly. Please note that only advanced computer users should try to manually edit the registry because removing any single critical system file leads to a serious problem or perhaps a computer crash. Moreover, certain malware keeps replicating which makes it tough to remove. Doing this malware-removal process in Safe Mode is suggested.
Files: %UserProfile%\Local Settings\Application Data\Google\Chrome\User Data\Default\Extensions\fhibenoomgnppdhbjaephephkddnokof %LOCALAPPDATA%\DigiSmirkzTooltab Registry: HKEY_CURRENT_USER\SOFTWARE\DigiSmirkz HKEY_CURRENT_USER\SOFTWARE\Wow6432Node\DigiSmirkz HKEY_CURRENT_USER\SOFTWARE\Microsoft\Internet Explorer\LowRegistry\DOMStorage\digismirkz.dl.myway.com HKEY_LOCAL_MACHINE\Software\Microsoft\Internet Explorer\DOMStorage\digismirkz.dl.myway.com HKEY_LOCAL_MACHINE\Software\[APPLICATION]\Microsoft\Windows\CurrentVersion\Uninstall..Uninstaller DigiSmirkzTooltab Uninstall Internet Explorer
Read More
How to Fix Windows 10 Error Code 0xC004E003

How to Fix Windows 10 Error Code 0xC004E003

What is Error Code 0xC004E003?

Error code 0xC004E003 almost always appears when there are damaged files in the Windows operating system. These files could be corrupt for a number of reasons and are usually a serious danger to the life of the computer system. These file errors may be caused by a number of things. Incomplete installation setup, incorrect deletion of hardware or utilities, or an unfinished file erasure. The trigger might also be in the event that the computer system is contaminated with a virus or adware or spyware, or even by the improper shut down of the computer. Any of these scenarios have the possibility to result in the removal or corruption of data of the Windows system data files.

The data system files that are damaged will give linked data and archives that are missing or wrongly linked. These are needed for the proper functioning of the software. This can also happen when or after installing third-party software that might have changed the system files. If it is suspected that a program installation will need to be stopped, it is best to let it run through the setup and then delete it later. While it installs, it is altering program files, and likely rearranging them. Stopping this in the middle can scramble files associated with the program and files vital to the usage of the computer.

Solution

Restoro box imageError Causes

This error will pop up after installing third-party software that has changed the system files. These system files are necessary to finish the activation process. A restore point will be necessary if it is ultimately determined that a system restore is necessary, to bring the computer back to the state it was in previous to the failed installation.

  • Error code “0xC004E003” appears and does not allow the system to continue the install.
  • The computer will not allow any further access or installation of the program.
  • The computer may crash.
  • The third-party program will not have installed completely or successfully.
  • The system will not start up correctly.
  • Personal files are corrupt or missing.

Further Information and Manual Repair

There are several steps that can be taken when the error code 0xC004E003 appears. It is helpful to know that this can occur from trying to install third party software. Going forward, do not attempt to install third-party software that is not trusted, and does not attempt to abruptly stop the third-party software from installing. This may cause the program to corrupt the files or delete important files. Recovering from this error can be easy if there is a recent restore point already backed up in the recovery portion of the system's files.

  • Method One

Run an error scan. The problem should be resolved after rebooting the computer once these steps have been completed.

  1. Download and save an error code fix utility.
  2. Setup the program and then click the Scan button.
  3. Click the Repair Errors button when the diagnostic has been completed successfully.
  4. Reboot the computer.
  • Method Two

Best when utilized by an expert.

  1. Start the system up and sign in as the admin.
  2. Click on Get Started, then select Programs, Accessories, Tools, and then System Restore.
  3. On the next screen, click on Restore my PC to an Earlier Period, and then click Next.
  4. Select the most recent system restore date within the drop-down menu of “select restore point”.
  5. Click Next.
  6. Click Next on the confirmation window.
  7. Reboot the system after the system has finished restoring.
  • Method Three

Another option for restoring. This method can be used by a novice.

  1. Right-click on the Start button, then select Control Panel.
  2. Look for the Control Panel for Recovery.
  3. Select Recovery, then Open System Restore, then Next.
  4. Choose the restore point right before the problematic installation.
  5. Click Next, click Finish.

NOTE: If there are no restore points available, the system recovery may not be turned on. To check this, go to Control Panel, and select Recovery. Configure System Restore, Configure. Then, select Turn on system protection. Having a current restore point for a computer ensures the ease of recovery if any problems with the computer arise.

If you wish to always have at your disposal a utility tool to fix these Windows 10 and other related issues when they do arise, download and install a powerful automated tool.

Read More
A Quick Guide to Resolving Error 2738

Fixing Error 2738

Error 2738 - What is it?

The error code 2738 typically occurs either when you attempt to install a program or uninstall it on Windows Vista and 7. The error message is displayed in the following format:
“Error 2738. Could not access VBScript run time for custom action.”
It is a type of runtime error associated with VB (Visual Basic) Script. It indicates that the VB script engine is not correctly registered on your computer.

Solution

Restoro box imageError Causes

The error 2738 may occur due to multiple reasons. These include:
  • Windows VB Script engine is not properly installed or is disabled on your PC
  • Registry keys are incorrect
  • Corrupt registry entries
  • Poor PC maintenance
As this error code may be generated due to registry issues, it is advisable to fix it immediately as it may pose serious threats to your system like system failure, crash and valuable data loss. And complete data retrieval is often the hardest task.

Further Information and Manual Repair

To avoid such threats and to resolve the error 2738 on your PC immediately, here are some solutions that you can try:

Register the VB Script Engine Correctly on Your PC

This can be done by running the command prompt as administrator:-
  • Simply go to the start menu, click all programs, and select accessories.
  • Right-click on Command Prompt and select ‘run as Administrator’.
  • Navigate to the folder that contains the DLL. If you are using Windows 32 bit version, then type cd %windir%system32 into the Command Prompt and then press enter.
Nonetheless, if you are using 64-bit version Windows then type the following command: regsvr32 vbscript.dll and then press enter. This will help you register the VB script engine correctly and resolve the issue.

Download and Run Restoro

If the error still persists, then this means the underlying cause of the error 2738 could be invalid and corrupt registry keys. To resolve either of the causes in seconds, it is advisable to install and run Restoro. Restoro is an advanced, innovative, and multi-functional PC Fixer. This tool is embedded with multiple utilities including a powerful registry cleaner, an antivirus and a system optimizer.  The registry cleaner is a powerful utility that instantly detects all registry issues and resolves them right away. The registry saves all activities performed on the PC. It stores all types of files including invalid registry keys, cookies, internet history, junk files and temporary files. If these unnecessary files are not removed and cleared from the PC, it not only takes a lot of disk space but also damages the registry and dll files. The registry cleaning utility detects all such files and removes them. It wipes out all invalid registry entries and bad keys clean the registry and restores it. In addition to this, this tool can also be used to remove viruses and optimize the system speed. It is a user-friendly and highly functional PC repair tool. It is compatible with all Windows versions Click here to download Restoro on your PC and resolve error 2738 right away!
Read More
Hide application and features in control panel
Program and features are Control panel section where once accessed contains all programs installed on the operating system. From these windows, any logged-in user can modify applications, uninstall them, etc. If for whatever reason you want to limit this access to users and remove this group from the control panel please do keep reading as we show you how you can achieve this desired result using two methods: via policy editor or registry editor. Feel free to use any provided method as both works (except on Windows 10 Home edition) and achieve the same thing, it all comes down to preferred preference on how you wish to do things.

Local group policy editor method

This method is more straightforward and easier perhaps than its counterpart but it has one significant drawback, it will not work on Windows 10 Home edition which does not have in itself a policy editor included. If you are using Windows 10 Home edition then feel free to skip this method and do it via registry editor. That being said let's start:
  • Press ⊞ WINDOWS + R to open the run dialog
  • Inside run dialog type in gpedit.msc followed by ENTER to open Group policy editor
  • Go to User Configuration\ Administrative Templates\ Control Panel\ Programs\
  • Double-click on the setting named Hide Programs and Features page
  • Change the toggle option from Not Configured to Enabled
  • Click on the Apply button and then the Ok button to save the changes
  • at this point, everything is supposed to be applied and your changes should take effect immediately. However, it has come to our attention that sometimes this is not the case. If you are one of these users which for whatever reason have not experienced applying to set momentarily do not despair and follow this quick guide on how to refresh settings and apply them right away.
  • Press ⊞ WINDOWS + X to open the hidden menu
  • Click on command prompt (admin)
  • In command prompt type in gpupdate /force and press ENTER in order to force update and set setting right away

Registry editor method

The registry editor method is a more complex one but it will be your only way of doing it if as mentioned you are running Windows 10 Home edition. As always it is highly recommended to make a backup of the Windows registry before tempering with it.
  • Press ⊞ WINDOWS + R to open the run dialog
  • Inside run dialog type in regedit and press ENTER to open the registry editor
  • If you would like to make a backup of the Windows registry go to File > Export and save the backup on a secure location naming it as you wish
  • Locate the following key inside the registry editor HKEY_CURRENT_USER\Software\Microsoft\Windows\CurrentVersion\Policies\Programs
  • Right-click on the right pane of the Programs key and choose the New > DWORD (32-bit) Value option
  • Name the value as NoProgramsAndFeatures
  • Double-click on the NoProgramsAndFeatures value to open it
  • Change the value data to 1
  • Save the changes
  • Reboot the computer in order for changes to take effect.
note: you can always change values back in order to show again panel by changing the value to 0 in registry editor or choosing Not Configured or Disabled in the local group policy editor
Read More
Every new movie & show on Netflix in September
netflixNetflix was one that made streaming service standard and even after some stumbles even today it is still a respected service. So in that spirit, we are bringing you the list of all new and old movies and TV series releasing to NETFLIX this September.

September 1

Turning Point: 9/11 and the War on Terror — NETFLIX DOCUMENTARY How to Be a Cowboy — NETFLIX ORIGINAL Agatha Christie’s Crooked House (2017) Anjaam (1994) Barbie: Big City Big Dreams (2021) Brave Animated Series (Season 1) Crocodile Dundee in Los Angeles (2001) Green Lantern (2011) House Party (1990) El Patron, radiografia de un crimen / The Boss: Anatomy of a Crime (2014) HQ Barbers (Season 1) Letters to Juliet (2010) Level 16 (2018) Los Carcamales / Oldsters (Season 1) Kid-E-Cats (Season 2) Kuroko’s Basketball (Season 3) Marshall (2017) Welcome Home: Roscoe Jenkins (2008)

September 2

Afterlife of the Party — NETFLIX FILM Q-Force — NETFLIX ORIGINAL The Guardian

September 3

Dive Club (Season 1) — NETFLIX ORIGINAL Money Heist (Season 5) — NETFLIX ORIGINAL Sharkdog (Season 1) — NETFLIX FAMILY Worth (2021) — NETFLIX ORIGINAL

September 5

Bunk’d (Season 5)

September 6

Countdown: Inspiration 4 Mission to Space (Season 1 – Episodes 1 & 2) — NETFLIX DOCUMENTARY Shadow Parties (2021)

September 7

Kid Cosmic (Season 2) — NETFLIX ORIGINAL Octonauts: Above & Beyond (Season 1) — NETFLIX ORIGINAL On The Verge (Season 1) — NETFLIX ORIGINAL UNTOLD: Breaking Point — NETFLIX DOCUMENTARY If I Leave Here Tomorrow: A Film About Lynyrd Skynyrd (2018)

September 8

Into the Night (Season 2) — NETFLIX ORIGINAL JJ + E — NETFLIX FILM The Circle (Season 3) — NETFLIX ORIGINAL Show Dogs (2018)

September 9

Blood Brothers: Malcolm X & Muhammad Ali — NETFLIX DOCUMENTARY The Women and the Murderer (2021) — NETFLIX DOCUMENTARY

September 10

Firedrake the Silver Dragon (2021) — NETFLIX ORIGINAL Metal Shop Masters — NETFLIX ORIGINAL Kate — NETFLIX FILM Pokemon Master Journey: The Series (Part 1) — NETFLIX ANIME Prey — NETFLIX FILM Lucifer (Season 6) — NETFLIX ORIGINAL Lucifer season 6 poster cast

September 13

Crime Stories: India Detectives (Season 1) — NETFLIX DOCUMENTARY

September 14

You vs. Wild: Out Cold — NETFLIX FILM The World’s Most Amazing Vacation Rentals — NETFLIX ORIGINAL

September 15

Countdown: Inspiration4 Mission to Space (Season 1 – Episodes 3 & 4) — NETFLIX DOCUMENTARY Too Hot to Handle Latino — NETFLIX ORIGINAL Nailed It! — NETFLIX ORIGINAL Schumacher — NETFLIX DOCUMENTARY

September 16

Safe House (2012) Birth of the Dragon (2017) He-Man and the Masters of the Universe (Season 1) — NETFLIX ORIGINAL My Heroes Were Cowboys (2021) — NETFLIX DOCUMENTARY

September 17

Chicago Party Aunt — NETFLIX ORIGINAL Sex Education (Season 3) — NETFLIX ORIGINAL Tayo and Little Wizards (Season 1) — NETFLIX FAMILY The Stronghold (2020) — NETFLIX FILM

September 22

Dear White People (Season 4) — NETFLIX ORIGINAL Confessions of an Invisible Girl — NETFLIX FILM

September 23

A StoryBots Space Adventure (2021) — NETFLIX ORIGINAL

September 24

Ganglands (Season 1) — NETFLIX ORIGINAL Midnight Mass — NETFLIX ORIGINAL My Little Pony: New Generation — NETFLIX FAMILY

September 28

Aba Twist, Scientist — NETFLIX FAMILY

September 29

Sounds Like Love — NETFLIX FILM
Read More
Removing old drivers from Windows 10
So you have just got home from that new computer store with your fancy and all-new mouse, screen, keyboard, etc. You plugged in your new component, Windows detected it, installed drivers for it and it is working like a charm. A few months later down the road and the computer starts little by little to slow down. Plug and play is a great concept, and automatic detection is even greater but how time passes old unused stuff piles in your hard drive and in Windows itself thus slowing down your computer and taxing it more and more as new components and software are added. Old drivers from old components sadly are not removed from Windows itself and over some larger period of time they can pile up and slow down your daily operations on the computer or even cause some problems in it. This guide will teach you how to manually remove old unused device drivers from your Windows so it is fresh and like new again.

Making old devices visible

In order for us to remove old drivers, the first thing we must do is make them visible in our device manager, old drivers are hidden and will not show up, we must make this happen. We do this by pressing WINDOWS + X keys on your keyboard to bring up a hidden menu in Windows. keyboard with windows and x markedOnce the menu appears, click on Command Prompt (admin) Windows menu command prompt adminOnce the command prompt with administrator privileges comes on-screen type in it following string: The device manager will open, go to view > snow hidden devices in order to show unused devices. device manager show hidden devices

Removing old device

Open any category and if there is a device that was once used and still has its drivers in the system it will be shown as faded out. device manager hidden device shownRight-click on the device and click on uninstall device to remove it completely from your system. device manager uninstall device driverPlease always be careful when removing devices so you do not remove the device which is being used by mistake and always double-check that you are removing something that you used to have on your system. This method will show all hidden devices even ones that are hidden but crucial to the system working properly.
Read More
How to Fix Windows 10 Update Error Code 80004002

How to Fix Windows 10 Update Error Code 80004002

Error Code 80004002 - What is it?

Error code 80004002 will be encountered when there are absent registry keys. These missing registry keys will hinder an update process when initiated. However, this error code can be averted once the user makes a reinstall of the Windows Update Client. The steps will be highlighted throughout the article.

Solution

Restoro box imageError Causes

Error code 80004002 might occur for various valid reasons. In cases of installing programs, a user might mistakenly install a new program over another, that was not properly (completely) uninstalled. This could cause a stack-up of registry keys and error messages. Additionally, error code 80004002 might be a consequence of malware, viruses, and adware.

Further Information and Manual Repair

If left unchecked, error code 80004002 could amount to system freezes and crashes, slow computer performance, error codes upon installation, and even blue screen errors. To fix this error code, you might want to attempt one or all the methods below. This is due to the fact that the problem might stem from various reasons.

Method 1: Safe Mode

Ensure to boot your computer in safe mode. This is to ensure that you are properly able to troubleshoot Windows update error code 80004002. To load your computer in safe mode, turn on the computer, press F8 before it fully loads to the ‘sign in’ screen.

Method 2: Update Outdated Drivers

One of the many reasons why you’ll encounter error code 80004002 is in light of the fact that your drivers might have been outdated. To check if your driver is outdated, Right click on the Start menu, select the Device Manager option. From there, you’ll be able to tell which device(s) is corrupted and needs updating.

Method 3: Reinstall Windows Update Client

To perform this process, follow the steps below:
  1. Locate “My Computer” or “This PC” on your device.
  2. Select the “Properties” option.
  3. Under the System option, determine whether your System type is 64-bit or 32-bit version of Windows.
  4. Use the links below to install the Windows Update client:

Click for 32-bit Operating System

Click for 64-bit Operating System

  1. After installation, search for Windows Update from the Search option.
  2. Select the Check for Updates option.
  3. Once any updates are found, hit Install Updates.

Method 4: Use An Automated Tool

If you wish to always have at your disposal a utility tool to fix these Windows 10 and other related issues when they do arise, download and install a powerful automated tool.
Read More
1 2 3 162
Logo
Copyright © 2022, ErrorTools. All Rights Reserved
Trademarks: Microsoft Windows logos are registered trademarks of Microsoft. Disclaimer: ErrorTools.com is not affiliated with Microsoft, nor claim direct affiliation.
The information on this page is provided for information purposes only.
DMCA.com Protection Status