Installation failed in the SAFE_OS phase

If you are trying to install a Windows 10 upgrade but was interrupted with an error saying, “0x80070003 – 0x2000D, The installation failed in the SAFE_OS phase with an error during MIGRATE_DATA operation”, then you’ve come to the right place as this post will help you sort this problem out.

When you get this kind of error while trying to upgrade your computer, although there could be various reasons for this, the primary one is that when you upgrade from one update to another, something stopped the upgrade process to migrate the user data. To fix this error, you can try to run both the DISM tool and the System File Checker to automatically repair any corrupted system files. You could also try checking the free storage space of your primary drive and if you have any file lock apps like BitLocker, consider disabling them for they could also be the reason why you’re getting the error.

Option 1 – Run the DISM tool

Running the DISM Tool helps in repairing the Windows System Image as well as the Windows Component Store in Windows 10 which might be the reason behind the Windows Upgrade error 0x80070003 – 0x2000D. Using this built-in tool, you have various options such as the “/ScanHealth”, “/CheckHealth”, and “/RestoreHealth”.

  • Open the Command Prompt as admin.
  • Then type in this command: exe /Online /Cleanup-image /Restorehealth
  • Do not close the window if the process takes a while as it will probably take a few minutes to finish.
  • Once it’s done, restart your computer and then check if the issue is resolved or not on the next startup.

Option 2 – Run the SFC scan

The SFC or System File Checker scan could detect and automatically repair damaged system files that could be causing the Windows Upgrade error to appear. SFC is a built-in command utility that helps in restoring corrupted files as well as missing files. It replaces bad and corrupted system files to good system files. To run the SFC command, follow the steps given below.

  • Tap Win + R to launch Run.
  • Type in cmd in the field and tap Enter.
  • After opening Command Prompt, type in sfc /scannow and hit Enter.

The command will start a system scan which will take a few whiles before it finishes. Once it’s done, you could get the following results:

  1. Windows Resource Protection did not find any integrity violations.
  2. Windows Resource Protection found corrupt files and successfully repaired them.
  3. Windows Resource Protection found corrupt files but was unable to fix some of them.
  • Reboot your PC.

Option 3 – Try checking the free storage space on your primary drive

The next option you can try to resolve the error is to see if you have enough free storage space on the primary drive because if you don’t then it’s probably the reason why you’re getting this error. To fix it, you need to free up some storage space by following these steps:

  • Open Setting > System > Storage from the WinX Menu.
  • From there, you will see a list of all the local and connected storage devices along with the details on the free space.
  • Now make sure that the Storage Sense feature is turned On then go find a link that says “Free Up Space” and click it to open.
  • After that, a screen which is the built-in program in Windows 10 will appear and will scan your computer for the following junk files so you can free up disk space:
  • Windows Upgrade Log Files
  • System created Windows Error Reporting Files
  • Thumbnails
  • Temporary Internet Files
  • Previous Windows Installation Files
  • Delivery Optimisation Files
  • DirectX Shader Cache

Note: Once you’re done freeing up space on your drive, try to run the setup file again.

Option 4 – Try disabling BitLocker and other file lock apps

If you are using BitLocker or other file lock apps, then it could be the reason why you’re getting the error. Usually, file lock apps don’t cause any kind of issue, however, if you have something that works on file level like BitLocker, you can try to disable it. Once you’ve disabled it, try to install the Windows 10 Upgrade again and after you do, enable BitLocker again. This should fix the problem.

If you like to learn and find out more about various Windows errors, and how to repair them go to our vast archive or use search to find articles that will explain and help you in solving your issue.
However, if you prefer to do things fast and with automatization then we are proposing to use an automated solution for your issues. The application that we are recommending is Advanced System Repair Pro
Advanced System Repair utilizes multiple tools all in one to give you a quick, simple, reliable, and very thorough diagnosis of your PC. It brings you all the tools you need in one program to clean, fix, protect, optimize and boost your PC!
1-Click Maintenance
All the tools to make it simple and easy! It's like having a professional technician at the click of a mouse.

Junk Cleaner
Keeping your computer free from unnecessary clutter also helps make your computer last longer. Like any other machine, if you keep it clean and take care of it, it will serve you better for longer!

Optimize background apps
Optimize applications background activity with the built-in Application Optimizer feature.

Disk Defrag
With a simple 1-click, Advanced System Repair speeds up your PC by assembling fragmented files on your machine and organizing them more efficiently.

Malware Removal
Finds and removes all types of harmful malware including trojans, worms, bots, adware, spyware, PUPs, and more!

Privacy Cleaner
The all-in-one privacy suite to Clean Your Tracks & Protect Your Privacy! Make your computer safe, secure, and more efficient!

System Tweak/Optimizer
ASR will analyze your complete system and settings to adjust your PC to function at its maximum performance.

Registry Cleaner
Over time, as you install and uninstall applications, the registry can become cluttered with old entries and broken settings which can result in program crashes, and annoying messages and slow the computer down.
Visit our Advanced System Repair Pro Download page to inform yourself about all the benefits of this software and get a free trial copy of it.
advanced system repair pro

Advanced System Repair Pro

One-click automated PC repair solution
ASR logo
With Advanced System Repair Pro you can easily
Replace damaged files
Restore performance
Free disk space
Remove Malware
Protects WEB browser
Remove Viruses
Stop PC freezing
DOWNLOAD
Privacy Policy | Terms of Use | Uinstall
Advanced System Repair Pro is compatible with all versions of Microsoft Windows including Windows 11

Share this article:

You might also like

Dune part two is officially green-lighted
Dune, arguably one of the best science fiction novels ever written was brought to a big screen first time by David Linch. Sadly movie itself went through development hell and a lot of troubles and the end result was somewhat strange. The audience was divided on it, some hated it, some loved it but for sure it left a mark in cinema history. Years have passed and just when people forgot about ever receiving another try on a book adaptation Denis Villeneuve has brought his vision of Frank Herbert's novel into its full glory on a big screen. The interesting thing about this new Dune movie was that from the start Denis envisioned it as a two-movie part openly saying that book itself is too complex to be done in a single movie. But, the issue arises when information about Dune part two was hanging on a thread on how well Dune part one will be received and performed in the box office. This naturally brought all kinds of speculation and worry among fans of the franchise, especially because the movie itself was really good and well made. Well for all of you fans and people who wanted to see a continuation of the story can rest at peace now since the Legendary picture has officially announced and green-lighted Dune part two. The budget was given and we can expect part two at the beginning of 2023. dune 2 annoucment
Read More
Telnet not recognized as internal/external
In case you don’t know, a teletype network, also known as Telnet, is a protocol that is meant for internet or LAN communication which is used primarily to control other computers effortlessly. And it is available as a command-line utility in Windows and helps users in opening a command-line interface for the remote computer. However, a lot of users have reported an error that states, “Telnet is not recognized as an internal or external command, operable program, or batch file” when you try to use it. If you are one of these users, then you’ve come to the right place as this post will guide you on how to fix this error in Windows 10. This kind of error means that the Telnet utility is not installed on your computer but Telnet is a default feature in Windows 10 so the protocol mainly is not enabled yet. The Telnet client is disabled by default in Windows 10 and to fix this error, you can try to enable the Telnet Client via Programs and Features or try to install Telnet using an elevated Command Prompt.

Option 1 – Try to enable the Telnet Client via Programs and Features

The first thing you can do is to enable the Telnet client using Programs and Features since it is disabled by default. To do that, follow the steps below.
  • Tap the Win + R keys to open the Run dialog box and type “appwiz.cpl” in the field and hit Enter to open the Programs and Features window.
  • Next, select the “Turn Windows features on or off” from the options given on the left-hand side.
  • After that, look for the Telnet client from the list and check the checkbox next to it and then click on OK to save the changes made.
  • Now restart your computer.

Option 2 – Try to install Telnet via an elevated Command Prompt

If enabling the Telnet client using Programs and Features didn’t work, then you can try to do it using Command Prompt instead. To get started, follow the steps given below.
  • In the Windows Search bar, type “command prompt” in the field and right-click on Command Prompt from the search results, and select the “Run as administrator” option.
  • Next, execute this command to enable the Telnet client: dism /online /Enable-Feature /FeatureName:TelnetClient
  • Once the command has been executed, close the Command Prompt and restart your computer.
Read More
How to Fix Windows 10 Error 0x8000222

How to Fix Windows 10 Error 0x8000222

Error Code 0x8000222 - What is it?

Error Code 0x8000222 is an error that occurs during the installation process for Windows 10. It is also present in past versions of the software, going all the way back to Windows 7 and even affecting Windows software products, including Microsoft Word, PowerPoint, and other items in the Microsoft Office Suite.

Common symptoms include:

  • Inability to complete the installation process for new versions of the operating system, Microsoft Office programs, or other Windows-based software

While there are several factors that can contribute to the appearance of Error Code 0x8000222 during the installation process, most of these factors can be addressed using a few high-level methods. These methods do require some advanced knowledge and computing skills, so if you are unable to complete the steps below successfully or do not have confidence in your ability to undertake these methods on your own, contact a qualified computer repair service that is familiar with the Windows 10 installation process.

Solution

Restoro box imageError Causes

There are a few different issues that can cause Error Code 0x8000222 to arise during the installation process on your Windows operating system. The first is a corrupted file in your system library or dynamic link library, also called the DLL. The second is interference by your proxy, firewall, or antivirus software that inhibits the machine from being able to access the files that it needs to successfully complete the installation of your Windows operating system or software.

Further Information and Manual Repair

To address and resolve Error Code 0x8000222 on your Windows operating system, regardless of the version of the software that you are using, there are a few steps that you can take. Keep in mind that these steps do require some advanced skills and knowledge about your computer, so if you don’t believe that you can undertake these steps on your own or if the following methods do not fully resolve the issue on your device, talk to a qualified computer repair technician for assistance.

Here are the best ways to address Error Code 0x8000222 on your Windows machine:

Method One:  Fix Your DLL Dependencies Registry

Before implementing this method, make sure that a proxy is not active on your computer. To check to see if there is an active proxy, simply press the Windows key together with the “R” key and type in the command “cmd”, then when the prompt opens up, type in the following command:  “netsh winhttp import proxy source=ie”. From the box that follows, if you see a message saying that there has been an error writing in the proxy settings and that access has been denied, it means that you can turn off the proxy setting in your Internet Explorer and the error will go away on its own.

If you do not have an active proxy, it is time to check and see whether your DLL dependencies are properly set up. To do so, open up the command prompt again by pressing the Windows key and “R” key at the same time and typing in “cmd”. Once the command prompt is active, simply typing in “regsvr32 Officevalidator.dll”, then attempt to resume your installation once it has been complete.

In some cases, you may need to restart your computer before attempting the Windows installation process.

Method Two:  Turn Off Firewalls and Antivirus Software Before Installing

If the above method did not successfully resolve the problem, you can go into your control panel and turn off any firewalls or antivirus programs that may be interfering with your ability to complete the Windows installation process. Depending on the programs that you use for your antivirus needs, you may need to restart your computer before you reattempt to do the installation process.

You should be able to turn your firewall and antivirus programs back on once the installation process has run through to completion.

In most cases, taking the steps above will fully resolve the appearance of Error Code 0x8000222 on your Windows 10 machine.

Method Three: Use An Automated Tool

If you wish to always have at your disposal a utility tool to fix these Windows 10 and other related issues when they do arise, download and install a powerful automated tool.

Read More
Fix Broadcom BCM20702A0 driver error
In recent times, some Windows 10 users have seen an error code BCM20702A0, when using Bluetooth and they are concerned as to what it is all about. We can say for certain that it has something to do with your Bluetooth driver. The error message in question is:
The drivers for this device are not installed. There are no compatible drivers for this device.
The problem here tends to no longer allow specific Bluetooth components to properly communicate with your Windows 10 operating system. It also affects laptops that do not have native Bluetooth support; therefore, the manufacturer installed a dongle on the inside to deliver the service. This is not the best way to do things because native support is always better. On the other hand, maybe you’re using a Broadcom USB Bluetooth dongle that is acting up, and as such, the error is showing. Below are solutions provided for this particular error and how to eliminate it.
  1. Run the Bluetooth Troubleshooter

    Press ⊞ WINDOWS to open the menu and select settings In settings choose Update & Security Go to troubleshoot and on the right panel click on additional troubleshooters Click on Bluetooth Select Run the troubleshooter, then sit back and allow the tool to do its thing. Once you’ve completed the task, click on Apply this fix if any repairs are needed Reboot your computer
  2. Install Broadcom driver from official website

    Windows drivers for Broadcom Bluetooth devices are no longer posted on their website. They should be available through Microsoft’s Windows Update service. If drivers were not downloaded automatically by Windows Update, use Device Manager to refresh the driver from Windows Update. However, the Broadcom Bluetooth drivers seem to be available here on the Lenovo website. To fix the BCM20702A0 driver error, you may download and install them. After downloading it, right-click on the downloaded item, and select Run as administrator. After installation, restart your computer, then check again if it works.
  3. Remove all Bluetooth drivers and USB controllers

    If previous solutions did not work, go to device manager and remove all Bluetooth devices along with all USB controllers. Reboot your computer and Windows will automatically reinstall and set all devices.
Read More
How to Resolve Error Code 0x80070643 in Windows 10

Error Code 0x80070643 – What is it?

Error Code 0x80070643 or Windows Update error code affects various versions of the Windows operating system, including Windows 10. Error code 0x80070643 usually occurs due to corruption within the .Net Framework. When this occurs, users will be unable to install updates they have downloaded on their PC.

Solution

Restoro box imageError Causes

Error codes within Windows occur for many reasons including corrupt system files, viruses, and lack of space on your PC. In terms of error code 0x80070643 in Windows 10, the cause usually relates to a problem with the .NET framework or errors within one’s registry.

Further Information and Manual Repair

To solve error code 0x80070643 in Windows 10, users will need to employ various manual repair methods. These methods seek to fix core problems that result in the error being present on your device in the first place. Thus, the methods include the use of the .Net Framework Repair tool, resetting Windows Update components, or running a clean boot.

Note that the instructions provided in this article must be followed correctly, as making changes to your computer via these manual repair methods can result in serious problems if mistakes are made. Consider a Windows repair technician if you are unable to complete the steps mentioned in the manual repair methods below. Note, failure to rectify this error might result in other error messages, such as error code 0xc004fc03

Method One: Run the .Net Framework Repair Tool

As error code 0x80070643 may be triggered by issues related to the .Net Framework on your machine, it’s important that you download the .Net Framework Repair tool. This tool, as the name suggests, helps to repair errors it detects within the setup or updates associated with the framework.

The tool is available on the official Windows site. Download the tool and follow the instructions provided. Once you’ve downloaded the .Net Framework Repair tool, run it and wait until it fixes all problems detected within the framework.

Afterward, reboot your computer and check to see if Windows Update is functioning properly. If the error code reoccurs, proceed to another solution by implementing the second manual repair method listed in this article.

Method Two: Reset Windows Update Components

This method is the most technical of all the methods mentioned in this article. It will require that Windows 10 user access Command Prompt and make modifications to the Windows registry – an area of the operating system which stores important information, settings and other details regarding hardware and programs installed on your machine. Follow the steps carefully and be sure to back up the registry before proceeding with this manual repair method.

Step one: Type Command Prompt in the search box near Start, then select Command Prompt (Admin).

Step two: Select Yes as soon as the User Account Control box appears.

Step three: Stop Windows Update service, the BITS service, and Cryptographic service by typing the following commands:

net stop bits

net stop wuauserv

net stop appidsvc

net stop cryptsvc

Step four: Be sure to press Enter after typing each command.

Step five: Type the following command, then Enter to delete qmgr*.dat files:

        Del "%ALLUSERSPROFILE%Application DataMicrosoftNetworkDownloaderqmgr*.dat"

Step six: Press enter after typing the following command:

        cd /d %windir%system32

Step seven: Reregister the files for BITS and Windows Update that you stopped in step three. To do this, type the following commands, selecting Enter after each command:

        regsvr32.exe atl.dll

        regsvr32.exe urlmon.dll

        regsvr32.exe mshtml.dll

        regsvr32.exe shdocvw.dll

        regsvr32.exe browseui.dll

        regsvr32.exe jscript.dll

        regsvr32.exe vbscript.dll

        regsvr32.exe scrrun.dll

        regsvr32.exe msxml.dll

        regsvr32.exe msxml3.dll

        regsvr32.exe msxml6.dll

        regsvr32.exe actxprxy.dll

        regsvr32.exe softpub.dll

        regsvr32.exe wintrust.dll

        regsvr32.exe dssenh.dll

        regsvr32.exe rsaenh.dll

        regsvr32.exe gpkcsp.dll

        regsvr32.exe sccbase.dll

        regsvr32.exe slbcsp.dll

        regsvr32.exe cryptdlg.dll

        regsvr32.exe oleaut32.dll

        regsvr32.exe ole32.dll

        regsvr32.exe shell32.dll

        regsvr32.exe initpki.dll

        regsvr32.exe wuapi.dll

        regsvr32.exe wuaueng.dll

        regsvr32.exe wuaueng1.dll

        regsvr32.exe wucltui.dll

        regsvr32.exe wups.dll

        regsvr32.exe wups2.dll

        regsvr32.exe wuweb.dll

        regsvr32.exe qmgr.dll

        regsvr32.exe qmgrprxy.dll

        regsvr32.exe wucltux.dll

        regsvr32.exe muweb.dll

        regsvr32.exe wuwebv.dll

Step eight: Reset Winsock in Command Prompt by typing the following command, then selecting Enter:

      netsh winsock reset

Step nine: Configure proxy settings in Windows 10 with the following command, then press Enter:

     netsh winhttp reset proxy

Step ten: To restart the BITS, Windows Update, and Cryptographic service, type the following commands, then press Enter:

        net start bits

        net start wuauserv

        net start appidsvc

        net start cryptsvc

Step eleven: Install the latest Windows Update Agent.

Step twelve: Restart your machine.

Once you’ve restarted your PC, check Windows Update to verify if the error code is resolved. You should now be able to access the latest updates on your device. However, if a problem has arisen and the error code reoccurs, you will need to proceed with a Clean Boot.

Method Three: Download an Automated Tool

If you wish to always have at your disposal a utility tool to fix these Windows 8 and other related issues when they do arise, download and install a powerful automated tool.

Read More
Stop the Hotspot from Turning off
As you know, Windows 10 is equipped with a Mobile Hotspot feature that allows users to share the existing internet connections to other devices over Wi-Fi. However, one of the downsides to this feature is that it does not stay on if there are no devices connected to it for over five minutes. In other words, if there are no devices connected to the mobile hotspot for five minutes, it will turn off automatically. Thus, if you want the mobile hotspot to stay turned on, then you’ve come to the right place as this post will walk you through how to stop the Mobile Hotspot from turning off in Windows 10. There are two scenarios tackled in this post wherein the Mobile Hotspot feature turns off automatically and where the hotspot disables when there is no internet connection. To remedy these scenarios, you can try turning off the power saving feature or use a PowerShell command to change the “PeerlessTimeoutEnabled” settings or increase the Mobile Hotspot idle timeout settings. You could also increase the timeout period when a cellular connection is not available or disable the Wi-Fi and network adapter power management options. For detailed instructions, refer to each one of the given options below.

Option 1 – Try turning off the power saving feature

The first solution you can check out is to turn off the power-saving feature. To do so, follow these steps:
  • Open the Settings app and go to Network & Internet and from there, click on the Mobile Hotspot option.
  • Next, toggle the “Share my Internet connection with other devices” option.
  • After that, toggle the “When no devices are connected, automatically turn off mobile hotspot” option.

Option 2 – Execute a command in PowerShell

The next option you can try to keep the mobile hotspot turned on is through a command in PowerShell. To get started, follow these steps:
  • Tap the Win + X keys and select the “Windows PowerShell (Admin)” option.
  • Next, execute the following command to make sure that the Mobile Hotspot stays on even when no devices are connected to it:
powershell -windowstyle hidden -command "Start-Process cmd -ArgumentList '/s,/c,net stop "icssvc" & REG ADD "HKLMSYSTEMCurrentControlSetServicesicssvcSettings" /V PeerlessTimeoutEnabled /T REG_DWORD /D 0 /F & net start "icssvc"' -Verb runAs"
  • After the command is executed, here is what the script is doing in the background:
    • It stops the Mobile Hotspot service (icssvc).
    • It navigates to this registry path (HKEY_LOCAL_MACHINESYSTEMCurrentControlSetServicesicssvcSettings) and creates a DWORD key named “PeerlessTimeoutEnabled” which has a value of 0.
  • It then restarts the Mobile Hotspot Service (icssvc).

Option 3 – Try increasing the Mobile Hotspot idle timeout settings

Another option you can try is to increase the idle timeout settings of the mobile hotspot. In case you don’t know, the default timeout when there’s no active connection is about five minutes. So if you don’t want to keep it on always but want to keep it on longer than five minutes, then this option is for you. All you have to do is change the same key (PeerlessTimeout) as mentioned above, at a different location. In fact, you can change it to a maximum of 120 minutes. To give this a try, follow these steps:
  • Tap the Win + R keys to open the Run dialog box and type “Regedit” in the field and then tap Enter to open the Registry Editor.
  • Next, navigate to this registry path: HKLMSystemControlSet001ServicesICSSVCSettingsPeerlessTimeout
  • From there, change its value to anywhere between 1 up to 120.
  • Once done, exit the Registry Editor and restart your computer.

Option 4 – Try increasing the timeout period when a cellular connection is not available

There are many times when you want to connect devices so it becomes part of the network. And as pointed out, the Mobile Hotspot turns off automatically when there is no internet or mobile data but when you use a registry setting, you can change any value between 1 and 60 inclusive.
  • Tap the Win + R keys to open the Run dialog box and type “Regedit” in the field and then tap Enter to open the Registry Editor.
  • Next, navigate to this registry path: HKLMSystemControlSet001ServicesICSSVCSettingsPublicConnectionTimeout
  • From there, set the value of the “Timeout” key between 1 and 60.
  • After that, close the Registry Editor and restart your PC.

Option 5 – Try to disable the Wi-Fi and Network adapter in Power Management options

As you know, the Wi-Fi adapter and the network devices have properties that will turn off when on battery and when it’s not used for a long time so you can try to disable these options.
  • Tap the Win + X + M keys to open the Device Manager.
  • Next, expand the list of Network devices and select the Wi-Fi adapter.
  • After that, go to the Power Management tab and make sure that anything related to power saving should be turned off. This will ensure that none of the network devices will turn off the Mobile Hotspot or trigger anything that will do that.
Read More
Setting a Static IP Address in Windows 10
If you are having issues with your network connection and you have it configured to DHCP, then you shouldn’t have any issues in figuring your IP address out. If you want to prevent conflicts between network devices and enable their easy management, then you have to set a static IP address in your Windows 10 computer, worry not for this post will show you how it’s done. The IP addresses for computers are usually configured to the Dynamic Host Configuration Protocol or DHCP automatically by the respective router. This is really convenient since the devices instantly connect to your network and through this, you can save yourself the trouble of configuring the IP address for each new device manually. However, there’s a shortfall in the process – the computer’s IP address can change every now and then. Moreover, you might also find it a lot easier to share a printer or configure a Port forwarding when you set a static IP address. There are three ways to do it – you can set it via Control Panel or Windows Settings or using Windows PowerShell. For more details, follow the options provided below.

Option 1 – Set a static IP address via Control Panel

  • Right-click on the network or Wi-Fi icon located in the Taskbar.
  • Then select the “Open Network and Internet settings” option from the given list of options.
  • Next, go to Wi-Fi settings and scroll down until you see the “Related Settings” section. Here, click on the “Change adapter options” link which will open a new window that will direct you to the Network Connections section of the Control Panel.
  • After that, right-click on the network connection you want to set a static IP address for and then select the Properties option.
  • Then select Internet Protocol Version 4 (TCP/IPv4) under the Networking tab and click the Properties button.
  • Now switch the selector to the “Use the following IP address” option and make the entry for the following fields that correspond to your network setup.
    • IP address (Find it using the “ipconfig /all” command)
    • Subnet Mask (On a home network, it is 255.255.255.0)
    • Default Gateway (It is your router’s IP address.)
  • Then check the “Validate settings upon exit” option to help Windows check your new IP address quickly as well as the other relevant information to make sure that it’s working.
  • Once you’re done, click the OK button and close the network adapter’s properties window.

Option 2 – Assign Static IP address using Settings

  • First, click on the gear icon for Settings and select the Network & Internet tab.
  • Next, select Wi-Fi > Current connection where you’ll have to select the network connection your computer is connected to.
  • After that, scroll down until you reach the IP settings section and then click the Edit button.
  • Now click the drop-down arrow when the IP settings window pops up and select the Manual option.
  • Now turn on the IPv4 toggle switch and set the static IP address. You also have to set the Subnet prefix length (subnet mask). For instance, if your subnet mask is “255.255.255.0”, then the subnet prefix length in bits should be 24.
  • Afterward, configure the Default Gateway address and the Preferred DNS address and then save the changes you’ve made.

Option 3 – Assign the static IP address using Windows PowerShell

  • In the Start Search, type “PowerShell” and right-click on Windows PowerShell from the search results to open PowerShell with admin privileges.
  • After that, enter this command to view your computer’s current network configuration: Get-NetIPConfiguration
  • Next, take note of the following information:
    • InterfaceIndex
    • IPv4Address
    • IPv4DefaultGateway
    • DNSServer
  • Once you’re done, execute this command to set a static IP address: New-NetIPAddress -InterfaceIndex 15 -IPAddress 192.168.29.34 -PrefixLength 24 -DefaultGateway 192.168.29.1
  • Afterward, change the default gateway with the default gateway address of your network and make sure that you change the InterfaceIndex number with the one that corresponds to your adapter and IPAddress with the IP address you want to assign to your computer.
  • Now execute this command to assign a DNS server address: Set-DnsClientServerAddress -InterfaceIndex 4 -ServerAddresses 10.1.2.1
  • Finally, save the changes you’ve made and restart your computer.
Read More
An Easy Guide to Fixing Libvlc.dll Error

Patch the Libvlc.dll Error

Libvlc.dll Error Code - What is it?

Libvlc.dll error is a type of DLL file error. Libvlc.dll is a type of Dynamic Link Library file associated with 3rd party software developed by the Videolan Team for the Windows OS. Libvlc.dll file contains small programs similar to EXE executable files which allow multiple software programs to share the same functionality. It helps load and run certain programs developed by Videolan Team on your system. The Libvlc.dll error pops up when the file fails to load and run your desired program. This error is usually triggered during program installation while a Libvlc.dll related software is running on the PC or during Windows start-up or shut down. Libvlc.dll error code may appear on your Windows computer in any of the following formats:
"Libvlc.dll not found." "The file libvlc.dll is missing." "Cannot register libvlc.dll." "Cannot find C:WindowsSystem32\libvlc.dll." "Libvlc.dll Access Violation." "Cannot start Third-Party Software. A required component is missing: libvlc.dll. Please install Third-Party Software again." "This application failed to start because libvlc.dll was not found. Re-installing the application may fix this problem."
Though Libvlc.dll error is not a fatal error code but nonetheless it is advisable to resolve it immediately to avoid any inconvenience.

Solution

Restoro box imageError Causes

Libvlc.dll error code may occur due to several reasons including but not limited to:
  • Corrupt Libvlc.dll registry entry
  • Malware infection
  • Hardware failure
  • Deleted or missing Libvlc.dll file
  • Another program overwrote the required version of Libvlc.dll

Further Information and Manual Repair

Here are some of the best and easy-to-work-around methods that you can try to resolve Libvlc DLL error on your system in minutes. Let’s get started:

Method 1: Re-install the Deleted Libvlc.dll file

Since DLL are shared files, sometimes the error code may pop up if it is deleted accidentally while uninstalling a program that is also run by the same file. In such a situation, to resolve the Libvlc.dll error all you have to do is re-install the deleted file by going into the recycle bin. If you find it reinstall, but if you don’t then simply download Libvlc.dll file from a reliable DLL file website and install. Hopefully this will resolve the issue. Alternatively, you can re-install VLC which should come with a complete copy of the libvlc.dll. However, if the error code still persists, then try other methods given below.

Method 2: Restore Points - Undo the Recent Changes

Another way to resolve Libvlc dll error is to restore your Windows system to an earlier point. System Restore can return your PC system files and programs back to a time when everything was working absolutely fine. This can help you avoid hours of troubleshooting headaches. This can be easily done by going to the start menu. In the search box type System Restore and press enter. Now click System Restore and enter administrator password if prompted. Follow the steps in the Wizard to choose a restore point and then reboot to activate changes.

Method 3: Repair the Registry

The Libvlc dll error can be triggered by invalid registry entries. To resolve, simply download Restoro. This is a user-friendly and multi-functional PC Fixer embedded with a powerful registry cleaner. It removes all the invalid files, repairs the damaged DLL files, and cleans the registry in seconds. Click here to download Restoro and resolve Libvlc dll error today!
Read More
NewTabAid Malware Removal Guide

New Tab Aid is an extension for Google Chrome. It is published by Spigot Inc. It is classified as a potentially unwanted browser hijacker as it injects Yahoo search into your new tab windows. This extension also adds recently viewed tabs under the search bar. It also redirects all your searches to Yahoo instead of your default browser search engine. It is often found bundled with other software found on the internet and not installed directly by the user. For these reasons, numerous anti-malware utilities flag New Tab Aid as potentially unwanted or malicious.

About Browser Hijackers

Browser hijackers (sometimes called hijackware) are a kind of malicious software that changes internet browser configurations without the user’s knowledge or permission. These types of hijacks appear to be increasing at an alarming rate around the world, and they could be actually nefarious and often harmful too. Browser hijackers could do more than just modifying homepages. The idea is to force users to visit specific websites that are looking to improve their website visitor traffic and produce higher ad earnings. Even though it may seem naive, all browser hijackers are damaging and therefore always regarded as security risks. Browser hijackers can even allow other vicious programs without your knowledge to further damage your personal computer.

Major signs that your web browser has been hijacked

There are numerous signs of browser hijacking: 1. the home page of your respective web browser is changed all of a sudden 2. you see new unwanted bookmarks or favorites added, typically directed to advertisement-filled or pornography sites 3. the default web browser settings are changed and/or your default web engine is altered 4. unwanted new toolbars are added to your browser 5. you observe numerous ads show up on your browsers or computer screen 6. your web browser gets sluggish, buggy crashes regularly 7. Inability to navigate to particular websites, particularly anti-malware and other security software sites.

How does a browser hijacker infect a computer?

Browser hijackers might use drive-by downloads or file-sharing networks or even an email attachment in order to reach a targeted computer. Many web browser hijackings come from add-on applications, i.e., toolbars, browser helper objects (BHO), or plug-ins added to browsers to provide them additional features. Browser hijackers sneak into your computer in addition to free software application downloads also that you unintentionally install alongside the original. Popular examples of browser hijackers include Conduit, CoolWebSearch, Coupon Server, OneWebSearch, RocketTab, Searchult.com, Snap.do, and Delta Search. Browser hijacking can result in severe privacy issues and also identity theft, affect your browsing experience by taking control of outgoing traffic, substantially slows down your personal computer by consuming a lot of resources, and cause system instability also.

How to fix a browser hijack

Certain browser hijacking could be quite easily stopped by discovering and eliminating the corresponding malware software through your control panel. However, most hijackers are hard to get rid of manually. No matter how much you attempt to remove it, it may come back again and again. Moreover, browser hijackers could modify the Windows registry therefore it can be very hard to repair manually, particularly when you’re not a very tech-savvy individual.

Virus Blocking Access To Safebytes Site And Preventing Anti-Malware Downloads - What To Do?

Malware can cause all kinds of damage if they invade your computer, from stealing sensitive information to deleting files on your computer system. Certain malware goes to great lengths to stop you from installing anything on your computer system, especially anti-malware software programs. If you’re reading this, you probably have affected by malware that prevents you from installing a computer security application like Safebytes Anti-Malware. Although this sort of issue will be tougher to get around, there are a few actions you can take.

Eliminate malware in Safe Mode

If any malware is set to load immediately when Microsoft Windows starts, getting into Safe Mode could block this attempt. Just minimal required applications and services are loaded whenever you start your personal computer into Safe Mode. The following are the steps you need to follow to take out viruses in Safemode. 1) Tap the F8 key repeatedly as soon as your PC boots, however, before the large Windows logo shows up. This should bring up the Advanced Boot Options menu. 2) Select Safe Mode with Networking with arrow keys and hit ENTER. 3) When this mode loads, you should have the internet. Now, obtain the malware removal application you want by using the web browser. To install the software, follow the directions within the installation wizard. 4) Once the application is installed, let the diagnostic scan run to eliminate viruses and other threats automatically.

Switch over to an alternate browser

Malicious program code may exploit vulnerabilities on a particular browser and block access to all anti-malware software sites. The most effective solution to avoid this issue is to choose a browser that is well known for its security measures. Firefox contains built-in Malware and Phishing Protection to keep you safe online.

Install and run antivirus from your USB drive

Another way is to download and transfer an antivirus application from a clean computer to run a scan on the affected system. Do these simple measures to clean up your affected computer using a portable antivirus. 1) Download the anti-malware program on a virus-free computer. 2) Insert the USB drive on the same system. 3) Double-click the exe file to open the installation wizard. 4) When asked, select the location of the pen drive as the place in which you want to put the software files. Follow the instructions on the computer screen to finish off the installation process. 5) Now, transfer the USB drive to the infected computer. 6) Double-click the Safebytes Anti-malware icon on the pen drive to run the software. 7) Run Full System Scan to detect and get rid of all sorts of malware.

Ensure the Safety of Your PC by Installing SafeBytes Anti-Malware

These days, anti-malware software can protect your computer from various types of internet threats. But exactly how to decide on the best one among many malware protection application that is available on the market? As you might be aware, there are several anti-malware companies and products for you to consider. Some of them are good, some are ok types, and some will destroy your computer themselves! When searching for antimalware software, pick one that provides reliable, efficient, and full protection against all known viruses and malware. One of the highly recommended software by industry experts is SafeBytes Anti-Malware, the most dependable program for Microsoft Windows. SafeBytes anti-malware is a powerful, very effective protection tool designed to assist end-users of all levels of computer literacy in detecting and eliminating malicious threats out of their computer. This program could easily detect, remove, and protect your computer from the most advanced malware attacks including spyware, adware, trojan horses, ransomware, parasites, worms, PUPs, along with other possibly damaging software programs. SafeBytes has excellent features when compared to various other anti-malware programs. Let’s look into some of them below: Active Protection: Malware programs trying to get into the computer are discovered and stopped as and when detected by the SafeBytes real-time protection shields. This tool will constantly monitor your computer for any suspicious activity and updates itself continuously to keep current with the latest threats. Antimalware Protection: With its enhanced and sophisticated algorithm, this malware removal tool can identify and remove the malware threats hiding in your PC effectively. Web Security: Safebytes allots all websites a unique safety rating that helps you to get an idea of whether the webpage you’re about to visit is safe to browse or known to be a phishing site. Lightweight: SafeBytes is well known for its minimal impact on computer resources and great detection rate of diverse threats. It operates quietly and efficiently in the background so you are free to utilize your personal computer at full power all of the time. 24/7 Customer Service: For any technical concerns or product assistance, you can get 24/7 professional assistance through chat and email.

Technical Details and Manual Removal (Advanced Users)

If you wish to manually remove NewTabAid without the use of an automated tool, it may be possible to do so by removing the program from the Windows Add/Remove Programs menu, or in cases of browser extensions, going to the browsers AddOn/Extension manager and removing it. You will likely also want to reset your browser. To ensure the complete removal, manually check your hard drive and registry for all of the following and remove or reset the values accordingly. Please note that this is for advanced users only and may be difficult, with incorrect file removal causing additional PC errors. In addition, some malware is capable of replicating or preventing deletion. Doing this in Safe Mode is advised.

The following files, folders, and registry entries are created or modified by NewTabAid

Files: C:windowssystem32services.exe C:Windowswinsxsamd64_microsoft-windows-s..s-servicecontroller_31bf3856ad364e35_6.1.7600.16385_none_2b54b20ee6fa07b1services.exe C:WindowsInstallerbbee3ba2-89af-930c-bb78-1fb4e17db3cc C:DOCUME~1USER~1LOCALS~1Tempnsw1.tmp C:c0b5e060b7e0becc89a6b6111a8644db7612072dc9a02f5bd32dc25dc459d7 C:DOCUME~1USER~1LOCALS~1Tempnsw2.tmp C:DOCUME~1USER~1LOCALS~1Tempnsg3.tmp C:DOCUME~1USER~1LOCALS~1Tempnsg3.tmpSM.dll C:WINDOWSRegistrationR000000000007.clb C:WINDOWSsystem32rsaenh.dll C:c0b5e060b7e0becc89a6b6111a8644db7612072dc9a02f5bd32dc25dc459d7 C:DOCUME~1USER~1LOCALS~1Tempnsw2.tmp C:WINDOWSRegistrationR000000000007.clb C:WINDOWSsystem32rsaenh.dll c:autoexec.bat C:WINDOWSsystem32cmd.exe C:DOCUME~1USER~1LOCALS~1Temp~sp4.tmp.exe C:DOCUME~1USER~1LOCALS~1Tempnsb6.tmp C:DOCUME~1USER~1LOCALS~1Tempnsw2.tmp C:DOCUME~1USER~1LOCALS~1Tempnsg3.tmpSM.dll C:DOCUME~1USER~1LOCALS~1Tempnsg3.tmpSystem.dll C:DOCUME~1USER~1LOCALS~1Tempnsg3.tmp.dll C:DOCUME~1USER~1LOCALS~1Tempnsg3.tmpNSISdl.dll C:DOCUME~1USER~1LOCALS~1Tempnsg3.tmppixel C:DOCUME~1USER~1LOCALS~1Temp~sp4.tmp.exe C:DOCUME~1USER~1LOCALS~1Tempnsb6.tmp C:DOCUME~1USER~1LOCALS~1Tempnsb7.tmpSystem.dll C:DOCUME~1USER~1LOCALS~1Tempnsb7.tmpSM.dll C:DOCUME~1USER~1LOCALS~1Tempnsw1.tmp C:DOCUME~1USER~1LOCALS~1Tempnsg3.tmp C:DOCUME~1USER~1LOCALS~1Tempnsg3.tmpNSISdl.dll C:DOCUME~1USER~1LOCALS~1Tempnsg3.tmppixel C:DOCUME~1USER~1LOCALS~1Tempnsg3.tmpSM.dll C:DOCUME~1USER~1LOCALS~1Tempnsg3.tmpSystem.dll C:DOCUME~1USER~1LOCALS~1Temp~sp4.tmp C:DOCUME~1USER~1LOCALS~1Tempnsr5.tmp C:DOCUME~1USER~1LOCALS~1Tempnsb7.tmp C:DOCUME~1USER~1LOCALS~1Tempnsb7.tmpSM.dll Registry: HKEY_LOCAL_MACHINESOFTWAREWow6432NodeMicrosoftWindowsCurrentVersionRunRandom.exe HKCUSOFTWAREMicrosoftWindowsCurrentVersionRunRandom.exe HKEY_LOCAL_MACHINEsoftwaremicrosoftwindowscurrentversionpoliciesexplorerEnableShellExecuteHooks= 1 (0x1) HKEY_LOCAL_MACHINESOFTWAREMicrosoftWindowsCurrentVersionpoliciesExplorerrunRandom.exe
Read More
Nostalgia hit: Commodore 64 emulator and games
If you are a kid or in your teenage years you maybe will be not familiar with Commodore 64 but we are welcoming you anyway to go with us on this journey through time and find out about one of the most influential and beloved home computer of all time.

commodore 64
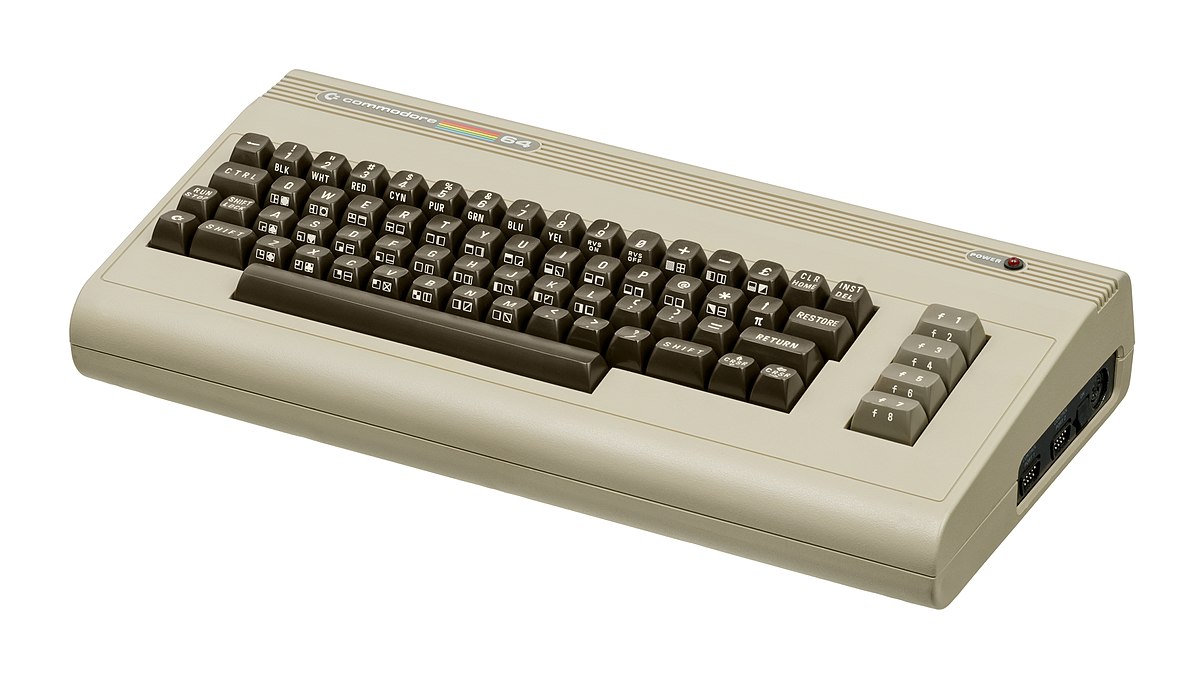
History of Commodore

Firstly shown to the world in January of 1982, at the Consumer Electronics Show, C64 caught attention right away with its low price of only $595. Although it had some issues like limited functionality in some fields and a non-wide range of use by 1984 its price dropped below $200 and it cemented itself as an affordable home computer for the middle class. In as same year Apple has released their Apple II computer with far superior capabilities, commodore 64 remains a middle-class favorite due to its price. Also, the company has decided to distribute its homemade computer via some other means including not only just electronics stores specialized in that kind of equipment but in general shops and big department stores, through toy stores and book shops as well as through specialized dealers. This has given C64 a more competitive edge and mixed with the affordable price it soon became a staple of home computing. c64 store
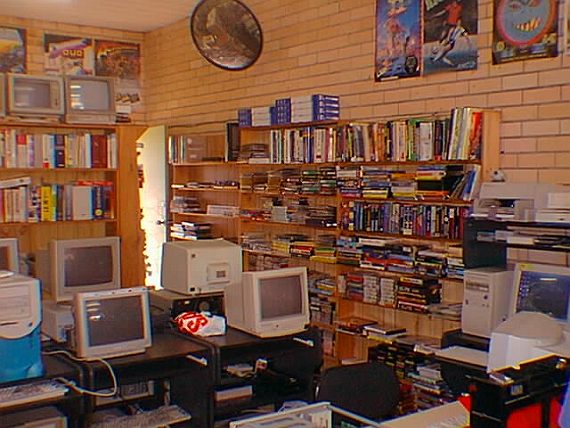
With sales booming and the early reliability issues with the hardware addressed, software for the C64 began to grow in size and ambition during 1984. This growth shifted to the primary focus of most US game developers. The two holdouts were Sierra, who largely skipped over the C64 in favor of Apple and PC compatible machines, and Broderbund, who was heavily invested in educational software and developed primarily around the Apple II. In the North American market, the disk format had become nearly universal while cassette and cartridge-based software all but disappeared. So most US-developed games by this point grew large enough to require multi-loading. At a mid-1984 conference of game developers and experts at Origins Game Fair, Dan Bunten, Sid Meier, and a representative of Avalon Hill said that they were developing games for the C64 first as the most promising market. By 1985, games were an estimated 60 to 70% of Commodore 64 software. Over 35% of SSI's 1986 sales were for the C64, ten points higher than for the Apple II. Everything was great for Commodore but the industry was moving forward and by the year 1988, PC compatible computers were stated to be the largest and fastest-growing home entertainment systems pushing C64 on to second place. Also, Nintendo’s gaming system has started to take hold in the world with amazing 7 million systems sold in 1988 only. By the year 1991, many developers exited the gaming market for Commodore 64 home computer system and its popularity started to fall due to lack of software and not so many hardware changes. commodore sales
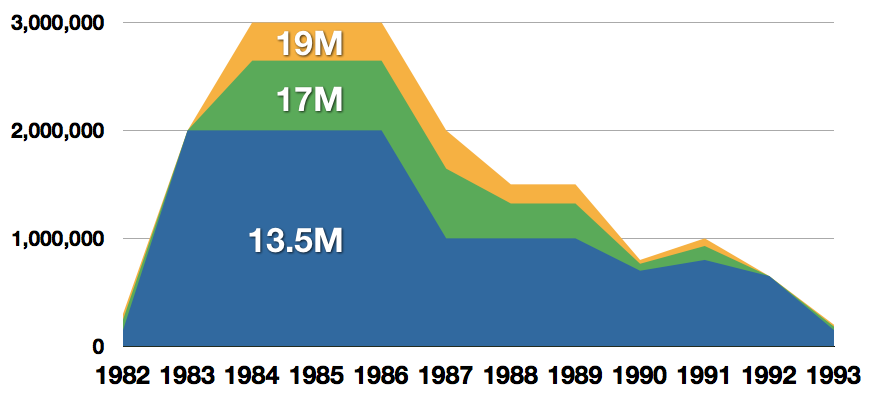
Commodore announced that the C64 would be finally discontinued in 1995. However, only one month later in April 1994, the company filed for bankruptcy. When Commodore went bankrupt, all production on their inventory, including the C64, was discontinued, thus ending the C64's 11 and a half year production.

Legendary titles

The history of Commodore 64 is interesting ones and I believe that it has done much for computers in general, yes it ran 11 years and that seems like a small-time, but remember that it was 11 years of C64 alone, there were other computers released by the company but none except arguably AMIGA 500 has not reached that much popularity as Commodore 64. That being said the system has left some of the great titles in its catalog that are great to be played even today and have been classic games on other platforms, even on PC itself. That being said I am giving you the top 100 games for Commodore 64:
  1. maggot
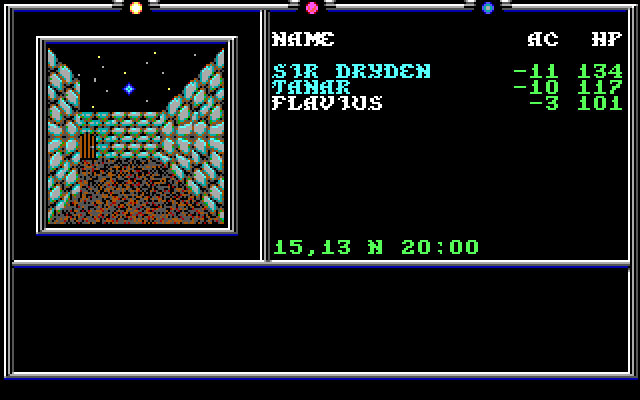
Zak McKracken and the Alien Mindbenders
  2. Pirates!
  3. Maniac Mansion
  4. IK+
  5. Bubble Booble
  6. Turrican II: The Final Fight
  7. Last Ninja 2
  8. Space Rogue
  9. Ultima IV: Quest of the Avatar
  10. Archon: The Light and the Dark
  11. Turrican
  12. Wasteland
  13. Defender of the Crown
  14. Elite
  15. Ultima V: Warriors of Destiny
  16. Laser Squad
  17. Prince of Persia
  18. Impossible Mission
  19. U.L.E.
  20. Pool of Radiance
  21. Bruce Lee
  22. Paradroid
  23. Project Stealth Fighter
  24. Curse of the Azure Bonds
  25. Ultima III: Exodus
  26. Legacy of the Ancients
  27. Winter Games
  28. Leaderboard Golf
  29. Supremacy
  30. Airborne Ranger
  31. Exile
  32. Last Ninja, The
  33. World Class Leader Board
  34. MicroProse Soccer
  35. Project Firestart
  36. Boulder Dash
  37. Summer Games 2
  38. Great Giana Sisters, The
  39. Neuromancer
  40. Mad Doctor
  41. Mail Order Monsters
  42. Zork I: The Great Underground Empire
  43. Buck Rogers: Countdown to Doomsday
  44. Katakis
  45. Bard's Tale, The: Tales of the Unknown
  46. WIzball
  47. Times of Lore
  48. Emlyn Hughes International Soccer
  49. Ultimate Wizard
  50. Alternate Reality: The Dungeonalternate reality dungeon
  51. World Games
  52. Leaderboard Executive
  53. California Games
  54. Samurai Warrior: The Battles of Usagi Yojimbo
  55. Summer Games
  56. Creatures 2: Torture Trouble
  57. Gunship
  58. Space Taxi
  59. International Karate
  60. Silent Service
  61. Bard's Tale III, The: Thief of Fate
  62. Seven Cities of Gold
  63. Armalyte
  64. Raid on Bungeling Bay
  65. Alter Ego: Male Version
  66. Enforcer: Fullmetal Megablaster
  67. Detective Game, The
  68. Creatures
  69. Skate or Die!
  70. Heart of Africa
  71. E.R.O. - Helicopter Emergency Rescue Operation
  72. Way of the Exploding Fist, The
  73. Stunt Car Racer
  74. Wizard of Wor
  75. Bard's Tale II, The: The Destiny Knight
  76. Mayhem in Monsterland
  77. Train, The: Escape to Normandy
  78. Jumpman
  79. Champions of Krynnchampions of krynn
  80. Pitstop II
  81. Barry McGuigan World Championship Boxing
  82. Montezuma's Revenge
  83. Boulder Dash II: Rockford's Revenge
  84. Spy vs Spy
  85. Mercenary: Escape from Targ
  86. Midnight Resistance
  87. Lords of Midnight
  88. Lode Runner
  89. Castles of Doctor Creep, The
  90. Boulder Dash Construction Kit
  91. Buggy Boy
  92. Racing Destruction Set
  93. Dino Eggs
  94. Realm of Impossibility
  95. Rainbow Islands
  96. Beach-Head II: The Dictator Strikes Back
  97. Barbarian: The Ultimate Warrior
  98. Grand Prix Circuit
  99. Head Over Heels
  100. Sentinel, The

Commodore 64 emulator and game ROMs

Commodore 64 might be in the past but its legacy still lives on even today through emulators and ROMs for emulators. You can even purchase one in working condition if you want and relive the full experience as it once was. vice c64 emulator
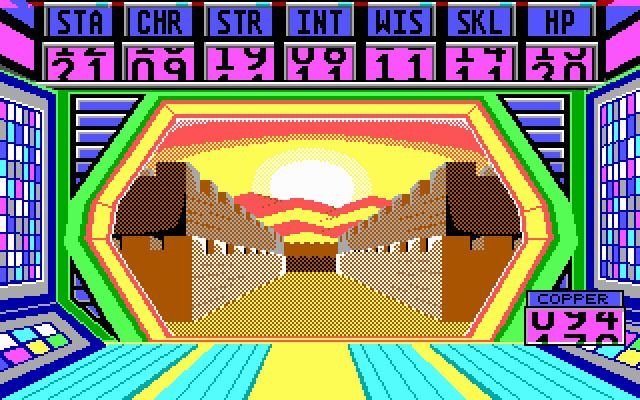
If you are not keen on spending money for reliving and checking games or software of C64 here are some links to help you to at least experience part of it completely free. 
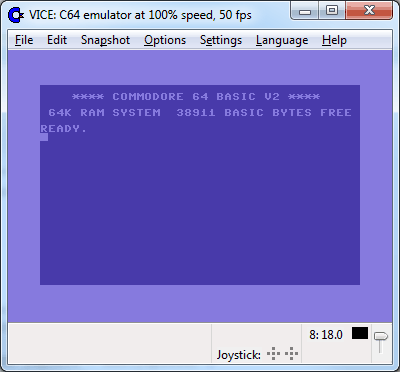
Commodore 64 Emulator C64 Game ROMs

Conclusion

It is without a doubt that the C64 home system has made a great mark on home computers echoing even today and I am very grateful that I have been part of it as a kid. Sometimes today I will still spin some old classic via emulator just for nostalgia and enjoy its simplicity. Thank you for reading the article and I hope to see you soon again.
Read More
1 2 3 162
Logo
Copyright © 2022, ErrorTools. All Rights Reserved
Trademarks: Microsoft Windows logos are registered trademarks of Microsoft. Disclaimer: ErrorTools.com is not affiliated with Microsoft, nor claim direct affiliation.
The information on this page is provided for information purposes only.
DMCA.com Protection Status