Fix 0x800f0982, PSFX E MATCHING COMPONENT

If you encounter an error saying, “0x800f0982 – PSFX_E_MATCHING_COMPONENT_NOT_FOUND”, when you try to install a Windows 10 cumulative update, then you’ve come to the right place as this post will help you sort this problem out. According to the reports, computers with Asian language packs installed are the ones that are mostly affected by this error. In fact, the same error code was also found with two KB4493509, KB4495667 and KB4501835. These cumulative updates are released as part of Patch Tuesday. However, it appears that it brought on issues. Thus, to fix the error, you can try to uninstall and reinstall any language packs you’ve added recently. You can also try to uninstall older KB updates or delay Windows Update, as well as reset Windows 10.

Option 1 – Try to uninstall and reinstall the language packs you’ve recently added

If you have installed a language pack recently, you have to uninstall it, restart your computer, and then reinstall it.

  • Go to the Settings app and select Time & Language.
  • Next, click on the Language option and select the language you have to uninstall.
  • After selecting the language, it will enable two-button namely the Options and Remove buttons.
  • Click on the Remove button and then reboot your PC.
  • Once your computer has restarted, install the language pack again.

Option 2 – Try to uninstall the KB updates

Microsoft has actually offered a solution, an odd one which is to install the April 2019 cumulative update. You have to uninstall the older KB4495667 and KB4501835 update from your Windows 10 computer. And after you’ve uninstalled them, click on the Update button and then install the April 2019 cumulative update.

  • Go to Settings and select Update and Security > Windows Update.
  • From there, click on the “View update history” option and then click on the “Uninstall Updates” option.
  • This will open a new window that contains the list of installed Windows Updates.
  • Now right click on the Windows Update you wish to uninstall and click Uninstall.
  • Once you’ve uninstalled the update, click the Update button and install the April 2019 cumulative update.

Option 3 – Try to delay Windows Update

If you have not installed the Windows 10 cumulative update KB4493509 yet and the Asian language is a must for you, then you have to delay or pause the Windows Update for at least a couple of days.

Option 4 – Reset your computer

  • Tap the Win key or click on the Start button located in the Taskbar.
  • Then click on the Power button at the bottom right portion of the screen.
  • Next, press and hold the Shift key on your keyboard and then click on Restart. This will restart your Pc into the Advanced Startup options.

Note: Once you have access to the Advanced Startup options, you have to go to the setting which allows you to Reset your Windows 10 PC. All you have to do is select Troubleshoot > Reset this PC to reach the following screen

  • Afterward, select either the “Keep my files” option and then proceed to the next on-screen instructions that follow to reset your Windows 10 computer without losing your files.
If you like to learn and find out more about various Windows errors, and how to repair them go to our vast archive or use search to find articles that will explain and help you in solving your issue.
However, if you prefer to do things fast and with automatization then we are proposing to use an automated solution for your issues. The application that we are recommending is Advanced System Repair Pro
Advanced System Repair utilizes multiple tools all in one to give you a quick, simple, reliable, and very thorough diagnosis of your PC. It brings you all the tools you need in one program to clean, fix, protect, optimize and boost your PC!
1-Click Maintenance
All the tools to make it simple and easy! It's like having a professional technician at the click of a mouse.

Junk Cleaner
Keeping your computer free from unnecessary clutter also helps make your computer last longer. Like any other machine, if you keep it clean and take care of it, it will serve you better for longer!

Optimize background apps
Optimize applications background activity with the built-in Application Optimizer feature.

Disk Defrag
With a simple 1-click, Advanced System Repair speeds up your PC by assembling fragmented files on your machine and organizing them more efficiently.

Malware Removal
Finds and removes all types of harmful malware including trojans, worms, bots, adware, spyware, PUPs, and more!

Privacy Cleaner
The all-in-one privacy suite to Clean Your Tracks & Protect Your Privacy! Make your computer safe, secure, and more efficient!

System Tweak/Optimizer
ASR will analyze your complete system and settings to adjust your PC to function at its maximum performance.

Registry Cleaner
Over time, as you install and uninstall applications, the registry can become cluttered with old entries and broken settings which can result in program crashes, and annoying messages and slow the computer down.
Visit our Advanced System Repair Pro Download page to inform yourself about all the benefits of this software and get a free trial copy of it.
advanced system repair pro

Advanced System Repair Pro

One-click automated PC repair solution
ASR logo
With Advanced System Repair Pro you can easily
Replace damaged files
Restore performance
Free disk space
Remove Malware
Protects WEB browser
Remove Viruses
Stop PC freezing
DOWNLOAD
Privacy Policy | Terms of Use | Uinstall
Advanced System Repair Pro is compatible with all versions of Microsoft Windows including Windows 11

Share this article:

You might also like

Setting up an FTP Server in Windows
File Transfer Protocol Server, also known as FTP Server, is a private or public service that can host files that can be accessed both locally and globally. It is a quick, flexible and seamless service that allows you to store any kind of files depending on the total size of the server. If you’ve always found an FTP server useful, then the good thing is you can now create your FTP server since Windows 10 now allows it. You can host this server locally and later on make it globally available via the internet. So if you are planning to set up an FTP server on your Windows 10 computer, read on as this post will guide you on how to do so.

To set up the FTP server, you need to configure it first and then configure the Windows Firewall for the connections to go through. For more details, refer to the following steps:

Step 1: You need to configure the FTP server on Windows 10.
  • In the Search box, type in “Turn Windows Features On or Off” to search for it.
  • Then click on the appropriate result which will open a mini window.
  • From this mini window, scroll down to the list and expand “Internet Information Services where you have to expand the FTP Server section.
  • Next, select all the checkboxes to enable all the entries under FTP Server and then click the OK button to apply the changes made.
  • And now, since your computer is now allowed to host an FTP server, you need to configure it. To do so, type “Internet Information Services (IIS) Manager” in the Search box and click on the appropriate entry.
  • Next, right-click on Sites under the navigation bar of Connections and select Add FTP Site. This will open a new window where you have to input some information about your FTP hosting.
  • Now enter the details and click on Next.
  • Upon clicking Next, you will be prompted to give some authentication details. Enter the following details in the screenshot below.
  • Now click on Finish. After that, you will get an FTP Server being hosted on your Windows 10 PC.
And now that you’ve successfully configured the FTP Server, the next thing you have to do is to allow connections from and to the FTP server. Refer to the next step below. Step 2: Configure the Windows Firewall for FTP connections to pass-through
  • In the Start Search, type “Allow an app or feature through Windows Firewall” and click on the related search result which will open a window with all the settings.
  • From there, click on the Change Settings button. This will display a list where you have to mark all the checkboxes for the FTP server to enable them in both the Private and Public configurations.
  • After that, click OK. This will allow you access to the FTP server on your local network.
Read More
A Quick Guide to Fixing Error Mswrd632.wpc

Error Mswrd632.wpc Fix Guide

Mswrd632.wpc - What is it?

Mswrd632.wpc is a Microsoft Office Word error message.  This error message is often displayed in the following format:
‘Word cannot start the converter mswrd632.wpc’
The error message mswrd632.wpc may pop up when computer users try to open certain MS Word documents using the .doc extension.

Solution

Restoro box imageError Causes

Error Mswrd632.wpc may be triggered due to several reasons. Some of the common reasons for the mswrd632.wpc error code include:
  • Issues with Microsoft Word application
  • MSwrd632.wpc file corrupted
  • Changes in the registry configuration settings
  • Issues with security updates
Sometimes when you attempt to access the Word file of the older version of the MS Word application after new security updates, you may experience this error code. This happens because the new security features that you have installed in the updated version blocks old files from being accessed.

Further Information and Manual Repair

If you can’t access important MS Word files on your PC, due to the error Mswrd632.wpc, then don’t you worry! The good news is that it is easy to fix and repair. By following a few simple methods, you can easily resolve this issue and access your MS Word files. Try the methods listed below to repair error Mswrd632.wpc on your system:

Method 1: Copy the MSwrd632.wpc file From Another Computer

The error may also occur if the MSwrd632.wpc file is corrupted. In such as situation, copy the MSwrd632.wpc file on your PC from another computer. You can usually find this file in the following path C:\Program Files\Common Files\Microsoft SharedTextConv. However, please note this method is not secure and may make your PC vulnerable to a possible security hack. Do it when your PC is not connected to the internet.

Method 2: Unregister the Text Converter

This issue can also be resolved by unregistering the converter. Here is a step-by-step guide to unregister the converter.
  • First, go to the start menu and select RUN.
  • Type REGEDIT and press the OK button.
  • Next, what you have to do is find and click on registry subkeys. Here are the keys that you have to click on
HKEY_LOCAL_MACHINESOFTWAREMicrosoftSharedToolsText ConvertersImportMSWord6.wpc (Windows 32 bit OS) HKEY_LOCAL_MACHINESOFTWAREWow6432NodeMicrosoftSharedToolsText ConvertersImportMSWord6.wpc (Windows 64 bit OS)
  • Choose the key according to your Windows bit operating system. After that, click on the Edit menu, select the Delete option and click ‘Yes’ to activate changes.
This change will effectively unregister the text converter and disable it for third-party applications and for Microsoft Office enabling you to access your desired MS Word files easily.

Method 3 - Download Restoro to Resolve Registry issues

If the error is related to the registry, then the best and most efficient way to fix it is to download Restoro. This is a powerful registry cleaner and a PC Fixer deployed with a user-friendly interface and compatible with all Windows versions. It scans and removes all registry errors and repairs the registry in seconds. Click here and download Restoro to resolve the MSwrd632.wpc error now!
Read More
Fix Chrome ERR_BAD_SSL_CLIENT_AUTH_CERT
The Google Chrome browser checks the SSL Security Certificate of the website that you are trying to open. However, if Chrome is not able to check the certificate then you might encounter an error related to the SSL Certificates which you might face when browsing the web. This particular error is the ERR BAD SSL CLIENT AUTH CERT error which is caused by many factors such as the computer’s Time, Cached Data is corrupt, Date is out of sync, as well as third party software installed in your computer is the one that’s blocking the site and many more. The ERR_BAD_SSL_CLIENT_AUTH_CERT error might also be coming from the website’s end. It could be that the server is rejecting the certificate the client website is sending. The certificate might have already expired or the server may not trust its issuer – whichever the case may be, here are some options you can check out to fix the error.

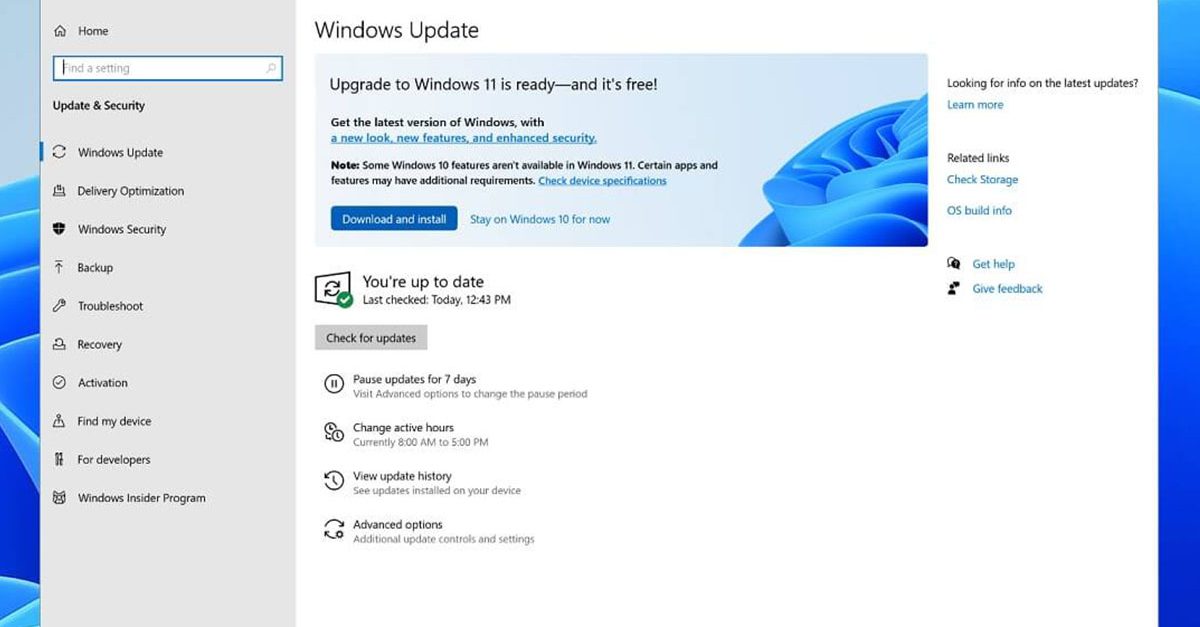
Option 1 – Sync Date and Time

The first thing you can try is to sync the Date and Time of your computer as the wrong Date and Time settings are one of the most common causes of connection problems like the ERR_BAD_SSL_CLIENT_AUTH_CERT error. This is because of the incompatibility between the SSL Certificate validation date and the System Clock. Thus, you have to sync your System Clock. Refer to the steps below to do so.
  • Right-click on the Taskbar and click on the Adjust Date and Time option.
  • Next, click on the Sync Now button to synchronize the Date and Time with the Microsoft Servers.
  • Now make sure that the Time Zone that’s set on the same page is correct.

Option 2 – Try clearing the browser data

There are times when some data in the browser is conflicting with the loading of the website and triggers errors like ERR_BAD_SSL_CLIENT_AUTH_CERT. And so you can try to clear your browser’s data. This might be a very basic solution but oftentimes it works in fixing this kind of error in Google Chrome. Follow the steps below to clear the data in your browser.
  • Open your Google Chrome browser.
  • After that, tap the Ctrl + H keys. Doing so will open a new panel that allows you to delete the browsing history and other data in your browser.
  • Now select every checkbox that you see and click on the Clear browsing data button.
  • Then restart your Chrome browser and check if you can now open any website or not.

Option 3 – Try to check and fix any possible conflicts with third-party programs

Third-party programs like internet protection software could be interrupting the connection and causing the error. For some unknown reason, your antivirus program or firewall might be detecting the webpage you are trying to open as malicious or with less credibility which is why it is blocking the browser from opening the website. To fix that, if you have third-party programs installed like VPN, security software, or any add-on, or firewall, you can disable them temporarily and see if it fixes the problem and you’re able to pull up the website. After a while, you have to enable them back and configure their settings so that the website won’t get blocked again.

Option 4 – Try enabling SSL 3 / TLS and disable QUIC Protocol

If you were using Google Chrome when you got the ERR_BAD_SSL_CLIENT_AUTH_CERT error, then you need to follow the protocol fixes for SSL3/TLS and QUIC which are usually some of the reasons that cause the SSL version / Cipher Mismatch. It also has a few fixes for Windows 10 computer where you can clear the certificates and make sure that your computer date and time is in sync with your time zone and so on. If you were using Edge or Internet Explorer when you got the error, then you have to follow the steps below.
  • Type “Internet” in the search box of your browser. After that, you should see the Internet Options from the search results.
  • Next, open the Internet Properties window and switch to the Advanced tab and then scroll down to the Security section.
  • From there, check the “Use TLS 1.1” checkbox as well as the “Use TLS 1.2” checkbox and then click OK to save the changes made.
  • Restart the browser.
On the other hand, if you were using Firefox when you go the error, here’s what you have to do.
  • Open Firefox and in the address bar, type “about:config” and hit Enter.
  • If a warning appears, just click on the “I accept the risk!” button to proceed.
  • Next, type in “TLS” in the search field and hit Enter.
  • Then look for “security.tls.version.min” and double click on it and set its integer value to 3 to force the protocol of TLS 1.3.
  • Now click OK and restart Firefox and do the same thing with SSL.

Option 5 – Try to update Google Chrome

You might also want to try updating your browser to its latest version and have it installed in your computer. After you install the update, check if you can now open the website you were trying to open earlier.

Option 6 – Get rid of any conflicting browser extensions

  • Open Chrome and press Alt + F keys.
  • Go to More tools and click Extensions to look for any suspicious browser extensions or toolbars.
  • Click the Recycle bin and select Remove.
  • Restart Chrome and press Alt + F keys again.
  • Proceed to On Startup and mark Open a specific page or set of pages.
  • To check if the browser hijacker is still active, click Set pages, if it is active, overwrite the URL.
Note: If removing the browser extensions or toolbars didn’t work, you can also try to reset your Google Chrome browser.
  • Open Google Chrome, then tap the Alt + F keys.
  • After that, click on Settings.
  • Next, scroll down until you see the Advanced option, once you see it, click on it.
  • After clicking the Advanced option, go to the “Restore and clean up option and click on the “Restore settings to their original defaults” option to reset Google Chrome.
  • Now restart Google Chrome.
Read More
Edge DevTools An error occurred while ...
In case you don’t know, Microsoft Edge, the new default browser of Windows 10, is equipped with the essential tools that are needed to help web developers in testing their websites in the Edge browser. However, it is not without its flaws as there are instances when you could also encounter some errors when using DevTools. One of these errors is the “An error occurred while starting the profiling session” error. You can see this error message in the DevTools Memory Panel, worry not for this post will help you resolve it. A memory panel is one that primarily measures your memory resource usage and compares heap snapshots in different states of code execution. The Memory panel also provides profiling of three different types, such:
  • Head Snapshot
  • Record Allocation timeline
  • Record Allocation profiles
Using a memory panel, you can find issues that affect the page performance in the most common scenarios like bloats and memory leaks. There are two steps you need to carry out to fix this error that’s associated with the Memory Panel of Microsoft Edge (Chromium) DevTools. First, you need to access the Microsoft (R) Diagnostics Hub Standard Collector Service. Second, you need to restart this service. For detailed steps, follow the instructions provided below. Step 1: Access the Microsoft (R) Diagnostic Standard Collector Service To access the Microsoft (R) Diagnostic Standard Collector Service, follow these steps:
  • Tap the Win + R keys to open the Run dialog box.
  • Then type “services.msc” in the field and hit Enter or click OK.
  • This will open the Services Manager. Here, look for the Microsoft (R) Diagnostic Service from the Services panel that opens on the right-hand side.
Step 2: Now restart the Microsoft (R) Diagnostic Hub Standard Collector Service
  • After accessing the Microsoft (R) Diagnostic Standard Collector Service, right-click on it and select the Restart option.
  • Once it’s done, exit the Microsoft Edge Developer Tools as well as the tab.
  • Next, open a new tab and navigate to your page and tap the F12 key.
  • Now, try to check if profiling begins.
Read More
Automatically Adjust Active Hours in Windows
In case you didn’t know, the new Windows 10 v1903 has brought tons of new features around Windows 10 Updates. One of these features is the ability to automatically adjust the Active Hours based on your computer activity. This feature is really useful as it tells the operating system when to install the Windows Updates. A lot of users use the Active Hours feature to ensure that the Windows Update won’t force them to restart their PCs to install the update. So if your computer is turned on, it won’t apply the update during the active hours you’ve specified. In addition, the active hours change for many users and they are not that strict. For instance, if you set the active hours between 10 am to 5 pm, Windows Update won’t be forcing you to restart your computer to install the updates at those times. Note that Windows Update allows enabling an option using where it can monitor the active hours in your computer and change it. To configure this setting, here’s what you have to do:
  • Frist, go to Settings > Update & security > Windows Update.
  • Next, take note of your current active hours and click on the “Change active hours” link.
  • Then toggle the option that says, “Automatically adjust active hours for this device based on activity”. This will change the active hours and if you match it with the previous one, it should be different.
As you can see on the image given above, the earlier active hours were between 8:00 to 17:00 and were changed to 11:00 to 19:00. If you have been using this feature for a while you’ll find how useful and handy it is especially when you’re using your computer and don’t want any notifications like the prompts for Windows Updates to bother you while working.
Read More
Fix Windows Update Error 0x800F0922
A lot of users connect to the internet are using VPN on their Windows 10 computers which means that their regions could be different from the actual region of their Windows 10 computers. Thus, if you are facing some issues in updating your computer in this kind of environment, specifically the Windows Update error 0x800F0922, you need to follow the tips given in this guide to help you resolve the issue. When you encounter this kind of Windows Update error, you might see either of the following error messages on your screen:
“Windows could not search for updates, Code 0x800F0922 Windows Update encountered an unknown error” Or: “Windows failed to install the update with error 0x800F0922”
This issue might be caused by two possible reasons such as:
  1. VPN issues
  2. Not enough space on the System Reserved partition
To resolve the problem, here are some tips that might help:

Option 1 – Try disabling the VPN

As mentioned, if you are using VPN, this could be the reason why you’re getting the Windows Update error 0x800F0922 so the most obvious thing to do is for you to turn off the VPN and try to run the Windows Update once more. And if you use a VPN software that works using their software, you can just completely exit or log-off from its account. On the other hand, if you are using a built-in Windows 10 VPN, you can simply turn it off or delete all the settings you have created there. Although it’s understandable that you might have to use a VPN connection to connect to the work network, you really have to disable it at least until the Windows Update is no longer stuck in the error 0x800F0922. It would be best if you do this when you are not working.

Option 2 – Try to free up space in the System Reserved partition

The System Reserved partition is a part of the hard disk created when Windows is first installed on it. It is where the Boot Configuration Database, Boot Manager Code, Windows Recovery Environment, and the reserves space for the startup files are stored. And as mentioned early on, the error might be due to some insufficient space in the System Reserved partition so the next thing you can do is to increase the space in this partition. Note that it is a complex process so you need to make sure that you have made backups to all your data on the computer. So if ever something goes out of hand, at least you have copies of your important files in case you aren’t able to boot into the system at all.
Read More
A Guide to Fixing Error Code 0x8007007b in Windows 8

Error Code 0x8007007b – What is it?

This error code occurs when users fail to activate their Windows operating system. It is one of the more popular Windows error codes since it affects many versions of Windows including Windows 7, Windows 8.1, and Windows 10. Error code 0x8007007b has common symptoms which include the following:

  • Inability to activate a Windows installation
  • Message box highlighting error code 0x8007007b

Solution

Restoro box imageError Causes

Error code 0x8007007b in Windows 8.1 usually results due to one or more main clauses. Windows 8.1 users may experience this error due to the use of volume-licensed media. The error code may also arise if the activation wizard is unable to connect to Key Management Service (KMS) host computer or if corrupted system files are present on your computer.

Further Information and Manual Repair

Windows error codes such as Error code 0x8007007b can be a complicated issue, requiring the use of technical knowledge and skills. For this reason, we have listed instructions in the simplest of forms to enable even average users to successfully complete manual repair methods that will resolve error code 0x8007007b.

The same approach has been applied to all our error code solutions. See also Error Code 0x00000024 and Error Code 0x80004005.

Below are the two main methods for correcting this issue.

Method One: Use Multiple Activation Key (MAK) to Activate Windows

This method involves the use of a Multiple Activation Key (MAK) instead of the Key Management Service (KMS) to activate the Windows operating system you intend to use on your PC. This manual repair method requires the use of Command Prompt so ensure you follow the instructions provided carefully so as to avoid the risks of causing harm to your system.

  • Step one: Select Windows log key + X.
  • Step two: Click Command Prompt, then Admin
  • Step three: Type in admin password if Command Prompt requests it
  • Step four: Type slmgr -ipk followed by the MAK product key. Note that the product key should have 25 characters with dashes between them like this xxxxx-xxxxx-xxxxx-xxxxx-xxxxx

Attempt to activate your Windows installation once you’ve completed the exact instructions above. If you are unable to complete this process, consider getting help from a Windows repair technician or simply move to the next manual repair method listed below.

Method Two: Run System File Checker

System File Checker (SFC) enables Windows users to scan and repair errors or corruption on system files. Since such errors within your system files can cause error code 0x8007007b to occur, follow the steps below to fix this error code.

  • Step One: Go to Start and type Command Prompt or CMD.
  • Step Two: Run as Administrator
  • Step Three: Type sfc /scannow with a space between “sfc” and “/scannow”.

The System File Checker tool will begin scanning your machine for corrupted or missing files in need of repair. If these files are found on your system, the tool will repair and replace them. Once this is done, restart your computer then check to see if you can now activate your Windows operating system.

Method Three: Use an Automated Tool

If you wish to always have at your disposal a utility tool to fix these Windows 8 and other related issues when they do arise, download and install a powerful automated tool.

Read More
Fix W11 Installation assistant is not working
Windows 11 is getting adopted more and more each day, and how more and more users are installing it some smaller bugs show up. One of the things that have manifested lately is that in some cases installation assistant is not working throwing error 0x8007007f at you while you try to finish the update of Windows. Win not working thumb If you are one of the users that are experiencing this kind of annoyance, we have a solution for you. Follow this guide as presented and repair this annoying error.

Run installation assistant as administrator

This is the most simple solution that can solve problems right away and it is advised to be tried first.
  1. Download standalone Installation assistant installer from Microsoft website here
  2. Go to the location where you had the file downloaded
  3. Right-click on file
  4. Click on Run as administrator
  5. On the permission box, click YES

Disable antivirus and/or firewall software

Antivirus or firewall software can sometimes interfere with Windows’s update and prevent for any reason download or installation of files they consider not safe. If the first solution has not provided success turn off your antivirus or firewall software and try again to install updates by running them as administrator. Now, how many different antivirus or firewall applications are unique pieces of software it would take too much time to cover all of them but usually and most commonly if you right-click on the taskbar icon of security app most of the time you will have either option to open it and close it or simply just to snooze it for some time.

Set the compatibility

If you are still having issues with installing updates try setting compatibility mode for the installer.
  1. Download standalone Installation assistant installer from Microsoft website here
  2. Go to the location where you had the file downloaded
  3. Right-click on file
  4. Click on properties
  5. Go to the Compatibility tab
  6. Click on Run this program in compatibility mode for:
  7. Choose Windows 7
  8. Click on APPLY
  9. Run installer

Run SFC scan

If you are still facing installation issues there is a high chance there is something wrong with Windows system files. Luckily Windows itself has a built-in tool to address these issues and fix them.
  1. Open command prompt as administrator by pressing Start and searching for the command prompt and then on right-clicking on run as administrator
  2. Once the command prompt opens type in SFC / SCANNOW and press ENTER
  3. Wait for the whole process to complete and then restart your system
Read More
Fixing the No Audio Output Device is Installed
If you suddenly encountered an error that says, “No Audio Output Device is installed” on your Windows 10 computer, worry not for this post will guide you on how exactly you can fix the problem. There are several possible reasons why this error pops up. It could be due to a recent Windows 10 update you’ve installed, or it could be due to a corrupted or outdated audio driver, and so on. There are several potential solutions to this error. You can try running the built-in Audio Playing troubleshooter or update or uninstall the Audio driver. You could also try to update the Intel Smart Sound Technology Audio Control driver, as well as contact support for your laptop or computer. For more details, refer to each one of the provided options below.

Option 1 – Try to run the Playing Audio Troubleshooter

Since the Windows 10 operating system has the Playing Audio Troubleshooter, you can use this troubleshooter to try and fix the problem with the “No Audio Output Device is installed” error. You can access this tool in the Control Panel or in the Taskbar Search and even on the Troubleshooters page of Windows 10. Run this troubleshooter and see if it can fix the issue or not.

Option 2 – Try to update the Audio driver

If the error has something to do with software, chances are it might be related to the audio driver – it could be that the newest version of your Windows 10 does not work well with the old version of the driver. This is why you have to update your audio driver to the newest available version.
  • Tap the Win + R keys to open the Run dialog box and then type in MSC and tap Enter or click OK to open the Device Manager.
  • Expand the section of the Sound, video, and Game Controllers.
  • And then from the drop-down menu, select the Update Driver option and follow the on-screen instructions to install the latest version of the driver.
  • Then also click on the option, “Search automatically for updated driver software.
  • Restart your PC after the installation.
Note: If updating the Audio driver didn’t work, you can go to the website of your PC manufacturer and look for the support section where you can download the drivers for your computer. You just need to take note of your PC’s correct model and model number so you can find the appropriate driver.

Option 3 – Try removing and reinstalling the sound card

If option 1 didn’t work, you can also try to remove and reinstall the sound card of your computer to fix the high-pitched sound coming from your computer’s speakers.
  • To get started, tap on the Windows key + R to pull up the Run box.
  • Next, type in “MSC” in the box to open the Device Manager.
  • After opening the Device Manager, go to the “Sound, video, and game controllers” option then right-click on the sound card.
  • Finally, click on Uninstall and tick the box with a label that says, “Delete the driver software for this device” and close the Device Manager.
  • Restart your computer and check if the problem’s fixed or not.
Note: After you restart your computer, the system should reinstall the speaker automatically. But if it does not reinstall, you can follow the aforementioned steps again to go to the Device Manager. From there, go back to “Sound, video, and Game Controllers” and right-click on the sound card. After that, enabling the sound card and restart your computer once more. That should fix the problem.

Option 4 – Try updating the Intel Smart Sound Technology Audio Control driver

If the three options given above didn’t fix the error, you might want to try updating the Intel Smart Sound Technology Audio Control driver. To do so, follow these steps:
  • Tap the Win + X keys and select the Device Manager option from the menu.
  • Next, scroll down and click on the System Devices option and select the “Intel Smart Sound Technology Audio Control” option.
  • Then right-click on it and select the “Update driver” option.
  • After a couple of seconds, the wizard will look for an available driver and will automatically update it.
  • Restart your computer and see if the error is now fixed.
Read More
Solution for Error 0x000000d1

What Is 0x000000D1 Error?

Error code 0x000000D1 is a serious error that is displayed when Windows automatically shuts down to protect the system against further damage.

Usually, when this error occurs, the message displayed to the users states something like STOP 0x000000D1 DRIVER_IRQL_NOT_LESS_OR_EQUAL.

Solution

Restoro box imageWhat Causes 0x000000D1 Error?

Usually, the STOP 0x000000D1 error code is caused by issues like incompatibilities, third-party drivers, driver conflicts, outdated drivers, malicious drivers, and other related problems.

Speaking technically, the message displayed to the user actually means that the kernel-mode driver has tried to gain access to memory at an unreasonably high process IRQL.

If left unfixed, STOP 0x000000D1 error can become quite serious. Increased frequency of occurrence may not only lead to data loss but can cause system corruption as well. That’s why it is crucial to fix it and to resolve the underlying issues causing it as soon as possible.

Further Information and Manual Repair

There are different ways of quickly fixing this error, some of which are briefly listed below as follows.
  • The solution advised for advanced users is to start the system and log on to it as the administrator. Then do to Start button. Click on All Programs -> Accessories-> System Tools->  System Restore. Here you will find the option, “Restore my computer to an earlier time”. Click on it and select ‘Next’. A list of restore points will appear in front of you. Select the latest restore point and then click on ‘Next’. The confirmation window will appear again. Click on the Next button again. Restart your computer. Congratulations, you have successfully restored your computer.
  • Another way that’s more suitable for novice users goes as follows. Download a repair utility tool. Now install the program. You are most likely to come across a Scan button. Once that happens, choose the Fix/Repair button. Your scan will be completed. The error will be removed. You can then restart your computer again to ensure the error is no longer displayed.
Some other suggestions to keep your computer from encountering these problems in the future are outlined below.
  • Update all your drivers. Obsolete or old hardware or software drivers may also trigger this STOP 0x000000D1 error.
  • If you have recently installed or modified a driver or hardware and the error has occurred afterward, it is highly likely that the installation or modification has caused it. Revert back to the original settings to steer clear of this driver in the future.
Read More
1 2 3 162
Logo
Copyright © 2022, ErrorTools. All Rights Reserved
Trademarks: Microsoft Windows logos are registered trademarks of Microsoft. Disclaimer: ErrorTools.com is not affiliated with Microsoft, nor claim direct affiliation.
The information on this page is provided for information purposes only.
DMCA.com Protection Status