Enumerating user sessions to generate ...

There are times when the Windows Search doesn’t work and you wouldn’t have a clue as to why it happened since it does not give any error codes. In such cases, you have to check the error logs in the Event Viewer to find out more about the problem. From there, look for an error with the Event ID 3104 in the Windows error logs and if you see an error message that says, “Enumerating user sessions to generate filter pools failed”, read on as this post will guide you in fixing the problem. Apart from the error message, you might also see more information in the details section of the log that says, “(HRESULT: 0x80040210) (0x80040210)”.

This kind of error is most likely caused by something that prohibits the search function from initializing. A lot of users assumed that it could be due to Cortana but it’s actually not. While some users also reported that they encounter the issue after they restarted their computers. This error was also reported with the same event ID 3104 on the Windows Server. According to security researchers, this error could be caused by problems in the Registry entry of Windows search. It could also be due to an issue with the SYSTEM account where it hasn’t been added to the DCOM Security. It is also possible that the Windows Search function has not been initialized.

To fix this error, you can try to rebuild the Search Index manually or run the Search and Indexing troubleshooter. You can also check the startup type of the Windows Search service or try some registry tweak.

Option 1 – Try to rebuild the Search Index manually

The first thing you can do to fix the problem is to manually rebuild the Search Index. You can do that by going to Control Panel > Indexing Options and from there, click on Advanced. After that, go to the Index Settings tab and then click on Rebuild > OK. Once you’re done, check if it fixed the problem.

Option 2 – Try running the Search and Indexing troubleshooter

You could also run the Search and Indexing troubleshooter in Windows 10 as it checks whether the settings are in place and automatically corrects any issues with the Windows 10 search function. To run this troubleshooter, just click on the Start button and select Settings > Updates and Security > Troubleshoot. From there, select the Search and Indexing Troubleshooter. Once the troubleshooter is done, restart your computer and see if it fixed the error.

Option 3 – Try checking the startup type of the Windows Search Service

In this option, you have to check the startup type of the Windows Search service since the service won’t start. To do so, refer to these steps:

  • Tap the Win + R keys to open the Run utility and type “services.msc” in the field and then tap Enter to open the Services Manager.
  • Next, from the list of services, look for the Windows Search Service or WSearch. Once you find it, right-click on it and select Properties.
  • After that, change the Startup type to Automatic and click on the Start button if the service is in the Stop state.
  • Now click on the Apply and OK buttons to save the changes made and then restart your computer.

Option 4 – Try changing the Registry entry for Windows Search

Before you apply some registry tweak, you need to create a System Restore point first. Once you have that covered, follow these steps:

  • Tap the Win + R keys to open the Run utility and type “Regedit” in the field and tap Enter to open the Registry Editor.
  • If a User Account Control prompt appears, just click Yes to proceed.
  • After opening the Registry Editor, navigate to this registry path: HKEY_LOCAL_MACHINESOFTWAREMicrosoftWindows Search
  • From there, click on Windows Search and look for the key named “SetupCompletedSuccessfully” and change its value to “0”. Just right-click on it and select Modify.
  • Then input “0” as its value data and click on OK to save the changes made.
  • Exit the Registry Editor and restart your computer.
  • Now check if the Enumerating user sessions to generate filter pools failed is fixed or not.
If you like to learn and find out more about various Windows errors, and how to repair them go to our vast archive or use search to find articles that will explain and help you in solving your issue.
However, if you prefer to do things fast and with automatization then we are proposing to use an automated solution for your issues. The application that we are recommending is Advanced System Repair Pro
Advanced System Repair utilizes multiple tools all in one to give you a quick, simple, reliable, and very thorough diagnosis of your PC. It brings you all the tools you need in one program to clean, fix, protect, optimize and boost your PC!
1-Click Maintenance
All the tools to make it simple and easy! It's like having a professional technician at the click of a mouse.

Junk Cleaner
Keeping your computer free from unnecessary clutter also helps make your computer last longer. Like any other machine, if you keep it clean and take care of it, it will serve you better for longer!

Optimize background apps
Optimize applications background activity with the built-in Application Optimizer feature.

Disk Defrag
With a simple 1-click, Advanced System Repair speeds up your PC by assembling fragmented files on your machine and organizing them more efficiently.

Malware Removal
Finds and removes all types of harmful malware including trojans, worms, bots, adware, spyware, PUPs, and more!

Privacy Cleaner
The all-in-one privacy suite to Clean Your Tracks & Protect Your Privacy! Make your computer safe, secure, and more efficient!

System Tweak/Optimizer
ASR will analyze your complete system and settings to adjust your PC to function at its maximum performance.

Registry Cleaner
Over time, as you install and uninstall applications, the registry can become cluttered with old entries and broken settings which can result in program crashes, and annoying messages and slow the computer down.
Visit our Advanced System Repair Pro Download page to inform yourself about all the benefits of this software and get a free trial copy of it.
advanced system repair pro

Advanced System Repair Pro

One-click automated PC repair solution
ASR logo
With Advanced System Repair Pro you can easily
Replace damaged files
Restore performance
Free disk space
Remove Malware
Protects WEB browser
Remove Viruses
Stop PC freezing
DOWNLOAD
Privacy Policy | Terms of Use | Uinstall
Advanced System Repair Pro is compatible with all versions of Microsoft Windows including Windows 11

Share this article:

You might also like

Razer Huntsman V2 mechanical keyboard
Razer huntsman
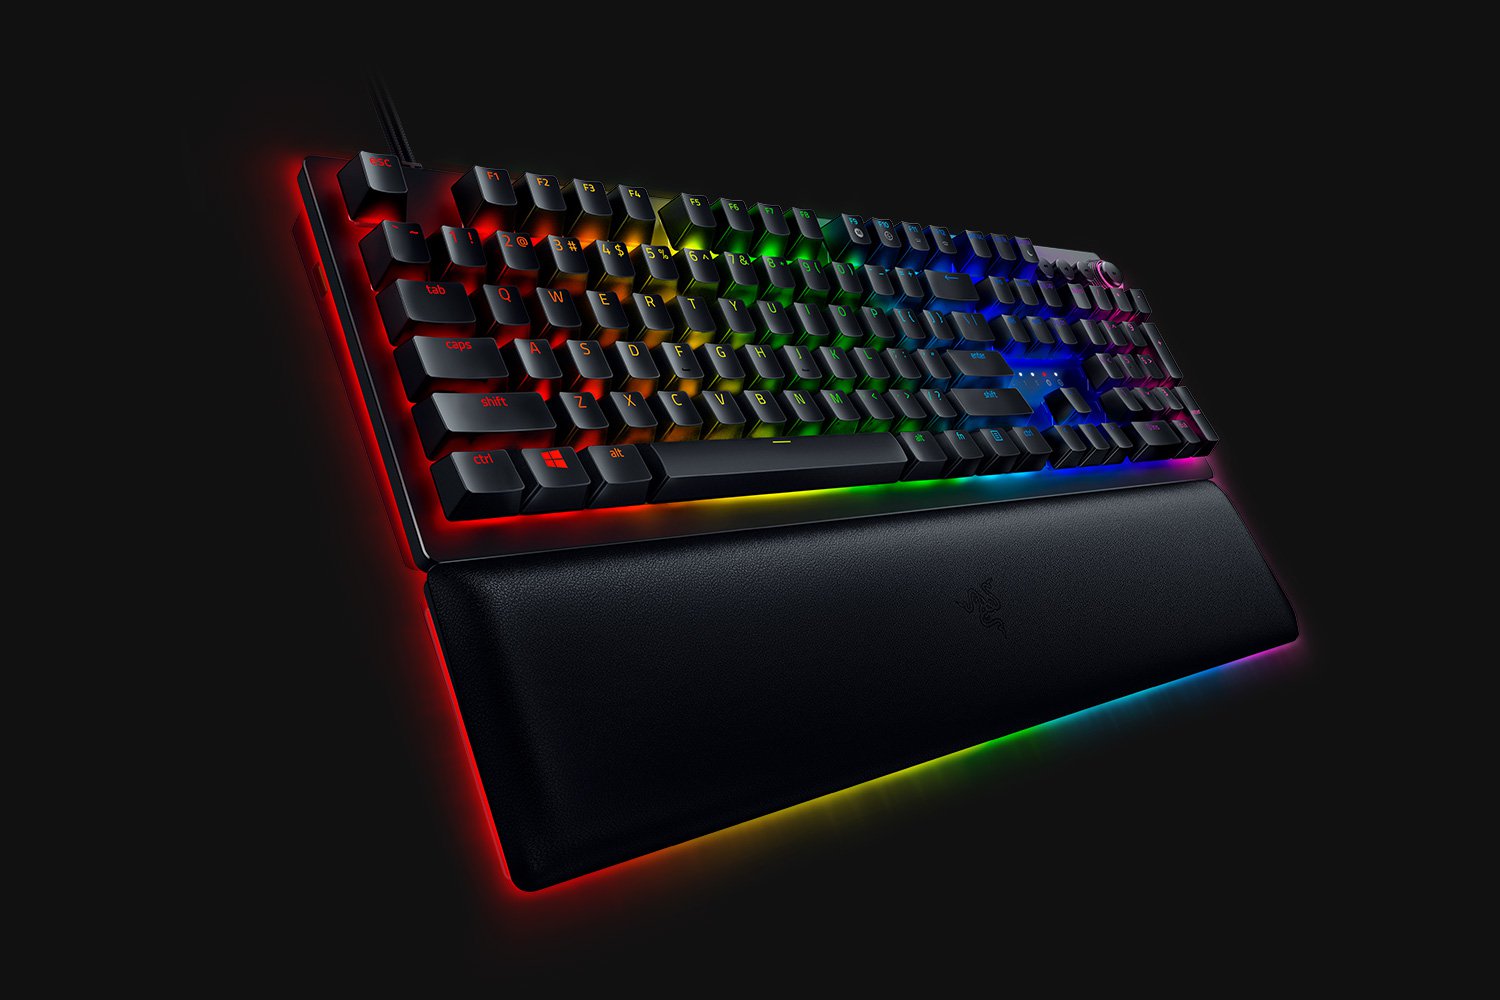
When it comes to computer peripherals first thing that comes to people's minds is probably Mouse and Keyboard. Also when discussing peripherals brands, Razer is not a stranger and over the years it has built its name and cult following. Razer’s mechanical keyboards have been always in the upper field of quality and trust from users and Huntsman is no different.

Tech specifics of Huntsman keyboard

  1. Mechanical optical switches Razer has introduced their new optical technology switch with this keyboard. These switches are faster and more accurate than typical mechanical switches and if tests are to be believed this is the fastest keyboard currently on the market.
  2. Multi-functional digital dial A multi-function digital dial with three tactile media keys gives you instant access to everything from brightness to volume in seconds. All programmable and customizable through Synapse 3, so you can set your preferred configurations right at your fingertips.
  3. 10-key rollover Anti-ghosting technology that enables 10-key simultaneous presses at the same time
  4. 4-side underglow with Razer chroma Go crazy and personalize lighting effects any way you want with a full 4-side underglow and 38 customization zones. Powered by Razer Chroma

Feel and noise

In the department of noise, well it is the mechanical keyboard so naturally, it will be louder than membrane ones but in terms of comparing it to other mechanical keyboards it is within the same noise range, maybe just a tiny bit silenced. The keyboard comes with 2 different types of switches, purple clicky ones that are louder and have that *click* sound for sound feedback, and red ones, that are not equipped with clicky sound but are linear providing slightly faster performance. If you choose the Huntsman elite model of the keyboard it will come with a nice hand resting mat that is very comfortable and feels right. Using a keyboard feels like using a Razer keyboard, it is responsive and gives that superior mechanical feeling.

Conclusion

Razer Huntsman mechanical keyboard is not the cheapest nor the best on the market but it is the fastest one out. It is in the top tier of keyboards and worth the investment.
Read More
Fix Chrome ERR QUIC PROTOCOL ERROR in Windows
If you aren’t able to pull up any website and instead got the ERR QUIC PROTOCOL ERROR error message in Google Chrome then read on as this post will help you resolve the problem. When you encounter such an error in Chrome, you will see the following error message:
“This site can’t be reached, The webpage at [website URL] might be temporarily down or it may have moved permanently to a new web address, ERR_QUIC_PROTOCOL_ERROR”
This kind of error message pops up when the URL is down. However, if you are certain that the site is not down and you’re still seeing this error message, then troubleshoot further using the suggestions given below.

Option 1 – Try to disable the QUIC Protocol

QUIC is an experimental transport layer network protocol that is present in Google Chrome in order to establish a connection between two endpoints over UDP. So if there is any problem on the development side, you will most likely encounter ERR_QUIC_PROTOCOL_ERROR on your Google Chrome browser when you try to open any website. Thus, you have to disable the QUIC protocol in order to resolve the error. How? Simply follow the steps below.
  • Open your Google Chrome browser.
  • Now type in “chrome://flags/” in the address bar and hit Enter.
  • After that, look for the Experimental QUIC protocol which should be set by default.
  • Then expand the drop-down menu and select Disable.
  • Restart Google Chrome and see if the error is fixed or not.

Option 2 – Disable VPN

As mentioned, if you are using VPN, this could be the reason why you’re getting the Windows Update error 0x800F0922 so the most obvious thing to do is for you to turn off the VPN and try to run the Windows Update once more. And if you use a VPN software that works using their software, you can just completely exit or log-off from its account. On the other hand, if you are using a built-in Windows 10 VPN, you can simply turn it off or delete all the settings you have created there. Although it’s understandable that you might have to use a VPN connection to connect to the work network, you really have to disable it at least until the Windows Update is no longer stuck in the error 0x800F0922. It would be best if you do this when you are not working.

Option 3 – Disable the Proxy server

You can also try to disable the Proxy server to fix the ERR_QUIC_PROTOCOL_ERROR in Chrome. Refer to these steps to do so:
  • Tap the Win + R keys to open the Run dialog box.
  • Then type “inetcpl.cpl” in the field and hit Enter to pull up the Internet Properties.
  • After that, go to the Connections tab and select the LAN settings.
  • From there. Uncheck the “Use a Proxy Server” option for your LAN and then make sure that the “Automatically detect settings” option is checked.
  • Now click the OK and the Apply buttons.
  • Restart your PC.
Note: If you are using a third-party proxy service, you have to disable it.
Read More
New Chrome update brings surveillance debate
Google Chrome 94 is here and it has introduced a controversial idle detection API. For those people that do not know what idle detection API is, well basically Chrome can be asked by a website to report when a user of the site has a site open and is idle on the device. The issue that people have with this is that this particular feature can be used to report when the user is not using a computer at all. chrome idle detection feature
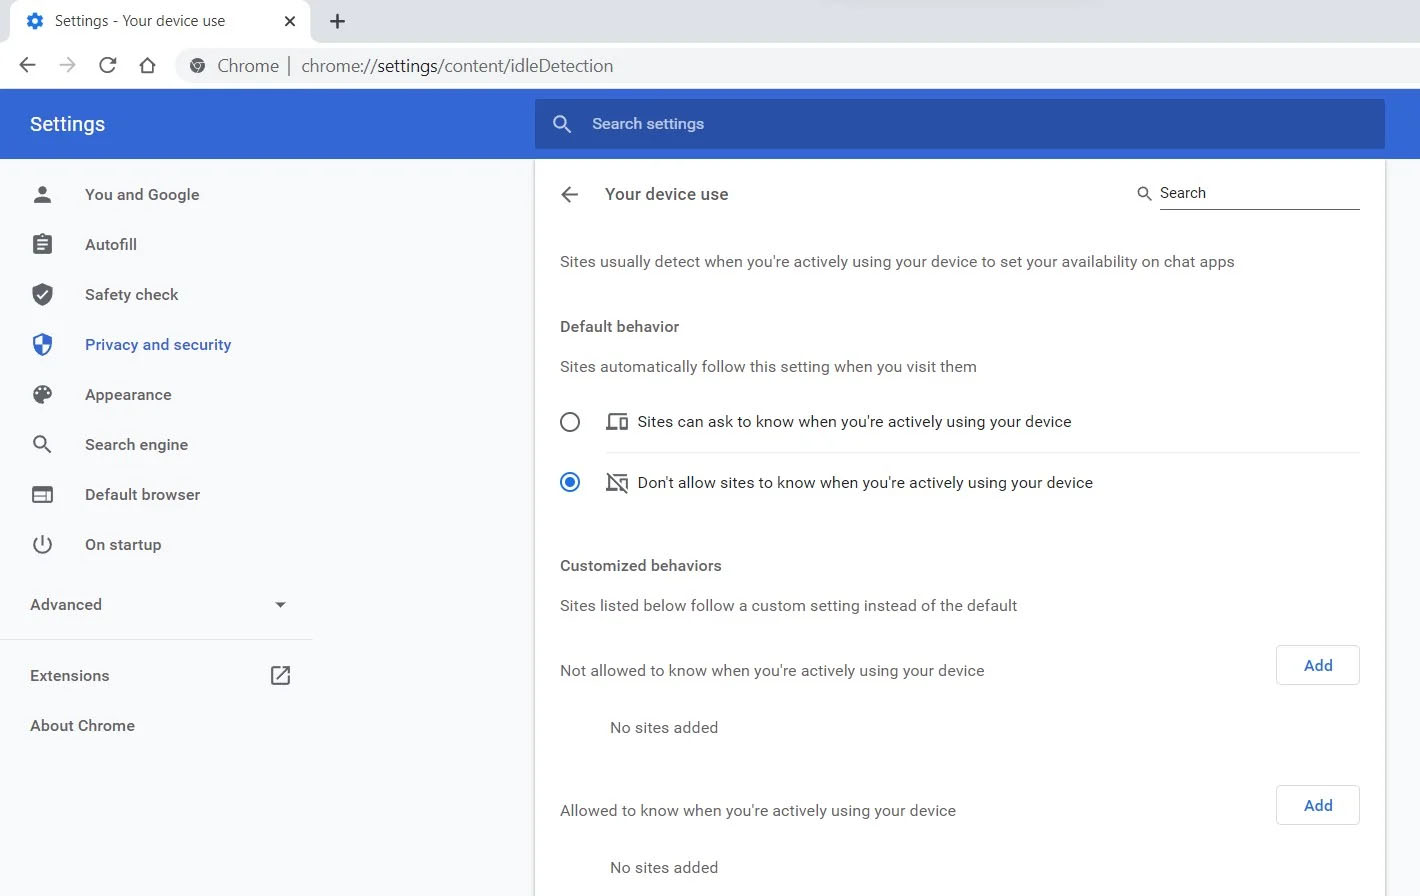
Good thing is that website or web application will prompt you to allow it to use this feature like when a site/application wants to use your microphone or web camera. Developers are on board with this feature since it can provide them with more telemetric data on how users are interacting with their website/application but there are some that are strongly voicing against this. Tantek Çelik, Mozilla Standards Lead, commented on GitHub, saying:
As it is currently specified, I consider the Idle Detection API too tempting of an opportunity for surveillance capitalism motivated websites to invade an aspect of the user’s physical privacy, keep long-term records of physical user behaviors, discerning daily rhythms (e.g. lunchtime), and using that for proactive psychological manipulation (e.g. hunger, emotion, choice)… Thus I propose labeling this API harmful and encourage further incubation, perhaps reconsidering simpler, less-invasive alternative approaches to solve the motivating use-cases.
Others who have spoken against this feature are people from the WebKit development team inside Apple. Ryosuke Niwa, an Apple software engineer who works on WebKit said:
That doesn’t seem like a strong enough use case for this API. For starters, there is no guarantee that the user won’t immediately come back to the device. Also, who is such a service supposed to know what another device user might be using at any given point? We’re definitely not going to let a website know all the devices a given user might be using at any given point. That’s a very serious breach of the said user’s privacy. It seems to me that such a suppression/distribution mechanism is best left for the underlying operating systems/web browsers to handle.
Of course, technology itself as always can be used for good or for bad and time will tell if this feature has brought good stuff or it has paved another brick in surveillance and privacy manipulation. As said for now option will prompt for agreement and let's hope that it will be used for good causes from this day into the future.
Read More
Intel & MS fixed DRM issue with alder lake
Due to its hybrid core technology, the Alder Lake line of processors had some DRM issues with some game titles where DRM protection software detected hybrid core design switching via manager as a hack attempt and prevented the game from working properly. Over 50 titles were affected by this issue, now only 3 remain still affected but it is being worked on them so that can be also resolved. alder lake drm
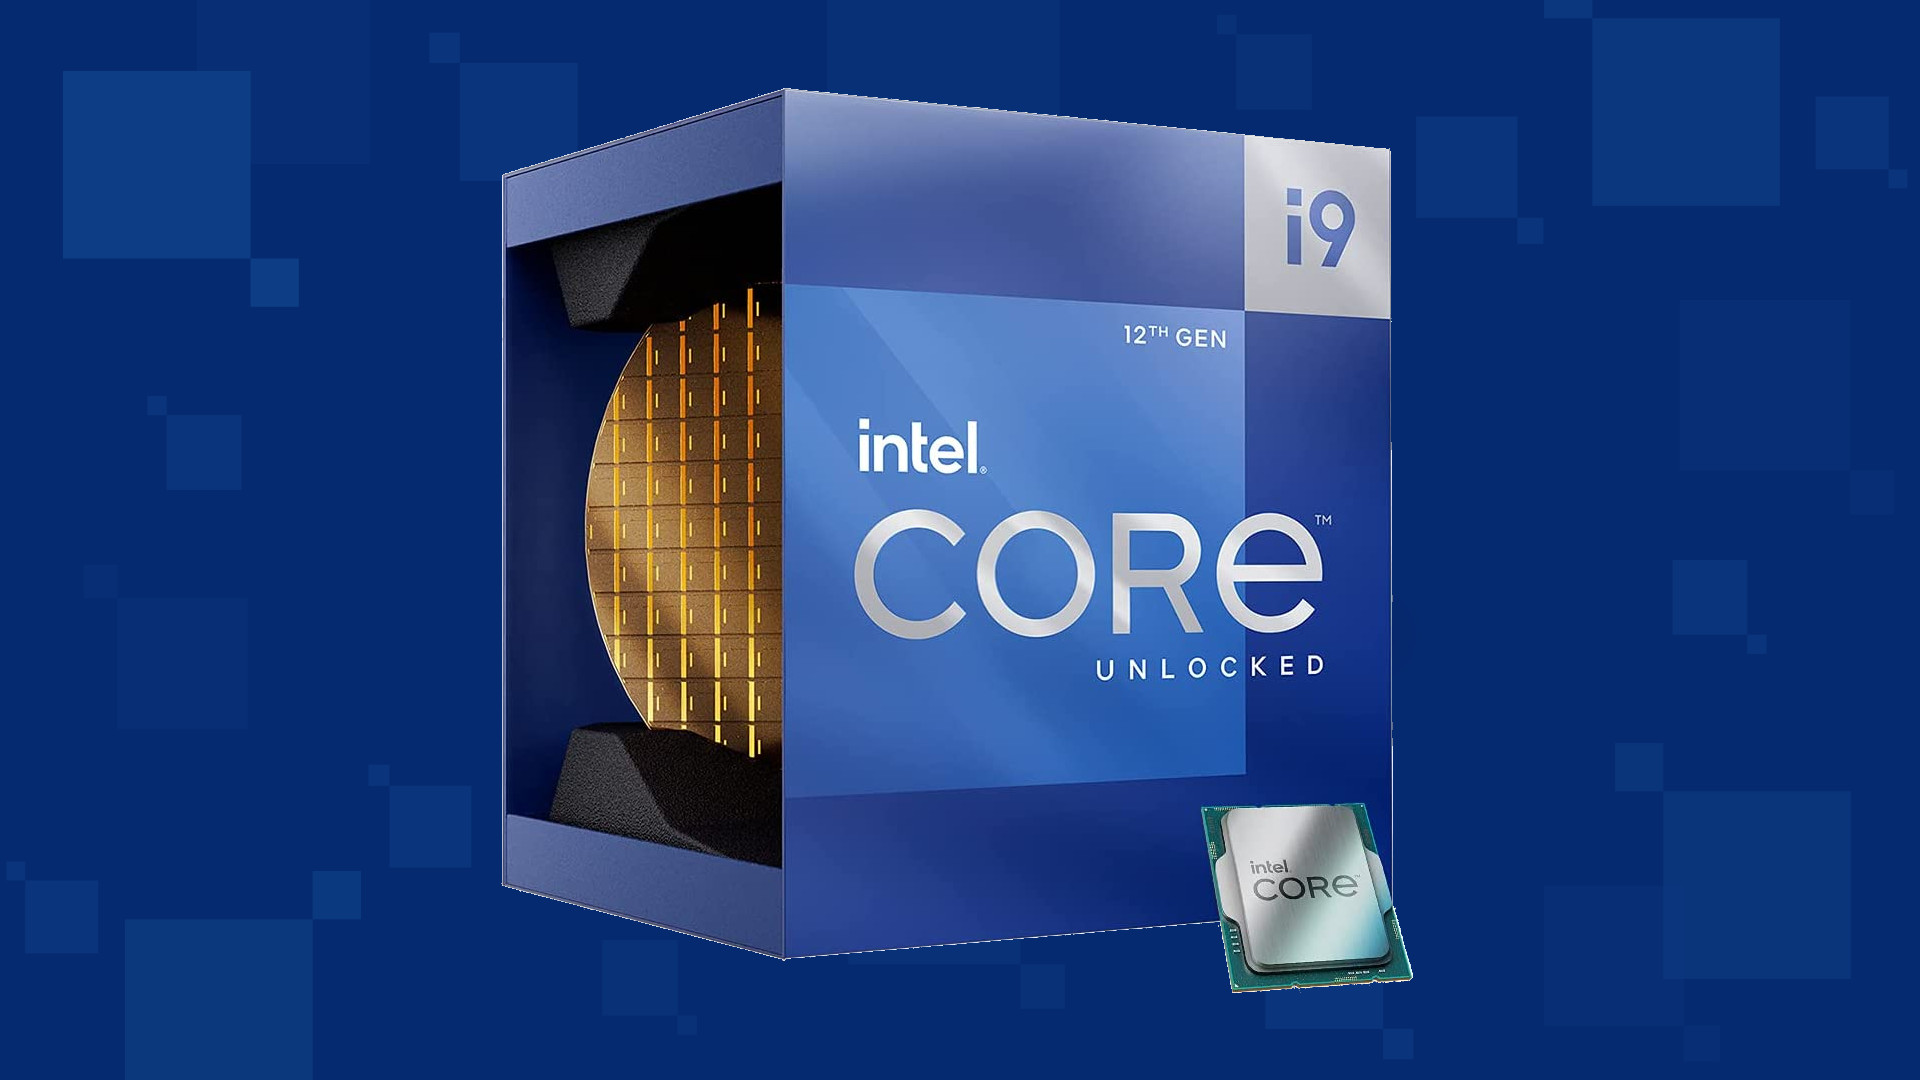
Intel says that the remedy to the issue for these games is the scroll lock fix which can be done so by enabling Legacy Game Compatibility mode from the BIOS of your motherboard. When running the said games, you can press scroll lock to park the E-cores on Intel's Alder Lake Desktop CPUs to get rid of DRM issues. Certain motherboard manufacturers such as MSI and Gigabyte have made this even easier through software tools with which you don't have to access the BIOS. All you need to do is select a button in the tool which works on both Windows 11 and Windows 10 operating systems and you will enable compatibility mode.
Read More
Excluding a folder from Windows Defender scan
The Windows Defender program can both scan and monitor almost the entire folder on a Windows 10 computer. So if you have a folder that may have files that could trigger an alarm to Windows Security, then it would be better if you add an exclusion to Windows Security. Note that it is okay to do this as long as you’re certain that the contents of the folder you want to exclude are safe and that Windows Defender is only throwing out warnings for nothing. This way, Windows Defender won’t scan those folders in the future. And besides, there are also some Windows folders and files that you may exclude from the Antivirus scans, especially if you want to save your scan time. This kind of feature also comes in handy when you trust a file type or folder or any process that you believe is safe but the Windows Security considers as malicious. To exclude a folder or a file or process or a file type from the Windows Security scan, here are some steps you can follow. Make sure to do them carefully. Step 1: Search for “Windows Security” in the Search box and then click on it from the search results to open it. Step 2: Next, click on Virus & threat protection > Manage settings > Add or remove exclusions. Step 3: After that, on the next screen, click on Add an exclusion > Folder. It will show you a list that includes File, Folder, File Type, and Process. Step 4: Now click on “+Add and exclusion” on the next window and then select a folder you want to exclude and click OK to add it in the Exclusions list. Step 5: Click on the down arrow button to remove it and then click on the Remove button. Note: If you want to only ignore a few file types, it’s better if you configure your antivirus program to ignore these files with a specific extension. This way, it will ignore all of them no matter what their location is. Also keep in mind that when you select a folder, all the subfolders in it will also be excluded from the scan. Thus, you need to understand what you’re about to do. Once you’re done excluding the folder, it is recommended that you protect the folder using the Controlled Folder Access since this folder is not monitored for threat. The Controlled Folder Access will ensure that an external program does not alter it. This way, you can be sure that even though this folder is not included in the scan, it is still secure.
Read More
A Quick Guide to Fixing Error 451

How to Fix Error 451

Error 451 - What is it?

This is a typical SMTP error code. SMTP is the abbreviation for Simple Mail Transfer Protocol. It is an internet standard for email transmission. In other words, SMTP is a text-based protocol in which the sender communicates with the mail receiver by issuing commands and receiving a response code. The SMTP error 451 is displayed in the following format:
‘451 Requested action aborted: local error in processing’
This error message indicates that the program cannot send more messages and the server has hit the limit. This is because some mail servers have limits. The sever stops the task of sending and receiving emails when this limit is achieved.

Solution

Restoro box imageError Causes

The causes of error 451 include:
  • Server limit reached
  • Email rejection due to a remote anti-spam filter
  • Request denied by the server
  • Viral infection
If you heavily rely on email communication with your business partners and colleagues, then it is advisable to immediately resolve this issue without any delays. Though this error is not fatal, you should repair it right away to avoid inconvenience. SMTP error code 451 can hamper your ability to communicate via email.

Further Information and Manual Repair

Here are some of the best, easy, and effective DIY methods that you can try to repair error code 451 on your PC.

Method 1

To fix this error, simply follow these steps:
  • login to Linux SSH
  • Open the file /etc/localdomains
  • Nano/etc/localdomains and then add the domain name that is triggering email sending error
  • Now reboot your PC
This will hopefully resolve the issue. Nonetheless, if the error code still persists, then try other methods given below.

Method 2 - Configure List Settings to change the server limit.

This can be done by accessing the List Settings then Outgoing Mail Server (SMTP) and then the Limit Feature. By accessing the limit feature, you can easily adjust the program to any limit of your choice. Configure the limit and save changes. Reboot PC to activate the changes made.

Method 3 - Scan and Remove Viruses.

This error code can also be triggered due to viral infection. If this is the cause, then simply download an anti-virus on your PC. Scan the entire system and remove all detected malicious programs like Trojans, malware, adware, viruses, and spyware. This will repair the error 451 on your system.

Method 4

If the error still persists, then contact your SMTP provider to check the situation and resolve it. There is a possibility the error is generated from the SMTP provider’s end.
Read More
Setting up an FTP Server in Windows
File Transfer Protocol Server, also known as FTP Server, is a private or public service that can host files that can be accessed both locally and globally. It is a quick, flexible and seamless service that allows you to store any kind of files depending on the total size of the server. If you’ve always found an FTP server useful, then the good thing is you can now create your FTP server since Windows 10 now allows it. You can host this server locally and later on make it globally available via the internet. So if you are planning to set up an FTP server on your Windows 10 computer, read on as this post will guide you on how to do so.

To set up the FTP server, you need to configure it first and then configure the Windows Firewall for the connections to go through. For more details, refer to the following steps:

Step 1: You need to configure the FTP server on Windows 10.
  • In the Search box, type in “Turn Windows Features On or Off” to search for it.
  • Then click on the appropriate result which will open a mini window.
  • From this mini window, scroll down to the list and expand “Internet Information Services where you have to expand the FTP Server section.
  • Next, select all the checkboxes to enable all the entries under FTP Server and then click the OK button to apply the changes made.
  • And now, since your computer is now allowed to host an FTP server, you need to configure it. To do so, type “Internet Information Services (IIS) Manager” in the Search box and click on the appropriate entry.
  • Next, right-click on Sites under the navigation bar of Connections and select Add FTP Site. This will open a new window where you have to input some information about your FTP hosting.
  • Now enter the details and click on Next.
  • Upon clicking Next, you will be prompted to give some authentication details. Enter the following details in the screenshot below.
  • Now click on Finish. After that, you will get an FTP Server being hosted on your Windows 10 PC.
And now that you’ve successfully configured the FTP Server, the next thing you have to do is to allow connections from and to the FTP server. Refer to the next step below. Step 2: Configure the Windows Firewall for FTP connections to pass-through
  • In the Start Search, type “Allow an app or feature through Windows Firewall” and click on the related search result which will open a window with all the settings.
  • From there, click on the Change Settings button. This will display a list where you have to mark all the checkboxes for the FTP server to enable them in both the Private and Public configurations.
  • After that, click OK. This will allow you access to the FTP server on your local network.
Read More
Fix Windows Update Error Code 0x8024402c
Connecting to Microsoft’s Windows Update servers does not always go smoothly since you could run into a number of errors. One of these errors is the error code 0x8024402c. You can see this error code when you check for Windows Updates. This kind of Windows Update error occurs when the proxy or the firewall settings are incorrectly configured. As a result, the client’s connection to the Windows Update servers fails. There are two things you can do to resolve error code 0x8024402c. First, you can try to fix the Proxy Settings. Second, you can set up Automatically Detect the connection settings. In addition, you can also try to perform System Restore as it could also help in fixing the problem. Performing System Restore might help you in fixing the error code 0x8024402C. Refer to the steps below to use System Restore.
  • Tap the Win + R keys to open the Run dialog box.
  • After that, type in “sysdm.cpl” in the field and tap Enter.
  • Next, go to the System Protection tab then click the System Restore button. This will open a new window where you have to select your preferred System Restore point.
  • After that, follow the on-screen instructions to finish the process and then restart your computer and check if the problem is fixed or not.
If performing System Restore didn’t help in fixing the problem, then try the two given options below.

Option 1 – Try fixing the Proxy Settings

  • In the Cortana search box, search for Internet Explorer and then click on the related search result.
  • After that, tap the Win + T keys on your keyboard and click on Internet Options.
  • Next, navigate to the Connections tab and click on LAN Settings.
  • Then click on the Advanced button and delete all the entries in the list generated in the Exceptions section. And if the Advanced button is disabled because the “Use a proxy server for your LAN (These settings will not apply to dial-up or VPN connections)” option is disabled then you are good to go. Now proceed to the next step.
  • Tap the Win + X keys or right-click on the Start button and select Command Prompt (Admin) or you could also search for “cmd” in the Cortana search box and right-click on Command Prompt from the search results and select the “Run as administrator” option.
  • If a User Account Control appears, click on Yes to proceed. After that, type each one of the commands listed below, and don’t forget to hit Enter after you type each one of them.
    • netsh winhttp reset proxy
    • net stop wuauserv
    • net start wuauserv
  • Now restart your computer and check if the problem is fixed or not by checking for Windows Updates again.

Option 2 – Try setting up Automatically Detect the connection settings

  • Type in “internet options” in the Cortana search box and then click on the related search result.
  • After that, navigate to the Connections tab.
  • Next, click on the LAN Settings button located under the Local Area Network (LAN) settings section.
  • Then uncheck the “Use a proxy server for your LAN (These settings will not apply to dial-up or VPN connections)” option under the Proxy Server section and click OK.
  • Now restart your computer to apply the changes made successfully.
Read More
Application side-by-side configuration ...
A lot of users lately reported getting an error that says, “The application has failed to start because its side-by-side configuration is incorrect”. This kind of error can pop up when you try to open a number of programs, regardless of their origin, the developer, and compatibility. Here’s the full context of the error message:
“<PATH OF THE EXECUTABLE FILE>, This application has failed to start because its side-by0side configuration is incorrect. Please see the application event log or use the command-line sxstrace.exe tool for more detail”.
This kind of problem has something to do with the C++ runtime package in the background. It could also be related to an error for a registry value. Whatever the cause is, you can fix this error with the help of some suggestions provided in this post. You can try to reinstall the application or check the registry setting or reinstall the suitable Visual C++ Runtimes or re-enable the Microsoft .NET Framework. For more details, refer to the instructions given below.

Option 1 – Try to reinstall the application

There are times when some supporting module for your application under the hood could have messed up the application. And so to fix that, you need to uninstall the concerned application and then try reinstalling it again. Once you’re done, check if it fixed the problem or not.

Option 2 – Try to change the Registry setting

  • Tap the Win + R key combination to open the Run dialog box.
  • Then type “Regedit” in the fields and tap Enter to open the Registry Editor.
  • Next, navigate to this registry key: Computer HKEY_LOCAL_MACHINE SOFTWARE Microsoft Windows NT CurrentVersion SideBySide Winners x86_policy.9.0.microsoft.vc90.crt_1fc8b3b9a1e18e3b_none_02d0010672fd8219 9.0
  • From there, look for a String value named “default” and double click on it.
  • After that, change its Value data to match the one as the third value in BINARY.
  • Now restart your computer to successfully apply the changes made.

Option 3 – Try reinstalling the appropriate Visual C++ Runtime

  • You need to open the Event Viewer first by searching for it in the Windows Search box.
  • After opening Event Viewer, look for the error events that are sourced by SideBySide.
  • Next, look for the actual Visual C++ Runtime module that’s causing the error.
  • Now download the module from the official website of Microsoft Support and then install it and see if it fixed the problem.

Option 4 – Re-enable the Microsoft .NET Framework

You could also try to disable the Microsoft .NET Framework then enable the latest version of the .NET Framework on your PC and check if the error is fixed.
Read More
The quick demise of the BRAVE browser
Brave browser has gained popularity very rapidly and many websites have gone into the territory of recommending it. Sadly although the browser kind of offered better performance, it seems that so much advertised privacy and security was a lie. Several months ago, Brave was involved in a “scandal”. Unfortunately, this incident did not get much media attention, and it’s hard to search for and discover as of today. There is an article on the Android police website explaining this issue in detail, you can check it here: https://www.androidpolice.com/2020/06/07/brave-browser-caught-adding-its-own-referral-codes-to-some-cryptcurrency-trading-sites/ But to sum things up and keep them short if you do not want to go through the full article, Brave had been injecting their affiliate codes into popular crypto-currency websites. This means that they had been intercepting your traffic, which they promised was secure by the way, and modifying it. This means Brave Software has access to all of your information on those crypto-currency sites as well. They can see your payments/purchases, and your activity on the websites (through affiliate statistics). Now some people might point out that they are not interested in crypto or have been visiting some of the sites but the issue still remains and that is they did all of this, without telling the user. They intentionally didn’t tell the user because they knew it would cause backlash and disruption. They knew one hundred percent what they were doing, and they knew it was unethical. And the point remains if something like this was already done, who knows what will come up in the future. Personal recommendation is to avoid Brave and go back to other browsers.
Read More
1 2 3 162
Logo
Copyright © 2022, ErrorTools. All Rights Reserved
Trademarks: Microsoft Windows logos are registered trademarks of Microsoft. Disclaimer: ErrorTools.com is not affiliated with Microsoft, nor claim direct affiliation.
The information on this page is provided for information purposes only.
DMCA.com Protection Status