Fix Error 30053-4 or 30053-39, language pack

As you know, the Office Language Packs need to be installed right after installing Office. It also has to be on the correct version of Office so if any of these conditions are not met, you will most likely get error codes 30053-4 or 30053-39 when you install a language pack in Microsoft Office. If you are currently facing this error, read on as this post will help you fix the problem. Here’s the full context of the error message:

“Something went wrong, Sorry, installation cannot continue because no compatible office products are detected.”

When you have to work on two different languages, that’s where the language packs come in handy. You might have to work on one language but when it comes to proofreading or help, you need another language. Note that some language accessory packs offer partial localization which is why some parts of the Office might show the default language.

If you are using Office 365 or Office 2019, 2016, 2013, or 2010, you need to go to the language accessory pack page from office.com and select your language. Once you see the download link, click on it to start downloading the pack. It includes the display in the chosen language, proofing tools for the selected language, as well as the Help in the selected language. Once the installation is complete, follow each one of the given options below to configure the language accessory pack properly.

Option 1 – Select Editing and Proofing language

  • You need to open any Office program and navigate to File > Options > Language.
  • From there, you need to make sure that the language you want to use is in the list under the Choose Editing Languages section.
  • After that, you can add or remove the language that Office uses for editing and proofing tools.

Option 2 – Configure the Display and Help languages

In this option, you can change the default display and help languages for all the Office applications so whatever you choose will be used for all the buttons, menus, and support of all the programs. After you select the language, restart all the Office applications to apply the changes made successfully.

On the other hand, if you are using Office volume license versions, note that only an administrator account can install this if you are using the Volume License version of Microsoft Office 2016. You have to download the ISO image of the language packs, language interface packs, and the proofing tools from the VLSC or Volume Licensing Service Center. This process can be quite complicated so you might have to go to the docs.microsoft.com page to be guided accordingly. After you installed everything correctly, the error code 30053-4 or 30053-39 should now be fixed.

If you like to learn and find out more about various Windows errors, and how to repair them go to our vast archive or use search to find articles that will explain and help you in solving your issue.
However, if you prefer to do things fast and with automatization then we are proposing to use an automated solution for your issues. The application that we are recommending is Advanced System Repair Pro
Advanced System Repair utilizes multiple tools all in one to give you a quick, simple, reliable, and very thorough diagnosis of your PC. It brings you all the tools you need in one program to clean, fix, protect, optimize and boost your PC!
1-Click Maintenance
All the tools to make it simple and easy! It's like having a professional technician at the click of a mouse.

Junk Cleaner
Keeping your computer free from unnecessary clutter also helps make your computer last longer. Like any other machine, if you keep it clean and take care of it, it will serve you better for longer!

Optimize background apps
Optimize applications background activity with the built-in Application Optimizer feature.

Disk Defrag
With a simple 1-click, Advanced System Repair speeds up your PC by assembling fragmented files on your machine and organizing them more efficiently.

Malware Removal
Finds and removes all types of harmful malware including trojans, worms, bots, adware, spyware, PUPs, and more!

Privacy Cleaner
The all-in-one privacy suite to Clean Your Tracks & Protect Your Privacy! Make your computer safe, secure, and more efficient!

System Tweak/Optimizer
ASR will analyze your complete system and settings to adjust your PC to function at its maximum performance.

Registry Cleaner
Over time, as you install and uninstall applications, the registry can become cluttered with old entries and broken settings which can result in program crashes, and annoying messages and slow the computer down.
Visit our Advanced System Repair Pro Download page to inform yourself about all the benefits of this software and get a free trial copy of it.
advanced system repair pro

Advanced System Repair Pro

One-click automated PC repair solution
ASR logo
With Advanced System Repair Pro you can easily
Replace damaged files
Restore performance
Free disk space
Remove Malware
Protects WEB browser
Remove Viruses
Stop PC freezing
DOWNLOAD
Privacy Policy | Terms of Use | Uinstall
Advanced System Repair Pro is compatible with all versions of Microsoft Windows including Windows 11

Share this article:

You might also like

Fix Windows Update Error 0x80070103
This post will guide you in fixing the error 0x80070103 when installing Windows Update. According to users who encountered this problem, Windows Update (WU) fails to install several different updates. This kind of Windows Update error is can mostly be seen in the Windows Update screen inside the update reports although it is also known to occur when a user attempts to install a peripheral driver – only if the Windows Update offers to update the driver through a prompt and when you click Yes. There are several possible causes for this error, it could be that Windows Update is trying to install a particular driver for the second time already which happens when it gets confused by an additional piece of identical hardware like the graphics adapter. Aside from that, the Windows Update might have already installed the driver which is known to occur with unsuitable versions of the already installed driver. In addition, the error could also be due to a third-party program interference like a security program or a utility program that is using the same driver and conflicts with the Windows Update. Here are some suggestions that might help in fixing the Windows Update error 0x80070103.

Option 1 – Install the updates in a Clean Boot State

You might want to try putting your computer in a Clean Boot state and then install Windows Updates again without any trouble. During this state, you can start the system with a minimum number of drivers and startup programs that will surely help you in isolating the root cause of the issue.
  • Log onto your PC as an administrator.
  • Type in MSConfig in the Start Search to open the System Configuration utility.
  • From there, go to the General tab and click “Selective startup”.
  • Clear the “Load Startup items” check box and make sure that the “Load System Services” and “Use Original boot configuration” options are checked.
  • Next, click the Services tab and select the “Hide All Microsoft Services” check box.
  • Click Disable all.
  • Click on Apply/OK and restart your PC. (This will put your PC into a Clean Boot State. And configure Windows to use the usual startup, just simply undo the changes.)
  • After that, try to install the Windows Updates or upgrade again.

Option 2 – Try installing the failing driver without using Windows Update

If installing the updates in a clean boot state didn’t help, you can try a manual approach to yield much better results using the Device Manager or by downloading the driver from the manufacturer’s website manually.
  • Tap the Win + R keys to launch Run.
  • Type in msc into the box and tap Enter or click OK to open the Device Manager.
  • After that, a list of device drivers will be displayed. Look for the device driver you and then select either “Update driver” or “Uninstall device”. And if you find any “Unknown device”, you need to update it as well.
  • Select the “Search automatically for updated driver software” option and then follow the instructions to complete the process.
  • If you have chosen to uninstall the driver, follow the screen options to complete the process and then restart your PC.
Note: You also have the option to go directly to the website of your device driver manufacturer and go to the section called Drivers then check if there’s a new available update – if there is, download and install it.

Option 3 – Try to run the Windows Update Troubleshooter

You might also want to run the built-in Windows Update Troubleshooter in Windows that could help you in resolving the Windows Update error 0x80070103. All you have to do is go to Settings > Update& security > Troubleshoot > Windows Update. From there, click on the Run the troubleshooter button and follow the next one-screen instructions that appear. After that, restart your computer and check if the error is now fixed or not by trying to install the update once again.
Read More
Windows computer doesn’t recognize second GPU
A lot of Windows users, use a second GPU for their computer systems, especially gamers above the dedicated graphics card. The operating system is set such that the dedicated high-end graphics card is set to default but there are times when the system does not recognize or detect the second graphics card. Even though every computer system comes with an integrated graphics card, for the most part, it is insufficient for graphics-intensive games and software which is why if you have an extra dedicated graphics card and your computer does not seem to detect or recognize it, then this post is for you. It could be that the dedicated graphics card has failed or it could also be an issue with the drivers and so on. Follow the suggested options below to resolve the problem.

Option 1 – Update your Graphics drivers

  • First, boot your computer into Safe Mode.
  • After that, tap the Win + R keys to launch Run.
  • Type in msc into the box and tap Enter or click OK to open the Device Manager.
  • After that, a list of device drivers will be displayed. From there, look for the Display Adapters and click on them.
  • After that, right-click on each entry under the Display Adapters and select the “Uninstall Device” option from the menu.
  • Now restart your computer.
  • After restarting your computer, go to the Settings app and Check for Updates in the Windows Update section.
Note: You also have the option to go directly to the website of your graphics card manufacturers like NVIDIA, Intel, or AMD and go to the section called Drivers then check if there’s a new available update – if there is, download and install it.

Option 2 – Update the BIOS

Take note that you have to be careful when modifying something in the BIOS. So if you don’t know much about it, it’s best if you skip on this option and try the other ones instead. However, if you are well-versed in navigating the BIOS, then follow the steps below.
  • Tap the Win + R keys to open the Run dialog box.
  • Next, type “msinfo32” in the field and press Enter to open System Information.
  • From there, you should find a search field on the bottom where you have to search for the BIOS version and then press Enter.
  • After that, you should see the developer and version of the BIOS installed on your PC.
  • Go to your manufacturer’s website and then download the latest version of BIOS on your computer.
  • If you are using a laptop, make sure that you keep it plugged in until you have updated the BIOS.
  • Now double click on the downloaded file and install the new BIOS version on your computer.
  • Now restart your computer to apply the changes made.

Option 3 – Try changing the GPU settings

  • Right-click on any empty space on your Desktop and select Graphics Properties. Note that the Graphics Properties screen depends on the graphics drivers installed on your computer and are system-specific as they may be different for other systems but they aren’t hard to find.
  • After that, make sure that the dedicated Graphics card is selected as Default under the Select Display drop-down.
  • If the Graphics card isn’t set as Default, set it and click Apply and Exit.

Option 4 – Try disabling the driver for the integrated Graphics card

  • Tap the Win + R keys to open the Run dialog box.
  • Next, type “devmgmt.msc” in the field and hit Enter to open the Device Manager.
  • From there, expand the list of Display Adapters and then right-click and select Disable device for the Integrated Graphics card. However, if the dedicated Graphics card fails, the display won’t work so you need to restart the system and enable it.
Read More
What to do if Windows 10 Taskbar Volume Control is not working
The quickest way to control and manage the volume of your Windows 10 PC is using the Volume control icon in the system tray. However, you might encounter issues in using it especially if you recently updated your PC. After the update, if it no longer responds to mouse clicks, be it a right-click or left-click, read on as this post will show you what you can do to remedy that issue. If you think that you’re the only one who has experienced this problem, you are mistaken as several users also reported that the volume icon does highlight and shows the volume level if you hover the cursor over it but it does not really do anything at all. This is definitely the quickest way to change the audio output in Windows 10 especially when you have to change from speakers to your earphone and whatnot. If you are one of the users whose Windows 10 Taskbar Volume Control icon has stopped working and every time you click on the icon and nothing happens and you’re still not able to adjust the volume of your Windows 10 computer, read on as this post will show you what you can do to fix that problem. Although the audio is working just fine, you will still not be able to adjust the volume from its control icon. The problem is most likely related to the UI interaction. There are times when icons in the taskbar also experience the same issue where you can hover your mouse over them but nothing happens when you click on them. As mentioned, the issue with the volume icon does not seem to affect the actual audio of the computer. Double-check to confirm and if it turns out that the audio is indeed working fine, you can use the hardware of your keyboard to manage and control the volume, however, the software just won’t work. This issue is really inconvenient especially for users who connect their laptops to a bigger display. To fix this issue, here are some suggestions you need to check out.

Option 1 – Try to restart the Windows Explorer

This option may sound silly but it has actually worked in fixing the issue for some users. So if anything gets stuck on the taskbar or system tray, the best way to revive them is by restarting Windows Explorer.
  • Right-click on the taskbar and then select the Task Manager.
  • Next, look for Windows Explorer under the Processes tab.
  • Then right-click and select restart.
  • After that, wait for the restart process to be completed and for the user interface to refresh. Note that you will notice the Taskbar disappearing and reappearing again. It will reload the entire user interface and allows you to access the volume icon. It should work this time.

Option 2 – Restart the Audio services

Restarting the audio services in your computer can also help you fix the volume control issue and to do that, refer to these steps:
  • Tap the Win + R keys to open the Run dialog box.
  • Type in “services.msc” in the field and hit Enter to open Services.
  • From there, look for Windows Audio and then right-click on it and go to Properties.
  • After that, you have to make sure that the Startup Type is set to Automatic.
  • Then click on the Stop button. Once it has stopped, start it again.
  • Now restart your computer and see if you can now access the volume icon on the taskbar.

Option 3 – Try to update or roll back the Audio driver

If the glitch in your audio has something to do with software, chances are it might be related to the audio driver – it could be that the newest version of your Windows 10 does not work well with the old version of the driver. This is why you have to update your audio driver to the newest available version.
  • Tap the Win + R keys to open the Run dialog box and then type in devmgmt.msc and tap Enter or click OK to open the Device Manager.
  • Expand the section for the outdated device drivers.
  • And then select the outdated driver(s) and right-click on it/them.
  • From the drop-down menu, select the Update Driver option and follow the on-screen instructions to install the latest version of the driver.
  • Then also click on the option, “Search automatically for updated driver software.
  • Restart your PC after the installation.
Note: If updating the Audio driver didn’t work, you can go to the website of your PC manufacturer and look for the support section where you can download the drivers for your computer. You just need to take note of your PC’s correct model and model number so you can find the appropriate driver.

Option 4 – Try running the Playing Audio Troubleshooter

Since the Windows 10 operating system has the Playing Audio Troubleshooter, you can use this troubleshooter to try and fix the volume control issue on your PC. You can access this tool in the Control Panel or in the Taskbar Search and even on the Troubleshooters page of Windows 10. Run this troubleshooter and see if it can fix the issue or not.
Read More
Fix Error 0xe0434f4d
[vc_row][vc_column][vc_column_text]

How To Fix Error 0xe0434f4d

What is Error 0xe0434f4d?

Error 0xe0434f4d displays when a remote computer runs an instance of the SQL Server 2005 but it fails to initialize. When the plan is started, this error displays in a status window on the SQL Server. Also, when the Update-OffilineAddressBook cmdlet is started in Microsoft Exchange Server, this error can occur.

Solution

Restoro box imageError Causes

Error 0xe0434f4d can occur for possibly two main reasons. The first one is when the System Attendant Service is not properly running, and the second when you don’t have the permission to run the update. Other causes are when the .NET Framework 2.0 security does not allow sqlplanlaunch access to run from a shared network. Another cause is when the Offline Address Book (OAB) is not found in the Configuration Domain Controller server that the server of OAB generation uses.

Further Information and Manual Repair

In case you didn’t know, the Offline Address Book generation server is a mailbox server, and in order to resolve error 0xe0434f4d, you will have to replicate the OAB object to the Configuration Domain Controller server. In order to do so, follow steps:
  • Go to start and click on All Programs, then go and click on Microsoft Exchange Server 2010. Click on Exchange Management Console
  • In Exchange Management Console, go to Server Configuration and click on Mailbox
  • In the details, go to mailbox server that generates Offline Address Book and right-click it, then go to Properties
  • In the Properties, click on System Setting and locate the domain controller name in the box that reads Domain controller servers being used by Exchange
Make sure the OAB object is reproduced in the Configuration Domain Controller Server. Follow these steps to do that:
  • Go to Start and click on Run. Type Adsiedit.msc in Open box and press Enter. Right-click on ADSI Edit and click on Connect to
  • Locate a list reading Select a well-known naming context, and from there select Default naming context. In a Select or type a domain or server window, type FQDN (fully qualified domain name) of the Configuration Domain Controller server which was determined in step 1, and click OK
  • Expand Configuration [dc.domain.com], expand CN=Configuration, DC=domain, DC=com, expand CN=Services, expand CN=First Organization, and expand CN=Address Lists Container
  • Click on CN=Offline Address Lists and make sure the OAB object is listed on the details pane
When the OAB generation server receives this, then it will connect to the Configuration Domain Controller server and will locate the OAB object. If the OAB generation server is unable to find the OAB object, then the error will return on the cmdlet. On SQL Server, you should change the .NET permissions to allow sqlplanlaunch application access to run from shared administration. For that, follow these steps:
  • On ArchiveIQ Server, open System from the Control Panel and note down the computer name
  • On SQL Server, log in as administrator and open the command prompt
  • On the command prompt type, ‘C:windowsmicrosoft.netframeworkv2.0.50727caspol.ece –m –ag l – url file:\[Archive IQServer Computer Name]AlQRemote$*FullTrust and Press Enter. Type yes and press Enter again to confirm the permission changes.
[/vc_column_text][/vc_column][/vc_row]
Read More
nslookup works but ping fails in Windows
nslookup is a command-line tool that helps in finding the DNS records of a website. It sends a name server query to the DNS and obtains the corresponding IP address. Aside from that, it can also perform some complex functionality such as finding details about FTP server, Mail server and many more but most of them are used by administrators. The best thing about nslookup is that it queries the DNS server directly and it does not rely on the cache. On the other hand, there is another tool called PING that is used to verify connectivity. PING sends a packet of information to the IP address or Domain and gets back a response in the form of packets. So if everything goes well, all packets are received but if not, it will help you find out where the delay in the network exactly is. However, the ping command does not always attempt a DNS lookup which means that it might be using the DNS cache and use the IP address available in that table. Although both nslookup and PING help you in identifying the host or IP address, however, they don’t always work and sometimes fail. So if your nslookup works but ping fails on your Windows 10 PC when querying the IP address of a website then it could be caused by many reasons. It could be that the nslookup queries work for you but when you try to use PING, it fails. For instance, if you open the abc.com website, here’s how it will look like:
nslookup xyz.com Server: dns.company.com Address: 192.168.1.38 C:> ping xyz.com Ping request could not find host xyz.com. Please check the name and try again.
The domain is converted into an IP address and then data is sent to that IP address when you use PING. So when a reply comes back it means that the data is going back and forth to that domain without any problem. However, if the DNS fails to resolve the IP address of the website or if your PC does not attempt a DNS lookup, you will receive a similar error message that says, “Could not find host” and so on. To resolve this issue, here are some options that might help.

Option 1 – Reset Winsock, TCP/IP & Flush DNS

Resetting Winsock, TCP/IP, and flushing DNS might help you resolve the issue with nslookup and PING. To do so, follow these steps:
  • Right-click on the Start button and click on Command Prompt (administrator) so you can pull up an elevated Command Prompt.
  • After that, execute each one of the commands listed below. And after you typed in one after the other, you have to hit Enter.
  1. netsh winsock reset – type in this command to reset Winsock
  2. netsh int ip reset resettcpip.txt – type in this command to reset TCP/IP
  3. ipconfig /flushdns – type in this command to flush the DNS cache
  • Next, restart your PC and check if the problem’s fixed.

Option 2 – Force Windows to do a DNS lookup using FQDN

  • Go to Settings > Network & Internet > Status > Change adapter options.
  • From there, right-click on the network and select Properties.
  • Next, in case you’re using IPv6, from the list of connections available in the list, select Internet Protocol Version 4.
  • Then click on Properties and click Advanced.
  • After that, switch to the DNS tab and select “Append these DNS suffixes (in order)” and click on the Add button and then add “.” as a suffix so that each time you query using PING and another tool, it will add a “.” at the end and will force the lookup.

Option 3 – Make sure that there is only one default gateway

If your computer has more than one NIC connected and there are multiple default gateways, then it will most likely create confusion which is why you need to remove the default gateway from the configuration of all NICs and make sure that there is only one default gateway.

Option 4 – Use the Google Public DNS

You might want to change your DNS to Google Public DNS as it could also help you in fixing the nslookup and PING issues. To do so, follow the steps below.
  • The first thing you have to do is right-click on the network icon in the Taskbar and select Network and Sharing Center.
  • Next, click on the “Change Adapter Settings” option.
  • After that, search for the network connection that you are using to connect to the internet. Note that the option might be “Wireless Connection” or “Local Area Connection”.
  • Right-click on your network connection and click on Properties.
  • Then select the new window to choose the “Internet Protocol 4 (TCP/IPv4)” option.
  • After that, click on the Properties button and click the checkbox in the new window for the option “Use the following DNS server addresses”.
  • Type in “8.8.8.8” and “8.8.4.4” and click OK and exit.

Option 5 – Check the Windows Host file

You can also try to cross-check the Windows Hosts file to find out if the website you are trying to open has been blocked, because if it is, then it’s no wonder why PING fails even when nslookup works. There are instances when some third-party application modifies the file and adds some websites to the blocklists. So if the website is indeed blocked, you need to remove it from the list.

Option 6 – Delete the WLAN Profiles

Deleting the WLAN Profiles might be a good idea if you are not able to connect to the internet on your computer and if you’re using Wi-Fi. It could be that the networks that were connected previously have gone rogue which is why it is not connecting properly. And so deleting the WLAN profiles might help you in fixing the issue with nslookup and PING.

Option 7 – Reinstall the Network Adapter Drivers

  • Tap the Win + R keys to launch the Run window and then type in the “msc” command and hit Enter to open the Device Manager window.
  • Under the Device Manager, you will see a list of drivers. From there, look for the Network Adapters and expand it.
  • Then right-click on each one of the Network drivers and select “Uninstall device”.
  • Restart your PC.
Read More
Nostalgia hit: Commodore 64 emulator and games
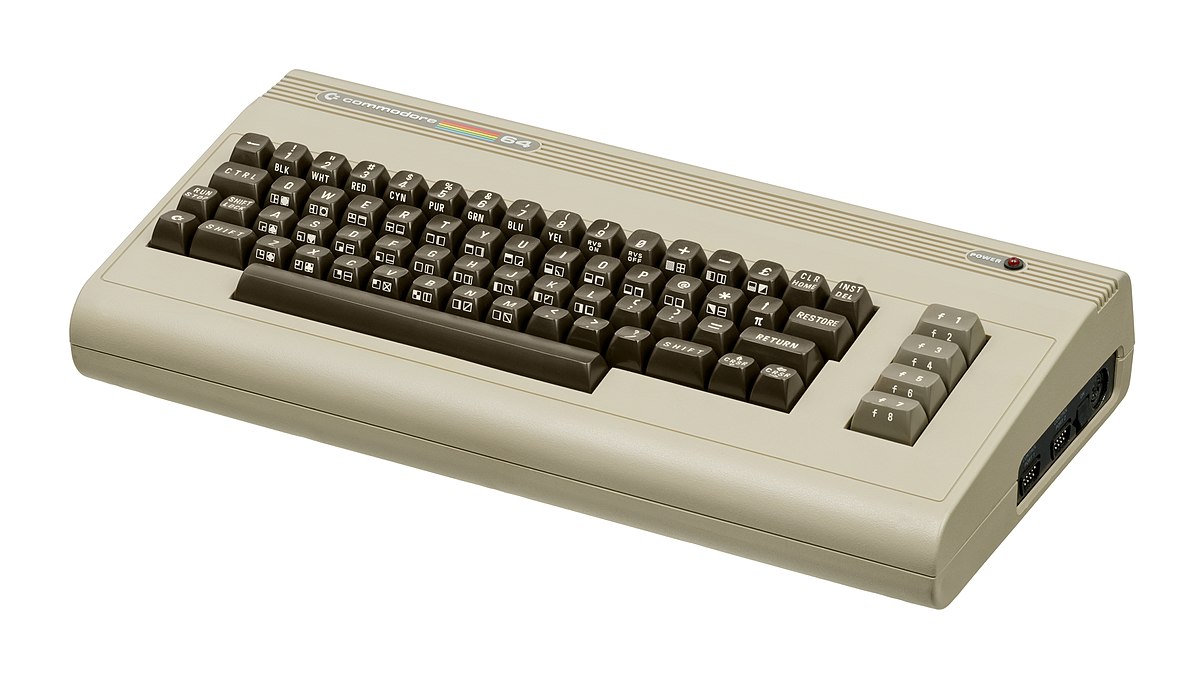
If you are a kid or in your teenage years you maybe will be not familiar with Commodore 64 but we are welcoming you anyway to go with us on this journey through time and find out about one of the most influential and beloved home computer of all time.

commodore 64History of Commodore

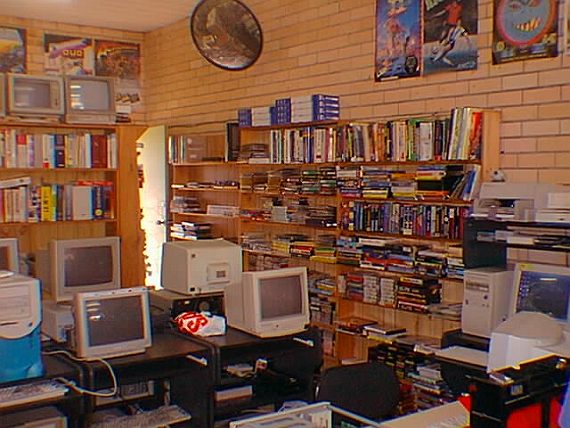
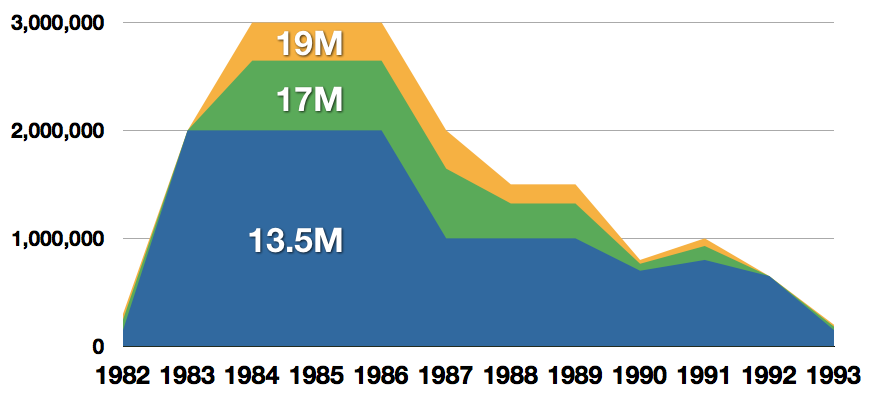
Firstly shown to the world in January of 1982, at the Consumer Electronics Show, C64 caught attention right away with its low price of only $595. Although it had some issues like limited functionality in some fields and a non-wide range of use by 1984 its price dropped below $200 and it cemented itself as an affordable home computer for the middle class. In as same year Apple has released their Apple II computer with far superior capabilities, commodore 64 remains a middle-class favorite due to its price. Also, the company has decided to distribute its homemade computer via some other means including not only just electronics stores specialized in that kind of equipment but in general shops and big department stores, through toy stores and book shops as well as through specialized dealers. This has given C64 a more competitive edge and mixed with the affordable price it soon became a staple of home computing. c64 storeWith sales booming and the early reliability issues with the hardware addressed, software for the C64 began to grow in size and ambition during 1984. This growth shifted to the primary focus of most US game developers. The two holdouts were Sierra, who largely skipped over the C64 in favor of Apple and PC compatible machines, and Broderbund, who was heavily invested in educational software and developed primarily around the Apple II. In the North American market, the disk format had become nearly universal while cassette and cartridge-based software all but disappeared. So most US-developed games by this point grew large enough to require multi-loading. At a mid-1984 conference of game developers and experts at Origins Game Fair, Dan Bunten, Sid Meier, and a representative of Avalon Hill said that they were developing games for the C64 first as the most promising market. By 1985, games were an estimated 60 to 70% of Commodore 64 software. Over 35% of SSI's 1986 sales were for the C64, ten points higher than for the Apple II. Everything was great for Commodore but the industry was moving forward and by the year 1988, PC compatible computers were stated to be the largest and fastest-growing home entertainment systems pushing C64 on to second place. Also, Nintendo’s gaming system has started to take hold in the world with amazing 7 million systems sold in 1988 only. By the year 1991, many developers exited the gaming market for Commodore 64 home computer system and its popularity started to fall due to lack of software and not so many hardware changes. commodore salesCommodore announced that the C64 would be finally discontinued in 1995. However, only one month later in April 1994, the company filed for bankruptcy. When Commodore went bankrupt, all production on their inventory, including the C64, was discontinued, thus ending the C64's 11 and a half year production.

Legendary titles

The history of Commodore 64 is interesting ones and I believe that it has done much for computers in general, yes it ran 11 years and that seems like a small-time, but remember that it was 11 years of C64 alone, there were other computers released by the company but none except arguably AMIGA 500 has not reached that much popularity as Commodore 64. That being said the system has left some of the great titles in its catalog that are great to be played even today and have been classic games on other platforms, even on PC itself. That being said I am giving you the top 100 games for Commodore 64:
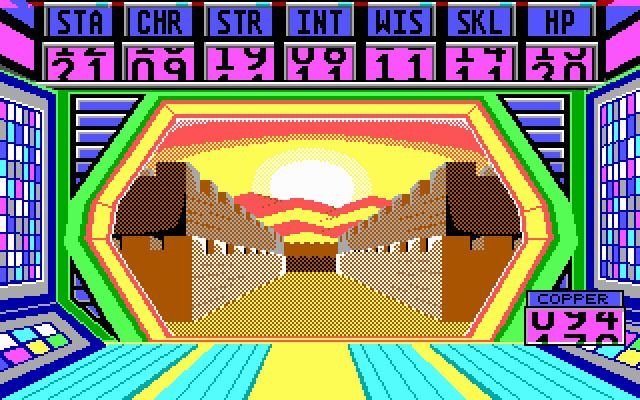
  1. maggotZak McKracken and the Alien Mindbenders
  2. Pirates!
  3. Maniac Mansion
  4. IK+
  5. Bubble Booble
  6. Turrican II: The Final Fight
  7. Last Ninja 2
  8. Space Rogue
  9. Ultima IV: Quest of the Avatar
  10. Archon: The Light and the Dark
  11. Turrican
  12. Wasteland
  13. Defender of the Crown
  14. Elite
  15. Ultima V: Warriors of Destiny
  16. Laser Squad
  17. Prince of Persia
  18. Impossible Mission
  19. U.L.E.
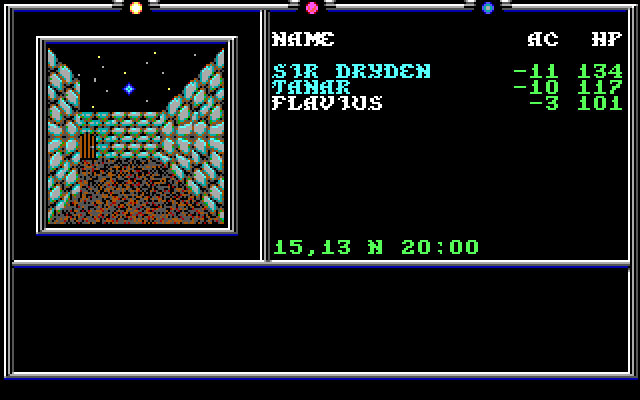
  20. Pool of Radiance
  21. Bruce Lee
  22. Paradroid
  23. Project Stealth Fighter
  24. Curse of the Azure Bonds
  25. Ultima III: Exodus
  26. Legacy of the Ancients
  27. Winter Games
  28. Leaderboard Golf
  29. Supremacy
  30. Airborne Ranger
  31. Exile
  32. Last Ninja, The
  33. World Class Leader Board
  34. MicroProse Soccer
  35. Project Firestart
  36. Boulder Dash
  37. Summer Games 2
  38. Great Giana Sisters, The
  39. Neuromancer
  40. Mad Doctor
  41. Mail Order Monsters
  42. Zork I: The Great Underground Empire
  43. Buck Rogers: Countdown to Doomsday
  44. Katakis
  45. Bard's Tale, The: Tales of the Unknown
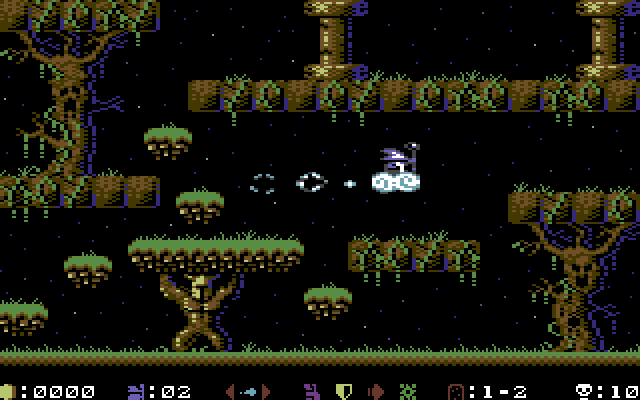
  46. WIzball
  47. Times of Lore
  48. Emlyn Hughes International Soccer
  49. Ultimate Wizard
  50. Alternate Reality: The Dungeonalternate reality dungeon
  51. World Games
  52. Leaderboard Executive
  53. California Games
  54. Samurai Warrior: The Battles of Usagi Yojimbo
  55. Summer Games
  56. Creatures 2: Torture Trouble
  57. Gunship
  58. Space Taxi
  59. International Karate
  60. Silent Service
  61. Bard's Tale III, The: Thief of Fate
  62. Seven Cities of Gold
  63. Armalyte
  64. Raid on Bungeling Bay
  65. Alter Ego: Male Version
  66. Enforcer: Fullmetal Megablaster
  67. Detective Game, The
  68. Creatures
  69. Skate or Die!
  70. Heart of Africa
  71. E.R.O. - Helicopter Emergency Rescue Operation
  72. Way of the Exploding Fist, The
  73. Stunt Car Racer
  74. Wizard of Wor
  75. Bard's Tale II, The: The Destiny Knight
  76. Mayhem in Monsterland
  77. Train, The: Escape to Normandy
  78. Jumpman
  79. Champions of Krynnchampions of krynn
  80. Pitstop II
  81. Barry McGuigan World Championship Boxing
  82. Montezuma's Revenge
  83. Boulder Dash II: Rockford's Revenge
  84. Spy vs Spy
  85. Mercenary: Escape from Targ
  86. Midnight Resistance
  87. Lords of Midnight
  88. Lode Runner
  89. Castles of Doctor Creep, The
  90. Boulder Dash Construction Kit
  91. Buggy Boy
  92. Racing Destruction Set
  93. Dino Eggs
  94. Realm of Impossibility
  95. Rainbow Islands
  96. Beach-Head II: The Dictator Strikes Back
  97. Barbarian: The Ultimate Warrior
  98. Grand Prix Circuit
  99. Head Over Heels
  100. Sentinel, The

Commodore 64 emulator and game ROMs

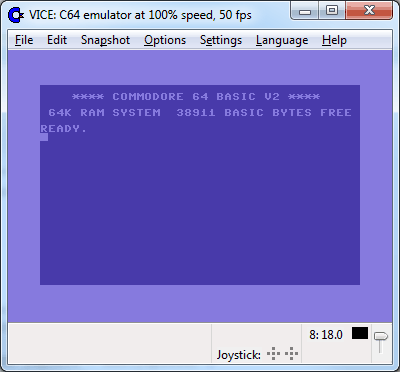
Commodore 64 might be in the past but its legacy still lives on even today through emulators and ROMs for emulators. You can even purchase one in working condition if you want and relive the full experience as it once was. vice c64 emulatorIf you are not keen on spending money for reliving and checking games or software of C64 here are some links to help you to at least experience part of it completely free. Commodore 64 Emulator C64 Game ROMs

Conclusion

It is without a doubt that the C64 home system has made a great mark on home computers echoing even today and I am very grateful that I have been part of it as a kid. Sometimes today I will still spin some old classic via emulator just for nostalgia and enjoy its simplicity. Thank you for reading the article and I hope to see you soon again.
Read More
10 Worst Computer Viruses in history
Computers viruses, worms, ransomware, etc. are kinds of malicious software that no user should take lightly. On several occasions, we have touched upon security steps that each user should take in order to protect its identity and data. Sadly sometimes even when all precautions are taken some malware can still slip through and wreak havoc. Today we are looking at some of the worst or the best, depending on your view that has indeed wreaked plenty of havoc.

viruses10 worst computer viruses in history

In the list of the 10 most famous computer viruses below, we show the costs, dates, reach, and other key facts. First a note about terms: we use the words “virus” and “worm” interchangeably because most readers search for them that way. But there’s a subtle difference that we explain after the list.

1. Mydoom – $38 billion

The worst computer virus outbreak in history, Mydoom caused estimated damage of $38 billion in 2004, but its inflation-adjusted cost is actually $52.2 billion. Also known as Novarg, this malware is technically a “worm,” spread by mass emailing. At one point, the Mydoom virus was responsible for 25% of all emails sent. Mydoom scraped addresses from infected machines, then sent copies of itself to those addresses. It also roped those infected machines into a web of computers called a botnet that performed distributed denial of service (DDoS) attacks. These attacks were intended to shut down a target website or server. Mydoom is still around today, generating 1% of all phishing emails. That’s no small feat considering the 3.4 billion phishing emails sent each day. By that figure, Mydoom has taken on a life of its own, infecting enough poorly-protected machines to send 1.2 billion copies of itself per year, 16 years after its creation. Though a $250,000 reward was offered, the developer of this dangerous computer worm was never caught. Wondering what makes the world’s most secure computers so safe? See the Tech@Work guide: Upgrade to the World's Most Secure and Manageable PC

2. Sobig – $30 billion

The 2003 Sobig computer virus is actually another worm. It is second only to the Mydoom virus in its scope. The $30 billion figure is a worldwide total, including Canada, the U.K., the U.S., mainland Europe, and Asia. Several versions of the worm were released in quick succession, named Sobig.A through Sobig.F, with Sobig.F being the most damaging. This cybercriminal program masqueraded as legitimate computer software attached to emails. It disrupted ticketing at Air Canada and interfered with countless other businesses. Despite its widespread damage, the creator of the successful bug was never caught.

3. Klez – $19.8 billion

Klez is a close third on the list of the worst computer viruses ever created. With nearly $20 billion in estimated damages, it infected about 7.2% of all computers in 2001, or 7 million PCs. The Klez worm sent fake emails, spoofed recognized senders and, among other things, attempted to deactivate other viruses. As with other viruses and worms, Klez was released in several variants. It infected files, copied itself, and spread throughout each victim’s network. It hung around for years, with each version more destructive than the last. Windows has come a long way since most of the computer viruses on this list hit the web. Thankfully, built-in protection with Microsoft Defender is always on the watch.

4. ILOVEYOU – $15 billion

The year 2000’s ILOVEYOU virus worked by sending a bogus “love letter” that looked like a harmless text file. Like Mydoom, this attacker sent copies of itself to every email address in the infected machine’s contact list. Shortly after its May 4 release, it had spread to more than 10 million PCs. The virus was created by a college student in the Philippines named Onel de Guzman. Lacking funds, he wrote the virus to steal passwords so he could log into online services he wanted to use for free. He reportedly had no idea how far his creation would spread. This virus is also known as Loveletter. Need to up your remote work security game before there’s another entry on the list of most deadly computer viruses? See our guide: How to Work Remotely and Securely

5. WannaCry – $4 billion

The 2017 WannaCry computer virus is ransomware, a virus that takes over your computer (or cloud files) and holds them hostage. The WannaCry ransomware ripped through computers in 150 countries, causing massive productivity losses as businesses, hospitals, and government organizations that didn’t pay were forced to rebuild systems from scratch. The malware raged like wildfire through 200,000 computers worldwide. It stopped when a 22-year-old security researcher in the U.K. found a way to turn it off. Computers with out-of-date operating systems were hit especially hard. That’s why security experts always recommend updating your systems frequently.

Ransomware strikes again

In September 2020, one of the potentially largest computer virus attacks in medical history hit Universal Health Services. The U.S. hospital chain, which has more than 400 locations, was reportedly struck by damaging ransomware. The attack forced the cancellation of surgeries and made healthcare workers switch to paper records.

6. Zeus – $3 billion

The Zeus computer virus is an online theft tool that hit the web in 2007. A whitepaper by Unisys three years later estimated that it was behind 44% of all banking malware attacks. By then, it had breached 88% of all Fortune 500 companies, 2,500 organizations total, and 76,000 computers in 196 countries. The Zeus botnet was a group of programs that worked together to take over machines for a remote “bot master.” It originated in Eastern Europe and was used to transfer money to secret bank accounts. More than 100 members of the crime ring behind the virus, mostly in the U.S., were arrested in 2010. It’s not as prominent today, but some of the virus’ source code lives on in newer botnet viruses and worms. Zeus caused documented damage of $100 million. But the real cost in terms of lost productivity, removal, and undocumented theft is undoubtedly much higher. A $3 billion estimate, adjusted for inflation, puts this virus at a cost of $3.7 billion in today’s dollars.

7. Code Red – $2.4 billion

First observed in 2001, the Code Red computer virus was yet another worm that penetrated 975,000 hosts. It displayed the words “Hacked by Chinese!” across infected web pages, and it ran entirely in each machine’s memory. In most cases it left no trace in hard drives or other storage. Financial costs are pegged at $2.4 billion. The virus attacked websites of infected computers and delivered a distributed denial of service (DDoS) attack on the U.S. White House’s website, www.whitehouse.gov. In fact, the White House had to change its IP address to defend against Cod Red. Can your printer get a virus? See our cool infographic: The State of Printer Security

8. Slammer – $1.2 billion

The SQL Slammer worm cost an estimated $750 million across 200,000 computer users in 2003. This computer virus randomly selected IP addresses, exploiting vulnerabilities and sending itself on to other machines. It used these victim machines to launch a DDoS attack on several internet hosts, significantly slowing internet traffic. The Slammer worm hit banks in the U.S. and Canada especially hard, taking ATMs offline in many locations. Customers of Toronto’s Imperial Bank of Commerce found themselves unable to access funds. The attack reared its ugly head again in 2016, launching from IP addresses in Ukraine, China, and Mexico.

9. CryptoLocker – $665 million

Thankfully, ransomware attacks like the 2013 CryptoLocker virus have dipped since their 2017 peak. This malware attacked upwards of 250,000 machines by encrypting their files. It displayed a red ransom note informing users that “your important files encryption produced on this computer.” A payment window accompanied the note. The virus’ creators used a worm called the Gameover Zeus botnet to make and send copies of the CryptoLocker virus. According to a report by security firm Sophos, the average ransomware attack costs a business $133,000. If we estimate that CryptoLocker hit 5,000 companies, that would put its total cost at $665 million. Where will cybersecurity go next? See our guide: The Future of Cybersecurity

10. Sasser – $500 million

The Sasser worm was written by a 17-year-old German computer science student named Sven Jaschan. He was arrested at the age of 18 in 2004 after a $250,000 bounty was posted for the computer virus’ creator. A friend of Jaschan’s tipped authorities that the youth had penned not only the Sasser worm but also the damaging Netsky.AC attack. Jaschan was given a suspended sentence after it was found he was a minor when he wrote the malware. The Sasser worm crashed millions of PCs, and though some reports put damages at $18 billion, the relatively low infection rate suggests a more likely cost of $500 million. Other notable viruses The top 10 worst computer viruses above are just the ugly tip of a gargantuan digital iceberg. With a million new malware programs popping up every 3 years, we may miss the forest for a few outstanding trees. Here are just a few more viruses that have wreaked havoc over the years: Mimail: This worm tried to harvest data from infected machines to launch a string of DDoS attacks, but was relatively easy to remove. Yaha: Yet another worm with several variants, thought to be the result of a cyber-war between Pakistan and India. Swen: Written in C++, the Swen computer worm disguised itself to look like a 2003 OS update. Its financial cost has been pegged at $10.4 billion, but not reliably. Storm Worm: This worm showed up in 2007 and attacked millions of computers with an email about approaching bad weather. Tanatos/Bugbear: A 2002 keylogger virus that targeted financial institutions and spread to 150 countries. Sircam: A computer worm from 2001 that used counterfeit emails with the subject line, “I send you this file in order to have your advice.” Explorezip: This worm used fake emails to spread to every machine on thousands of local networks. Melissa: The most dangerous computer virus in 1999, Melissa sent copies of itself that looked like NSFW pics. The U.S. FBI estimated cleanup and repair costs at $80 million. Flashback: A Mac-only virus, Flashback infected over 600,000 Macs in 2012 and even infected Apple’s home base in Cupertino, Calif. In 2020, there’s now more malware on Macs than on PCs. Conficker: This 2009 virus still infects many legacy systems and could do significant damage if it ever activates. Stuxnet: This worm is reported to have destroyed Iranian nuclear centrifuges by sending damaging instructions.
Read More
Fix Windows Update Error 0x80242006
If you are trying to update your Windows 10 computer using Windows Update but encounter an error code 0x80242006, then you’ve come to the right place as this post will guide you in fixing this particular Windows Update error. This kind of error might be due to mishandling by the operating system. It could also be caused by the antivirus program or security software installed in your computer. When you encounter this error, you will see the following error message on your screen as you try to run Windows Update:
“0x80242006, WU_E_UH_INVALIDMETADATA. A handler operation could not be completed because the update contains invalid metadata.”
Here are some troubleshooting tips you can try to fix Windows Update Error 0x80242006.

Option 1 – Try to reset the Windows Update components

If by any chance that the second option didn’t work, resetting the Windows Update components could also help you resolve the problem. How? Refer to the following steps:
  • Open Command Prompt with admin privileges.
  • After that, type each one of the following command and hit Enter after you key in one after the other.
    • net stop wuauserv
    • net stop cryptsvc
    • net stop bits
    • net stop msiserver
Note: The commands you entered will stop the Windows Update components such as Windows Update service, Cryptographic services, BITS and MSI Installer.
  • After disabling WU components, you need to rename both the SoftwareDistribution and Catroot2 folders. To do that, type each one of the following commands below and don’t forget to hit Enter after you type one command after the other.
    • ren C:WindowsSoftwareDistribution SoftwareDistribution.old
    • ren C:WindowsSystem32catroot2 Catroot2.old
  • Next, restart the services you’ve stopped by entering another series of commands. Don’t forget to hit Enter after you key in one command after the other.
    • net start wuauserv
    • net start cryptsvc
    • net start bits
    • net start msiserver
  • Close Command Prompt and reboot your PC.

Option 2 – Run the Windows Update Troubleshooter

If resetting the Windows Update components didn’t work, you could also try running the Windows Update Troubleshooter as it could also help in fixing any issues related to Windows Update including this one. To run it, go to Settings and then select Troubleshoot from the options. From there, click on Windows Update and then click the “Run the troubleshooter” button. After that, follow the next on-screen instructions and you should be good to go.

Option 3 – Try to disable your antivirus program

Disabling the antivirus program or any security software installed in your computer is always a good idea you can try when the Windows Update process does not go smoothly. So before you try updating your computer again, make sure to disable the antivirus or security program and once the Windows Update is done, don’t forget to enable the antivirus program back again.

Option 4 – Check the Background Intelligent Service and the Cryptographic Service

  • Tap the Win + R keys to open the Run dialog box.
  • Next, type “services.msc” in the field and hit Enter or click OK to open Services.
  • From the list of Services, look for the following services and make sure that their Startup type is as follows:
    • Background Intelligent Transfer Service – Manual
    • Cryptographic Service ­– Automatic
  • After that, check if the Service status of the listed services above are set to Running. If they’re not, click on the Start button to start these services and then check if you can now enable the Windows Update service or not.

Option 5 – Run the System File Checker Scan

System File Checker or SFC is a built-in command utility that helps in restoring corrupted files as well as missing files. It replaces bad and corrupted system files to good system files. To run the SFC command, follow the steps given below.
  • Tap Win + R to launch Run.
  • Type in cmd in the field and tap Enter.
  • After opening Command Prompt, type in sfc /scannow
The command will start a system scan which will take a few while before it finishes. Once it’s done, you could get the following results:
  1. Windows Resource Protection did not find any integrity violations.
  2. Windows Resource Protection found corrupt files and successfully repaired them.
  3. Windows Resource Protection found corrupt files but was unable to fix some of them.
  • Restart your computer.

Option 6 – Try running the DISM tool

You can try running the Deployment Imaging and Servicing Management or DISM tool to fix the Windows Update error 0x80242006. Using this built-in tool, you have various options such as the “/ScanHealth”, “/CheckHealth”, and “/RestoreHealth”.
  • Open the Command Prompt with admin privileges.
  • Then type in the following commands and make sure to hit Enter right after you type each one of them:
    • Dism /Online /Cleanup-Image /CheckHealth
    • Dism /Online /Cleanup-Image /ScanHealth
    • exe /Online /Cleanup-image /Restorehealth
  • After that, wait until the process is finished and do not close the window as the process will probably take a couple of minutes.
  • Once it’s done, restart your computer.
Read More
What to do if Remote Desktop is not working or won’t connect in Windows 10
One of the biggest annoyances in Windows 10 is that it’s upgrading from one version to another. Although these upgrades are necessary to fix some bugs or improve user experience, some of them actually bring bugs into the computers instead. And in one of the recent Windows 10 updates, a lot of issues were found especially for users who use Remote Desktop on a daily basis. The error stacks up as Windows 10 Remote Desktop Protocol client is not working or won’t connect and can’t find the computer HOSTNAME generally. Based on the reports by users who experienced this issue, there are two cases around it:
  1. Users who try to reach a specific website or folder on the network
Some users encounter this error when they try to run the Network Troubleshooter. Even when they add the server name inside it, it still won’t identify the problem, and unpredictably, the driver seems to appear and disappear every now and then. And even after connecting, the network commands don’t work at all. This is really troublesome for users who have lots of PCs and all the other systems do not appear on the network.
  1. Remote Desktop isn’t able to find the computer HOSTNAME
Some other users reported that the error appeared when they use the classic remote desktop software. It keeps on failing and throwing the error message, “Remote Desktop can’t find the computer “HOSTNAME”. If this is the same scenario you are having, it means that “HOSTNAME” does not belong to the specified network. So you need to verify the computer name and domain where you are trying to connect to. There are times when it used to work after some users tried connecting to the domain a couple of times. However, when users try to use the UWP version of Remote Desktop, it seems to connect most of the time. This kind of problem is definitely a DNS issue. It could be that there are two different records on the DNS server which is why it connects and other times it doesn’t. When it is able to resolve the correct address, the drives connect to the PC however, after a couple of minutes, they will suddenly go missing. Using “nslookup” for the hostname, multiple times, you can check this and see if you’ll get identical results all the time.
nslookup [–SubCommand …] [{ComputerToFind| [–Server]}]
If you’ve determined that the drives disappear each time, you may have to change the DNS server or ask your admin to resolve the problem for you. Alternatively, you can also check out another option that has worked for a lot of users. This second option is disabling the IPv6 on the network adapter. In case you don’t know, Windows 10 prefers IPv6 over IPv4 so if you now have issues using IPv6 to connect to the servers, you can change your computer’s settings so that it’ll only use IPv4 instead of IPv6. To do so, follow these instructions:
  • Open Settings > Network and Internet > Ethernet > Change Adapter options.
  • From there, right-click on the adapter for where you want to disable it and then select Properties.
  • Next, look for the checkbox labeled, “Internet Protocol Version 6 (TCP/IPv6)” then uncheck it.
  • Now click on OK and restart your PC to save the changes made.
Read More
CcSvcHst.exe Application Error Troubleshoot Guide

CcSvcHst.exe Application Error Fix

What is the ccSvcHst.exe Application Error?

The ccSvcHst.exe is an executable file. This is a part of the Symantec Service Framework. This file is added to your computer database when you install Norton products for example Norton Antivirus or Norton Internet Security. This file is saved in C:\Program Files\Common Files folder location. It runs along with the Norton programs in the background. This file helps to load up services and settings. When the ccSvcHst.exe file becomes infected and corrupt, you experience the ccSvcHst.exe application error pop up on your system. This error code hampers you from running Norton programs on your system.

Solution

Restoro box imageError Causes

The ccSvcHst.exe application error message is triggered by some of the following causes:
  • Temporary system misconfiguration
  • Viral infection
  • Damaged files
  • High CPU usage
  • Registry corruption
The ccSvcHst.exe application error should be repaired immediately as a delay in fixing this error can put you at risk of fatal system crashes and failure.

Further Information and Manual Repair

The best and possibly the easiest way to repair the ccSvcHst.exe application error on your computer is to install Restoro. Restoro is an innovative, intuitive, user-friendly, and feature-filled repair tool. This multi-functional tool functions as a registry cleaner, system optimizer, and antivirus too. With all these essential PC fixings and maintenance features integrated into one, you don’t need to install numerous programs offering limited functions on your PC. This PC Fixer has a sophisticated interface, neat layout along easy navigation. So, using it is not complex or challenging, not even for those trying it for the first time. It resolves PC errors like ccSvcHst.exe application error in seconds. Whether this error is generated due to viral infection or registry damage, it detects all and repairs your PC right away thus ensuring a smooth functioning and error-free PC. With Restoro you can resolve issues in just three simple steps, install the software, scan for errors and click repair to resolve. It’s that fast and easy to use. Now let’s get down to how this PC Fixer resolves the ccSvcHst.exe application error successfully. If a ccSvcHst.exe application error is caused by temporary system misconfiguration, a simple system reboot may stop the error from occurring again. However, if viral infection and registry corruption is the cause then installing Restoro is the way to go.

How Registry Errors Cause ccSvcHst.exe Application Error

ccSvcHst.exe application error indicates that your computer contains too many registry fragments and obsolete entries like junk files, temporary internet files, and files of uninstalled programs occupying a huge amount of RAM and disk space. The cluttering of the disk causes and malicious files causes the registry to corrupt. This is what the registry cleaning feature of Restoro takes care of. The registry cleaner scans and wipes out these unnecessary and obsolete system files freeing your disk space. It resolves errors like ccSvcHst.exe application error by repairing registry damages. With the help of its privacy error detector, it detects malicious viruses hidden on your system and in your hard disk. These usually gain access to your system via unsafe internet browsing, downloading programs from unreliable websites, and opening phishing emails. Without you being aware, these viruses and spyware enter your system giving hackers access to manipulate your confidential and private information like credit card number, bank account number, and SSN number, if such information is present on your PC. The ccSvcHst.exe application error hampers you in running Norton and thus exposes you to serious data security dangers. This is where Restoro not only serves as an error fixer but a powerful antivirus too. It removes all the viruses infecting your PC in a couple of seconds.

Restoro Benefits

Restoro is efficient and ensures user safety. Sometimes during repair, you may lose important data which may be hard to recover if you don’t have a backup. Unlike other tools, Restoro helps users create backup copies for safety purposes thus you don’t have the risk of losing your valuable data. You can restore and recover all your essential files in case data is lost during repair. This PC Fixer is compatible and runs smoothly with all Windows versions. So, if you have come across a ccSvcHst.exe application error on your system fix it by installing Restoro today. Click here to install Restoro.
Read More
1 2 3 162
Logo
Copyright © 2022, ErrorTools. All Rights Reserved
Trademarks: Microsoft Windows logos are registered trademarks of Microsoft. Disclaimer: ErrorTools.com is not affiliated with Microsoft, nor claim direct affiliation.
The information on this page is provided for information purposes only.
DMCA.com Protection Status