Fix cannot load the Device Driver Code 38

Each you connect time external devices like scanners, printers, and the likes to a Windows 10 computer, the device either pushes the drivers through the USB or any other port, or you are expected to install the drivers through external media. In both cases, the driver will be loaded into the system, allowing you to use the device. However, it doesn’t always go smoothly as you could encounter some errors like the “Windows cannot load the Device Driver for this hardware because a previous instance of the Device Driver is still in memory ( Code 38 )”.

If you encounter such an error in the Device Manager, then this means that a previous version of the device driver is still in memory and that each time the device is used, that previous version is loaded into memory and then unloaded which triggers the “Windows cannot load the Device Driver for this hardware because a previous instance of the Device Driver is still in memory (Code 38)” error. This kind of error occurs if the operating system loads the unwanted driver or if it fails to unload the driver.

It could be that there is an obsolete version of the driver that’s still installed in the system or it could also be that you need to update your USB drivers as they could be outdated or the problem could also be due to some third party program that is interfering with the installation. Whatever the cause is, here are some suggestions you can check out to resolve the problem.

Option 1 – Uninstall previously installed drivers and reinstall their latest working version from the manufacturer’s website

The first thing you can do is to uninstall the drivers that are currently installed on your computer and then reinstall their latest working versions from their official sites. This kind of error is commonly encountered while loading drivers for scanners and printers. This is due to the fact that their drivers and software come along with a package which is usually in external media like CD or DVD. So when you install the software package, there’s a possibility that a newer version has been launched by its manufacturer. When that happens, you have to uninstall the previously installed driver package and then download the drivers from the manufacturer’s website and install them.

Option 2 – Run the Hardware and Devices Troubleshooter

  • The first thing you need to do is click on Start and then on the gear-like icon to pull up the window for Settings.
  • After opening Settings, look for the Update and Security option and select it.
  • From there, go to the Troubleshoot option located on the left-hand side of the list.
  • Next, select Hardware and Devices from the list and open the Troubleshooter and run it. Once it is doing its job, wait for it to complete the process and then restart the system.
  • After the system restarts, check if the problem’s now fixed. If not, refer to the next option given below.

Option 3 – Update or reinstall the Universal Serial Bus Controller driver

Since it could be a driver issue, you can try to update or reinstall the Universal Serial Bus Controller drivers using the Device Manager. Refer to the following steps:

  • First, click the Start button and type “device manager”.
  • Then click on the “Device Manager” from the search results to open it.
  • From there, look for the “Universal Serial Bus controllers” option and then right-click on each one of the USB drivers and select the Update Driver from the menu.

Note: If it is a regular USB drive, then it will be listed as a USB Mass Storage Device but if you have a USB 3.0 device, then look for a USB 3.0 Extensible Host Controller.

  • Restart your PC and then click the “Search automatically for updated driver software” option.

Note: If updating the USB Controller drivers didn’t work, you can try to reinstall them instead.

Option 4 – Restart your computer in a Clean Boot State

If the first three given options didn’t work and you still see the error when you connect external devices, you can try putting your computer in a Clean Boot State and then try connecting them again.

  • Log onto your PC as an administrator.
  • Type in MSConfig in the Start Search to open the System Configuration utility.
  • From there, go to the General tab and click “Selective startup”.
  • Clear the “Load Startup items” check box and make sure that the “Load System Services” and “Use Original boot configuration” options are checked.
  • Next, click the Services tab and select the “Hide All Microsoft Services” check box.
  • Click Disable all.
  • Click on Apply/OK and restart your PC. (This will put your PC into a Clean Boot State. And configure Windows to use the usual startup, just simply undo the changes.)
  • Now try to connect the external devices and check if the error is now gone.
If you like to learn and find out more about various Windows errors, and how to repair them go to our vast archive or use search to find articles that will explain and help you in solving your issue.
However, if you prefer to do things fast and with automatization then we are proposing to use an automated solution for your issues. The application that we are recommending is Advanced System Repair Pro
Advanced System Repair utilizes multiple tools all in one to give you a quick, simple, reliable, and very thorough diagnosis of your PC. It brings you all the tools you need in one program to clean, fix, protect, optimize and boost your PC!
1-Click Maintenance
All the tools to make it simple and easy! It's like having a professional technician at the click of a mouse.

Junk Cleaner
Keeping your computer free from unnecessary clutter also helps make your computer last longer. Like any other machine, if you keep it clean and take care of it, it will serve you better for longer!

Optimize background apps
Optimize applications background activity with the built-in Application Optimizer feature.

Disk Defrag
With a simple 1-click, Advanced System Repair speeds up your PC by assembling fragmented files on your machine and organizing them more efficiently.

Malware Removal
Finds and removes all types of harmful malware including trojans, worms, bots, adware, spyware, PUPs, and more!

Privacy Cleaner
The all-in-one privacy suite to Clean Your Tracks & Protect Your Privacy! Make your computer safe, secure, and more efficient!

System Tweak/Optimizer
ASR will analyze your complete system and settings to adjust your PC to function at its maximum performance.

Registry Cleaner
Over time, as you install and uninstall applications, the registry can become cluttered with old entries and broken settings which can result in program crashes, and annoying messages and slow the computer down.
Visit our Advanced System Repair Pro Download page to inform yourself about all the benefits of this software and get a free trial copy of it.
advanced system repair pro

Advanced System Repair Pro

One-click automated PC repair solution
ASR logo
With Advanced System Repair Pro you can easily
Replace damaged files
Restore performance
Free disk space
Remove Malware
Protects WEB browser
Remove Viruses
Stop PC freezing
DOWNLOAD
Privacy Policy | Terms of Use | Uinstall
Advanced System Repair Pro is compatible with all versions of Microsoft Windows including Windows 11

Share this article:

You might also like

Choosing default browser in Windows 11
Default applications in previous Windows versions were a pretty straightforward process. The user went to the settings application and picked for each category which application he would like to choose from the list of installed ones. In Windows 11 things are little changed. In this article, we will show you how to choose the default internet browser inside Windows 11, and sadly it is a more tedious task than in previous versions.

windows 11 default browser
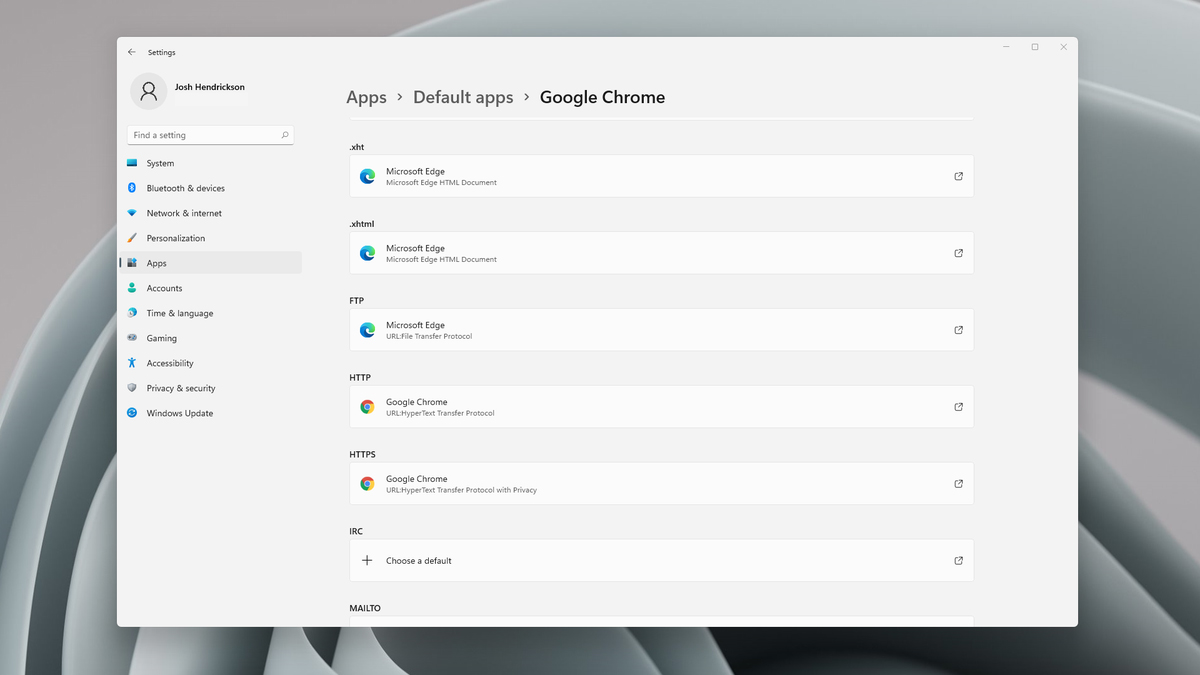
Choosing default browser in settings

As in previous versions of the Windows operating system you will need to use the settings application in order to change your default Internet browser. Previously, in Windows 10, a variety of general categories like email, web browser, and photo viewer were all listed under the Default Apps section of the Settings panel. It was easy to click on one of those categories and click on the option you like best from the small pop-up suggestion window. In the Windows 11 Insider Build, you’ll see a gauche list of an individual file or link types that you’ll need to specify your preferred browser for. The types include: HTM, HTML, PDF, SHTML, SVG, WEBP, SHT, FTP, HTTP, and HTTPS. There are additional optional types you can specify your preferred browser for as well. The issue here is in order to use a single browser which most users do you will have to go through each file type and set your preferred one. I am really not sure why this was introduced or why it has to be this way, all I can do is hope that in the final release of Windows 11 this feature will be rolled back as it used to be and that you could set your default browser in just one simple click.
Read More
How to Fix Backup Error 0x80070002
[vc_row][vc_column][vc_column_text]

Backup Error 0x80070002

What is Backup Error 0x80070002?

Error 0x80070002 shows once you’re done backing up files through the Windows Backup program on a system running Windows 7, you see a notification that pops up with a message that reads something like: “Check your backup results. The backup completed but some files were skipped.” You try finding out the reason and you hover over to the Options button beside the message, then you get to read the following lines: “Check your backup results. The backup completed but some files were skipped. View skipped files.” Upon clicking the “View Skipped Files” option, the backup error 0x80070002 pops up on your screen and you’re left scratching your head, wondering what you’re going to do now.

Solution

Restoro box imageError Causes

There are multiple error logs that you will encounter in backup error 0x80070002 as per different conditions. The two most common cases in which this error shows up are stated below:

Case 1

You will see the following message when you press “View skipped files”: “Backup encountered a problem while backing up file C: Windows/System32/config/systemprofile. Error: (The system cannot find the file specified. (0x80070002))” You will face this case if you have backed up a library that included custom folders that were located in your user profile.

Case 2

Upon pressing “View Skipped files” you will encounter the below-mentioned messages: “Backup encountered a problem while backing up file C:/Users<User>AppDataLocalLow. Error: (The system cannot find the file specified. (0x80070002))” “Backup encountered a problem while backing up file C:/Users<User>Contacts. Error: (The system cannot find the file specified. (0x80070002))” “Backup encountered a problem while backing up file C:/Users<User>Searches. Error:(The system cannot find the file specified. (0x80070002))” You are likely to encounter any of these messages in case:
  • The Windows Backup program is trying to back up your files in either one or all of these folders (LocalLow, Searches, Contacts).
  • All three of these folders don’t exist in your system.
Keep in mind that all three of these folders exist due to the installation of certain programs and applications on your system.

Notes

The backup error 0x80070002 is also found to occur while using USB devices instead of storage devices. Other occurrences include the times when input/output (I/O) operations are performed on the USB device, which results in failure.

Further Information and Manual Repair

To make sure this issue is resolved, you will have to follow either one of the following solutions as appropriate to your situation:

Solution for Case 1

  1. Ignore the error. The store files of the custom library in your user profile will not be created as backups.
  2. Transfer the library folder from where it currently exists to a place outside its current folder (user profile). For instance, you can move the library folder to an entirely new destination such as “C: My Folders”
  3. Remove the library folder from the list of files that you are backing up using the Windows Backup program. Then, add the original place of the library’s content in the list.
  4. Go back and check step two. If carried out successfully then add a link to the folder you moved from the library. Check to see if the backup includes the library folder. To make sure, you have to do as follows:
  • Go to Start and select your username.
  • Hover across to the folder you wish to move, right-click on it and select “Cut”.
  • Head to the navigation pane and search for the area you will store the folder in, right-click and select “Paste” so that the folder is moved to that location.
  • Right-click on the folder that you just moved and select “Copy”.
  • Go back to Start, select your username, right-click any vacant space in your folder and select “Paste Shortcut”.
Note: If you want to store the folder in a different place other than the folder in which it currently exists (user profile), you will need to create a new folder. In order to do so, go to the Windows Explorer menu and look up the root of the drive. Hit “New Folder” and then choose edit to change its name. You can set it as any name for instance, “My Folders”.

Solution for Case 2

You can ignore this error safely. However, if you wish not to see this error in the future during your backup operations then you will need to carry out the following steps:
  1. Create all the folders listed in the error message including LocalLow, Contacts, and Searches.
  2. Remove all of these folders from the Backup settings to make sure they aren’t being backed up then add the folders which are in their original place. To carry out this procedure, you will have to follow the below-mentioned steps:
  • Head over to the Control Panel and open “Backup & Restore”.
  • Go to the Backup section and select “Change Settings”.
  • Click Next in the Setup backup dialog box.
  • Select “Let me choose” in the dialog box termed “What do you want to back up” then proceed by clicking Next.
  • Expand Data Files, expand <user> Libraries, expand Additional Locations then proceed by clearing out the AppData Folder, searches, and Contacts check boxes.
  • Expand Computer as well as the item for your system drive (expand Local Disk (D:)), expand users, expand <user>, then go to AppData, Searches and Contacts and mark them if they are present.
  • Proceed by clicking next and select “Save Settings” then exit.
  • Back to Backup & Restore, select Back up now and your new backup will begin proceeding. The entire process will complete without any errors now.
[/vc_column_text][/vc_column][/vc_row]
Read More
Find out bottlenecks in your PC easily
Building a custom PC is a great feeling but it can sometimes not be ideal and we are not talking about breaking or losing parts. What we mean is that choosing the right components can be sometimes a difficult task. Of course, picking a PC case can have its issues, choosing the right power supply can be tricky but pairing all components together, especially CPU and GPU can be tricky. bottlenecks
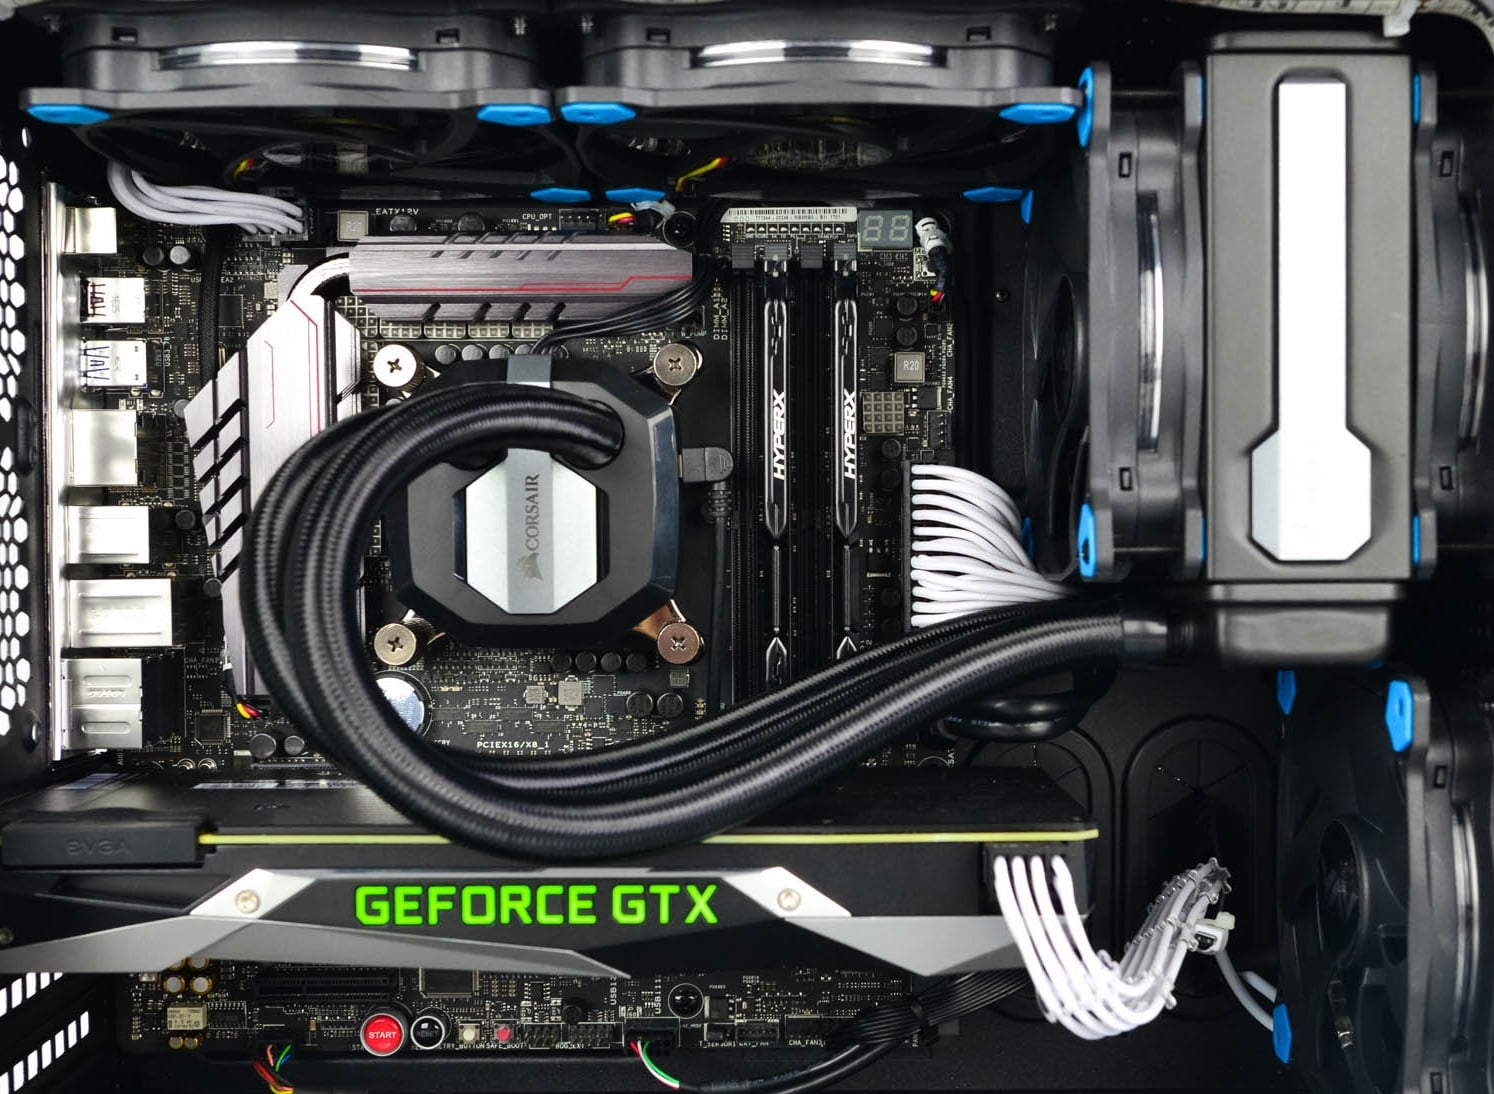
Builders with no depth knowledge and experience can sometimes choose improper CPU or GPU, picking one of them to be much more powerful than another thus not using it to its full potential because another component cannot handle stuff at the same speed. In order to not be trumped by this kind of stuff, there is a website that is completely free and you do not even need to be registered in order to use it. Bottlenet calculator link here What is even better, once you input your components you will get advice on what to change in order to tweak the system a little more to avoid bottlenecks even more. It is a very useful tool and we are advising you to use it in order to save money but not throwing it on some component that will be half used.
Read More
Fix Minecraft Won’t Launch in Windows 10
Minecraft has taken the world by the storm, it was an indie project game and it went mainstream. Dream of every game developer I guess. The dream of every gamer on the other hand is to double click on the game and to play it and not to deal with various issues, especially if they are launch issues. Luckily for all of you gamers, here at errortools we game as well and we are happy to bring you a solution on how to fix Minecraft won't launch issue. So sit back, relax and keep on reading, and hopefully enough you will be gaming again in no time. Follow the guide presented step by step, point by point how it is presented for the quickest way to get back in Minecraft. This guide also presumes that your hardware configurations meet at least the minimum system requirements for running Minecraft.
  1. Disable antivirus and firewall

    90% of the time this is the issue why Minecraft is not working, your antivirus or firewall has detected it as a false positive, and access to system internet, etc has been cut. Try disabling it and if everything is working fine add it to the antivirus or the firewall exception list.
  2. Run Minecraft as admin

    Minecraft will sometimes refuse to run if it does not has administrator privileges. To make sure this is the case locate the Minecraft executable, right-click on it and choose properties. Go to the compatibility tab and check Run as Administrator box.
  3. End Minecraft process

    It came to knowledge that even if Minecraft is not running it can have its processes active in the background. Press CTRL + SHIFT + ESC to open task manager Locate if Minecraft has a process running If you find the Minecraft process right-click on it and choose End Task
  4. Run Minecraft in compatibility mode

    If Minecraft still refuses to start try running it in compatibility mode in the previous Windows version Locate Minecraft executable file in its install location Right-click on it and choose properties In the properties, windows go to the compatibility tab Check run this program in compatibility mode for: Select previous version of the operating system, try Windows 8 or Windows 7
  5. Update graphic card driver

    The best bet is to go to your GPU manufacturer's website and download the latest version of the driver of your GPU.
  6. Remove mods, plugins, texture packs

    Mods, plugins, texture packs are all great but sometimes they can cause GPU overloads and other issues to see if this is the case try running Minecraft in Vannila mode without anything installed, just pure and clean Minecraft as it was just downloaded and installed.
  7. Reinstall Minecraft

    If everything else failed, reinstall Minecraft. There might be a chance that some DLL file was deleted or corrupted by mistake or that some crucial files are missing. Clean reinstallation will fix all of these issues.
Read More
How To Fix the D3dx9_43.dll Error Code

Repair D3dx9_43.dll Error Code

D3dx9_43.dll – What is it?

D3dx9_43.dll is a type of dynamic link library. This is one of the many files contained in the DirectX software collection which is used to load and run most of the Windows PC based games and advanced graphics programs. D3dx9_43.dll error message is displayed when any one of the Microsoft games fails to load. The error message is displayed in either of the following formats:
“D3dx9_43.DLL Not Found" "The file d3dx9_43.dll is missing" "File d3dx9_43.dll not found" "D3dx9_43.dll not found. Reinstalling might help fix this."

Solution

Restoro box imageError Causes

D3dx9_43.dll error may occur due to multiple reasons. These include:
  • D3dx9_43.dll files get corrupt or damaged
  • Missing Microsoft DirectX file
  • Viruses and malware on your system
  • Driver issues
  • Registry overloaded with invalid entries
If the D3dx9_43.dll error is not fixed timely, it not only causes you a great deal of inconvenience as it hampers your ability to play Microsoft games but since the underlying causes of the error are critical, it can result in serious PC damages like system failure, system crash, and data loss. Therefore to avoid it, it is advisable to resolve the error code immediately.

Further Information and Manual Repair

Though this is a critical PC error but the good thing is that it is easy to resolve. To fix it, you don’t always have to pay hundreds of dollars to a professional technician or be technically sound. Here are some of the best ways to repair and resolve D3dx9_43.dll error on your system:

Check the Recycle Bin

If you get the error message "The file d3dx9_43.dll is missing" then the best method to resolve this error from your system is to check your recycle bin. The Microsoft Direct X file could be there especially if you recently uninstalled a gaming program. Here’s why: dll files are shared by multiple programs. So, it is possible that the program you deleted from your PC also shared the same file to load and run. And because of this reason, the file also got removed from your PC when you uninstalled that particular program. Therefore, check your recycle bin. If you find the d3dx9_43.dll in there, restore it and try running the desired Microsoft game again. See if it works.

Re-Download DirectX

Nonetheless, if you can’t relocate it, try installing the latest version of DirectX on your system. This can be done by downloading the DirectX End-User Runtimes Web Installer on your system from the official Microsoft website.

Update Your Drivers

If the error is related to video card driver, then it is advisable to update the driver. By updating the driver for your video card you can fix the D3dx9_43.dll error instantly.

Repair the Registry

Other reasons for the D3dx9_43.dll error could be corrupt and damaged dll files. It triggers registry issues and sometimes even malware infections. DLL files often get corrupt when the registry overloads with too many files these include mostly unnecessary and obsolete files like junk files, cookies, temporary internet history, invalid and bad registry entries. As the clutter and overload the registry, the important files like dynamic link libraries get damaged. Here cleaning and restoring of the registry is the best way to resolve the error pop-ups like D3dx9_43.dll. You can repair the registry manually however, it is time consuming and somewhat technical. But if you are looking for a simple and a quick fix, then download Restoro.

Try Restoro.

Restoro is a next-generation and multi-functional PC repair tool. It is embedded with a variety of PC fixing and performance-boosting utilities all in one. It includes a registry cleaner with an intuitive algorithm that detects all types of registry issues on your system and resolves them in seconds. It cleans the registry, restores the damaged D3dx9_43.dll files, and repairs the registry. Furthermore, Restoro also includes utilities like an antivirus, Active X controls and class detector. With the help of the in-built antivirus you can scan for viruses and malware infecting your system and remove them right away. It also functions as a system optimizer boosting the speed of your PC dramatically. It is safe, efficient, and compatible with all Windows versions. Click here to download Restoro, resolve the D3dx9_43.dll error, and resume enjoying Microsoft games on your PC.
Read More
Fix Office Activation error 0x80070426
In case you don’t know, Microsoft Office uses a separate mechanism than the Windows operating system for specific purposes such as Updates and Activation which brings in the content dependencies of this mechanism on different services and processes. Thus, in such cases, you could encounter errors like the error code 0x80070426. When you get this error, you will see the following error message on your screen:
“An unexpected error has occurred. Your request cannot be processed at this time. Please try again later. (0x80070426)”
This kind of error is caused by various supporting processes and services that are not working or are not being triggered as they were supposed to. If you are currently facing this issue, worry not for this post will guide you in fixing it. There are two potential fixes you can try – you can either check the responsible services or manually run the Activation Script. For more details refer to the given options below.

Option 1 – Try checking the responsible Services

  • In the Start search, type “services.msc” in the field and tap Enter or click OK to open the Windows Services Manager.
  • If a User Account Control or UAC prompt appears, just click on Yes to proceed to the Windows Services Manager utility window.
  • After that, look for the “Software Licensing Service” service entry from the given list of services inside the window.
  • Then right-click on it and select Properties and from there, make sure that its Startup Type is set to Automatic.
  • Once done, click on the Start button to start the service and then exit the Services Manager.
  • Next, tap the Win + R keys to open the Run utility and then type “cmd” in the field and tap Enter to open an elevated Command Prompt.
  • After that, type and enter each command below one after the other.
    • net start slsvc
    • sc qc slsvc
    • sc queryex slsvc
    • sc qprivs slsvc
    • sc qsidtype slsvc
    • sc sdshow slsvc
  • Now check if the problem is fixed or not.

Option 2 – Try to manually run the Activation Script

  • In the Start search, type “cmd” and right-click on Command Prompt from the given search results and then select the “Run as administrator” option to open Command Prompt with admin privileges.
  • Next, navigate to the following location inside the Command Prompt command-line utility if you are using Office 16.
    • x86: C:/Program Files (x86)/Microsoft Office/Office16
    • x64: C:/Program Files/Microsoft Office/Office16
  • On the other hand, if you are using an older version, go to the following location instead.
    • x86: C:/Program Files (x86)/Microsoft Office/OfficeXX
    • x64: C:/Program Files/Microsoft Office/OfficeXX
  • Once you’re in the location, type the following command to run the Activation Script and then tap Enter.
cscript ospp.vbs/act
  • The command you just entered will activate your copy of Microsoft Office.
Read More
Schedule restart update on Windows 11
windows 11 schedule update
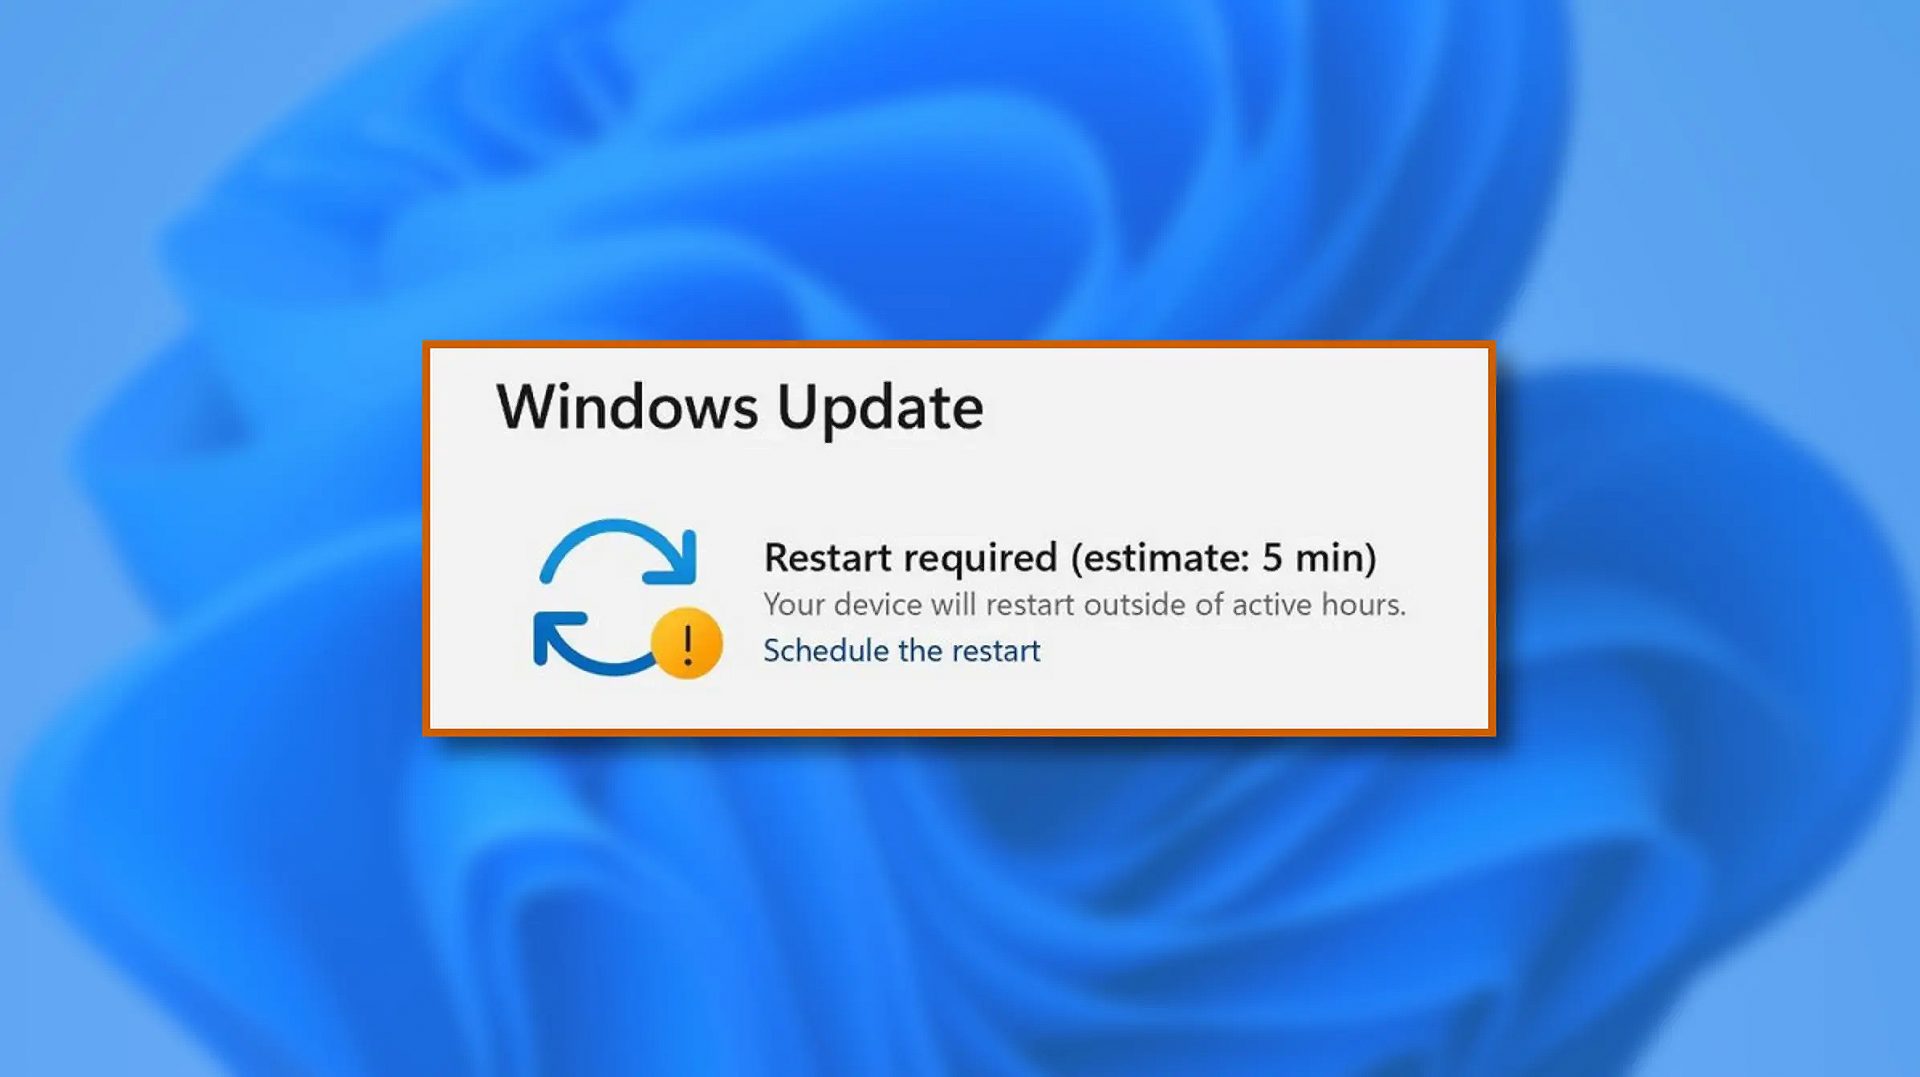
When Windows 11 update is available but you do not wish to restart right away because you are in the middle of using a computer, you can schedule a restart for up to 7 days. It is very easy and we will show you how to do it.
  1. Press ⊞ WINDOWS + I to open settings
  2. Click on Windows Update
  3. At the top, under the Restart required to click on Schedule the Restart
  4. Click the switch under Schedule a Time to turn it ON
  5. Use the Pick a Time and Pick a Day menu to set time and day when you want to update
  6. Go back to one screen and visually confirm that the date is set
  7. Close the settings
The scheduled restart will be confirmed in a message on the Windows Update page.
Read More
Fix Winload.efi file missing error
The Winload.efi file is an Extensible Firmware Interface or EFI file. EFI files are executable files for the firmware of the computers that are mainly based on UEFI and execute the tasks of loading the files to the bootloader of the computer. They are used for a specific set of tasks such as turning on the computer, installing Windows, restarting the computer or resetting it, and so on. This is why the Winload.efi file is a significant file so if it gets corrupted, lost, or damaged, it would be impossible for the Windows operating system to proceed. Here are some errors you can encounter that are related to the Winload.efi file:
  • efi is missing
  • efi cannot be found
  • efi is missing or contains errors
  • This program can’t start because winload.efi is missing from your computer
  • This application requires the file winload.efi, which was not found on this system.
  • There was a problem starting [path]winload.efi. The specified module could not be found.
In addition, the 0xc0000225 , 0xc00000e and 0xc0000001error codes are also associated with the Winload.efi file. Before you start troubleshooting the problem, you can try to perform System Restore first. This will help undo any changes you’ve made in your computer that might have triggered the Blue Screen error. To perform System Restore, here’s what you have to do:
  • First, press the Win + R keys to open the Run dialog box.
  • After that, type in “sysdm.cpl” in the field and tap Enter.
  • Next, go to the System Protection tab then click the System Restore button. This will open a new window where you have to select your preferred System Restore point.
  • After that, follow the on-screen instructions to finish the process and then restart your computer and check if the problem is fixed or not.
If System Restore didn’t help in fixing the Blue Screen error, now’s the time for you to resort to the troubleshooting tips provided below but before you get started, make sure that your create a System Restore point first.

Option 1 – Try rebuilding the Boot Configuration Data (BCD) and repairing MBR

  • Once you get to the Welcome Screen part, click on Next.
  • Afterwards, click on the Repair your computer option located on the bottom-left part of the window.
  • Then click on Troubleshoot.
  • Next, select the Advanced Options and then Command Prompt.
  • Once Command Prompt has been pulled up, the following commands to rebuild BCD files and repair MBR. Don’t forget to hit Enter right after you type each command.
    • bootrec /repairbcd
    • bootrec /osscan
    • bootrec /repairmbr
  • Once the command line is successful in finding out a Windows installation, hit Y to let it boot from the list which will successfully rebuild BCD.
  • Now type “exit” to close Command Prompt and then restart your computer to successfully apply the changes made.

Option 2 – Disable the Secure Boot in the BIOS

Disabling the Secure Boot in the BIOS settings is definitely recommended to resolve errors related to the Winload.efi file. To disable Secure Boot, here’s what you have to do:
  • First, boot your computer into Windows 10.
  • Next, go to Settings > Windows Update. From there, check if there is anything that you have to download and install if you see any available updates. Usually, OEMs send and update the list of trusted hardware, drivers, and operating systems for your computer.
  • After that, go to the BIOS of your computer.
  • Then go to Settings > Update & Security > Advanced Startup options. If you click on Restart Now, it will restart your computer and give you all the advanced options.
  • Next, select Troubleshoot > Advanced Options. As you can see, this screen offers you further options including System restore, Startup repair, Go back to the previous version, Command Prompt, System Image Recovery and UEFI Firmware Settings.
  • Select the UEFI Firmware Settings which will take you to the BIOS.
  • From there, go to Security > Boot > Authentication tab where you should see Secure Boot. Note that every OEM has its own way of implementing the options so it varies.
  • Next, set Secure Boot to Disabled and set Legacy Support to On or Enabled.
  • Save the changes made and exit. Afterward, your computer will reboot.

Option 3 – Run System File Checker scan

You might also try running the System File Checker or SFC scan to fix the error. System File Checker is a command utility built into your computer that helps restore corrupted files and missing files. Refer to the following steps to run it:
  • Hit the Win + R keys to launch Run.
  • Type in cmd in the field and tap Enter.
  • After opening Command Prompt, type in sfc /scannow
The command will start a system scan which will take a few whiles before it finishes. Once it’s done, you could get the following results:
  1. Windows Resource Protection did not find any integrity violations.
  2. Windows Resource Protection found corrupt files and successfully repaired them.
  3. Windows Resource Protection found corrupt files but was unable to fix some of them
  • Reboot your computer.

Option 4 – Disable the Early Launch Anti-Malware Protection

  • You need to restart your computer in the Start Menu first while holding down the Shift key on your keyboard.
  • After that, it will restart your computer to Startup Settings.
  • Now ensure that the 8th option is labeled as “Disable early launch anti-malware protection.
  • Then tap the F8 key since the aforementioned option above is listed at number 8. This should launch and load Windows on your PC with the Early Anti-malware protection disabled for that session only when you try to carry out the same task and then check if the error related to the Winload.efi file is now fixed.
Read More
Display driver nvlddmkm stopped responding
Users are reporting that randomly their screen will just go black for a second and come back. When this happens, it usually distorts any video currently on the screen; sometimes, they can resume working on the PC normally. However, when they view the event logs, they see the error message Display driver nvlddmkm stopped responding and has successfully recovered. In this article, we will address solutions to this issue and how to not have it again.
  1. Remove Aura iCUE plugin (applies to only ASUS motherboards)

    Some PC users discovered that iCue adds an Aura plugin for ASUS MOBOs. That, combined with EVGA Precision X1, was causing the error it seems – this was determined when the screen would turn off and on when opening EVGA x1 software. In this case, the issue was resolved by removing the Aura iCUE plugins.
  2. Change Power Management mode

    Right-click the battery icon on the notification area on the right of the Taskbar. Select Power Options. In the Power Options window, locate your current Power Plan. Select High performance, if that’s not your current power plan. Now, click on Change plan settings next to it. Now click on Change advanced power settings. Expand PCI Express section. Expand Link State Power Management. Now set power saving to Off for both On battery and Plugged in state. This would fix any issues caused by the low power of the video card. Click Apply > OK to save changes.
  3. Update graphics driver

    Go into device manager Expand display adapter section Right-click on adapter Click on update driver Reboot
  4. Rollback graphics driver

    Go into device manager Expand display adapter section Right-click on adapter Click on Roll back driver Reboot
  5. Uninstall and reinstall graphics card driver

    Go into device manager Expand display adapter section Right-click on adapter Click on Uninstall device Reboot
  6. Replace the graphics card

    If everything else failed, replace the graphic card
Read More
Explanation of deep and dark WEB
Often when we connect to the internet were browsing indexed pages through some well-known search engine, usually Google. But beneath the so-called normal internet lurks deep and dark web. You might have heard of the deep web and dark web if you have some geeky friends and we are here to explain what exactly is the deep and dark web. The first thing to know is that the deep and dark web is not the same thing and they coexist separately from one another, you could say that beneath the deep web lies the dark web, yet another layer of the internet. So let us explore first the deep web. What is exactly a deep web?

Deep web, hidden web, or invisible web

as sometimes referenced are part of worldwide web not indexed by search engines, meaning that engines do not basically see and index content of deep web sites. The content of the deep web is hidden behind HTTP forms and includes many very common uses such as webmail, online banking, private or otherwise restricted access social-media pages and profiles, some web forums that require registration for viewing content, and services that users must pay for, and which are protected by paywalls, such as video on demand and some online magazines and newspapers. The content of the deep web can be located and accessed by a direct URL or IP address but may require a password or other security access to get past public website pages. While it is not always possible to directly discover a specific web server's content so that it may be indexed, a site potentially can be accessed indirectly (due to computer vulnerabilities). To discover content on the web, search engines use web crawlers that follow hyperlinks through known protocol virtual port numbers. This technique is ideal for discovering content on the surface web but is often ineffective at finding deep web content. For example, these crawlers do not attempt to find dynamic pages that are the result of database queries due to the indeterminate number of queries that are possible. It has been noted that this can be (partially) overcome by providing links to query results, but this could unintentionally inflate the popularity of a member of the deep web.

Dark WEB

The dark web is the World Wide Web content that exists on darknets: overlay networks that use the Internet but require specific software, configurations, or authorization to access. Through the dark web, private computer networks can communicate and conduct business anonymously without divulging identifying information, such as a user's location. The dark web forms a small part of the deep web, the part of the Web not indexed by web search engines, although sometimes the term deep web is mistakenly used to refer specifically to the dark web. The darknets which constitute the dark web include small, friend-to-friend peer-to-peer networks, as well as large, popular networks such as Tor, Freenet, I2P, and Riffle operated by public organizations and individuals. Users of the dark web refer to the regular web as Clearnet due to its unencrypted nature. The Tor dark web or Onionland uses the traffic anonymization technique of onion routing under the network's top-level domain suffix .onion.

Dark & Deep WEB difference

The dark web has often been conflated with the deep web, the parts of the web not indexed (searchable) by search engines. The dark web forms a small part of the deep web but requires custom software in order to access its content. This confusion dates back to at least 2009. Since then, especially in reporting on Silk Road, the two terms have often been conflated, despite recommendations that they should be distinguished. Darknet websites are accessible only through networks such as Tor ("The Onion Routing" project) and I2P ("Invisible Internet Project"). Tor browser and Tor-accessible sites are widely used among darknet users and can be identified by the domain ".onion". While Tor focuses on providing anonymous access to the Internet, I2P specializes in allowing anonymous hosting of websites. Identities and locations of darknet users stay anonymous and cannot be tracked due to the layered encryption system. The darknet encryption technology routes users' data through a large number of intermediate servers, which protects the users' identity and guarantees anonymity. The transmitted information can be decrypted only by a subsequent node in the scheme, which leads to the exit node. The complicated system makes it almost impossible to reproduce the node path and decrypt the information layer by layer. Due to the high level of encryption, websites are not able to track the geolocation and IP of their users, and users are not able to get this information about the host. Thus, communication between darknet users is highly encrypted allowing users to talk, blog, and share files confidentially.

Darknet

The darknet is also used for illegal activity such as illegal trade, forums, and media exchange for pedophiles and terrorists. At the same time, traditional websites have created alternative accessibility for the Tor browser in an effort to connect with their users. ProPublica, for example, launched a new version of its website available exclusively to Tor users.
Read More
1 2 3 162
Logo
Copyright © 2022, ErrorTools. All Rights Reserved
Trademarks: Microsoft Windows logos are registered trademarks of Microsoft. Disclaimer: ErrorTools.com is not affiliated with Microsoft, nor claim direct affiliation.
The information on this page is provided for information purposes only.
DMCA.com Protection Status