Fix Element Not Found for Bootrec /Fixboot

One of the most useful utilities for advanced users in Windows is the Windows command line or Command Prompt. It is efficient in fixing system files, checking the disk for errors as well as other intensive tasks that are made convenient using this.

One of the tasks you can carry out using Command Prompt is repairing the Windows bootup process if it encounters any issues. However, if you tried running the “bootrec/fixboot” command and you receive an error message saying, “Element not found”, read on as this post will guide you in fixing this error. This kind of error in the command line could be due to a damaged BCD or MBE, inactive system partition, or it could also be that there is no drive letter being assigned to the EFI partition. Whichever the case is, here are some possible fixes that should help you resolve the problem.

Option 1 – Try to repair BCD

As mentioned the error could be caused by a damaged BCD and so to fix the problem, you need to repair BCD by following these steps:

  • First, make sure that you have a bootable Windows 10 USB drive with you and use it to boot your computer.
  • Once you’re on the Welcome Screen, click on Next.
  • After that, click on Repair your computer located at the bottom-left portion of the window.
  • Then select Troubleshoot > Advanced Options > Command Prompt.
  • After you open the Command Prompt window, execute the following command:

bootrec /fixboot

  • Afterward, enter the next command below to rename the BCD file:

ren BCD BCD.bak

  • Next, type the following command and make sure to replace “b:” with the letter of your bootable drive attached to your computer.

bcdboot c:Windows /l en-us /s b: /f ALL

  • Now, wait until the process is completed and restart your computer to successfully apply the changes made.

Option 2 – Try assigning the drive letter to the EFI partition

  • Tap the Win + X keys or right-click on the Start button and click on Command Prompt (Admin) to open Command Prompt with admin privileges.
  • Then type the following command to start the Diskpart utility:

diskpart

  • After that, if you receive a UAC prompt, just click on Yes to proceed.
  • Next, type the following command to list all the volumes created on your PC including both types of partitions that are visible to a normal user in the File Explorer as well as the ones created by Windows 10 by default which helps it in storing the boot files and other important system files:

list volume

  • Now type the following command to select the desired volume:

select volume number

  • Then type the following command to assign a letter to the selected volume:

assign letter=<LETTER>

Note: Make sure to replace “<LETTER>” with the letter you want to allocate to that partition. Afterward, it will assign a letter to the selected volume.

  • Reboot your PC to apply the changes made.

Option 3 – Try setting the System Partition to Active

Like the first given option, you also have to make sure that you have a bootable Windows 10 USB drive before you proceed to set the System Partition to Active. Once you have it covered, refer to these steps:

  • Boot your computer using the bootable Windows 10 USB drive.
  • Next, click Next when you get to the Welcome Screen.
  • Then click on Repair your computer located at the bottom left part of the window and select Troubleshoot > Advanced Options > Command Prompt.
  • After opening Command Prompt, type the following command and hit Enter to start the Diskpart utility. It is a command line-based utility just like Command Prompt but has a UAC prompt once you provoke it. So if you encounter a UAC prompt, just click on Yes to proceed.

diskpart

  • Now type the following command:

list disk

  • From there, select your primary disk by typing the following command:

select disk number

  • After that, list all the partitions on the selected disk by entering the following command:

list partition

  • The command you just entered will list all the partitions created on your PC including both types of partitions that are visible to a normal user in the File Explorer as well as the ones created by Windows 10 by default which helps it in storing the boot files and other important system files.
  • Now type the following command to select the partition that is usually around 100 MB in size:

select partition number

  • Finally, type the following command to mark the partition active:

active

  • Then type the “exit” command to exit the disk part utility.
If you like to learn and find out more about various Windows errors, and how to repair them go to our vast archive or use search to find articles that will explain and help you in solving your issue.
However, if you prefer to do things fast and with automatization then we are proposing to use an automated solution for your issues. The application that we are recommending is Advanced System Repair Pro
Advanced System Repair utilizes multiple tools all in one to give you a quick, simple, reliable, and very thorough diagnosis of your PC. It brings you all the tools you need in one program to clean, fix, protect, optimize and boost your PC!
1-Click Maintenance
All the tools to make it simple and easy! It's like having a professional technician at the click of a mouse.

Junk Cleaner
Keeping your computer free from unnecessary clutter also helps make your computer last longer. Like any other machine, if you keep it clean and take care of it, it will serve you better for longer!

Optimize background apps
Optimize applications background activity with the built-in Application Optimizer feature.

Disk Defrag
With a simple 1-click, Advanced System Repair speeds up your PC by assembling fragmented files on your machine and organizing them more efficiently.

Malware Removal
Finds and removes all types of harmful malware including trojans, worms, bots, adware, spyware, PUPs, and more!

Privacy Cleaner
The all-in-one privacy suite to Clean Your Tracks & Protect Your Privacy! Make your computer safe, secure, and more efficient!

System Tweak/Optimizer
ASR will analyze your complete system and settings to adjust your PC to function at its maximum performance.

Registry Cleaner
Over time, as you install and uninstall applications, the registry can become cluttered with old entries and broken settings which can result in program crashes, and annoying messages and slow the computer down.
Visit our Advanced System Repair Pro Download page to inform yourself about all the benefits of this software and get a free trial copy of it.
advanced system repair pro

Advanced System Repair Pro

One-click automated PC repair solution
ASR logo
With Advanced System Repair Pro you can easily
Replace damaged files
Restore performance
Free disk space
Remove Malware
Protects WEB browser
Remove Viruses
Stop PC freezing
DOWNLOAD
Privacy Policy | Terms of Use | Uinstall
Advanced System Repair Pro is compatible with all versions of Microsoft Windows including Windows 11

Share this article:

You might also like

Add names of applications in the taskbar
Microsoft is trying to make Windows into a personalized OS, more and more features and parts can be customized to user liking. From larger things to smaller ones nowadays you can almost personalize every detail of Windows itself. In this article, we will tackle how to bring back the names of running applications on the taskbar. Placing names beside icons on the taskbar is a pretty simple and straightforward task easily done. First, right-click the Taskbar and select Taskbar settings. In Taskbar settings, click the menu labeled Combine taskbar buttons. Select Never. That's it, now all of your running applications have a name beside them. If you change your mind, you can always undo it by selecting Always hide labels in the Combine taskbar buttons menu.
Read More
What to do if CPU is not running at full speed
The speed at which the CPU runs varies depending on any Windows laptop or desktop. And in case you don’t know, the CPU does not run at full speed all the time as it depends on how the operating system distributes the load so it works accordingly. However, there are instances when it runs at full speed especially if your Windows 10 computer is on a heavy workload. But if you find that even when your computer is already on a heavy workload and the CPU is still not running at full speed, then you need to look into this situation. To verify that your CPU’s speed, you can use any CPU stress test tool. This kind of issue is common on laptops compared to desktop computers since laptop runs on battery. The Intel Processor on laptops uses the Speed Stepping Technology which means that when you are doing some small tasks on your laptop, the processor’s speed is reduced. On the other hand, if this happens when you are using a heavy application, it can be due to a low charge on the laptop’s battery. Thus, Windows will try its best to keep the computer running for as long as possible by reducing the CPU speed or processor. But there are times when you are ready to sacrifice battery to make sure that the work gets done on time. To achieve that, here are some options you can check out.

Option 1 – Try setting the processor state to the maximum in Power Options

  • Type “control” in the search box to view the classic Control Panel as well as the popular options.
  • Next, click on Power Options > Change plan settings > Change advanced power settings.
  • Then navigate to Processor power management > Maximum processor state.
  • Now select 100% when it is on Battery and Plugged in.
  • After that, expand the System cooling policy option and make sure to set it as Active to make sure that the battery won’t overheat.
  • Finally, apply the changes made to all the profiles of the power management and restart your computer. This will ensure that your CPU will run at maximum power at all times.

Option 2 – Try to update or disable the Intel Power Management driver

The next option you can try is to update or disable the Intel Power Management driver. The Intel-powered computers have dedicated software that controls CPU speed and Fan speed when it needs to save battery. You can try disabling it temporarily and check if there are any changes with the CPU fan speed.
  • First, restart your computer by holding the Shift key to boot your computer into Troubleshooting or Advanced mode.
  • Next, go to Troubleshoot > Advanced Options > Command Prompt.
  • Then change the directory to C:/Windows/System32/driver and then rename the file named “Intelppm” by entering the “ren intelppm.sys intelppm.sys.bak”.
  • Now restart your computer.
Note: If you were not able to find the drivers in C:/Windows/System32/driver, check if they are available under C:/Drivers/IntelPPM. After that, the CPU speed should change now with the Intel driver missing from the system. And in case you want to enable it, simply follow the same steps given above and rename the file again.

Option 3 – Try disabling the IPPM using the Command Line or Registry Editor

  • Command Prompt:
    • Tap the Win + R keys to open the Run dialog box and type “cmd” and tap Enter to open Command Prompt.
    • Next, type this command and hit Enter: sc config intelppm start= disabled
    • The “sc config” command you entered modifies the value of a service’s entries in the registry as well as in the Service Control Manager database.
  • Registry Editor:
    • Tap the Win + R keys to open the Run dialog box and type “Regedit” in the field and hit Enter to open the Registry Editor.
    • Next, navigate to HKEY_LOCAL_MACHINESYSTEMCurrentControlSetServicesintelppm.
    • From there, double click on the intelppm and change the Start key value to
    • Now close the Registry Editor and reboot your computer.
Note: The steps given will make sure that the CPU will run at maximum power at all times.
Read More
Enable or disable Full-screen optimizations
In case you don’t know, there is a feature in Windows 10 computers that allows them to function a lot better. This feature is called Full-Screen optimization and it is enabled by default for several applications such as games and video players. If enabled, the Full-Screen optimization feature enhances the video playback and gaming by simply putting the CPU and GPU process as a priority. However, there are times when it can also result to a drop in the frame rate or FPS while in full-screen mode. And of course, the obvious solution to this dilemma is by disabling the Full-Screen optimization feature which is why Microsoft took action and removed this feature themselves in the recent Windows 10 Update releases. However, there is another way for you to enable it back or disable it yourself if you haven’t installed the recent updates yet and there are plenty of ways you can do both. All you have to do is follow the options given below carefully.

Option 1 – Try using Windows 10 Settings

If you haven’t installed the recent updates yet and all you have are the earlier releases, then this method would suit you.
  • Open the Windows 10 Settings app.
  • Next, navigate to System > Display > Graphics Settings or Advanced graphics settings.
  • From there, uncheck the “Enable Fullscreen optimization” option if you want to disable the feature, else just keep it checked.

Option 2 – Try using the Registry Editor

  • Tap the Win + R keys to open the Run dialog box and then type “Regedit” in the field and hit Enter to open the Registry Editor.
  • Afterward, if a User Account Control or UAC prompt appears, click on Yes.
  • Once the Registry Editor is pulled up, navigate to this registry key: HKEY_CURRENT_USERSystemGameConfigStore
  • Next, right-click on Explorer and select New > DWORD (32-bit) Value and then name it to “GameDVR_DSEBehavior and tap Enter to save it.
  • Now double click on the newly created GameDVR_DSEBehavior DWORD and set its value to “2” if you want to disable it, or “0” if you want to enable it.
  • Once you entered the value, close the Registry Editor and restart your computer to successfully apply the changes made.

Option 3 – Try running the application in Compatibility Mode

If the first two options didn’t work, the next thing you can do is to run the application in a Compatibility Mode. Follow the steps below to do so:
  • Go to the location of the application or game on which you need to disable or enable the Full-Screen optimization feature.
  • After that, right-click on it and select Properties.
  • Next, switch to the Compatibility tab where you can see the “Disable fullscreen optimization” option to disable the feature and vice versa.
  • Now click on the Apply and OK buttons to apply the changes made in the application’s settings.
Read More
Applications you should remove from Windows
ApplicationsOver time Applications change, some for the better some for worse. Some of them even stop receiving updates and are old and vulnerable. Sometimes standards change and some file types are not used anymore. Software evolves along with technology and that is good. Keeping old and useless applications inside your Windows is not so good. From various exploits to simply taking up space, maybe even slowing down OS it is always wise and good to clean your Windows from unwanted old applications. In this article, we will be mentioning some relics of old and providing you with an explanation of why you should remove them from your system if by any chance you still have them on it.

Silverlight

Silverlight was meant to be a competitor for Adobe Flash, it is a WEB framework that enables rich media content inside your WEB browser. The issue is that it is not developed anymore and today's browsers do not support it. The only browser that actually can support it is internet explorer which itself is not supported and how there is practically 0 content on today's modern WEB that will require Silverlight, it is safe and recommended to remove it.

Adobe Flash

Speaking of Adobe Flash, you should remove it as well. Flash has stopped receiving support as of January 2021 and browsers have dropped support for it and even blocked it due to security issues. However, there still might be some local installation of Flash itself inside Windows along with the old Shockwave player that stopped receiving support in 2019. You should remove them both.

JAVA

Now this one is tricky, by itself JAVA does not present any security issues since browsers do not support it anymore and the desktop version is not really slowing down your computer. This one has simply put just another media runtime that is not used and simply takes up space and resources. However if you have some applications that you do use that rely on it (I can really just think of JAVA Minecraft at this point) leave it of course but in any other case, it is just purely not needed.

Quicktime

While we are at media runtime and stuff that just simply is not needed, Quicktime is one of them. Now this Apple Video player and codec is still pretty developed and active in Apple’s iOS environment, Windows version has not been updated since 2016 and it was discovered that it contains some critical vulnerabilities. Uninstall it and if you need a player that could play MOV files, just use a VLC player that can play them without any separately installed codec.

uTorrent

This one, the same as CCleaner was once a good application, as a matter of fact, it was the best torrenting application. Sadly it has fallen from its grace very low, from getting tons of ads in its interface to findings in 2015 that code of torrent client was packed with a crypto miner that used system resources of an installed computer to mine crypto without user’s awareness. You should uninstall this torrent client if you would like to get your PC back and not provide it for cryptocurrency mining for the company that developed it. Use qBittorrent or TIxati, open-source and free ones that have everything needed for any torrenting needs.

Toolbars and Browser extensions

There are a lot of toolbars for browsers and extensions that are malicious in nature or simply not updated providing security issues. It is very advisable to remove this as soon as possible.

WinRAR

WinRAR has gained its large popularity solely for the reason that you could download it from the official site like shareware and use it forever. The license never expired and you could use it indefinitely. Sadly not much has been improved in the application itself and it is slowly falling out in its range of what it can do. There are better open source and free options today like 7zip, PeaZip, ZIPvare, and more that are working the same as WinRAR if not even better.

Windows and manufacturers Bloatware

Yes, applications that come bundled with Windows and with some laptops that include manufacturers made software for different tasks like its own specific media players, calculators, etc. It is known that these applications are not better than their open-source rivals and there are too many of them including some that you will probably never use. It is the same as buying a new phone bundled with tons of applications that you do not need, did not ask for, and do not use. Delete all of them. Considering Windows there are also some Store application like Candy Crush Saga demo and other are safe to remove if not needed. That’s it, our advice for old and not needed applications so you can keep your PC safe and fast.
Read More
Selected boot image did not authenticate Error
If you are using UEFI and you encountered an error message that says, “Selected boot image did not authenticate”, then read on as this post will show you what to do it fix it. This kind of error indicates that UEFI is having an issue in figuring out if the boot image has tampered with. UEFI offers Secure Boot and if the boot image seems to be invalid, you won’t be allowed to boot into your computer. Aside from that, it could be that you may be using endpoint encryption and the software can’t validate the certificate. To fix the “Selected boot image did not authenticate” error in UEFI, you need to first check if the error has given any reference to any software that you might have for encryption. If it has, then you need to disable the Encryption tool to resolve the problem. In addition, you could also try to disable Secure Boot or perform Startup Repair in case the disabling Encryption tool didn’t work. For more details, make sure to use each one of the options provided below as a reference.

Option 1 – Try to disable the Encryption tool

The first thing you can do to fix the “Selected boot image did not authenticate” error is to disable the Encryption tool. Many users reported that some encryption tools like the ESET Endpoint Encryption won’t let them boot into the computer if the system manufacturer does not include the correct certifications as a part of the UEFI BIOS. And since there is no way to bypass this, you have to disable Secure Boot in order for you to boot into your computer.

Option 2 – Disable the Secure Boot in the BIOS

Disabling the Secure Boot in the BIOS settings is definitely recommended to resolve the error. To disable Secure Boot, here’s what you have to do:
  • First, boot your computer into Windows 10.
  • Next, go to Settings > Windows Update. From there, check if there is anything that you have to download and install if you see any available updates. Usually, OEMs send and update the list of trusted hardware, drivers, and operating systems for your computer.
  • After that, go to the BIOS of your computer.
  • Then go to Settings > Update & Security > Advanced Startup options. If you click on Restart Now, it will restart your computer and give you all the advanced options.
  • Next, select Troubleshoot > Advanced Options. As you can see, this screen offers you further options including System restore, Startup repair, Go back to the previous version, Command Prompt, System Image Recovery, and UEFI Firmware Settings.
  • Select the UEFI Firmware Settings which will take you to the BIOS.
  • From there, go to the Security > Boot > Authentication tab where you should see Secure Boot. Note that every OEM has its own way of implementing the options so it varies.
  • Next, set Secure Boot to Disabled and set Legacy Support to On or Enabled.
  • Save the changes made and exit. Afterward, your computer will reboot.

Option 3 – Try to run the Automatic Repair Utility

If disabling Secure Boot did not fix the problem, you might also want to run the Automatic Repair utility in fixing the error. To do so, follow the steps below.
  • You can start by booting into the Advanced Recovery Mode.
  • After that, select Troubleshoot > Startup Repair.
  • Next, follow the on-screen instructions that appear on the screen and finish the Automatic Repair process.
  • Now check if the block is gone once the reboot is completed.
Read More
Windows is stuck in Airplane Mode
As of late, a number of users reported experiencing a problem where their Windows 10 computers get stuck on Airplane mode for some unknown reason. According to the affected users, they were unable to turn off the Airplane mode which means that their computers are also not able to connect to the internet. One of the possible reasons why this kind of issue occurs is that there could be a bug with the airplane mode or it could also be the doing of faulty network drivers or physical switch that’s turned on, and so on. If you are one of the few users who experience the same issue, then read on as this post will guide you on what to do if your Windows 10 computer gets stuck on Airplane mode. There are a couple of suggestions you can check out to resolve the problem. You can try to check the status of the Radio Management service, flush the DNS cache or you could turn off the airplane mode via system settings. You could also update the network drivers or turn off the physical switch for airplane mode or make some adjustments in the Windows Registry. For more details, refer to each one of the suggestions provided below.

Option 1 – Try to check the Radio Management Service status

  • First, tap the Win + R keys to open the Run dialog box and type “services.msc” in the field, and hit Enter to open the Windows Services Manager.
  • Next, look for the Radio Management service and select Properties.
  • From there, change its Startup type to Disabled and click on the Apply and OK buttons to save the changes made.
  • Once done, restart your computer and check if you can now turn off the airplane mode.

Option 2 – Flush the DNS cache

You could also try to flush the DNS cache to fix the “ERR_ICAN_NAME_COLLISION” error. All you have to do is open Command Prompt as an administrator and then execute each one of the following commands sequentially to flush the DNS cache:
  • ipconfig/release
  • ipconfig/renew
  • ipconfig/flushdns

Option 3 – Try turning off the airplane mode via System settings

If flushing the DNS cache did not help in fixing the problem, then you might want to turn off airplane mode via system settings.
  • In the Windows Search bar, type “airplane mode”.
  • From the search results that appear, click on Airplane mode.
  • After that, a window will appear where you have to turn off the toggle button for Airplane mode.

Option 4 – Try to update, rollback or reinstall the Network adapter drivers

The next thing you can do to resolve the problem is to update the Network Adapter drivers by following these steps:
  • Tap the Win + R keys to launch the Run window and then type in the “devmgmt.msc” command and hit Enter to open the Device Manager window.
  • Under the Device Manager, you will see a list of drivers. From there, look for the Network Adapters and expand them.
  • Look for the Broadcom Network Adapter and right-click on it, as well as other network adapters that have an exclamation icon, and update them all.
  • Restart your PC and see if it helped in fixing the problem.
Note: If updating the network drivers didn’t help in fixing the problem, you can also try to roll back the very same drivers from their previous versions and restart your Windows 10 PC. After that, the system itself will reinstall the drivers you just uninstalled. Alternatively, you can also download and install the drivers from the manufacturer’s website directly. To reinstall the network adapter drivers, refer to these steps:
  • Open the Devices Manager from the Win X Menu.
  • Then locate the device drivers and right-click on them to open the Properties.
  • After that, switch to the Driver tab and click on the Uninstall Device button.
  • Follow the screen option to completely uninstall it.
  • Finally, restart your computer. It will just reinstall the device drivers automatically.

Option 5 – Try to turn off the physical switch for Airplane mode

If your computer has a physical switch to turn on or off the airplane mode, then you might want to check that switch if you have one. Chances are, it could be the reason why you’re unable to turn off Airplane mode on your computer.

Option 6 – Try to make some adjustments in the Registry

  • Tap the Win + R keys to launch the Run utility.
  • Then type “Regedit” in the field and hit Enter to open the Registry Editor.
  • Next, navigate to this registry path: HKEY_LOCAL_MACHINESystemCurrentControlSetControlClass
  • From there, edit the registry value of “RadioEnable” to “1”.
  • Exit the Registry Editor once done, and restart your computer.
Read More
Software review series: Adobe Photoshop
From photo editing and compositing to digital painting, animation, and graphic design you can do it all in Photoshop. Bring ideas to life across desktop and iPad. Magically transform images with the power of AI. Learn new skills and share your projects via Livestream. Started as a photo editing application, photoshop has surpassed the original ideas and designs in the following years growing with each release and including more tools and flexibility not matched in other applications. Photoshop was the first to introduce many new features and set standards for other applications. How years have passed product grew and innovation was pushed forward, it took some time but eventually, photoshop was able to set itself as the industry-standard application for pixel editing and it holds that position even today. Throughout the world artist all over the globe are using it to create digital art in various fields be that illustrations, film, photography, texturing, etc. Its vast majority of tools and possibilities as well as its extensibility with plugins, actions, brushes have cemented it in the highest place in any designer or artist toolkit. Today you can get it as a part of a creative suite for a monthly fee on the official adobe website and even if you do not need other creative suite applications photoshop is worth the fee alone. Simply you have to try it, learn it, and then harvest its power. If you would like to read more helpful articles and tips about various software and hardware visit errortools.com daily.
Read More
How to fix random Computer crashes
Computer crashes are one of the most annoying things that can happen to users. It often loses your data and work, you must spend extra time if you were in the middle of something and can even break Windows itself. Computer without crashes working fineBefore we move to the article I just want to say that technically there are no random crashes, there is always a reason why the system hangs up, why you received blue screen, annoying restarts out of nowhere and many more PC crashes. In this article, we will explore many possible reasons why something may occur and offer you straight forward solution on how to escape the situation and prevent it from happening again. Without further delay, let's begin:
  1. Check switch connectors and power outlets

    Yes, sometimes the most basic approach provides the best results, check to see if your power outlet is stable and providing you with constant voltage, if not, maybe you want to invest in a UPS system so you do not face random shutdowns and restarts during work, also while you are at it, check to see if that reset and power switch are connected properly and that they are not dirty or loose.
  2. Clean your PC and check connectors

    Dirt can cause many issues with computers, from overheating to shutdowns to blue screens and memory dumps, check to see if your computer is clean enough and that all connectors are connected tight into their respective sockets.
  3. Check the temperature of your CPU

    CPU overheating can cause so-called random freezes and blue screens, the computer might shut down or restart also without any visible reason. Check to see if your fan on the CPU is working properly and change the thermal paste if needed.
  4. Check the health of your hard drive

    If your hard drive is beginning to go down the path of dying out, many issues can come from this condition. There are many tools on the internet and in Windows itself to check if your hard drive is working properly.
  5. Run antivirus and firewall

    Random lock-ups or similar issues can also occur if by any chance you have some malware on your system, run protection software, and keep it updated to make sure the issue does not come from the computer being infected with malicious applications.
  6. Keep system clean

    Have a habit to clean regularly system files and registries, keep removing unnecessary files from your computer and regularly update your Windows and applications along with drivers.
  7. Run memory test

    Bad RAM bank can cause many issues during the work, check it out to be sure the problem is not RAM itself.
  8. Do not run applications that are too demanding for your system

    Some applications require stronger hardware, and some require the latest hardware, if your computer is a little outdated, running a demanding application can cause issues like freezing, restarts, etc.
  9. Remove applications you do not use

    This does not seem like anything important but if you are not using a specific application just remove it from the system, why? Sometimes an application has some ties to certain services and if it is outdated can cause issues for newer ones.
  10. Stop installing everything you find on the internet

    Yes, that extension for chrome looks cool, yes, that fancy new player seems sick but if it is from an unverified source and from the unknown publisher without any reviews maybe you are better off with it. You can never tell what you might be placing into your system from the internet.
And that's it, 10 reasons and solutions on what to do on random computer freezes, crashes, etc.
Read More
Fix Printer driver issue in Windows
The printer can stop working for many various reasons, some of them are however tied to the printer driver itself. In this guide, we will address issues and provide you with advice on how to get your printer back in working order in no time. All of that being said let us fix your Printer driver issue.
  1. Check to see if the printer is plugged and that it has toner or colors and paper in the tray

    The simplest solutions are the best ones, and most of the time simplest issues are overlooked. To eliminate any basic issues check the printer cable does it has paper in the tray and check the status of toner or colors in it.
  2. Check if Windows troubleshooter will resolve the issue

    Bring up settings and choose devices, under devices click on printers and scanners. On the far right top, you have a link to start the troubleshooter, click on it. Windows built-in tools could resolve issues and fix them for you. If by any chance Windows is not able to find or resolve issues move to the next step.
  3. Check if the Device Manager is reporting an error and update the driver

    If the hardware is functioning properly then the issue might be in Windows not detecting device or driver malfunction. In any case, the Device Manager will be the one who will report this problem. In order to check to see if the driver is properly working press ⊞ WINDOWS + X to open the hidden start menu. keyboard with windows and x marked Once it opens, click on Device Manager to open it, 
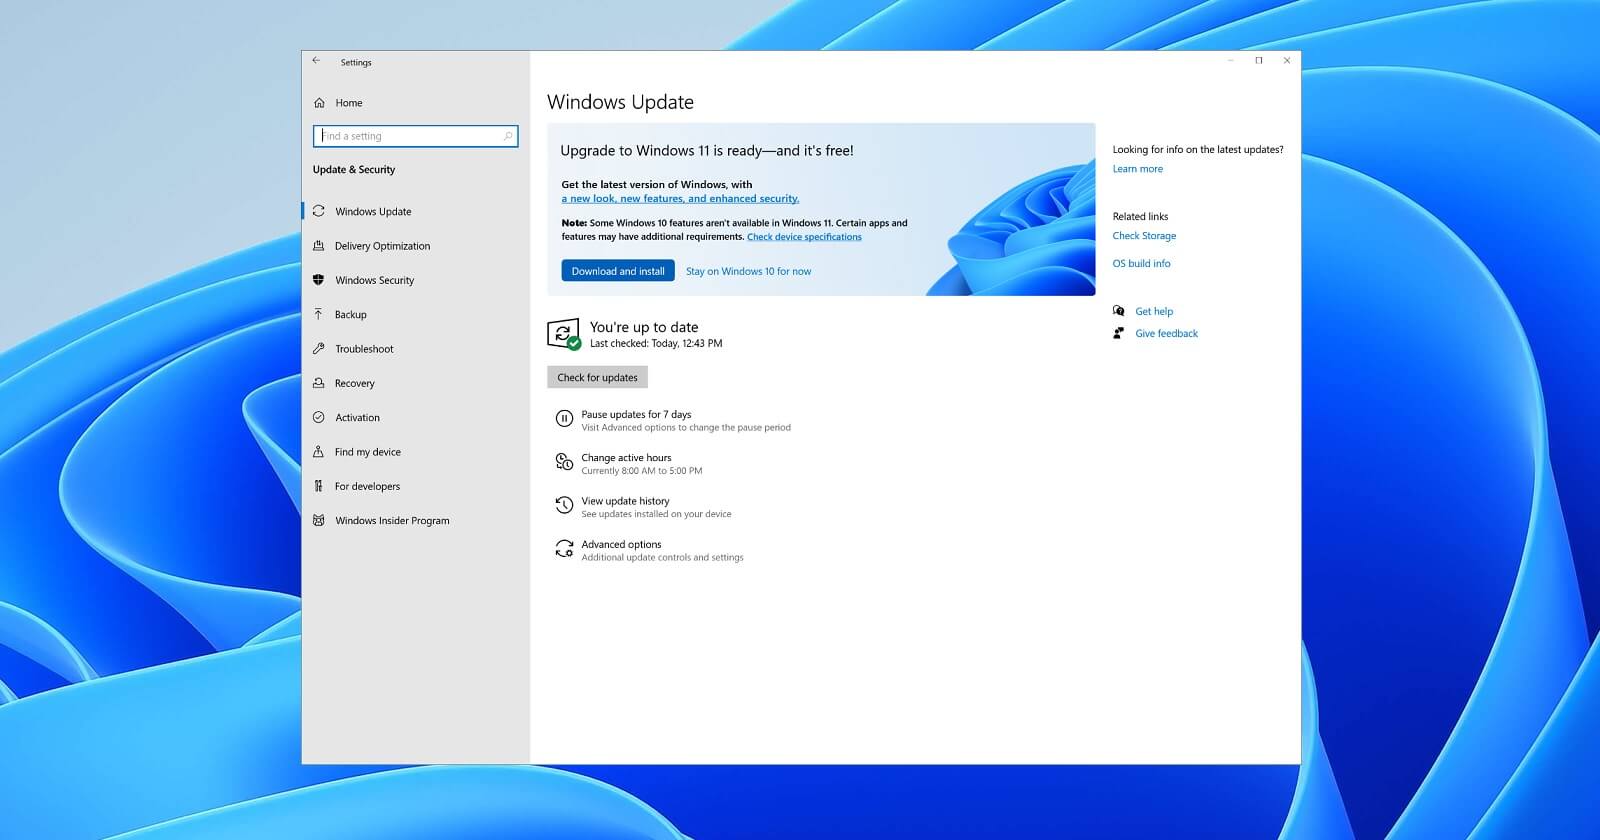
If you have a driver device error inside Windows, you should see it immediately when entering the Device Manager, it will have a yellow exclamation mark beside it. Right-click on it and choose update driver.
  4. Reinstall driver

    If driver update failed or you already have the latest drivers, reinstalling them could fix the issue since drivers might have corrupted during installation of some update or application. Follow steps from point 3 to get to the driver in Device Manager, then right-click on it but instead of update choose to uninstall. Reboot Windows once the driver is uninstalled and Windows will install a new one automatically. If you do not want to update drivers automatically install the latest driver for your device, then reboot.
  5. Check Windows update

    Check to see if the latest Windows update is installed, update your Windows if needed
  6. Fix driver issue with DRIVERFIX

    If everything else fails, get DRIVERFIX, a premium solution for your PC issues, and fix driver errors.
Read More
Fix Installer encountered an error 0x800f0905

Are you trying to update your Windows 11 OS and are receiving a 0x800f0905 error? Do not sweat and do not worry we have a couple of solutions that you can try in order to fix this issue. How this error is tied to various things like misconfigured settings, corrupt system files, and more there is no way to present one simple solution that will solve everything in one click.

error 0x800f0905Therefore we are presenting a couple of solutions that will fix your issue, it is advisable to follow them as presented since they will go from the most common to the more complex one.

Run the troubleshooter

The most common fix and one that will actually repair things most of the time is simply running the Windows Update troubleshooter.

  1. Press ⊞ WINDOWS + I to open the Settings app
  2. Click on System on the left
  3. Click on Troubleshoot in the right part
  4. Click on Other Troubleshooters
  5. Find the Windows Update section and click on Run
  6. Let troubleshooter finish

Reset Windows update components

If the previous solution did not work we will need to do things manually. Follow the steps as presented in order to reset Windows update components.

  1. Press ⊞ WINDOWS + S to open search
  2. Type in Terminal
  3. Select Run as administrator
  4. Click on Yes on the User account control (UAC) pop up
  5. Press CTRL + SHIFT + 2 to open Command prompt
  6. Inside command prompt type each line of a command followed by ENTER after each line:
    net stop bits
    net stop wuauserv
    Del “%ALLUSERSPROFILE%Application DataMicrosoftNetworkDownloaderqmgr*.dat”
    Ren %Systemroot%\SoftwareDistribution\DataStore DataStore.bak
    Ren %Systemroot%\SoftwareDistribution\Download Download.bak
    Ren %Systemroot%\System32\catroot2 catroot2.bak
    exe sdset bits D:(A;;CCLCSWRPWPDTLOCRRC;;;SY)(A;;CCDCLCSWRPWPDTLOCRSDRCWDWO;;;BA)(A;;CCLCSWLOCRRC;;;AU)(A;;CCLCSWRPWPDTLOCRRC;;;PU)
    sc.exe sdset wuauserv D:(A;;CCLCSWRPWPDTLOCRRC;;;SY)(A;;CCDCLCSWRPWPDTLOCRSDRCWDWO;;;BA)(A;;CCLCSWLOCRRC;;;AU)(A;;CCLCSWRPWPDTLOCRRC;;;PU)
    cd /d %windir%\system32
    regsvr32.exe atl.dll
    regsvr32.exe urlmon.dll
    regsvr32.exe mshtml.dll
    regsvr32.exe shdocvw.dll
    regsvr32.exe browseui.dll
    regsvr32.exe jscript.dll
    regsvr32.exe vbscript.dll
    regsvr32.exe scrrun.dll
    regsvr32.exe msxml.dll
    regsvr32.exe msxml3.dll
    regsvr32.exe msxml6.dll
    regsvr32.exe actxprxy.dll
    regsvr32.exe softpub.dll
    regsvr32.exe wintrust.dll
    regsvr32.exe dssenh.dll
    regsvr32.exe rsaenh.dll
    regsvr32.exe gpkcsp.dll
    regsvr32.exe sccbase.dll
    regsvr32.exe slbcsp.dll
    regsvr32.exe cryptdlg.dll
    regsvr32.exe oleaut32.dll
    regsvr32.exe ole32.dll
    regsvr32.exe shell32.dll
    regsvr32.exe initpki.dll
    regsvr32.exe wuapi.dll
    regsvr32.exe wuaueng.dll
    regsvr32.exe wuaueng1.dll
    regsvr32.exe wucltui.dll
    regsvr32.exe wups.dll
    regsvr32.exe wups2.dll
    regsvr32.exe wuweb.dll
    regsvr32.exe qmgr.dll
    regsvr32.exe qmgrprxy.dll
    regsvr32.exe wucltux.dll
    regsvr32.exe muweb.dll
    regsvr32.exe wuwebv.dll
    netsh winsock reset
    net start bits
    net start wuauserv

Well, that was a lot of typing or copy and pasting line by line followed by ENTER after each one but hopefully, your issue is solved. These provided solutions fixed most users' issues with this error but if for some reason this is not the case for you, move to the next step.

Run the SFC scan

If you are still having 0x800f0905 error after previous attempts do the following:

  1. Press ⊞ WINDOWS + S to open search
  2. Type in Terminal
  3. Select Run as administrator
  4. Click on Yes on the User account control (UAC) pop up
  5. Press CTRL + SHIFT + 2 to open Command prompt
  6. Type in sfc /scannow and press ENTER
  7. Wait for the scan to finish
  8. Reboot the computer

Perform a system restore

If for any reason previous solutions have not provided you with the solution we will try to fix the issue by performing system restore.

  1. Press ⊞ WINDOWS + S to open search
  2. In the text box type in Create a restore point
  3. Click on the closest match in search results, should be Create a restore point
  4. Click on System Restore or on Next if there are no points created
  5. Choose to restore a point from the list and click on next
  6. Review settings and click on Finish
  7. Wait for the process to finish and for the computer to restart

Manually install update

If for any reason Windows still cannot install the update, try installing it manually.

  1. Go to Windows 11 update history and find the Knowledge base (KB) number for the latest version
  2. Go to the official Microsoft Update Catalog
  3. Paste the KB number in the search box and press ENTER
  4. Click on DOWNLOAD
  5. Double click on the downloaded file to launch the installer
  6. Follow on-screen instructions and install the update

Perform Windows 11 reset

If nothing worked, reset your Windows 11 to its factory settings to fully repair and reset the whole operating system.

Read More
1 2 3 162
Logo
Copyright © 2022, ErrorTools. All Rights Reserved
Trademarks: Microsoft Windows logos are registered trademarks of Microsoft. Disclaimer: ErrorTools.com is not affiliated with Microsoft, nor claim direct affiliation.
The information on this page is provided for information purposes only.
DMCA.com Protection Status