Fix MEMORY_MANAGEMENT due to Chrome browser

When you try to open your Google Chrome browser and it starts to connect to the internet but suddenly, your Windows 10 computer crashes along with a Blue Screen error that says, “MEMORY_MANAGEMENT”, then read on as this post will guide you in fixing the problem.

This kind of BSOD error occurs when Google Chrome requests more memory or when it tries to access the network and demand is raised for more memory, the memory management program fails. To fix the problem, here are some possible solutions you might want to try. Follow them thoroughly.

Option 1 – Use the Driver Verifier Manager

The Driver Verifier Manager is another tool in Windows that could help you fix driver-related issues. And since the MEMORY_MANAGEMENT Blue Screen error concerns Google Chrome and an internet connection, the root cause of the problem might have something to do with the Network driver and to verify that, you can use the Driver Verifier Manager:

  • Type in the keyword “Verifier” in the Cortana search box to search for Verifier in Windows 10.
  • After that, select the option “Create custom settings”.
  • Make sure that you have checked everything except the options “DDI compliance checking” and “Randomized low resources simulation”.
  • Next, select the option “Select driver names from a list” option.
  • Afterward, you have to select all the drivers from any unofficial or third-party provider. To simply put it, you have to select all the drivers that are not supplied by Microsoft.
  • Then click on the Finish button.
  • Open Command Prompt as administrator and execute this command – verifier /querysettings
  • The command you just executed will display the Driver Verifier settings so if you see any of the flags enabled boot your Windows 10 PC into Safe Mode.
  • Open the Command Prompt as admin again and run this command – verifier /reset
  • The command will reset the Driver Verifier. Once the process is done, restart your PC and check.

Option 2 – Try updating the Network drivers

  • Tap the Win + R keys to launch the Run window and then type in the “devmgmt.msc” command and hit Enter to open the Device Manager window.
  • Under the Device Manager, you will see a list of drivers. From there, look for the Network Adapters and expand it.
  • Then right-click on each one of the Network drivers and update them all.
  • Restart your PC and see if it helped in fixing the MEMORY_MANAGEMENT BSOD error.

Option 3 – Try disabling Hardware Acceleration

You might want to disable Hardware Acceleration system-wide or for a particular program like Google Chrome and see if it resolves the MEMORY_MANAGEMENT error

Option 4 – Run the Memory Diagnostic Tool to check for Memory leaks

  • Tap the Win + R keys to open Run and type exe and hit Enter to open the Windows Memory Diagnostic Tool.
  • After that, it will give two options such as:
    • Restart now and check for problems (Recommended)
    • Check for problems the next time I start my computer
  • Once your computer has restarted, perform a basic scan or you could also go for the “Advanced” options such as “Test mix” or “Pass count”. Simply tap the F10 key to start the test.

Note: After you select the option, your PC will restart and check for memory-based issues. If it finds any issues, it will automatically fix them and if there’s no issue found, then it’s most likely not a memory-based issue so you should try the other options given below.

Option 5 – Perform a System Restore

Performing System Restore might help you in fixing the SYNTP.SYS Blue Screen error. You can do this option either by booting into Safe Mode or in System Restore. If you are already in the Advanced Startup Options, just directly select System Restore and proceed with the next steps. And if you have just booted your PC into Safe Mode, refer to the steps below.

  • Tap the Win + R keys to open the Run dialog box.
  • After that, type in “sysdm.cpl” in the field and tap Enter.
  • Next, go to the System Protection tab then click the System Restore button. This will open a new window where you have to select your preferred System Restore point.
  • After that, follow the on-screen instructions to finish the process and then restart your computer and check if the problem is fixed or not.

Option 6 – Run the Blue Screen Troubleshooter

The Blue Screen troubleshooter is a built-in tool in Windows 10 that helps users in fixing BSOD errors like MEMORY_MANAGEMENT. It can be found in the Settings Troubleshooters page. To use it, refer to these steps:

  • Tap the Win + I keys to open the Settings panel.
  • Then go to Update & Security > Troubleshoot.
  • From there, look for the option called “Blue Screen” on your right-hand side and then click the “Run the troubleshooter” button to run the Blue Screen Troubleshooter and then follow the next on-screen options. Note that you might have to boot your PC into Safe Mode.
If you like to learn and find out more about various Windows errors, and how to repair them go to our vast archive or use search to find articles that will explain and help you in solving your issue.
However, if you prefer to do things fast and with automatization then we are proposing to use an automated solution for your issues. The application that we are recommending is Advanced System Repair Pro
Advanced System Repair utilizes multiple tools all in one to give you a quick, simple, reliable, and very thorough diagnosis of your PC. It brings you all the tools you need in one program to clean, fix, protect, optimize and boost your PC!
1-Click Maintenance
All the tools to make it simple and easy! It's like having a professional technician at the click of a mouse.

Junk Cleaner
Keeping your computer free from unnecessary clutter also helps make your computer last longer. Like any other machine, if you keep it clean and take care of it, it will serve you better for longer!

Optimize background apps
Optimize applications background activity with the built-in Application Optimizer feature.

Disk Defrag
With a simple 1-click, Advanced System Repair speeds up your PC by assembling fragmented files on your machine and organizing them more efficiently.

Malware Removal
Finds and removes all types of harmful malware including trojans, worms, bots, adware, spyware, PUPs, and more!

Privacy Cleaner
The all-in-one privacy suite to Clean Your Tracks & Protect Your Privacy! Make your computer safe, secure, and more efficient!

System Tweak/Optimizer
ASR will analyze your complete system and settings to adjust your PC to function at its maximum performance.

Registry Cleaner
Over time, as you install and uninstall applications, the registry can become cluttered with old entries and broken settings which can result in program crashes, and annoying messages and slow the computer down.
Visit our Advanced System Repair Pro Download page to inform yourself about all the benefits of this software and get a free trial copy of it.
advanced system repair pro

Advanced System Repair Pro

One-click automated PC repair solution
ASR logo
With Advanced System Repair Pro you can easily
Replace damaged files
Restore performance
Free disk space
Remove Malware
Protects WEB browser
Remove Viruses
Stop PC freezing
DOWNLOAD
Privacy Policy | Terms of Use | Uinstall
Advanced System Repair Pro is compatible with all versions of Microsoft Windows including Windows 11

Share this article:

You might also like

OneXPlayer Mini Handheld Gaming PC
OneXPlayer is a direct competitor to Valve’s upcoming steam deck. This device is clearly inspired by Valve’s offering and it shows all over the place, from its looks to its purpose and aims to PC gamers as a handheld device.

OneXPlayer miniHardware under the hood

This device is packing a 7-inch 1080p display, 11th generation Intel Core i7-1195G7 CPU, stunning 16GB of RAM, 512GB SSD drive with the option to purchase 1TB or 2TB model. GPU of choice is Intel iris Xe Graphics that is in our opinion a bottleneck in the whole system and for more demanding games, we believe switching them to 720p would be a better option. Everything here is powered with a 10455 mAh lithium-ion battery.

OneXPlayer inputs and other stuff

Handheld is equipped with dual bumpers and dual linear triggers. The console comes with dual speakers on both sides of it. Inside the console, there is an aluminum heat sink with copper heat pipes and a fan in order to cool internal hardware. On the outside, we have two USB-C ports and one USB-A port for connections, and of course, a headphone jack for headphones. The console comes with Wi-Fi 6 and Bluetooth 5.0 for wireless connectivity.

Price

The base entry model will cost you a whopping $1.259, 1TB model $1.399 and 2TB one will go as far as $1,599. With this kind of price, I am not sure it can come up as a winner against Valve. Sure it is packing fully licensed Windows 11 that will for sure offer more options than Stem’s OS based on Linux but even with that advantage I do not think it justifies such a big price difference.

Conclusion

Of course, this kind of console or handheld PC will still find its customer base, many users will probably like it since it comes Windows ready out of the box. Sure, you can place Windows on Steam deck as well but you will need to know how, where everything is ready and you can run beside steam other launchers without issues like origin, uplay, gog, etc. How this will be accepted by community time will tell but it is good to see that there is variety and competition in handheld PC space.
Read More
Managing the Local Users and Groups
As you know, Windows PowerShell is a useful command-line utility in Windows 10 that can be used to manage the Local Users and Groups which affirms the multiuser operating system principle of Windows 10. Although there are other GUI-based utilities used to manage the Local Users and Groups, there are some system administrators that would still like to use the command-line utility to manage these Local Users and Groups. So in this post, you will be guided on how exactly you can manage the Local Users and Groups using PowerShell on your Windows 10 computer. To get started, refer to the options provided below to manage both the Local Users and Groups using Windows PowerShell.

Option 1 – Manage the Local Users via Windows PowerShell

  • You need to first open Windows PowerShell as an admin. To do that, just tap the Win + X keys and select the Windows PowerShell (Admin) option.
  • After opening PowerShell, you need to execute the “Get-LocalUser” cmdlet so that you can find all the details about all the local user accounts in your computer which would include the Account Name, Enabled status, as well as description.
Note: On the other hand, you can also get the customized data about several objects that are related to your account. For instance, if you want to check when was the last time the Local account’s password was set, then you need to execute the “Get-LocalUser -Name root | Select-Object PasswordLastSet” cmdlet. Thus, the structure for this cmdlet is “Get-LocalUser -Name root | Select-Object *”. Here are the objects you can use to get different sorts of data:
  • AccountExpires
  • Description
  • Enabled : True
  • FullName
  • PasswordChangeableDate
  • PasswordExpires
  • UserMayChangePassword
  • PasswordRequired
  • PasswordLastSet
  • LastLogon
  • Name
  • SID
  • PrincipalSource
  • ObjectClass

Option 2 – Manage the Local User Groups using Windows PowerShell

  • Like what you did earlier, open Windows PowerShell as admin and then execute the “Get-LocalGroup” cmdlet so you can get all the information about all the groups of all the local user accounts.
  • Now if you want to create a new Local User Group, just execute the “New-LocalGroup -Name <NAME OF THE GROUP> -Description '<ENTER THE DESCRIPTION OF THE GROUP HERE>'” cmdlet.
  • And if you want to add Local User Accounts to a specific group, just execute the “Add-LocalGroupMember -Group '<NAME OF THE GROUP' -Member ('NAME 1','NAME 2','<ROLE>') -Verbose” cmdlet. You could also use the “Get-Localuser -Name john | Add-LocalGroupMember -Group '<NAME OF THE GROUP>'” cmdlet for the same purpose.
  • If you want to display all the User Accounts of a specific group, just use the “Get-LocalGroupMember –Group ‘ ’” cmdlet.
  • Now if you want to remove a local user account from a group, all you have to do is use the “Remove-LocalGroupMember -Group '<NAME OF THE GROUP>' –Member <NAME OF THE LOCAL USER ACCOUNT>” cmdlet.
Read More
How to Fix Error 2200

How to fix Error 2200

What is Error 2200?

Error 2200 is an error code that you are likely to experience if you have Dell Photo All in One Printer 926. Dell Photo Printer 926 is an inkjet multifunction device. It offers features like print, copy, scan, and fax.

Error 2200 may stop you from scanning and printing documents on your Dell Photo All in One Printer 926.

Solution

Restoro box imageError Causes

Error 2200 may occur due to several reasons. However, the most common causes include:

  • Registry issues
  • Broken or missing system files
  • Corrupted driver
  • Malware

Further Information and Manual Repair

To resolve error 2200 on your system try the methods listed below. These DIY methods are easy and effective and can repair this error in no time. These solutions require zero technical expertise and knowledge.

This means if you are not technically sound or you are not a computer programmer, you can try these solutions and repair error 2200 on your system easily.

Method 1

When the underlying cause of error 2200 is related to a corrupted driver then follow these steps to resolve the issue. Go to the Start menu, click Control Panel, Performance and Maintenance tab, System and Device Manager.

Navigate the device, click properties, driver, and then uninstall. Now reboot your PC to activate changes.  Now download the latest version of the Dell Photo All in One Printer 926 drivers from a reliable website and save install it on your PC.

Method 2

Malware can also damage and corrupt drivers and system files. If the reason for error 2200 on your PC is malware then download a powerful antivirus and scan your entire PC. Remove all malware and viruses infecting your system to resolve the error.

Method 3

The Windows registry is that part of the computer that stores much of the information and settings for software programs, operating system configurations, and hardware devices.

It also saves unnecessary and obsolete files like junk files, cookies, internet history, bad registry entries, and invalid files. If these files are not removed from the registry frequently, they accumulate in the registry and corrupt it thereby triggering different error codes.

These files damage the registry and other important system files.

To repair the registry and error codes triggered due to registry issues, it is suggested you download Restoro. This is a cutting-edge and user-friendly PC Fixer deployed with a powerful and intuitive registry cleaner.

The registry cleaner scans your entire PC, removes all the bad entries and obsolete files. It cleans the registry, repairs the damaged and corrupt system files thereby resolving registry issues instantly.

Click here to download Restoro and repair error 2200.

Method 4: Locate and Install the Driver As was pointed out, you might need to reinstall the printer driver again. Using DriverFIX, you’ll be able to automatically update your computer system and install the drivers your computer needs to operate smoothly.
Read More
How to remove PC Fix Speed from your Windows PC

PC Fix Speed is a Potentially Unwanted Program designed to improve the speed of your computer. This program usually comes bundled with other software, and when installs automatically scan your PC and displays exaggerated messages on the status of the PC’s performance, to get users to pay for the PRO version of the software. It also adds registry entities that allow it to run each time the computer is started, and the application itself will constantly keep reminding users that they have errors by putting the application windows on top.

From the Author: The Service is provided by PCRx through Crawler, LLC. Clean and repair your PC’s registry, optimize PC performance and free up disk and memory space. With everything you do on your PC, including adding on devices, a new entry is created in your Windows® registry, and seldom are any removed after they’re no longer needed. As a result, your PC gets bogged down with unnecessary entries, slowing your PC speed, the start-up, and your Internet browser. PC Fix Speed cleans up registry entries and puts your PC back on track for optimal performance. PC Fix Speed is an essential application that should be a part of every computer. PC Fix Speed especially helps computers that are unusually slow, freeze up often or show error messages, by cleaning the system registry and improving overall performance.

About Potentially Unwanted Applications

If you have ever downloaded software from the internet (shareware, freeware, etc,), it’s quite possible you’ve unconsciously installed unwanted programs on your computer system. A Potentially Unwanted Program, often known as PUP, in short, is software that contains adware, installs toolbars, or has other hidden goals. These kinds of programs are usually bundled up with free applications that you download from the internet or will also be bundled inside the custom installers on many download sites. It’s clear by its name – unwanted programs – but did not actually constitute “malware” in the traditional sense. An important difference between malware and PUP is distribution. Malware is normally dropped through vulnerability exploitation while PUP gets installed with the consent of the user, who intentionally or unwittingly approves the PUP installation on their computer. PUP developers can argue their programs aren’t malicious software however, it can nevertheless be unsafe software and put your PC at risk much the same way malware does.

Exactly how do PUPs look like?

Unwanted programs come in various forms. More often, they can be found in adware bundlers which are known to utilize aggressive and misleading advertising. Most bundlers install many adware programs from a number of vendors, each of which possesses its own EULA policy. Safebytes Anti-malware entirely eliminates this threat and safeguards your computer against unwanted programs or adware infection. Several PUPs also show up as toolbars or add-ons, mounted on your preferred web browser. These toolbars change your homepage and your search engine in the installed browser, track your web activities, control your search results with redirects and sponsored links, and eventually slow down your browser and diminish your web browsing experience. Potentially Unwanted Programs occasionally act very much like viruses or spyware. Some PUPs carry keyloggers, dialers, and other software to collect your personal details that can cause identity theft. Because of this unwanted program, your application may freeze, your security protections can get disabled which could leave your computer susceptible, your system may get ruined, and the list goes on and on.

Some tips on protecting yourself from PUPs

• Read meticulously before you install anything. Don’t click accept until you have read the fine print. There could be a clause about PUPs. • Use ONLY custom or manual install method – and don’t blindly click Next, Next, Next. • Use good anti-malware software. Try Safebytes Anti-malware which can spot PUPs and handle them as malware by flagging them for removal. • Be alert if you install freeware, open-source programs, or shareware. Disable or eliminate toolbars and browser extensions you don’t really need. • Only download applications from the original providers’ websites. Avoid download portals since they use their very own download manager to pack additional programs together with the initial download. Remember the fact that although PUPs could cause damage and hinder the proper function of the computer, they can’t get into your system without your consent, so be watchful not to provide them with it.

What To Do If You Cannot Install Any Antivirus?

Malware could cause a great deal of damage to your PC. Some malware sits in between your PC and your net connection and blocks some or all internet sites that you would like to check out. It could also prevent you from adding anything to your PC, especially the antivirus program. So what should you do when malware prevents you from downloading or installing Anti-Malware? Although this kind of issue will be tougher to get around, there are some steps you can take.

Start your computer in Safe Mode

If the malware is set to load at Windows start-up, then booting in Safe Mode should prevent it. Only the bare minimum required applications and services are loaded whenever you start your laptop or computer into Safe Mode. Listed below are the steps you should follow to boot into the Safe Mode of your Windows XP, Vista, or 7 computers (check out the Microsoft website for instructions on Windows 8 and 10 PCs). 1) At power-on/startup, tap the F8 key in 1-second intervals. This will bring up the Advanced Boot Options menu. 2) Make use of the arrow keys to select Safe Mode with Networking and press ENTER. 3) When you are into this mode, you will have an internet connection again. Now, use your web browser to download and install an anti-malware program. 4) After the application is installed, allow the diagnostic scan run to eliminate trojans and other threats automatically.

Switch to an alternate web browser

Web-based viruses could be environment-specific, aiming for a particular internet browser or attacking specific versions of the web browser. The ideal way to avoid this problem is to select an internet browser that is well known for its security features. Firefox contains built-in Malware and Phishing Protection to keep you safe online.

Make a bootable USB anti-virus drive

Here’s yet another solution which is using a portable USB anti-malware software package that can check your computer for malware without needing installation. To run anti-virus from a USB drive, follow these simple steps: 1) Make use of another virus-free PC to download Safebytes Anti-Malware. 2) Plug in the pen drive to a USB port on the uninfected computer. 3) Double-click the executable file to run the installation wizard. 4) Choose a USB drive as the location when the wizard asks you where you want to install the application. Follow the instructions on the computer screen to finish off the installation process. 5) Now, insert the USB drive into the corrupted PC. 6) Double-click the EXE file to run the Safebytes tool right from the thumb drive. 7) Click the “Scan” button to run a full system scan and remove viruses automatically.

SafeBytes AntiMalware Overview

Want to download the best anti-malware software program for your system? There are various applications available that come in free and paid versions for Microsoft Windows systems. A few are good ones, some are decent, while some are merely bogus anti-malware programs that can damage your personal computer themselves! When searching for an anti-malware tool, select one which gives dependable, efficient, and complete protection against all known viruses and malware. On the list of highly recommended software is SafeBytes Anti-Malware. SafeBytes carries a superb track record of excellent service, and customers appear to be happy with it. SafeBytes can be described as a powerful, real-time antivirus application that is created to assist the typical computer end user in protecting their PC from malicious threats. This tool can easily detect, remove, and protect your computer from the most advanced malware intrusions including adware, spyware, trojan horses, ransomware, worms, PUPs, parasites, and other potentially harmful software programs.

There are plenty of amazing features you will get with this particular security product. Here are some of the features you will like in SafeBytes.

Active Protection: SafeBytes provides a totally hands-free active protection that is set to observe, block, and remove all computer threats at its first encounter. This utility will always keep track of your PC for suspicious activity and updates itself continuously to keep abreast of the constantly changing threat landscape. Anti-Malware Protection: This deep-cleaning anti-malware software goes much deeper than most antivirus tools to clean your computer system. Its critically acclaimed virus engine finds and disables hard-to-remove malware that hides deep inside your PC. Web protection: Through its unique safety rating, SafeBytes informs you whether a site is safe or not to access it. This will make sure that you’re always certain of your online safety when browsing the web. Low Memory/CPU Usage: SafeBytes is a lightweight and easy-of-use anti-virus and antimalware solution. As it uses very little computer resources, this application leaves the computer’s power exactly where it belongs: with you. 24/7 Premium Support: SafeBytes provides 24/7 technical support, automatic maintenance, and updates for the best user experience. SafeBytes has developed a wonderful anti-malware solution that can help you conquer the latest malware threats and virus attacks. You can rest assured that your computer system will be protected in real-time as soon as you put this software to use. So if you need sophisticated forms of protection features and threat detections, purchasing SafeBytes Anti-Malware will be well worth the dollars!

Technical Details and Manual Removal (Advanced Users)

If you do not want to use malware removal software and prefer to get rid of PC Fix Speed manually, you might do so by going to the Add/Remove Programs menu in the control panel and removing the offending software; in cases of web browser plug-ins, you could un-install it by going to the browser’s Add-on/Extension manager. You will definitely also want to reset your browser. Finally, examine your hard drive for all of the following and clean your computer registry manually to remove leftover application entries after uninstalls. However, this is a tough task and only computer professionals can perform it safely. Moreover, some malware keeps replicating which makes it tough to get rid of. It is advised that you carry out the removal procedure in Windows Safe Mode.
Folders: C:\Program files\PC Fix Speed\ C:\Documents and Settings\All Users\Start menu\Programs\PC Fix Speed\ C:\Program filesx7Help\ Registry: HKLM\SOFTWARE\PCFixSpeed HKCU\Software\PCFixSpeed HKLM\SOFTWARE\Microsoft\Windows\CurrentVersion\Run\PCFixSpeed
Read More
Fix ntkrnlmp.exe Blue Screen in Windows
The ntkrnlmp.exe file is a file associated with the Windows operating system’s NT Kernel and other system processes. It is also related to the “CRITICAL PROCESS DIED” error. So if you encounter a Blue Screen of Death error that’s related to this file, then you’ve come to the right place as this post will guide you in fixing the ntkrnlmp.exe Blue Screen error. This kind of Blue Screen error might be caused by the file getting corrupted or infected with some malware. Aside from these causes, the error might also be due to the corruption and malfunction of the graphics card drivers. Before you troubleshoot the problem, you might want to try performing System Restore especially if you tend to create a System Restore point every now and then. Performing System Restore could help you resolve the ntkrnlmp.exe Stop error. You can do this option either by booting into Safe Mode or in System Restore. If you are already in the Advanced Startup Options, just directly select System Restore and proceed with the next steps. And if you have just booted your PC into Safe Mode, refer to the steps below.
  • Tap the Win + R keys to open the Run dialog box.
  • After that, type in “sysdm.cpl” in the field and tap Enter.
  • Next, go to the System Protection tab then click the System Restore button. This will open a new window where you have to select your preferred System Restore point.
  • After that, follow the on-screen instructions to finish the process and then restart your computer and check if the problem is fixed or not.
If System Restore didn’t help, then proceed to the given options below.

Option 1 – Disable the C-states and EIST in the BIOS

The first thing you can do is try to disable the C-states and EIST in the BIOS. To do that, refer to the steps given below.
  • Go to the BIOS and from there look for an option named CPU Configuration which can usually be found under the Advanced menu.
  • Next, look for CPU Power Management and under that section, disable both the “Intel EIST” and “Intel C-state” options.
  • After you disable them, save the changes you’ve made and exit the BIOS.
  • Now restart your computer and check if the ntkrnlmp.exe BSOD error is now fixed.

Option 2 – Try to update, rollback or disable drivers

If the first option didn’t help in fixing the ntkrnlmp.exe Blue Screen error the next thing you can do is to roll back, or update, or disable device drivers in your computer. It is most likely that after you updated your Windows computer that your driver also needs a refresh. On the other hand, if you have just updated your device drivers then you need to roll back the drivers to their previous versions. Whichever applies to you, refer to the steps below.
  • Open the Devices Manager from the Win X Menu.
  • Then locate the device drivers and right-click on them to open the Properties.
  • After that, switch to the Driver tab and click on the Uninstall Device button.
  • Follow the screen option to completely uninstall it.
  • Finally, restart your computer. It will just reinstall the device drivers automatically.
Note: You can install a dedicated driver on your computer in case you have it or you could also look for it directly from the website of the manufacturer.

Option 3 – Configure the Driver Verifier Manager

The Driver Verifier Manager is another tool in Windows that could help you fix driver-related issues. And so if you want to fix the ntkrnlmp.exe Blue Screen error you need to use the Driver Verifier Manager:
  • Type in the keyword “Verifier” in the Cortana search box to search for Verifier in Windows 10.
  • After that, select the option “Create custom settings”.
  • Make sure that you have checked everything except the options “DDI compliance checking” and “Randomized low resources simulation”.
  • Next, select the option “Select driver names from a list” option.
  • Afterward, you have to select all the drivers from any unofficial or third-party provider. To simply put it, you have to select all the drivers that are not supplied by Microsoft.
  • Then click on the Finish button.
  • Open Command Prompt as administrator and execute this command – verifier /querysettings
  • The command you just executed will display the Driver Verifier settings so if you see any of the flags enabled boot your Windows 10 PC into Safe Mode.
  • Open the Command Prompt as admin again and run this command – verifier /reset
  • The command will reset the Driver Verifier. Once the process is done, restart your PC and check.

Option 4 – Run the Blue Screen Troubleshooter

The Blue Screen troubleshooter is a built-in tool in Windows 10 that helps users in fixing BSOD errors like ntkrnlmp.exe. It can be found on the Settings Troubleshooters page. To use it, refer to these steps:
  • Tap the Win + I keys to open the Settings panel.
  • Then go to Update & Security > Troubleshoot.
  • From there, look for the option called “Blue Screen” on your right-hand side and then click the “Run the troubleshooter” button to run the Blue Screen Troubleshooter and then follow the next on-screen options. Note that you might have to boot your PC into Safe Mode.
Read More
A Quick Guide to Fixing Error 451

How to Fix Error 451

Error 451 - What is it?

This is a typical SMTP error code. SMTP is the abbreviation for Simple Mail Transfer Protocol. It is an internet standard for email transmission. In other words, SMTP is a text-based protocol in which the sender communicates with the mail receiver by issuing commands and receiving a response code. The SMTP error 451 is displayed in the following format:
‘451 Requested action aborted: local error in processing’
This error message indicates that the program cannot send more messages and the server has hit the limit. This is because some mail servers have limits. The sever stops the task of sending and receiving emails when this limit is achieved.

Solution

Restoro box imageError Causes

The causes of error 451 include:
  • Server limit reached
  • Email rejection due to a remote anti-spam filter
  • Request denied by the server
  • Viral infection
If you heavily rely on email communication with your business partners and colleagues, then it is advisable to immediately resolve this issue without any delays. Though this error is not fatal, you should repair it right away to avoid inconvenience. SMTP error code 451 can hamper your ability to communicate via email.

Further Information and Manual Repair

Here are some of the best, easy, and effective DIY methods that you can try to repair error code 451 on your PC.

Method 1

To fix this error, simply follow these steps:
  • login to Linux SSH
  • Open the file /etc/localdomains
  • Nano/etc/localdomains and then add the domain name that is triggering email sending error
  • Now reboot your PC
This will hopefully resolve the issue. Nonetheless, if the error code still persists, then try other methods given below.

Method 2 - Configure List Settings to change the server limit.

This can be done by accessing the List Settings then Outgoing Mail Server (SMTP) and then the Limit Feature. By accessing the limit feature, you can easily adjust the program to any limit of your choice. Configure the limit and save changes. Reboot PC to activate the changes made.

Method 3 - Scan and Remove Viruses.

This error code can also be triggered due to viral infection. If this is the cause, then simply download an anti-virus on your PC. Scan the entire system and remove all detected malicious programs like Trojans, malware, adware, viruses, and spyware. This will repair the error 451 on your system.

Method 4

If the error still persists, then contact your SMTP provider to check the situation and resolve it. There is a possibility the error is generated from the SMTP provider’s end.
Read More
Should you buy used GPU in current market?
Things have stirred lately with Chinas ban on crypto mining and many used GPUs will flow the market probably. But should you buy a used GPU? Short answer: NO, long answer: keep on reading to find out why.

GPU 1080ti
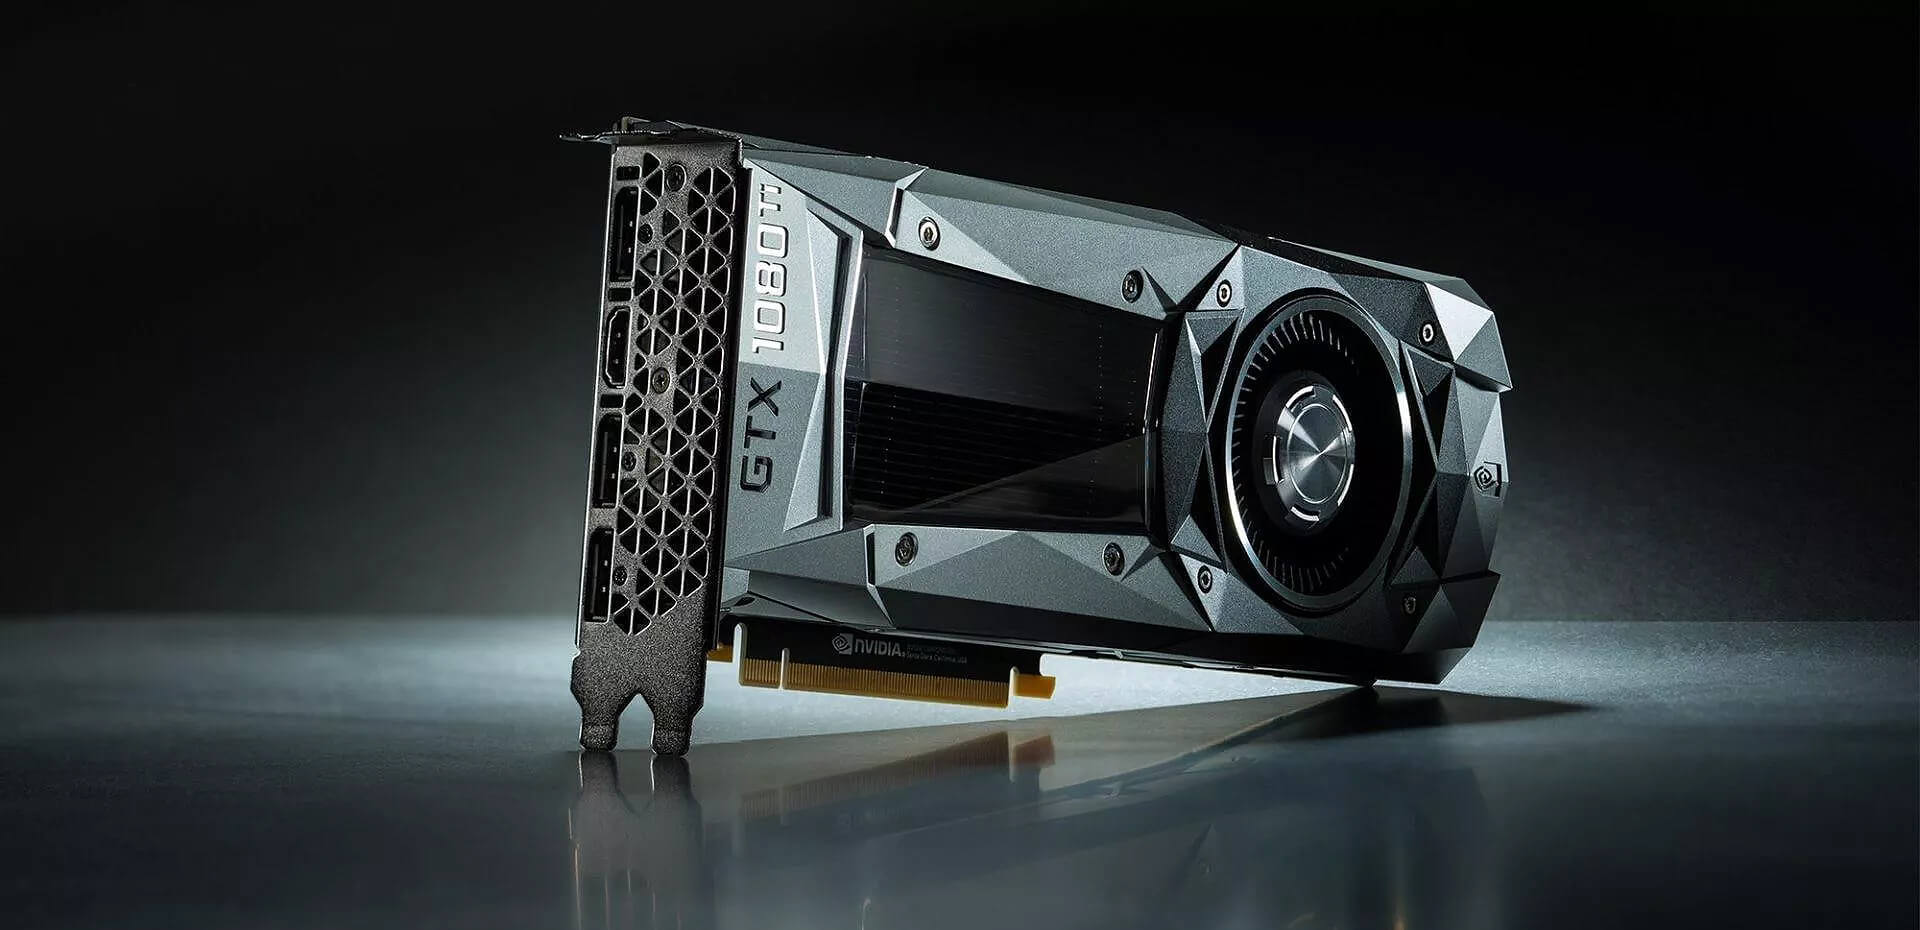
GPU shortage and its cause

As you all know by now, we live sadly in a world struck by a global Pandemic. Due to this awful disease and measures taken against it, many people are either working from home or are at home making the manufacturing of new chips problematic while demand on the market has raised. Throw into that mix crypto mining which has raised in popularity and you have, well today's market where we have GPU shortage. Now with the latest news that China has banned the mining of cryptocurrency, there is to be expected that at some point in time mining cards used there will fit the market in the whole world. Sadly even with a large quantity of GPUs that will become available, the overall price of cards will not be much lowered I am afraid since demand is still very high and many people would not want to purchase used mining cards and neither should you.

Be prepared for the worst scenario

Although this sounds very pessimistic and in most cases, it will not turn out to be true, you should always prepare yourself mentally that you might be in that lower percentage that will end up with a really bad GPU. What has come up to be absolutely true when considering GPU that were mining is that if anything at all can be done to GPU in order to increase performance, it has been done. Miners want to optimize and almost every GPU if could be overclocked, it was overclocked. Extensive mining also means that thermal paste has been dried and it is pretty useless at this point and there is a very high chance that fans and heat sinks will need much cleaning or even replacement raising the price of the card itself for mentioned paste, fans, and heat sinks. There's no way to tell what the previous owner might have done with a graphics card when you're shopping online, so our advice is to assume the worst. Don't trust the seller to give truthful information. Any listing that says it was "never used for mining" at this point is probably a lie.

Age of the GPU matters

Date when GPU itself has manufactured really matters. Newer cards even if used extensively have been used for a much shorter period of time and are not so damaged were ones produced a few years ago have seen a lot of action. Let’s say that you get RTX 3060, In the worst-case scenario it has been mining since late February of 2021 and basically, it is still under warranty so it should behave OK and put some good work in gaming even in that state. On another hand, if we take for example GTX 1080Ti which is 4 years old GPU things start to change drastically. 4 years GPU could be worn out even if it was used just for extensive gaming sessions let alone for mining.

No return policy and seller rating

Most of the time you will run into a product that cannot be returned or no refunds policy. This should bring a red flag right away and deter you from purchase. Sellers with the highest ratings are more trustworthy since many of them will not want to destroy their reputation but these will probably not even have these kinds of merchandise in their store. Buying with a poor rating seller and no return policy on a product is just asking for trouble. And although some stores do have arbitration and will stand on the customer side there is no guarantee for that and it will take too much time to process.

If you really must buy a second-hand GPU

Of course in these troubled times sometimes due to malfunction or any other reason, there would not be another choice than to buy a second-hand GPU. In this case, if there is no other option consider sellers with many positive ratings. If you can buy locally that would even be better or the best-case scenario would be if you could visually see and inspect GPU itself in order to see in what state it is. Look for warranty stickers to see if they are thorn and the card has been tampered with. Also take a good look at screws, if they have scratches card has been opened, probably to replace fan or heating sinks which means that it has worked a lot.

Conclusion

It is very difficult to give the best possible advice on this situation since of GPU shortage, but I would much prefer a new GPU with lower performance than a hi-performance one which was mining.
Read More
Add names of applications in the taskbar
Microsoft is trying to make Windows into a personalized OS, more and more features and parts can be customized to user liking. From larger things to smaller ones nowadays you can almost personalize every detail of Windows itself. In this article, we will tackle how to bring back the names of running applications on the taskbar. Placing names beside icons on the taskbar is a pretty simple and straightforward task easily done. First, right-click the Taskbar and select Taskbar settings. In Taskbar settings, click the menu labeled Combine taskbar buttons. Select Never. That's it, now all of your running applications have a name beside them. If you change your mind, you can always undo it by selecting Always hide labels in the Combine taskbar buttons menu.
Read More
Enable or disable Full-screen optimizations
In case you don’t know, there is a feature in Windows 10 computers that allows them to function a lot better. This feature is called Full-Screen optimization and it is enabled by default for several applications such as games and video players. If enabled, the Full-Screen optimization feature enhances the video playback and gaming by simply putting the CPU and GPU process as a priority. However, there are times when it can also result to a drop in the frame rate or FPS while in full-screen mode. And of course, the obvious solution to this dilemma is by disabling the Full-Screen optimization feature which is why Microsoft took action and removed this feature themselves in the recent Windows 10 Update releases. However, there is another way for you to enable it back or disable it yourself if you haven’t installed the recent updates yet and there are plenty of ways you can do both. All you have to do is follow the options given below carefully.

Option 1 – Try using Windows 10 Settings

If you haven’t installed the recent updates yet and all you have are the earlier releases, then this method would suit you.
  • Open the Windows 10 Settings app.
  • Next, navigate to System > Display > Graphics Settings or Advanced graphics settings.
  • From there, uncheck the “Enable Fullscreen optimization” option if you want to disable the feature, else just keep it checked.

Option 2 – Try using the Registry Editor

  • Tap the Win + R keys to open the Run dialog box and then type “Regedit” in the field and hit Enter to open the Registry Editor.
  • Afterward, if a User Account Control or UAC prompt appears, click on Yes.
  • Once the Registry Editor is pulled up, navigate to this registry key: HKEY_CURRENT_USERSystemGameConfigStore
  • Next, right-click on Explorer and select New > DWORD (32-bit) Value and then name it to “GameDVR_DSEBehavior and tap Enter to save it.
  • Now double click on the newly created GameDVR_DSEBehavior DWORD and set its value to “2” if you want to disable it, or “0” if you want to enable it.
  • Once you entered the value, close the Registry Editor and restart your computer to successfully apply the changes made.

Option 3 – Try running the application in Compatibility Mode

If the first two options didn’t work, the next thing you can do is to run the application in a Compatibility Mode. Follow the steps below to do so:
  • Go to the location of the application or game on which you need to disable or enable the Full-Screen optimization feature.
  • After that, right-click on it and select Properties.
  • Next, switch to the Compatibility tab where you can see the “Disable fullscreen optimization” option to disable the feature and vice versa.
  • Now click on the Apply and OK buttons to apply the changes made in the application’s settings.
Read More
Removing BEEP when adjusting volume in Windows
I often switch between my desktop speakers and headphones and because of this I very often use the volume adjustment bar to adjust sound levels so it is not too loud and each time when I set it I get annoying BEEP at the end. Now personally this might not bother you and you might want to leave it since it can be a useful feature to tell you how much volume is loud but if you are adjusting multiple times volume during the say it can become really frustrating to hear it each time, especially when switching to headphones and it beeps into your ears. In this guide, I will show you how to remove the beep so it is not heard anymore when you adjust the volume. Please know that beep is part of the Windows sound scheme and you can either remove specific sound with a completely silent wave or just turn off all windows alert sounds.
  • Open Windows settings and go to system > sound
  • in system sound, go to the right part of the screen and click on the sound control panel
  • In the sound control panel click on the Sounds tab
  • In the sounds, tab click on the drop-down menu under the sound scheme and choose no sounds.
There you go! You have successfully removed annoying BEEP each time you adjust the volume in Windows 10
Read More
1 2 3 162
Logo
Copyright © 2022, ErrorTools. All Rights Reserved
Trademarks: Microsoft Windows logos are registered trademarks of Microsoft. Disclaimer: ErrorTools.com is not affiliated with Microsoft, nor claim direct affiliation.
The information on this page is provided for information purposes only.
DMCA.com Protection Status