Can’t remove Bluetooth mouse & keyboard

Windows 10 supports various devices to get connected to which makes it quite a flexible operating system. The connection varies on the fact that the device can be connected either with Bluetooth or other wireless and wired connection. However, no matter how great the features are, there a few times when they bring in some bugs too. One of these bugs won’t allow you to either remove or reinstall the Bluetooth mouse and keyboard device from your Windows 10 computer. So if you are currently experiencing this problem, read on as this post will guide you in fixing it.

Before you go over the suggestions laid out below, you need to create a System Restore Point first since, in one of the options, you will be making some changes with the registry files as well as some critical Windows settings. Once you have that covered, refer to the following options.

Option 1 – Configure the Bluetooth Services

The first thing you can do is configure Bluetooth Services.

  • Tap the Win + R key combination to open the Run dialog box.
  • After that, type “services.msc” in the field and hit Enter to open the Windows Services Manager.
  • You will then see a list of services and from there, look for the following services and make sure that their default values are set as follows:
    • Bluetooth Audio Gateway Service – Manual (Triggered)
    • Bluetooth Support Service – Manual (Triggered)
    • Bluetooth User Support Service – Manual (Triggered)
  • Now click on the Start button to start all the aforementioned services and then check if you can now remove or reinstall the Bluetooth mouse and keyboard device.

Option 2 – Try running the Bluetooth Troubleshooter

As you know, Windows 10 has various troubleshooters with user-friendly interfaces where you can utilize them to fix issues in your PC. And since you’re dealing with some Bluetooth problem, you have to run the Bluetooth Troubleshooter.

  • Open the Windows 10 Settings.
  • Then go to Update & Security > Troubleshoot.
  • You should find the option for Bluetooth on your right-hand side – click on it then click on the “Run the troubleshooter” option.
  • Now follow the next screen options.

Option 3 – Try to reinstall or update the Bluetooth driver

The issue might have something to do with the Bluetooth drivers. It could be that it is outdated and needs to be updated or that you recently updated it and since then you have trouble removing the Bluetooth device and so to fix the issue, you can update, roll back or uninstall the Bluetooth drivers. How? Follow the steps below.

  • Tap the Win + X keys to open the Device Manager.
  • Next, look for the Bluetooth device and right-click on it.
  • Select the option “Update driver”.
  • After that, a new popup window will appear. In there, select the option, “Search automatically for updated driver software”.

Note: Checking the update may take a few minutes so you’ll have to wait until it finishes. If it is able to find an update, you must install it.

Option 4 – Get rid of any interference

If you have several wireless devices in the same room as your PC then it might have caused interference with the current connection in your PC which is why you have to switch off all the other devices and then try removing reinstalling the Bluetooth mouse and keyboard devices again.

Option 5 – Remove or reinstall the Bluetooth devices in a Clean Boot State

You might want to uninstall or remove the Bluetooth Devices while your computer is in a Clean Boot State. Putting your computer in this state will surely help especially if there are some processes that prevent the Bluetooth devices from being removed or reinstalled.

  • Log onto your PC as an administrator.
  • Type in MSConfig in the Start Search to open the System Configuration utility.
  • From there, go to the General tab and click “Selective startup”.
  • Clear the “Load Startup items” check box and make sure that the “Load System Services” and “Use Original boot configuration” options are checked.
  • Next, click the Services tab and select the “Hide All Microsoft Services” check box.
  • Click Disable all.
  • Click on Apply/OK and restart your PC. (This will put your PC into a Clean Boot State. And configure Windows to use the usual startup, just simply undo the changes.)
  • After that, try to reinstall or remove the Bluetooth mouse and keyboard devices again.
If you like to learn and find out more about various Windows errors, and how to repair them go to our vast archive or use search to find articles that will explain and help you in solving your issue.
However, if you prefer to do things fast and with automatization then we are proposing to use an automated solution for your issues. The application that we are recommending is Advanced System Repair Pro
Advanced System Repair utilizes multiple tools all in one to give you a quick, simple, reliable, and very thorough diagnosis of your PC. It brings you all the tools you need in one program to clean, fix, protect, optimize and boost your PC!
1-Click Maintenance
All the tools to make it simple and easy! It's like having a professional technician at the click of a mouse.

Junk Cleaner
Keeping your computer free from unnecessary clutter also helps make your computer last longer. Like any other machine, if you keep it clean and take care of it, it will serve you better for longer!

Optimize background apps
Optimize applications background activity with the built-in Application Optimizer feature.

Disk Defrag
With a simple 1-click, Advanced System Repair speeds up your PC by assembling fragmented files on your machine and organizing them more efficiently.

Malware Removal
Finds and removes all types of harmful malware including trojans, worms, bots, adware, spyware, PUPs, and more!

Privacy Cleaner
The all-in-one privacy suite to Clean Your Tracks & Protect Your Privacy! Make your computer safe, secure, and more efficient!

System Tweak/Optimizer
ASR will analyze your complete system and settings to adjust your PC to function at its maximum performance.

Registry Cleaner
Over time, as you install and uninstall applications, the registry can become cluttered with old entries and broken settings which can result in program crashes, and annoying messages and slow the computer down.
Visit our Advanced System Repair Pro Download page to inform yourself about all the benefits of this software and get a free trial copy of it.
advanced system repair pro

Advanced System Repair Pro

One-click automated PC repair solution
ASR logo
With Advanced System Repair Pro you can easily
Replace damaged files
Restore performance
Free disk space
Remove Malware
Protects WEB browser
Remove Viruses
Stop PC freezing
DOWNLOAD
Privacy Policy | Terms of Use | Uinstall
Advanced System Repair Pro is compatible with all versions of Microsoft Windows including Windows 11

Share this article:

You might also like

Blu-ray player does not recognize the disc
So, you just made some popcorns, dimmed light, relaxed in from of the TV, pressed play on your application and Blu-ray drive can not read your movie. Your movie night failed sadly, but there is hope and in this article, we are going to explore and offer you solutions on what to do when something like this happens so you do not miss another movie night and some hard-earned relaxation. Please note that in this article we are assuming that you are using a Blu-ray player on your PC, so some of the solutions presented are meant only for this case. So the first thing that you are supposed to do is to check the disc itself. You can turn the disc around and visually check the disc for fingerprints and scratches which can be fatal for disc playing, alternatively, you can try to play the same disc on another device and if it fails there also it is not the disc, it is your drive. So if it is no issue with the disc let's see that seems to be a problem with the drive. The common thing that could stop disc reading are cables, check all connections and cables in the back of your device to be sure that everything is plugged in correctly and nicely. After checking cables if the issue persists lens cleaning is the next step. Over time lens from the Blu-ray, the device becomes dirty and dust accumulates on it, there are special cleaning discs on market made especially for this purpose, to clean the dirty lens of optical devices. If you have one put it in and clean your lens. After lens cleaning with a specialty disc, a good idea would be to use compressed air in a can to reduce the dust inside so no excess dust will accumulate quickly again on the lens itself.

So the device is cleaned and checked and still no disc playing?

Update firmware first. In order to accomplish this visit your device manufacturer's website and follow instructions there on how to upgrade firmware. If this did not helped also update or reinstall device drivers. Go to device manager and update drivers for your device by right-clicking on it and choosing update driver. If none of the things helped, go to command prompt as administrator and type in SFC /scannow, leave the process to finish, and reboot.
Read More
How to Remove PUP ExpressFiles Tutorial

ExpressFiles is a program developed by Express Solutions. A number of Anti-Virus programs have flagged this program as a Potentially Unwanted Application. In many instances, it is bundled with additional programs on installation.

The program claims it offers users easy to search for various currently popular search terms. During our testing, the software never displays any search results, no matter the search words. Upon installation and setup, it defines an auto-start registry entry which makes this program run on each Windows boot for all user logins. A scheduled task is added to Windows Task Scheduler in order to launch the program at various scheduled times. The program defines an exception rule in Windows Firewall, allowing it to connect to the internet without limitations and auto-update itself.

About Browser Hijackers

Precisely what is a PUP?

If you’ve ever downloaded a free application or shareware, chances are high that the computer can get installed with a bunch of unwanted applications. A PUA / PUP (potentially unwanted application / potentially unwanted program) is a software program that comes bundled with free software and you consent to install it on your PC. These are programs you almost certainly don’t want on your computer simply because it doesn’t give any valuable service. Despite being regarded as very detrimental, PUPs aren’t always viruses or malware One simple difference between PUP and malware is distribution. Malware is normally dropped by silent installation vectors like drive-by downloads while PUP gets installed with the consent of the computer user, who purposefully or unknowingly approves the PUP installation on its PC. Having said that, there is no doubt that PUPs remain bad news for PC users as they can be incredibly damaging to the computer in numerous ways.

Exactly how do unwanted programs look like?

Potentially Unwanted Programs appear in different forms and varieties, however, in the majority of instances, they are adware programs that exhibit irritating pop-up ads and advertisements on websites you explore. In addition, the majority of free programs these days come with some unwanted add-ons; in most cases an internet browser toolbar or browser modification like a homepage hijacker. They’ll keep track of your online routines, redirect your search results to risky websites where viruses can be downloaded and installed, hijack your home page, and slow your browser down to a crawl. Potentially Unwanted Programs occasionally act quite much like computer viruses or spyware. They might carry keyloggers, dialers, browser hijackers, and tracking components that gather system details, or tracks customer habits and relays this information to third-party firms. Even if the PUPs really aren’t basically malicious, these software programs still do absolutely nothing good on your personal computer – they will take valuable system resources, slow down your PC, weaken your computer security, and make your system more susceptible to trojans.

How do you avoid PUPs?

• Read cautiously before accepting the license agreement as it may have a clause about PUPs. • Always opt for the custom if you’re presented an option between “Custom” and “Recommended” Installations – never click Next, Next, Next blindly. • Have a top-notch antivirus program like Safebytes Anti-Malware which can protect your computer from PUPs. As soon as you install this software, protection from malware and PUPs is already switched on. • Think carefully before you download any kind of shareware or freeware. Disable or get rid of toolbars and browser extensions you don’t really need. • Only use official product websites for downloading programs. Stay away from download portals altogether as most websites compel users to download the software using their own download manager, which is often bundled up with some sort of PUPs.

What To Do If You Cannot Install Any Anti-Malware?

All malware is bad, but certain types of malicious software do a lot more damage to your computer than others. Some malware types modify browser settings by adding a proxy server or modify the PC’s DNS settings. In these instances, you will be unable to visit some or all of the websites, and therefore not able to download or install the required security software to remove the infection. If you are reading this right now, you have perhaps recognized that a malware infection is a reason for your blocked web connectivity. So how to proceed when you want to install an anti-malware application like Safebytes? Follow the instructions below to eliminate malware by alternative methods.

Install in Safe Mode

The Windows-based PC comes with a special mode called “Safe Mode” where just the bare minimum required applications and services are loaded. If the malware is set to load immediately when the computer starts, shifting to this mode may well prevent it from doing so. In order to enter into Safe Mode or Safe Mode with Networking, press the F8 key while the PC is starting up or run MSConfig and locate the “Safe Boot” options under the “Boot” tab. As soon as you restart the PC into Safe Mode with Networking, you could download, install, and update anti-malware software from there. Right after installation, run the malware scanner to get rid of standard infections.

Utilize an alternate internet browser to download antivirus software

Web-based malware could be environment-specific, targeting a specific web browser or attacking particular versions of the web browser. If you’re not able to download the anti-virus application using Internet Explorer, this means the virus is targeting IE’s vulnerabilities. Here, you need to switch to a different web browser such as Chrome or Firefox to download the Safebytes Anti-malware program.

Install and run antivirus from a Thumb drive

Here’s yet another solution which is creating a portable USB anti-virus software that can scan your computer for malware without the need for installation. Try these simple actions to clean up your infected computer using portable anti-malware. 1) Download Safebytes Anti-Malware or Microsoft Windows Defender Offline onto a clean PC. 2) Mount the pen drive on the same PC. 3) Run the setup program by double-clicking the executable file of the downloaded software, which has a .exe file extension. 4) Select the drive letter of the USB drive as the location when the wizard asks you exactly where you would like to install the anti-malware. Follow activation instructions. 5) Now, insert the thumb drive into the corrupted PC. 6) Run the Safebytes Anti-malware directly from the pen drive by double-clicking the icon. 7) Click the “Scan” button to run a full computer scan and remove viruses automatically.

Overview of SafeBytes Anti-Malware

If you are looking to download the anti-malware program for your computer, there are lots of tools in the market to consider nonetheless, you just cannot trust blindly anyone, irrespective of whether it is free or paid software. A few of them do a great job in removing threats while some will ruin your PC by themselves. You need to pick a company that develops industry-best antimalware and has achieved a reputation as trustworthy. When considering commercial tool options, most people opt for well-known brands, such as SafeBytes, and they are quite happy with it. SafeBytes anti-malware is really a powerful, very effective protection software made to help users of all levels of computer literacy in detecting and removing malicious threats out of their computer. Using its outstanding protection system, this utility will quickly detect and get rid of the majority of the security threats, which include adware, viruses, browser hijackers, ransomware, PUPs, and trojans. SafeBytes anti-malware takes computer protection to a totally new level with its advanced features. Here are a few typical features present in this software: Live Protection: SafeBytes offers complete and real-time security for your laptop or computer. It’ll regularly monitor your computer for hacker activity and also gives end-users superior firewall protection. Most Reliable AntiMalware Protection: With its enhanced and sophisticated algorithm, this malware elimination tool can find and eliminate the malware threats hiding in your PC effectively. “Fast Scan” Features: SafeBytes’s high-speed malware scanning engine minimizes scanning times and extends battery life. Simultaneously, it will effectively identify and remove infected computer files or any online threat. Web Protection: SafeBytes checks and gives a unique safety ranking to each and every website you visit and block access to webpages considered to be phishing sites, thus safeguarding you from identity theft, or known to contain malicious software. Low CPU/Memory Usage: SafeBytes is well known for its low effect on computer resources and great detection rate of diverse threats. It runs quietly and efficiently in the background so you’re free to use your PC at full power all of the time. 24/7 Premium Support: SafeBytes gives you 24/7 technical support, automatic maintenance, and upgrades for the best user experience.

Technical Details and Manual Removal (Advanced Users)

If you wish to manually remove ExpressFiles without the use of an automated tool, it may be possible to do so by removing the program from the Windows Add/Remove Programs menu, or in cases of browser extensions, going to the browsers AddOn/Extension manager and removing it. You will likely also want to reset your browser. To ensure the complete removal, manually check your hard drive and registry for all of the following and remove or reset the values accordingly. Please note that this is for advanced users only and may be difficult, with incorrect file removal causing additional PC errors. In addition, some malware is capable of replicating or preventing deletion. Doing this in Safe Mode is advised.

The following files, folders, and registry entries are created or modified by ExpressFiles

Files: %APPDATAExpressFilescurrent-cloud.html %COMMONDESKTOPExpressFiles.lnk %COMMONSTARTMENUExpressFilesExpressFiles.lnk %COMMONSTARTMENUExpressFilesUninstall.lnk %PROGRAMFILESExpressFilescurrent-cloud.de.html %PROGRAMFILESExpressFilescurrent-cloud.en.html %PROGRAMFILESExpressFilescurrent-cloud.fr.html %PROGRAMFILESExpressFilescurrent-cloud.ru.html %PROGRAMFILESExpressFilesEFupdater.exe %PROGRAMFILESExpressFilesExpressDL.exe %PROGRAMFILESExpressFilesExpressFiles.exe %PROGRAMFILESExpressFilesuninstall.exe %WINDIRTasksExpress Files Updater.job %APPDATAExpressFiles %COMMONSTARTMENUExpressFiles %PROGRAMFILESExpressFileslanguage %PROGRAMFILESExpressFiles Registry: key ExpressFiles.exe at HKEY_LOCAL_MACHINESOFTWAREConduitAppPaths. key ExpressFiles at HKEY_CURRENT_USERSoftware. key ExpressFiles at HKEY_LOCAL_MACHINESOFTWARE. key ExpressFiles at HKEY_USERS.DEFAULTSoftware. HKEY_CLASSES_ROOTMagnetsshellopencommand value $PROGRAMFILESExpressFilesExpressDL.exe at HKEY_LOCAL_MACHINESYSTEMControlSet001ServicesSharedAccessParametersFirewallPolicyStandardProfileAuthorizedApplicationsList. value $PROGRAMFILESExpressFilesExpressDL.exe at HKEY_LOCAL_MACHINESYSTEMControlSet002ServicesSharedAccessParametersFirewallPolicyStandardProfileAuthorizedApplicationsList. value $PROGRAMFILESExpressFilesExpressDL.exe at HKEY_LOCAL_MACHINESYSTEMControlSet003ServicesSharedAccessParametersFirewallPolicyStandardProfileAuthorizedApplicationsList. value $PROGRAMFILESExpressFilesExpressFiles.exe at HKEY_LOCAL_MACHINESYSTEMControlSet001ServicesSharedAccessParametersFirewallPolicyStandardProfileAuthorizedApplicationsList. value $PROGRAMFILESExpressFilesExpressFiles.exe at HKEY_LOCAL_MACHINESYSTEMControlSet002ServicesSharedAccessParametersFirewallPolicyStandardProfileAuthorizedApplicationsList. value $PROGRAMFILESExpressFilesExpressFiles.exe at HKEY_LOCAL_MACHINESYSTEMControlSet003ServicesSharedAccessParametersFirewallPolicyStandardProfileAuthorizedApplicationsList.
Read More
Fix Windows Update Error Code 0x8024402c
Connecting to Microsoft’s Windows Update servers does not always go smoothly since you could run into a number of errors. One of these errors is the error code 0x8024402c. You can see this error code when you check for Windows Updates. This kind of Windows Update error occurs when the proxy or the firewall settings are incorrectly configured. As a result, the client’s connection to the Windows Update servers fails. There are two things you can do to resolve error code 0x8024402c. First, you can try to fix the Proxy Settings. Second, you can set up Automatically Detect the connection settings. In addition, you can also try to perform System Restore as it could also help in fixing the problem. Performing System Restore might help you in fixing the error code 0x8024402C. Refer to the steps below to use System Restore.
  • Tap the Win + R keys to open the Run dialog box.
  • After that, type in “sysdm.cpl” in the field and tap Enter.
  • Next, go to the System Protection tab then click the System Restore button. This will open a new window where you have to select your preferred System Restore point.
  • After that, follow the on-screen instructions to finish the process and then restart your computer and check if the problem is fixed or not.
If performing System Restore didn’t help in fixing the problem, then try the two given options below.

Option 1 – Try fixing the Proxy Settings

  • In the Cortana search box, search for Internet Explorer and then click on the related search result.
  • After that, tap the Win + T keys on your keyboard and click on Internet Options.
  • Next, navigate to the Connections tab and click on LAN Settings.
  • Then click on the Advanced button and delete all the entries in the list generated in the Exceptions section. And if the Advanced button is disabled because the “Use a proxy server for your LAN (These settings will not apply to dial-up or VPN connections)” option is disabled then you are good to go. Now proceed to the next step.
  • Tap the Win + X keys or right-click on the Start button and select Command Prompt (Admin) or you could also search for “cmd” in the Cortana search box and right-click on Command Prompt from the search results and select the “Run as administrator” option.
  • If a User Account Control appears, click on Yes to proceed. After that, type each one of the commands listed below, and don’t forget to hit Enter after you type each one of them.
    • netsh winhttp reset proxy
    • net stop wuauserv
    • net start wuauserv
  • Now restart your computer and check if the problem is fixed or not by checking for Windows Updates again.

Option 2 – Try setting up Automatically Detect the connection settings

  • Type in “internet options” in the Cortana search box and then click on the related search result.
  • After that, navigate to the Connections tab.
  • Next, click on the LAN Settings button located under the Local Area Network (LAN) settings section.
  • Then uncheck the “Use a proxy server for your LAN (These settings will not apply to dial-up or VPN connections)” option under the Proxy Server section and click OK.
  • Now restart your computer to apply the changes made successfully.
Read More
Best online learning websites for everything
Building your skill set could be a very important thing, especially in today’s world, and what’s the best way other than online learning classes. You are not exposing yourself to pandemics, staying safe in the warmth of your home and most of the courses are free. Presented here are sites that I believe will and can help you with your goal of learning desired material whatever that might be. Sites are listed in no particular order with a description of what each has to offer.

Coursera

https://www.coursera.org/ courseraCoursera was one of the pioneers when it comes to college education online. When it started all courses were free and offered certificates if the taker has done tasks with a passing grade. Today not everything is free but still, there are tons of free courses that can help you to learn something new and to advance in your work or hobby. Google is using the Coursera platform to deliver its courses to the audience and besides google a lot of academic professors from Princeton, Stanford, John Hopkins and many more are presently offering their course material.

edX

https://www.edx.org/ edx online learningedX has evolved from MITx, MIT’s free initiative to place some free academic lectures from its classrooms free into the world. Since it was rebranded into edX it started including other big university names like Berkeley, University of Texas System, Harvard, and many more. Since its infant days, edX has expanded and included many areas that it offers coursework from arts to science. Certificated today are mostly not free but course videos are, so if you care to learn and not wave certificates around this is a great place to do it.

Udemy

https://www.udemy.com/ udemyUdemy has a little different approach to course material than previously mentioned websites. Teachers on Udemy are mostly people that are working in a given field. Programmers will teach programming, fitness instructors will teach training, etc. There are vas variety of topics even on lifestyle, hobbies even gaming to more serious ones like software developing hardware, etc. There are free courses but mostly are one-time purchases with unlimited access to course material and with frequent discounts udemy might be a good place to look if you can find anything interesting.

Alison

https://alison.com/ alisonAlison is kind of Udemy if we are talking about course material and who is teaching, the difference however is that it has more free content and it is one of the rare websites on this list that has Language courses. Courses vary from beginner level to more advanced ones.

Udacity

https://www.udacity.com/ udacity online learning
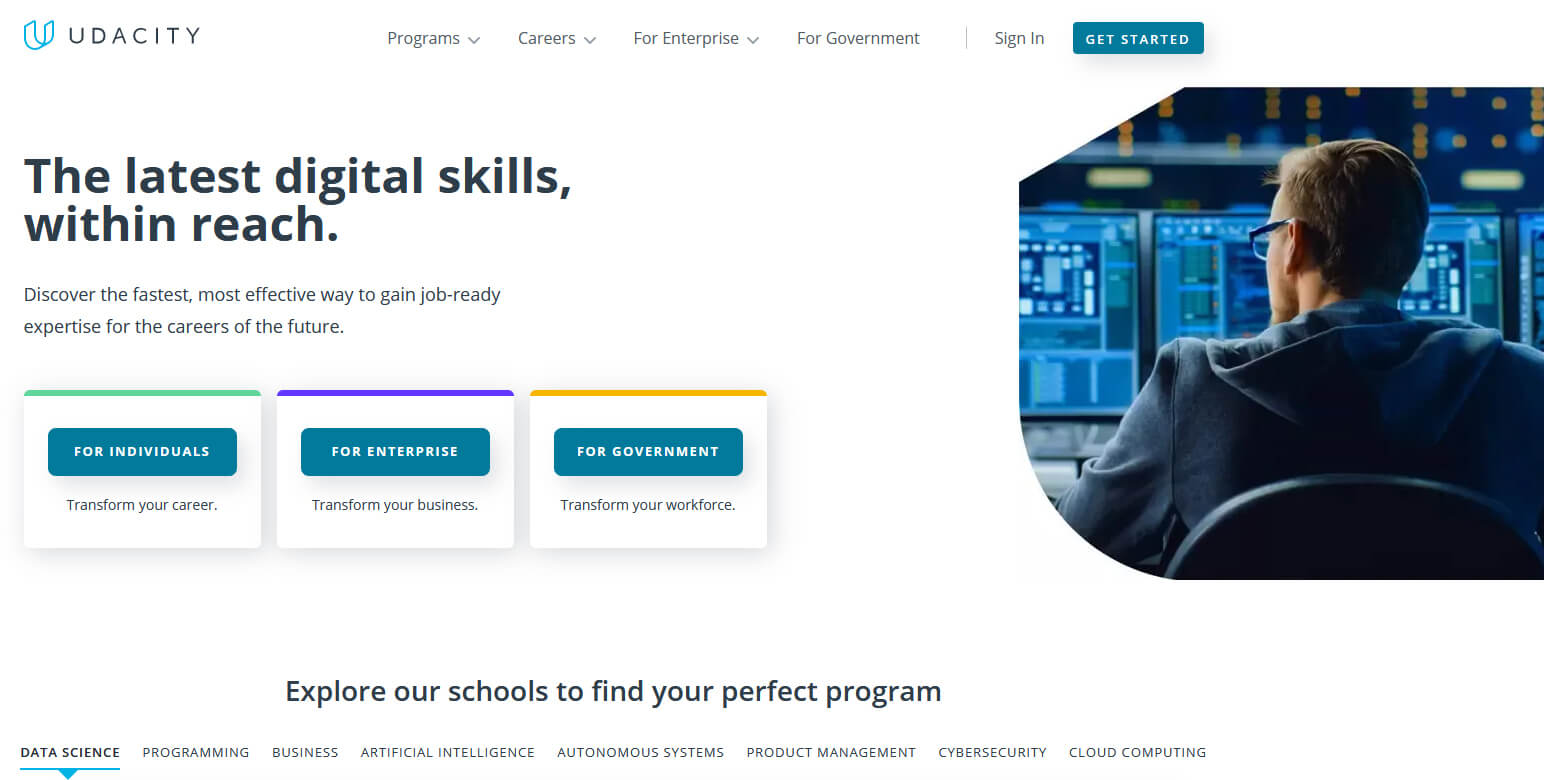
Udacity was also one of the earlier websites to offer free courses, in today’s world it still has free material but there is also paying one. The big difference from other competitors is that Udacity focuses mostly on programming, data science, and web development and it is very strong in this field. There are no courses about art. Music or similar, mostly IT stuff is covered here. If this is something that interests you, make a free account and give it a go.

Codecademy

https://www.codecademy.com/ codecademyCodecademy is a website mainly focused on teaching you how to code. Pro plan is there but there are a lot of basic and free courses on the mentioned subject. The curriculum is really wide covering Python, R, Java, JavaScript, SQL, Ruby, C#, C++, Swift, PHP, HTML, CSS and more so I am sure that if you are interested in coding this would be a pretty good place to find things. Besides pure language coding courses site offers also, Cybersecurity, Web design, Data science, web development, Game Development, Mobile Development, and many more courses on provided subjects.

Academic Earth

https://academicearth.org/ academic earth
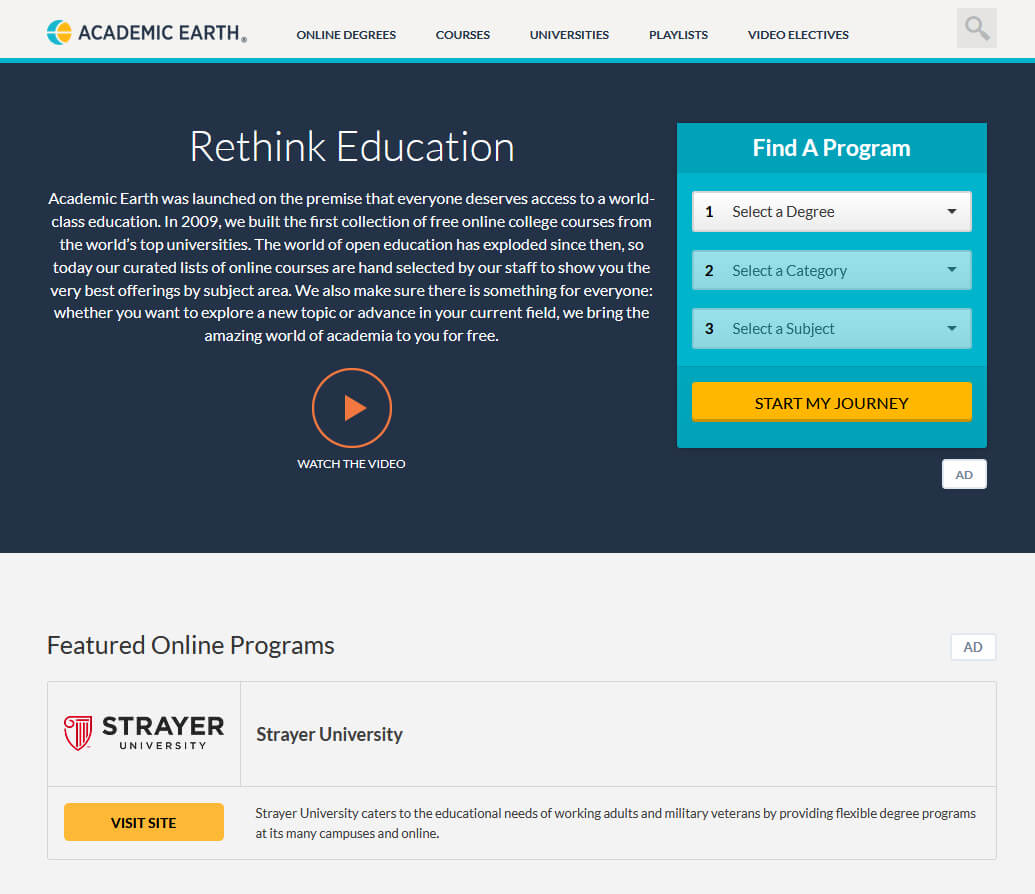
Academic Earth has been built with one simple premise: Everyone deserves access to education. Lead by this kind of mindset on Academic Earth you will find well, academic courses similar to ones found on edX and Coursera, but from mentioned sites here all courses are free and you will find only academic ones, there are no entrepreneur or expert courses here, just pure academic ones. If you wish to see and learn something the way it is taught in Harvard, Berkeley, MIT, etc this is the place for you.

Khan Academy

https://www.khanacademy.org/ khan academy
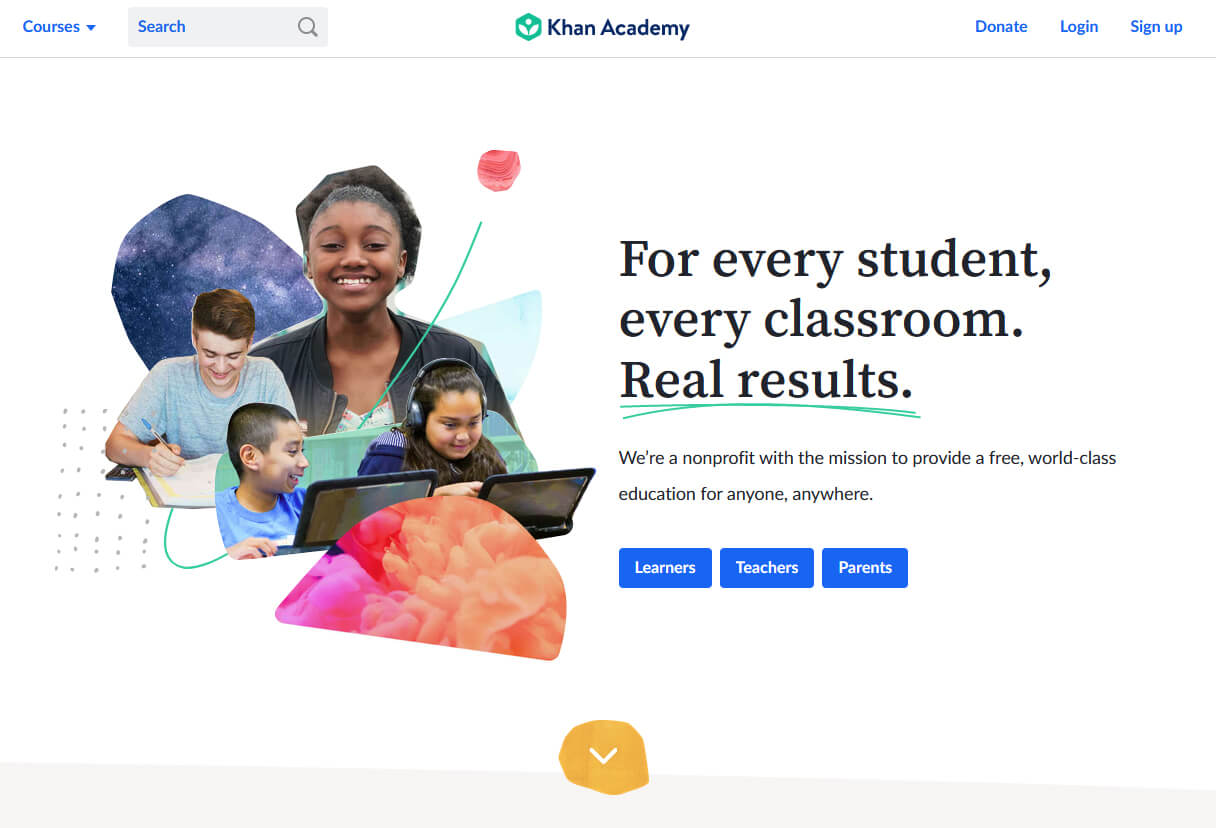
Khan academy is completely free and it is offering courses matching certain grades for children. It is offering courses for all 8 years of elementary school, math courses for high school and college with some coursework on topics like science, arts & humanities, reading, life skills, etc. Despite not being on the same level as some university courses presented on other mentioned websites Khan Academy is a good place to learn a lot of basic skills that you could build upon later.

Conclusion

I hope that I have helped you in some way to expand your skill set and learn something new with provided sources and I hope to see you again on errortools.com
Read More
How to Fix Windows 10 Error 0x80070017

How to Fix Windows 10 Error 0x80070017

Error Code 0x80070017- What is it?

Error Code 0x80070017 is an error code that is most often associated with Windows 10 installations, although it has also been encountered by users on previous versions of the Windows operating systems. It is usually encountered as users attempt to install a new version of the software on their machine.

Common symptoms include:

  • A vague error message regarding the inability of the system to copy over the necessary files pops up as users attempt to install a new version of the Windows operating system on their computer

While it can be hard to tell what the exact cause of Error Code 0x80070017 is on your specific device, the good news is that there are two primary methods that can be used to fix the problem and to allow you to proceed with your installation. These two methods do require some degree of technical knowledge and/or skill, so if you don’t feel like you have the ability to undertake them on your own, be sure to get in touch with a trusted computer repair professional to assist you.

Solution

Restoro box imageError Causes

The most basic cause of Error Code 0x80070017 is that some of the files that are needed by the system to complete the installation are either not being found by the computer or are believed to be corrupted by the system. When this happens, security features within the software prevent it from completing the installation process, so as to avoid damage to the computer. Error Code 0x80070017 can be disruptive to your installation process, but there are two basic methods that can be employed to resolve it.

Further Information and Manual Repair

While it can be frustrating to encounter Error Code 0x80070017 on your Windows machine, there are two methods that can be used to try to resolve the problem. One of these methods is extremely simple, even for the most basic users, while the second method takes a little bit more skill and technical knowledge. If you aren’t able to complete these methods on your own, be sure to get in touch with a qualified computer repair technician that can assist you. Here are the best ways to attempt to resolve Error Code 0x80070017 on your device:

Method One:  Clean Your Physical Disk

If you purchased a physical disk version of the installation files for your Windows operating system, remove the disk from your drive and clean it using a microfiber or other lint-free cleaning cloth. As you wipe down the disk, do not use any chemicals, and be sure to wipe gently from the center towards the outside edge rather than the other direction, as failure to do so can damage the disk irreparably.

In some cases, you may need to contact Windows support if you believe that there is an error on the disk itself, such as a scratch, that would prevent the disk from being used as needed in the installation process. They may be able to offer you a replacement disk or you may be able to download a digital copy of the version that you are attempting to install on your machine.

Method Two:  Use the Chkdsk Utility

To determine if there may be an error within the disk drive itself, place the installation disk into the drive and restart the system. Go through the prompts until you see the option to “repair your computer.” Choose the operating system that you are using, go into the menu for System Recovery, and type in the words “Chkdsk/r” to begin to use the tool.

Whenever you run a tool like Chkdsk on your computer, it is important to restart your machine afterward to ensure that any changes that have been made are able to be fully applied and accepted by the operating system that you are running.

Method Three: Use An Automated Tool

If you wish to always have at your disposal a utility tool to fix these Windows 10 and other related issues when they do arise, download and install a powerful automated tool.
Read More
How to Fix Hal.dll Error Code

Repair the Hal.dll Error

Hal.dll Error - What is it?

Hal.dll error is a type of dynamic link library error that is common in Windows. Hal.dll is the critical file in all Windows installations and the error occurs when this file cannot be correctly loaded. Hal is the abbreviation for ‘Hardware Abstraction Layer’. Communication between Windows and different PC hardware is facilitated with this file. The error causes inconvenience and hampers your ability to use the hardware. The error message is displayed in either one of the following formats:
  • "Windows could not start because the following file is missing or corrupt: C:Windowssystem32hal.dll. Please re-install a copy of the above file."
  • "Cannot find WindowsSystem32hal.dll"
  • "C:WindowsSystem32Hal.dll missing or corrupt: Please re-install a copy of the above file."

Solution

Restoro box imageError Causes

Hal.dll error occurs due to multiple reasons. These include:
  • BIOS are not configured properly
  • Damaged hard drive
  • Hal.dll file is missing, damaged, or corrupt
  • Viral Infection

Further Information and Manual Repair

To fix and resolve the Hal.dll error code on your system, you don’t always have to hire a professional technician for the job. Though Hal.dll error is critical but easy to resolve, here are some solutions that you can try to fix it right away even if you don’t have any technical expertise.

1) Restart Your PC

Sometimes this can be a temporary error, so try restarting your PC. If the error is resolved then that’s great. However, if it still persists, then try other solutions.

2) Change the Boot Order

The underlying cause for the Hal.dll error is often not properly configured BIOS; if this is the cause, simply change the boot order of the bootable devices like your hard drive. The BIOS setup utility is used to change boot order settings. This can be done by restarting your PC. Once you restart, press F2 to enter the setup. Now go to SATA operation and change RAID AHCI to RAID ATA. Save changes and then exit. By doing so, you will be able to re-configure the BIOS and resolve the error.

3) Use BOOTMGR

Another way to resolve is to update the volume boot code to use BOOTMGR. To do this, access advanced startup options, open the command prompt and type bootsect command and then press Enter. Run the command and then you’ll get the following message: C: (\?Volume{37a450c8-2331-11e0-9019-806e6f6e6963}) Successfully updated NTFS filesystem bootcode. Bootcode was successfully updated on all targeted volumes. After that close the command prompt. This is most likely to resolve the error.

4) Repair Registry With Restoro.

In case the error is still not fixed, then this means that the problem is bigger than you thought. It may be due to hard drive failure, viral infection, or sometimes because of hal.dll file corruption. In the event of these error causes, it is recommended to download Restoro. Restoro is an advanced, next-generation, and multi-functional PC repair tool embedded with numerous utilities like a registry cleaner, an antivirus, and a system optimizer. The registry cleaner utility:
  • Scans for all registry issues
  • Wipes out the unnecessary files saved in the hard drive like the junk files, cookies, internet history, and temporary files
  • Cleans the disk
  • Repairs damaged and corrupt files
  • Restores the registry
The antivirus utility scans and removes all malicious software from your PC including viruses, Trojans, malware, adware, and spyware. Simultaneously, it also boosts the speed of your system. It is safe and efficient PC repair software. It has simple navigation and a user-friendly interface. Whether you are using Windows 7, 8 or Vista, it is compatible with all. It can also be used on Windows XP. Click here to download Restoro and resolve the Hal.dll error today!
Read More
Fix Windows Update Error 0x8007001E
This post will provide you a couple of fixes you can try to resolve the Windows Update Error 0x8007001E in Windows 10. So if you are one of the users who encountered this particular Windows Update error then you’ve come to the right place. The error code in this error message also happens to be linked to some random BSOD crashes. The error code 0x8007001E is related to a storage space error or out-of-memory-type error. On the other hand, there are also instances when this error has nothing to do with your computer’s space or shortage of memory – it could be that there are broken software components or corrupted system files that are causing this error. Whichever your case is, refer to the options given below to fix the Windows Update Error 0x8007001E.

Option 1 – Run the Windows Update Troubleshooter

Running the built-in Windows Update troubleshooter is one of the things you can first check out as it is known to automatically resolve any Windows Update errors like Error 0x8007001E. To run it, go to Settings and then select Troubleshoot from the options. From there, click on Windows Update and then click the “Run the troubleshooter” button. After that, follow the next on-screen instructions and you should be good to go.

Option 2 – Free up some space on your drive

As mentioned, storage space error or out-of-memory-type error might have something to do with this problem so you need to free up some space on your drive. Make sure that you have enough space on your drive (15GB or so should do) and then restart your computer. After your computer reboots, ensure that all the major RAM hoggers are closed before you try to install the update or upgrade again.

Option 3 – Run the SFC scan

The SFC or System File Checker scan could detect and automatically repair damaged system files that could be causing the Windows Update Error 0x8007001E to appear. SFC is a built-in command utility that helps in restoring corrupted files as well as missing files. It replaces bad and corrupted system files with good system files. To run the SFC command, follow the steps given below.
  • Tap Win + R to launch Run.
  • Type in cmd in the field and tap Enter.
  • After opening Command Prompt, type in sfc /scannow and hit Enter.
The command will start a system scan which will take a few whiles before it finishes. Once it’s done, you could get the following results:
  1. Windows Resource Protection did not find any integrity violations.
  2. Windows Resource Protection found corrupt files and successfully repaired them.
  3. Windows Resource Protection found corrupt files but was unable to fix some of them.

Option 4 – Run the DISM tool

Running the DISM Tool helps in repairing the Windows System Image as well as the Windows Component Store in Windows 10 which might be the reason behind the Windows Update error 0x8007001E. Using this built-in tool, you have various options such as the “/ScanHealth”, “/CheckHealth”, and “/RestoreHealth”.
  • Open the Command Prompt as admin.
  • Then type in this command: exe /Online /Cleanup-image /Restorehealth
  • Do not close the window if the process takes a while as it will probably take a few minutes to finish.
  • Once it’s done, restart your computer and then check if the issue is resolved or not on the next startup.

Option 5 – Perform a System Restore

You can also try to perform a System Restore as it can also help you fix the Windows Update error 0x8007001E. You can do this option either by booting into Safe Mode or in System Restore. If you are already in the Advanced Startup Options, just directly select System Restore and proceed with the next steps. And if you have just booted your PC into Safe Mode, refer to the steps below.
  • Tap the Win + R keys to open the Run dialog box.
  • After that, type in “sysdm.cpl” in the field and tap Enter.
  • Next, go to the System Protection tab then click the System Restore button. This will open a new window where you have to select your preferred System Restore point.
  • After that, follow the on-screen instructions to finish the process and then restart your computer and check if the problem is fixed or not.

Option 6 – Try running Microsoft’s online troubleshooter

You also have the option to run Microsoft’s online troubleshooter which could help you fix Windows Update errors including the Windows Update error 0x8007001E.
Read More
A Guide to Quickly Fixing Error 103

DIY Troubleshooting Error 103

What Is Error 103?

Error 103 is an error that is usually encountered by those who use Google Chrome. This error is usually generated because of a conflict arising between Google Chrome and the antivirus program running on the user’s computer. Primarily, error 103 is an incompatibility issue. It is not critical in nature. However, since it will disrupt the smooth functioning of the browser, it is strongly advised to rectify this error that is generated due to any temporary conflicts between the logic of the two programs namely Google Chrome and antivirus. In layman's terms, it would be only justified to say that this error has a lot to do with the way programs react to each other in real-time.

Solution

Restoro box imageError Causes

When the error is displayed to the user, it usually states something like ‘chrome error 103 connection aborted’, ‘chrome error 103 err_connection_aborted’ or ‘Error 103 (net: ERR_CONNECTION_ABORTED): Unknown error. This begs the question, what triggers this error? Here it is important to understand that Google Chrome constantly applies to upgrade. In most instances, the upgrades almost go unnoticed. In the meanwhile, there are other programs running on any system such as firewall, Antispyware, or antivirus programs. All such programs govern the functionality of the web browser. Now, when the web browser attempts to update and any programs on the system view the update as a threat, the connection to the internet will be terminated. It is also important to understand that these programs will keep you from upgrading or from doing anything with your browser.

Further Information and Manual Repair

google chrome error 103Before we move on to the discussion of fixing the underlying causes for error 103, it is important to understand all those programs that are most likely to generate this error. A list of all such programs is outlined below as follows.
  • Kaspersky Pure 3.0
  • Kaspersky ONE
  • Kaspersky small office security 2013
  • Kaspersky internet security 2013
  • Kaspersky antivirus 2013
A downside associated with error 103 is that it won’t disappear on its own. That’s why it is important to make some manual changes as there are no tools available online to rectify this error automatically. Follow the steps listed below to easily fix the problem.
  • Click on the Start button.
  • In the search box, enter ‘expand.exe’.
  • Right-click on the file that appears and select the option ‘Open Folder Location’.
  • Now, copy the file and paste it at the destination ‘C:\Windows\System32’.
  • If you are not able to find the file, it is advised you copy it from Windows Installation Disk.
  • Now, click on the ‘Start’ button again.
  • Find and select ‘Run’.
  • Now enter ‘C: ’ in the search box and press Ok.
  • Now right-click anywhere on the screen, select new, and then select folder.
  • Rename this folder. Change the name from ‘New Folder’ to ‘Temp’.
  • Now go to the Start button again.
  • Select ‘Run’ once again.
  • Type ‘cmd.exe’ in the command prompt and press Ok.
  • Now type Command. Press enter.
  • Now type this code as it is: ‘set TMP=C:temp’ and press enter.
  • Now restart the browser.
  • If it fails, install Google Chrome once again.
  • Just make sure everything is in sync to avoid any data loss.
Read More
Applications you should remove from Windows
ApplicationsOver time Applications change, some for the better some for worse. Some of them even stop receiving updates and are old and vulnerable. Sometimes standards change and some file types are not used anymore. Software evolves along with technology and that is good. Keeping old and useless applications inside your Windows is not so good. From various exploits to simply taking up space, maybe even slowing down OS it is always wise and good to clean your Windows from unwanted old applications. In this article, we will be mentioning some relics of old and providing you with an explanation of why you should remove them from your system if by any chance you still have them on it.

Silverlight

Silverlight was meant to be a competitor for Adobe Flash, it is a WEB framework that enables rich media content inside your WEB browser. The issue is that it is not developed anymore and today's browsers do not support it. The only browser that actually can support it is internet explorer which itself is not supported and how there is practically 0 content on today's modern WEB that will require Silverlight, it is safe and recommended to remove it.

Adobe Flash

Speaking of Adobe Flash, you should remove it as well. Flash has stopped receiving support as of January 2021 and browsers have dropped support for it and even blocked it due to security issues. However, there still might be some local installation of Flash itself inside Windows along with the old Shockwave player that stopped receiving support in 2019. You should remove them both.

JAVA

Now this one is tricky, by itself JAVA does not present any security issues since browsers do not support it anymore and the desktop version is not really slowing down your computer. This one has simply put just another media runtime that is not used and simply takes up space and resources. However if you have some applications that you do use that rely on it (I can really just think of JAVA Minecraft at this point) leave it of course but in any other case, it is just purely not needed.

Quicktime

While we are at media runtime and stuff that just simply is not needed, Quicktime is one of them. Now this Apple Video player and codec is still pretty developed and active in Apple’s iOS environment, Windows version has not been updated since 2016 and it was discovered that it contains some critical vulnerabilities. Uninstall it and if you need a player that could play MOV files, just use a VLC player that can play them without any separately installed codec.

uTorrent

This one, the same as CCleaner was once a good application, as a matter of fact, it was the best torrenting application. Sadly it has fallen from its grace very low, from getting tons of ads in its interface to findings in 2015 that code of torrent client was packed with a crypto miner that used system resources of an installed computer to mine crypto without user’s awareness. You should uninstall this torrent client if you would like to get your PC back and not provide it for cryptocurrency mining for the company that developed it. Use qBittorrent or TIxati, open-source and free ones that have everything needed for any torrenting needs.

Toolbars and Browser extensions

There are a lot of toolbars for browsers and extensions that are malicious in nature or simply not updated providing security issues. It is very advisable to remove this as soon as possible.

WinRAR

WinRAR has gained its large popularity solely for the reason that you could download it from the official site like shareware and use it forever. The license never expired and you could use it indefinitely. Sadly not much has been improved in the application itself and it is slowly falling out in its range of what it can do. There are better open source and free options today like 7zip, PeaZip, ZIPvare, and more that are working the same as WinRAR if not even better.

Windows and manufacturers Bloatware

Yes, applications that come bundled with Windows and with some laptops that include manufacturers made software for different tasks like its own specific media players, calculators, etc. It is known that these applications are not better than their open-source rivals and there are too many of them including some that you will probably never use. It is the same as buying a new phone bundled with tons of applications that you do not need, did not ask for, and do not use. Delete all of them. Considering Windows there are also some Store application like Candy Crush Saga demo and other are safe to remove if not needed. That’s it, our advice for old and not needed applications so you can keep your PC safe and fast.
Read More
How to remove AudioToAudio (Browser Extension) from your PC

AudioToAudio is a browser extension for Google Chrome developed by Mindspark Inc. This extension allows users easy access to popular audio converting websites.

When installed, it changes the default search engine, home page, and new tab to MyWay.com. While active AudioToAudio gathers user browsing activities such as, but not limited to: visited websites, clicked links, search queries. This data is later used/sold by the Mindspark ad network to better target ads. While browsing the internet with this extension enabled, you will see additional injected ads, sponsored content (such as links to web pages, banner ads, affiliate shop links, etc), and even pop-up ads from time to time if the regular ads are blocked. AudioToAudio has been marked as a Browser Hijacker by several anti-virus applications and is marked for removal by most of them.

About Browser Hijackers

Browser hijacking is a form of unwanted software, commonly a web browser add-on or extension, which causes modifications in web browser’s settings. They are created to interfere with browser functions for various purposes. Typically, hijackers are developed for the benefit of cyber hackers often through revenue generation from forced ad clicks and website visits. However, it isn’t that innocent. Your online safety is compromised and it is also extremely annoying. Some browser hijackers are programmed to make particular modifications beyond the browsers, like changing entries in the computer registry and letting other malware further damage your computer.

How to determine if your browser has been hijacked

When your web browser is hijacked, the following might happen: 1. your web browser’s homepage is suddenly different 2. you get re-directed to sites you never meant to visit 3. The default search page of the web browser is changed 4. discover new toolbars that you simply did not add 5. you see numerous ads pop up on the web browsers or computer screen 6. webpages load slowly and often incomplete 7. Inability to navigate to certain websites, especially antivirus and also other computer security software sites.

How they infect computers

There are many ways your computer or laptop can become infected with a browser hijacker. They usually arrive by way of spam email, via file-sharing networks, or by a drive-by-download. They can also be deployed via the installation of an internet browser toolbar, extension, or add-on. A browser hijacker could also come bundled up with some free software that you unknowingly download and install the browser hijack, compromising your PC security. Some of the most well-known hijackers are AudioToAudio, Babylon Toolbar, Conduit Search, OneWebSearch, Sweet Page, and CoolWebSearch.

Removing browser hijackers

Some hijackers could be removed by just uninstalling the related freeware or add-ons through the Add or Remove Programs in the Microsoft Windows Control Panel. But, the majority of hijackers are quite tenacious and require specialized applications to eliminate them. Novice computer users shouldn’t ever attempt the manual form of removal, as it requires thorough computer knowledge to carry out repairs on the computer registry and HOSTS file. Browser hijackers can be effectively removed by installing and running anti-malware software on the affected PC. Safebytes Anti-Malware has a sophisticated anti-malware engine to help you prevent browser hijacking in the first place, and mop up any existing issues. In addition to anti-malware, a system optimizer tool, similar to Total System Care, could help you resolve Windows registry errors, eliminate unwanted toolbars, secure online privacy, and increase overall computer performance.

How To Get Rid Of Malware That Is Preventing Anti-Malware Installation?

All malware is bad, but certain types of malware do more damage to your computer than others. Some malware types alter internet browser settings by including a proxy server or change the PC’s DNS settings. In these cases, you will be unable to visit some or all internet sites, and thus not able to download or install the required security software to remove the malware. If you are reading this article, you probably have got affected by malware that prevents you from installing a computer security program like Safebytes Anti-Malware. There are a few actions you can take to get around this problem.

Install in Safe Mode

In Safe Mode, you are able to modify Windows settings, un-install or install some applications, and remove hard-to-delete viruses and malware. In the event the malware is blocking access to the internet and affecting your PC, running it in Safe Mode allows you to download anti-malware and run a diagnostic scan whilst limiting possible damage. In order to enter into Safe Mode or Safe Mode with Networking, press the F8 key while the PC is starting up or run MSCONFIG and locate the “Safe Boot” options in the “Boot” tab. Once you are in Safe Mode, you can attempt to download and install your anti-malware software without the hindrance of the malicious software. Now, you can actually run the antivirus scan to remove computer viruses and malware without any interference from another application.

Switch over to a different web browser

Malicious code could exploit vulnerabilities in a particular internet browser and block access to all anti-virus software websites. If you suspect that your Internet Explorer happens to be hijacked by a computer virus or otherwise compromised by cybercriminals, the best plan of action would be to switch to an alternate browser like Chrome, Firefox, or Safari to download your favorite computer security program – Safebytes Anti-Malware.

Install and run antivirus from your Thumb drive

Here’s another solution which is creating a portable USB anti-virus software package that can scan your computer for malicious software without needing installation. Adopt these measures to use a USB drive to fix your infected computer system. 1) Download Safebytes Anti-Malware or MS Windows Defender Offline onto a virus-free computer system. 2) Mount the USB drive on the same computer. 3) Double-click the executable file to run the installation wizard. 4) Choose the USB flash drive as the destination for saving the file. Do as instructed on the screen to finish up the installation process. 5) Transfer the USB drive from the uninfected PC to the infected computer. 6) Double-click the EXE file to open the Safebytes tool from the thumb drive. 7) Run Full System Scan to detect and clean-up up all types of malware.

Protect Your PC and Privacy With SafeBytes Anti-Malware

If you’re looking to install an anti-malware application for your computer, there are several tools in the market to consider but you should not trust blindly anyone, irrespective of whether it is paid or free software. A few of them do a good job in removing malware threats while many will damage your computer by themselves. When searching for an antivirus tool, purchase one that offers reliable, efficient, and complete protection against all known viruses and malware. When considering commercial anti-malware software options, most people choose popular brands, like SafeBytes, and are very happy with them. Safebytes is among the well-established computer solutions companies, which provide this all-inclusive anti-malware application. Through its cutting-edge technology, this software will help you protect your PC against infections brought on by various kinds of malware and other threats, including spyware, adware, computer viruses, worms, trojan horses, keyloggers, potentially unwanted program (PUPs), and ransomware.

SafeBytes anti-malware takes computer protection to a whole new level with its advanced features. Here are a few of the good ones:

Robust, Anti-malware Protection: Safebytes is built on the very best virus engine within the industry. These engines can find and eliminate threats even during the early phases of a malware outbreak. Real-Time Protection: Malware programs trying to enter the computer are identified and stopped as and when detected by the SafeBytes real-time protection shields. This software will constantly monitor your PC for any suspicious activity and updates itself regularly to keep abreast of the constantly changing threat scenarios. Internet Security: Safebytes assigns all websites a unique safety rating that helps you to get an idea of whether the webpage you’re going to visit is safe to browse or known to be a phishing site. Lightweight: SafeBytes is a lightweight application. It uses up a really small amount of processing power as it works in the background so you’re free to use your Windows-based computer the way you want. Premium Support: For any technical problems or product guidance, you may get 24/7 professional assistance via chat and e-mail. Overall, SafeBytes Anti-Malware is a solid program since it has loads of features and could detect and eliminate any potential threats. You now may realize that this tool does more than just scan and eliminate threats from your computer. So when you want advanced forms of protection features & threat detections, purchasing SafeBytes Anti-Malware will be well worth the money!

Technical Details and Manual Removal (Advanced Users)

If you’d like to carry out the removal of AudioToAudio manually rather than utilizing an automated software tool, you can follow these simple steps: Go to the Windows Control Panel, click on the “Add/Remove Programs” and there, select the offending application to uninstall. In case of suspicious versions of web browser plugins, you can easily get rid of them through your browser’s extension manager. You may also want to reset your home page and search engine providers, as well as clear your browser cache and cookies. If you decide to manually delete the system files and registry entries, utilize the following checklist to ensure that you know exactly what files to remove before undertaking any actions. However, this can be a tricky task and only computer professionals could carry it out safely. In addition, some malware is capable of replicating or preventing deletion. It is recommended that you do the removal procedure in Safe Mode. For more information and manual removal instructions visit www.ErrorTools.com Download Safebytes Anti-Malware: https://errortools.com/download/safebytes-anti-malware/ AudioToAudio is a browser extension for Google Chrome developed by Mindspark Inc. This extension allows users easy access to popular audio converting websites. When installed, it changes the default search engine, home page, and new tab to MyWay.com. While active AudioToAudio gathers user browsing activities such as, but not limited to: visited websites, clicked links, search queries. This data is later used/sold by the Mindspark ad network to better target ads. While browsing the internet with this extension enabled, you will see additional injected ads, sponsored content (such as links to web pages, banner ads, affiliate shop links, etc), and even pop-up ads from time to time if the regular ads are blocked. AudioToAudio has been marked as a Browser Hijacker by several anti-virus applications and is marked for removal by most of them.
Read More
1 2 3 162
Logo
Copyright © 2022, ErrorTools. All Rights Reserved
Trademarks: Microsoft Windows logos are registered trademarks of Microsoft. Disclaimer: ErrorTools.com is not affiliated with Microsoft, nor claim direct affiliation.
The information on this page is provided for information purposes only.
DMCA.com Protection Status