What to do if Windows Media Player is not playing the Music Playlist in Windows 10

Many users would probably agree that the Windows Media Player, in most cases, is a lot better than the Groove. Although it is understandable why the Groove Music app was created, it may be time for Microsoft to bring its focus back on Windows Media Player. Even more, so that some users are experiencing an issue where they were not able to play their playlist in the Windows Media Player on their Windows 10 PCs.

One particular user claimed that when he removed his music from the C drive and transferred them to the C drive for some reason he didn’t state. Right after he did that, any attempts to play songs in the Windows Media Player just don’t seem to work. Transferring music to a different location shouldn’t cause any issue but for some unknown reason, it did. According to security experts, the reason why the Windows Media Player didn’t play the playlist is that it still believes that the songs are still located in the C drive when they’re really not. So the question here is, how can you get the Windows Media Player to recognize the exact and correct location of the songs? Worry not, for this post will show you how exactly you can do that.

Carefully follow each one of the instructions given below to fix the Windows Media Player issue.

Option 1 – Try running the WMP Troubleshooters

In case there are any issues with the Windows Media Player, you can always count on the WMP Troubleshooters to fix the problem for you. These built-in troubleshooters, namely, Windows Media Player Library and Windows Media Player DVD Troubleshooters can help you fix the problem, so run them both and see if you can now play those songs or not.

Option 2 – Try rebuilding the Windows Media Player Database

If the first option didn’t work for you, you might have to rebuild the Windows Media Player database. You can do this by following the steps below.

  • Tap the Win + R keys at the same time to open the Run dialog box.
  • After that, copy and paste this command in the field: %userprofile%Local SettingsApplication DataMicrosoftMedia Player
  • Once you’ve pasted the command, hit Enter then you will see a new File Explorer which is the folder for the Media Player. You will have to delete every item in this folder, except for the folders. Meaning to say, you must only delete the individual contents inside but not the folders.
  • Now launch the Windows Media Player again and watch as it rebuilds the music library automatically.
If you like to learn and find out more about various Windows errors, and how to repair them go to our vast archive or use search to find articles that will explain and help you in solving your issue.
However, if you prefer to do things fast and with automatization then we are proposing to use an automated solution for your issues. The application that we are recommending is Advanced System Repair Pro
Advanced System Repair utilizes multiple tools all in one to give you a quick, simple, reliable, and very thorough diagnosis of your PC. It brings you all the tools you need in one program to clean, fix, protect, optimize and boost your PC!
1-Click Maintenance
All the tools to make it simple and easy! It's like having a professional technician at the click of a mouse.

Junk Cleaner
Keeping your computer free from unnecessary clutter also helps make your computer last longer. Like any other machine, if you keep it clean and take care of it, it will serve you better for longer!

Optimize background apps
Optimize applications background activity with the built-in Application Optimizer feature.

Disk Defrag
With a simple 1-click, Advanced System Repair speeds up your PC by assembling fragmented files on your machine and organizing them more efficiently.

Malware Removal
Finds and removes all types of harmful malware including trojans, worms, bots, adware, spyware, PUPs, and more!

Privacy Cleaner
The all-in-one privacy suite to Clean Your Tracks & Protect Your Privacy! Make your computer safe, secure, and more efficient!

System Tweak/Optimizer
ASR will analyze your complete system and settings to adjust your PC to function at its maximum performance.

Registry Cleaner
Over time, as you install and uninstall applications, the registry can become cluttered with old entries and broken settings which can result in program crashes, and annoying messages and slow the computer down.
Visit our Advanced System Repair Pro Download page to inform yourself about all the benefits of this software and get a free trial copy of it.
advanced system repair pro

Advanced System Repair Pro

One-click automated PC repair solution
ASR logo
With Advanced System Repair Pro you can easily
Replace damaged files
Restore performance
Free disk space
Remove Malware
Protects WEB browser
Remove Viruses
Stop PC freezing
DOWNLOAD
Privacy Policy | Terms of Use | Uinstall
Advanced System Repair Pro is compatible with all versions of Microsoft Windows including Windows 11

Share this article:

You might also like

Driver Power State Failure Error in Windows
Driver state power failure error can be linked to three things happening in your computer. Incorrect power settings, driver issues, or incompatible hardware. Sadly when this error happens you only receive a blue screen of death with this message: Blue screen of death driver power state failureSadly receiving this blue screen does not really explain which of the three cases is the correct one and causing the unwanted issue. That being said, this article will not offer you a direct solution this time, it will be more like a guide on what to check and to do in order to remove this error, reason for this is the nature of the error itself. If your computer is booting properly and you can enter Windows without issues the first thing you can try is going into power options and set it to high performance, if you are on a laptop set high performance both ways, when plugged and when on battery. Power performance settings can reflect on some hardware and can cause mayhem. After setting reboot the computer and see if the error repeats itself. If the error persists go to the device manager and see if there is hardware that has any kind of warning beside it. If there is, update the driver or remove the driver of the device to see if this fixes the issue. If all of the previous two things fail there is another thing you could try. Turn off your computer and disconnect all hardware except the most basic one. Now, this may take a long period of time but boot your computer and then repeat this process but each time add a new piece of hardware to eliminate and find which one is causing the issue. When found try to see if it is repairable through driver updates or get a new device.
Read More
Repairing a corrupt Group Policy in Windows
If you recently made some changes in your Windows 10 computer using the Group Policy Editor but they were not reflected and you got errors instead, it could be that your Windows computer wasn’t able to read the Group Policy file (registry.pol). To resolve this kind of issue, you have to repair the potentially corrupted Group Policy using the options given in this post. .As you know, Group Policy is a feature in the Microsoft Windows Active Directory which allows an admin to make changes in the features on Windows PCs that are on the network. So if the modifications you just made weren’t successfully applied, then there could be something wrong with the registry.pol file on the client or it could also be that the Group Policy folder is missing. To fix this issue in the Group Policy, you need to refer to the given suggestions below and make sure that you have admin privileges as you execute them.

Option 1 – Try to delete or recreate the missing registry.pol file

The entire settings of the Group Policy are stored in the registry.pol file so if it went missing, all the changes you make will not be reflected. The good thing is that you can recreate it but if the file exists and is corrupted, you need to delete it first before you recreate it.
  • First, go to the C:/Windows/System32/GroupPolicy/Machine location.
  • And from there, check if the registry.pol file exists or not. If it’s there, just delete it permanently by tapping the Shift + Delete keys.
  • Now it’s time to recreate the file. Just open Windows PowerShell with admin privileges by tapping Win + X + A keys.
  • After opening PowerShell, type this command: gpupdate /force
  • The command you entered will recreate the registry.pol file and will refresh the Group Policy. Restart your computer.

Option 2 – Try recreating the secedit.sdb file

The security settings of Group Policy are stored in the secedit.sdb file so if you made some changes to security and they weren’t reflected, you can try to delete and recreate the secedit.sdb file instead of deleting the Group Policy file. All you have to do is navigate to the C:/WINDOWS/security/Database folder and look for the secedit.sdb file and rename it or move it to another folder. After that, restart your computer. Once your computer has restarted, the secedit.sdb file will be created again.

Option 3 – Try to reset the Group Policy to default

You can also try to reset the Group Policy back to its default state. There are several ways you can do that. You can either use the gpupdate or the secedit command in the Windows PowerShell to do that. Resetting the Group Policy will resolve any issues that could be caused by its current settings.

Option 4 – Try to perform System Restore

System Restore can also help resolve the Group Policy issue. It could be that prior to the issue, you’ve made some changes in the system that might have affected the Group Policy. To undo these changes, perform System Restore.
  • First, tap the Win + R keys to open the Run dialog box.
  • After that, type in “sysdm.cpl” in the field and tap Enter.
  • Next, go to the System Protection tab then click the System Restore button. This will open a new window where you have to select your preferred System Restore point.
  • After that, follow the on-screen instructions to finish the process and then restart your computer and check if the problem is fixed or not.

Option 5 – Use the DISM tool

You can also try running the Deployment Imaging and Servicing Management or DISM tool. This tool will repair the Windows System Image as well as the Windows Component Store in your Windows 10 computer. So if there are any missing or corrupted folders and files, the DISM tool can restore and repair them. As a result, any system consistencies and corruptions will be fixed. To run this tool, follow these steps:
  • Tap the Win + X keys and click on the “Command Prompt (Admin)” option.
  • After that, input each one of the commands listed below sequentially to execute them:
    • Dism /Online /Cleanup-Image /CheckHealth
    • Dism /Online /Cleanup-Image /ScanHealth
    • Dism /Online /Cleanup-Image /RestoreHealth
  • Once you’ve executed the commands given above, restart your computer.
Read More
A Patch for Windows Code 44 Error

Quickly Solve Windows Error Code 44

Error Code 44 – What is it?

Error Code 44 is a device driver error that users encounter when using Windows 2000 operating system and later versions.

It is when the peripheral device that is connected to the computer, such as a printer or a fax machine, cannot be accessed as the programs required for operation interfere with other software on the computer. The error code will pop up with the following message:

“An application or service has shut down this hardware device. (Code 44)”

Solution

driverfix boxError Causes

Error Code 44 is caused when the program that you are using shuts down the peripheral device installed on your system. It is triggered by the following:
  • Corrupted system registry entries
  • Device driver files are outdated
  • Device driver files are missing
It is critical to fix the Error Code 44 as it can pose serious risks to the wellbeing of your PC.

Further Information and Manual Repair

While bothersome, like other error codes, error code 44 to is relatively easy to fix. Here are ways to help resolve the error.

Method 1 – Restart your PC

The easiest method you can use to solve your PC error code is to simply run a restart of your Windows system. It may be that the error prompted upon connecting the device you have connected is merely a temporary problem, and upon restart, will resume functioning smoothly.

Method 2 – Run the Troubleshooting Wizard

If restarting your PC does not help, you will have to find the exact nature of the problem by running the troubleshooting wizard for the device and address the problem accordingly. To do this, proceed with the following steps:

  • Run Device Manager on your PC
  • Click on the program under the installed programs that are creating problems for you
  • Click on the ‘General’ Tab
  • Click ‘Troubleshoot’
  • Upon opening, the Troubleshooting Wizard will ask a series of questions regarding the error. Answer the questions and follow its directions for solving the error code.

After following the directions of the Troubleshooting wizard, make sure to restart your PC for the changes to take effect. Then check if your device is still causing problems.

Method 3 – Manually uninstall and reinstall the device driver

If troubleshooting does not work, you may have to resort to manually uninstalling and then reinstalling the device driver causing the problem.

This would be necessary since the remaining incomplete files due to a partial removal or installation of programs is what contributes to the error code. A fresh install, after uninstallation of the previous drivers, would lead to the completion of the files.

You can do this by firstly logging in as Administrator and opening Device Manager. Select the device that is causing the problem and double click it and make sure that the peripheral is connected properly to the PC.

Upon opening, click on the ‘Driver’ tab and then select ‘Update Driver’. Make sure to refer to the system documentation that you received with your PC or computer to check for the motherboard details and driver specifics.

Method 4 – Use software to automatically download the driver

Manually uninstalling and reinstalling the driver will do the trick, however, it may be time-consuming especially when you would have to resort to your hardware user manual.

Therefore, using a program such as DriverFIX can save you a lot of time and frustration in having your device work properly on your computer.

Driver Assist, with its user-friendly approach to help you fix your PC issues, comes with an integrated database that detects which drivers you need to reconfigure within just a few seconds and downloads it automatically.

It further ensures that your drivers are installed in their entirety leaving no room for any incomplete files to remain that create Error Code 38.

It also has the added advantage of being able to backup and restores your files should there be the slightest possibility of system file damage. DriverFIX is the answer to fixing your PC error codes accurately and quickly.

Click here to download DriverFIX to fix Error Code 44 quickly and effectively!

Read More
Fix Realtek HD audio driver issue
Realtek sound device not playing sound is a common Windows issue.  It happens occasionally and luckily it can be solved with a little effort and in a short time period. Today in this article we will explore the most common reasons and solutions for driver malfunction for Realtek inside Windows 10. If you have this particular problem, go from step 1 to the last step since all steps are meant to go from simplest to the most complex. All of that being said let us fix your Realtek driver issue.
  1. Check Speakers or/and Headphones first

    The first thing would in any troubleshooting be to check are your speakers turned on or are your headphones connected and the volume or switch on them is set properly. Nothing more embarrassing than spending an hour or so troubleshooting only to find out that issue was in a malfunction of speakers or them not being turned on.
  2. Check the Volume control in Windows

    Same as the previous step where you have checked hardware, now it is time to check to see if the volume control is set properly and not by any chance muted or volume is brought all the way down.
  3. Check if the Device Manager is reporting an error and update the driver

    If both hardware is functioning properly and volume control in Windows is set correctly then the issue might be in Windows not detecting device or driver malfunction. In any case, the Device Manager will be the one who will report this problem. In order to check to see if the driver is properly working press ⊞ WINDOWS + X to open the hidden start menu. keyboard with windows and x marked Once it opens, click on Device Manager to open it, realtek audio driver in device menager If you have a driver device error inside Windows, you should see it immediately when entering the Device Manager, it will have a yellow exclamation mark beside it. Right-click on it and choose update driver.
  4. Reinstall driver

    If driver update failed or you already have the latest drivers, reinstalling them could fix the issue since drivers might have corrupted during installation of some update or application. Follow steps from point 3 to get to the driver in Device Manager, then right-click on it but instead of update choose to uninstall. Reboot Windows once the driver is uninstalled and Windows will install a new one.
  5. Check Windows update

    Check to see if the latest Windows update is installed, update your Windows if needed
  6. Fix driver issue with DRIVERFIX

    If everything else fails, get DRIVERFIX, a premium solution for your PC issues, and fix driver errors.
Read More
Windows 365, what it is, and how you can get it
Windows 365
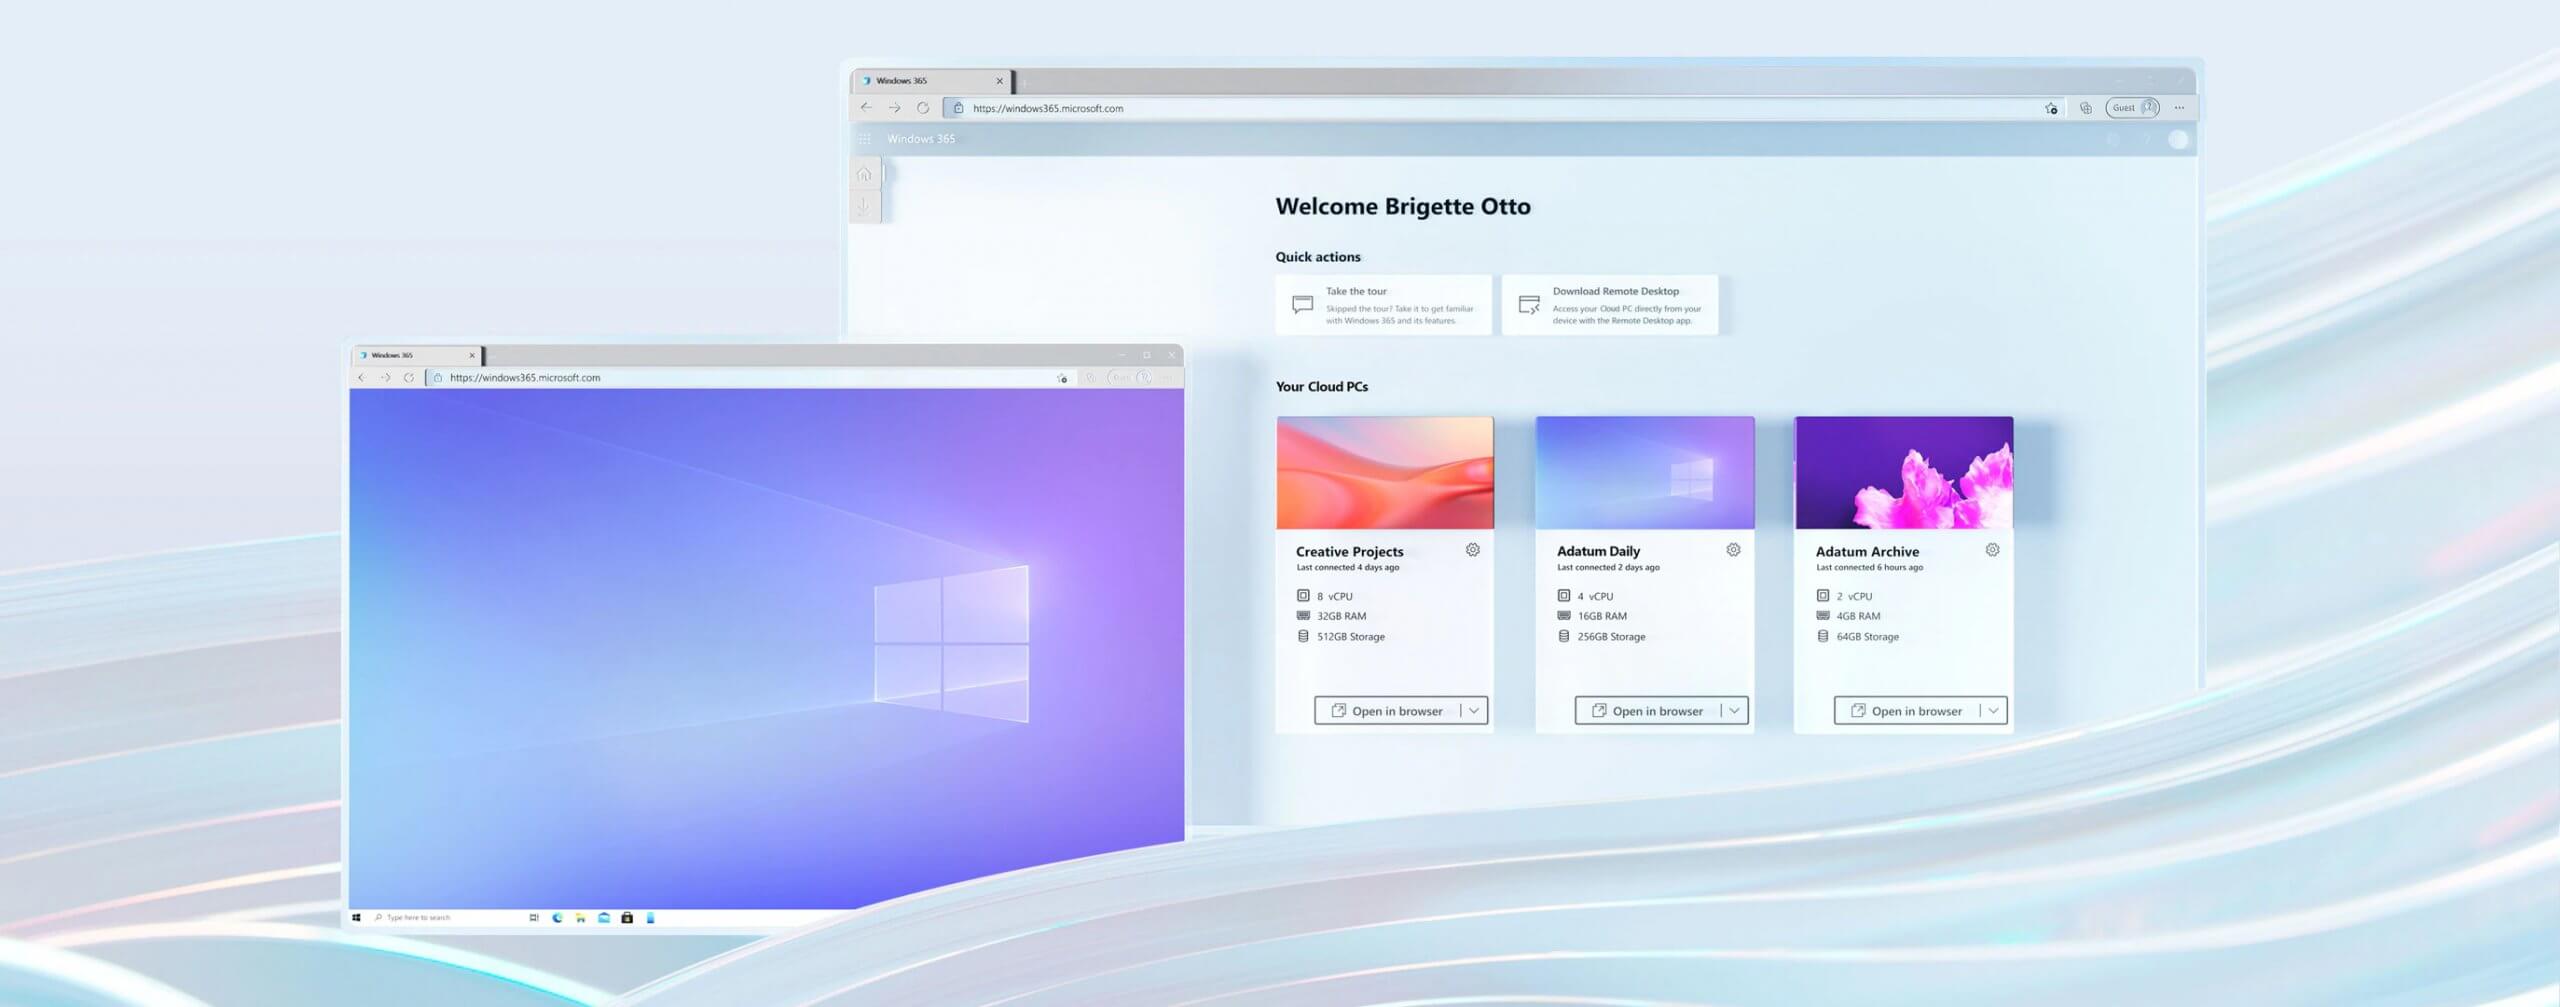
Microsoft has announced Windows 365, a new cloud-based operating system aimed mainly at businesses of all sizes. Just after Windows 11 announcement and presentation, we are seeing another Windows announcement from Microsoft. Dive into the following text in order to find out what exactly is new Windows 365, its role in today's IT world, and do you need it?

What is Windows 365 and when it is coming out?

Windows 365 is planned to be released this year (2021) on August 2nd. It is the first Microsoft cloud-based operating system meaning that OS itself will be installed on the cloud server and it will be accessed by the user via a web browser. Essentially you are accessing a remote PC with Windows on it, you can install whatever Windows application you want and use it as it was on your computer. When you disconnect from the cloud computing and reconnect again from the same or another device you will continue exactly where you left off. Cloud PC will remember the state it was left off and will greet you in that same state once it is awakened again. This of course offers some great benefits like moving from laptop to desktop and continuing exactly where you left off.

How can I access Windows 365?

Any device which has a web browser will be able to access Windows 365 making it a really great solution for business on the move or for anyone who switches devices during the day. That being said it is clear to see that Windows 365 can be accessed via Linux, macOS, iOS, Android, or any other operating system on any computer, tablet or phone.

Who is this OS made for?

Microsoft’s general idea is that Windows 365 is primarily made for business which in their minds can benefit most out of it. So far it is not made for a single user although there is a possibility that even a one-man business can subscribe and create accounts for it.

Price and technical characteristic

Microsoft will bill Windows 365 on a per-user, per-month basis. In other words, businesses will pay a fixed amount per employee every month. There will be two tiers: Windows 365 Business and Windows 365 Enterprise. Microsoft also said it will offer different performance tiers. Businesses can choose to pay for more CPU, RAM, and storage resources for certain cloud PCs depending on their needs. Microsoft told me the smallest configuration would be one CPU, 2GB of RAM, and 64GB of storage. The largest will be eight CPUs, 32GB of RAM, and 512GB of storage. After a business has chosen its plan tier and performance options, that business will pay a fixed amount every month. This is unlike Azure Virtual Desktop, which Windows 365 is built on. With Azure Virtual Desktop, companies pay on a usage model, depending on how much the remote system is used every month.

Conclusion

Windows 365 is around the corner and if you are a business no matter small or large with the need for software on the go, Windows 365 might be a worthwhile investment and a great asset to your business.
Read More
What is HEIF file format and how to use it?
High Efficiency Image File Format (HEIF) is a container format for individual images and image sequences. The standard covers multimedia files that can also include other media streams, such as timed text, audio, and video. A HEIF image using High-Efficiency Video Coding, HEVC, requires only about half the storage space as the equivalent quality JPEG. HEIF also supports animation and is capable of storing more information than an animated GIF or APNG at a small fraction of the size. HEIF files are a special case of the ISO Base Media File Format (ISOBMFF, ISO/IEC 14496-12), first defined in 2001 as a shared part of MP4 and JPEG 2000. Introduced in 2015, it was developed by the Moving Picture Experts Group (MPEG) and is defined as Part 12 within the MPEG-H media suite (ISO/IEC 23008-12). HEIF was adopted by Apple in 2017 with the introduction of iOS 11, and support on other platforms is growing.

HEIF files can store the following types of data:

Image items
Storage of individual images, image properties, and thumbnails.
Image derivations
Derived images enable non-destructive image editing and are created on the fly by the rendering software using editing instructions stored separately in the HEIF file. These instructions (rectangular cropping, rotation by one, two or three quarter-turns, timed graphic overlays, etc.) and images are stored separately in the HEIF file, and describe specific transformations to be applied to the input images. The storage overhead of derived images is small.
Image sequences
Storage of multiple time-related and/or temporally predicted images (like a burst-photo shot or cinemagraph animation), their properties, and thumbnails. Different prediction options can be used in order to exploit the temporal and spatial similarities between the images. Hence, file sizes can be drastically reduced when many images are stored in the same HEIF file.
Auxiliary image items
Storage of image data, such as an alpha plane or a depth map, which complements another image item. These data are not displayed as such but used in various forms to complement another image item.
Image metadata
Storage of EXIF, XMP and similar metadata which accompany the images stored in the HEIF file.
Read More
Managing the Local Users and Groups
As you know, Windows PowerShell is a useful command-line utility in Windows 10 that can be used to manage the Local Users and Groups which affirms the multiuser operating system principle of Windows 10. Although there are other GUI-based utilities used to manage the Local Users and Groups, there are some system administrators that would still like to use the command-line utility to manage these Local Users and Groups. So in this post, you will be guided on how exactly you can manage the Local Users and Groups using PowerShell on your Windows 10 computer. To get started, refer to the options provided below to manage both the Local Users and Groups using Windows PowerShell.

Option 1 – Manage the Local Users via Windows PowerShell

  • You need to first open Windows PowerShell as an admin. To do that, just tap the Win + X keys and select the Windows PowerShell (Admin) option.
  • After opening PowerShell, you need to execute the “Get-LocalUser” cmdlet so that you can find all the details about all the local user accounts in your computer which would include the Account Name, Enabled status, as well as description.
Note: On the other hand, you can also get the customized data about several objects that are related to your account. For instance, if you want to check when was the last time the Local account’s password was set, then you need to execute the “Get-LocalUser -Name root | Select-Object PasswordLastSet” cmdlet. Thus, the structure for this cmdlet is “Get-LocalUser -Name root | Select-Object *”. Here are the objects you can use to get different sorts of data:
  • AccountExpires
  • Description
  • Enabled : True
  • FullName
  • PasswordChangeableDate
  • PasswordExpires
  • UserMayChangePassword
  • PasswordRequired
  • PasswordLastSet
  • LastLogon
  • Name
  • SID
  • PrincipalSource
  • ObjectClass

Option 2 – Manage the Local User Groups using Windows PowerShell

  • Like what you did earlier, open Windows PowerShell as admin and then execute the “Get-LocalGroup” cmdlet so you can get all the information about all the groups of all the local user accounts.
  • Now if you want to create a new Local User Group, just execute the “New-LocalGroup -Name <NAME OF THE GROUP> -Description '<ENTER THE DESCRIPTION OF THE GROUP HERE>'” cmdlet.
  • And if you want to add Local User Accounts to a specific group, just execute the “Add-LocalGroupMember -Group '<NAME OF THE GROUP' -Member ('NAME 1','NAME 2','<ROLE>') -Verbose” cmdlet. You could also use the “Get-Localuser -Name john | Add-LocalGroupMember -Group '<NAME OF THE GROUP>'” cmdlet for the same purpose.
  • If you want to display all the User Accounts of a specific group, just use the “Get-LocalGroupMember –Group ‘ ’” cmdlet.
  • Now if you want to remove a local user account from a group, all you have to do is use the “Remove-LocalGroupMember -Group '<NAME OF THE GROUP>' –Member <NAME OF THE LOCAL USER ACCOUNT>” cmdlet.
Read More
How to Fix the Dnssd.dll Error Code

Repair Dnssd.dll Error

What is Dnssd.dll Error Code?

Dnssd.dll is a type of dynamic link library. It is developed for Windows Operating System by Apple Computer Inc. The latest version of fnssd.dll is 3.0.0.10 used in Windows Vista.  This file also functions like a typical dynamic link library.  DDL files are small programs similar to executable files which are used by multiple programs to load and run properly. Dnssd.dll error occurs when the dnssd.dll file fails to function properly and load to run the desired application/program.  The error may occur most often during computer startup and program startup. The dnssd.dll error message may be displayed on your PC on either one of the following formats:
  • "Dnssd.dll not found."
  • "Dnssd.dll Access Violation."
  • "Cannot register dnssd.dll."
  • "The file dnssd.dll is missing."
  • "Cannot find C:WindowsSystem32\dnssd.dll."
  • "This application failed to start because dnssd.dll was not found. Re-installing the application may fix this problem."
  • "Cannot start Bonjour. A required component is missing: dnssd.dll. Please install Bonjour again."

Solution

Restoro box imageError Causes

To narrow down the cause of the dnssd.dll error is difficult virtually because there are multiple reasons why this error occurs on your system. However, here are the most common causes for this error:
  • Missing  Dnssd.dll file
  • Corrupt and damaged Dnssd.dll file
  • Invalid  dnssd.dll registry entry
  • Viral Infection
  • Improperly shutting down your PC
  • Poor PC maintenance
  • Broken registry keys
  • Hardware failure
  • Dnssd.dll file deleted when uninstalling another program
It is advisable to fix this error right away, as it can create many troublesome problems on your PC such as slow system performance, computer freeze up, blue screen of death errors, system failure, and crash.

Further Information and Manual Repair

Here are some of the best and easiest DIY solutions that you can try to resolve this issue on your PC without hiring a professional.

1. Use System Restore Function

Since this error largely indicates poor PC maintenance, it is advisable to use the System Restore function built-in Windows to resolve the Dnssd.dll file error. It will help you restore the system back to its previous healthy status. It can also help you get a fresh copy of damaged and corrupted files. Here’s what you need to do:
  • Go to the start menu of Windows, type restore in the search box.
  • Choose the option that says ‘choose a different restore point’ this presents customizable options for users.
  • Here you will be presented with a list of restore points, choose the one that you believe has most likely caused the dnssd.dll error.
  • Confirm your selection.
This will help resolve the error. Now restart to see changes made. If the error still persists then try other solutions given below.

2. Reinstall the Program Causing the Dnssd.dll Error to Pop Up

As dll files are shared files, there is a possibility that the file got deleted when you tried to uninstall a certain program. Therefore, if this is the reason, then try to reinstall the program that is causing the error message. By doing so, you can set up the dnssd.dll file again on your PC.

3. Scan for Viruses and Registry Issues

Other reasons for the error are associated with viral infection and registry issues. Therefore it is advisable to download software to scan for these issues and remove them from your PC. Viruses can also corrupt dll files. On the other hand, dll errors like Dnssd.dll can also occur if the registry is not cleaned frequently. The registry becomes corrupt due to the accumulation of invalid/wasted and irrelevant files. This also causes disk defragmentation and hard disk problems which can also lead to hardware failure and dll file damage and corruption. Now to repair it you can either download 2 different programs, an antivirus, and a registry cleaner, or you can install multi-functional and advanced software, Restoro. Downloading 2 separate programs can reduce your PC performance even furthermore. Therefore we recommend you opt for Restoro. This is a one-stop solution for all your PC problems. It includes multiple utilities like an antivirus that detects all malicious software including spyware, malware, adware, Trojans, and viruses. A powerful registry cleaner that resolves all registry issues, wipes out bad registry entries and repairs broken registry keys, damaged dll files like Dnssd.dll, and restores the registry back to its optimum health. This software also functions as a system optimizer that boosts the speed of your PC dramatically. It is safe, bug-free, and efficient. All PC issues are resolved in seconds in just a few clicks. It is user-friendly and compatible with all Windows versions. Click here to download Restoro and resolve the dnssd.dll file error right away!
Read More
New Windows 11 keyboard shortcuts
New Windows brings new keyboard shortcuts, most of them are tied to new features and we are presenting you some new ones that are worth remembering. keyboad shortcuts⊞ WINDOWS + N - notification panel ⊞ WINDOWS + W - News and Interests feed With the News and Interests feed, Windows 11 offers users the ability to check the latest news, the weather, and more without opening a browser window. ⊞ WINDOWS + Z - Snap Layout Instead of the usual two windows snapping capability, Windows 11 allow users to snap their windows in a three-column layout. Users can access this by pressing Windows Key and Z to access the Snap layout. ⊞ WINDOWS + PRT SCN - taking screenshots This one isn’t exactly new, but pressing the Windows Key and Print Screen will automatically capture the entire screen and save a copy of the image on your PC. Once the screen flashes, you will know that the screenshot has been taken, after which you can find the file saved under your Pictures folder in a subfolder called Screenshot. ⊞ WINDOWS + C - Microsoft Teams chat Microsoft Teams app, the service allows anyone with a Microsoft account to quickly start a chat using the Windows + C shortcut.
Read More
An intelligent Solution to Repair Outlook PST Mailbox Errors

Repair Outlook PST Mailbox Errors

Outlook PST Mailbox Errors Malfunctions

Can you use an MS-Outlook e-mail account to send and get workplace e-mails on a daily basis? Are you using the exact same Outlook e-mail account for a long time? Are you getting PST Mailbox Errors? Then you have developed awareness and knowledge about Outlook PST Errors. Ms-outlook essentially stores the email items in a PST record. This includes all attachments, contacts, calendar items, your e-mails and records. You might encounter various kinds of Outlook Inbox error messages exhibited on the display in extended formats eg. 0x80040600 0x8004060c or 0x80040116. All all these are Outlook mailbox malfunctions that stop the Outlook program from executing jobs correctly and thus restricting your capacity to gain access to your e-mail account, see attachments, contacts, and calendar items that are significant.

Error Causes

There's not a single particular trigger for Outlook email malfunctions. A few causes can trigger these, but, the most frequent are virus contamination, 2 GB limit is exceeded by PST file and broken. There are no specific signals which will help help you identify but some pointers to look at include the following:-
  • You cannot access certain parts of your Outlook interface
  • Obscure error messages start popping on your screen
  • You can’t add new contacts or change entry data in your calendar

Further Information and Manual Repair

When you experience these signs related to PST Inbox errors, it is advisable to repair the problem immediately to ensure it does not cause inconvenience for you and hampers your communication via Outlook emails. Remember this error not only inconveniences you but also hinders proper communication between various business partners. Determining the ultimate reason for distinct Outlook email malfunctions could be tricky, time-consuming, and might need specialized knowledge to nail it down with regards to fixing the Outlook mailbox malfunctions. In case you are not a specialist, working out and fixing this problem is an uphill process. To simplify this process, obtain and install an Outlook PST Repair Tool! This is an intelligent solution to fix all kinds of Outlook errors. You do not have to go deeper into the technical details of the problem. The Outlook PST Repair tool does it for you. An inbox repair tool identifies and also repairs all sorts of MS Outlook errors in seconds. It is easy to use, highly functional, safe and efficient. By installing an Outlook repair tool, Outlook errors can be easily removed from your computer and keep the errors from happening again. It also fixes damaged PST files and damaged e-mails can help regain data. Whatever you should do is to begin:
  1. Click here to download the inbox repair tool
  2. Install the software on your system
  3. Run it and click restore to resolve Inbox errors
Read More
1 2 3 162
Logo
Copyright © 2022, ErrorTools. All Rights Reserved
Trademarks: Microsoft Windows logos are registered trademarks of Microsoft. Disclaimer: ErrorTools.com is not affiliated with Microsoft, nor claim direct affiliation.
The information on this page is provided for information purposes only.
DMCA.com Protection Status