Fixing “Could not find this item. This is no longer located in [Path]. Verify the item’s location and try again” Error in Windows 10

If you are trying to access a particular file on your Windows 10 computer either to open, rename or delete it, and you suddenly encounter an error stating, “Could not find this item. This is no longer located in [Path]. Verify the item’s location and try again”, read on for this post will help you out in resolving this issue.

If you are able to find and view a file on your computer, you should have clear access to it. And since you are seeing an error message when you try to do something about this file, you are not able to do anything with the file. There are times when this error pops up with the files created by third-party services and that the file’s extension is not defined properly. On the other hand, there are also other obscure causes for this error. To fix it, here are some suggestions you can try.

Option 1 – Delete the file using Command Prompt

If you wish to delete the problematic file and weren’t to, you can use Command Prompt.

  • In the Start menu, type in “Command Prompt” to search for it or you could also click the search button right next to the Start menu and then right-click on the related result and select the option “Run as administrator”.
  • Once you’ve opened Command Prompt, copy and paste the command given below and tap Entre after you do so. You also have to make sure that you key in the correct path where the file is located as well as its name.

rd /s \?X:badfolderpath

Note: In the command above, “X” is the placeholder letter so you must input the letter that corresponds to the drive’s letter where the file is located.

  • After that, you will see the “Operation completed successfully” message on your screen. If you don’t, check if you’ve really inputted the correct location of the file or its name.

Option 2 – Use a Command Prompt tweak to rename the file

If you don’t want to delete the file and only want to rename it, you can apply some tweaks using the Command Prompt. Make sure to follow the steps carefully.

  • In the Start menu, type in “Command Prompt” to search for it or you could also click the search button right next to the Start menu and then right-click on the related result and select the option “Run as administrator”.
  • After opening Command Prompt, type in “cd” followed by the path where the file is located with this format – “C:\Folder1\Folder2\Folder3”. However, you have to omit the problematic file this time. To put it simply, the last folder in the command must be the folder where the file is located.
  • After inputting the command, tap Enter on your keyboard and then use the set of commands given below. Note that each command is a new line so you need to tap Enter after copying each line.
    • DIR /A /X /P
    • RENAME (the current name of the problematic file) (a non-problematic name)
    • EXIT

Note: Make sure that you only input the current name and the new name separated by a space. You must not write the brackets in the command. If everything goes well, you will now be able to operate the file like you used to before.

Option 3 – Use Command Prompt to delete the file without any extension

This option applies to cases where the affected file does not have any viable extension which means that Windows does not really know what to do with it and it only displays the “Could not find this item. This is no longer located in [Path]. Verify the item’s location and try again” error message. It usually occurs with the files created by browser plugins that are mostly from Mozilla Firefox. To delete these kinds of files, here’s what you have to do:

  • Follow the first two steps from the previous option above so you can navigate to the location of the file accurately just be careful in inputting the folders.
  • Don’t forget to tap Enter right after each command and then use the next command below so you can delete the affected file which has no extension:

del *.*

  • After you’re done, open the File Explorer and then check if the file is now deleted or not.

Option 4 – Try using another workaround without using Command Prompt

This option is a lot like a workaround but it definitely gets the job done for you. It’s ideal for you if you do not want to deal with Command Prompt and only want to do everything in a graphical environment. To get started, follow the steps below.

  • Look for the affected file or folder on your PC using File Explorer. Once you found it, right-click on it and select the “Add to archive” option from the context menu.
  • Once the archiving options window pops up, look for the
    “Delete files after archiving” option and make sure that you select it then click OK to start archiving the folder or file. After that, you should now notice the file no longer exists.
  • After that, delete the archive file as well.
If you like to learn and find out more about various Windows errors, and how to repair them go to our vast archive or use search to find articles that will explain and help you in solving your issue.
However, if you prefer to do things fast and with automatization then we are proposing to use an automated solution for your issues. The application that we are recommending is Advanced System Repair Pro
Advanced System Repair utilizes multiple tools all in one to give you a quick, simple, reliable, and very thorough diagnosis of your PC. It brings you all the tools you need in one program to clean, fix, protect, optimize and boost your PC!
1-Click Maintenance
All the tools to make it simple and easy! It's like having a professional technician at the click of a mouse.

Junk Cleaner
Keeping your computer free from unnecessary clutter also helps make your computer last longer. Like any other machine, if you keep it clean and take care of it, it will serve you better for longer!

Optimize background apps
Optimize applications background activity with the built-in Application Optimizer feature.

Disk Defrag
With a simple 1-click, Advanced System Repair speeds up your PC by assembling fragmented files on your machine and organizing them more efficiently.

Malware Removal
Finds and removes all types of harmful malware including trojans, worms, bots, adware, spyware, PUPs, and more!

Privacy Cleaner
The all-in-one privacy suite to Clean Your Tracks & Protect Your Privacy! Make your computer safe, secure, and more efficient!

System Tweak/Optimizer
ASR will analyze your complete system and settings to adjust your PC to function at its maximum performance.

Registry Cleaner
Over time, as you install and uninstall applications, the registry can become cluttered with old entries and broken settings which can result in program crashes, and annoying messages and slow the computer down.
Visit our Advanced System Repair Pro Download page to inform yourself about all the benefits of this software and get a free trial copy of it.
advanced system repair pro

Advanced System Repair Pro

One-click automated PC repair solution
ASR logo
With Advanced System Repair Pro you can easily
Replace damaged files
Restore performance
Free disk space
Remove Malware
Protects WEB browser
Remove Viruses
Stop PC freezing
DOWNLOAD
Privacy Policy | Terms of Use | Uinstall
Advanced System Repair Pro is compatible with all versions of Microsoft Windows including Windows 11

Share this article:

You might also like

Close non responsive application in Windows
We have all been there, unfortunately, the application freezes, and sometimes it can even freeze whole windows. Well if the whole Windows freezes because of the application there is not much we can do except hard reset but if only the application freezes we can still kill it and return the PC in working condition. The first thing you can try is to press ALT + F4, this shortcut is for closing the program, if the application is frozen Windows will try to close it when using this shortcut, and if it succeeds you will find yourself on the desktop environment in Windows with non-responsive application taken care of. If however, this fails and the application is not closed, try ending it in the task manager. To open task manager press CTRL + SHIFT + ESC, locate unresponsive application select it, and click on the end task button on the bottom right.
Read More
Fix ERR_EMPTY_RESPONSE error in Chrome
It is a fact that Google Chrome is one of the world’s most used web browsers and it’s because this search giant is focused on following the standards of the web. Although this web browser has become quite bloated over the years, it still remains at the top of the list of browsers used most by users. If you are a user of Google Chrome for a long time now, you have most likely come across a couple of issues in the past while using this browser. In this post, we’ll help you fix one of the issues commonly encountered in Chrome which is the “No Data Received – ERR_EMPTY_RESPONSE” error. This kind of error message in Chrome pops up when you try to log into a website. It isn’t clear what’s the cause of this error but worries not, for there are several ways you can try to fix it.

Option 1 – Try checking if your network connection is working

The No Data Received – ERR_EMPTY_RESPONSE error is not usually related to a downed network. However, anything is possible so you need to check if your internet connection is working just fine or not as it might be the reason why you’re getting this error in Chrome.

Option 2 – Try resetting the network

There are instances when a network goes into haywire because of a bad DNS. Thus, a bad DNS might be the one that’s causing this headache so it’s time for you to reset the entire network to resolve the issue. To reset the network, here’s what you have to do:
  • Click the Start button and type in “command prompt” in the field.
  • From the search results that appear, right-click on Command Prompt and select the “Run as administrator” option.
  • After opening Command Prompt, you have to type each one of the commands listed below. Just make sure that after you type each command, you hit Enter
    • ipconfig /release
    • ipconfig /all
    • ipconfig /flushdns
    • ipconfig /renew
    • netsh int ip set dns
    • netsh winsock reset
After you key in the commands listed above, the DNS cache will be flushed and the Winsock, as well as the TCP/IP, will reset.
  • Now restart your computer and open Google Chrome then try opening the website you were trying to open earlier.

Option 3 – Try to clear the browsing data of Google Chrome

If your browsing data in Chrome hasn’t been cleared for some time now then that might be the reason why you’re suddenly getting the ERR_EMPTY_RESPONSE error when you browse the web. To fix this error, you need to clear your web browsing data. Refer to the following steps to do so.
  • Tap the Ctrl + Shift + Delete buttons to go to the Clear browsing data section in Chrome.
  • Next, set the time range to “All time” and tick all the boxes and then click on the Clear data button.
  • After that, restart the Chrome browser and try to open the website you were trying to open earlier.

Option 4 – Reset Google Chrome

If none of the options given above worked, you can try resetting the Chrome browser. To do that, follow these steps:
  • Open Google Chrome, then tap the Alt + F keys.
  • After that, click on Settings.
  • Next, scroll down until you see the Advanced option, once you see it, click on it.
  • After clicking the Advanced option, go to the “Restore and clean up an option and click on the “Restore settings to their original defaults” option to reset Google Chrome.
  • Restart Chrome and check if you can now open the webpage or not.
Read More
How to Fix Fatal Error c000021a

Repair Error c000021a

Fatal Error c000021a - What is it?

Fatal Error c000021a is a type of Windows stop error also known as the blue screen of death (BSoD) error. When this error occurs, it causes the computer screen to go blue and locks the user out of the current activity. This error code is fatal and can lead to serious issues like system crashes and freeze. The error code is usually displayed in the following format:
STOP: c000021a {Fatal System Error} The Windows Logon Process system process terminated unexpectedly with a status of 0xc0000034 (0x00000000 0x0000000)

Solution

Restoro box imageError Causes

Fatal Error c000021a occurs when the Windows kernel detects that either Winlogon.exe or Csrss.exe service processes have stopped responding or failed to load.  When this happens the error code pops up on the screen. Nonetheless, this is not the only reason for the occurrence of this error. There are plenty more reasons why Fatal Error c000021a may pop on your computer screen. These include:
  • Missing or corrupt hardware drivers
  • Faulty hardware
  • Windows System Restore failed during the rollback process
  • Malware or viral infection
  • Registry issues
No matter what the reason may be, it is advisable to fix the error right away without any delays. Remember it is a fatal error and can cause a great deal of damage to your PC.

Further Information and Manual Repair

Fatal Error c000021a is a serious PC issue but this does not mean you have to hire an expert to get it fixed. The good news is that this error is actually quite easy to resolve. You don’t have to be a technical whiz or a computer programmer to fix Fatal Error c000021a on your PC. Here are some do it yourself methods to fix this error code right away without any hassle: Let’s get started:

Method 1: Update Your PC Drivers

As we mentioned about corrupt or missing drivers can be one of the many reasons for the occurrence of this error. So, check the drivers first. Perform a driver scan and make sure all your drivers are updated.

Method 2: Perform a Windows System Restore

To do this, first launch Task Manager by pressing CTRL+SHIFT+ESC on your keyboard. Now click on the application tab and then click ‘New Task’ then browse. After that, go to C:\Windows\System32\Restore  folder and then double click the rstrui.exe file. This will help start system restoration. Your computer will reboot during the process and hopefully, the error will be resolved. Nonetheless, if the error still persists then try methods 3 and 4.

Method 3: Scan for Viruses

Sometimes Fatal Error c000021a may also occur due to malware infection. Your PC may be affected by viruses hidden in different locations without you knowing about it. Therefore to resolve this error, it is recommended to run an antivirus and scan for viruses. If detected, remove them right away to fix the error code.

Method 4: Repair the Registry

Another method to resolve Fatal Error c000021a code on your system is to repair the registry. The registry stores all the information and activities performed on the system. If it is not cleaned frequently, it gets loaded with too many files unnecessary and obsolete files like the junk files, cookies, internet history and temporary files which corrupts and damages the registry thereby generating blue screen of death error codes like Fatal Error c000021a. Though you can repair the registry manually it can be both time-consuming and slightly difficult especially if you are not a computer programmer. Therefore it is advisable to download a registry cleaner to fix it right away.

Automatic Repair with Restoro.

Whether the Fatal Error c000021a code occurs due to viral infection or registry issues, download Restoro. This is a next-generation, advanced, and multi-functional PC Fixer. This software is deployed with multiple utilities such as a powerful registry cleaner, an antivirus, a system optimizer, and more. The registry cleaner scans the entire PC and detects all types of registry issues at once. It cleans the registry, wipes out all the unnecessary files, and restores the registry back to normal. Simultaneously, the antivirus embedded in this software detects all types of viruses including malware, adware, spyware and Trojans and removes them in seconds. The system optimizer feature ensures the speed and performance of your PC are not compromised during the repairing process. It ensures your PC works at its optimal speed. Restoro is a one-stop solution for all your PC needs. It has a user-friendly interface making it easy for all levels of users to work around. It is compatible with all Windows versions Click here to download Restoro and resolve the Fatal Error c000021a code on your PC today!
Read More
Fix 0x80071AC3, Volume is dirty error message
If you are trying to copy a folder or a file but encountered an error that says, “An unexpected error is keeping you from copying the folder. If you continue to receive this error, you can use the error code to search for help with this problem”, read on as this post will guide you on how you can fix this error. This kind of error is a CHKDSK error. It is the “Volume is dirty” error message with error code 0x80071AC3 which indicates that the CHKDSK operation on your computer did not go through due to some corrupted sector of your hard drive, data corruption, corrupted system files, malware infection, as well as improper installation of an application that left some residual folders and files and many more. To fix the Error 0x80071AC3, here are some potential fixes you can check out to resolve it:

Option 1 – Run the Check Disk utility

You can also run the Check Disk utility to fix the error when you connect your USB or external device.
  • In the Windows Search box, type “command prompt” and from the search results, right-click on Command Prompt and select “Run as administrator”.
  • After opening Command Prompt, type this command and tap Enter: chkdsk /r /f <PARTITION LETTER>
  • The command you entered will start to check for errors and fix them automatically. Else, it will throw an error message saying, “Chkdsk cannot run because the volume is in use by another process. Would you like the schedule this volume to be checked the next time the system restarts? (Y/N)”.
  • Tap the Y key to schedule Disk Check the next time your computer restarts.

Option 2 – Try to check if a particular volume is dirty and exclude it

The next thing you can do to fix the problem is to check if the particular volume is dirty and exclude it. To do so, follow these steps:
  • In the Start Search, type “command prompt” in the field and right-click on Command Prompt from the search results, and then select the “Run as administrator” option.
  • After opening Command Prompt with admin privileges, execute this command: fsutil dirty query <PARTITION LETTER>
  • After that, you will see either of the following results of the command you just executed:
    • “Volume <PARTITION LETTER> is dirty”
    • “Volume <PARTITION LETTER> is not dirty”
  • If you see the “Volume <PARTITION LETTER> is dirty” message, then you can just skip checking the drive for errors by executing this command: CHKNTFS /X <PARTITION LETTER>

Option 3 – Try to format the destination drive

If the first two options above didn’t work, then you might want to try formatting the drive can also help you resolve the error. To format it, follow these steps:
  • To get started formatting your drive, tap the Win + E keys and then go to the access page of the drive.
  • Next, right-click on the drive and select Format.
  • After that, uncheck the “Quick Format” option and then format your drive properly.
  • Now once the formatting process is finished, unplug the drive and plug it back in afterward.
  • Check if the error is already fixed. If the drive is not initialized, tap the Win + R keys and hit Enter.
  • After opening the Run dialog box, type “diskmgmt.msc” and hit Enter to open Disk Management.
  • From there, right-click on the drive volume and select initialize disk.
  • Next, select the correct partition type and proceed.
Read More
Setup has failed to determine install choices
Running the Windows Setup does not always go smoothly as you could encounter some errors along the way. One of these errors is the “Something happened, Setup has failed to determine supported install choices” error. The only given option in such cases is to click the Close button and exit the setup. This kind of error in Windows setup can occur when you try to downgrade to the previous version of Windows using the built-in mechanism. This error could be caused by a corrupted image or it is also possible that the set of files are incomplete. Aside from that, it could also be due to compatibility issues or that the module used to downgrade the Windows operating system is not configured properly. To fix this error, you have to run the Windows Setup program in compatibility mode so that you can downgrade Windows. You could also use the image for the lower version of Windows that’s available on the official site of Microsoft. But before you do any of these, make sure that you’re logged in as an administrator. To fix the “Something happened, Setup has failed to determine supported install choices” error, follow the given options below sequentially.

Option 1 – Try to run the Installer of the downgraded version in Compatibility Mode

This is the first thing you can try to resolve the issue instead of going right ahead on making a bootable device. So if you are downgrading Windows, you can try to run the installer in the compatibility mode for that specific Windows version.
  • Look for the setup file.
  • Once you find it, right-click on it and select Properties from the context menu.
  • After that, go to the Compatibility tab and mark the checkbox for “Run this program in compatibility mode for:” and from the drop-down list, select either Windows 7 or Windows 8.
  • You also have to check the “Run as administrator” option.
  • Now click the Apply button and then click OK to save the changes made and check if it has resolved the issue or not.

Option 2 – Try to troubleshoot compatibility

This option is almost the same as the first one except it is an alternative way of fixing the “Setup has failed to determine supported install choices” error in case the first one didn’t work. In this option, you will troubleshoot the compatibility issue.
  • Look for the setup file.
  • Then right-click on it and select the “Troubleshoot compatibility” from the context menu.
  • After that, click on the “Try recommended setting” option. Once the process is done, the error message should be gone.

Option 3 – Run the DISM tool

You can run the DISM tool as well to help fix the error code 0x80244022 during Windows Update. Using this built-in tool, you have various options such as the “/ScanHealth”, “/CheckHealth”, and “/RestoreHealth”.
  • Open the Command Prompt with admin privileges.
  • Then type in the following commands and make sure to hit Enter right after you type each one of them:
    • Dism /Online /Cleanup-Image /CheckHealth
    • Dism /Online /Cleanup-Image /ScanHealth
    • exe /Online /Cleanup-image /Restorehealth
  • Do not close the window if the process takes a while as it will probably take a few minutes to finish.

Option 4 – Try using the image from the official site of Microsoft

If none of the options given above worked, you can try to use the image from Microsoft’s official site. This would help, especially if the error is caused by a corrupted image or image folder with incomplete files.
Read More
Fix Boot Configuration Data error 0xc0000185
This post will guide you in fixing a particular problem where your Windows 10 computer does not even let you turn it on and it appears as soon as it starts to boot the operating system and it displays an error message that says, “The Boot Configuration Data for your PC is missing or contains errors, Error code 0xc0000185”. On the other hand, it may also display a different error message saying, “The operating system couldn’t be loaded because a required file is missing or contains errors”. There are various suggestions you can try to resolve this error. You could check the physical status of your hardware or rebuild the Boot Configuration Data, use the Automatic Startup Repair or System Restore, or better yet, reset your Windows 10 computer. Since your computer will not boot, you will have to either try to get into the Advanced Startup Options screen, boot Windows 10 in Safe Mode, or use a bootable Windows 10 media to boot your computer.

Option 1 – Try to rebuild the BCD files

The first thing you can do to resolve the issue is to Rebuild Boot Configuration Data or BCD files.
  • You can start by booting into the installation environment for Windows 10 from an installation media.
  • After that, click on Repair your computer and on the blue screen, select Troubleshoot and then select the Advanced options menu.
  • From there, select Command Prompt and once you open it, enter each one of the commands given below by sequence.
    • bootrec /FixMbr
    • bootrec /FixBoot
    • bootrec /ScanOS
    • bootrec /RebuildBcd
  • Once you’re done executing the commands given above, type “exit” to close the Command Prompt window and then restart your computer and see if it fixed error code 0xc000014c.

Option 2 – Try to run Automatic Startup Repair

In this option, you need to boot your computer into the Advanced Startup Options and from there, run the Automatic Startup Repair and then wait until the process is completed.

Option 3 – Try running System Restore in Advanced Startup Options

Since you probably can’t boot into your Windows 10 computer, you can try to run System Restore again in the Advanced Startup Options.
  • Boot your computer into the Advanced Startup Options screen.
  • From there, you will see some options to troubleshoot when you can’t log in to Windows in the usual way.
  • Now select Troubleshoot > Advanced Options > Command Prompt.
  • After that, type “rstrui” and hit Enter to execute the command which will start the System Restore process.

Option 4 – Try to perform repair install by creating a Windows 10 installation media

  • Click this link and then click the Download Tool Now button.
  • Next, click the “Use the tool to create installation media (USB flash drive, DVD, or ISO file)…” option and follow the next given instructions on the screen.
  • Now select the ISO file option in step 5.
  • After that, you should now have an ISO file.
  • Next, go to the location where you’ve downloaded the ISO file.
  • Then right-click on the Windows 10 ISO file and select the Open with option and then select File Explorer.
  • Now click on “setup.exe” and follow the next instructions that appear on the screen. When asked, you have to select either Nothing (clean install) or Keep personal files only option. Take note that you must not select the “Keep personal files, apps, and Windows settings since it doesn’t really work.

Option 5 – Try to physically check the hardware

You should also check the physical status of the hardware in your computer. You can clean the dust off the hardware components like the Network Card of the computer. You might want to use a small blower or you could also use a soft cloth and run the components gently. Make sure that you don’t damage any parts with moisture or cause harm to any circuits while you carry out this task.
Read More
Fixing Your Firefox profile cannot be loaded
Caching is used to enhance the performance of applications in Windows and other operating systems. It helps applications to load faster but there are times when the cache can get damaged or corrupted and as a result, you might encounter some issues. One of them is in the Firefox browser where the “Your Firefox profile cannot be loaded, It may be missing or inaccessible” error message may appear. You could also encounter this kind of error when Firefox is unable to access or find the profile folder. In case you don’t know what the profile folder is, it is where Firefox stores your user data and settings by default. Firefox pulls information from this folder each time you choose to open it. You can find this default Firefox profile folder under the %APPDATA%MozillaFirefoxProfiles folder. If you experience issues when trying to access the Profile Manager, you have the option to create a new default Firefox profile folder. This will fix the “Your Firefox profile cannot be loaded, It may be missing or inaccessible” error. How? Simply follow the given steps below. Step 1: Tap the Win key or click the Windows Start button to open the Start menu. Step 2: Next, type “%appdata%” in the field and hit Enter to open the hidden AppDataRoaming folder. Step 3: Now double click the Mozilla folder as well as the Firefox folder. Step 4: From there, look for the “profiles.ini” file and delete it. Make sure that you don’t delete the Profiles folder which should have the icon of a file folder. Note: Keep in mind that the .ini file extension is identified as the file that features a gear icon beside the “Configuration settings” or “Application settings”. Step 5: Once you open Firefox, a new profile will be created. On the other hand, if you know where your profile exists, you can try the following steps below to help Firefox locate it.
  • First, you need to move the profile folder back to its original location.
  • Next, restore the profile folder’s original name if you have modified it.
  • Then create a new profile using the Profile Manager and give it an appropriate name.
  • Now click on the Choose Folder button and select the profile folder you have moved or renamed before you exit the Create a new profile wizard.
Read More
Custom widgets in Windows 11 later
windows custom widgets
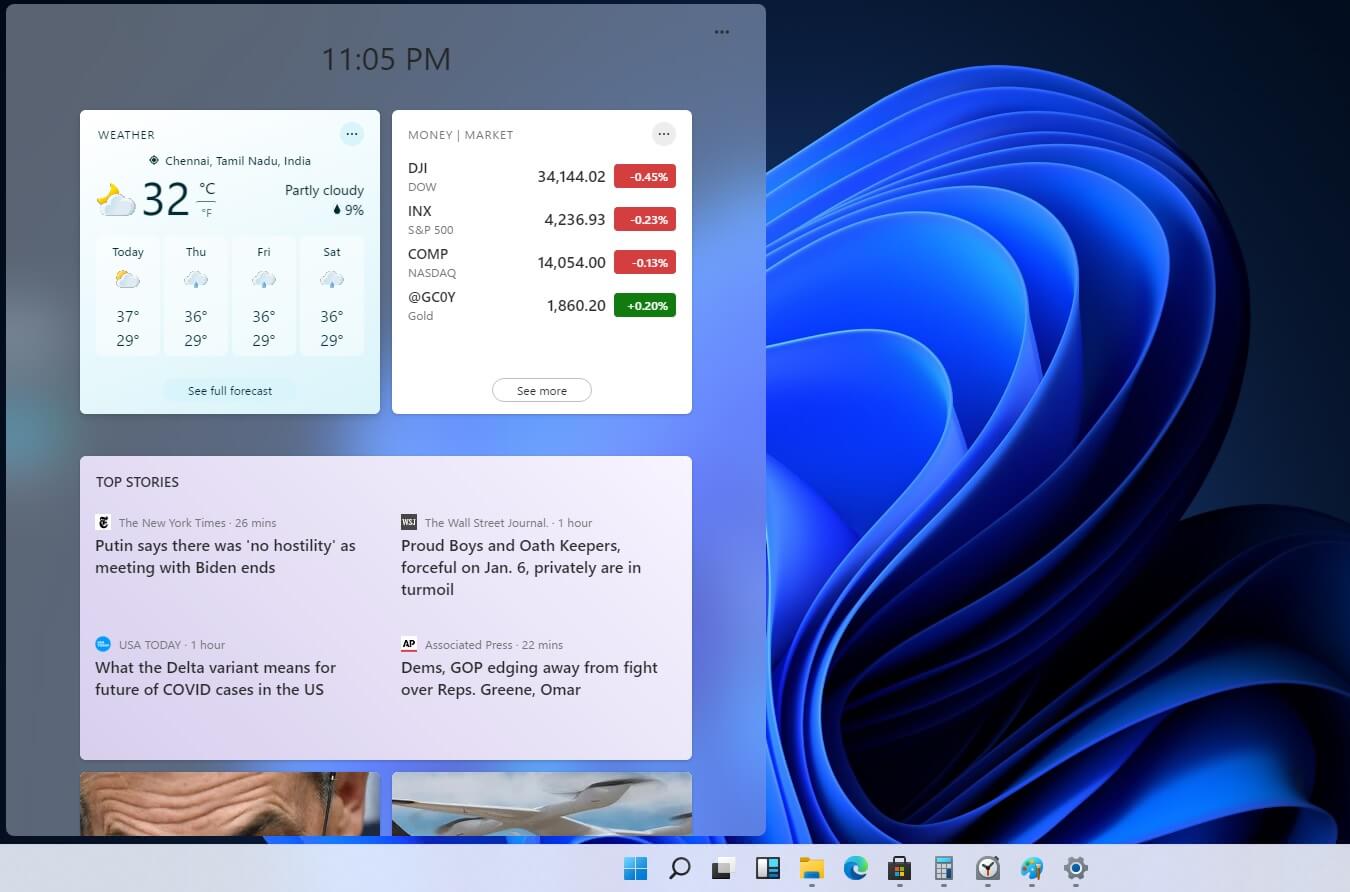
Originally Microsoft has imagined its widgets menu as Microsoft-only widgets but it seems that they have changed their mind. Due to the latest leak, it seems that Microsoft will open the widgets menu to 3rd party developers as well but at launch, it will be only official widgets. It was hinted that later widgets menu will be open to developers who want to bring their own stuff into it. Distribution, date, and technology that will need to be used in order to create your widget have not been discussed nor leaked at a given time but in some way, I am very glad that at least some customization will be in Windows 11. It is funny and amusing how some things that were in Windows Vista are getting back like glass design, round corners, and widgets. Let’s just hope Windows 11 will be a better Windows than Vista was.
Read More
0x800701e3, The request failed due ...
A lot of things can go wrong even when you’re only doing some simple operations or tasks on your computer and this is due to the fact that there are various small operations make up in order to perform the larger operations on your computer. So if any of these smaller operations are not properly working, it crashes the operation as a whole and it throws an error code instead. And one of these error codes is Error 0x800701e3. This particular error pops up when an error has occurred in the File Explorer when a transfer is initiated from one disk to another in your Windows 10 computer. When you encounter this error, you will get the following error message:
“Error 0x800701e3: The request failed due to a fatal hardware error.”
There are several methods you can check out to fix this error – you can try to run System Restore or Check Disk or format the destination drive or check the SMART attribute of the drive. For more details, refer to each one of the following options.

Option 1 – Try to run System Restore

Error 0x800701e3 might be due to some adjustments you’ve made in your computer’s settings. Thus, to fix this error, you can try undoing those changes using System Restore. How? Refer to these steps:
  • Tap the Win + R keys to open the Run dialog box.
  • After that, type in “sysdm.cpl” in the field and tap Enter.
  • Next, go to the System Protection tab then click the System Restore button. This will open a new window where you have to select your preferred System Restore point.
  • After that, follow the on-screen instructions to finish the process and then restart your computer and then check if your mouse is now back to its normal state.

Option 2 – Try running the Check Disk utility

You can also run the Check Disk utility in fixing Error 0x800701e3.
  • In the Windows Search box, type “command prompt” and from the search results, right-click on Command Prompt and select “Run as administrator”.
  • After opening Command Prompt, type this command and tap Enter: chkdsk <Partition Letter>: /f /r /x /b
  • The command you entered will start to check for errors and fix them automatically. Else, it will throw an error message saying, “Chkdsk cannot run because the volume is in use by another process. Would you like the schedule this volume to be checked the next time the system restarts? (Y/N)”.
  • Tap the Y key to schedule Disk Check the next time your computer restarts.

Option 3 – Try to format the destination drive

Formatting the destination drive could also help you resolve error 0x800701e3. To format your drive, follow these steps:
  • First, open File Explorer and then right-click on the drive where you encountered the error.
  • Next, select Format from the context menu. This will open a new mini window.
  • Then select the NTFS option from the drop-down menu for the File System menu.
  • After that, check the box labeled as Quick Format.
  • Now click on Start. Keep in mind that doing so will remove all the contents of your storage device.

Option 4 – Verify the hard drive using SMART attributes

In case you don’t know, Windows has a built-in feature of SMART analysis which analyzes the hard drive/SSD and checks all the parameters by performing some minor operations. To use it, follow these steps:
  • Tap the Win + S keys and type “command prompt” in the field then right-click on the related search result and select the “Run as administrator” option.
  • After opening Command Prompt as admin, type the “wmic diskdrive get status” command and hit Enter.
  • You should get a result after that, and if you see that it’s “normal”, proceed to the next option below
Read More
Windows Update failed, error 0x80240034
If you got an error message saying, “Windows Update failed to install error 0x80240034” when trying to update your Windows 10 then it’s probably due to some update services that are failing at some point. In addition, you might also see Error constant WU_E_DOWNLOAD_FAILED with the description that “Update has failed to download”. The Windows Update failed to install error 0x80240034 might be caused by some connection problem or there might be a duplicate update or that installation is not allowed and so on. And so to fix the problem, we’ve prepared some options that could help. Make sure to follow them accordingly but before you proceed, you need to verify if you have a stable internet connection.

Option 1 – Restart your computer and try installing the Updates again

Restarting your computer can also help in fixing the Windows Update failed to install error 0x80240034. There are cases where the issue resolves on its own as it could just be some simple network or PC error.

Option 2 – Try to disable your antivirus program

The Windows Update failed to install error 0x80240034 might be caused by the antivirus program installed in your computer which is why disabling the antivirus program or any security software installed in your computer is always a good idea you can try when the Windows Update process does not go smoothly. So before you try updating your computer again, make sure to disable the antivirus or security program and once the Windows Update is done, don’t forget to enable the antivirus program back again.

Option 3 – Clean up temporary and junk files

  • Open Setting > System > Storage from the WinX Menu.
  • From there, you will see a list of all the local and connected storage devices along with the details on the free space.
  • Now make sure that the Storage Sense feature is turned On then go find a link that says “Free Up Space” and click it to open.
  • After that, a screen which is the built-in program in Windows 10 will appear and will scan your computer for the following junk files so you can free up disk space:
  • Windows Upgrade Log Files
  • The system created Windows Error Reporting Files
  • Thumbnails
  • Temporary Internet Files
  • Previous Windows Installation Files
  • Delivery Optimisation Files
  • DirectX Shader Cache
Note: Once you’re done freeing up space on your drive, try to run the setup file again.

Option 4 – Run the Windows Update Troubleshooter

Running the built-in Windows Update troubleshooter is one of the things you can first check out as it is known to automatically resolve any Windows Update errors like error 0x80240034. To run it, go to Settings and then select Troubleshoot from the options. From there, click on Windows Update and then click the “Run the troubleshooter” button. After that, follow the next on-screen instructions and you should be good to go.

Option 5 – Delete Files from Software Distribution Folder & Catroot2 folders

The downloaded Windows Updates are placed in a folder called “SoftwareDistribution”. The files downloaded in this folder are automatically deleted once the installation is completed. However, if the files are not clean up or if the installation is still pending, you can delete all the files in this folder after you pause the Windows Update service. For complete instructions, refer to the steps below.
  • Open the WinX Menu.
  • From there, open Command Prompt as admin.
  • Then type in the following command – don’t forget to hit Enter right after typing each one of them.
net stop wuauserv net start cryptSvc net start bits net start msiserver
  • After entering these commands, it will stop the Windows Update Service, Background Intelligent Transfer Service (BITS), Cryptographic, and the MSI Installer
  • Next, go to the C:/Windows/SoftwareDistribution folder and get rid of all the folders and files thereby tapping the Ctrl + A keys to select them all and then click on Delete. Note that if the files are in use, you won’t be able to delete them.
After resetting the SoftwareDistribution folder, you need to reset the Catroot2 folder to restart the services you just stopped. To do that, follow these steps:
  • Type each one of the following commands.
net start wuauserv net start cryptSvc net start bits net start msiserver
  • After that, exit Command Prompt and restart your computer, and then try to run Windows Update once more.

Option 6 – Run the DISM tool

If the first five options didn’t work, then running the Deployment Imaging and Servicing Management tool might help as it can repair the Windows System Image as well as the Windows Component Store in Windows 10.
  • After you access the Advanced Startup options, select Command Prompt by using the arrow keys on your keyboard.
  • Next, type in this command: DISM /Online /Cleanup-Image /RestoreHealth
  • Do not close the window if the process takes a while as it will probably take a few minutes to finish.

Option 7 – Run System File Checker

Running the SFC scan or System File Checker might also help in fixing error 0x80240034.
  • Tap Win + R to launch Run.
  • Type in cmd in the field and tap Enter.
  • After opening Command Prompt, type in sfc /scannow and hit Enter.
  • Restart your PC.

Option 8 – Try to use the Media Creation tool

The Media Creation tool in Windows allows you to use the ISO installation file to make a bootable device that you can use to install Windows on your PC. Note that this is kind of different from the usual installation process as it could erase your computer’s current settings and data on the primary drive. Thus, before you proceed, you need to backup all your data into some removable drive and then use the Media Creation Tool to make a bootable drive.
  • After making the bootable drive, you need to plug it into your computer and then reboot.
  • Next, tap the F10 or Esc key to open the boot options.
  • Now set the boot priority of the removable drive the highest. Once the setup comes forth, follow the next onscreen instructions and install Windows without any problems.
Read More
1 2 3 162
Logo
Copyright © 2022, ErrorTools. All Rights Reserved
Trademarks: Microsoft Windows logos are registered trademarks of Microsoft. Disclaimer: ErrorTools.com is not affiliated with Microsoft, nor claim direct affiliation.
The information on this page is provided for information purposes only.
DMCA.com Protection Status