GoForFiles Removal Guide

GoforFiles is a Potentially Unwanted Program that allegedly allows users to easily search for files, movies, apps, and other useful things on the internet. In our testing, this program on further inspection does not work, it only displays an error for every search query. To top this off this program comes bundled up with other programs which could be malicious or unwanted.
This program adds startup links into windows, allowing it and its bundled programs to launch every time Windows is restarted or launched. A task scheduled is also made, that lets the launch of the program at different random times during the day.
Many anti-virus applications have marked this program and its bundled counterparts as Potentially Unwanted Programs, and it is highly recommended to remove these programs from your computer.

About Potentially Unwanted Programs

Exactly what is a Potentially Unwanted Program (PUP)?

People have encountered it – you download free software, you then discover some unwanted applications on your computer system, or discover a strange toolbar has been included with your browser. You didn’t have them installed, so how did they appear? These unwanted applications, which are called Potentially Unwanted Programs, or PUP in short, usually tag along as a software bundle when downloading the application and could cause serious problems for computer users.

PUP does not involve malware in the traditional sense. What normally makes a PUP different from malicious software is the fact that when you download one, you’re doing it with your consent – although in most cases unintentionally and reluctantly. But, there is no doubt that PUPs remain bad news for computer users as they can be incredibly damaging to the PC in many ways.

How do unwanted programs affect you?
Unwanted programs come in many forms. More commonly, they will be found in adware bundlers which are known to utilize aggressive and misleading advertising. The majority of bundlers install many adware applications from a number of vendors, each of which features its own EULA policy. Safebytes Anti-malware completely removes this threat and safeguards your PC against PUP or malware infection. PUPS also appear in the form of undesirable toolbars or internet browser plug-ins. Not just they needlessly use up space on your screen, toolbars can also manipulate search results, track your web browsing activities, decrease your internet browser’s performance, and slow down your web connection to a crawl.

They could seem harmless but PUPs are generally spyware. They may include dialers, keyloggers, and also other software built inside them that could monitor you or send out your sensitive information to 3rd parties. Because of this unwanted program, your application may freeze, your security protections can get disabled that could leave your computer susceptible, your system could get ruined, and this list goes on and on.

Tips for preventing PUPs

• Study cautiously prior to agreeing to the license agreement as it could have a clause about PUPs.
• Always opt for the custom if you are given an option between Recommended and Custom Installations – never click Next, Next, Next thoughtlessly.
• Install an advert blocker/pop-up blocker; Deploy anti-malware products such as Safebytes Anti-malware. These software programs will establish a wall between the computer and online criminals.
• Be alert when you download and install freeware, open-source software, or shareware. Avoid downloading and installing browser extensions and applications you are not knowledgeable about.
• Always download software from reliable sources like official sites as opposed to untrustworthy sharing space. Avoid torrents and peer-to-peer clients.

Can't Install Safebytes Anti-malware because of a Virus? Try This!

Malware could potentially cause all sorts of damage after they invade your system, from stealing your private details to erasing files on your PC. Some malware sits in between the computer and your internet connection and blocks some or all internet sites that you really want to visit. It might also prevent you from the installation of anything on your machine, especially an anti-virus program. If you’re reading this now, you’ve probably realized that a malware infection is a reason for your blocked internet traffic. So what to do when you want to download and install antivirus software like Safebytes? Do as instructed below to get rid of malware through alternative methods.

Boot your PC in Safe Mode

In Safe Mode, you can actually change Windows settings, un-install or install some applications, and remove hard-to-delete viruses. In the event, the virus is set to load automatically when the computer boots, switching to this mode could prevent it from doing so. To get into Safe Mode or Safe Mode with Networking, press F8 while the system is starting up or run MSConfig and find the “Safe Boot” options under the “Boot” tab. Once you are in safe mode, you can attempt to install your antivirus program without the hindrance of the malicious software. Right after installation, run the malware scanner to remove standard infections.

Switch over to an alternative internet browser

Malicious program code might exploit vulnerabilities on a particular browser and block access to all anti-malware software websites. If you appear to have a trojan attached to Internet Explorer, then switch over to a different web browser with built-in safety features, such as Firefox or Chrome, to download your favorite antivirus program – Safebytes.

Make a bootable USB antivirus drive

Another option is to save and operate an antivirus program entirely from a USB drive. To run anti-virus using a USB drive, follow these simple measures:
1) Make use of another virus-free PC to download Safebytes Anti-Malware.
2) Connect the flash drive to a USB port on the clean computer.
3) Run the setup program by double-clicking the executable file of the downloaded software, with a .exe file extension.
4) Choose the USB stick as the location for saving the software file. Follow the on-screen instructions to finish the installation process.
5) Now, plug the USB drive into the infected system.
6) Double-click the EXE file to run the Safebytes program from the thumb drive.
7) Run Full System Scan to identify and get rid of all kinds of malware.

Protect your PC from Malware With SafeBytes Security Suite

To protect your computer or laptop from various internet-based threats, it is very important to install an anti-malware application on your laptop. However, with so many antimalware companies out there, nowadays it is actually tough to decide which one you should obtain for your personal computer. A few of them are excellent, some are decent, and some will destroy your PC themselves! You must be careful not to choose the wrong product, especially if you buy premium software. Among few good applications, SafeBytes Anti-Malware is the highly recommended software program for the security-conscious end user.

Safebytes is one of the well-established PC solutions firms, which offer this comprehensive anti-malware application. Using its outstanding protection system, this utility will instantly detect and remove the majority of the security threats, including browser hijackers, viruses, adware, ransomware, trojans, worms, and PUPs.

SafeBytes anti-malware takes computer protection to a whole new level with its advanced features. Let’s look into a few of them below:

Optimum AntiMalware Protection: With a critically acclaimed anti-malware engine, SafeBytes offers multilayered protection which is intended to catch and eliminate threats that are hidden deep in your computer’s operating system.

Real-time Threat Response: SafeBytes provides round-the-clock protection for your computer limiting malware intrusions in real-time. It will continuously monitor your computer for hacker activity and also gives users advanced firewall protection.

Web Protection: Safebytes allots all sites a unique safety score that helps you to get an idea of whether the webpage you’re about to visit is safe to view or known to be a phishing site.

Faster Scanning: SafeBytes Anti-Malware has got a multi-thread scan algorithm that works up to 5x faster than any other antivirus software.

Light-weight: SafeBytes is a lightweight and user-friendly antivirus and antimalware solution. Since it uses minimal computer resources, this software leaves the computer power exactly where it belongs to: with you actually.

24/7 Online Support: Support service is readily available for 24 x 7 x 365 days via email and chats to answer your concerns.

SafeBytes has created an excellent anti-malware solution to help you conquer the latest computer threats and virus attacks. You now may understand that this tool does more than just scan and delete threats on your PC. You’ll get the best all-around protection for the money you spend on SafeBytes AntiMalware subscription, there is no doubt about it.

Technical Details and Manual Removal (Advanced Users)

If you wish to carry out the removal of GoforFiles manually instead of using an automated software tool, you can follow these simple steps: Go to the Windows Control Panel, click on the “Add/Remove Programs” and there, select the offending application to uninstall. In cases of suspicious versions of web browser plug-ins, you can easily get rid of it through your web browser’s extension manager. It is also highly recommended to factory reset your web browser to its default state to fix corrupt settings.

In order to ensure the complete removal, manually check your hard disk and registry for all of the following and eliminate or reset the values as needed. But bear in mind, this can be a complicated task and only computer experts can perform it safely. Also, certain malware is capable of replicating itself or preventing deletion. You’re urged to do this process in Windows Safe Mode.

Files:
%ProgramFiles%GoForFiles.comGoForFiles.com.exe
%UserProfile%DesktopGoForFiles.com.lnk
%UserProfile%StartMenuGoForFiles.comGoForFiles.com.lnk
%UserProfile%StartMenuGoForFiles.comHelp.lnk
%UserProfile%StartMenuGoForFiles.comRegistration.Lnk
%UserProfile%ApplicationDataMicrosoftInternetExplorerQuickLaunchGoForFiles.com.lnk

Registry:
HKEY_CURRENT_USERSoftware376694984709702142491016734454
HKEY_CURRENT_USERSoftwareMicrosoftWindowsCurrentVersionRun376694984709702142491016734454

If you like to learn and find out more about various Windows errors, and how to repair them go to our vast archive or use search to find articles that will explain and help you in solving your issue.
However, if you prefer to do things fast and with automatization then we are proposing to use an automated solution for your issues. The application that we are recommending is Advanced System Repair Pro
Advanced System Repair utilizes multiple tools all in one to give you a quick, simple, reliable, and very thorough diagnosis of your PC. It brings you all the tools you need in one program to clean, fix, protect, optimize and boost your PC!
1-Click Maintenance
All the tools to make it simple and easy! It's like having a professional technician at the click of a mouse.

Junk Cleaner
Keeping your computer free from unnecessary clutter also helps make your computer last longer. Like any other machine, if you keep it clean and take care of it, it will serve you better for longer!

Optimize background apps
Optimize applications background activity with the built-in Application Optimizer feature.

Disk Defrag
With a simple 1-click, Advanced System Repair speeds up your PC by assembling fragmented files on your machine and organizing them more efficiently.

Malware Removal
Finds and removes all types of harmful malware including trojans, worms, bots, adware, spyware, PUPs, and more!

Privacy Cleaner
The all-in-one privacy suite to Clean Your Tracks & Protect Your Privacy! Make your computer safe, secure, and more efficient!

System Tweak/Optimizer
ASR will analyze your complete system and settings to adjust your PC to function at its maximum performance.

Registry Cleaner
Over time, as you install and uninstall applications, the registry can become cluttered with old entries and broken settings which can result in program crashes, and annoying messages and slow the computer down.
Visit our Advanced System Repair Pro Download page to inform yourself about all the benefits of this software and get a free trial copy of it.
advanced system repair pro

Advanced System Repair Pro

One-click automated PC repair solution
ASR logo
With Advanced System Repair Pro you can easily
Replace damaged files
Restore performance
Free disk space
Remove Malware
Protects WEB browser
Remove Viruses
Stop PC freezing
DOWNLOAD
Privacy Policy | Terms of Use | Uinstall
Advanced System Repair Pro is compatible with all versions of Microsoft Windows including Windows 11

Share this article:

You might also like

MS will release single office apps in MS Store
It seems that Microsoft is going to offer subscription and sales of individual office applications in the Windows Store. The office package will still be available as a package but for the first time, we will get single applications as standalone ones available for purchase. ms officeThis is a very interesting decision by Microsoft and I fully support it, this time users will be able to pay less and to choose only applications that they need instead of paying for the whole package and not using it.
Read More
How to Fix Error Code 0xc004f210 in Windows 10

Error Code 0xc004f210 – What is it?

Error code 0xc004f210 is one of the many activation errors that affect Windows 10 users. Users will be able to identify error code 0xc004f210 because of the following common symptoms which occur:

  • Inability to activate Windows 10 operating system
  • Message box with error code 0xc004f210

Solution

Restoro box imageError Causes

Error code 0xc004f210 usually occurs due to issues related to one’s product key or digital entitlement. Both the product key and digital entitlement are used by Microsoft to enable customers to activate the version of Microsoft that they have legitimate access to. If you enter the wrong product key or if you upgrade to Windows 10 but the current version of Windows to which you are attempting an activation does not match the edition of your digital entitlement, error code 0xc004f210 may occur. To correct this issue, you will need to implement one or more manual repair procedures. This will depend on the problem that caused the error to occur in the first place.

Further Information and Manual Repair

The methods below are simple procedures that Windows users lacking technical knowledge will be able to successfully complete. However, do contact a Windows repair technician if you have difficulty completing the manual repair methods listed below, or if the problem persists after completing these steps.

Method One: Enter Valid Product Key

In order to successfully activate your Windows 10 operating system and resolve error code 0xc004f210, you will need to enter a valid product key. Ensure you enter the 25-character code in the order it is given as making a simple mistake while typing the product key can lead to the reoccurrence of the error code. Follow the instructions below to enter the product key.

  • Step one: Click the Start button then select Settings
  • Step two: Select Update & security then Activation
  • Step three: Click the Change product key
  • Step four: Type in your valid product key with its 25 characters in the correct order

You should be able to successfully activate Windows 10 once you complete the process. However, move to the next manual method suggested below if the problem persists as error code 0xc004f210 could be due to an issue with your digital entitlement.

Method Two: Reinstall Windows 10 Edition that Matches Your Digital Entitlement

Digital entitlement, a new form of activation that doesn’t require the use of a product key, could be the real reason you are experiencing error code 0xc004f210 on your device. To combat any issues related to your digital entitlement, ensure the version of Windows 10 installed on your system matches your digital entitlement. This will require that you reinstall your operating system as well. After reinstalling Windows 10, follow the steps below to complete the process.

  • Step one: Click the Start button then select Settings
  • Step two: After selecting Settings, click Update & Security
  • Step three: Select Windows Update then the Check for updates tab
  • Step four: Activate Windows 10 update

If this method is successful, you will no longer see the error code 0xc004f210 pop up on your screen. However, contact a Windows repair technician to evaluate your system if the issue persists.

Method Three: Use an Automated Tool

This method involves the use of a powerful automated tool. But why is this important you might ask? A third-party tool is often the best solution when all manual repair efforts fail. Automated tools come equipped to tackle the most serious PC problems including error codes which can cause frustration and result in reduces PC performance.

Read More
Fix Chassis Intruded…Fatal Error…System Halted
When you encounter an error message that says, Chassis Intruded…Fatal Error…System Halted on your monitor then it indicates that the Chassis or the cabinet that holds the CPU, GPU, motherboard, and many more is open. It is a security feature offered by OEMs wherein a connector that is found in the motherboard can detect if the chassis component has been replaced or removed. There are a few OEMs that offer onboard speaker or PC chassis speaker which goes off in this kind of situation. Obviously, the problem has something to do with the hardware and in most cases, you have to put the jumper back on the motherboard with the pin-labeled chassis signal and ground. There are times when some OEMs offer a simple switch that is armed automatically when you properly close the chassis. Thus, you need to check if this switch has something to do with the error. If there is no switch or if it doesn’t resolve the issue, although you may be able to get into Windows with a warm boot, the normal Windows boot won’t really work unless you fix the problem. It is rather false positive and has something to do with the RTC RAM state or the BIOS. You might need to completely disable the Chassis intrusion feature to fix the error. Refer to the suggestions given below to try and fix the “Chassis Intruded, Fatal Error … System Halted” error.

Option 1 – Try to clear CMOS

You can easily clear CMOS by shorting two pins which can be found side by side on the motherboard. Keep in mind that it may vary from OEM to OEM although the basics are still the same to clear CMOS. In addition, you might also have to download the manual from the OEM’s website so that you’ll know its exact location.

Option 2 – Try booting into the BIOS

You can also try booting into the BIOS. All you have to do is tap either the DEL or F2 keys to get there. Note that everything will be set back to their default setting after you reset the CMOS.

Option 3 – Try disabling Chassis intrusion

In this option, you have to look for the Chassis intrusion feature in your BIOS. It might be located under security. From there, disable it and check if the problem’s fixed.

Option 4 – Try to reconfigure the BIOS

Once you have disabled the Chassis feature, you need to reconfigure the BIOS the way you expect it to be or to what it was before the reset.
Read More
Win 11 update brings one click browser change
After a lot of backlash about choosing the default Windows browser, Microsoft has officially backed up and brought back a one-click browser change into Windows 11. default browser inside windows 11
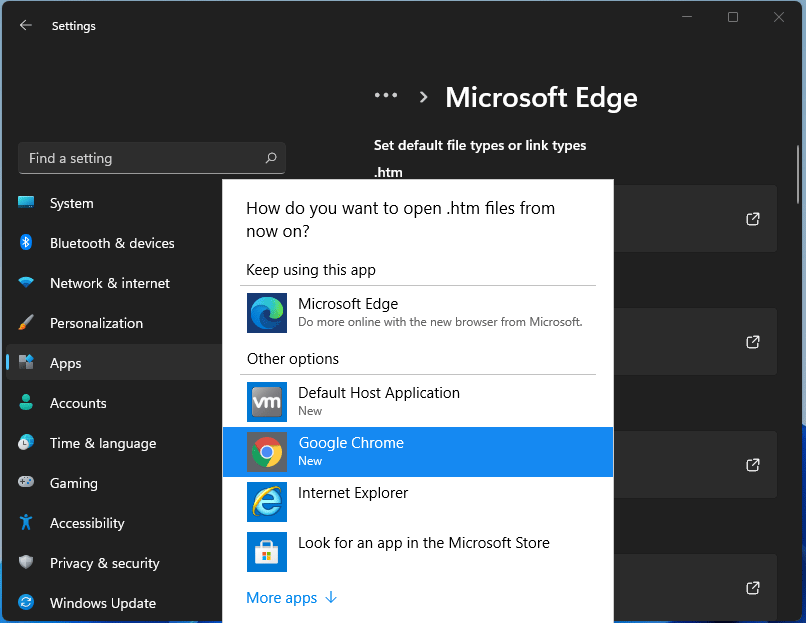
For anyone who is not aware, when Windows 11 was released if you wanted to switch to another browser you had to go into the settings app and choose the default browser for different types of file extensions like HTML, HTM, PDF for opening on the web, etc. Of course, this was completely unnecessary and it was not well received by users. So after some time, Microsoft backpedaled to standard one click, choose your default browser solution that existed in the previous version of Windows OS. Altho sometimes Microsoft knows how to irritate its users base, it is good to know that they can also listen and fix things that are required.
Read More
Command prompt tips and tricks
Hello and welcome to errortools articles. Today we will talk about some great and awesome tips and tricks for the command prompt. Commands which can make your life easier and your workday more pleasant. That being said let's dive in right into muddy waters and swim out with new knowledge.

Tip 1: Read Motherboard information

There are a lot of reasons why you would like to read information from your motherboard, maybe you would like to upgrade your BIOS, perhaps you would like to know the serial number, maybe even the version number. Well, you can, type the following code into the command prompt and you will receive all information about your motherboard.
wmic baseboard get product,version,serialnumber,product

Tip 2: Copy command output to clipboard

Getting information from the command prompt to a word processor, into an email or any other medium can be somewhat troublesome, usually, people tend to screenshot or write from a command prompt into another destination, which could induce errors, and let's be honest, it is not practical. You can copy command output directly into the clipboard ready for pasting it anywhere with | clip. So for example if you would like to paste the directory structure of your c drive command would look like: dir c: | clip, now output would be placed into the clipboard ready to be pasted anywhere needed.

Tip 3: Erase data permanently

When you delete data on your hard drive, what really happens is that files are marked with a marker which marks that space for new data writing, but the data itself is still present and can be brought back. This sometimes could impose problems but if you would type: cipher /w:c Windows will write random data over each marked file deleting it forever without means to be brought back.

Tip 4: Manage your IP address

If you would like to play with your IP address and do fancy stuff with it do the following: ipconfig /release to release your IP address ipconfig /renew to renew your IP address ipconfig /flushdns to flush down DNS information and enjoy a new browsing start.

Tip 5: Check to see are packets reaching the desired location

You installed a new LAN printer, or a new switch, maybe you want to check if your new site is up and running. Use ping destination in order to see if TCP packets are reaching desired information, you can use it with a specific address like ping 192.168.1.1 or you can type a web address, for example, ping google.com and see if a connection can be established.

Tip 6: Get information about a specific command

So you learned some command prompt commands, but you do not know all of their configuration or switches? No worries, just type command/? to get a list of available switches for it. For example ipconfig/? will write you a list of available switches for ipconfig command.

Tip 7: Link and execute multiple commands one after another.

Let us say that for example, you would like to copy files into a different folder, then rename some and delete others and you need to do a couple of times. Instead of writing command after command once each one is finished link them with && and they will execute one after another.

Tip 8: Scan and repair files.

In order to scan files and repair broke or corrupted ones write in the command prompt: sfc /scannow. Please know that this command can take a long time since it is solely dependant on the number of files, their size, and the power of the computer.

Tip 9: Manage and configure your computer energy

Command powercfg will let you manage and see the power configuration of your computer. Just write powercfg/? and see what you need and want to change or get information about.

Tip 10: Associate files with applications

Windows already has some file associations defined, and some applications take over some type of files but if you want to take control into your own hand use assoc command. For example assoc.txt= "APPLICATION NAME" will associate txt files with the provided application.

Tip 11: Hide files and folder.

Do you have some folder or file with information that you do not want to be seen when someone opens file explorer? Use attrib +h <name of file> and hide file or attrib +h /D <folder name> to hide folder.

Tip 12: Get a list of installed computer drivers

Want to know which drivers are installed in your system? Use driverquery and take a look.

Tip 13: Find and locate shared folders

have you shared a folder but forgot which one and where? Do not bang your head on the wall, we have a simple solution for you. just type in command prompt net share and see everything.

Tip 14: Run commands as an administrator

You do not have administrator privileges? Do you want to bypass common blockades?
runas /user:yourdomainadministrator command
That is all that we have for you today, I certainly hope you have found something useful here and that we have managed to teach you some valuable things.
Read More
Diablo 2 Resurrected facing server issues
It has been some time since the release of Diablo 2 resurrected and overall reception was pretty good. People are enjoying the old classic game in hi-def. resolution and with new and improved visuals. Sadly some server issues are present still until this day and somewhat spoil the experience for players. diablo 2 server status
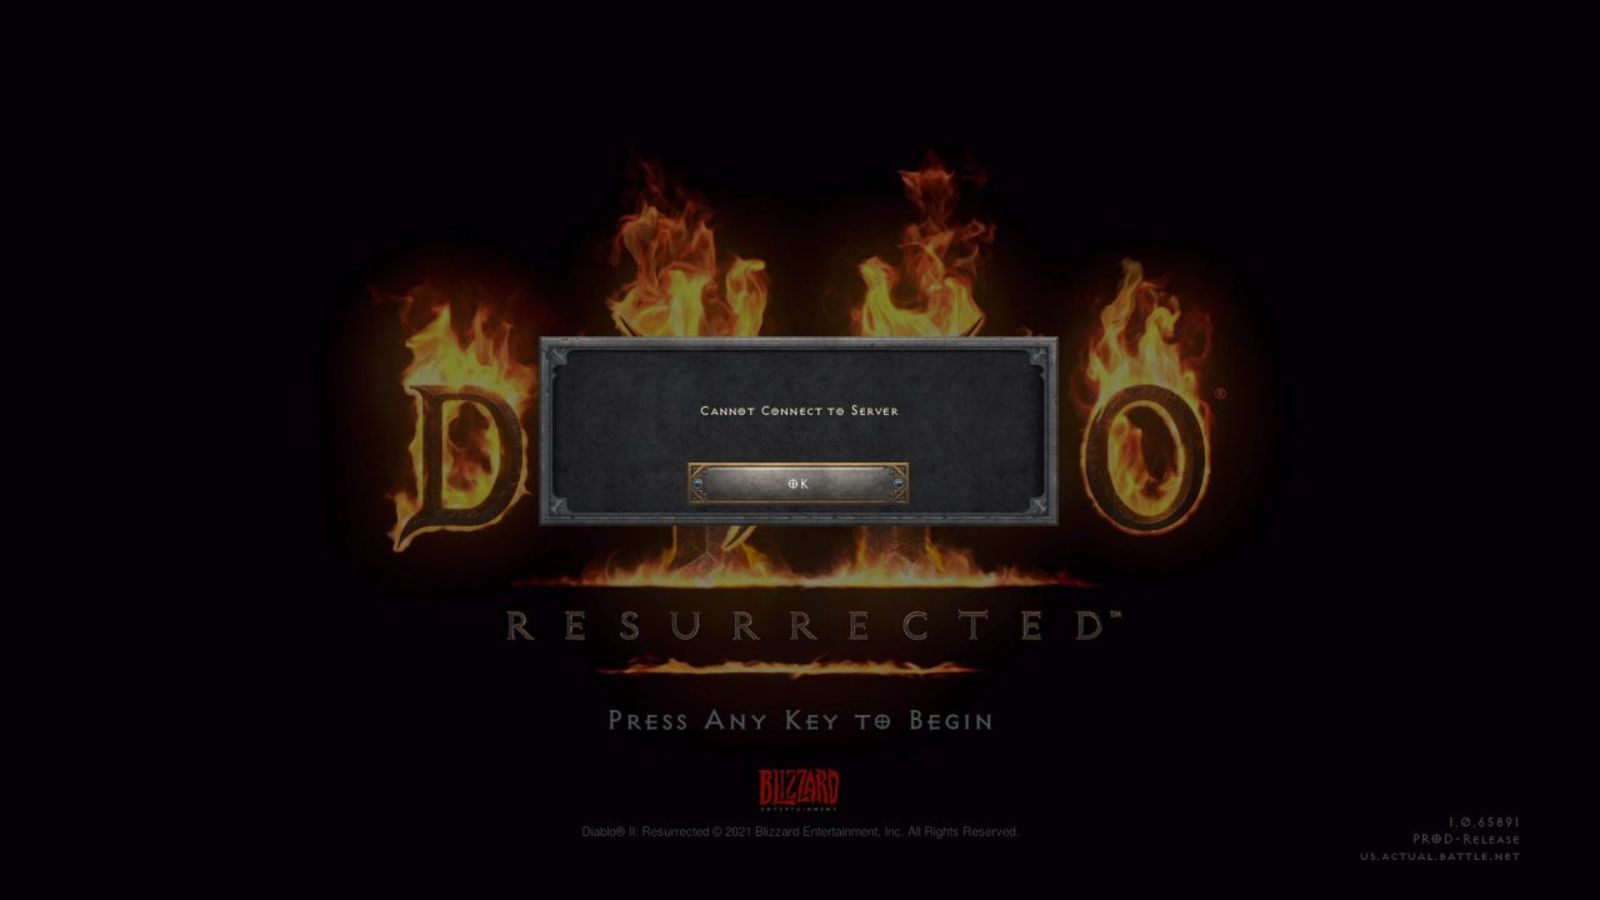
The greatest lag and server crashes are pinpointed to game-creating events. When a player creates a new online game, the server needs to pull a lot of details from the database and make a game, due to some legacy code present this process takes some time and it is demanding a bit on the server-side, and although code was optimized to cater to more modern approach some legacy code still remains. Another thing that was spotted to affect performance itself is player behavior, to be more specific, modern gamer behavior. Where players find good builds and runs on the internet and then go to farm-specific areas or bosses for loot or experience points, which in return boils down to making plenty and short runs that are made by creating games and after run eliminating them. Now pair that with the previous statement about legacy server and database code and you can add 1 and 1 and see how this might be an issue. A lot of short games over legacy code are placing games in a state it was not designed for back in 2001 and therefore we have issues. Sadly solutions without completely rewriting the whole code are not very promising and they include rate limiting, which will prevent players to create many games in succession in a short period of time and maybe even login queues to drop a load on servers. Blizzard reached to people in the whole company, even old diablo 2 developers to ask for advice and they say that they are working on solutions so they could lift limitations and have everything running fine.
Read More
How to Remove AtoZ Manuals from Windows

AtoZManuals is a Browser Extension developed by MindSpark Inc. This extension offers users an easy way to search Customer Manuals for Products. This extension may seem handy at first, however, this extension hijacks your browser home page, and changes your default search engine to MyWay.

While browsing the internet with this extension you will see additional ads, sponsored links, and pop-up ads in your browser. Additionally, this extension monitors your browser activity, including search words, visited links, shopping information, and sometimes even personal information, which is later used to display better-targeted ads.

Multiple anti-virus scanners have marked this extension as a Browser Hijacker, and due to its rogue behavior, it is not recommended to keep it on your computer.

About Browser Hijackers

Browser hijacking means a malicious program code has control over and altered the settings of your browser, without your permission. They’re made to interfere with web browser functions for various reasons. Often, it’ll drive users to predetermined websites that are trying to boost their ad earnings. Although it may seem naive, these tools were created by vicious people who always look to take advantage of you, so that hackers could earn money from your naivety and distraction. When the program attacks your laptop or computer, it begins to mess things up a whole lot that slows your system down to a crawl. In the worst-case scenario, you may be forced to tackle serious malware threats as well.

How one can recognize a browser hijack

There are various signs that indicate the internet browser has been hijacked: your homepage is reset to some unfamiliar website; you observe new unwanted favorites or bookmarks added, typically directed to ad-filled or porn sites; default search engine is changed; you see many toolbars on the browser; your internet browser displays endless pop-up windows; your browser has become unstable or starts running sluggishly; you’re prohibited access to specific web pages, for example, the site of an antivirus software developer like SafeBytes.

How it infects your PC

A browser hijacker could be installed on your PC when you check out an infected website, click on an email attachment, or download something from a file-sharing website. They are generally included with toolbars, add-ons, BHO, plug-ins, or browser extensions. A browser hijacker could also be installed as a part of freeware, shareware, demoware, and fake programs. Examples of popular browser hijackers are Fireball, CoolWebSearch. GoSave, Ask Toolbar, RocketTab, and Babylon Toolbar.

Getting rid of browser hijackers

Some kinds of browser hijackers can be removed from the computer by deleting malicious software or any other recently added freeware. However, many hijackers are much more difficult to discover or remove since they could get themselves connected with some important computer files that enable it to operate as a necessary operating-system process. Furthermore, manual removals demand in-depth system knowledge and thus could be a very difficult task for novice computer users.

Learn How To Install Safebytes Anti-Malware On An Infected Computer system

Malware may cause several kinds of damage to computing devices, networks, and data. Some malware is meant to restrict or block things that you wish to do on your computer system. It may well not allow you to download anything from the web or it will stop you from accessing a few or all internet sites, particularly the anti-virus sites. If you’re reading this right now, you might have perhaps recognized that virus infection is the cause of your blocked internet connectivity. So what to do when you want to download and install anti-malware software like Safebytes? Although this sort of issue will be difficult to get around, there are some actions you can take.

Install the anti-malware in Safe Mode

If any virus is set to load automatically when Microsoft Windows starts, getting into safe mode could block this attempt. Since just the minimum programs and services launch in “Safe Mode”, there are seldom any reasons for conflicts to happen. To start your Windows XP, Vista, or 7 computers in Safe Mode with Networking, follow the instructions below. 1) At power-on/startup, hit the F8 key in 1-second intervals. This would conjure up the Advanced Boot Options menu. 2) Make use of the arrow keys to select Safe Mode with Networking and press ENTER. 3) When you are into this mode, you should have an internet connection once again. Now, make use of your browser to download and install Safebytes Anti-malware. 4) Following installation, run a full scan and let the software program remove the threats it finds.

Obtain the security program in a different browser

Some malware might target vulnerabilities of a particular web browser that obstruct the downloading process. The best way to overcome this issue is to go with an internet browser that is well known for its security measures. Firefox contains built-in Malware and Phishing Protection to keep you secure online.

Install and run antivirus from your USB drive

Here’s another solution which is utilizing a portable USB anti-virus software package that can scan your system for viruses without the need for installation. To run anti-virus from a USB pen drive, follow these simple measures: 1) On a clean computer, download and install Safebytes Anti-Malware. 2) Mount the pen-drive onto the same computer. 3) Double-click the Setup icon of the antivirus software package to run the Installation Wizard. 4) Select the USB flash drive as the location when the wizard asks you exactly where you wish to install the application. Follow activation instructions. 5) Now, transfer the thumb drive to the infected PC. 6) Run the Safebytes Anti-malware directly from the USB drive by double-clicking the icon. 7) Click the “Scan” button to run a full system scan and remove viruses automatically.

How SafeBytes Anti-Malware Keep your Computer Malware Free

These days, an anti-malware tool can protect your computer or laptop from different kinds of internet threats. But exactly how to choose the right one amongst numerous malware protection software that is available in the market? As you might be aware, there are lots of anti-malware companies and tools for you to consider. Some of them are great, some are ok types, while some will affect your computer themselves! You have to select one that is reliable, practical, and has a good reputation for its malware source protection. When it comes to commercial application options, the majority of people go with well-known brands, such as SafeBytes, and are very happy with it. SafeBytes is a powerful, real-time antivirus application that is made to assist the typical computer user in safeguarding their computer from malicious internet threats. With its outstanding protection system, this utility will instantly detect and remove most of the security threats, including viruses, adware, browser hijackers, ransomware, PUPs, and trojans. SafeBytes carries a variety of great features that can help you protect your laptop or computer from malware attack and damage. Below are some of the great ones: Robust Anti-malware Protection: Using its advanced and sophisticated algorithm, this malware elimination tool can find and get rid of the malware threats hiding in the computer system effectively. Real-time Threat Response: SafeBytes delivers complete and real-time security for your computer system. It’ll inspect your computer for suspicious activity regularly and its unparalleled firewall guards your computer against unauthorized entry by the outside world. Quick Multithreaded Scanning: This software has one of the fastest and most efficient virus scanning engines in the industry. The scans are very accurate and take a little time to complete. Web Protection: Through its unique safety ranking, SafeBytes informs you whether a website is safe or not to access. This will ensure that you’re always certain of your online safety when browsing the world wide web. Light-weight: SafeBytes is a lightweight and simple to use antivirus and antimalware solution. Since it utilizes minimal computer resources, this program leaves the computer’s power exactly where it belongs to: with you actually. 24/7 Online Technical Support: Support service is readily available for 24 x 7 x 365 days through email and chats to answer your queries.

Technical Details and Manual Removal (Advanced Users)

If you’d like to manually get rid of AtoZManuals without the use of an automated tool, it may be possible to do so by deleting the program from the Microsoft Windows Add/Remove Programs menu, or in cases of web browser extensions, going to the browsers AddOn/Extension manager and uninstalling it. You will likely also want to reset your web browser. Lastly, examine your hard drive for all of the following and clean your Windows registry manually to remove leftover application entries after uninstalls. Please note that only experienced computer users should try to manually edit the system files simply because deleting any single critical registry entry leads to a serious issue or even a system crash. In addition, certain malware is capable of replicating itself or preventing its deletion. Completing this task in Safe Mode is suggested.
Folder: C:Users%UserName%AppDataLocalTemp Registry: HKLMSOFTWAREClassesAppIDAtoZManuals.exe HKEY_LOCAL_MACHINESOFTWAREMicrosoftInternet ExplorerExtensions HKEY_LOCAL_MACHINESoftwareMicrosoftWindowsCurrentVersionExplorerBrowser Helper Objects HKEY_LOCAL_MACHINESoftwareMicrosoftInternet ExplorerToolbar HKEY_LOCAL_MACHINESOFTWAREGoogleChromeExtensions HKEY_LOCAL_MACHINESOFTWAREMozillaFirefoxExtensions HKEY_CURRENT_USERSoftwareOpera Software HKEY_LOCAL_MACHINESOFTWAREMicrosoftWindows NTCurrentVersionvirus name HKEY_CURRENT_USERSoftwareMicrosoftWindows NTCurrentVersionWinlogon Shell = %AppData%IDP.ARES.Generic.exe HKEY_CURRENT_USERSoftwareMicrosoftWindowsCurrentVersionRun Random HKEY_LOCAL_MACHINESoftwareMicrosoftWindows NTCurrentVersionRandom
Read More
System32 Folder Keeps Popping up at Startup
The System32 folder contains vital configuration and information that are essential to the operating system. It is located inside the “Windows” folder and it consists of important DLL files as well as executable files. You probably have noticed some errors that have the “System32” word in them but that does not necessarily mean that the System32 folder is the one that triggers them as these kinds of errors have only occurred when some important files are corrupted or missing. Some users recently reported that each time they start their computers, the System32 folder will automatically open up in the File Explorer. If you encounter the same problem, read on as this post will guide you on what to do to fix it. This kind of issue is most likely caused by service or application interference – it is possible that there is a third-party application installed in your computer or a Windows service that triggers the System32 to pop up during startup. It is also possible that this is a result of system modification. Thus, you need to identify the third-party program or restore your computer to its previous state.

Option 1 – Put your computer in a Clean Boot State

As pointed out, it is possible that some third-party program or service is the one that’s behind the problem. To isolate this possibility and to identify the culprit, you have to put your computer into a Clean Boot State. To do so, follow the steps below.
  • Log onto your PC as an administrator.
  • Type in MSConfig in the Start Search to open the System Configuration utility.
  • From there, go to the General tab and click “Selective startup”.
  • Clear the “Load Startup items” check box and make sure that the “Load System Services” and “Use Original boot configuration” options are checked.
  • Next, click the Services tab and select the “Hide All Microsoft Services” check box.
  • Click Disable all.
  • Click on Apply/OK and restart your PC. (This will put your PC into a Clean Boot State. And configure Windows to use the usual startup, just simply undo the changes.)
After putting your PC in a Clean Boot State, try creating a system restore point and see if the problem still occurs. Clean Boot troubleshooting is designed to help you isolate the problem. For you to execute a clean boot troubleshooting, you must do a couple of actions (the steps given above) and then restart your PC after every action. You might have to disable one third-party app after the other to really isolate the issue. And once you’ve narrowed down the problem, you can either disable the third-party app that’s causing the problem or remove it. Note that you must switch your PC back into the Normal Startup mode after you’re done troubleshooting the problem. Here’s how you can do it:
  • From the “Start” menu, go to System Configuration.
  • After that, switch to the General tab and click the option for “Normal Startup”.
  • Next, go to the Services tab and clear the checkbox for “Hide all Microsoft services”.
  • Then find and click “Enable all” and if prompted, you have to confirm.
  • Afterward, go to the Task Manager and enable all the Startup programs and confirm the action.
  • Restart your PC when prompted.

Option 2 – Perform System Restore

  • First, press the Win + R keys to open the Run dialog box.
  • After that, type in “sysdm.cpl” in the field and tap Enter.
  • Next, go to the System Protection tab then click the System Restore button. This will open a new window where you have to select your preferred System Restore point.
  • After that, follow the on-screen instructions to finish the process and then restart your computer and check if the problem is fixed or not.

Option 3 – Run System File Checker scan

You might also try running the System File Checker or SFC scan to fix the issue. System File Checker is a command utility built into your computer that helps restore corrupted files and missing files. Refer to the following steps to run it:
  • Hit the Win + R keys to launch Run.
  • Type in cmd in the field and tap Enter.
  • After opening Command Prompt, type in sfc /scannow
The command will start a system scan which will take a few whiles before it finishes. Once it’s done, you could get the following results:
  1. Windows Resource Protection did not find any integrity violations.
  2. Windows Resource Protection found corrupt files and successfully repaired them.
  3. Windows Resource Protection found corrupt files but was unable to fix some of them.
 Restart your computer and see if the System32 folder still pops up at startup or not.
Read More
Fix Windows Update Error 0x8024000B
As you know, Windows Updates are essential for your operating system as it keeps it protected from potential threats, fixes bugs and improves your experience in using Windows 10. However, there are instances when Windows Updates also cause errors and one of them is the Windows Update Error 0x8024000B. One of the causes of this particular Windows Update error is that Windows was not able to read the Update Manifest file which is needed to install the Windows Updates. This means that the operation was canceled by either the service or the user. On the other hand, this error could also occur if you are not able to filter the results. When you encounter this error, you will see an error message that says, “WU_E_CALL_CANCELLED: Operation was canceled”. This indicates that the operation was canceled by the operating system itself. To resolve the Windows Update Error 0x8024000B, here are some suggestions you need to check out.

Option 1 – Try to run the Cleanup (Decline) Superseded updates PowerShell script

The first thing you can do to fix the Windows Update Error 0x8024000B is to run the Cleanup (Decline) Superseded updates PowerShell script. This is actually an easy fix since all you have to do is download and run it from the Microsoft Technet site. Once you’re done downloading and running the file, restart your computer and see if the error is fixed or not.

Option 2 – Try to rename the Spupdsvc.exe file

If the first option didn’t work, you can try renaming the Spupdsvc.exe file which is one of the reasons why you’re getting the Windows Update Error 0x8024000B.
  • First, tap the Win + R keys to launch the Run utility.
  • Next, type the following command and hit Enter to execute it in cmd:
 /c ren %systemroot%System32Spupdsvc.exe Spupdsvc.old
  • The command you entered will rename the troublesome “Spupdsvc(.)exe” file to “Spupdsvc(.)old”.
  • Now restart your computer after the command has been executed.

Option 3 – Try to restart various Windows Update-related services and components

You could also try to restart some Windows Update-related services to resolve the Windows Update error. Refer to the following steps to do so:
  • Tap the Win + X key combination and select Command Prompt (Admin) to open Command Prompt with admin privileges.
  • After opening Command Prompt, copy and paste each one of the commands listed below one by one and tap Enter right after you enter each command.
    • net stop wuauserv
    • net stop bits
    • net stop appidsvc
    • ren %systemroot%SoftwareDistribution SoftwareDistribution.bak
    • ren %systemroot%system32catroot2 catroot2.bak
  • Once you’ve entered all the commands given above, they will stop all the Windows Update services that are running on your computer as well as clear the SoftwareDistribution folder, and reset the Catroot2 folder. Now you have to start all these Windows Update services you’ve just stopped by executing the following commands:
    • net start wuauserv
    • net start bits
    • net start appidsvc
    • net start cryptsvc
  • After that, restart your computer and try to run the setup again, and see if the error is now fixed.

Option 4 – Try to run the Windows Update Troubleshooter

You should also try to run the built-in Windows Update troubleshooter as it could help you resolve the Windows Update Error 0x8024000B. To run it refer to these steps:
  • Go to Settings and then click on Windows Update from the given menu.
  • Next, click on the Troubleshoot option and select Windows Update from the given options to run the Windows Update troubleshooter.
  • After that, follow the next on-screen instructions and wait until the process is completed, and check if the Windows Update Error 0x8024000B is fixed or not.
Read More
How to Fix Remote Desktop Black Screen issues
According to some reports, using RDP or Remote Desktop Protocol on recent versions of Windows 10 results in a black screen. One encounters this issue is when using the Remote Desktop Connection feature on Windows 10. The real causes of this black screen are either the display drivers or some misconfiguration with the Remote Desktop Connection utility. In most cases, the Remote Desktop in Windows 10 will display a black screen and then disconnects afterward. To fix this kind of issue on your Remote Desktop, there are two suggestions you need to check out. First, you can try to disable the persistent bitmap caching, and then you can also try to update your display driver. Follow the given options below for more troubleshooting instructions.

Option 1 – Try to disable Persistent Bitmap caching

The first thing you can do to resolve the black screen issue with the remote desktop is to disable the persistent bitmap caching. All you have to do is follow these steps:
  • First, open the Remote Desktop Connection client.
  • Next, click on the Show Options button to configure the Remote Desktop Connection.
  • After that, go to the Experience tab and uncheck the Persistent bitmap caching option.
  • Once done, you should now be able to connect to the remote computer without the black screen.

Option 2 – Try to update or rollback the Graphics driver

You can try to update your Graphics card driver using the Device Manager in your computer to resolve the blank dialog boxes problem or you can also go directly to the website of your graphics card manufacturers like NVIDIA, Intel, or AMD and go to the section called Drivers then check if there’s a new available update – if there is, download and install it. To update your Graphics driver via Device Manager, refer to these steps:
  • First, boot your computer into Safe Mode.
  • After that, tap the Win + R keys to launch Run.
  • Type in devmgmt.msc into the box and tap Enter or click OK to open the Device Manager.
  • After that, a list of device drivers will be displayed. From there, look for the Display Adapters and click on them.
  • After that, right-click on each entry under the Display Adapters and select the “Uninstall Device” option from the menu.
  • Now restart your computer.
  • After restarting your computer, go to the Settings app and Check for Updates in the Windows Update section.
Note: If updating the Graphics driver didn’t fix the problem, you can also try to roll back to its previous version and see if that helps or you could also try to roll back, update or reinstall the Network Adapter drivers.

Option 3 – Try performing a System Restore

You might also want to perform a System Restore that might help you in fixing the error. You can do this option either by booting into Safe Mode or in System Restore. If you are already in the Advanced Startup Options, just directly select System Restore and proceed with the next steps. And if you have just booted your PC into Safe Mode, refer to the steps below.
  • Tap the Win + R keys to open the Run dialog box.
  • After that, type in “sysdm.cpl” in the field and tap Enter.
  • Next, go to the System Protection tab then click the System Restore button. This will open a new window where you have to select your preferred System Restore point.
  • After that, follow the on-screen instructions to finish the process and then restart your computer and check if the problem is fixed or not.
Read More
1 2 3 162
Logo
Copyright © 2022, ErrorTools. All Rights Reserved
Trademarks: Microsoft Windows logos are registered trademarks of Microsoft. Disclaimer: ErrorTools.com is not affiliated with Microsoft, nor claim direct affiliation.
The information on this page is provided for information purposes only.
DMCA.com Protection Status