How to Fix: Not a Valid Win32 Application Error

Not a Valid Win32 Application Error

Not a Valid Win32 Application Error - What is it?

Not a Valid Win32 Application error code that indicates either the file or the program you are attempting to run missing or corrupt. And because of this error, Windows is unable to open your desired file or run the program successfully.

Error Causes

The ‘Not a Valid Win32 Application’ is triggered due to multiple reasons such as:

  • Unsuccessful program installation due to damaged disc/CD
  • Corrupted or incompatible file
  • The hard drive is loaded with bad and invalid entries
  • Malware invasion or viral infection

When you come across this error code on your PC, it is advisable to resolve it as it will cause you a great deal of inconvenience hampering program and file accessibility.

Furthermore, if the error code occurs due to malware or viruses, then it can lead to severe data security threats and privacy issues.

Further Information and Manual Repair

To resolve the Not a Valid Win32 Application error on your PC, you don’t need to be a technical expert or hire a professional. Though this error might be crucial it is easy to fix.

Here are some of the many methods that you can try to resolve this error code on your PC:

  • Check for File Compatibility

If you downloaded a file that is not compatible with your Windows version then you will come across this error. In this case, it is advisable to download the file version that is compatible and can run easily on the Windows version installed on your system.

Nonetheless, if the file is compatible but still doesn’t run on your PC, then it’s possible that the file became corrupt during the download.

Try downloading the file again.

  • Check if the CD is Clean

You may also come across the Not a valid Win32 application error code if the program installation from the CD is unsuccessful.

This happens when the CD is dirty or it is scratched. The program does not copy properly onto the computer from the damaged CD. So, if the CD is scratched and dirty, buy a new CD and try installing the program again.

  • Verify the Program You Want to Run is Still on the Computer

If you are running the program from a shortcut, then verify that the program is still installed on your PC. This error may occur if the program is no longer installed on the computer.

If you find the program is not installed on your system, then reinstall and try running the program again.

  • Wrong File Name Issue

Make sure the program or the file you are attempting to run on your system does not contain the same name as the long filename directory it is saved in. For example, running a file named ‘program’ in the ‘program files’ directory can cause errors in some Windows versions.

If this is the issue, then try installing the program in a different directory.

  • Repair Hard Drive

If the hard drive is bad or corrupted, it can also generate the not a valid Win32 application. And because of this error files and programs fail to execute successfully as not all data can be read from the hard drive.

To repair this issue first you need to run defrag and ScanDisk Microsoft built-in tools. These tools check for errors on the hard drive.

  • Run an Antivirus

If the error code occurs due to a viral infection or malware attack on your system, then you must download an antivirus, scan, and remove such malicious software. However, antivirus may slow down the speed of your PC.

So, to resolve speed issues and boost the performance of your system, you may have to download a system optimizer.

Congratulations, you have just fixed Not a Valid Win32 Application Error In Windows 10 all by yourself. If you would like to read more helpful articles and tips about various software and hardware visit errortools.com daily.

Now that’s how you fix Not a Valid Win32 Application Error in Windows 10 on a computer. On the other hand, if your computer is going through some system-related issues that have to get fixed, there is a one-click solution known as Restoro you could check out to resolve them. This program is a useful tool that could repair corrupted registries and optimize your PC’s overall performance. Aside from that, it also cleans out your computer for any junk or corrupted files that help you eliminate any unwanted files from your system. This is basically a solution that’s within your grasp with just a click. It’s easy to use as it is user-friendly. For a complete set of instructions in downloading and using it, refer to the steps below

Perform a full system scan using Restoro. To do so, follow the instructions below.

      1. Download and install Restoro from the official site.
      2. Once the installation process is completed, run Restoro to perform a full system scan.
        restoro application screen
      3. After the scan is completed click the “Start Repair” button
        restoro application screen
If you like to learn and find out more about various Windows errors, and how to repair them go to our vast archive or use search to find articles that will explain and help you in solving your issue.
However, if you prefer to do things fast and with automatization then we are proposing to use an automated solution for your issues. The application that we are recommending is Advanced System Repair Pro
Advanced System Repair utilizes multiple tools all in one to give you a quick, simple, reliable, and very thorough diagnosis of your PC. It brings you all the tools you need in one program to clean, fix, protect, optimize and boost your PC!
1-Click Maintenance
All the tools to make it simple and easy! It's like having a professional technician at the click of a mouse.

Junk Cleaner
Keeping your computer free from unnecessary clutter also helps make your computer last longer. Like any other machine, if you keep it clean and take care of it, it will serve you better for longer!

Optimize background apps
Optimize applications background activity with the built-in Application Optimizer feature.

Disk Defrag
With a simple 1-click, Advanced System Repair speeds up your PC by assembling fragmented files on your machine and organizing them more efficiently.

Malware Removal
Finds and removes all types of harmful malware including trojans, worms, bots, adware, spyware, PUPs, and more!

Privacy Cleaner
The all-in-one privacy suite to Clean Your Tracks & Protect Your Privacy! Make your computer safe, secure, and more efficient!

System Tweak/Optimizer
ASR will analyze your complete system and settings to adjust your PC to function at its maximum performance.

Registry Cleaner
Over time, as you install and uninstall applications, the registry can become cluttered with old entries and broken settings which can result in program crashes, and annoying messages and slow the computer down.
Visit our Advanced System Repair Pro Download page to inform yourself about all the benefits of this software and get a free trial copy of it.
advanced system repair pro

Advanced System Repair Pro

One-click automated PC repair solution
ASR logo
With Advanced System Repair Pro you can easily
Replace damaged files
Restore performance
Free disk space
Remove Malware
Protects WEB browser
Remove Viruses
Stop PC freezing
DOWNLOAD
Privacy Policy | Terms of Use | Uinstall
Advanced System Repair Pro is compatible with all versions of Microsoft Windows including Windows 11

Share this article:

You might also like

TPM 2.0 and Windows 11, all you need to know
TPM or Trusted Platform Module version 2.0 is a must-have if you plan on upgrading your system to Windows 11. So what exactly is TPM and do you have it?

TPM checker
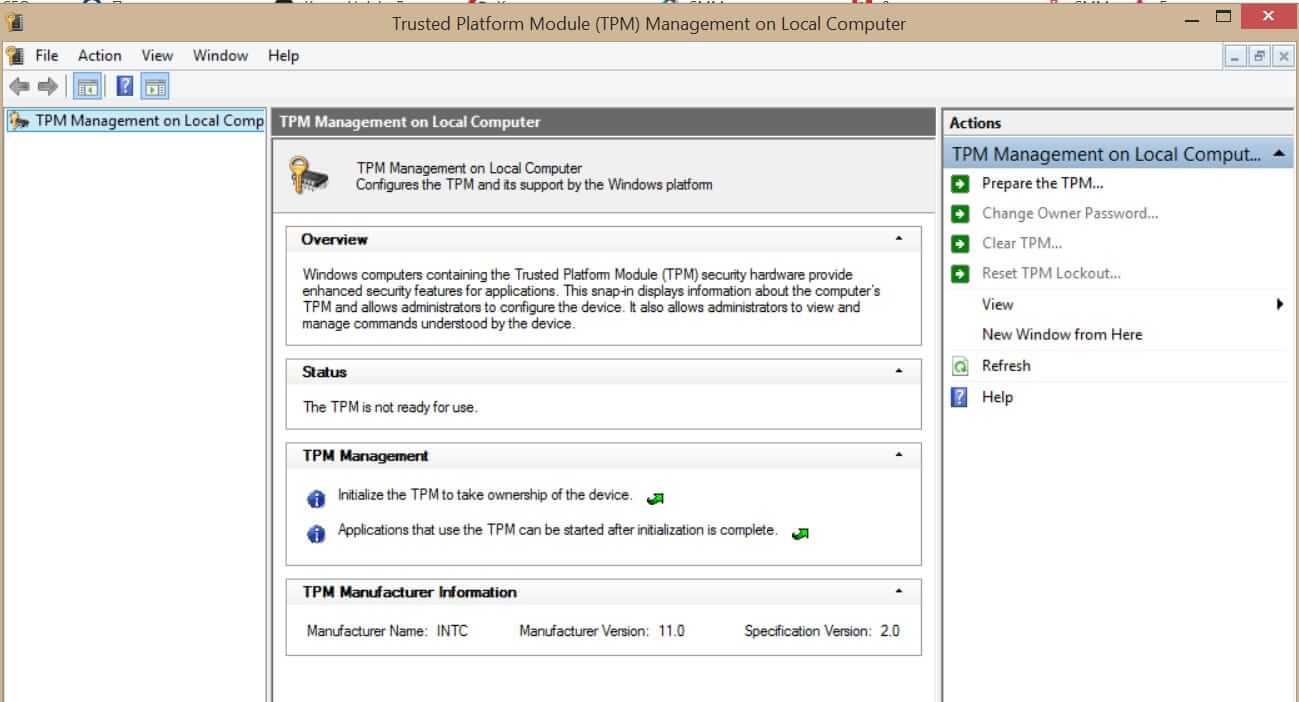
What exactly is TPM?

TPM is a tamper-resistant hardware technology tasked with generating and storing encryption keys inside it for better PC security. It can be remotely used to authenticate hardware and software by utilizing a unique endorsement key placed into the hardware itself. This technology can be used for example in BitLocker inside Windows in order to have data on a hard drive encrypted so if the mentioned drive is connected to another computer it would not be able to be accessed since the encryption key is stored in the TPM module. Microsoft is pushing its agenda that Windows 11 must be and must feel like safety first OS which will protect user data and user information and requiring TPM means that each Windows 11 will be secure so no additional software patches will be required for an extra layer of security. Windows 11 will assume that each user has TPM encryption enabled and will be built upon that.

Do you have TPM on your computer?

If your computer or hardware has been purchased in 2016 or later there are very high chances that you already have the required technology to run Windows 11. Unfortunately, many gaming motherboards have not been placing TPM in their boards and you might not have it. Also, there is the option of you having it but it is turned off in motherboard settings making Windows unable to detect it. As you can clearly see there are a lot of scenarios around required tech and honestly it is a complete mess. But lucky for you there are ways to find out do you possess the needed module in order to make an upgrade. On your current computer on which you would like to make an upgrade in your current Windows OS press ⊞ WINDOWS + R to open the run dialog. Inside run dialog type in TPM.msc and press ENTER to open Trusted Platform Module Management on Local Computer. You will immediately receive information do you have the required module. If everything is fine, you are good to go, however, if it says that compatible TPM cannot be found there is a chance that either you do not have needed hardware or it might be turned off inside motherboard settings.

Check motherboard UEFI

If you have a newer motherboard but Windows utility cannot detect TPM there is a chance that it might be turned off directly on your board. In order to check this, you will have to boot up your PC into UEFI either by pressing the corresponding key when it is turned ON or from Windows reboot options. Once you are inside UEFI you need to find security options and see if there is an option to turn ON or enable TPM. Since every motherboard is different and has different UEFI software we cannot cover all of the permutations and the best we can do is hope that provided information is enough. You can also visit your motherboard manufacturer to see instructions for your specific case.

Conclusion

TPM itself is generally an OK idea and I can surely see good sides of it but there is this lurking feeling that generally, Microsoft is not really concerned about the security of our data and that the real requirement for this is trying to battle software piracy. I simply cannot trust company which introduced tons of telemetry tracking through ages and which has done everything in their power to battle non-legal use of their software. I do not promote piracy but I support free choice and besides, who can tell me what will happen if TPM malfunctions, will I lose all of my data forever? It is not so uncommon that TPM has malfunctioned in the past and it is only logical to presume it can do it again in the future but this time we will not have the choice not to use it, we will be forced into it.
Read More
Media Creation Tool Error 0x80072f76 – 0x20016
One of the most useful tools in the Windows 10 operating system is the Windows Media Creation tool. This tool is used to download and install the latest version of Windows 10. However, there are times when you might encounter some issues while using this tool. One of these issues is the Error code 0x80072F76 – 0x20016. If you encounter this error, you will see the following error message during setup:
“We’re not sure what happened, but we’re unable to run this tool on your PC. If you continue experiencing problems, reference the error code when contacting customer support – Error code: 0x80072F76 – 0x20016.”
This kind of error in the Media Creation tool could be due to an interrupted download or unstable internet connection, and many more. To fix it, you can run the Windows Update troubleshooter or try using another browser to download the tool to another location. You can also try changing the DNS or the ISP connection or use the Windows 10 Update Assistant as well as delete the $Windows.~BT & $Windows.~WS folders. Check out the given suggestions below to fix the Media Creation Tool Error code 0x80072F76 – 0x20016 in your Windows 10 computer.

Option 1 – Try to run the Windows Update troubleshooter

Windows 10 have various troubleshooters that can help you resolve many system issues. So if you’re dealing with Windows Update errors like Error Code 0x80072f76 – 0x20016, you can run the Windows Update troubleshooter to resolve it. To run the Windows Update troubleshooter, go to Settings and then select Troubleshoot from the options. From there, click on Windows Update and then click the “Run the troubleshooter” button. After that, follow the next on-screen instructions and you should be good to go.

Option 2 – Try using a different browser to download the tool to another location

You could also use another browser in downloading the tool and place it in a different location on your computer but if you do not have another browser, you can just install one and then download the same tool to another location like the Desktop.

Option 3 – Try to change the DNS

  • Tap the Win + R keys to open the Run dialog box.
  • Then type “inetcpl.cpl” in the field and hit Enter to pull up the Internet Properties.
  • After that, go to the Connections tab and select the LAN settings.
  • From there. Uncheck the “Use a Proxy Server” option for your LAN and then make sure that the “Automatically detect settings” option is checked.
  • Now click the OK and the Apply buttons.
  • Restart your PC and then check if the Media Creation tool error is fixed.
Note: If you are using a third-party proxy service, you have to disable it.

Option 4 – Try to change the ISP connection

There are times when the connection to the Microsoft servers is interrupted due to some glitch or it could also be blocked by your Internet Service Provider or ISP. To rule out this possibility, you can try to change your computer’s internet connection and then see if it fixes the problem.

Option 5 – Try to use the Windows 10 Update Assistant

There’s another tool you can use as an alternative to the Media Creation tool. It is called the Windows 10 Update Assistant. This tool can also help you download and install Windows updates seamlessly.

Option 6 – Try to delete the $Windows.~BT and $Windows.~WS folders

From time to time, the Windows Update files also get corrupted which can cause some problems and conflicts when downloading and installing a Windows Update. To fix this, you need to delete the $Windows.~BT & $Windows.~WS folders in your computer.
Read More
uTorrent is not responding on Windows
As you probably know, uTorrent is one of the best software you can use to download torrents over the web. It has been around for many years now and is trusted by lots of users despite having competition here and there. Over the years, uTorrent has changed as it is now packed with tons of features. What’s more, is that this program is no longer the smallest client when it comes to file size. However, just like other software, it is not always working smoothly as there are instances when it’s not responding even when it’s already running. The first thing you can do is to close all the processes of uTorrent and then try opening it again. There are various reasons why your uTorrent program fails to respond. However, it is most likely caused by some virus that was brought on by the file you’ve just downloaded. On the other hand, it could also be caused by other factors as well but whichever the case is, here are some fixes you can check out to resolve the uTorrent issue.

Option 1 – Delete the file you’ve downloaded

As pointed out earlier, uTorrent might have failed to respond due to some file you’ve just downloaded which is why you have to delete it since there really is no point in keeping a file that’s causing this kind of issue. After deleting the file, try opening uTorrent again and see if it now works or not.

Option 2 – Allow uTorrent to run via Windows Defender Firewall

  • Click on the Cortana or the Start button and type “firewall” in the field.
  • From the search results that appear, click on the “Allow an app through Windows firewall”.
  • After that, a new window will pop up and from there, you will see a list of apps that can be allowed or disallowed using a Windows firewall. From this list, you have to search for uTorrent and once you find it, set it to Publick if you are on a public network or Private if you’re in a private network.

Option 3 – Uninstall or reinstall uTorrent software

You can also try to completely uninstall uTorrent from your computer and then reinstall it right back. to do so, follow the steps below.
  • In the search box, type in “control” and then click on Control Panel (desktop app) among the search results.
  • After that, select Programs and Features from the list which will give you a list of all the programs installed on your computer.
  • From there, look for uTorrent and select it and then uninstall it.
  • Once uTorrent is uninstalled, go to uTorrent’s official website and download its latest version.

Option 4 – Try scanning your computer using Windows Defender

  • Tap the Win + I keys to open Update & Security.
  • Then click on the Windows Security option and open Windows Defender Security Center.
  • Next, click on Virus & threat protection > Run a new advanced scan.
  • Now make sure that Full Scan is selected from the menu and then click the Scan Now button to get started.
Read More
What driver to use inside Windows
When clean Windows is installed or when you place new hardware in your computer usually Windows itself detects the device and installs its driver. The question that comes now is, do you keep that driver or do you install the manufacturer's one. In order to answer this question let's analyze what is difference between the two drivers and other factors which could influence your decision.

Difference between drivers

First of all, know that drivers Windows installs are also drivers from the device manufacturer which have gone through Microsoft quality control in order to be included in Windows itself. Now naturally question which occurs, what is the difference, well answer to that would be this: in Windows, you have stripped down driver, just a driver in order for Windows to know what device is plugged and how to use it, meaning that for example if you install printer device, you will be able to print documents and Windows will know it is a printer but ... You will not get the control panel for that printer where you can adjust the printer itself and all of its features like let's say paperweight, etc. So if you need these kinds of features in that case it would be better to install a complete driver suite from the manufacturer and get the whole package. Windows will recognize the RAZER mouse for example but you will not be able to change its colors of program custom buttons on it until you install RAZER drivers. One more important thing to note is that drivers which are in Windows are less updated than drivers from the manufacturer's site. That being said, if you prefer and want to have the latest drivers you will prefer to get them again from the manufacturer.

Conclusion

So it seems that manufacturer's drivers are always in some form of advantage and that you will always want them and most of the time this is true, as a matter of fact, the only time I could think that you could use bare down Windows drivers is when new drivers update breaks something in Windows and device start behaving improperly. in this particular case, it is better to roll back to the previous Windows driver which has passed Microsoft quality control and is working for sure. In any other case, you are better off with the latest manufacturers drivers If you would like to read more helpful articles and tips about various software and hardware visit errortools.com daily.
Read More
Bluetooth A2dp Source not working Code 52
A number of users have recently reported that they were going through an issue with their Bluetooth devices on their Windows 10 computers. This issue involves an error saying,
“Windows cannot verify the digital signature for the drivers required for this device. A recent hardware or software change might have installed a file that is signed incorrectly or damaged, or that might be malicious software from an unknown source. (Code 52).”
If you are one of the users who encountered this kind of error on your Windows 10 computer, read on as this post will guide you on how you can fix this Bluetooth error. According to security experts, the key to fixing this error is to sign the Bluetooth A2DP files with the built-in tool, System File Checker. Apart from that, you could also run the Hardware and Devices troubleshooter or perform System Restore, as well as update or reinstall the concerned drivers. For more details, refer to each one of the options provided below.

Option 1 – Try to check Bluetooth-related services

In Services, there is a Bluetooth-related service that helps users use Bluetooth so if that particular service suddenly malfunctions for some reason, you will most likely get the “Windows was unable to connect with your Bluetooth network device” error message. That’s why you need to check Services and to do that, refer to these steps:
  • Tap Win + R keys to open Run prompt and type in “services.msc” then tap Enter to open Services.
  • Next, look for the Bluetooth Support Service and double click on it to open Properties.
  • From there, verify if the Service status is showing “Running” or “Stopped”. If it’s the latter, you have to click the Start button.
  • Lastly, check if the Startup type is set to Manual.

Option 2 – Try running System File Checker or SFC scan

You could also run System File Checker or SFC scan to fix the Bluetooth error. It is a built-in command utility that helps in restoring corrupted files as well as missing files. It replaces bad and corrupted system files with good system files. To run the SFC command, follow the steps given below.
  • Tap Win + R to launch Run.
  • Type in cmd in the field and tap Enter.
  • After opening Command Prompt, type in sfc /scannow
The command will start a system scan which will take a few whiles before it finishes. Once it’s done, you could get the following results:
  1. Windows Resource Protection did not find any integrity violations.
  2. Windows Resource Protection found corrupt files and successfully repaired them.
  3. Windows Resource Protection found corrupt files but was unable to fix some of them.
  • Reboot your PC.

Option 3 – Try to perform System Restore

You might also want to perform System Restore as the error might be caused by system modifications. Thus, to undo them, you can use System Restore. Run it using these steps:
  • First, tap the Win + R keys to open the Run dialog box.
  • After that, type in “sysdm.cpl” in the field and tap Enter.
  • Next, go to the System Protection tab then click the System Restore button. This will open a new window where you have to select your preferred System Restore point.
  • After that, follow the on-screen instructions to finish the process and then restart your computer and check if the problem is fixed or not.

Option 4 – Try running the Hardware and Devices Troubleshooter

The next thing you can do to fix the problem is to run the Hardware and Devices troubleshooter. Although it won’t make much of a difference, there’s still a possibility that it could automatically fix the Bluetooth error. To use it, refer to these steps:
  • The first thing you need to do is click on Start and then on the gear-like icon to pull up the window for Settings.
  • After opening Settings, look for the Update and Security option and select it.
  • From there, go to the Troubleshoot option located on the left-hand side of the list.
  • Next, select Hardware and Devices from the list and open the Troubleshooter and run it. Once it is doing its job, wait for it to complete the process and then restart the system.
  • After the system restarts, check if the problem’s now fixed. If not, refer to the next option given below.

Option 5 – Try to reinstall or update the Bluetooth driver

The issue might have something to do with the Bluetooth drivers. It could be that it is outdated and needs to be updated or that you recently updated it and since then you have trouble removing the Bluetooth devices and so to fix the issue, you can update, roll back or uninstall the Bluetooth drivers. How? Follow the steps below.
  • Tap the Win + X keys to open the Device Manager.
  • Next, look for the Bluetooth device and right-click on it.
  • Select the option “Update driver”.
  • After that, a new popup window will appear. In there, select the option, “Search automatically for updated driver software”.
Note: Checking the update may take a few minutes so you’ll have to wait until it finishes. If it is able to find an update, you must install it. And if you want to reinstall the Bluetooth driver, just select the “Uninstall driver” option and follow the next on-screen instructions that follow.
Read More
PrintNightmare returns Microsoft states
PrintNightmareA few days ago we celebrated fixing of months-long PrintNightmare vulnerability by Microsoft, sadly a new bug and issue have been found. Firstly discovered Microsoft stated:
A remote code execution vulnerability exists when the Windows Print Spooler service improperly performs privileged file operations. An attacker who successfully exploited this vulnerability could run arbitrary code with SYSTEM privileges. An attacker could then install programs; view, change, or delete data; or create new accounts with full user rights.
A few days ago, Microsoft officially released a patch that was supposed to finally fix it. As you might recall this vulnerability was present for quite some time, Microsoft's solution after a long struggle was to elevate certain privileges to administrator account only and remove user accounts from managing printers. It complicated things a little bit but it was stated payoff was worth it. The new issue now is that on a system that already had accounts created and set, old accounts still can hijack the system, patch issues address only accounts that are created after the fix is administrated, old ones can still do whatever they want. Once again of course Microsoft has stated that until it is again resolved you should again disable the Print Spooler service as a temporary workaround.
Read More
How to Fix Windows 10 Error 0x80072efe

How to Fix Windows 10 Error 0x80072efe

Error Code 0x80072efe - What is it?

Error Code 0x80072efe is a fairly common error code that generally occurs in Windows 10. It is most often associated with the process of performing updates using the Windows Update tool.

Common symptoms include:

  • Inability to install or complete updates on your Windows machine
  • Computer freezing as programs are run or started
  • Inability to perform installations of downloaded programs
  • Programs crashing or failing to work properly

While Error Code 0x80072efe can cause a number of frustrating issues on your device, the good news is that there are several methods that can be used to fix this error. The two most common methods are actually fairly easy to perform and do not require advanced tools or knowledge. However, if you don’t feel like you will be able to perform the necessary steps on your own, be sure to get in touch with a qualified computer repair technician to help you in the resolution of this particular error.

Solution

Restoro box imageError Causes

Two things are generally behind the appearance of Error Code 0x80072efe on a Windows device. The first is that one or more of your registry keys are not available, have been corrupted, or are not installed properly. The second is that necessary DLL files aren’t working properly within your machine.

However, other things can mimic these causes, which is why the two methods listed below will resolve the issue in most cases.

Further Information and Manual Repair

Fortunately, there are two resolution methods that can be used quickly and easily when Error Code 0x80072efe arises on your Windows computer. Neither of these requires advanced knowledge or skill, but if you don’t feel comfortable with performing these steps on your own, it is recommended that you contact a qualified computer repair technician in order to get assistance.

Here are the best ways to resolve Error Code 0x80072efe on your computer:

Method One:  Check Your Time and Date Settings for Accuracy

If your time or date has been set incorrectly, it can make your system logs appear to have incorrect information, which can lead to the appearance of Error Code 0x80072efe. Because this is the easiest thing to fix if it is indeed the problem that is making the error code appear, this should always be the first thing that you try when this error code arises.

In order to check your time and date settings, follow these simple steps:

  • Step One: Make sure that you are logged into your computer as an administrator.
  • Step Two: Click on the time and date listed on the lower right edge of your screen. If the settings are not correct, choose the option to change the time and date.

If method one has not successfully resolved Error Code 0x80072efe, you may need to attempt method two.

Method Two:  Check Your Firewall Settings During Updates

In some cases, your firewall can prevent your machine from accessing the information that it needs in order for the installation or update to go through correctly. If that is the case, you can follow a few simple steps to turn off your firewall, just while you install the update, and then turn it back on.

In order to do so, follow these steps:

  • Step One: In the Start menu, choose the option to open the Control Panel.
  • Step Two: Select the option for System and Security, looking for and clicking on Windows Firewall.
  • Step Three: Turn off any private network firewalls.
  • Step Four: Reboot your computer to apply the changes that you have made.
  • Step Five: Re-attempt to run your Windows Update.

Note that if this method allows you to successfully bypass the error code, you’ll need to make sure to turn the firewall back on when you are finished. Even though it can interfere with the Update process, your firewall is still very important to your computer.

Method Three: Use An Automated Tool

If you wish to always have at your disposal a utility tool to fix these Windows 10 and other related issues when they do arise, download and install a powerful automated tool.

Read More
MS Edge Can’t connect to the proxy server
If you are trying to connect to the internet using the Microsoft Edge browser but encountered an error message instead that says, “Can’t connect to the proxy server”, read on as this post will show you how you can fix this error. This kind of error in Microsoft Edge could be caused by incorrect proxy settings or worse, malware. To fix this error, here are some suggestions you need to check out:

Option 1 – Try to check your internet connection

The first thing you can do to resolve the “Can’t connect to the proxy server” error in Microsoft Edge is to check your internet connection. There are times when your internet connection or Wi-Fi router can cause such problems. In such cases, you have to ensure that you have a valid internet source and if you are using a Wi-Fi router, you can try to use another connection and then see if the error is gone or not.

Option 2 – Try to disable the manual proxy set up from the Settings

In case you miss it, there is actually an option in the Settings panel that you can use to set up proxy in your Windows 10 computer. So if you encounter the “Can’t connect to the proxy server” error, you should disable manual proxy for the meantime and check if it fixed the error or not.
  • Tap the Win + I keys to open the Windows Settings.
  • Then go to Network & Internet > Proxy.
  • And on your right-hand side, ensure that the Automatically detect settings are enabled and that the Use a proxy server option under the Manual proxy setup is disabled.
  • Now try to open any website again and see if the problem’s fixed.

Option 3 – Try disabling the VPN

Like pointed out earlier, if you are using VPN, this could be the reason why you’re getting the “Can’t connect to the proxy server” error so the most obvious thing to do is for you to turn off the VPN and try to load a website in Edge again. And if you use a VPN software that works using their software, you can just completely exit or log-off from its account. On the other hand, if you are using a built-in Windows 10 VPN, you can simply turn it off or delete all the settings you have created there.

Option 4 – Disable the proxy server for your LAN

If your PC was just attacked by some adware or malware as of late, it is possible that it has changed the network settings in the system and might display spam advertisements. Thus, you have to disable the proxy server for your LAN. To do that, refer to these steps:
  • Tap the Win + R keys to open the Run dialog box.
  • Then type “inetcpl.cpl” in the field and hit Enter to pull up the Internet Properties.
  • After that, go to the Connections tab and select the LAN settings.
  • From there. Uncheck the “Use a Proxy Server” option for your LAN and then make sure that the “Automatically detect settings” option is checked.
  • Now click the OK and the Apply buttons.
  • Restart your PC.
Note: If you are using a third-party proxy service, you have to disable it.

Option 5 – Temporarily disable Firewall and third-party antivirus

Firewall and antivirus programs are known to block files the instant it detects a threat to the system. However, there are some cases when it can also block a file even when it’s a safe one. Thus, your antivirus or firewall programs might be the reason why you can’t download anything on your Windows 10 computer. To isolate the issue, you need to temporarily disable both the Firewall and antivirus programs and then check if you can now download anything from the internet. Do not forget to enable them again as disabling them can leave your computer vulnerable to cyber threats.

Option 6 – Clear the browsing data of Microsoft Edge

  • Open Microsoft Edge.
  • Then click on the three horizontal dots to open the menu.
  • From there, click on Settings. And under Settings, click the “Choose what to clear” button under the Clear browsing data section.
  • Next, check all the checkboxes and then click the Clear button to clear the browsing data in the Edge browser.
  • Restart Edge.

Option 7 – Try to reset, repair or reinstall Edge via Settings

You can reset, repair or reinstall the Edge browser through Settings. If none of it helped, you can try the following:
  • Open File Explorer and then go to this path – C:/Users/YourUsername/AppData/Local/Packages
Note: Before you type in the path in the Address bar, make sure that you put your user account name in place with the “YourUsername”.
  • Tap Enter to proceed.
  • Next, look for the folder named “MicrosoftEdge_8wekyb3d8bbwe” then right-click on it.
  • Click on Properties and uncheck the option “Read-only” under the General tab in the Properties window.
  • Click on Apply and then OK to save the changes made.
  • After that, look for the MicrosoftEdge_8wekyb3d8bbwe folder again and delete it. And if a prompt stating “Folder Access Denied” appears on your screen, just click on the Continue button to proceed – doing so will delete most of the content inside the folder except for the folder named “AC”.
  • Restart your PC.
  • Now all you have to do is to re-register Microsoft Edge using PowerShell. In the Start Menu, search “Windows PowerShell”.
  • Right-click on Windows PowerShell from the search results and select the “Run as administrator” option.
  • Type in this command in the PowerShell windows and tap Enter – Cd C:/Users/YourUsername
Note: Once again, make sure that you key in your user account name in place of “YourUsername.
  • After that, type in this command and tap Enter – Get-AppXPackage -AllUsers -Name Microsoft.MicrosoftEdge | Foreach {Add-AppxPackage -DisableDevelopmentMode -Register "$($_.InstallLocation)AppXManifest.xml" -Verbose}
  • Restart your PC.

Option 8 – Scan your computer for malware using Windows Defender

Your computer could be infected with malware which might have triggered the “Can’t connect to the proxy server” error. To fix this, you need to scan your computer using a reliable program like Windows Defender.
  • Tap the Win + I keys to open Update & Security.
  • Then click on the Windows Security option and open Windows Defender Security Center.
  • Next, click on Virus & threat protection > Run a new advanced scan.
  • Now make sure that Full Scan is selected from the menu and then click the Scan Now button to get started.
Read More
Photos app Export or Share is not working
The Photos app in Windows 10 is the default photo viewer. However, there are times when it might encounter some problems while you use it. One of these problems in the Photos app reported recently is where users try to export or share the images and videos from the app but weren’t successful in doing so. This can be really quite a hassle in opening images on your computer, especially since the Photos app is the default photo viewer in Windows 10 and if you don’t have any other photo viewer app installed. This kind of problem in the Photos app can be noticed when you try to use the “Remix” function for both photos and videos. In other words, this problem can occur with just pictures, videos, as well as a combination of both. So if you are trying to watch a video using this app, then you wouldn’t be able to play it. In such a case, the only thing you can hear is the audio but you wouldn’t see anything except for a hazy purple screen that has not export or share option. There are several possible causes for this problem and it could be fixed by updating the display driver/graphics driver or disabling the hardware-accelerated video encoding. You could also try updating or resetting or reinstalling the Photos app. For more details, follow each one of the suggestions provided below.

Option 1 – Try to update the Graphics driver

You can try to update your Graphics card driver using the Device Manager in your computer to resolve the blank dialog boxes problem or you can also go directly to the website of your graphics card manufacturers like NVIDIA, Intel, or AMD and go to the section called Drivers then check if there’s a new available update – if there is, download and install it. To update your Graphics driver via Device Manager, refer to these steps:
  • First, boot your computer into Safe Mode.
  • After that, tap the Win + R keys to launch Run.
  • Type in msc into the box and tap Enter or click OK to open the Device Manager.
  • After that, a list of device drivers will be displayed. From there, look for the Display Adapters and click on them.
  • After that, right-click on each entry under the Display Adapters and select the “Uninstall Device” option from the menu.
  • Now restart your computer.
  • After restarting your computer, go to the Settings app and Check for Updates in the Windows Update section.

Option 2 – Try disabling the hardware-accelerated video encoding

The next thing you can do to fix the problem is to disable the hardware-accelerated video encoding in your computer. To do that, follow these steps:
  • Open the Photos app and click on the visible three dots located in the upper right corner of the app and then select Settings.
  • From there, you should see the version number of the app in the “About this app” section. So if your app is version 2018.18071.****0.0 or greater, you should see the Video section which has a toggle button.
  • Turn that toggle button off to disable hardware-accelerated video encoding in the Photos app. This should fix the problem, if not, simply follow the next given options below.

Option 3 – Try to update the Microsoft Photos app

  • Open the Microsoft Store and click on the three horizontal dots for the menu located on the top right portion of the window to see the options.
  • Next, select Downloads and updates and then click the Get updates button in the top right. This will install any pending updates for all the apps including the Microsoft Photos app using the Microsoft Store.

Option 4 – Try resetting the Photos app

  • To get started in resetting the Photos app, open the Windows 10 Settings.
  • Then go to Apps > Apps & features.
  • After that, scroll down until you see the Photos app option – click on it and open its Advanced options.
  • From there, you will see the Reset button, click on it and click and then click on it once more to confirm.
Note: The process may take a couple of minutes to complete. Once it’s done, open the pictures again using the Photos app.

Option 5 – Try reinstalling the Photos app

If none of the options given above worked, then you might want to consider reinstalling the Photos app. Unlike what most users think, it isn’t really that hard reinstalling preinstalled apps as you have the Windows PowerShell for that. To use this program in reinstalling the Photos app, follow these steps:
  • Open the Windows PowerShell program with admin privileges and key in the following command:
Set-ExecutionPolicy Unrestricted
  • After that, execute this second command to re-register and reinstall the Microsoft Photos app.
Get-AppXPackage -AllUsers | Foreach {Add-AppxPackage -DisableDevelopmentMode -Register "$($_.InstallLocation)AppXManifest.xml"}
Note: In the command given, do not forget to replace the “PackageFullName” with the actual package name for the Photos app. After executing the command, it will uninstall the Photos app from your computer so you need to install it again from the Windows Store by simply looking for it. Once you found it, just click on install to start the installation process.
Read More
5 Windows 10 Upgrade errors you might encounter

5 Windows 10 Upgrade errors you might encounter

5 Windows 10 Upgrade Errors

The recently released Windows 10 captivated the mass but its rollout, polished as it might have been, proved everything but seamless. Surf the Internet and you’ll get the gist. People are complaining and they need assistance. Assistance with what you might ask? Many have attempted to make an upgrade but failed after encountering various strange combinations of letters and numbers. These are none other than error codes. If you’ve tried and failed, feast your visuals below as you might encounter one of these 5 Windows 10 Upgrade errors.

Error Code 0x80073712

Encountering error code 0x80073712 in no way implies that you need to throw out your computer system and acquire a new one. Not at all! This error code simply means that a very important file to Windows might have gone missing or corrupted. This file is crucial to Windows update so without obtaining this file, you won’t be able to proceed with the update.

Error Code 0x800F0923

Likely, there are many programs and drivers installed on your computer. They all play a vital role. However, if you’ve received error code 0x800F0923, it might be time to consider or turn your eyes to installed drivers on your system. Why? Error code 0x800F0923 means that there’s a driver or driver on your current Operating System that’s not compatible with Windows 10. There’s clearly a dilemma here.

“We couldn't complete the updates. Undoing changes. Don't turn off your computer.” Or “Failure configuring Windows Updates. Reverting changes”

That’s a pretty odd error but I will say it's slick… That Windows 10 upgrade error is straightforward. Microsoft is just letting you know that they won’t be able to complete the update to Windows 10 and so they are putting your computer back to where it was. How nice of them.

The error messages above are pretty generic and will manifest when the upgrade fails for one reason or the other. To resolve this issue, you’ll most definitely have to decipher what error code was presented. Identifying that will provide a glimpse into exactly what steps you need to take.

The Update Isn't Applicable to Your Computer

I don’t know about you but I strongly believe Microsoft is subtly letting you know that your computer system is old and needs to be thrown out. Also, this update could imply that your PC needs to install important updates to rev you up to the requirements. All relevant updates to your computer must be installed before you can get past this stage.

Error… “Something Happened”

This Windows 10 upgrade error has been the talk of the Internet. In fact, users of Windows OS have been making it a mockery. Clearly, not many have had success after encountering this error. Obviously, “something happened” but it’s just not easy to decipher what went wrong. Microsoft is still trying to figure it out.

Solution

Restoro box image
Read More
1 2 3 162
Logo
Copyright © 2022, ErrorTools. All Rights Reserved
Trademarks: Microsoft Windows logos are registered trademarks of Microsoft. Disclaimer: ErrorTools.com is not affiliated with Microsoft, nor claim direct affiliation.
The information on this page is provided for information purposes only.
DMCA.com Protection Status