How to Fix 0x0000001A Error Code in Just a Few Clicks!

Repair Error 0x0000001A

What is 0x0000001A Error Code?

The 0x0000001A is a severe memory management blue screen of death error code.

This is Windows error is also called a Stop code The system is automatically forced to reboot state which means any unsaved work is likely to be lost.

This error code pop-up locks you out of the program running on the screen and prevents you from working on it.

Solution

Restoro box imageError Causes

Experiencing error codes on your PC is an unusual activity that triggers that there is definitely something wrong with your system which should be repaired before it becomes a serious threat. The underlying causes of each error code are different.

When you come across a 0x0000001A error message this triggers several issues on your PC but largely it’s related to defective or mismatched RAM (Random Access Memory).

This could be due to disk De-fragmentation, cluttered registry, and overheating of PC hardware, or perhaps the power supply units that have been used to overcapacity which prompts your PC to show a 0x0000001A error message on your screen.

In addition to this, another reason could be a fault in the BIOS motherboard that could be outdated.

No matter what the underlying cause of the 0x000001A may be, it is imperative to get it resolved as it seriously damages your computer and leads to system failure.

Further Information and Manual Repair

Restoro is the best way to resolve almost all types of error codes including 0x0000001A in just a few clicks. It is a multi-functional PC registry cleaner that serves as a one-stop solution for all PC issues.

This tool can be used to resolve the blue screen of death errors like 0x0000001A in seconds and help you resume and get access to the program that you were working on before you experienced the error code.

With this helper, you don’t need to have the technical expertise or sound knowledge about the underlying cause of 0x0000001A.

This is an intuitive and advanced tool with built-in cutting edge technology that scans and identifies the cause of 0x00000001A and fixes it right away.

It has a neat design layout and a user-friendly interface that is easy to use for even novice users.

Restoro registry cleaner cleans up registry disk space, occupied by unnecessary files including junk files, invalid registry entries, temporary internet files, and entries of uninstalled programs that are still present in the registry.

It cleans and clears up disk space and wipes out clutter stored in the registry of your system which is likely to trigger RAM and memory mismanagement issues triggering an error code 0x0000001A pop-up message.

Restoro is feature-filled which makes it multi-functional.  It is safe, secure and efficient. For optimum data security during repair, it creates backup files. This helps recover data in the event of data loss during repair, which is quite rare.

So what are you waiting for? Download Restoro Registry Cleaner today and resolve the error pop-up 0x0000001A now!

If you like to learn and find out more about various Windows errors, and how to repair them go to our vast archive or use search to find articles that will explain and help you in solving your issue.
However, if you prefer to do things fast and with automatization then we are proposing to use an automated solution for your issues. The application that we are recommending is Advanced System Repair Pro
Advanced System Repair utilizes multiple tools all in one to give you a quick, simple, reliable, and very thorough diagnosis of your PC. It brings you all the tools you need in one program to clean, fix, protect, optimize and boost your PC!
1-Click Maintenance
All the tools to make it simple and easy! It's like having a professional technician at the click of a mouse.

Junk Cleaner
Keeping your computer free from unnecessary clutter also helps make your computer last longer. Like any other machine, if you keep it clean and take care of it, it will serve you better for longer!

Optimize background apps
Optimize applications background activity with the built-in Application Optimizer feature.

Disk Defrag
With a simple 1-click, Advanced System Repair speeds up your PC by assembling fragmented files on your machine and organizing them more efficiently.

Malware Removal
Finds and removes all types of harmful malware including trojans, worms, bots, adware, spyware, PUPs, and more!

Privacy Cleaner
The all-in-one privacy suite to Clean Your Tracks & Protect Your Privacy! Make your computer safe, secure, and more efficient!

System Tweak/Optimizer
ASR will analyze your complete system and settings to adjust your PC to function at its maximum performance.

Registry Cleaner
Over time, as you install and uninstall applications, the registry can become cluttered with old entries and broken settings which can result in program crashes, and annoying messages and slow the computer down.
Visit our Advanced System Repair Pro Download page to inform yourself about all the benefits of this software and get a free trial copy of it.
advanced system repair pro

Advanced System Repair Pro

One-click automated PC repair solution
ASR logo
With Advanced System Repair Pro you can easily
Replace damaged files
Restore performance
Free disk space
Remove Malware
Protects WEB browser
Remove Viruses
Stop PC freezing
DOWNLOAD
Privacy Policy | Terms of Use | Uinstall
Advanced System Repair Pro is compatible with all versions of Microsoft Windows including Windows 11

Share this article:

You might also like

How to Fix CoreFoundation dll Error

Troubleshoot CoreFoundation dll Error

CoreFoundation dll Error – What is it?

The CoreFoundation dll error is a common error associated with Apple Software products. Most of the Apple Software products rely on this dll file to load and run. This dll file is Apple’s proprietary. The error message is prompted in the following format:
“CoreFoundation.dll was not found” or “Apple Application Support is missing’.

Solution

Restoro box imageError Causes

The CoreFoundation.dll error message is triggered because of several reasons. These include:
  • Deleted CoreFoundation dll file
  • The CoreFoundation dll file has been overwritten
  • Poor installation of the Apple software
  • Corrupt software due to viral infection
  • Registry problems

Further Information and Manual Repair

It is advisable to fix CoreFoundation dll error code right away to avoid inconvenience. This error may stop you from accessing and running your desired Apple application. Here are some of the best ways to resolve this error on your system:

1. Restore the Deleted CoreFoundation dll File

Since Dynamic Link Library is a shared program, if you happen to delete an Apple program on your PC, chances are you might have deleted that file too in the process. Therefore, the easiest way to recover and restore the CoreFoundation dll file and resolve the error is to look for the file in the recycle bin. If you can’t locate it, then another way to restore the missing CoreFoundation dll file is to download the files from the internet.

2. Reinstall  Apple Software

If the error still persists then it is advisable to re-install Apple software via iTunes or any other Apple Software that you have on your PC. For example, if you have iTunes, then to reinstall it first go to the start menu and then the control panel. Now click on Add/Remove programs and locate iTunes software. Click the Uninstall button next to iTunes. Wait for a while until the program is completely uninstalled. After the installation is complete, restart your PC and then download the latest version on iTunes and install it. Now try running the software again. Hopefully, this will resolve the issue.

3. Scan for Viruses

Another way to resolve CoreFoundation dll error on your system is to scan for viruses. Run an antivirus to detect viruses and remove them from your PC.

4. Clean Your Registry

Remember DLL file errors also indicate a corrupt registry. When you don’t clean the registry it overloads with unnecessary and obsolete files like junk files, cookies, temporary internet history, and bad /invalid registry entries. When these files accumulate, they damage the registry, dll, and system files too. It also causes disk fragmentation. To repair the registry and fix dll files again, download a registry cleaner. Whether you want to scan for viruses or clean the registry, it is advisable to download Restoro. This is a multi-functional and advanced PC Fixer deployed with an intuitive algorithm and multiple powerful utilities. These include an antivirus, a registry cleaner, Active X controls, and class scanner, and a system optimizer. The registry cleaner detects all registry issues and resolves them instantly. It wipes out the unnecessary files cluttering and damaging the registry. It fixes and restores the damaged dll files including CoreFoundation dll file thereby resolving the error. It takes a few clicks to resolve this error. The antivirus feature scans your entire PC and removes all kinds of malicious software including spyware, malware, viruses, and Trojans. To ensure the antivirus does not slow down the speed of your PC, Restoro also features a system optimizer that boosts the performance of your computer significantly. It is powerful and bug-free software with a user-friendly interface that makes it quite easy to operate. You can download it on any Windows version as it is compatible with all. Click here to download Restoro and resolve CoreFoundation dll error now!
Read More
How to Fix Plugin.dll Error

Repair Plugin.dll Error

Plugin.dll Error - What is it?

Plugin.dll is a dynamic link library file associated with Adobe Photoshop CC powered by Adobe Systems Incorporated for the Windows Operating System. DLL are small programs similar to ‘exe’ files which allow multiple software programs to share the same functionality. It is used to call commands, load applications, and successfully execute applications. Plugin.dll error messages may appear during program installation, while a plugin.dll related software program (Adobe Photoshop CC) is running, during startup and shutdown.

Solution

Restoro box imageError Causes

Plugin.dll errors may occur due to multiple reasons such as:
  • Missing or corrupt Plugin.dll files
  • Viral infection
  • Issues in the Windows registry
  • Broken registry keys
Plugin.dll errors may appear on a Windows-based computer as the following:
  1. “Plugin.dll not found."
  2. “The file Plugin.dll is missing."
  3. “Cannot register Plugin.dll."
  4. "Cannot start Adobe Photoshop CC. A required component is missing: Plugin.dll. Please install Adobe Photoshop CC again."
All the causes of the plugin.dll error code are associated with the registry. It is advisable to repair this error before it causes serious damages to your system.

Further Information and Manual Repair

To repair the plugin.dll error on you system, you don’t have to hire a technician or be adept at computer programming. The best way to resolve this error code is to download Restoro. This is a new, innovative, high and multi-functional PC fixer integrated with powerful and performance-driven multiple utilities. It includes a registry cleaner, and system stability scanner. So, whether the cause of the error code Plugin.dll error on your system is missing DLL files or even broken registry keys, Restoro can help you repair all these issues in no time. It is user-friendly and can be operated by users of all levels. Dll files go missing and registry gets corrupt because of the data overload in the RAM/the hard disk. This happens due to poor PC maintenance. The registry tends to save all the activities performed on the PC this includes even the junk files, invalid registry entries and files from uninstalled programs. If the registry is not cleaned regularly, such files accumulate a lot of disk space which leads to registry malfunctioning. It damages .dll files and eventually corrupts the registry. By scanning your PC with a powerful registry cleaner, you can easily wipe out the files cluttering your PC and clear your disk space. Additionally, it also repairs the damaged plugin.dll files, fragmented disk and corrupt registry.  Thereby restoring your PC to its normal condition and resolving the plugin.dll error code on your system. Besides this, you can also run Restoro on your PC to resolve speed issues and Active X and class errors. It is safe, efficient and compatible with all Windows versions. Click here to download Restoro and resolve the plugin.dll error.
Read More
Fix AMD driver crashing Windows 10
Graphic cards are essential to our computers but from time to time in the race to make better GPU and to grab a large portion of the market bad drivers get released and can create really unwanted and unpleasant experiences, from Windows freezes to the black screen of death, to AMD driver Windows crashing down and many more. This article will cover basic troubleshooting with AMD drivers and offer you solutions on how to fix them.
  1. Rollback the previous version of the driver.

    Installing the new driver version is the reason for this particular error, so naturally rolling back the previous version which was stable and did not cause issues will solve the problem. To roll back the previous version of drivers follow the next steps: Open Start menu and click on settings, go to system and choose Apps and features Find: AMD Catalyst Install Manager, right-click on it, and choose to uninstall Go to AMD official website and download the previous driver version, install it on your computer Turn off automatic driver updates and reboot your system
  2. Reinstall the driver

    Sometimes it is not a bug in the released driver, it is a corruption of files because of file transfer or any other specific reason. The reinstalling driver will fix an issue if this is the case. To reinstall the driver Press ⊞ WINDOWS + X and choose Device Manager Expand Display adapters, right-click on AMD device and choose to uninstall Go to the official AMD website, download the latest driver and install it Reboot your system
  3. Disable browser extensions

    Some users have reported that error occurs only when they are watching videos online, if this is your case, go to your browser options and disable extensions to see if this will remove the problem.
  4. Remove Lucid Virty MVP

    If by any chance have this relic installed on your system, go to Applications and remove it. It is an old program shipped with old drivers and it is usually present in your Windows that was upgraded from 8.1 to 10. Uninstall it and see if this fixes your issue.
  5. Clean your graphic card

    Sometimes this error can happen due to excessive dust on your GPU, if you have the expertise, clean it or take it somewhere to be cleaned.
Read More
Fixing To use System Restore you must ...
There are cases when you want to undo some changes you’ve made to your computer and to do that you have to perform the System Restore task. However, if you encounter an error that states “To use System Restore you must specify which Windows installation to restore”, when doing so, read on as this post will help you fix the problem. This kind of error in System Restore could be due to corrupted files in the system. There are also situations where you are not able to boot up once you encounter this error which could be a big problem. On the other hand, this error might have something to do with corrupted BCD files. Whatever the cause is, here are some potential fixes you have to try.

Option 1 – Try to run System File Checker offline

Like pointed out, since the error might be due to corrupted system files, you can try to run System File Checker offline. How? Refer to these steps:
  • You need to go to the Advanced Startup Options and from there select Troubleshoot.
  • Next, select the Advanced Options and then Command Prompt.
  • After opening Command Prompt, type the commands given below and tap Enter right after you type each one of them.
    • Cd /
    • Dir
  • If you can see the “Users” folder, that is your system’s drive. However, if you can’t see it, you can just change the drive-by assigning “D” as its alphabet volume.
  • Then execute this command where “C” is the system drive: sfc /scannow /offbootdir=C: /offwindir=C:Windows
  • Now repeat the given steps sequentially.

Option 2 – Try to run DISM tool

You can also run the DISM tool to repair the potentially corrupted system image. First, you have to check the health of the system like checking the integrity of the system files and Windows services. To run DISM, follow the given steps below sequentially.
  • Open Command Prompt from the Advanced Startup options.
  • After that, execute this command where “C:” is the system volume: DISM /Image:C:Windows /Cleanup-Image /RestoreHealth /Source:C:WindowsWinSxS
  • If you encounter an error after executing the given command, insert the Windows USB or DVD and then execute this next command where “E:” is the USB or DVD drive: DISM /Image:C:Windows /Cleanup-Image /RestoreHealth /Source:esd:E:SourcesInstall.esd:1 /limitaccess
  • In some cases, “install.esd” would be “install.wim” and in such case, you have to modify and execute this command: DISM /Image:C:Windows /Cleanup-Image /RestoreHealth /Source:wim:E:SourcesInstall.wim /limitaccess

Option 3 – Try to repair corrupted BCD

As mentioned, the error could also be due to corruption in BCD, and to fix it, you can use Bootrec.exe – a built-in command-line tool used to troubleshot issues related to boot up and Windows Startup. Before you run this tool, make sure that you have inserted a bootable USB or DVD into your computer. Once you have that covered, follow these steps:
  • You need to go to the Advanced Startup Options.
  • Then click on Troubleshoot.
  • Next, select the Advanced Options and then Command Prompt.
  • Once Command Prompt has been pulled up, enter each one of the following commands and in the sequence that they are given to rebuild BCD files and repair MBR files:
    • Bootrec /Fixmbr
    • Bootrec /FixBoot
  • After you execute the commands given above, you should see a confirmation message that says, “The operation completed successfully”.
  • Now type the “Bootrec /RebuildBCD” command to rebuild BCD.
  • Finally, close Command Prompt and then restart your computer to successfully apply the changes made.

Option 4 – Try to run the Automatic Repair Utility

You might also want to use Automatic Repair in fixing the error. To do so, follow the steps below.
  • You can start by creating and booting from a bootable Windows 10 USB Stick.
  • After that, click on Repair your computer located in the bottom left corner when you are on the initial Windows Startup screen.
  • Next, click on Troubleshoot, and then on the other screen, click the Startup Repair option.
  • Now select the operating system you want to repair. Once you do that, it will start to repair your operating system. Wait until the process is completed and then check if the problem’s now fixed.

Option 5 – Try to use the Windows Recovery Environment

If the four options given above didn’t help fix the problem, you could try running Windows Repair and a Windows bootable USB or DVD.
  • First, insert the bootable USB or DVD and boot into it, and select the “Repair your computer” option.
  • Next, once you see the manufacturer logo on your computer, tap the key to enter into Windows Recovery Environment.
  • After that, change the Boot sequence to DVD drive under the UEFI Firmware settings and restart your computer.
  • Once your computer has restarted, select the boot order and make changes accordingly as displayed in the BIOS.

Option 6 – Try running System Restore in Advanced Startup Options

Since you probably can’t boot into your Windows 10 computer, you can try to run System Restore again in the Advanced Startup Options.
  • Boot your computer into the Advanced Startup Options screen.
  • From there, you will see some options to troubleshoot when you can’t log in to Windows in the usual way.
  • Now select Troubleshoot > Advanced Options > Command Prompt.
  • After that, type “exe /OFFLINE:C:Windows” and hit Enter to execute the command which will start the System Restore process.
Note: You need to replace “C” with the drive where Windows Installation is located.
Read More
How to fix 502 Bad Gateway error in Windows
Browsing the internet doesn’t always go smoothly, you might encounter ads, pop-ups, viruses, malware, and even errors. In this post, we’ll walk you through how you can fix the 502 Bad Gateway error that you might encounter in browsing the internet. This kind of error suggests the server which is the one that’s acting as a gateway to facilitate in taking your request to the server and bring some response back has received an invalid response or even no response at all. It could be that the connection is broken or that there is an issue on the server-side that returns an invalid response. Even though the 502 Bad Gateway error is a server-related error, there are still a few things you can try that might help resolve it, if tapping the Ctrl + F5 keys does not resolve the problem. Keep in mind that it doesn’t matter what website you open as this error can appear on any website. To resolve the problem, you need to follow the options prepared below.

Option 1 – Check the network cable connections and restart your router

As with other connection problems, this is the most basic thing to do before you try other troubleshooting options because the root cause of the problem might be as simple as a cable not connected properly or a router that just needs to be restarted. Thus, checking the network cable connection to see if there is anything out of order can help as well as restarting your router.

Option 2 – Reset Winsock, TCP/IP & Flush DNS

Resetting Winsock, TCP/IP, and flushing DNS might help you resolve the issue. To do so, follow these steps:
  • Right-click on the Start button and click on Command Prompt (administrator) so you can pull up an elevated Command Prompt.
  • After that, execute each one of the commands listed below. And after you typed in one after the other, you have to hit Enter.
  1. netsh winsock reset – type in this command to reset Winsock
  2. netsh int ip reset resettcpip.txt – type in this command to reset TCP/IP
  3. ipconfig /flushdns– type in this command to flush the DNS cache
  • Next, restart your PC and check if the problem’s fixed.

Option 3 – Change the DNS

Changing the DNS server for your network can also help you fix the 502 Bad Gateway error. You can use a public DNS like the Google Public DNS, Open DNS, Yandex DNS, Comodo Secure DNS, and many more. All you have to do is to override the default DNS settings on your PC so that you can specify which DNS server is used as well as which IP address should be used for a specific domain.

Option 4 – Try updating the Network Adapter Driver

Follow the steps below to update your Network Adapter Driver:
  • Tap the Win + R keys to launch the Run window and then type in the “devmgmt.msc” command and hit Enter to open the Device Manager window.
  • From there, expand the list of all the network drives and update each one of them.
Note: If updating the network drivers didn’t help in fixing the problem, you can also try to uninstall the very same drivers and restart your Windows 10 PC. After that, the system itself will reinstall the drivers you just uninstalled. Alternatively, you can also download and install the drivers from the manufacturer’s website directly.

Option 5 – Try a Network Reset

When all else fails, you might have to consider resetting your entire network settings. Simply follow the steps below to do so.
  • Click on the Start button and then click on the gear-like icon for Settings to open it.
  • Next, select Network and Internet.
  • Then scroll down and look for “Network Reset” – click on it and then click on the Reset now button.
Read More
How to turn the game mode off in Windows 11
Among other things and innovations, Windows 11 brings to the table is the game mode. The game mode is a system designed to release some resources and optimize your system when Windows 11 detects that you are playing games. It also turns off automatic updates while the game is active. game mode in Windows 11
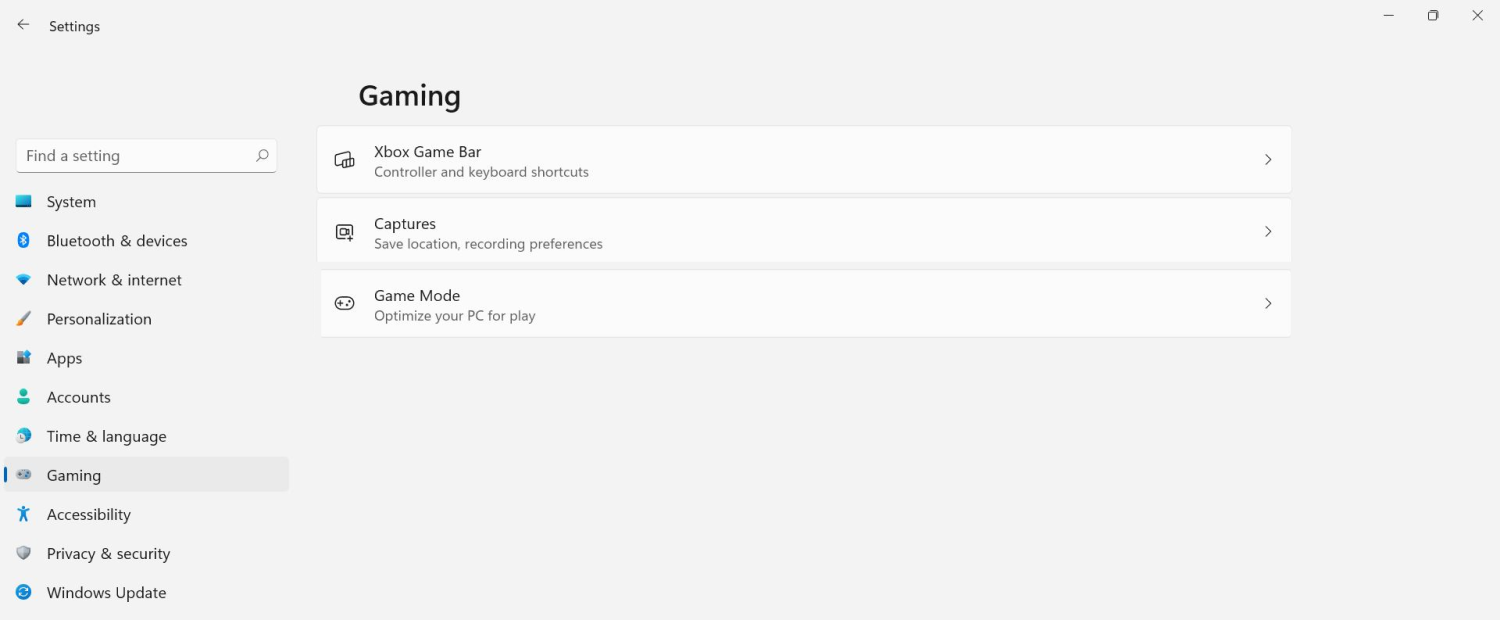
The game mode is active at all times and usually, everything works great but in some instances, it can sadly cause some performance issues. If you are one of these unlucky people where game mode is not working as supposed to do, don’t panic, we have a quick guide for you on how to turn it off.
  1. Press ⊞ WINDOWS + I to open settings
  2. Inside click on Gaming
  3. Select Game mode
  4. Click switch beside Game mode to turn it off
  5. Close settings
Everything will be automatically saved and applied and you should not have any issues from now on. If for any reason you wish to turn game mode back ON, just follow the same steps and turn the switch to ON.
Read More
Chrome won’t open or launch on Windows
If you’re suddenly unable to launch or open Google Chrome or unable to load web pages, then it’s most likely that the files in Chrome have been corrupted or some plugin is taking up a lot of resources which is why you encounter an error message saying, “Google Chrome has stopped working”. And when you try to check the Task Manager, you’ll see that Chrome is really taking up lots of resources, however, when you check the Taskbar, strangely, you will see nothing. If you are currently facing this issue in Chrome on your Windows 10 PC, follow the given options below.

Option 1 – Kill Google Chrome’s process in the Task Manager

If you aren’t able to open Chrome, then maybe its process is running in the background and you don’t see the browser windows. If that’s the case, you may have to force quit the browser and then try to open it again.
  • First, right-click on the Taskbar then select the Task Manager. And if the Task Manager is not responding, you can just use the Alt + Ctrl + Del keys and then select the Task Manager.
  • After opening the Task Manager, under Processes, look for Google Chrome’s process which would most likely be named “chrome.exe”.
  • Right-click on Google Chrome’s process and then select the End task option.
  • Now try to open Google Chrome again.

Option 2 – Try checking if your antivirus program is blocking Google Chrome

There are instances when due to false-positive, a security or antivirus program might block Chrome which is why it failed to open properly. Thus, you can just disable the security program temporarily and then check if you can now open Chrome or not.

Option 3 – Delete the User Profile in Chrome

You can also try deleting the User Profile folder in Chrome. To do so, follow these steps:
  • Tap the Win + R keys to open the Run dialog box.
  • Then copy and paste “%USERPROFILE%AppDataLocalGoogleChromeUser Data” and hit Enter.
  • From there, look for a folder named “Default folder” and then copy the folder to another drive as a backup.
  • After creating a copy of the folder, delete the Default folder.
  • Next, open Google Chrome again and go to Settings > Advanced > Reset.

Option 4 – Disable the Extensions in Chrome

There are instances when issues on a browser are triggered or caused by some problematic extension. To find out which one of your extensions is causing the problem, disable them all first and then enable them back one by one.
  • Click on the three-dotted icon for the menu located at the top-right corner of your screen.
  • Then click on the More tools option and go to Extensions.
  • From there, you will see a list of all the installed extensions in Chrome.
  • Disable all these extensions and restart the browser.
  • Now enable them back one by one to figure out which one of them is the culprit. You could also remove extensions that you no longer use.

Option 5 – Run the Chrome Cleanup tool

You might also want to try running the Malware Scanner & Cleanup tool in Chrome. This is a built-in tool that can help you get rid of any unwanted pop-ups, banners, ads, unusual startup pages, toolbars, and malware. Thus, it can help you to resolve the issue in Chrome.

Option 6 – Try to reinstall Chrome

If running the Malware Scanner & Cleanup tool in Chrome didn’t work out for you, you can try reinstalling it. To do so, follow these steps:
  • Open the Settings app and go to System > Apps & features.
  • From there, look for Chrome and uninstall it from your PC.
  • Then go to the official website of Google Chrome and download its latest version and install it.
Read More
The proxy server is refusing connections
If you receive an error message saying, “The proxy server is refusing connections” while trying to open a website on your Google Chrome or Mozilla Firefox browser in Windows 10, then read on as this post will guide you in fixing this error. This kind of error occurs when you have a wrong or dead proxy configuration or when you are using some VPN service. However, this kind of error could also mean that your computer might be infected by malware which caused some changes in the internal settings. Whatever triggered the error, here are some suggestions that could help in fixing it.

Option 1 – Check the proxy settings in your browser

Like other browsers, Firefox allows users to set up proxy in several ways. However, if you’ve made any changes recently which might have caused the error, the first thing you can do is to check the proxy settings in your Firefox browser. Follow the steps below to do so.
    • Open the browser and go to Menu and then click Options.
    • After that, go to the General tab and scroll down and click the Settings button under Network Settings.
  • From there, make sure that the Use system proxy settings option is set. If not, you have to enable No proxy and then save the changes made.
  • Now check if the “The proxy server is refusing connections” error is fixed or not.
Note: If you want to use a proxy in Firefox, you have to select the Manual proxy configuration and set it up properly. And if your network has a proxy setting and you want to grab that, you have to opt for the Auto-detect proxy settings for this network option.

Option 2 – Try disabling the proxy server for your LAN

If your PC was just attacked by some adware or malware as of late, it is possible that it has changed the network settings in the system and might display spam advertisements. Thus, you have to disable the proxy server for your LAN. To do that, refer to these steps:
  • Tap the Win + R keys to open the Run dialog box.
  • Then type “inetcpl.cpl” in the field and hit Enter to pull up the Internet Properties.
  • After that, go to the Connections tab and select the LAN settings.
  • From there. Uncheck the “Use a Proxy Server” option for your LAN and then make sure that the “Automatically detect settings” option is checked.
  • Now click the OK and the Apply buttons.
  • Restart your PC.
Note: If you are using a third-party proxy service, you have to disable it.

Option 3 – Try disabling the manual proxy setup from Settings

In case you miss it, there is actually an option in the Settings panel that you can use to set up a proxy in your Windows 10 computer. So if you encounter the “The proxy server is refusing connections” error, you should disable manual proxy for the meantime and check if it fixed the error or not.
  • Tap the Win + I keys to open the Windows Settings.
  • Then go to Network & Internet > Proxy.
  • And on your right-hand side, ensure that the Automatically detect settings are enabled and that the Use a proxy server option under the Manual proxy setup is disabled.
  • Now try to open any website again and see if the problem’s fixed.

Option 4 – Check your VPN

If you are using a VPN application, there are times when it causes some issues like this error. If that’s the case, you can try to disable your VPN temporarily and see if the error is resolved or not and if turns out that your VPN is the culprit, you have to uninstall it and install a new one or its latest version. To uninstall it, follow the steps below.
  • Tap the Win + R keys to open the Run dialog box
  • Then type “appwiz.cpl” in the field and hit Enter to open the Programs and Features in Control Panel.
  • From there, look for the VPN service you are using, select it and then click on Uninstall to remove it.
  • After that, restart your computer and try to install the latest version of the program again. It should work now. If not, proceed to the next available option below.

Option 5 – Clear your browser’s internet cache

You actually have the option to Hard Refresh in order to clear the cache of your browser either pressing key combination Ctrl +F5.

Option 6 – Try scanning your computer using Windows Defender

As mentioned, the “The proxy server is refusing connections” might be caused by some malware in the system and so to eliminate the malware, you have to scan your computer using security programs like Windows Defender.
  • Tap the Win + I keys to open Update & Security.
  • Then click on the Windows Security option and open Windows Defender Security Center.
  • Next, click on Virus & threat protection > Run a new advanced scan.
  • Now make sure that Full Scan is selected from the menu and then click the Scan Now button to get started.
Read More
What driver to use inside Windows
When clean Windows is installed or when you place new hardware in your computer usually Windows itself detects the device and installs its driver. The question that comes now is, do you keep that driver or do you install the manufacturer's one. In order to answer this question let's analyze what is difference between the two drivers and other factors which could influence your decision.

Difference between drivers

First of all, know that drivers Windows installs are also drivers from the device manufacturer which have gone through Microsoft quality control in order to be included in Windows itself. Now naturally question which occurs, what is the difference, well answer to that would be this: in Windows, you have stripped down driver, just a driver in order for Windows to know what device is plugged and how to use it, meaning that for example if you install printer device, you will be able to print documents and Windows will know it is a printer but ... You will not get the control panel for that printer where you can adjust the printer itself and all of its features like let's say paperweight, etc. So if you need these kinds of features in that case it would be better to install a complete driver suite from the manufacturer and get the whole package. Windows will recognize the RAZER mouse for example but you will not be able to change its colors of program custom buttons on it until you install RAZER drivers. One more important thing to note is that drivers which are in Windows are less updated than drivers from the manufacturer's site. That being said, if you prefer and want to have the latest drivers you will prefer to get them again from the manufacturer.

Conclusion

So it seems that manufacturer's drivers are always in some form of advantage and that you will always want them and most of the time this is true, as a matter of fact, the only time I could think that you could use bare down Windows drivers is when new drivers update breaks something in Windows and device start behaving improperly. in this particular case, it is better to roll back to the previous Windows driver which has passed Microsoft quality control and is working for sure. In any other case, you are better off with the latest manufacturers drivers If you would like to read more helpful articles and tips about various software and hardware visit errortools.com daily.
Read More
Change default audio output for Narrator
For PC users that are blind or have low vision, the Narrator accessibility feature in Windows 10, lets you use your PC without a display or mouse to complete common tasks – it reads and interacts with things on the screen, like text and buttons. The narrator can be used to read and write an email, browse the internet, and work with documents. In Windows 10, there are a lot of options for Narrator that you can customize. You can change its keyboard shortcuts, personalize Narrator’s voice, enable Caps Lock warnings, and more. You can choose the voice for the Narrator, adjust the speaking rate, pitch, and volume. To change the default audio output device used to play the voice of the Narrator in Windows 10:
  • Press the ⊞ WINDOWS + I
  • From the Settings menu, click Ease of Access.
  • Click Narrator on the left pane.
  • In the Narrator window, on the right pane, toggle the button to On to enable Narrator if required.
  • Scroll down to the Personalize Narrator’s voice section.
  • For the Select where you hear Narrator’s voice option, click the drop-down and select the audio output device you want from the list. Please know that you will not be able to choose if you do not have multiple audio output devices connected to your Windows 10 computer.
  • Exit Settings when done.
If you would like to read more helpful articles and tips about various software and hardware visit errortools.com daily.
Read More
1 2 3 162
Logo
Copyright © 2022, ErrorTools. All Rights Reserved
Trademarks: Microsoft Windows logos are registered trademarks of Microsoft. Disclaimer: ErrorTools.com is not affiliated with Microsoft, nor claim direct affiliation.
The information on this page is provided for information purposes only.
DMCA.com Protection Status