Prompted For A Product Key On Windows 10 - How to Fix It

Prompted For A Product Key – What Is It?

Some Windows 7 or Windows 8/8.1 users are having a hard time upgrading to Windows 10 as they are being prompted for a product key. By default, the Windows 10 operating system does not require a product key and users should not be prompted for one, given you upgraded your computer from an activated Windows 7 or Windows 8/8.1 license or from the Windows 10 Preview build. However, there are some users encountering this problem and there are several reasons for this.

Solution

Restoro box imageError Causes

There are a few reasons why some users are being prompted for a product key when upgrading to Windows 10:

  • Windows 7 or Windows 8/8.1 license is not activated.
  • You’re upgrading to Windows 10 final release from a preview build.
  • There are broken operating system files.
  • Activation servers get overwhelmed due to the high volume of upgrades.
  • The Windows 10 copy you downloaded does not correspond with the current Windows system you are upgrading from.

Further Information and Manual Repair

Before you can fix this problem, you need to know why you’re being prompted for a product key. Some things you should know about Windows 10 product key activation are the following:

  • You cannot activate Windows 10 using your Windows 7 or Windows 8/8.1 product key. Windows 10 has a unique product key.
  • Error codes such as 0x8007232b, 0XC004E003, 0x8007007B, or 0x8007000D might pop up during system upgrade especially when the activation servers get overwhelmed with the high volume of upgrades.
  • You don’t really need to know your Windows 10 product key.

Now, if ever you’re prompted for a product key when you’re upgrading to Windows 10, you can apply the following methods:

Method One: Give It A Few Days

If you’ve been prompted for a product key upon upgrading to Windows 10, you should click on the “Do this later” option. Wait for a few days then Windows 10 will get activated automatically.

Method Two: Download A Copy of Windows 10 Corresponding Your Current System

One of the reasons Windows users are being prompted for a product key when upgrading to Windows 10 is that they have downloaded a wrong edition of Windows 10 and do not correspond with your current system.

  • Users of Home Basic, Home Premium, Windows 7 Starter, Windows 8.0 Core, and Windows 8.1 Core should download Windows 10 Home ISO.
  • Users of Windows 7 Ultimate, Windows 7 Professional, Windows 8.0 Pro, and Windows 8.1 Pro should download Windows 10 Pro ISO.

NOTE: Users of Windows 7 Enterprise, Windows 8.0 Enterprise, and Windows 8.1 Enterprise are not eligible for the free upgrade offer.

Method Three: Ensure Windows Is Activated

If your Windows 7 or Windows 8/8.1 is not genuine or activated, you will get prompted for a product key. You need to make sure first your current system is activated.

  1. Click on Start then right-click Computer. For Windows 8 and up users, you can simply press on Windows key + X then select Choose Properties.
  2. When the Properties window appears, check if the Windows you’re running is activated.

Method Three: Reset License Status

  1. Press on Windows key + X.
  2. Select Command Prompt (Admin).
  3. Once the command prompt window appears, type vbs –rearm then press Enter.
  4. Exit Command Prompt then restart your PC.
  5. Input the product key by following the instructions given.

Method Four: Force Activation

  1. Press on Windows key + X
  2. Select Command Prompt (Admin).
  3. Once the command prompt window appears, type vbs –ato then press Enter.
  4. Exit Command Prompt then restart your PC.

Method Five: Run System File Checker

Another thing you can try doing is to run the system file checker utility to scan if there are any broken operating system files. In doing so, you’ll be able to detect problems that might be preventing the product activation of your Windows 10 upgrade.

Method Six: Contact Microsoft Activation Center

If in case you’ve exhausted all your resources and you are still being prompted for a product key when upgrading to Windows 10, you can try contacting the Microsoft Activation Center for further details. Check here for the appropriate telephone numbers to contact.

Method Seven: Download An Automated Tool

If you still experience the error after doing the methods above, you might want to try a powerful and trusted automated tool to fix the job.

If you like to learn and find out more about various Windows errors, and how to repair them go to our vast archive or use search to find articles that will explain and help you in solving your issue.
However, if you prefer to do things fast and with automatization then we are proposing to use an automated solution for your issues. The application that we are recommending is Advanced System Repair Pro
Advanced System Repair utilizes multiple tools all in one to give you a quick, simple, reliable, and very thorough diagnosis of your PC. It brings you all the tools you need in one program to clean, fix, protect, optimize and boost your PC!
1-Click Maintenance
All the tools to make it simple and easy! It's like having a professional technician at the click of a mouse.

Junk Cleaner
Keeping your computer free from unnecessary clutter also helps make your computer last longer. Like any other machine, if you keep it clean and take care of it, it will serve you better for longer!

Optimize background apps
Optimize applications background activity with the built-in Application Optimizer feature.

Disk Defrag
With a simple 1-click, Advanced System Repair speeds up your PC by assembling fragmented files on your machine and organizing them more efficiently.

Malware Removal
Finds and removes all types of harmful malware including trojans, worms, bots, adware, spyware, PUPs, and more!

Privacy Cleaner
The all-in-one privacy suite to Clean Your Tracks & Protect Your Privacy! Make your computer safe, secure, and more efficient!

System Tweak/Optimizer
ASR will analyze your complete system and settings to adjust your PC to function at its maximum performance.

Registry Cleaner
Over time, as you install and uninstall applications, the registry can become cluttered with old entries and broken settings which can result in program crashes, and annoying messages and slow the computer down.
Visit our Advanced System Repair Pro Download page to inform yourself about all the benefits of this software and get a free trial copy of it.
advanced system repair pro

Advanced System Repair Pro

One-click automated PC repair solution
ASR logo
With Advanced System Repair Pro you can easily
Replace damaged files
Restore performance
Free disk space
Remove Malware
Protects WEB browser
Remove Viruses
Stop PC freezing
DOWNLOAD
Privacy Policy | Terms of Use | Uinstall
Advanced System Repair Pro is compatible with all versions of Microsoft Windows including Windows 11

Share this article:

You might also like

How to Fix The Rtl70.bpl Error on Your System

Repair Rtl70.bpl Error on Your System

Rtl70.bpl Error - What is it?

To understand Rt170.bpl error code, it is important to have a good understanding of .bpl files first. BPL is the abbreviation of Borland Package Library. BPL is a developer file format used by Borland. It contains dynamic link libraries which are used for constructing Borland programs. BPL files are most commonly used for Borland Delphi programs. Delphi competes with Visual Basic as an offering for an object-oriented visual programming approach to application development. There are many programs/applications on your system that use rtl70.bpl file format to run successfully on Windows PC. The rtl70.bpl error occurs when this file gets damaged or corrupted. It fails to execute the command and run the application on your system. When your computer experiences this problem with this file, the following error messages are likely to appear:
  • rtl70.bpl is not responding
  • Runtime error: rtl70.bpl
  • Symantec User Session has encountered a problem and needs to close. We are sorry for the inconvenience. Application Name: rtl70.bpl
This error code exposes you to system freeze, crash, abrupt system shutdowns, blue screen of death errors, and it also reduces your PC performance.

Solution

Restoro box imageError Causes

The potential causes of rtl70.bpl error code includes:
  • DLL file was damaged due to viral infection or spyware
  • DLL file was overwritten by an incompatible version
  • Poor program installation
  • Too many invalid and obsolete registry entries stored in the RAM
  • Related Registry entries are corrupt

Further Information and Manual Repair

Here are some of the best yet simple solutions for you to resolve rtl70.bpl error on your PC:

1. Reboot Your PC

Sometimes this error can be resolved by simply restarting your system. Try rebooting your system and running .bpl supported program. If the program runs after you reboot your PC, then that’s great! But you should keep in mind that this is a temporary solution. The error may reappear anytime soon. So, it is advisable to consider a long-term solution for repairing the error code for the longest time.

2. Uninstall and then Reinstall the Program Causing the Error

If the error occurred after a certain program installed on your system,  it is advisable to uninstall it and then reinstall the program. Simply go to the control panel, select Add/Remove program option and uninstall the program that you recently installed that could be triggering the rtl70.bpl error code. Now reinstall and run it on your system. If the error is resolved, then this means the poor installation was the cause. If not, then this means the cause of the error is related to the registry.

3. Registry Restore to Fix rt170.bpl error

There are two ways to go about it. The first one is to click on the start menu, type registry editor, and press run. This will open the registry editor. Now click on the computer option then click file and import. This helps restore the registry but it is possible that the problem might persist. The error code may pop up again. Also, if the registry is damaged due to viral infection, then this solution may not work and you may still experience the error on your system. Then you will also have to download an antivirus which may further reduce the speed of your PC. However, the best way to restore the registry and to get rid of the error code for the longest time is to download Restoro. This is a new, user-friendly, high and multi-functional repair tool that functions as a registry cleaner and a system optimizer. It cleans the registry by scanning and removing all the unnecessary and obsolete files saved in RAM such as junk files, internet history, invalid registry entries, and more. It also repairs the damaged dll files and restores the registry thereby resolving the rtl70.bpl error. Restoro is easy to use, safe, efficient, and compatible on all Windows versions. To get started and resolve the rtl70.bpl error code in just a few seconds on your system click here and download Restoro.
Read More
Ways to speed up your Computer
Having a PC is a great thing, more often we are enjoying it than we have issues, but as time passes it seems that our computer is slowing more and more as new applications and games are coming which demand more powerful computers. Before you decide to throw away your computer and buy a new one because you feel it is a bit slow, read through this guide where we will guide you to common tips & trick to make your PC run faster:
  1. Keep your PC clean and tidy

    Slowdowns and many other issues, even hardware failures can come from dirty PC. Make sure your PC is clean and tidy for maximum performance.
  2. Optimize airflow through PC casing

    Airflow is very important so your GPU and CPU and overall all hardware components can be kept in optimal working temperatures. If any device inside the casing is working in abnormal temperatures you will experience slowdowns and freezing on daily basis. Make sure that all fans are working and that your temperatures are in the optimal range to prevent overheating and make sure to have maximum performance.
  3. Check PC for malware

    Viruses, worms, and overall all malware can drastically reduce system performance. Make sure that your protection software is up to date with the latest definitions and that you have the latest Windows updates installed.
  4. Create a Hi-Performance power plan

    Windows power plans can be a very useful feature, especially if you are working on laptop but in order to boost performance and drain maximum, you will need to switch to a hi-performance power plan.
  5. Free space on the system drive

    Having little to no space on your Windows system drive can lead to extreme slowdowns, make sure that your hard drive is not on red when viewed from File explorer or you will experience even 50% poorer performance.
  6. Choose startup applications

    If you have many applications starting up with your Windows and many of them running in the background you will experience performance issues. Each application that runs in the background is taking RAM and CPU time for themselves which could be free and used for the program that you need.
  7. Do not open too many tabs in Browser

    Having too many tabs in Browser while working on a computer can also cause slowdowns, each tab is taking RAM for itself and even can cause Browser poor performance if a tab is LIVE and refreshing with new content all the time.
  8. Remove browser extensions

    Speaking of browser, having too many installed extensions which are active as soon as the browser is up and running can also lead to poor performances. Remove all which you really do not need and your computer will gain in speed.
  9. Make hardware upgrade

    Sometimes your system is just a little outdated, upgrading more RAM or switching to a new SSD with the greater speed can cause a world of difference in PC performance. Check to see how RAM is standard and upgrade accordingly, you can also upgrade the CPU and other bottlenecks in your system this way instead of completely buying a new PC.
  10. Format and reinstall system

    Drives, application traces, registry entries, etc. are piling up in your system over time, and if enough time is given it will clog your computer. From time to time it is a good idea to backup files and do a completely clean full format of HD and install a new and fresh copy of Windows with new and clean copies of applications and drivers.
That's it, 10 tips on how to make your Windows and PC perform better and speed it up. I hope that you found the read informative and helpful and I hope that I will see you soon.
Read More
How to Fix the Error Code 28

How to Fix the Error Code 28

Error Code 28- What is it?

The error code 28 is a driver error. This is one of the many device manager error codes. When this error occurs on your computer, the following message is displayed:

“The drivers for this device are not installed. (Code 28)”

Another driver device error message you might encounter is error code 41. 

Error Causes

Error 28 occurs because of unsuccessful device driver installation. This usually happens when you try to update new drive versions on your system. It is advisable to repair this error right away as it can hamper your ability to use certain hardware. For example, if error 28 occurs due to the unsuccessful installation of the USB driver, then it if not fixed and resolved it may prevent you from using hardware devices. Unsuccessful driver installation means you either didn’t install it properly or your computer has registry issues. If it’s the registry then you must fix it without any delay because it can expose your PC to serious threats like system crash and failure. To avoid such inconvenience, repair it.

Further Information and Manual Repair

When it comes to repairing the error code 28, here’s what you can do: Simply go to the control panel and click on the Device Manager option:
  • In the details pane with the list of devices, locate the device for which you want to reinstall the driver software.
  • Double click on it to open the properties dialog box.
  • Now click on the driver tab and then click update driver.
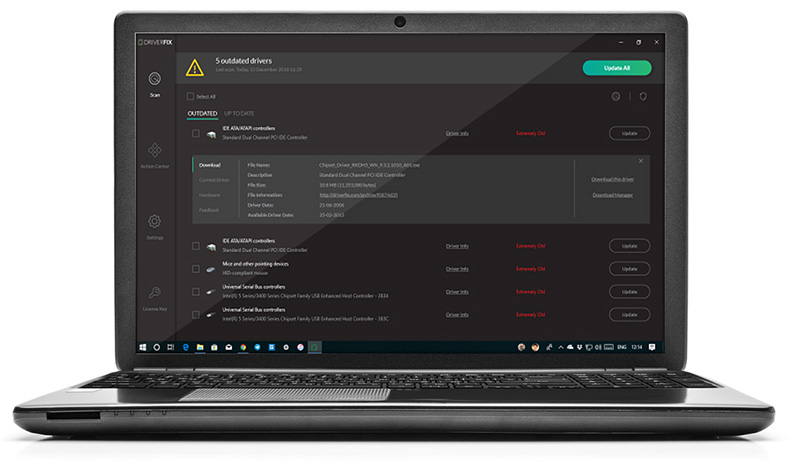
After updating, try using that device again if it doesn’t work and shows the error code 28 on your computer screen then this means the underlying cause is the registry. Congratulations, you have just Fixed Error Code 28 In Windows 10 all by yourself. If you would like to read more helpful articles and tips about various software and hardware visit errortools.com daily. Now that’s how you fix Error Code 28 In Windows 10 on a computer. On the other hand, if your computer is going through some driver-related issues that have to get fixed, there is a one-click solution known as DRIVERFIX you could check out to resolve them. This program is a useful tool that could repair corrupted drivers and optimize your PC’s overall performance. This is basically a solution that’s within your grasp with just a click. It’s easy to use as it is user-friendly. For a complete set of instructions in downloading and using it, refer to the steps below Perform a full system scan using DRIVERFIX. To do so, follow the instructions below.
  1. Download and install DRIVERFIX. from the official site.
  2. Once the installation process is completed, run DRIVERFIX. to perform a full system scan. driverfix screenshot
  3. After the scan is completed click the “Update All” button. driverfix screenshot
Read More
The server did not register with DCOM
There are times when after you upgrade your Windows operating system, the System Logs under the Event Viewer will display an error message saying, “Event ID 10010 error – The server did not register with DCOM within the required timeout”. What is DCOM? DCOM stands for “Distributed Component Object Model”. It is a proprietary Microsoft technology that allows the Component Object Model or COM software to communicate across a network. You can consider it as an extension of COM which is equipped with the capability of solving a couple of inherent problems related to the COM model to the better use over a network. COM is a tool that’s used for advanced configuration and troubleshooting in Windows 10. Developers usually use it to configure routine components and application behavior like participation in transactions and object pooling and so on. The Component Services needs the DCOM wire protocol in order to communicate with the Component Object Model components on other computers. By default, in a Windows-based system, the network computers are configured initially to enable DCOM. There are also some components in Windows that might require registering themselves with DCOM. However, if they fail to do so, you will encounter the “The server did not register with DCOM within the required timeout” error. To fix this, here are some suggestions you can check out.

Option 1 – Try to use the Component Services

  • Tap the Win + R keys to open the Run dialog box.
  • Then type “dcomcnfg” in the field and tap Enter to pull up Component Services.
  • Next, double click on the Computers folder located in the right pane and right-click on My Computer, and select the Properties option.
  • After that, switch to the COM Security tab under My Computer Properties and then go to the Access Permissions section.
  • From there, click the Edit Default button and in the new window that appears, apply the correct permission to objects under the Group or user names section.
  • Once you’re done, click OK and exit. This should fix the error.

Option 2 – Make sure that Function Discovery Resource Publication Properties Services is running

  • In the Cortana search box, type “services” and click on the Services icon to open the Services Manager. Alternatively, you can also tap the Win + R keys to launch the Run prompt and then type “services.msc” in the field and hit Enter to open the Services Manager.
  • Next, scroll down and look for the “Function Discovery Resource Publication” entry and double click on it.
  • Then switch to the General tab and from there, make sure that the Startup Type is set to “Manual (Triggered).
  • You also have to make sure that the service is running so if it’s not, just click on the Start button to start the service.
  • Now click on Apply to save the changes made.

Option 3 – Try resetting the default DCOM permissions

  • Tap the Win + R keys to open the Run dialog box.
  • Then type “dcomcnfg” in the field and tap Enter to pull up Component Services.
  • After that, expand Component Services > Computers and right-click on My Computer, and then select Properties.
  • Next, go to the Default Properties tab, and in the Default Distributed COM Communication Properties section, make sure that:
    • Default Authentication Level is set to Connect
    • Default Impersonation Level is set to Identify.
Read More
How to Fix Jp2klib.dll Error Code

How to Fix Jp2klib.dll Error Code

Jp2klib.dll Error - What is it?

Jp2klib.dll is a type of Dynamic Link Library. This file is developed by Adobe Systems Inc and associated with CS2 (Creative Suite 2 Premium). Like all DLL files, this file also contains small programs that support programs developed by Adobe Systems on your PC. The function of Jp2klib.dll is to load and run programs. Jp2klib.dll error occurs when it fails to do so. It occurs during program startup. Jp2klib.dll error is displayed in several different formats depending on the cause of the error. Here are some common error messages that you may come across:
  • "JP2KLib.dll not found."
  • "Cannot find C:\WindowsSystem32\JP2KLib.dll."
  • "Cannot start Creative Suite 2 Premium. A required component is missing: JP2KLib.dll. Please install Creative Suite 2 Premium again."
  • "Cannot register JP2KLib.dll."
  • "The file JP2KLib.dll is missing."
  • "This application failed to start because JP2KLib.dll was not found. Re-installing the application may fix this problem."
  • JP2KLib.dll Access Violation."

Solution

Restoro box imageError Causes

There are several causes for the Jp2klib.dll error code pop-up. These include:
  • Hardware failure
  • Jp2klib.dll file not properly registered
  • Viral infection
  • Deleted, missing, or corrupted Jp2klib.dll file
  • Registry problems
  • Another program overwrote the Jp2klib.dll file
The good news is that this is not a fatal error code like the blue screen of death errors. However, it is still advisable to resolve it right away to avoid inconvenience.  This error may limit your ability to access your desired program.

Further Information and Manual Repair

Follow these methods to resolve Jp2klib.dll error code on your PC in a few minutes without any professional assistance or technical know-how:

Method 1 - Re-register the Jp2klib.dll file

Sometimes Jp2klib.dll error may occur if the DLL file is not registered properly. In such a situation "JP2KLib.dll not registered" error message will pop on your computer screen. To resolve, all you need to do is register this file. Follow these steps to register the Jp2klib.dll file on your PC:
  1. Go to the start menu, type the command in the search box. Don’t press enter yet.
  2. First, hold CTRL-SHIFT and then press it. This action will prompt a permission dialog box. Click yes to proceed.
  3. You will be asked to enter a command, here simply type regsvr32 /u JP2KLib.dll and then press enter.
  4. This will first unregister the previous Jp2klib.dll file. Now type regsvr32 /i JP2KLib.dll and press enter to re-register the same file.
  5. After this, close the command window and reboot your PC to activate changes.

Method 2 - Check the Recycle Bin and Restore the Jp2klib.dll file

If you come across this error message "JP2KLib.dll not found”, this indicates a missing Jp2klib.dll file. This usually happens if you recently uninstalled a program on your system which was also supported by the Jp2klib.dll file due to which the file was also deleted. But don’t worry! Check your recycle bin to retrieve the accidentally deleted file on your system. If you find it restore, but if you don’t then simply download it from a reliable DLL website.

Method 3 - Scan for Viruses

Install and run an antivirus to detect viruses. Viruses are malicious programs that damage and corrupt DLL files like the Jp2klib.dll file. Scan for all viruses on your PC and remove them to fix the problem.

Method 4 - Repair the Registry

If you don’t clean the registry often it becomes accumulated with obsolete files like bad and broken entries, cookies, and junk files. These files corrupt the registry and damage system and DLL files also stored in the same location. It then leads to such error message pop-ups. To resolve, download Restoro. This is an advanced PC Fixer deployed with a registry cleaner. It is easy to use and in just a few clicks can repair the Jp2klib.dll error on your PC. The registry cleaner scans and removes all obsolete files. It cleans the registry and repairs the damaged system and DLL files. Click here to download Total System Care and fix the Jp2klib.dll error.
Read More
How to Fix Screen Flickering in Windows 10 Error

Screen flickering in Windows 10 - What Is It?

Screen flickering when you’re using Windows 10 is quite a common problem. It is often caused by apps that are not compatible with the operating system, or faulty display drivers.

There are a lot of possibilities for why this issue occurs. If you are one of the many users that encounter this kind of problem, you might want to check on your task manager to see if everything is working fine. One common sign that something wrong has happened is if the task manager flickers, as well. To fix this, you will need to update an app, uninstall an app, or update your display driver.

Solution

Restoro box imageError Causes

Common causes of the screen flickering when running on Windows 10 are software issues. This is most likely caused by the following:

  • Faulty display driver
  • You have an application installed that is not compatible with your operating system

Further Information and Manual Repair

In order to fix the issue of your screen flickering when you have Windows 10 as your operating system, follow these simple steps.

Note: It is very important to consult with an authorized computer technician if you are not highly confident in solving this issue by yourself. Furthermore, you can also use software to fix this problem.

  • The first method is by checking if your task manager is flickering. To open the task manager, all you have to do is right-click or press and hold the start button, then select task manager.

If you have confirmed that the task manager is the one causing the screen flickers, the display driver can possibly be your problem. To fix it, all you have to do is update your display driver.

How to update the display driver

  1. You have to reset your computer and boot it on Safe Mode.

      -In order to do this, you have to hold the Shift key while selecting Power>Restart. When your computer boots up, you will be greeted by a Choose an option screen. From there, you have to select Troubleshoot, then Advanced Options, then Startup Settings, and then Restart. When your computer restarts, select 4 or hit the F4 key to enter into Safe Mode.

  1. When your computer finally boots up in Safe Mode, right-click or press and hold the Start button. From there, click Device Manager.
  1. From the Device Manager screen, you have to expand the Display Drivers section, right-click on the driver that might be causing the problem then select Uninstall. Don’t forget to tick the Delete the driver software for this device box, press the OK button, and then restart your computer.

            - When you have two, or more, drivers installed on your computer, all you have to do is disable the other drivers. You can do this by right-clicking on the driver in the Device Manager and click the Yes box next to disable. Shut down your PC after this, disconnect the installation, and boot your computer back on.

  1. When your PC boots up after the restart, click on the Start button then click on Settings.
  1. You need to go to Update & Security, then Windows Update, and then check for updates.

            - If you are using multiple drivers and this technique doesn’t work, repeat the process in Step 3 and try to disable a different driver.

Remove an incompatible app

There are two ways to remove an incompatible app to fix the issue of a screen flicker on Windows 10. Apps like Norton AV, iCloud, and IDT Audio are usually the ones causing the problem. Uninstalling these apps could solve the problem. Uninstall the apps by using the methods below:

First Solution: Uninstall an app in Settings

  1. Click Start, and then click Settings.
  2. Click on System, and then click on Apps & Features.
  3. A window will pop up and from there you will need to select the application you wish to uninstall. Click the app, and then click uninstall. Follow the screen prompt to fully uninstall the program.

Second Solution: Uninstall an app in the Start Menu

  1. Click Start, and then click All Apps.
  2. Look for the application you will need to uninstall, right-click the said app, and then click Uninstall. Follow the screen prompt to fully uninstall the program.
[/section]
Read More
5 Windows 10 Upgrade errors you might encounter

5 Windows 10 Upgrade errors you might encounter

5 Windows 10 Upgrade Errors

The recently released Windows 10 captivated the mass but its rollout, polished as it might have been, proved everything but seamless. Surf the Internet and you’ll get the gist. People are complaining and they need assistance. Assistance with what you might ask? Many have attempted to make an upgrade but failed after encountering various strange combinations of letters and numbers. These are none other than error codes. If you’ve tried and failed, feast your visuals below as you might encounter one of these 5 Windows 10 Upgrade errors.

Error Code 0x80073712

Encountering error code 0x80073712 in no way implies that you need to throw out your computer system and acquire a new one. Not at all! This error code simply means that a very important file to Windows might have gone missing or corrupted. This file is crucial to Windows update so without obtaining this file, you won’t be able to proceed with the update.

Error Code 0x800F0923

Likely, there are many programs and drivers installed on your computer. They all play a vital role. However, if you’ve received error code 0x800F0923, it might be time to consider or turn your eyes to installed drivers on your system. Why? Error code 0x800F0923 means that there’s a driver or driver on your current Operating System that’s not compatible with Windows 10. There’s clearly a dilemma here.

“We couldn't complete the updates. Undoing changes. Don't turn off your computer.” Or “Failure configuring Windows Updates. Reverting changes”

That’s a pretty odd error but I will say it's slick… That Windows 10 upgrade error is straightforward. Microsoft is just letting you know that they won’t be able to complete the update to Windows 10 and so they are putting your computer back to where it was. How nice of them.

The error messages above are pretty generic and will manifest when the upgrade fails for one reason or the other. To resolve this issue, you’ll most definitely have to decipher what error code was presented. Identifying that will provide a glimpse into exactly what steps you need to take.

The Update Isn't Applicable to Your Computer

I don’t know about you but I strongly believe Microsoft is subtly letting you know that your computer system is old and needs to be thrown out. Also, this update could imply that your PC needs to install important updates to rev you up to the requirements. All relevant updates to your computer must be installed before you can get past this stage.

Error… “Something Happened”

This Windows 10 upgrade error has been the talk of the Internet. In fact, users of Windows OS have been making it a mockery. Clearly, not many have had success after encountering this error. Obviously, “something happened” but it’s just not easy to decipher what went wrong. Microsoft is still trying to figure it out.

Solution

Restoro box image
Read More
A Quick Guide to Resolving Error 0x800ccc17

How to Fix Error 0x800ccc17

What is error 0x800ccc17?

This is a typical Outlook Express error code. Outlook Express is email software by Microsoft. This error may pop up when sending or receiving emails on your Outlook Express. It cancels email sending and receiving operations. In other others, the 0x800ccc17 error code hampers your email communication via Outlook Express account. This error message is displayed in the following format:
0x800CCC17 - User cancelled operation

Solution

Restoro box imageError Causes

0x800ccc17 error code may appear on your PC due to multiple reasons. These include:
  • Issues with Pop3uid.dbx file (this file supports Outlook Express software on Windows Vista)
  • Viral infection
  • Registry corruption
No matter what the underlying reason for this error code may be, it is advisable to resolve the issue right away without any delay. This error may cause great deal of inconvenience. It may lower your office productivity badly especially if you interact and communicate with people of other office departments via your Outlook Express account.

Further Information and Manual Repair

Here are some of the best and efficient do-it-yourself methods to resolve the 0x800ccc17 error code on your system. These methods are very easy to work around and do not require any kind of technical expertise.

Method 1 - Restart Your PC

Sometimes this might error can be resolved by simply rebooting your system. So, restart your PC and try using your Outlook Express account again. If it works, the error is resolved. However, if it persists then try other methods given below.

Method 2 - Rename pop3uid.dbx File on Your System

If the underlying cause of error 0x800ccc17 is related to pop3uid.dbx file damage, then simply rename it to resolve. This can be done by searching for the file pop3uid.dbx. After locating it rename it to ‘pop3uid.bak’. Now reopen Outlook Express and try sending or receiving emails again. If the operations are executed successfully then the error is resolved.

Method 3 - Remove Viruses

Viruses can infect your PC without you knowing about it. These malicious programs usually enter your system through phishing emails and file downloads. If the error 0x800ccc17 is triggered due to viral infection then it is advisable to install a powerful antivirus and remove all viruses from your PC.

Method 4 - Repair the Registry

If you don’t clean the registry frequently it fills up with unnecessary and obsolete files like junk files, cookies, internet history, and bad registry entries. These files then corrupt and damage the registry thereby generating codes like error 0x800ccc17. To resolve this, you first need to remove all these unnecessary files and repair the registry. Though this can be done manually if you are not technically sound, it may be time-consuming and slightly tricky. Therefore it is advisable to download Restoro. This is a powerful registry cleaner that wipes away all obsolete files instantly, cleans the registry, and repairs it in seconds. Click here to download Restoro and fix error 0x800ccc17 on your PC today.
Read More
Surefire Methods of Fixing Error Code 47

Repair Error Code 47

Error Code 47 – What is it?

It is a device driver error that users encounter when they use Windows 2000 operating system and its later versions.

The error occurs when the connected peripheral device, upon removal using the ‘Safe Removal Hardware’ program, hangs up a problem within the process. The error prompt you then see is referred to within the operating system as error code 47.

It usually pops up on your computer screen with the following message:

Windows cannot use this hardware device because it has been prepared for "safe removal", but it has not been removed from the computer. (Code 47)

Solution

driverfix boxError Causes

There are many factors responsible for the Error Code, the primary ones are listed below:

  • An incomplete program installation
  • An incomplete program uninstallation
  • System recovery from viruses
  • Corrupted Windows system registry entries

Further Information and Manual Repair

Error Code 47, like other device driver error codes, is relatively easy to solve. You can fix the error code in the following ways:

Method 1 – Reconnect the device to your computer

Unplugging and plugging the USB cable of the device into the computer is the easiest way to resolve the error.

Doing this will help refresh the system and increase the likelihood of the device driver files loading and function properly.

Method 2 – Restart your PC

Another simple method you can use to solve your PC error code is to simply restart your Windows system.

It may be that the error prompted upon connecting the device you have connected is merely a temporary problem, and upon restart, will resume functioning smoothly.

Method 3 – Manually uninstall then reinstall the device driver

If both of the above-listed methods fail to resolve the problem, you may have to resort to manually uninstalling and then reinstalling the device driver causing the problem.

This would be necessary since the remaining incomplete files due to a partial removal or installation of programs is what contributes to the error code. By uninstall and reinstalling the device driver program, it would lead to the completion of the files.

You can do this by firstly logging in as Administrator and open Device Manager. Select the device that is causing the problem and double click it and make sure that the peripheral is connected properly to the PC.

Upon opening, click on the ‘Driver’ tab and then select ‘Update Driver’. Make sure to refer to the system documentation that you received with your PC or computer to check for the motherboard details and driver specifics.

Method 4 – Use software to automatically download the driver

Manually uninstalling and reinstalling the driver will usually do the trick; however, it may be time-consuming especially when you would have to resort to your hardware user manual.

Therefore, using a program such as DriverFIX can save you a lot of time and frustration in having your device work properly on your computer.

DriverFIX, with its user-friendly approach to help you fix your PC issues, comes with an integrated database that detects which drivers you need to reconfigure within just a few seconds and downloads it automatically. It further ensures that your drivers are installed in their entirety leaving no room for any incomplete files to remain that create Error Code 47. It also has the added advantage of being able to backup and restores your files should there be the slightest possibility of system file damage. Thus, registry damage can be averted by letting the software roll back the system files to an earlier healthy checkpoint. DriverFIX is the answer to fixing your PC error codes accurately and quickly. Click here to download DriverFIX to fix Error Code 47 quickly and effectively!
Read More
Backup all drivers in Windows 10
When Windows is installed on a clean hard drive it usually finds most of the needed drivers for our computer to run, but if we by any chance have any old unsupported hardware or some exotic one chance are very high that Windows will not be able to locate and install drivers for it. And sometimes we do not even have drivers from where to download them, let's say for example you have purchased a second-hand laptop with Windows on it, you wish to create a clean and fresh copy of new Windows installation but you do not have drivers, and let us say the model is not supported so you can not download them. In this case, this shown method will help you a ton and save you a lot of time and frustration. So, in order to back all of your drivers from your Windows follow this simple guide step by step. Note please that this method will backup drivers themselves, you will not backup installation packages of drivers or similar stuff, only drivers installed in Windows itself.

Backing up the drivers

First thing first, create a folder where you want your drivers to be backed up somewhere in your HD and give it any name. Second, press ⊞ WINDOWS + X to open the secret Windows menu. keyboard with windows and x markedFrom the menu choose Command Prompt (administrator) Windows menu command prompt adminWhen the command prompt is active type the next command in it: DISM /online /export-driver /destination:C:\DriverBackup where: C:\DriverBackup is the folder and the hard drive where you want to store your backed-up drivers. Press ENTER That's it, you have now successfully backed-up all of your installed Windows drivers. Now, save all of your drivers on USB and reinstall Windows.

In order to now return backed drivers do the following:

Press again ⊞ WINDOWS + X to open the secret Windows menu. keyboard with windows and x markedbut this time choose Device manager Windows menu device managerFrom decide, manager right-click on any device Windows has not been able to install appropriate driver and choose update driver
  • Click on the Browse my computer for driver software option.
  • Click the Browse button.
  • Select the folder with the driver backup.
  • Check the Include subfolders option.
  • Click the Next button.
  • Click the Close button.
Read More
1 2 3 162
Logo
Copyright © 2022, ErrorTools. All Rights Reserved
Trademarks: Microsoft Windows logos are registered trademarks of Microsoft. Disclaimer: ErrorTools.com is not affiliated with Microsoft, nor claim direct affiliation.
The information on this page is provided for information purposes only.
DMCA.com Protection Status