How to Fix Windows 8 Error Code 0x80070422

How to Fix Windows 8 Error Code 0x80070422

Error Code 0x80070422 - What is it?

Error Code 0x80070422 can be found on many versions of the Windows operating system including Windows 7, Windows 8, and 8.1, and Windows 10. The reason for its occurrence may vary, however, depending on the version of the operating system that you use.

In the case of error code 0x80070422 in Windows 8, it often occurs when users attempt to update their firewall or download apps from the Windows store. When this error occurs the user is unable to complete the updates and will need to apply different solutions to correct the issue.

Solution

Restoro box imageError Causes

Whenever error code 0x80070422 is encountered on Windows 8 or 8.1, it might be a result of various factors. These error codes include:

  • Registry errors – This occurs when new programs are installed over old ones
  • Malicious software such as adware, spyware, and or viruses

Further Information and Manual Repair

You do not need to be a Windows expert to attempt to solve errors like the 0x80070422 Windows 8 error code. Simply try the solutions below. If however, you feel you need a professional’s help, contact a certified Windows technician.

  • Check for any viruses or malicious software

Viruses and other malicious software are often the cause of various issues within the PC. For this reason, be sure to check your machine for a possible virus infestation. If you are unable to use your anti-virus software or if none is present you might need to download an automated tool that offers overall repair and other solutions.

  • Disable third-party security apps

Another step you can take is to disable third-party security apps. When these apps are downloaded onto your device, it can lead to the disabling of your Firewall and the inability of your device to download other apps. If this is the source of the 0x80070422 error code on your machine, the issue will be resolved after you disable the third-party apps and reboot your computer.

  • Disable Firewall

If error code 0x80070422 in Windows 8 or 8.1 occurred while you attempted to update Windows firewall, one of the best solutions you can try is to disable the firewall. Note however that disabling your firewall should be temporary as it protects your computer from worms as well as hackers that might infect or compromise your PC. Access the firewall by swiping right on the screen then searching for “firewall”. Click “Windows firewall” then select “Turn off Windows firewall”.

  • Performs a clean boot

Another option is for you to perform a clean boot. This simply refers to a reboot in Windows where only a minimum set of drivers and programs are used. A clean boot can help resolve issues related to software conflict which can occur when Windows users install programs or updates or simply run a program. Note that you must log on to the computer as an administrator. Otherwise, you will not be able to perform the clean boot.

  • Clean registry

The source of many errors related to Windows can lie within the registry. This is because the registry is involved in every aspect of a Windows computer’s operation. If there is an issue in the files of the registry or if it has been hacked, your computer will not function. For this reason, begin by cleaning the registry regularly. To clean our registry, use a powerful tool that is both reputable and user-friendly. Research your option before you make a selection as choosing the wrong tool could lead to even more errors or computer malfunctions.

  • Set Windows Update to Automatic

Another important method to solve issues related to error code 0x80070422 in Windows 8 or 8.1 is your Windows Update service. Though you may have never noticed this feature before now, the Windows Update services allow PC owners to access updates to their operating system automatically. This leads to a properly functioning PC as your machine will always have the latest features and tools available. However, if the setting is not correct, your computer may end up experiencing error code 0x80070422. Check if this is the source of your problems by verifying if your Windows Update settings are automatic. Once the settings are on automatic, reboot your machine to ensure your computer responds to the changes.

  • Download an Automate Tool

Always be prepared for the possibility of other errors. You can do this by downloading powerful software. This enables users to regularly check for issues that may cause errors on their Windows device.

If you like to learn and find out more about various Windows errors, and how to repair them go to our vast archive or use search to find articles that will explain and help you in solving your issue.
However, if you prefer to do things fast and with automatization then we are proposing to use an automated solution for your issues. The application that we are recommending is Advanced System Repair Pro
Advanced System Repair utilizes multiple tools all in one to give you a quick, simple, reliable, and very thorough diagnosis of your PC. It brings you all the tools you need in one program to clean, fix, protect, optimize and boost your PC!
1-Click Maintenance
All the tools to make it simple and easy! It's like having a professional technician at the click of a mouse.

Junk Cleaner
Keeping your computer free from unnecessary clutter also helps make your computer last longer. Like any other machine, if you keep it clean and take care of it, it will serve you better for longer!

Optimize background apps
Optimize applications background activity with the built-in Application Optimizer feature.

Disk Defrag
With a simple 1-click, Advanced System Repair speeds up your PC by assembling fragmented files on your machine and organizing them more efficiently.

Malware Removal
Finds and removes all types of harmful malware including trojans, worms, bots, adware, spyware, PUPs, and more!

Privacy Cleaner
The all-in-one privacy suite to Clean Your Tracks & Protect Your Privacy! Make your computer safe, secure, and more efficient!

System Tweak/Optimizer
ASR will analyze your complete system and settings to adjust your PC to function at its maximum performance.

Registry Cleaner
Over time, as you install and uninstall applications, the registry can become cluttered with old entries and broken settings which can result in program crashes, and annoying messages and slow the computer down.
Visit our Advanced System Repair Pro Download page to inform yourself about all the benefits of this software and get a free trial copy of it.
advanced system repair pro

Advanced System Repair Pro

One-click automated PC repair solution
ASR logo
With Advanced System Repair Pro you can easily
Replace damaged files
Restore performance
Free disk space
Remove Malware
Protects WEB browser
Remove Viruses
Stop PC freezing
DOWNLOAD
Privacy Policy | Terms of Use | Uinstall
Advanced System Repair Pro is compatible with all versions of Microsoft Windows including Windows 11

Share this article:

You might also like

Explanation of deep and dark WEB
Often when we connect to the internet were browsing indexed pages through some well-known search engine, usually Google. But beneath the so-called normal internet lurks deep and dark web. You might have heard of the deep web and dark web if you have some geeky friends and we are here to explain what exactly is the deep and dark web. The first thing to know is that the deep and dark web is not the same thing and they coexist separately from one another, you could say that beneath the deep web lies the dark web, yet another layer of the internet. So let us explore first the deep web. What is exactly a deep web?

Deep web, hidden web, or invisible web

as sometimes referenced are part of worldwide web not indexed by search engines, meaning that engines do not basically see and index content of deep web sites. The content of the deep web is hidden behind HTTP forms and includes many very common uses such as webmail, online banking, private or otherwise restricted access social-media pages and profiles, some web forums that require registration for viewing content, and services that users must pay for, and which are protected by paywalls, such as video on demand and some online magazines and newspapers. The content of the deep web can be located and accessed by a direct URL or IP address but may require a password or other security access to get past public website pages. While it is not always possible to directly discover a specific web server's content so that it may be indexed, a site potentially can be accessed indirectly (due to computer vulnerabilities). To discover content on the web, search engines use web crawlers that follow hyperlinks through known protocol virtual port numbers. This technique is ideal for discovering content on the surface web but is often ineffective at finding deep web content. For example, these crawlers do not attempt to find dynamic pages that are the result of database queries due to the indeterminate number of queries that are possible. It has been noted that this can be (partially) overcome by providing links to query results, but this could unintentionally inflate the popularity of a member of the deep web.

Dark WEB

The dark web is the World Wide Web content that exists on darknets: overlay networks that use the Internet but require specific software, configurations, or authorization to access. Through the dark web, private computer networks can communicate and conduct business anonymously without divulging identifying information, such as a user's location. The dark web forms a small part of the deep web, the part of the Web not indexed by web search engines, although sometimes the term deep web is mistakenly used to refer specifically to the dark web. The darknets which constitute the dark web include small, friend-to-friend peer-to-peer networks, as well as large, popular networks such as Tor, Freenet, I2P, and Riffle operated by public organizations and individuals. Users of the dark web refer to the regular web as Clearnet due to its unencrypted nature. The Tor dark web or Onionland uses the traffic anonymization technique of onion routing under the network's top-level domain suffix .onion.

Dark & Deep WEB difference

The dark web has often been conflated with the deep web, the parts of the web not indexed (searchable) by search engines. The dark web forms a small part of the deep web but requires custom software in order to access its content. This confusion dates back to at least 2009. Since then, especially in reporting on Silk Road, the two terms have often been conflated, despite recommendations that they should be distinguished. Darknet websites are accessible only through networks such as Tor ("The Onion Routing" project) and I2P ("Invisible Internet Project"). Tor browser and Tor-accessible sites are widely used among darknet users and can be identified by the domain ".onion". While Tor focuses on providing anonymous access to the Internet, I2P specializes in allowing anonymous hosting of websites. Identities and locations of darknet users stay anonymous and cannot be tracked due to the layered encryption system. The darknet encryption technology routes users' data through a large number of intermediate servers, which protects the users' identity and guarantees anonymity. The transmitted information can be decrypted only by a subsequent node in the scheme, which leads to the exit node. The complicated system makes it almost impossible to reproduce the node path and decrypt the information layer by layer. Due to the high level of encryption, websites are not able to track the geolocation and IP of their users, and users are not able to get this information about the host. Thus, communication between darknet users is highly encrypted allowing users to talk, blog, and share files confidentially.

Darknet

The darknet is also used for illegal activity such as illegal trade, forums, and media exchange for pedophiles and terrorists. At the same time, traditional websites have created alternative accessibility for the Tor browser in an effort to connect with their users. ProPublica, for example, launched a new version of its website available exclusively to Tor users.
Read More
Reset Windows computer without Settings app
As you know, the Settings app is a vital part of Windows 10 as it helps in fixing issues in the system and offers users access to various Troubleshooters, as well as the Reset function and many more. So if you want to Reset this PC or a Windows Store app, you need to use the Settings app to do so. However, one of the most annoying errors you can encounter when using the Settings app is that it crashes or sometimes does not open at all. Thus, if you are having issues with this app, worry not for there are alternative ways you can try to reset your Windows 10 PC. For you to reset your Windows 10 PC without using the Settings app, the main option you have is to use the Advanced Startup options and there are different methods by which it can be accessed. It can be accessed via Lockscreen, Command Prompt window, or via Start Menu.

Option 1 – Reset Windows 10 via Lockscreen

  • You need to first boot into the Advanced Startup options from the lock screen. If you’re already logged in to your account, you have to hit the Win + L keys to get on the lock screen.
  • Next, click on the Power button located at the bottom right corner of the screen.
  • After that, hold the Shift key and click on Restart to restart your computer into the Advanced Setup option mode. And from there, you can reset your Windows 10 computer.

Option 2 – Reset Windows 10 via Command Prompt

  • Search for “cmd” in the Cortana search box or hit the Win + R keys to open the Run box and type “cmd” in the field and hit Enter to open Command Prompt.
  • If a User Account Control or UAC prompt appears, click Yes to proceed in opening Command Prompt.
  • After that, type the following command and hit Enter to execute it:
shutdown /r /o /f /t 00
  • After you execute the command, it will restart your computer into the Advanced Startup options where you can reset your Windows 10 computer.

Option 3 – Reset Windows 10 via Start Menu

  • Tap the Win key or click on the Start button located in the Taskbar.
  • Then click on the Power button at the bottom right portion of the screen.
  • Next, press and hold the Shift key on your keyboard and then click on Restart. This will restart your Pc into the Advanced Startup options.
Note: Once you have access to the Advanced Startup options, you have to go to the setting which allows you to Reset your Windows 10 PC. All you have to do is select Troubleshoot > Reset this PC to reach the following screen Afterward, select either the “Keep my files” option or the “Remove everything” option depending on your preference, and then proceed to the next on-screen instructions that follow to reset your Windows 10 computer.
Read More
Fix Unable to terminate the process Error in Windows 10
There are times when you may find it hard to kill a particular process in the Windows Task Manager and every time you try to do so, you will only get an error message saying, “Unable to terminate the process, The operation could not be completed, Access is denied”. If you are one of the users who is constantly getting this error, read on as this post will provide you with a couple of options you can try to resolve the problem. Refer to the given instructions below if you are unable to terminate a process in the Task Manager but before you proceed you need to restart your PC and then try killing the process again, if you’re still not able to do it, you need to follow the options laid out below.

Option 1 – Try using Taskkill

  • Open the Command Prompt as admin from the WinX Menu.
  • After opening Command Prompt, type in the following command and tap Enter to execute it:
taskkill /IM "processname" /T /F processname – it is the name of the process which you can see on the Details tab of the Windows Task Manager. /IM – it is the one that specifies the image name of the process, which follows, that is to be terminated. /T – it is the one that kills not just the main process but also the child process. /F – it is the one that terminates the process forcefully.

Option 2 – Try using the WMIC

  • Open Command Prompt as admin from the WinX Menu.
  • From the Command Prompt window that opens, type in the following command and hit Enter to execute it:
wmic process where name='processname.exe' delete
Note: In the given command, you need to replace “processname.exe” with the name of the particular process you want to terminate which is found in the Details tab of the Windows Task Manager.

Option 3 – Try using PowerShell

  • The first thing you have to do is open an elevated PowerShell prompt.
  • From there, type in the following command and hit Enter to execute it:
kill -id pid
Note: In the given command above, “pid” is the Process ID number of the process you want to terminate. And for you to identify this number, you need to open the Details tab of the Windows Task Manager once again and take note of the number against the process you want to get rid of. Alternatively, you can also run the following command in the PowerShell prompt that you’ve pulled up to get the process ID number:
Get-Process
For example, “5364” is the process ID number for the DimScreen.exe process which is the process you want to terminate. In order for you to kill this process, you need to type in this command:
kill -id 5364
Read More
Reddit released the application in MS store
Reddit app
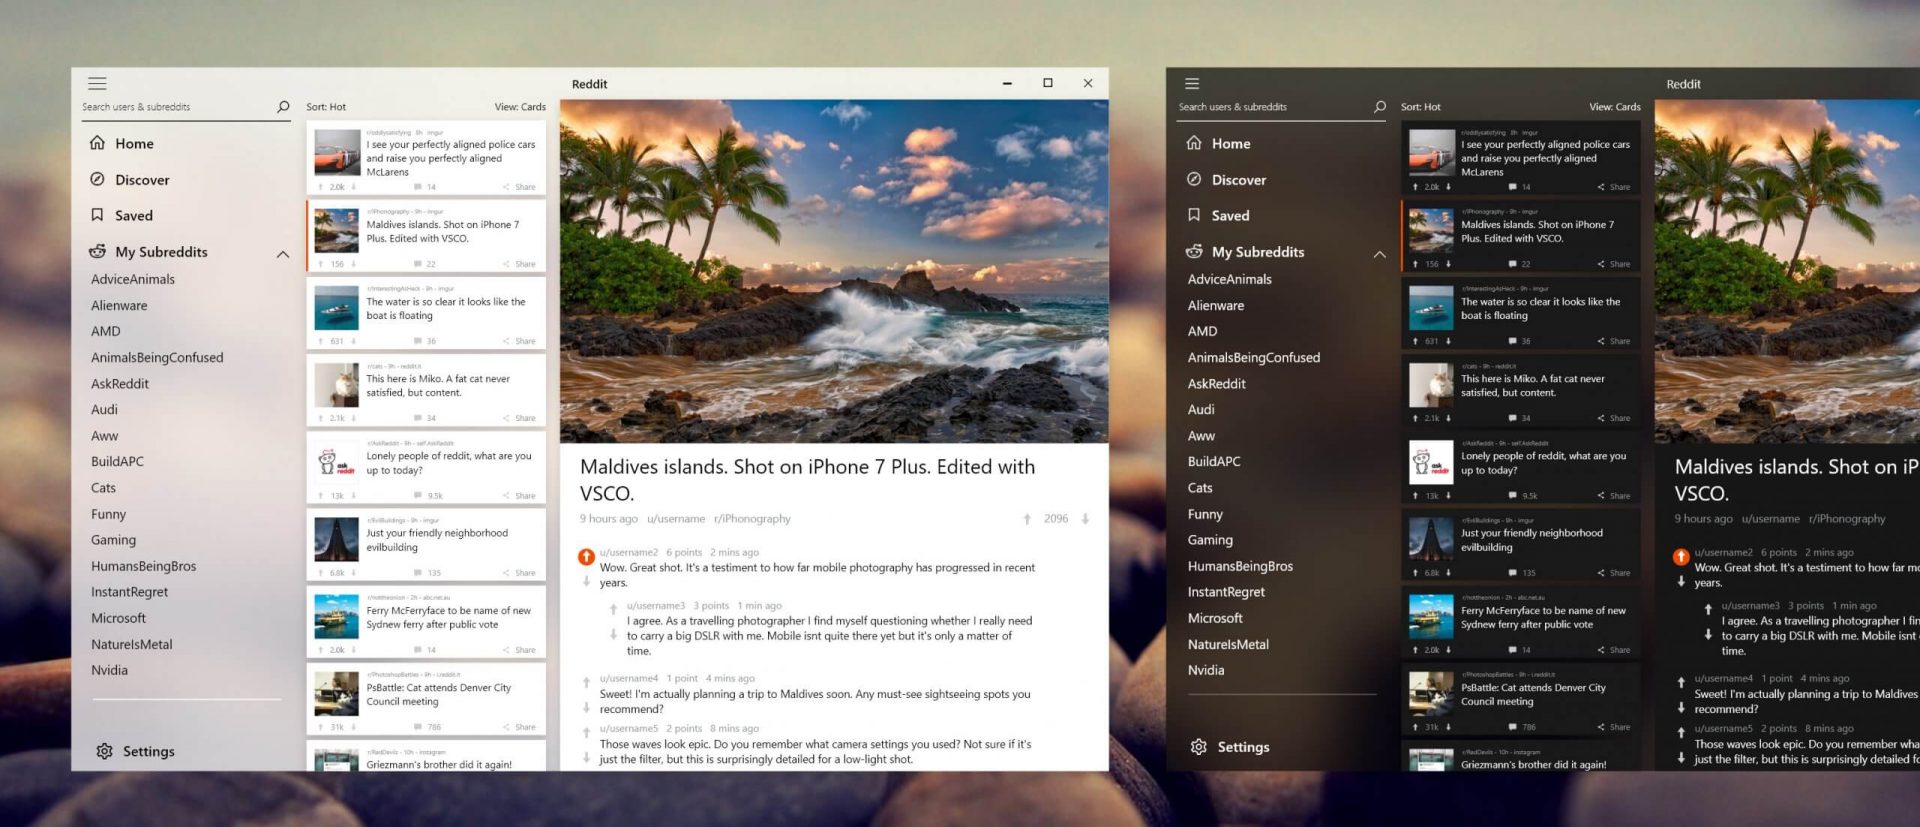
Reddit is one of the most popular websites in the world and how Microsoft is opening doors to everyone in its new store Reddit took a logical step and made a Progressive web application and placed it in it. Being a Progressive web app makes it more familiar and feels like a home experience using it for a lot of Reddit users. Reddit itself has a large community and active topics discussions all the time about anything. Bringing it to Windows as an application is, in my opinion, a great move since as an application it is independent, more light-weighted, and offering some other advantages specifically tied to being a standalone windows application. Everyone familiar with and using the Reddit website will feel right at home in this app and you can start using it right away.
Read More
Problem prevented document from being scanned
If an error suddenly pops up that states, “A problem prevented the document from being scanned” when you’re scanning a document in your computer, then you’ve come to the right place as this post will guide you on how exactly you can fix the problem. A lot of users have reported that they receive a two-layer error message when they try to scan their documents – the first screen throws an error message that says, “Error applying Settings to Driver” while the next error message states, “A problem prevented the document from being scanned”. As a result, the scanning won’t be completed which defeats the whole process of buying a printer with a scanner. As you can see the two error messages point to two different situations, while the other one is pointing at the driver, the second one points to the scanning problem. To resolve these issues, there are several suggestions you need to check such as follows:

Option 1 – Run the Printer Troubleshooter

One of the first basic troubleshooting you can perform to resolve the printer issue is running the Printer Troubleshooter. This built-in troubleshooter can detect and automatically fix the problem for you. To use it, follow these steps:
  • Tap the Win + R keys to open the Run dialog box.
  • Next, type “msdt.exe /id PrinterDiagnostic” in the field and click OK or hit Enter to open the Printer Troubleshooter.
  • Then click the Next button and follow the next on-screen instructions to fix the issue with the printer.

Option 2 – Try updating the Printer drivers

You might also want to try updating your printer drivers. All you have to do is locate the USB Composite Device. For complete details, follow the steps below.
  • First, click the Start button and type “device manager”.
  • Then click on the “Device Manager” from the search results to open it.
  • From there, look for the USB Composite Device option and right-click on it, and select the Update Driver from the options.
  • Restart your PC and then click the “Search automatically for updated driver software” option.
Note: You also have the option to download the latest version of your Printer from the manufacturer’s website.

Option 3 – Try to reset the settings of the Printer or reinstall it

If none of the two options given above worked, you can try to either reset the printer settings or reinstall the printer so that it can go back to its default state. However, if it doesn’t work, you can try to uninstall the printer as well as its related drivers. To do so, follow these steps:
  • First, go to Settings > Devices > Printer and Scanners.
  • After that, select the printer and select the Remove Device option.
  • Once done, restart your computer and check again and see if the error is now fixed.

Option 4 – Try to modify the Registry settings for the Still Image devices

In case you don’t know, Windows has Registry settings for the Still Image devices like Scanners and Printers. And these devices have vendor-specific settings that if ended up getting corrupted or misconfigured then you will most likely encounter errors like “A problem prevented the document from being scanned”. Thus, to fix this error, you can try modifying the Still Image devices registry settings, and to do that, you need to follow the instructions below but before that, make sure that you create a System Restore Point first.
  • Once you’ve created a System Restore point, tap the Win + R keys to open the Run dialog box and type “Regedit” in the field, and then hit Enter to open the Registry Editor.
  • Next, navigate to this registry key: HKEY_LOCAL_MACHINESYSTEMCurrentControlSetControlStillImage
  • From there, right-click on the “StillImage” registry key and delete it.
  • After that, exit the Registry Editor and restart your computer.
  • Once your computer has restarted, Windows will recreate the settings of the Still Image devices back to their default settings.
Read More
MyScrapNook Complete Removal Tutorial

MyScrapNook is a browser extension for Google Chrome that allows users to easily find scrapbook templates, layouts, and graphics. This extension requires the use of Adobe Flash Player and does not work with Chrome’s built-in flash player.

When installed MyScrapNook will change your home page and default search engine to MyWebSearch.com. It will also inject unwanted ads and sponsored links into your search queries. This extension has been marked as a Browser Hijacker by several anti-virus applications and is recommended to remove it from your PC.

From the Author:

FREE scrapbooking templates, layouts, and graphics! Get creative with tons of FREE scrapbooking features. With MyScrapNook, you can make beautiful, custom scrapbooks — with just a few clicks. Let us help you capture the memories with FREE scrapbook templates. The MyScrapNook extension offers convenient web search and features from the Chrome New Tab page.

About Browser Hijackers

Browser hijack is a common type of internet fraud where your web browser configurations are altered to make it do things you don’t intend. Basically, nearly all browser hijackers are created for marketing or advertising purposes. These are generally used to force visitors to predetermined sites, manipulating web traffic to generate ad revenue. Many people assume that such websites are legitimate and harmless but that is not the case. Nearly all browser hijacker pose an existent threat to your on-line safety and it is important to classify them under privacy dangers. Browser hijackers can even allow other vicious programs without your knowledge to further damage your computer.

How to know whether the web browser is hijacked?

There are numerous signs of browser hijacking. Below are some of them: the browser’s home page is changed; bookmark and the new tab are likewise modified; the default online search engine has been changed and your browser security settings have been cut down without your knowledge; you notice many toolbars on the web browser; numerous pop-up ads show up and/or your browser popup blocker is disabled; your web browser gets slow, buggy, crashes often; You cannot access particular websites, especially anti-virus sites.

Exactly how browser hijacker infects PCs

There are several ways your computer can become infected by a browser hijacker. They typically arrive through spam e-mail, via file-sharing websites, or by a drive-by-download. They also come from add-on application, also known as browser helper objects (BHO), web browser extensions or toolbars. Also, certain freeware and shareware can put the hijacker within your PC through the “bundling” technique. An example of some notorious browser hijacker includes Anyprotect, Conduit, Babylon, SweetPage, DefaultTab, Delta Search, and RocketTab, however, the names are constantly changing. Browser hijackers can interrupt the user’s web browsing experience greatly, track the websites visited by users and steal sensitive information, cause problems in connecting to the net, and then finally create stability problems, causing applications and system to freeze.

Removing browser hijackers

Some hijackers can be removed by deleting the free software they came with or by eliminating any extension you have recently added to your browser. Sometimes, it could be a difficult job to discover and remove the malicious component because the associated file could be running as part of the operating system process. And there is no denying the very fact that the manual fixes and removal methods can certainly be a difficult job for an amateur computer user. On top of that, there are plenty of risks associated with fiddling around with the system registry files. Experts always recommend users get rid of any malicious software including browser hijacker by using an automatic malware removal tool, which is easier, safer, and faster than the manual removal process. If you’d like to eliminate persistent hijackers effectively, install the top-rated, award-winning anti-malware software Safebytes Anti-Malware. Together with the anti-virus tool, a system optimizer, like SafeBytes’s Total System Care, will help you in deleting all linked files and modifications in the computer registry automatically.

Learn How To Install Safebytes Anti-Malware On An Infected PC

All malware is bad and the degree of the damage can vary greatly with regards to the type of infection. Some malware sits in between your computer and the internet connection and blocks a few or all internet sites that you want to visit. It might also block you from installing anything on your computer, especially the antivirus program. If you’re reading this, you may have infected by malware that prevents you from installing security software such as Safebytes Anti-Malware. There are some steps you can take to get around this issue.

Download the software in Safe Mode with Networking

In the event the malware is set to run at Windows start-up, then booting in safe mode should prevent it. Since only the bare minimum programs and services start-up in “Safe Mode”, there are rarely any reasons for issues to take place. Here are the steps you have to follow to boot into the Safe Mode of your Windows XP, Vista or 7 computers (go to Microsoft site for instructions on Windows 8 and 10 computers). 1) Press the F8 key repeatedly as soon as your computer boots, however, before the big Windows logo or black screen with white texts shows up. This will invoke the “Advanced Boot Options” menu. 2) Select Safe Mode with Networking using arrow keys and press ENTER. 3) As soon as this mode loads, you should have the internet. Now, utilize your browser to download and install Safebytes Anti-malware. 4) Immediately after installation, run a complete scan and allow the software program to delete the threats it finds.

Switch to some other internet browser

Malicious code could exploit vulnerabilities in a specific browser and block access to all anti-virus software sites. If you seem to have a virus attached to Internet Explorer, then switch over to an alternate browser with built-in safety features, such as Firefox or Chrome, to download your favorite antivirus program – Safebytes.

Install and run anti-malware from your flash drive

Another solution is to store and run an antivirus program completely from a USB drive. Abide by these steps to run the anti-malware on the affected computer. 1) Make use of another virus-free computer to download Safebytes Anti-Malware. 2) Connect the USB flash drive to a USB port on the uninfected computer. 3) Double click on the downloaded file to open the installation wizard. 4) Pick a thumb drive as the place when the wizard asks you where you want to install the software. Follow activation instructions. 5) Transfer the USB drive from the uninfected computer to the infected PC. 6) Double-click the EXE file to run the Safebytes program from the thumb drive. 7) Click on the “Scan” button to run a full system scan and remove viruses automatically.

Detect And Destroy Viruses With SafeBytes Anti-Malware

Want to download the very best anti-malware software program for your desktop? You can find many applications on the market that comes in free and paid versions for Windows computers. A few are really worth your money, but most aren’t. You have to be very careful not to select the wrong product, particularly if you purchase a paid software. One of the highly recommended software by industry experts is SafeBytes Anti-Malware, a popular security application for Windows computers. SafeBytes anti-malware is a trustworthy tool that not only protects your computer system completely but is also very user friendly for people of all ability levels. Once you’ve got installed this software program, SafeBytes superior protection system will ensure that absolutely no viruses or malware can seep through your personal computer.

There are many great features you will get with this particular security product. Here are a few popular features found in this computer software:

Anti-Malware Protection: With a critically acclaimed malware engine, SafeBytes offers multilayered protection that is intended to catch and get rid of threats that are concealed deep inside your computer’s operating system. Live Protection: SafeBytes gives you round-the-clock protection for your PC limiting malware intrusions in real-time. This software will always keep track of your PC for any suspicious activity and updates itself continuously to keep abreast of the constantly changing threat situation. “Fast Scan” Features: This software program has got one of the fastest and most efficient virus scanning engines in the industry. The scans are extremely accurate and take a short amount of time to complete. Safe Web Browsing: SafeBytes inspects the links present on a web page for possible threats and tells you whether the site is safe to view or not, through its unique safety ranking system. Light-weight: This software program is not “heavy” on the computer’s resources, so you’ll not see any performance troubles when SafeBytes is operating in the background. 24/7 Premium Support: You can obtain high levels of support 24/7 if you’re using their paid version. SafeBytes has created a wonderful anti-malware solution to help you conquer the latest malware threats and virus attacks. Malware trouble will become a thing of the past once you put this tool to use. If you’re seeking the very best malware removal tool out there, and if you don’t mind paying out some dollars for it, go for SafeBytes Anti-Malware.

Technical Details and Manual Removal (Advanced Users)

If you’d like to manually remove MyScrapNook without the use of an automated tool, it might be actually possible to do so by deleting the application from the Microsoft Windows Add/Remove Programs menu, or in cases of browser plug-ins, going to the browser’s AddOn/Extension manager and removing it. It’s also advised to reset your browser settings to their default state. If you opt to manually delete the system files and Windows registry entries, use the following list to ensure that you know precisely what files to remove before executing any actions. Please be aware that this is for professional users only and may be challenging, with incorrect file removal causing additional PC errors. In addition, some malware keeps replicating which makes it difficult to get rid of. Doing this in Safe Mode is recommended.
Folders: %LOCALAPPDATTA%\Google\Chrome\User Data\Default\Extensions\lbapdklahcjljfincdglncfpdgfhckcf %LOCALAPPDATTA%\Google\Chrome\User Data\Default\Local Extension Settings\lbapdklahcjljfincdglncfpdgfhckcf %LOCALAPPDATTA%\Google\Chrome\User Data\Default\Sync Extension Settings\lbapdklahcjljfincdglncfpdgfhckcf %LOCALAPPDATTA%\My Scrap NookTooltab Registry: key My Scrap Nook at HKEY_CURRENT_USER\Software\ key My Scrap NookTooltab Uninstall Internet Explorer at HKEY_CURRENT_USER\Software\Microsoft\Windows\CurrentVersion\Uninstall\
Read More
Fix Can’t initialize disk in Windows 10
If you have recently installed a new internal or external hard drive or SSD and you’ve noticed that its status on the left side of the Disk Management tool states “Unknown Not Initialized”, this indicates that Windows can’t initialize the disk and that you won’t be able to use this new SSD or hard drive. You can encounter this kind of issue randomly and not just with a new hard drive or SSD but also with existing drives. There are times when you won’t be able to find your drive or partition in the File Explorer. In such a case, you have to check the Disk Management if your drive or partition is there physically. You also have to check if you can see it as Not Initialized. If it is, then this means that the disk or partition does not have a valid signature that is if it’s not registered with the system properly. Note that a disk is registered when you format it at least once so if the disk was available before, then it could be somehow corrupted. To resolve the problem, you can try to initialize the disk manually or bring it online and add a drive letter. You can also try checking the Device Manager for issues or check the cable physically.

Option 1 – Try to manually initialize the disk

Since initializing the disk is the most common way to resolve the “Unknown Not Initialized” error, this is what you have to try first.
  • To initialize the disk manually, you have to open the Disk Management from the WinX menu by tapping Win + X keys and selecting Disk Management.
  • From there, you can find the non-initialized disk. Right-click on it and select the “Initialize Disk” option.
  • Next, select the partition style. It is recommended that you use the MBR option instead of the GPT or GUID Partition Table.
  • Now click the OK button. Your hard drive or SSD should now initialize without any problem.

Option 2 – Set the disk Online and add the Drive letter

  • If the disk appears to be offline under Disk Management, right-click on it and select the Online option.
  • On the other hand, if the disk is already set Online but does not have a drive letter, right-click on it and select the Change drive letter and path option.
  • Select a letter that is not allocated yet.
  • Once you’re done, you have the option to format the disk in either NTFS or FAT32 but if you are using a 64-bit computer, make sure that you opt for NTFS.

Option 3 – Try to check any issues in the Device Manager

It is also possible that the hard drive is not working properly due to some driver issues. Thus, it’s better if you check the Device Manager and see if that drive is listed with a yellow exclamation mark next to it. And if that’s the case, you have to right-click on that drive and select the Uninstall drive option. After that, click on Action and then run the Scan for hardware changes. It should fix the problem.

Option 4 – Try to physically check the cable

You might also want to check the physical status of the wires and see if they are connected properly or not. Specifically, you have to check two cables, such as:
  • The first one is the power cable that’s connected to your SMPS.
  • Next is the one that’s connected to your motherboard.
If any of the two cables are not working or missing, then it’s no wonder why your drive has an “Unknown Not Initialized” status. Thus, you need to have them replaced to fix the problem.
Read More
How to Repair Missing MSVCR100.dll Error

Fix Missing MSVCR100.dll Error

What is MSVCR100.dll Error?

Msvcr100.dll is a dynamic link library file. This file is loaded into the memory at runtime for successful program execution. This process is also referred to as runtime dynamic linking. The Msvcr100.dll belongs to the Microsoft Visual C++ Runtime Library. It is a core Windows component used by numerous Windows-based applications to load and run smoothly on Windows PC. Msvcr100.dll error occurs when the process of runtime dynamic linking fails. Due to this error, you are unable to access the desired application. The error code is displayed in either of the following formats:
  • “Msvcr100.dll Not Found"
  • "This application failed to start because msvcr100.dll was not found. Re-installing the application may fix this problem."
  • "Cannot find [PATH]msvcr100.dll"
  • "msvcr100.dll  is missing from your computer"
  • "XXX.exe - System Error - MSVCR100.dll is missing from your computer."

Solution

Restoro box imageError Causes

Narrowing down the cause of the Msvcr100.dll error is not possible as this error can occur on your PC due to multiple reasons. However, here are some of the most common causes of Msvcr100.dll error code on Windows PC:
  • Msvcr100.dll file corrupt and damaged
  • Missing Msvcr100.dll file
  • Corrupt runtime code library
  • Registry issues
  • Malware attack and viral infection

Further Information and Manual Repair

Here are some of the best ways to resolve this error on your system:

Reinstall the application causing the error

As dll are shared files used by multiple programs to load and run, there is the possibility of it getting deleted when uninstalling a certain program. If so, then the best way to fix it is to reinstall the application that is causing the error to pop up on your screen. This way you’ll be able to set up the program again and install the Msvcr100.dll file back on your system.

Download Microsoft Visual C++ 2010 Redistributable Package

Another way to resolve this error is to download Microsoft Visual C++ 2010 Redistributable Package. To do this, first, see if you are running a 32 bit or 64-bit copy of Windows. XP users go to the start menu and click run then type winver and press enter. In Vista and Windows 7, go to the start menu and type computer and click properties. The information you require is under Windows Edition. Once you find out whether you are using a 32 bit or a 64-bit version, accordingly, download the correct version of Microsoft Visual C++ 2010 Redistributable Package directly from Microsoft’s official website. Simply download and install the software. Then follow the prompts to add the toolbox to your PC. After that, restart your computer; most likely the error message will be gone. If it still persists, then this means the error is either related to the registry or malware.

Download and Run Restoro

Restoro can be used to resolve both malware infection and registry issues on your PC that could be triggering Msvcr100.dll errors. Restoro is a next-generation and multi-functional PC repair tool embedded with powerful utilities like an antivirus, a registry cleaner, and a system optimizer. The registry cleaning feature detects all registry issues and Msvcr100.dll errors. It removes unnecessary and obsolete files on the disk, like junk files, cookies, internet history, and temporary files cluttering the disk and damaging dll files. It repairs the damaged and corrupt dll files and restores the registry. Simultaneously the antivirus feature scans and removes all malicious software on your system. These include spyware, viruses, Trojans, adware, and malware that can damage dll files. This software is efficient and resolves the Msvcr100.dll error in seconds. It is easy to use and has a simple navigation. It is compatible with all Windows versions. Click here to download Restoro on your PC and resolve the Msvcr100.dll error today!
Read More
Fix can not open EXE file in Windows 10
Can not open and run EXE file in Windows is not a new issue and sadly it can still happen from time to time, luckily this step by step solution will help you to resolve this problem fast and effective in no time. Try the below solutions in no particular order and I hope that you will solve the issue fast and be able to return to using the computer like it never happened
  1. Run SFC scan

    As the EXE file not opening issue lies in the Windows OS, the SFC tool will be able to identify the cause and fix this issue. Press ⊞ WINDOWS + X and choose command prompt (admin) in command prompt type: sfc /scannow Press ENTER
  2. Check registry and modify if needed

    Sometimes value in the registry key is wrong and can cause this error, in order to check if this is the case, we will open the registry editor and find out Press ⊞ WINDOWS + R to bring run dialog up type in it: RegEdit and press ENTER In the left pane of the Registry Editor window, click on the HKEY_CLASSES_ROOT to expand the section Scroll down to find out the .exe registry and click on it Go to the right pane of the window and double-click on the Default and set the Value Data as exefile Click on the OK button Next, located the given in the window: HKEY_CLASSES_ROOT>exefile>shell>open>command Click on the “Command” in the left pane of the window In the right pane of the window double-click on the Default and set Value Data as “%1” %* Click on the OK button Restart your computer and check if the issue persists
  3. Turn off Firewall and defender

    If you have a firewall and antivirus active there might be a chance of a conflict and that firewall or antivirus is preventing the EXE file from starting, disable your firewall and anti-virus and try again to open the EXE file.
  4. Turn off user account control

    User account control can also like a firewall prevent some files from executing, go into accounts and turn off user account control to see if this might be an issue preventing you from opening the file.
Read More
A Simple Guide to Fixing Error Code 0x80070424

Repair Error Code 0x80070424

Error Code 0x80070424 - What is it?

The error code 0x80070424 is a Windows PC error. It may occur when using Windows Update, Microsoft Update or while trying to change Windows Firewall settings. This error does not allow you to enable or disable the Firewall on your PC. It is quite common on Windows 7 and Vista. Symptoms of error code 0x80070424 include Windows Firewall may not be listed on Services.msc, inability to change Windows Firewall settings and you may come across this error message when restarting your PC, “Base Filtering Engine Service could not be found in the system”.

Solution

Restoro box imageError Causes

Some of the common causes of the error code 0x80070424 include:
  • Base Filtering Engine Service file corruption
  • Registry issues
When you encounter this error code on your system, it is recommended to fix it immediately as this error can lead to serious PC damages.

Further Information and Manual Repair

To resolve the error code 0x80070424 here are some of the best DIY solutions for you. By following these solutions, you can fix the error all by yourself. These are simple, easy, and quick PC fixers that require no technical expertise. Just follow the simple steps and the error will be resolved in the shortest time.

Re-Install Windows Firewall & Filtering Engine

If the underlying cause of the error 0x80070424 is Base Filtering Engine Service file corruption, then the best way to resolve it is to download the Firewall and register file from a reliable website. Once you download it extract the zip on your desktop.
  • Double click on both files one by one to confirm their installation on your PC. Once installed, restart your PC and click on the start button. Search file type and run and then press enter.
  • When the Run window opens, type REGEDIT and click OK. After that, from the left sidebar navigate to HKEY_LOCAL_MACHINESYSTEMCurrentControlSetservicesBFE.
  • Now simply right-click on BFE folder and choose permission. Once that’s done, click on add button and type everyone then press OK to confirm settings.  Here you will see the ‘everyone’ added field.
  • After that in the below permission panel, tick the box that says Full Control and confirm. Now close the window and go to the menu and type services MSC.
This will open the service window. From the list search for ‘Base Filtering engine file’ right-click on it. Now search for Windows Firewall and see if you can change the settings. This procedure is most likely to resolve the error code 0x80070424 on your PC. It is time-consuming but worth it.

Use a Registry Cleaner

None the less, if the error is triggered by registry issues, then it is advisable to download Restoro. This is an advanced and highly functional PC fixer integrated with multiple utilities including a powerful registry cleaner. The registry cleaner utility detects all registry issues on your system and fixes them in seconds. It wipes out the excess, unnecessary, and obsolete registry entries and files corrupting your system cleans, and restores the registry. It is user-friendly and compatible with all Windows versions. So whether you are using Windows 7, 8, XP or Vista, you can run it on all versions with ease and resolve the error code 0x80070424 generated by registry issues. This software also includes other functional and value-added features like antivirus and a system optimizer. Click here to download Restoro and resolve error code 0x80070424  on your PC today!
Read More
1 2 3 162
Logo
Copyright © 2022, ErrorTools. All Rights Reserved
Trademarks: Microsoft Windows logos are registered trademarks of Microsoft. Disclaimer: ErrorTools.com is not affiliated with Microsoft, nor claim direct affiliation.
The information on this page is provided for information purposes only.
DMCA.com Protection Status