Malware Guide: How to Remove BitCoinMiner

How to Easily and Quickly Remove BitCoin Miner

What is BitCoinMiner Malware?

BitCoinMiner is a Malware created with the intent to force computer systems to generate crypto-currency, namely Bitcoin. This is done without the consent and knowledge of a computer/system holder. This unwanted file bears no digital signature or publisher since the creators of such a heinous invention do not wish to be known.

Technical details about BitCoinMiner Malware include:

Product Version: 1.0.0.0

Original File Name: crss.exe

Entry Point:  0x000C5AAE

Assessment of BitCoinMiner Malware

After installation of the BitCoinMiner Malware, there were no visible signs of an infection or program files installed. However, based on research, BitcoinMiner Malware utilizes the CPU’s resources (est. to be about 50%). Computer users have reported that they recognized an unknown process utilizing the majority of their processing space.

the bitcoin miner is used by the creators to penetrate a user’s system, in effect coercing each infected system to mine Bitcoins covertly. After years of mining, a user might discern that their computer is moving slouchy and may even encounter various forms of BSODs.   After Bitcoins have been mined in the infiltrated system, the cyber currency is then returned/ sent to the creator of the malware. This venture is a sly and deceptive way to earn Bitcoins since the currency is gaining much popularity.

Further Information on BitCoinMiner

BitCoinMiner works covertly. There are no obvious traces of this program running on a computer system. However, once a computer system is infiltrated, the computer user will realize that their CPU resources are strangely being used up, even while the computer idles.

Another expression of BitCoinMiner is the addition of cookies of various sorts to a computer system. These include:

  • Tracking cookies
  • Advert (Adware) cookies
  • Casale Media (Spyware) cookies
  • Atwola (Spyware) cookies
  • Adtech (Spyware) cookies

Once BitCoinMiner is present on a computer system, it can potentially slow it down and also create back doors as a means to install other unwanted and harmful programs.

To completely remove BitCoinMiner Malware from your computer, click here to download and install Spyhunter.

If you like to learn and find out more about various Windows errors, and how to repair them go to our vast archive or use search to find articles that will explain and help you in solving your issue.
However, if you prefer to do things fast and with automatization then we are proposing to use an automated solution for your issues. The application that we are recommending is Advanced System Repair Pro
Advanced System Repair utilizes multiple tools all in one to give you a quick, simple, reliable, and very thorough diagnosis of your PC. It brings you all the tools you need in one program to clean, fix, protect, optimize and boost your PC!
1-Click Maintenance
All the tools to make it simple and easy! It's like having a professional technician at the click of a mouse.

Junk Cleaner
Keeping your computer free from unnecessary clutter also helps make your computer last longer. Like any other machine, if you keep it clean and take care of it, it will serve you better for longer!

Optimize background apps
Optimize applications background activity with the built-in Application Optimizer feature.

Disk Defrag
With a simple 1-click, Advanced System Repair speeds up your PC by assembling fragmented files on your machine and organizing them more efficiently.

Malware Removal
Finds and removes all types of harmful malware including trojans, worms, bots, adware, spyware, PUPs, and more!

Privacy Cleaner
The all-in-one privacy suite to Clean Your Tracks & Protect Your Privacy! Make your computer safe, secure, and more efficient!

System Tweak/Optimizer
ASR will analyze your complete system and settings to adjust your PC to function at its maximum performance.

Registry Cleaner
Over time, as you install and uninstall applications, the registry can become cluttered with old entries and broken settings which can result in program crashes, and annoying messages and slow the computer down.
Visit our Advanced System Repair Pro Download page to inform yourself about all the benefits of this software and get a free trial copy of it.
advanced system repair pro

Advanced System Repair Pro

One-click automated PC repair solution
ASR logo
With Advanced System Repair Pro you can easily
Replace damaged files
Restore performance
Free disk space
Remove Malware
Protects WEB browser
Remove Viruses
Stop PC freezing
DOWNLOAD
Privacy Policy | Terms of Use | Uinstall
Advanced System Repair Pro is compatible with all versions of Microsoft Windows including Windows 11

Share this article:

You might also like

login does not appear/password box not showing
As you know, Windows 10 offers its users tons of options to log in to their computers. This includes simple and easy methods like PIN and complex ones like the Windows Hello Face unlock. However, there are instances when you might face a situation where the login screen in Windows 10 does not appear at all. If you are currently facing this problem, worry not for this post will show you what you can do to fix this problem. There are actually two scenarios to this issue, you might encounter one where the login screen does not show up at all, while the second one is when the login screen shows up but there is no username or password box. There are several options you can check out to resolve the problem. You can try to run System Restore or try the combination of Ctrl + Alt + Delete keys. You could also try to enter a username and password to use the computer or disable Fast Startup or troubleshoot the problem in a Clean Boot State. You could also create a new User Account or run Fresh Start or run the Startup Repair. To get started, follow each one of the given options below.

Option 1 – Try using the Ctrl + Alt + Delete key combination

The first and simple thing you can do to fix the login screen is to tap the Ctrl + Alt + Delete keys and see if it makes the credentials appear or not. If not, proceed to the next given option.

Option 2 – Try running System Restore

If you aren’t able to boot into the desktop of your computer, you can run System Restore in the Advanced Startup Options by following these steps:
  • Boot your computer into the Advanced Startup Options screen.
  • From there, you will see some options to troubleshoot when you can’t log in to Windows in the usual way.
  • Now select Troubleshoot > Advanced Options > Command Prompt.
  • After that, type “rstrui” and hit Enter to execute the command which will start the System Restore process.
  • Once it’s done, restart your computer.

Option 3 – Try to turn off Fast Startup

  • Tap the Win + R keys to open the Run dialog box and type in “control” to open the Control Panel.
  • Next, click on the Hardware and Sound section and click on Power Options.
  • Afterward, select the “Choose what the power buttons do” option from the left side menu pane.
  • Now click on Change settings that are currently unavailable and uncheck the entry that says, “Turn on fast startup (Recommended).
  • Then click on Save Changes and restart your computer and see if it has fixed the problem or not.

Option 4 – Try troubleshooting the problem in a Clean Boot State

There are times when some conflicting programs installed in your computer might be the reason why there is an issue with the password box in the login screen of Windows 10. To identify which program is causing the problem, you need to put your computer in a Clean Boot State. To do so, follow the steps below.
  • Log onto your PC as an administrator.
  • Type in MSConfig in the Start Search to open the System Configuration utility.
  • From there, go to the General tab and click “Selective startup”.
  • Clear the “Load Startup items” check box and make sure that the “Load System Services” and “Use Original boot configuration” options are checked.
  • Next, click the Services tab and select the “Hide All Microsoft Services” check box.
  • Click Disable all.
  • Click on Apply/OK and restart your PC. (This will put your PC into a Clean Boot State. And configure Windows to use the usual startup, just simply undo the changes.)
  • From there, start to isolate the problem by checking which one of the programs you installed recently is the root cause of the problem.

Option 5 – Try to run Startup Repair

You might also want to run Startup Repair in fixing the issue with the login screen. To do so, follow the steps below.
  • You can start by creating and booting from a bootable Windows 10 USB Stick.
  • After that, click on Repair your computer located on the bottom left corner when you are on the initial Windows Startup screen.
  • Next, click on Troubleshoot, and then on the other screen, click the Startup Repair option.
  • Now select the operating system you want to repair. Once you do that, it will start to repair your operating system. Wait until the process is completed and then check if the problem’s now fixed.
Read More
Delete last 15 min of browsing history on phone
google browsing 15min history delete
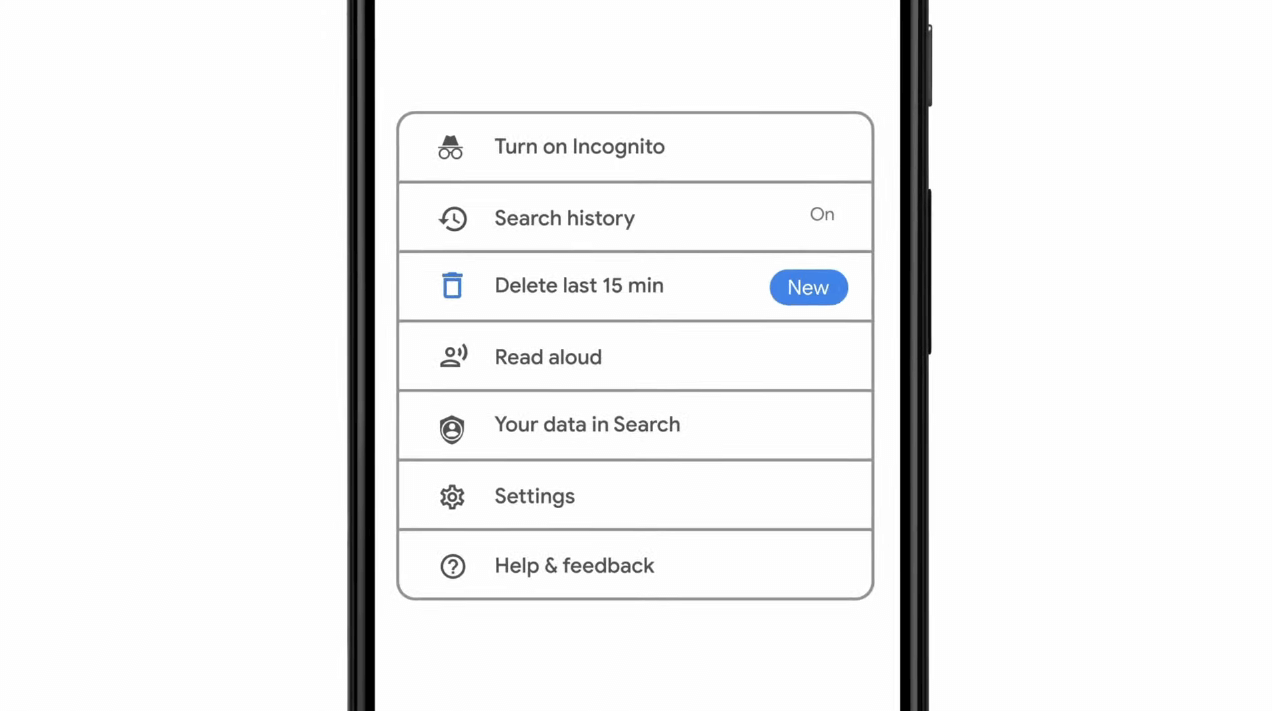
As previously announced by Google feature to quickly delete the last 15min of browsing history via one button is rolling out now. For now, only Apple users will be available to use this feature but the Android update is scheduled for later this year, a strange move by Google but it is what it is. For anyone who is unfamiliar with this feature, basically, Google wants a quick way to remove the last 15min of browsing history as a supposedly stated request to make deleting browsing history much easier. Google came up with this idea so you can keep the previous history intact but remove just 15min time frame, no additional explanation was given on why 15 but I presume it is some round number that came up as the middle one with research, read telemetry info. Using quick delete requires being signed into Search with a Google account. Users can access the option by simply tapping on the avatar icon to access the settings then choosing "Delete last 15 minutes."
Read More
A Guide to Fixing Error Code 0x8007007b in Windows 8

Error Code 0x8007007b – What is it?

This error code occurs when users fail to activate their Windows operating system. It is one of the more popular Windows error codes since it affects many versions of Windows including Windows 7, Windows 8.1, and Windows 10. Error code 0x8007007b has common symptoms which include the following:

  • Inability to activate a Windows installation
  • Message box highlighting error code 0x8007007b

Solution

Restoro box imageError Causes

Error code 0x8007007b in Windows 8.1 usually results due to one or more main clauses. Windows 8.1 users may experience this error due to the use of volume-licensed media. The error code may also arise if the activation wizard is unable to connect to Key Management Service (KMS) host computer or if corrupted system files are present on your computer.

Further Information and Manual Repair

Windows error codes such as Error code 0x8007007b can be a complicated issue, requiring the use of technical knowledge and skills. For this reason, we have listed instructions in the simplest of forms to enable even average users to successfully complete manual repair methods that will resolve error code 0x8007007b.

The same approach has been applied to all our error code solutions. See also Error Code 0x00000024 and Error Code 0x80004005.

Below are the two main methods for correcting this issue.

Method One: Use Multiple Activation Key (MAK) to Activate Windows

This method involves the use of a Multiple Activation Key (MAK) instead of the Key Management Service (KMS) to activate the Windows operating system you intend to use on your PC. This manual repair method requires the use of Command Prompt so ensure you follow the instructions provided carefully so as to avoid the risks of causing harm to your system.

  • Step one: Select Windows log key + X.
  • Step two: Click Command Prompt, then Admin
  • Step three: Type in admin password if Command Prompt requests it
  • Step four: Type slmgr -ipk followed by the MAK product key. Note that the product key should have 25 characters with dashes between them like this xxxxx-xxxxx-xxxxx-xxxxx-xxxxx

Attempt to activate your Windows installation once you’ve completed the exact instructions above. If you are unable to complete this process, consider getting help from a Windows repair technician or simply move to the next manual repair method listed below.

Method Two: Run System File Checker

System File Checker (SFC) enables Windows users to scan and repair errors or corruption on system files. Since such errors within your system files can cause error code 0x8007007b to occur, follow the steps below to fix this error code.

  • Step One: Go to Start and type Command Prompt or CMD.
  • Step Two: Run as Administrator
  • Step Three: Type sfc /scannow with a space between “sfc” and “/scannow”.

The System File Checker tool will begin scanning your machine for corrupted or missing files in need of repair. If these files are found on your system, the tool will repair and replace them. Once this is done, restart your computer then check to see if you can now activate your Windows operating system.

Method Three: Use an Automated Tool

If you wish to always have at your disposal a utility tool to fix these Windows 8 and other related issues when they do arise, download and install a powerful automated tool.

Read More
Diablo 2 Resurrected facing server issues
It has been some time since the release of Diablo 2 resurrected and overall reception was pretty good. People are enjoying the old classic game in hi-def. resolution and with new and improved visuals. Sadly some server issues are present still until this day and somewhat spoil the experience for players. diablo 2 server status
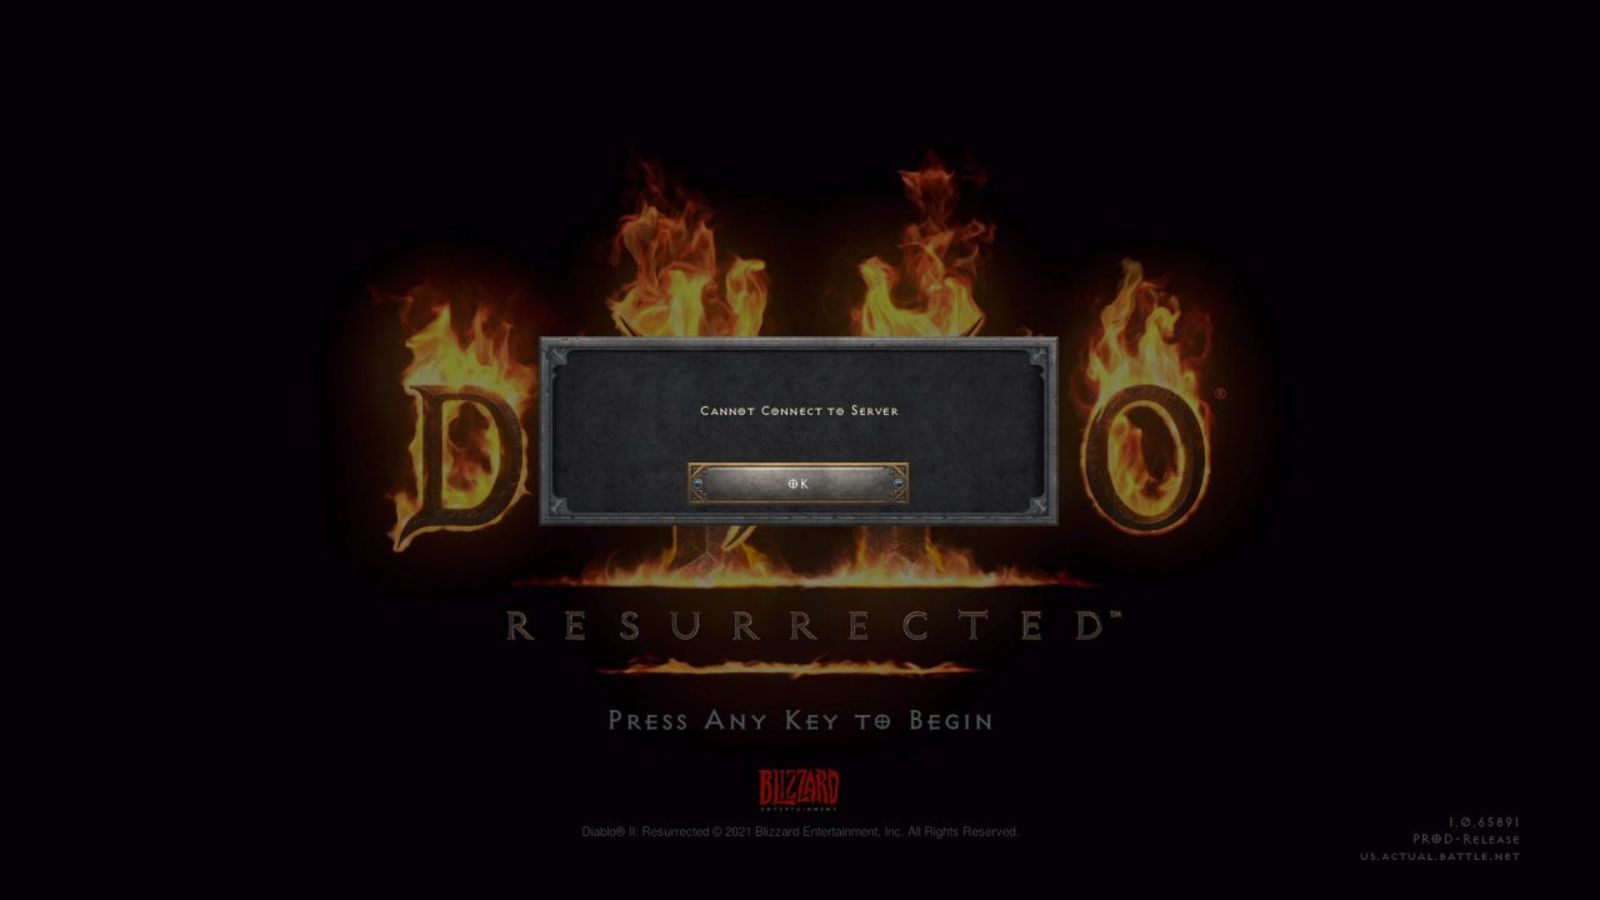
The greatest lag and server crashes are pinpointed to game-creating events. When a player creates a new online game, the server needs to pull a lot of details from the database and make a game, due to some legacy code present this process takes some time and it is demanding a bit on the server-side, and although code was optimized to cater to more modern approach some legacy code still remains. Another thing that was spotted to affect performance itself is player behavior, to be more specific, modern gamer behavior. Where players find good builds and runs on the internet and then go to farm-specific areas or bosses for loot or experience points, which in return boils down to making plenty and short runs that are made by creating games and after run eliminating them. Now pair that with the previous statement about legacy server and database code and you can add 1 and 1 and see how this might be an issue. A lot of short games over legacy code are placing games in a state it was not designed for back in 2001 and therefore we have issues. Sadly solutions without completely rewriting the whole code are not very promising and they include rate limiting, which will prevent players to create many games in succession in a short period of time and maybe even login queues to drop a load on servers. Blizzard reached to people in the whole company, even old diablo 2 developers to ask for advice and they say that they are working on solutions so they could lift limitations and have everything running fine.
Read More
Guide to Fixing 0x80040600 Error
[vc_row][vc_column][vc_column_text]

Repair 0x80040600 Error

What Is 0x80040600 Error?

The 0x80040600 error is a common error that becomes particularly distressing for Outlook users. This error prevents users from sending or receiving emails through Microsoft Outlook. Users may also encounter this problem while altering an entry on the calendar or adding a new contact. There is no obvious message that is displayed to the user when this error occurs. However, Outlook displays a vague message that includes the code 0x80040600.

Solution

Download available to recover all lost Outlook data

Restoro box imageError Causes

The primary cause of this error is a problem with the PST file. When the PST file is corrupt, missing, or damaged, this error occurs at once. The PST file is essentially an important file that stores crucial and personal information of an individual’s accounts. Sometimes this error is because the file is corrupt while at other times, the reason that it occurs is that the file is too full to accommodate any further information. Irrespective of the causes of this problem, it is important that this error is promptly fixed to ensure the proper and uninterrupted functioning of Outlook in the future.

Further Information and Manual Repair

The error occurs because the Outlook application encounters problems while attempting to receive, send or read emails. Some solutions that can work wonders and help you get rid of the problem are outlined below.
  • As soon as the error appears, the first solution is to restart the system. This is the first thing that must be done because a lot of times, these errors can be removed by simply restarting the system. This will, hence, save the user the inconvenience of manually fixing this problem.
If restarting the system doesn’t resolve the problem and the error message displays again, it is advised the user makes use of the ‘Inbox Repair Tool’. This is the most commonly used and effective approach to fixing a corrupt PST file. The procedure to remedy this Personal Storage Table file or PST file is listed below.
  • Go to the start menu. Type Run and launch the Inbox Repair Tool by typing the following path:  drive name: Program FilesCommon FilesSystemMapiLocale IDscanpst.exe. Now click Ok. A pop-up message will appear. Enter file name and path of the damaged PST file. Now click on the Start button. Here it is important to mention that the inbox repair tool may take a long time depending upon the file size and the amount of data that has to be recovered. However, it is the most effective way of fixing this problem.
[/vc_column_text][/vc_column][/vc_row]
Read More
Update cannot currently check for updates
If you receive an error message saying, “Windows Update cannot currently check for updates because updates on this computer are controlled”, while trying to change the Windows Update preferences or manually update, then read on as this post will guide you in fixing it. You can mostly encounter this error in managed systems where an Administrator controls the permission on the operating system. The reason why you are not able to modify the Windows Update preferences or manually update your system is that a group policy prevents you from doing so and that the only user who can do these things is none other than the administrator of the system. Troubleshooting this kind of problem is the same as when you troubleshoot an error message that says, “Some settings are managed by your organization”. In such cases, you need to check both the Windows Update Group Policy and Registry settings. If you’re just a standard user, you have to contact your system administrator regarding this issue and if you are the administrator, you can make adjustments to the system settings via the Registry Editor and the Group Policy Editor. Refer to the instructions given below for detailed instructions.

Option 1 – via the Registry Editor

If you are using the Home edition of Windows 10 and you want to change the policy for non-admin users on your local computer, then you can use the Registry Editor for that. Here’s how you can do it:
  • Tap the Win + R keys to open the Run dialog box.
  • Then type “Regedit” in the field and hit Enter to open the Registry Editor.
  • After that, navigate to the following registry key:
HKEY_LOCAL_MACHINESOFTWAREPoliciesMicrosoftWindows
  • From there, look for the key named “WindowsUpdate” in the Windows folder and if it does not exist, you can just right-click on the Windows folder and select New > Key.
  • Now name the new key “WindowsUpdate” and create a new sub-key under the newly created key and input “AU” as its name.
  • Keep AU selected and then right-click anywhere in the right pane and select New > DWORD (32-bit) Value.
  • Then name the Value as “AUOptions” and right-click on AUOptions and select Modify.
  • Next, change the value of the Value data to “5” and click OK to save the changes made to the settings. Note that the Value Data of 5 refers to the policy to allow the local admin to choose the setting.
  • Now restart your computer once you’re done and check if non-admin users can now modify the Windows Update settings or update Windows.

Option 2 – via Group Policy Editor

  • Tap the Win + R keys to open the Run dialog box and then type “gpedit.msc” and hit Enter to open the Group Policy Editor.
  • Next, navigate to this folder: Computer Configuration > Administrative Templates > Windows Components > Windows Update.
  • Now look for the “Configure Automatic Updates” policy on the right pane and double click on it to open its Properties.
  • After that, shift the Radio button to “Enabled” and from the drop-down menu for Configure automatic updating, select option 5: Allow local admin to choose the setting.
  • Then click on Apply and OK to save the changes made to the settings.
  • Restart your computer and check if the problem’s fixed or not.
Read More
Fix Boot Device Not Found 3F0 Error
Today we will be solving the Device not found 3F0 error which is a common error, especially among HP (HP Pavilion G6), Lenovo, Acer, and Dell laptops/desktops. This error occurs when the computer is turned ON and when the system is about to boot. It can happen on windows 7,  8, or 10. When a mentioned error occurs one of the following messages will be displayed on your screen:
  • “No bootable device – insert boot disk and press any key”
  • “No Boot Device Found. Press any key to reboot the machine”
  • “Boot Device Not Found. Please install an operating system on your hard disk. Hard Disk (3FO)”
  • “No boot device is available”

The most common reasons for 3F0 error to occur is:

  • Using the unbootable device or disk to boot from.
  • If the bootable hard drive you are using might have corrupted or damaged somehow.
  • MBR or boot sector is damaged on the bootable hard drive.
  • If your system has gone through a virus or malware attack.
  • The wrong boot order in the BIOS.
  • Hard disk connection problem.
  • System files or boot files unknowingly damaged.
  • Corrupt hard drive partitions.
Now all of these being said let us go through some of the solutions and fix this dreaded error in order to get your computer back in working order:

1: Change Boot Order


This is well, the most simple solution and the easiest one, try to change the boot sequence in the BIOS settings of your motherboard. Sometimes most easier solutions can provide great results and solve our problems. If sadly this fails and the issue persists move to the next solution.

2: Perform a Hard Reset


Performing hard reset can often solve issues, to perform a hard reset do the following:
  • Turn off the computer and unplug the power adapter. If there is a removable battery, it should also be removed.
  • Then disconnect all peripherals, including the removable hard drive, etc.
then
  • Press and hold the power button for 15 seconds to drain all remaining power.
  • Insert the battery, and then re-plug the AC adapter into the laptop.
  • Press the power button to turn on the computer.
  • Once the computer starts up properly and the startup menu appears, use the arrow keys to select “Start Windows normally” and then press Enter.
Reconnect everything back of your peripherals. If by any chance problem still persists follow the next step:

3: Test Hard Drive Using HP Diagnostic Tool


Use the built-in tool in the Hp device to solve the issue:
  • Turn on your computer and keep pressing the Esc key until the menu appears on the screen.
  • Next, press the F2 key.
  • Choose the Components Tests option from the HP PC Hardware Diagnostics menu.
  • Select Hard Drive from the Component Tests menu.
  • Click on the Quick Test, then click on the Run once button.
  • If there are still any issues with your hard drive, then run the Extensive Test.

4: Restore BIOS Default Settings


  • Press the Power button to start the computer, and immediately after this, repeatedly press the F10 key to enter the BIOS setup menu.
  • To load and restore BIOS Setup Default settings, press F9 on the BIOS setup menu.
  • Once loaded, press F10 to Save and Exit.
  • Select yes, and then press Enter when it says Exit Saving Changes.

5: Reconnect Your Hard Drive


  • Turn the computer off and remove the power cable.
  • If you have a removable battery, take it out
  • Disconnect your hard drive and then connect it back.
  • Reassemble your computer and turn the computer on to see if it fixed the issue.

6: Fix and Rebuild Damaged MBR


  • Boot from the original installation DVD (or the recovery USB)
  • At the Welcome screen, click Repair your computer.
  • Choose Troubleshoot.
  • Choose Command Prompt.
  • When the Command Prompt loads, type the following commands: bootrec /FixMbr bootrec /FixBoot bootrec /ScanOs bootrec /RebuildBcd.

7: Fix Operating System


  • Prepare a Windows installation disc, CD/DVD or USB flash drive and connect it to your PC.
  • During the installation process, launch Command Prompt.
  • In Windows 7, under the System Recovery Options tab, click Startup Repair.
  • In Windows 8 and Windows 10, click Repair your computer, then select Troubleshoot > Advanced options > Automatic Repair (Windows 8) or Startup Repair (Windows 10).

8: Replace the Hard Disk

Read More
How to Fix Win32kbase.sys BSOD error
There is various Blue Screen of Death errors that you can encounter as you use your Windows 10 computer and some of these Stop errors have something to do with the win32kbase.sys file. This post will guide you in fixing the BSOD errors related to the win32kbase.sys file.
  • A problem has been detected and Windows has been shut down to prevent damage to your computer. The problem seems to be caused by the following file: Win32kbase.sys.
  • Your PC ran into a problem and needs to restart. If you would like to know more, you can search online later for this error: win32kbase.sys.
  • SYSTEM_SERVICE_EXCEPTION (win32kbase.sys)
  • STOP 0x0000000A: IRQL_NOT_LESS_EQUAL – win32kbase.sys
  • STOP 0x0000001E:
KMODE_EXCEPTION_NOT_HANDLED – win32kbase.sys
  • STOP 0×00000050:
PAGE_FAULT_IN_NONPAGED_AREA – win32kbase.sys
The win32kbase.sys file is a Windows operating system Base Win32 Kernel Driver file located in the System32 folder so if it ends up getting corrupted or if it went missing, your computer will throw up Blue Screen error. To fix BSOD errors that have something to do with the win32kbase.sys file, here are some possible fixes that could help. Worry not for these possible fixes are not complicated.

Option 1 – Run the Check Disk or CHDSK utility

One of the first things you can try to resolve the win32kbase.sys Blue Screen error is running the CHKDSK utility. If your hard drive has issues with integrity, the update will really fail as the system will think that it’s not healthy and that’s where the CHKDSK utility comes in. The CHKDSK utility repairs hard drive errors that might be causing the problem.
  • Open Command Prompt with admin privileges.
  • After opening Command Prompt, execute the following command and hit Enter:
chkdsk /f C:
  • Wait for the process to be completed and then restart your computer.

Option 2 – Run SFC or System File Checker scan

System File Checker or SFC is a built-in command utility that helps in restoring corrupted files as well as missing files. It replaces bad and corrupted system files to good system files. To run the SFC command, follow the steps given below.
  • Tap Win + R to launch Run.
  • Type in cmd in the field and tap Enter.
  • After opening Command Prompt, type in sfc /scannow
The command will start a system scan which will take a few whiles before it finishes. Once it’s done, you could get the following results:
  1. Windows Resource Protection did not find any integrity violations.
  2. Windows Resource Protection found corrupt files and successfully repaired them.
  3. Windows Resource Protection found corrupt files but was unable to fix some of them.
 Restart your PC.

Option 3 – Try to run the DISM commands

You might want to repair potentially corrupted files in your system as having them could also trigger the win32kbase.sys Blue Screen error. To repair these corrupted system files, you can run the DISM commands:
  • Tap the Win + X keys and click on the “Command Prompt (Admin)” option.
  • After that, input each one of the commands listed below sequentially to execute them:
    • Dism /Online /Cleanup-Image /CheckHealth
    • Dism /Online /Cleanup-Image /ScanHealth
    • Dism /Online /Cleanup-Image /RestoreHealth
  • Once you’ve executed the commands given above, restart your computer and check if the dxgkrnl.sys Blue Screen error is now fixed.

Option 4 – Try to run the Blue Screen Troubleshooter

As you know, the Blue Screen troubleshooter is a built-in tool in Windows 10 that helps users in fixing Blue Screen errors related to the win32kbase.sys file. It can be found in the Settings Troubleshooters page. To use it, refer to these steps:
  • Tap the Win + I keys to open the Settings panel.
  • Then go to Update & Security > Troubleshoot.
  • From there, look for the option called “Blue Screen” on your right-hand side and then click the “Run the troubleshooter” button to run the Blue Screen Troubleshooter and then follow the next on-screen options. Note that you might have to boot your PC into Safe Mode.
Read More
How to Download Steam saves
Steam is one of if not the largest online store for the digital distribution of games on the PC platform. The game gets downloaded to your PC when you are planning to play it and its saves are synched in the Steam cloud. They get automatically downloaded when you install the game but you can also get your saves by directly downloading them from Valve's website in your browser. If Steam isn’t automatically downloading your old save games after you install a game, ensure Steam Cloud is enabled for that game within Steam. Locate the game in your Steam library, right-click it, and then select Properties. Click the Updates tab and ensure the Enable Steam Cloud synchronization option is checked for the game. If this option isn’t checked, Steam won’t automatically download your cloud saves. If you don’t see a Steam Cloud option for a game here, that game doesn’t support Steam Cloud. Not all games on Steam do, it’s up to each game developer.

Download the Files in Your Web Browser

Valve lets you download your Steam cloud save files via a web browser, too. You can download just your saved files without re-downloading the entire game. To find your saved files, visit Valve’s View Steam Cloud page in your web browser and sign in with your Steam account. You’ll see a list of games using your Steam Cloud storage. Locate the game in the list and click Show Files to see all the files for a game. Each game has a page showing all the files it’s storing in Steam Cloud, as well as the date they were modified. To download a file, click Download. Download all the save files for your game, and you’ll have a copy of its save games. This feature is especially useful for multi-platform games that don’t automatically synchronize save files between platforms.
Read More
Animated background on desktop on Windows 10
Windows Vista had in it animated wallpapers on desktop but sadly how they were heavy on system resources Microsoft abandoned the idea. Moving forward a couple of years later we have Windows 10 but still, we do not have live animated wallpapers. Since I am the kind of person who does not want to wait on Microsoft and now it is time to bring animated wallpapers back I am going to make one all by myself and you are welcome to join the ride and do the same for you as well. Enough talk, let's dive into how we can make animated wallpaper for our Windows 10.

Choosing the application

First, we will need some form of application which can we look at our animated wallpapers and since they are animations it means video, so we will need a video player and what better choice than a VLC player, an open-source light weighs all-format player. Get a VLC player from here and install it.

Finding video source

The next thing is to of course have some looping video that we will use as background. There are many sites and ways to get seamless loop videos, I use this youtube channel for my backgrounds. Altho you can use any video footage you want it is recommended that it is not too long, that it is hi-resolution so we do not have pixels on-screen, and if you can, get it as seamless since we do not want to see stutter when the video is lopped from the beginning. So hopefully you have desired video and VLC player installed.

Putting it all together

Copy the following code and paste it into your search bar in Windows to open the Startup folder, or navigate to the Startup folder yourself via file explorer if you know where it is. %appdata%\Microsoft\Windows\Start Menu\Programs\Startup Now, next thing is to copy and past the VLC shortcut into this folder so it is started when Windows is first time booted. Right-click on the shortcut and in the edit field paste this: "C:\Program Files\VideoLAN\VLC\vlc.exe" --video-wallpaper --qt-start-minimized --no-qt-fs-controller --repeat --no-video-title-show --qt-notification=0 "C:\videopath\filename.mp4" where "C:\Program Files\VideoLAN\VLC\vlc.exe" is the path where VLC is installed, point this to where you have installed it "C:\videopath\filename.mp4" is the path where you have your video that you wish to use as animated wallpaper. Please note also that in my case there is mp4 as an extension but it does not need to be mp4, just use any extension VLC can open and play.

Conclusion

And that's it, you have successfully made an animated background or live wallpaper on your Windows 10 computer. You can change your wallpaper anytime by editing shortcut and giving it a new path to a new video or simply overwrite the existing one with a new baring same name.
Read More
1 2 3 162
Logo
Copyright © 2022, ErrorTools. All Rights Reserved
Trademarks: Microsoft Windows logos are registered trademarks of Microsoft. Disclaimer: ErrorTools.com is not affiliated with Microsoft, nor claim direct affiliation.
The information on this page is provided for information purposes only.
DMCA.com Protection Status