Guide to Patching Error Code 34

Guide to Fixing Error Code 34

Code 34 - What is it?

Code 34 is one of the several Device Manager error codes. This error code indicates that a hardware device on your PC is not properly configured.

This usually occurs when the device installed on your system is a non-plug and play. Non-plug and play devices don’t configure automatically and require manual configuration from the users end.

Error code 34 is usually displayed in the following format:

“Windows cannot determine the settings for this device. Code 34”

Solution

driverfix boxError Causes

Error code 34 may be triggered due to several reasons like:

  • Improper device configuration
  • Missing or outdated drivers

Device Manager error codes like code 34 are easy to fix. These error codes don’t indicate any serious PC problem, nor are they fatal like blue screen of death error codes.

Nonetheless fixing it immediately is advisable to ensure the proper functioning of the plugged-in hardware device. If you don’t resolve it, you may not be able to use the device.

Further Information and Manual Repair

When PC users experience error codes like code 34, they instantly think of hiring a professional for repair especially if they lack technical understanding.

If you are not a technical whiz and you are also thinking of hiring a professional for the repair job, then don’t! Here’s why, to begin with, Device Manager error codes can be resolved easily, better yet you can fix it by yourself without spending a dime even if you are not technically sound.

To help you, below is a list of easy and effective repair solutions for error code 34. Try them to resolve the issue.

Method 1 - Configure the Device by Using Device Manager

This is one of the best ways to resolve error code 34 on your system. The procedure will take 5 to 7 minutes. Simply follow the steps illustrated below to configure the problematic device on your PC.

  1. First off, go to the start menu
  2. Now type Device Manager in the search bar and press enter to continue
  3. Now in the Device Manager locate the problematic device and click on it
  4. Click on the resources tab to change the resource settings
  5. Now click on the Use Automatic Settings check box
  6. After that click on the Settings based on the tab and then click on the hardware configuration of the device you want to change
  7. Press resource type in the resource settings box to make further changes
  8. Once that is done, click change settings and type a new value for the resource type

Method 2 - Consult the Hardware Manufacturer for Resource Settings

You may not be able to configure resource settings for some devices in such an event it is advisable to consult your hardware manufacturer. Your hardware manufacturer can provide you with specific resource settings. Follow the manufacturer’s instructions to repair error code 34.

If the error continues to persist even after device configuration, then the problem may be linked to driver corruption. In that case, try method 3.

Method 3 - Download DriverFIX to Update Drivers Automatically

Whether code 34 is caused by outdated or corrupted drivers, simply download DriverFIX to resolve. DriverFIX is an advanced and user-friendly software program deployed with an intelligent programming system.

The software scans your PC to detect all problematic drivers. It finds and matches the latest and compatible versions and then updates the drivers accordingly that too automatically and on a regular basis.

Click here to download DriverFIX to repair Device Manager error code 34 on your PC automatically.

If you like to learn and find out more about various Windows errors, and how to repair them go to our vast archive or use search to find articles that will explain and help you in solving your issue.
However, if you prefer to do things fast and with automatization then we are proposing to use an automated solution for your issues. The application that we are recommending is Advanced System Repair Pro
Advanced System Repair utilizes multiple tools all in one to give you a quick, simple, reliable, and very thorough diagnosis of your PC. It brings you all the tools you need in one program to clean, fix, protect, optimize and boost your PC!
1-Click Maintenance
All the tools to make it simple and easy! It's like having a professional technician at the click of a mouse.

Junk Cleaner
Keeping your computer free from unnecessary clutter also helps make your computer last longer. Like any other machine, if you keep it clean and take care of it, it will serve you better for longer!

Optimize background apps
Optimize applications background activity with the built-in Application Optimizer feature.

Disk Defrag
With a simple 1-click, Advanced System Repair speeds up your PC by assembling fragmented files on your machine and organizing them more efficiently.

Malware Removal
Finds and removes all types of harmful malware including trojans, worms, bots, adware, spyware, PUPs, and more!

Privacy Cleaner
The all-in-one privacy suite to Clean Your Tracks & Protect Your Privacy! Make your computer safe, secure, and more efficient!

System Tweak/Optimizer
ASR will analyze your complete system and settings to adjust your PC to function at its maximum performance.

Registry Cleaner
Over time, as you install and uninstall applications, the registry can become cluttered with old entries and broken settings which can result in program crashes, and annoying messages and slow the computer down.
Visit our Advanced System Repair Pro Download page to inform yourself about all the benefits of this software and get a free trial copy of it.
advanced system repair pro

Advanced System Repair Pro

One-click automated PC repair solution
ASR logo
With Advanced System Repair Pro you can easily
Replace damaged files
Restore performance
Free disk space
Remove Malware
Protects WEB browser
Remove Viruses
Stop PC freezing
DOWNLOAD
Privacy Policy | Terms of Use | Uinstall
Advanced System Repair Pro is compatible with all versions of Microsoft Windows including Windows 11

Share this article:

You might also like

How To Fix Error Code 652 On Windows PC

Resolve Error Code 652

What is the Error Code 652?

Error code 652 is a runtime error. It hampers you from accessing and running your program on your system. If not resolved, it can also lead to program corruption.

Solution

Restoro box imageError Causes

Runtime Error 652 can occur due to several causes. These include:
  • Conflict of color depth within icons, the desktop, or a particular application in the Visual Basic environment.  This happens when the Image
  • List control consists of more colors than the depth of what Windows can support.
Other causes include:
  • Malicious software and malware attack
  • Conflict with Terminate
  • Invalid or corrupt registry

Further Information and Manual Repair

If you are not a computer programmer and don’t have any sound technical expertise, then you might think of hiring a professional to resolve the error on your PC. But this can be costly as you may have to pay hundreds of dollars to the technician. However, an alternative way to resolve the error code 652 is to download the Total System Care. This PC repair tool is integrated with an intuitive registry cleaner and a powerful anti-virus. It is safe, efficient, user-friendly, and available for free. Restoro is a multi-functional error tool and a one-stop solution to resolve practically all kinds of PC-related problems. By running this repair tool, you can fix runtime error code 652 on your system in seconds.

Restoro

What makes Restoro a hot favorite among PC users is that it is simple and easy to use. To operate this PC fixer, you don’t need to have the sound technical knowledge or be adept at computer programming. It can be used by all levels of PC users including beginners and intermediates. It has a neat and clean layout with simple instructions and navigation making it easy for users to resolve even the mightiest errors in just a few clicks.

Restoro features

Whether the underlying reason for the error code 652 is malicious software or registry corruption, Restoro takes care of all. Registry corruption occurs due to unnecessary files and data overload in the hard disk. This includes junk files, internet history, invalid registry entries, and bad registry keys. The registry cleaner embedded in Restoro intuitively detects and scans all registry issues. It wipes and clears the hard disk from all the unnecessary and obsolete files and thus cleans up your disk space. It repairs the corrupt registry and also boosts your PC’s performance. Thus it not only repairs the error code 652 but also resolves system slowdown issues by optimizing your system’s speed. With the help of its in-built anti-virus, it removes all the malicious software on your system that could be triggering the error code 652. Data security threats such as malicious software are detected and scanned and listed under the privacy error utility. It is compatible with all Windows versions including both the latest and old versions. You can run it to scan error code 652 on any Windows version you have installed on your computer.

Restoro for error Code 652

Furthermore, as mentioned above Error Code 652 is safe to use. It is bug-free and besides, it offers users outstanding data safety. It has a backup file feature that helps you save and create backup copies of all the data you have on your system. This is carried for safety purposes. It enables users to retrieve and recover data in case the data and files are lost during the repair thus sparing you from a big loss. The error code 652 may be critical but it can be resolved in seconds with Restoro. Here’s how:
  1. To get started click here to download and install Restoro on your system
  2. Once installed, run it to scan for errors. It will take only a few seconds to scan your entire PC.
  3. Then simply create a backup and click on repair to resolve and resume your desired program.
For best results, it is advised to run Restoro on the computer often. This will help you detect PC errors and repair them timely. It will help you ensure proper PC maintenance, health, and performance.
Read More
The boot configuration data store can not open
The Boot Configuration Data or BCD files have the instructions required by the Windows operating system in order to properly boot the computer. So if you experience any trouble when you boot your computer, then it is possible that it is due to some misconfiguration or even corrupted Boot Configuration Data files. And if you also encounter an error saying,
“The boot configuration data store could not be opened”
while you try to carry out any command on the bcedit.exe, then you’ve come to the right place as this post will guide you on how you can fix this error in Windows 10. This kind of error could pop up if the system is not able to locate the specified file. It is also possible that the requested system device can’t be found or that the boot configuration data store could not be opened. In addition, when you open the System Configuration or MSConfig, you might notice that there is no Boot data, and according to the reports, is that when you try to dual boot the computer, the installer will replace the default bootloader.

Explanation

In case you don’t know, Windows’ earlier versions were stored in the “Boot.ini” file. You can find the entry in the EFI firmware boot manager of the EFI-based operating system which is located at EFIMicrosoftBootBootmgfw.efi. Whatever the cause of the error is, there are several suggestions you can check out to resolve the problem. You can try to set an entry option value in BCD or enable the Advanced options menu, as well as rebuild the BCD. Before you proceed with the troubleshooting options provided below, make sure that you boot your computer into the Advanced Recovery Mode first since that’s where you can find Command Prompt under the Advanced Options. In addition, you also have to suspend or disable BitLocker and Secure Boot on your PC.

Option 1 – Try to set an entry option value in BCD

  • Once you’re in the Advanced Options, select Command Prompt.
  • Next, execute this command to set an entry point: bcdedit /set {current} Description "TheNameYouWant"
  • After the command has been executed, it will enable the system to trust a version of Windows that is not trusted by default. This should fix the problem, if not, follow the next given options below.

Option 2 – Try to specify the BCD file

  • In the elevated Command Prompt, execute this command: bcdedit /store c:BootBCD
  • Once done, the command will give you a list of options and then execute this next command: bcdedit /store c:BootBCD /set bootmenupolicy legacy
  • After that, restart your computer and select your Windows and then tap the F8 key right away.
Note: When you select the legacy option, the Advanced Options menu will be available during the computer boot up and then you can select into which operating system you can boot your computer into.

Option 3 – Try to rebuild the BCD files

The first thing you can do to resolve the issue is to Rebuild Boot Configuration Data or BCD files.
  • You can start by booting into the installation environment for Windows 10 from an installation media.
  • After that, click on Repair your computer and on the blue screen, select Troubleshoot and then select the Advanced options menu.
  • From there, select Command Prompt and once you open it, enter each one of the commands given below by sequence.
    • bootrec /FixMbr
    • bootrec /FixBoot
    • bootrec /ScanOS
    • bootrec /RebuildBcd
  • Once you’re done executing the commands given above, type “exit” to close the Command Prompt window and then restart your computer and see if it fixed error code 0xc000014c.
Read More
How to Fix Error Code 0x8024002e

How to Fix Error Code 0x8024002e

Error Code 0x8024002e - What is it?

Windows 10 error code 0x8024002e is related to the Windows update service. When you see the error code displayed on your screen, it means that the Windows update service has been blocked or not working. As a result of this error code, your computer might lag and the system may freeze while performing normal operations. The error may read as follows:
“There were some problems installing updates, but we’ll try again later. If you keep seeing this and want to search the web or contact support for information this may help: (0x8024002e)”.
Common symptoms include:
  • Slow computer performance
  • System freezes while performing normal operations or freezes while multitasking
  • BSOD error is showing
  • Some unwanted files get opened automatically
  • Updating is not possible

Solution

Restoro box imageError Causes

This error code appears because of the following reasons:
  • Incomplete installation of the Windows operating system
  • Incorrect registry entry
  • Corrupt or damaged system files
  • The computer has come under a virus attack
  • Miscommunication between the computer and the Windows Automatic Update service
The decline in RAM or outdated Hard Disk Drive

Further Information and Manual Repair

Method 1:

  • Remove any external media connected to the computer
  • Crash reboot your PC 2 to 3 times.
  • Now check if you are still having the problem.
If the problem still persists, try the following methods if you are able to boot to the desktop and check for the problem.

Method 2:

Changing Windows Update property to automatic: You might see this error if your Windows update property is set to manual. Follow the steps below to change it to automatic. Open Task Manager.
  1. Click on the Services tab. Find “Open Services” at the bottom of the window.
  2. A new window will pop up. Scroll down and find “Windows Update” from the list. Double click on the Windows Update. It will open its properties.
  3. Select Automatic for ‘Startup Type.’ Click Apply, Start, and OK.
Now, try the Windows Update and check if you are still getting the error message. If the problem isn’t resolved, reboot your PC for the changes to take effect and then try again.

Method 3:

Disable Antivirus program: If you have any antivirus installed on your PC, you might need to disable it first and see if that helps. Although, most of the antivirus makers have made changes to work smoothly with Windows 10, it is a new Operating System and some antivirus may cause conflict. Disable the antivirus and check for updates to see if it is preventing you from updating your system and displaying the error code 0x8024002e.

Method 4:

Run inbuilt Windows update troubleshooter. Follow the steps given below:
  1. Press Windows + W keys on your keyboard to enable the search option.
  2. In the Search box type Troubleshooting.
  3. Click on View all
  4. Click on Windows update and follow the prompts to run the troubleshooter.
If the issue persists, try Method 5

Method 5:

Run the System File Checker tool (sfc.exe):
  1. Open Command prompt.
  2. Type sfc /scannow and hit Enter.
  3. The sfc /scannow will scan all protected system files and replace corrupted files with a cached copy that is located in a compressed folder at %WinDir%System32dllcache. The %WinDir% has the Windows Operating System folder. For example, C:\Windows.
Do not close the Command prompt window until the verification is 100% complete. The command prompt will show the scan results when it is done. After it is done, you may receive one of the following messages:
“Windows Resource Protection did not find any integrity violations.” This means you do not have any missing or damaged system files.
OR you may receive a message saying:
“Windows Resource Protection could not perform the requested operation.”
To resolve this problem, run the System File Checker in safe mode and make sure that the PendingDeletes and PendingRenames folders exist under %WinDir%WinSxSTemp.
OR you may also receive a message saying, “Windows Resource Protection found corrupt files and successfully repaired them. Details are included in the CBS.Log%WinDir%LogsCBSCBS.log.” OR you may receive a message saying, “Windows Resource Protection found corrupt files but was unable to fix some of them. Details are included in the CBS.Log%WinDir%LogsCBSCBS.log.”
Read More
KFConsole enters the console competition
Yes, you read that right, KFC is making a console partnered with Cooler Master. Bizzare at it sounds, it is even more bizarre that the console is designed to keep your food warm!!! You can pull out the drawer from the console out on its top and place some food there in order to keep it warm. kfconsole drawerThe console itself is coming in cylindrical shape powered by Intel CPU and ASUS GPU of the unknown chipset. It has Seagate Baraccuda 1TB SSD and it is VR-ready. The console will have raytracing and will be 4K ready.

My thoughts

Well, my thoughts are somewhat strange, on one side I am not really sold on food heating gimmicks and without specific hardware specifications, it is difficult to say how much power the console will have. Price is also not leaked so that is also a stumbling stone for making an informed opinion. I am a little puzzled and concerned about this whole heating food thing because personally, I can see 2 issues: Console overheating and fat dripping on inside hardware, I am sure they have somehow eliminated this but I would be very interested to see how.
Read More
Repair Windows 10 Error Code 0xC1900208, 0x4000C

Repair Windows 10 Error Code 0xC1900208, 0x4000C

Code 0xC1900208 0x4000C, What is it?

The Error Code 0xC1900208 – 0x4000C is an error that is caused by an installed application or program on your computer that is not compatible with Microsoft Windows 10. The incompatible application prevents you from being able to complete the upgrade to Microsoft Windows 10 and will continue to do so until the issue is resolved. Common symptoms include:
  • You receive a dialog box displaying Error Code 0xC1900208 – 0x4000C
  • You are unable to successfully complete the Microsoft Windows 10 upgrade process.

Solution

Restoro box imageError Causes

Error Code 0xC1900208 – 0x4000C is caused by a non-compatible application or program that is currently installed on your computer, and is not allowing the Microsoft Windows 10 upgrade to finish the installation and update process.
  • The upgrade is stopped due to an incompatible app or program.
  • Out of date or no longer supported software can cause this error to occur.
  • Device drivers that are not up to date or no longer compatible.
  • The computer might pick up malware along the way and might be preventing the upgrade. If error code 0xC1900208 – 0x4000C is not rectified, you’ll not be able to proceed with your Windows 10 upgrade.

Further Information and Manual Repair

The good news is, error code 0xC1900208 – 0x4000C is a relatively common problem that is usually easily fixed by the user at home, though it can be a little time-consuming. To elude this time-consuming process, use a powerful tool to rectify the issue in no time (TSC). Before making any attempts to repair this error, ensure to perform a compatibility test.
  • Check the compatibility of applications and programs installed on your computer to locate and remove, or fix the one that is incompatible. (Don't stop at the first one you find, there could be multiple incompatibility issues.)
  • Check to ensure all programs and software are not outdated or no longer supported, and remove or fix any outdated or unused, unnecessary programs or software. (This is also a great way to free up space and clean your computer up a bit.)
  • Check to ensure that all of your device drivers are current, up to date, and compatible with Microsoft Windows 10, and replace or update where necessary.

Method 1:

Use the get Microsoft Windows 10 application on your computer to check its compatibility, follow the steps below to run the check.
  1. Look at the taskbar, to the right; you will see an icon for Microsoft Windows 10, right-click the icon. Locate the option in the menu to check the status of your upgrade. This will open an app for getting Microsoft Windows 10.
  2. Next, you will see 3 lines on top of one another on the upper left side, this will open a drop-down menu, once you have this menu open, locate the option to check the compatibility of your computer.
  3. Microsoft Windows will then run a check of your entire computer to check for compatibility with Microsoft Windows 10. Once it has finished its check, a pop-up window will display whether or not your computer will work with Microsoft Windows 10, and will also display a list of any hardware and software that are not compatible with the upgrade.
  4. This may not catch everything and there may still be incompatible programs so the previous steps, though time-consuming may still be necessary.

Method 2:

Once the incompatible applications are discovered, use the control panel to remove/uninstall them. The steps are below:
  1. Locate your computer’s Control Panel.
  2. Choose the option that says “Programs”
  3. From the options available, select the ‘Programs and Features’ link.
  4. Locate the app in the queue or menu.
  5. Right-click and choose the uninstall option.
… another option
You can also locate the app on the ‘app homepage’, right-click and choose the ‘uninstall’ option. If after following these steps the problem is still not corrected, download and install an automated tool for a quick fix.
Read More
Fix Err Connection Timed Out issue in Chrome
If you are using Google Chrome browser in surfing the web, you might have experienced a situation where you’re trying to connect to a website but were unable to since Chrome failed to fetch the website to the browser and throws an error that says, This webpage is not available – Err Connection Timed Out. Aside from an issue with the network connection, there are also other reasons why this error suddenly shows up, read on to fix it. There are times when the Windows computer is responsible for this kind of issue. And it can happen not just to Google Chrome but to other browsers as well. To resolve this issue, here are some suggestions that might be of help.

Option 1 – Try checking the network cables and then restart your router and reconnect

The first thing you can do is to check if all the network cables are properly connected be it to your computer or to the router. And if your computer is connected via Wi-Fi, you need to restart your router once. And of course, you can always opt to forget the Wi-Fi details and then reconnect again just make sure that you know the password.

Option 2 – Check the Windows Host file

You can also try to cross-check the Windows Hosts file to find out if the website you are trying to open has been blocked because if it is, then it’s no wonder why you’re getting the ERR CONNECTION TIMED OUT error in Chrome. There are instances when some third-party application modifies the file and adds some websites to the blocklists. So if the website is indeed blocked, you need to remove it from the list.

Option 3 – Try removing Proxy

Removing the Proxy might also help you in fixing the ERR CONNECTION TIMED OUT error. Here’s how you can do it:
  • Tap the Win + R keys to open the Run dialog box.
  • Then type “inetcpl.cpl” in the field and hit Enter to pull up the Internet Properties.
  • After that, go to the Connections tab and select the LAN settings.
  • From there. Uncheck the “Use a Proxy Server” option for your LAN and then make sure that the “Automatically detect settings” option is checked.
  • Now click the OK and the Apply buttons.
  • Restart your PC.
Note: If you are using a third-party proxy service, you have to disable it.

Option 4 – Try to clear the browsing data of Google Chrome

If your browsing data in Chrome hasn’t been cleared for some time now then that might be the reason why you’re suddenly getting the ERR CONNECTION TIMED OUT error when you browse the web. To fix this error, you need to clear your web browsing data. Refer to the following steps to do so.
  • Tap the Ctrl + Shift + Delete buttons to go to the Clear browsing data section in Chrome.
  • Next, set the time range to “All time” and tick all the boxes and then click on the Clear data button.
  • After that, restart the Chrome browser and try to open the website you were trying to open earlier.

Option 5 – Flush the DNS and reset TCP/IP

You might also want to flush the DNS and reset TCP/IP as it could help in fixing the ERR CONNECTION TIMED OUT error. To do so, refer to these steps:
  • Click the Start button and type in “command prompt” in the field.
  • From the search results that appear, right-click on Command Prompt and select the “Run as administrator” option.
  • After opening Command Prompt, you have to type each one of the commands listed below. Just make sure that after you type each command, you hit Enter
    • ipconfig /release
    • ipconfig /all
    • ipconfig /flushdns
    • ipconfig /renew
    • netsh int ip set dns
    • netsh winsock reset
After you key in the commands listed above, the DNS cache will be flushed and the Winsock, as well as the TCP/IP, will reset.
  • Now restart your computer and open Google Chrome then try opening the website you were trying to open earlier.

Option 6 – Run the built-in Malware Scanner and Cleanup Tool in Chrome

In case you don’t know, there is actually a built-in malware scanner and cleanup tool in Chrome that helps you get rid of any unwanted ads, pop-ups, and even malware, as well as unusual startup pages, toolbars, and other things that could affect the performance of the browser.

Option 7 – Reset Chrome

Resetting Chrome can also help you get rid of the ERR CONNECTION TIMED OUT error. Resetting Chrome means restoring its default settings, disabling all the extensions, add-ons, and themes. Aside from that, the content settings will be reset as well and the cookies, cache, and site data will also be deleted. To reset Chrome, here’s what you have to do:
  • Open Google Chrome, then tap the Alt + F keys.
  • After that, click on Settings.
  • Next, scroll down until you see the Advanced option, once you see it, click on it.
  • After clicking the Advanced option, go to the “Restore and clean up the option and click on the “Restore settings to their original defaults” option to reset Google Chrome.
  • Now restart Google Chrome.
Read More
Intel & MS fixed DRM issue with alder lake
Due to its hybrid core technology, the Alder Lake line of processors had some DRM issues with some game titles where DRM protection software detected hybrid core design switching via manager as a hack attempt and prevented the game from working properly. Over 50 titles were affected by this issue, now only 3 remain still affected but it is being worked on them so that can be also resolved. alder lake drm
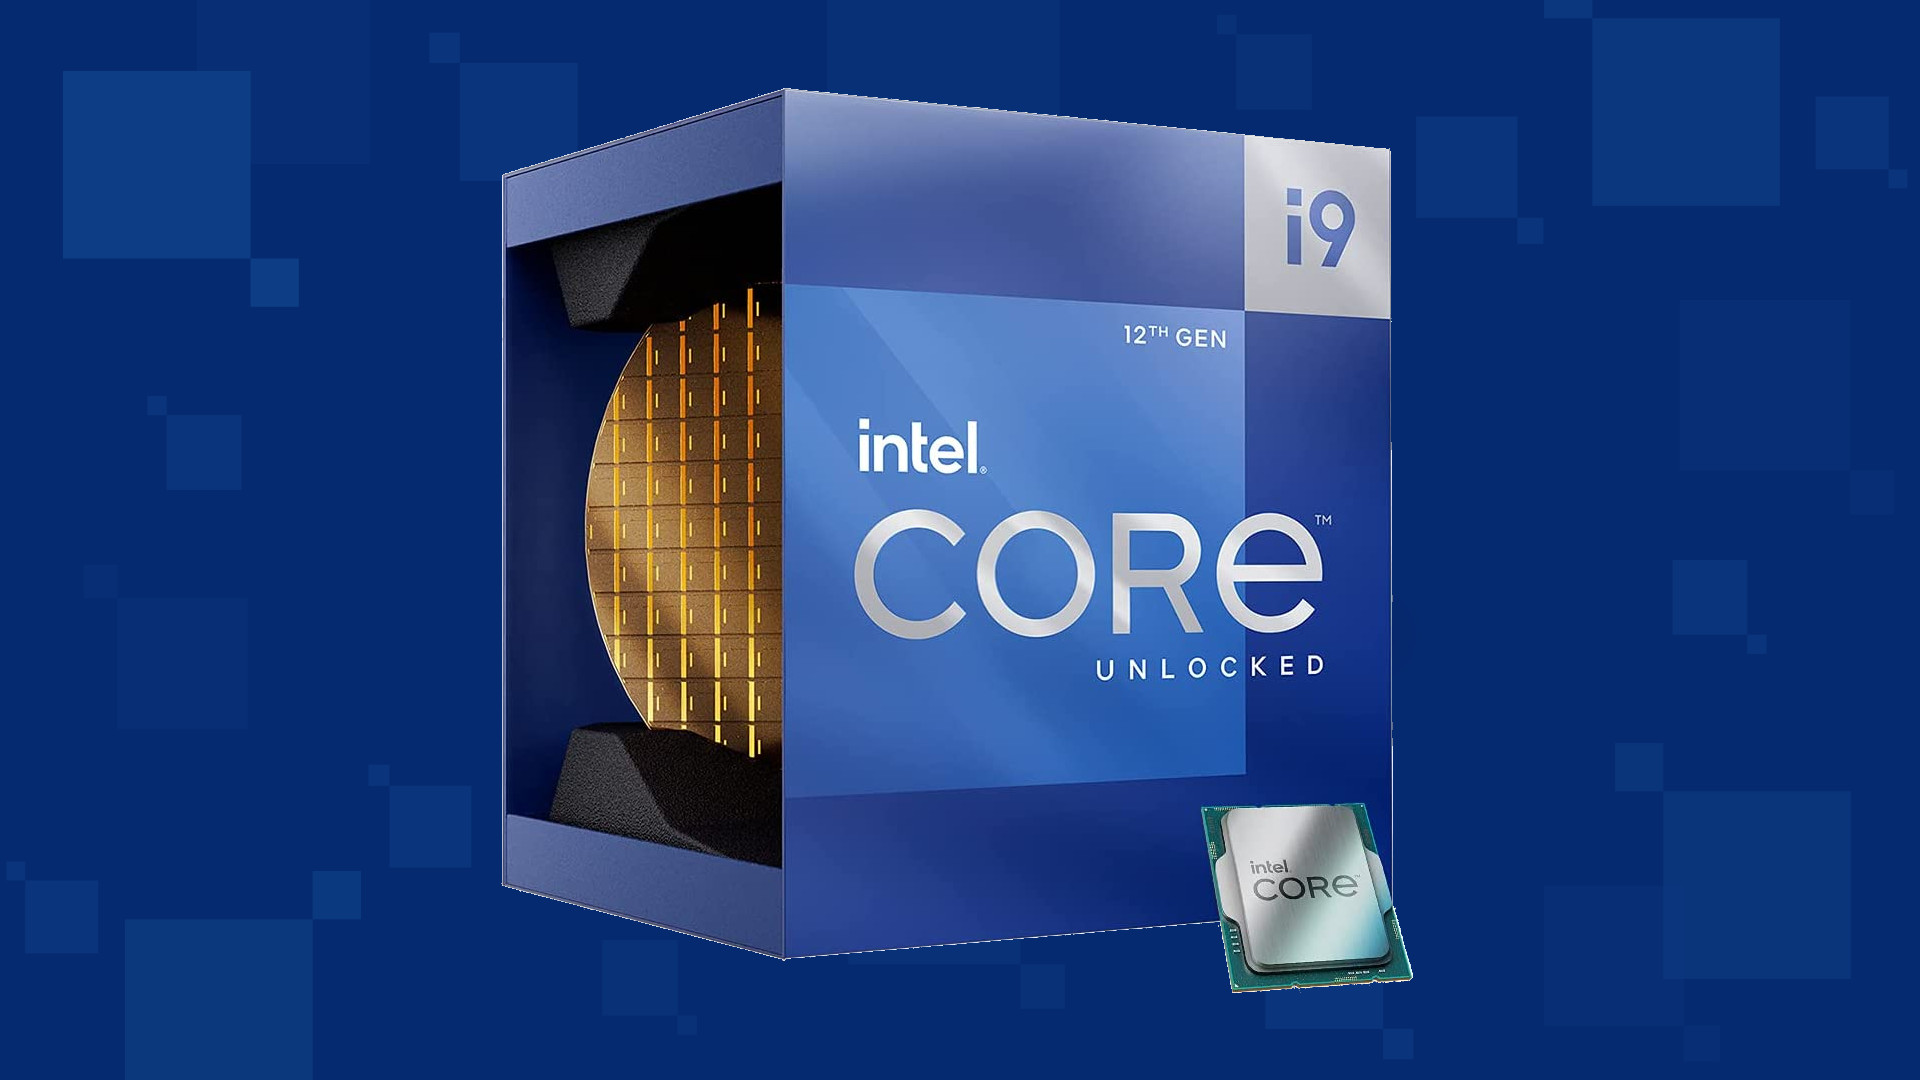
Intel says that the remedy to the issue for these games is the scroll lock fix which can be done so by enabling Legacy Game Compatibility mode from the BIOS of your motherboard. When running the said games, you can press scroll lock to park the E-cores on Intel's Alder Lake Desktop CPUs to get rid of DRM issues. Certain motherboard manufacturers such as MSI and Gigabyte have made this even easier through software tools with which you don't have to access the BIOS. All you need to do is select a button in the tool which works on both Windows 11 and Windows 10 operating systems and you will enable compatibility mode.
Read More
Could not start Diagnostic Policy Service
If you are trying to run a Windows Service like the Diagnostic Policy Service and encounter an error instead that says, “Windows could not start the Diagnostic Policy Service”, worry not for this post will guide you on what you can do of the Diagnostic Policy Service is not running in your Windows 10 computer. As you know, the Diagnostic Policy Service enables problem detection, troubleshooting, and resolution for Windows components on your Windows operating system. When you encounter this kind of problem, you will also see the “Access is denied” error message. This occurs when the “MpsSvc” process does not have the permissions needed for the Registry keys. This kind of problem happens when the TrustedInstaller account is missing the permissions for a Registry key and so to fix this issue, you need to take full control and ownership of the Registry keys. You need to create a System Restore point first before you get started. This way, you can always undo the changes you’re about to make in case anything goes wrong. Once you’re done creating a System Restore point, refer to the following instructions to fix the “Windows could not start the Diagnostic Policy Service” error. Step 1: Tap the Win + R key combination to open the Run utility. Step 2: Type in “Regedit” in the field and tap Enter to open the Registry Editor. Step 3: After opening the Registry Editor, navigate to this registry path:
HKEY_LOCAL_MACHINESYSTEMCurrentControlSetServicesDPSParameters
Step 4: After that, look for the “Parameters” registry key and select Permissions. Step 5: Now select your account under Group or user names. Step 6: Next, make sure that the “Full Control” and “Read” boxes are both checked, and then click on the Apply and OK buttons to save the changes. Step 7: Afterwards, navigate to this registry key: HKEY_LOCAL_MACHINESYSTEMCurrentControlSetControlWDIConfig Step 8: From there, look for the Config key and right-click on it and select Permissions and then click on Add and type “NT Service/DPS in the box and click OK. Step 9: Now select “DPS” and check the Full control box, click OK and exit the Registry Editor. Step 10: Reboot your computer and check if the error is now fixed.
Read More
Software review series: Visual studio code
Visual Studio codeVisual studio code is a code editor available for Windows, Linux, and macOS. It is a completely free tool offering you to code in any language without the need to switch to another editor. Visual Studio Code is part of Microsoft Visual Studio which is a complete integrated development environment (IDE). Take notice that Visual studio itself has more advanced tools for developing and testing, it has 24/7 support, training, and Azure for WEB apps. Visual Studio Code is an editor lacking in some advanced features Visual Studio offers.

Visual Studio code Price and royalty

As mentioned Visual Studio code is completely free licensed under the MIT license agreement giving you the tool free to use and sell your product. How it supports Linux, Windows, and macOS, all you need it to go to its official page https://code.visualstudio.com/, download it and start using it. How this is free project backside is that there is no official support, you will have to rely on various articles and community in order to get needed information or problem solution.

Features

Syntax highlighting has become standard and norm for any editor but besides this function VS code offers us also IntelliSense option which goes a step further with code completion, code hinting, and parameter info. This means that VS code is aware of many things going on inside your code and will offer you as you type a menu with options for autocomplete along with variables referenced, function names, etc. VS code offers extensions inside its extensions marketplace where you can add extensions in order to implement new languages, add debuggers, change the layout, etc. This is one of the great features it allows you to easily switch from one project to another, one language to another not leaving your code editor. Working with version control systems like Git is easy with VS Code. You’ll be able to stage files and make commits, then push and pull changes to your remote code repository of choice, right from the editor.

Conclusion about Visual Studio code

Visual Studio Code is one of if not the most flexible and extensible code editors currently on the market that I have ever tried and used. IT has become my code editor of choice simply for reasons that there is really not much it cannot do and it is constantly updated and taken care of. You can really tune it to look and feels how you want with extensions and you really cannot beat the free price tag. I would highly recommend this editor for daily use especially since its biggest competitors like Atom and sublime text have not seen many updates lately.
Read More
What to do if Windows is stuck in Tablet Mode
To make the Windows 10 operating system a lot more user-friendly, Microsoft introduced the Tablet Mode for Windows 10 devices, especially the 2-in-1 devices like Surface Pro and Surface Book. Despite the Tablet Mode’s efficiency, it also encounters some errors from time to time. One of the issues users reported about tablet mode is that they can’t turn off or exit tablet mode. If you are one of these users, read on as this post will guide you in what you can do to fix the issue. To fix the problem with Tablet Mode, there are several suggestions you can check out. You can try to check the full-screen setting, or perform a full shutdown or perform two buttons to restart the Surface devices. You could also disable Tablet Mode via Registry Editor or perform System Restore or change the settings in the System tab or the Action Center.

Option 1 – Try to check the full-screen setting

  • Tap the Win + I keys to open the Windows Settings app.
  • Then navigate to this path, Personalization > Start.
  • Next, scroll down to toggle off the “Use Start Full Screen” option.
  • After that, restart your computer and see if the problem is fixed.

Option 2 – Perform a full shutdown

  • Open Command Prompt with admin privileges first.
  • Next, execute this command to perform a full shutdown: shutdown /s /f /t 0
  • The command you entered will shut down your computer and once it’s turned off, wait for a couple of minutes and then turn it back on.

Option 3 – Try to perform a two-button restart on your Surface device

  • Tap and hold the power button for about 30 seconds.
  • Then release them after 30 seconds.
  • After that, tap and hold the volume up + the power button for 20 seconds. This will cause the display to flash a few times but you have to keep those buttons pressed until your Surface device is turned off.
  • Wait for a couple of minutes and your Surface will turn back on. This should resolve the problem.

Option 4 – Try to disable the Tablet Mode via Registry Editor

  • In the Start Search, type “registry editor” and right-click on the Registry Editor from the results, and then select the Run as administrator option. This will open the Registry Editor with admin privileges.
  • Next, navigate to this registry key: ComputerHKEY_CURRENT_USERSoftwareMicrosoftWindowsCurrentVersionImmersiveShell
  • From there, look for the DWORD named “SignInMode” and double click on it.
  • Set its value to “1” and its base as hexadecimal.
  • After that, click on OK to save the changes made. This will make sure that you are signed in to the desktop mode when you log into your account.
  • Now look for the DWORD named “TabletMode” and double click on it and set its value data to “0” and it's base as hexadecimal.
  • Click on OK to save the changes made and then restart your computer.

Option 5 – Run System Restore

  • Tap the Win + R keys to open the Run dialog box.
  • After that, type in “sysdm.cpl” in the field and tap Enter.
  • Next, go to the System Protection tab then click the System Restore button. This will open a new window where you have to select your preferred System Restore point.
  • After that, follow the on-screen instructions to finish the process and then restart your computer and check if the problem is fixed or not.

Option 6 – Try changing the settings in the System tab or the Action Center

  • Go to Settings and navigate to System > Tablet Mode.
  • After that, scroll down to set the “Use desktop mode” from the drop-down menu under the “When I sign in” section.
  • Now restart your computer and see if the issue is fixed.
Read More
1 2 3 162
Logo
Copyright © 2022, ErrorTools. All Rights Reserved
Trademarks: Microsoft Windows logos are registered trademarks of Microsoft. Disclaimer: ErrorTools.com is not affiliated with Microsoft, nor claim direct affiliation.
The information on this page is provided for information purposes only.
DMCA.com Protection Status