How to Quickly Fix MSI.chm Error

Repair MSI.chm Error

What is the MSI.chm Error Code?

MSI.chm error is a common Windows Error code that occurs when the Windows OS becomes overloaded with invalid system references.

Solution

Restoro box imageError Causes

The MSI.chm error is normally triggered by the following causes:

  • Poor PC maintenance

You may experience the MSI.chm error if you don’t pay attention to its maintenance. This usually happens when you don’t run antivirus software or update programs and drivers frequently.

  • Registry files get corrupt and damaged

This error may also occur when the registry files of your PC get corrupt and damaged. This normally happens due to continuous writing, editing and deleting of information from your PCs registry over time as programs are installed, modified and deleted.
Other causes include: malware and system conflicts.

Further Information and Manual Repair

When you come across the MSI.chm error on your PC, it is advisable to repair it immediately without any delays. If you procrastinate in repairing this error, your PC is likely to be exposed to risks like:

  • Slow PC performance
  • System failure and crashes

Nonetheless, to resolve this error you don’t have to get the assistance of an IT professional. The MSI.chm is easy to repair and you can resolve it in no time even if you aren’t technically adept.

Here are some of the best ways to repair the MSI.chm error on your PC successfully in the shortest time:-

Cause: Corrupt and Damaged Registry Files

Quick Fix: If you think the MSI.chm Windows error on your system is related to Windows registry issues, then the best way to resolve this error is to download and install a Registry cleaner tool.  A word of advice here is to always download such tools from a reliable and a trusted website.

Once you download the Restoro, run it on your PC to scan for errors. The scanning will usually take a couple of minutes. So, it is advisable to be patient. After the scanning is complete, you will see a detailed scanning report highlighting the registry errors on your PC.

Now to resolve the MSI.chm error that has occurred on your PC due to registry issues, click on the ‘Repair’ button to fix the error.

Once the repairing process is complete, restart your PC.

Restoro helps you not only fix the MSI.chm error but it also helps improve the speed of your PC, and protects it from failure and crashes.

Cause: Poor PC Maintenance

Quick Fix: If the cause of the MSI.chm error is poor PC maintenance, then the best way to resolve the error is to update the drivers. You can do this by installing the latest drivers for the devices that you think are now old and need to be updated.

Here’s what you need to do:

First find which devices don’t have drivers installed. For this go to the start menu and then click on the Control Panel. Now open the Device Manager. The Device Manager will list down all the devices that don’t have drivers installed with yellow exclamation point icons next to the device name.

As for the updates, the general rule of thumb if the driver does not support the program you are trying to run, then this means that you probably need to update the driver to ensure compatibility. For example your video card driver does not support a newly launched game, then you definitely need a driver update to play the game on your PC.

To install or update drivers on your PC, you can either get CDs from the market or you can download updated versions of the drivers from the main manufacturer’s website for free.

You can also use automated solution for all of your driver issues:

driverfix boxSo, next time when you or your friends encounter this problem, try these quick fixes to repair the error without any hassle.

If you like to learn and find out more about various Windows errors, and how to repair them go to our vast archive or use search to find articles that will explain and help you in solving your issue.
However, if you prefer to do things fast and with automatization then we are proposing to use an automated solution for your issues. The application that we are recommending is Advanced System Repair Pro
Advanced System Repair utilizes multiple tools all in one to give you a quick, simple, reliable, and very thorough diagnosis of your PC. It brings you all the tools you need in one program to clean, fix, protect, optimize and boost your PC!
1-Click Maintenance
All the tools to make it simple and easy! It's like having a professional technician at the click of a mouse.

Junk Cleaner
Keeping your computer free from unnecessary clutter also helps make your computer last longer. Like any other machine, if you keep it clean and take care of it, it will serve you better for longer!

Optimize background apps
Optimize applications background activity with the built-in Application Optimizer feature.

Disk Defrag
With a simple 1-click, Advanced System Repair speeds up your PC by assembling fragmented files on your machine and organizing them more efficiently.

Malware Removal
Finds and removes all types of harmful malware including trojans, worms, bots, adware, spyware, PUPs, and more!

Privacy Cleaner
The all-in-one privacy suite to Clean Your Tracks & Protect Your Privacy! Make your computer safe, secure, and more efficient!

System Tweak/Optimizer
ASR will analyze your complete system and settings to adjust your PC to function at its maximum performance.

Registry Cleaner
Over time, as you install and uninstall applications, the registry can become cluttered with old entries and broken settings which can result in program crashes, and annoying messages and slow the computer down.
Visit our Advanced System Repair Pro Download page to inform yourself about all the benefits of this software and get a free trial copy of it.
advanced system repair pro

Advanced System Repair Pro

One-click automated PC repair solution
ASR logo
With Advanced System Repair Pro you can easily
Replace damaged files
Restore performance
Free disk space
Remove Malware
Protects WEB browser
Remove Viruses
Stop PC freezing
DOWNLOAD
Privacy Policy | Terms of Use | Uinstall
Advanced System Repair Pro is compatible with all versions of Microsoft Windows including Windows 11

Share this article:

You might also like

Backup and Restore pinned Taskbar Items
Pinned Windows 10 Taskbar Items. One of the most used interfaces in the Windows environment is the Taskbar. It is where users like to pin their most-used programs as well as shortcuts with extra privileges and automated tasks. In fact, it’s a lot better than the Start Menu. So if any Windows Update messes up with your computer, or if you’ve just switched to a different computer, setting up the Taskbar with the very same set of programs you used to have is definitely not an easy task. But worry not as this post will guide you on how you can backup and restore the items on your Taskbar either manually or automatically.

Manual Backup:

  • Tap the Win + R keys to open the Run prompt.
  • Then type “%AppData%MicrosoftInternet ExplorerQuick LaunchUser PinnedTaskBar” in the field and hit Enter to open the folder where you can see all the shortcuts or pinned items in the Taskbar.
  • After that, copy all the files in the folder and paste them somewhere else as a backup. For instance, E:\Pinned Items Backuppinnedshortcuts.
  • Next, tap the Win + R keys to open the Run prompt once more, and then type “Regedit” in the field and hit Enter to open the Registry Editor. When the User Account Control dialog box appears, click Yes.
  • After opening the Registry Editor, navigate to this key – HKEY_CURRENT_USERSoftwareMicrosoftWindowsCurrentVersionExplorerTaskband
  • Then right-click on the Taskbar folder and select Export.
  • Now save the file with the .reg extension to another location like the E:\Pinned Items Backup folder and then name it.
  • Close the Registry Editor.

Manual Restore:

Make sure to copy all the files to one of the drives if you are using another computer and then refer to the following steps.
  • Tap the Win + R keys to open the Run prompt.
  • Then type “%AppData%MicrosoftInternet ExplorerQuick LaunchUser PinnedTaskBar” in the field and hit Enter to open the same folder where you just copied all the shortcuts. Make sure to keep it open.
  • Then open the backup folder where you saved all the pinned items and copy all the files there.
  • Next, go to the Taskbar folder (%AppData%MicrosoftInternet ExplorerQuick LaunchUser PinnedTaskBar) and then paste your files in there. If you encounter a problem while doing so, just replace it with your own set of files.
  • After that, go to E:\Pinned Items Backuppinnedshortcuts and then double click on tb-pinned-items.reg. If a User Account Control prompt appears, click Yes. This will add the registry file into the main registry hub. You will also get a dialog box that will confirm that data has been added to the registry successfully. Click OK.
  • You should now see the items on the Taskbar. You have to restart Windows Explorer. To do so, end its process in the Task Manager.

Automatic Backup:

Backing up and restoring the pinned Taskbar items in your Windows 10 computer can be done automatically as well. But before you get started on the process, you need to understand what’s going on behind the hood first. First, you need to create two bat files and name them “Backup Pinned Taskbar Items” and “Restore Pinned Taskbar Items”. After you have that covered, refer to the following steps:
  • Open the Notepad app and paste the following details and save it as “Backup Pinned Taskbar Items.bat.
REG EXPORT HKEY_CURRENT_USERSoftwareMicrosoftWindowsCurrentVersionExplorerTaskband “E:\Pinned Items Backuptb-pinned-items.reg” xcopy “%AppData%MicrosoftInternet ExplorerQuick LaunchUser PinnedTaskBar” “E:\Pinned Items Backuppinnedshortcuts” /E /C /H /R /K /Y
  • After that, run the newly created bat file with admin privileges.

Automatic Restore:

  • Open the Notepad app and paste the following details and save it as “Restore Pinned Taskbar Items.bat”.
REGEDIT /S “E:Pinned Items Backuptb-pinned-items.reg” xcopy “E:Pinned Items Backuppinnedshortcuts” “%AppData%MicrosoftInternet ExplorerQuick LaunchUser PinnedTaskBar” /E /C /H /R /K /Y
  • After that, run the bat file with admin privileges.
Note: Just so you know, there is a drawback to this process as we’ve noticed that any pinned apps that were downloaded from the Windows Store don’t appear in these places and any items downloaded and installed separately from the internet and then pinned.
Read More
How to Fix Windows Update Error 0x80070103

How to Fix Windows Update Error 0x80070103

What is error code 0x80070103?

When visiting the Windows Update Website or the Microsoft Update Website to download the latest update for hardware drives, you could possibly receive Error Code 0x80070103 when clicking on the update driver. This error code occurs when Windows tries to download a piece of identical hardware for a second time. It could also occur when Windows tries to update a currently installed driver to an unsuitable version of that driver.

Solution

Restoro box imageFurther Information and Manual Repair

There aren’t many ways to handle this issue. Below are two methods of fixing Error Code 0x80070103.

Method 1:

  • Visit the Microsoft Update Website
  • After the "scan for updates" is complete, click the Welcome or Custom page.
  • Next, click Hardware, in the navigation panel, and then on the tab for "optional hardware Updates", the Update client will display the available updates.
  • For the graphics card, scan the second update after which you'll click to select the option that says "do not show this update again".
  • Hit the "Review and install updates" button.
  • Confirm that the second update for the graphics card is not present, then move on the installing the updates.
  • Click on the start button, go to All Programs, and then click on Windows Update.
  • Hit the "Check for updates" tab.
  • After the "scan for updates" is over, click the"Optional updates" link.
  • In the "Select the updates you want to install" section, right-click the update that is not needed and hide them.
  • Hit the OK button.
  • To install any additional updates that are selected, click "Install Updates". Close Windows Update if no other updates are selected,
  • For touch screens, swipe in from the right edge of the screen, tap Search (or point to the upper-right corner of the screen if you're using a mouse, moving the pointer down, before clicking Search). Enter "Windows Updates" in the search box, click Settings, and then click "Check for updates".
  • After the scan is complete, click the"Optional updates are available" link.
  • Right-click or Tap and hold the update you want to hide, select"Hide update", and then select OK.
  • If any other updates are available, save all work in "other programs", then restart the computer to the install updates; otherwise, opt out of the Windows Update window.
Open the search window and type “Windows Update” in the search box.

Method 2:

When trying to repair error code 0x80070103, if you find method one hard to follow, can contact Microsoft directly. Call up the help center number listed on their website, and a technician will be able to walk you through the process of ensuring the updater is not attempting to download multiple copies of hardware or trying to install unusable updates on your computer. Because the Windows Updater is set to a generic method of searching for updates, it may not be set to optimize the personal computer's settings. This is why you must select all of the optional update options and why this process is so long. It may be made easier by having a computer repairs technician walk you through it. However, if you want to automate the process of getting that problem solved, you can use a powerful tool to get the job done.
Read More
An Easy Guide to Fixing Error D3dx9_43.dll on Your PC

Repair Error D3dx9_43.dll

D3dx9_43.dll Error - What is it?

D3dx9_43.dll is a type of Dynamic Link Library containing small programs. This file is associated with Microsoft DirectX software. It is used and utilized by most Windows-based games and DirectX advanced graphic programs. The error D3dx9_43.dll pops on your computer screen when there is some issue when running or loading Microsoft DirectX programs. This error is often displayed in any one of the following formats:
  • “D3dx9_43.DLL Not Found"
  • "D3dx9_43.dll not found. Reinstalling might help fix this."
  • "The file d3dx9_43.dll is missing"
  • "File d3dx9_43.dll not found"
The good news is that this error code is not fatal. This means it will not result in system crashes, failure, or data loss. But it may hamper your ability to access, run and load Windows-based games associated with DirectX therefore to avoid the inconvenience it is advisable to repair it immediately.

Solution

Restoro box imageError Causes

D3dx9_43.dll error code can occur due to several reasons. These include but are not limited to:
  • Missing or corrupt D3dx9_43.dll file
  • Outdated drivers
  • Corrupt registry
  • Viral infection

Further Information and Manual Repair

To fix the D3dx9_43.dll error on your PC, try the manual easy to do methods illustrated below. To perform these methods to repair the issue, you don’t need to be a technical whiz. These are simple methods and easy to perform.

Method 1 - Check Your Recycle Bin or Download D3dx9_43.dll File

If you just recently uninstalled a program from your PC, then there is a possibility that the D3dx9_43.dll file got accidentally deleted during the process. This happens because DLL is a shared file. The program you uninstalled might be running with the same file. In case of accidental deletion of the D3dx9_43.dll file, it is advisable to check your recycle bin to repair the issue. Simply go to the recycle bin and look for the deleted file; if you locate it simply reinstall. However, if you are unable to find it, then if you have access to an internet connection, simply download the D3dx9_43.dll file from a reliable DLL website.

Method 2 - Update Drivers

If the error code occurs due to outdated drivers, then it is recommended to update drivers on your system. For example, the D3dx9_43.dll file error indicates an outdated video card driver since this file is linked to video game software. Therefore, simply update the drivers for your video card. Drivers can be updated in Windows by using a driver update wizard from within Device Manager. The wizard will walk you through the entire driver update process, making the updating task a lot simple and hassle-free.

Method 3 - Install an Antivirus

In case of malware infection, it is advisable to install a powerful antivirus. Simply run it to scan your entire PC for viruses. Then remove them to resolve the issue.

Method 4 - Clean and Repair the Registry

D3dx9_43.dll error may also pop up due to registry corruption. This happens when the registry loads with unnecessary and obsolete files like cookies, junk files, internet history, and bad registry entries. These files take up all the space and damage the registry. It also results in DLL file corruption and disk fragmentation. To resolve this it is important to clean the registry and repair it. A quick way to perform registry clean-up is to download Restoro. This is an advanced PC Fixer embedded with a powerful registry cleaner. It scans for all registry-related errors instantly, removes them, cleans the registry, and repairs the damaged files. Click here to download Restoro on your PC and resolve error D3dx9_43.dll today!
Read More
Intel i9 Alder Lake better than AMD Ryzen 9
Alder Lake
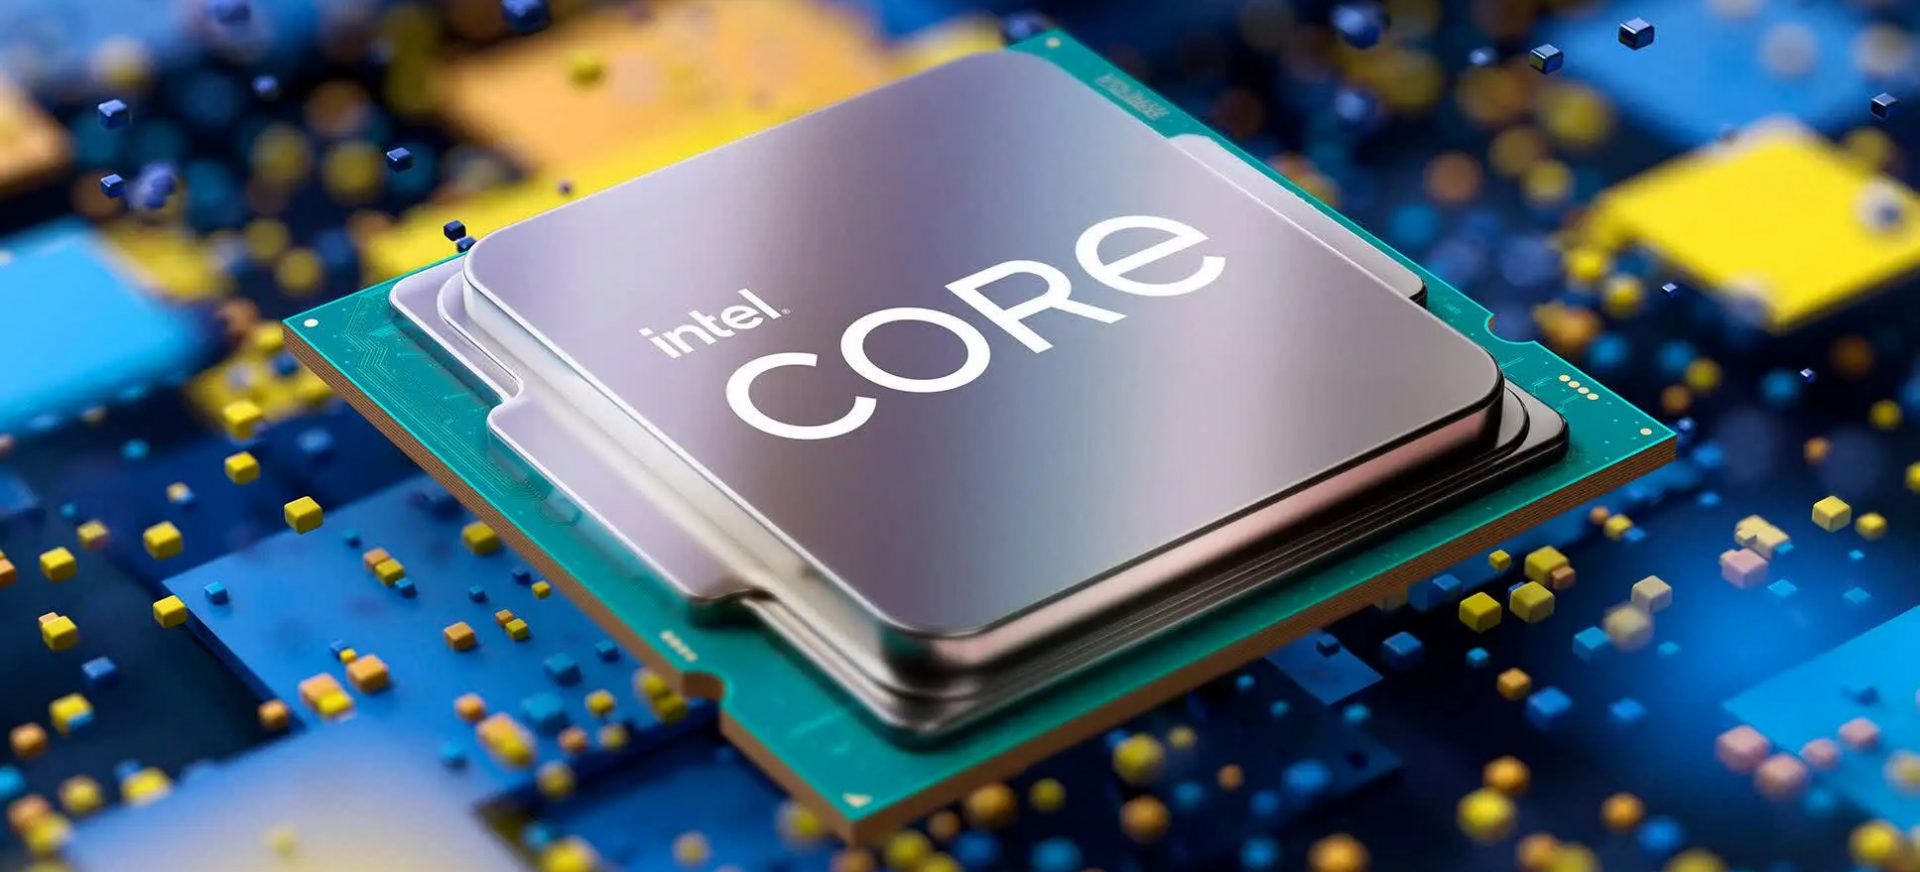
If we are to believe news from Intel, new series of processors based on Alder Lake architecture are about to be released somewhere in October. Alder Lake is the 12th Generation Core of Intel processors and it is meant to have all advantages of the current CPU structure. I9 is aimed to pack a punch against its competitors with technology including eight high-performance Golden Cove cores (P-cores) with Hyper-Threading and eight energy-efficient Goldmont (E-cores) equipped with a 30MB L3 cache and operating at high clock speeds. During the benchmark test, the new CPU outperformed all of Intel’s previous Rocket Lake structure processors which is logically expected but the big surprise came from results that indicate better performance than Apple’s new M1 processor even in single-threaded performance which is supposed to be best in that field. Another surprise was really beating AMD Ryzen 9 in each field. If we take into account that i9 has 16 cores in total and can process 24 threads against Ryzen 9 with 16 Cores and 32 threads this is an impressive feature. Now truth to be told Alder lake has massive L3 cache and microarchitectural advantages and consumes much more power but the results of performance are high. Also, note that this early CPU is not really a mass production one and maybe some things will still change but early results are very satisfactory. We will see what will price tag be since in this age of shortage and competition that will also play a big role in its overall success. Speaking of competition I eagerly await AMD’s response to this, in any way it seems that the CPU market is for some turbulence which is always a good thing for the final customer and I welcome it.
Read More
A Guide to Fixing Magcore.dll Error on Your PC

Magcore.dll Error Fix Guide

Magcore.dll Error - What is it?

Magcore.dll is a type of Dynamic Link Library. This file is associated with software developed by ArcSoft, a renowned multimedia application developer. Magcore.dll consists of small programs that help load and run software developed by ArcSoft on your system smoothly. This file virtually comes into function when you use certain audio and video features incorporated in ArcSoft programs for example ArcSoft Media converter. However, you may experience Magcore.dll error code on when this DLL file fails to run and load programs. The error may hamper your ability to access ArcSoft programs on your system and cause you a great deal of inconvenience. Magcore.dll error is often displayed in any one of the following formats:
“The file magcore.dll is missing” “MagCore.dll cannot be found” "Cannot find [PATH]magcore.dll" “This application has failed to start because MagCore.dll was not found. Reinstalling the application may fix the error.”

Solution

Restoro box imageError Causes

This DLL file is known to be prone to errors. MagCore.dll error occurs due to several reasons such as:
  • Missing or damaged MagCore.dll file
  • Hardware failure
  • Viral infection
  • Registry issues
If you experience MagCore.dll error on your system, it is advisable to fix it right away. Though it is not fatal, but if you don’t repair it, you may not be able to access practically all ArcSoft programs on your PC.

Further Information and Manual Repair

Here are some of the efficient and easy manual methods to resolve error MagCore.dll on your PC:

Method 1 - Scan and Remove Malware

MagCore.dll error can be triggered by viral or other malware infection. Malware can easily damage DLL files and masquerade as the MagCore.dll file. To resolve, simply download a powerful antivirus on your system. Run it to scan your entire PC for viruses and remove them right away.

Method 2 - Update the Drivers for Hardware Devices

As we mentioned above the error may be related to hardware failure too. In times like these, it is advisable to update the drivers for hardware devices. For example if you try to play a 3D video game and it fails to run showing you MagCore.dll error message, then simply try updating the drivers for your video card. Drivers can be updated in Windows by using a driver update wizard from within Device Manager.

Method 3 - Use System Restore to Undo Recent System Changes

After trying method 1 and 2, if the error code still persists, then it is opt for method 3. Use Windows System Restore utility to undo recent system changes and bring your PC to its normal previous condition before the error occurred. To restore, simply go to the start menu, type System Restore. Now click on System Restore and just pick a point in the past called a restore point to return important Windows files and settings.

Method 4 - Repair the Registry

If the underlying cause of the MagCore.dll error code is related to registry issues, then simply repair the registry. You can fix it manually but it is a little complicated and time-consuming. You may find it difficult if you are not a technical whiz. Nonetheless to resolve and repair it in seconds, download Restoro. This is a powerful and a user-friendly PC Fixer embedded with a registry cleaner and several other highly functional scanners. Run it to scan your entire PC for registry problems. The registry cleaner utility removes all bad and invalid entries, cleans up the registry space, and repairs the damaged files. Click here to download Restoro and repair MagCore.dll error code on your PC.
Read More
Disable Telemetry & Data Collection in Windows
The Windows 10 Telemetry and Data Collection features are auto-enabled and they collect all sorts of user activity and sends it to Microsoft. Microsoft says that the data collected only enhances the overall user experience and Windows functionality better but the number of data breaches happening across the globe has forced users to be extra cautious about their data privacy. So naturally, from stronger passwords and other services management, it is only logical to turn off Windows data gathering. To do so:
  • Press ⊞ WINDOWS + R to open the run dialog.
  • In the Run dialog type: taskschd.msc
  • Press CTRL + SHIFT + ENTER key combo to open Task Scheduler in admin mode.
  • On the left pane, navigate to the: Task Scheduler Library > Microsoft > Windows > Customer Experience Improvement Program
  • At the location, on the middle pane, right-click on the task named Consolidator and select Disable from the context menu...
  • Repeat the process with all other tasks listed in the middle pane.
  • Exit Task Scheduler.
Read More
Fix 0xd00000e5, 0x8007139f, 0x80090030 PIN
The quickest and easiest way to log into your computer is when you use the PIN feature in Windows 10. Even though it is a bit slower compared to biometric logins such as Fingerprint and Iris scanning that comes under Windows Hello, the PIN feature is definitely less complicated. However, just like any other module of the software, it is also prone to some errors. In this post, you will be guided in fixing several PIN errors such as 0xd00000e5, 0x8007139f, and 0x8009003. These errors could be caused at different points in time like when you change or create a PIN or when you log into your computer. To fix the 0xd00000e5, 0x8007139f and 0x8009003 PIN errors, there are various solutions you can try. You may empty the contents of the NGC folder or remove and change the PIN or the password. You could also use the Group Policy Editor or reset the ACLs in the NGC folder as well as run built-in tools like System File Checker and the DISM tool.

Option 1 – Take ownership of the NGC folder and delete its contents

  • Boot your computer first into Safe Mode.
  • Next, you need to take ownership of the Ngc folder first and you can do that using Command Prompt.
  • Type “command prompt” in the Windows Search bar and then right-click on the relevant search result and select “Run as administrator”.
  • After that, if a User Account Control or UAC prompt appears, just click on Yes to proceed.
  • Next, type and enter this command: TAKEOWN /F C:WindowsServiceProfilesLocalServiceAppDataLocalMicrosoftNgc
  • Note that the <path> is the location of the folder or file in File Explorer.
  • Now type and enter this second command: ICACLS C:WindowsServiceProfilesLocalServiceAppDataLocalMicrosoftNgc /grant administrators:F
  • Finally, once the command has been executed, restart your computer.
  • Once your computer has restarted, delete all the contents in the Ngc folder and check if the error is now fixed.

Option 2 – Try to remove and change the PIN or password

The 0xd00000e5, 0x8007139f, and 0x8009003 PIN errors could be caused by some conflicting issues with the PIN or password you have set for the User Account of your computer. Thus, you have to remove or change the PIN or password to fix these PIN errors.
  • Remove the PIN by going to Settings > Accounts > Sign-in options.
  • From there, go to the PIN section and click on the Remove button.
  • You will be asked to verify your account to proceed in removing the PIN, enter your credentials.
  • Restart your computer and then set up a new PIN.
  • Once you’re done, restart your computer and check if the error is gone now.

Option 3 – Try to use the Group Policy Editor

  • Tap the Win + R keys to open the Run utility and type “gpedit.msc” in the field and tap Enter to open the Group Policy Editor.
  • Next, navigate to this policy setting: Computer Configuration > Administrative Templates > System > Logon
  • After that, double click on the “Turn on convenience PIN Sign-in” option located on the right-side panel.
  • Then set its radio button to Enabled. You will see the following description when you do so:
“This policy setting allows you to control whether a domain user can sign in using a convenience PIN. If you enable this policy setting, a domain user can set up and sign in with a convenience PIN. If you disable or don’t configure this policy setting, a domain user can’t set up and use a convenience PIN. Note: The user’s domain password will be cached in the system vault when using this feature. To configure Windows Hello for Business, use the Administrative Template policies under Windows Hello for Business.”
  • After setting the radio button to Enabled, it will turn on the Logins in your computer using the PIN.
  • Close the Group Policy Editor and restart your computer for the changes to take effect.

Option 4 – Try to reset the ACLs in the Ngc folder

  • Type “command prompt” in the Windows Search bar and then right-click on the relevant search result and select “Run as administrator”.
  • After opening Command Prompt with admin privileges, execute this command: C:/Windows/Service/Profiles/Local/Service/AppData/Local/MicrosoftNgc /T /Q /C /RESET
  • The command you entered will start checking for errors and fix them automatically.

Option 5 – Run the System File Checker scan and the DISM tool

System File Checker:

  • Tap Win + R to launch Run.
  • Type in cmd in the field and tap Enter.
  • After opening Command Prompt, type in sfc /scannow
The command will start a system scan which will take a few whiles before it finishes. Once it’s done, you could get the following results:
  1. Windows Resource Protection did not find any integrity violations.
  2. Windows Resource Protection found corrupt files and successfully repaired them.
  3. Windows Resource Protection found corrupt files but was unable to fix some of them.
  • Now restart your computer.

DISM tool:

  • Open Command Prompt.
  • Then type in the following commands and make sure to hit Enter right after you type each one of them:
    • Dism /Online /Cleanup-Image /CheckHealth
    • Dism /Online /Cleanup-Image /ScanHealth
    • Dism /Online /Cleanup-image /Restorehealth
  • After that, wait until the process is finished and do not close the window as the process will probably take a couple of minutes.
  • Once it’s done, restart your computer.
Read More
Fix Orange Screen of Death Error in Windows
The Windows 10 Orange Screen of Death, unlike Blue Screen of Errors, is quite an uncommon error where the hardware is the culprit which is mostly caused by some issues with the GPU. If you are currently facing this problem, then you’ve come to the right place as this post will guide you on what you can do to fix it. There have been reports from users that the Orange Screen of Death is caused by various reasons. Some users reported that they encountered Orange Screen of Death when they were watching a YouTube video, while some were not able to boot into their Windows 10 PCs and encountered an error instead of that either says, FAULTY_HARDWARE_CORRUPTED_PAGE or WHEA_UNCORRECTABLE_ERROR error. In addition, this error can also occur when your computer wakes up from Sleep or while using BitLocker, or while you use a second monitor. Whatever the case is, you can try updating your drivers or lower the clock speed of the GPU. You could also try to fix the DRIVER_IRQL issue in case it’s the one that triggers the error or performs Automatic Repair or uninstalls any recently installed software.

Option 1 – Update your Graphics card drivers

One of the possible reasons why you’re getting the Orange Screen of Death error is most likely related to the Graphics card drivers in your computer. Thus, the first thing you can do to resolve it is to update these drivers by following these steps:
  • First, boot your computer into Safe Mode.
  • After that, tap the Win + R keys to launch Run.
  • Type in msc into the box and tap Enter or click OK to open the Device Manager.
  • After that, a list of device drivers will be displayed. From there, look for the Display Adapters and click on them.
  • After that, right-click on each entry under the Display Adapters and select the “Uninstall Device” option from the menu.
  • Now restart your computer.
  • After restarting your computer, go to the Settings app and Check for Updates in the Windows Update section.
Note: You also have the option to go directly to the website of your graphics card manufacturers like NVIDIA, Intel, or AMD and go to the section called Drivers then check if there’s a new available update – if there is, download and install it.

Option 2 – Try to uninstall software you’ve installed recently

If you have installed a software or two recently and then suddenly encounter this Orange Screen of Death, then they are most likely the culprits. The best thing you can do is to first check the System Log in the Event Viewer for any additional information in case it’s not the GPU but some other driver or device that’s causing the error. Once you have identified the culprits, uninstall them and see if the error is fixed.

Option 3 – Try disabling Overclocking

If overclocking is enabled, you might have to disable it as some users reported that the WHEA_UNCORRECTABLE_ERROR 0x00000124 error started to appear right after overclocking. To disable it, follow the steps below.
  • Go to the Start Menu and open Settings.
  • Next, select Update and Security and go to the Recover tab.
  • From there, click on Restart now in Advanced startup. This will restart your computer.
  • Once you’re in the Advanced startup, go to Troubleshoot and then select Advanced Options.
  • From there, select the UEFU Firmware Settings.
  • Now click on Restart. Once your computer has restarted, it will automatically open BIOS.
  • From the BIOS, go to the Advanced tab and navigate to Performance and then look for Overclocking.
  • Once you’ve found Overclocking, make sure that it is disabled. If it’s not, then disable it and then save the changes made by tapping the F10 key.
  • Start your computer normally and check if the WHEA_UNCORRECTABLE_ERROR 0x00000124 error is now fixed.

Option 4 – Use the Driver Verifier Manager

The Driver Verifier Manager is another tool in Windows that could help you fix driver-related issues. And so if you want to fix the Wdf01000.sys Blue Screen error, you need to use the Driver Verifier Manager:
  • Type in the keyword “Verifier” in the Cortana search box to search for Verifier in Windows 10.
  • After that, select the option “Create custom settings”.
  • Make sure that you have checked everything except the options “DDI compliance checking” and “Randomized low resources simulation”.
  • Next, select the option “Select driver names from a list” option.
  • Afterward, you have to select all the drivers from any unofficial or third-party provider. To simply put it, you have to select all the drivers that are not supplied by Microsoft.
  • Then click on the Finish button.
  • Open Command Prompt as administrator and execute this command – verifier /querysettings
  • The command you just executed will display the Driver Verifier settings so if you see any of the flags enabled boot your Windows 10 PC into Safe Mode.
  • Open the Command Prompt as admin again and run this command – verifier /reset
  • The command will reset the Driver Verifier. Once the process is done, restart your PC and check.

Option 5 – Try to run the Automatic Repair Utility

You might also want to use Automatic Repair in fixing the error. To do so, follow the steps below.
  • You can start by creating and booting from a bootable Windows 10 USB Stick.
  • After that, click on Repair your computer located on the bottom left corner when you are on the initial Windows Startup screen.
  • Next, click on Troubleshoot, and then on the other screen, click the Startup Repair option.
  • Now select the operating system you want to repair. Once you do that, it will start to repair your operating system. Wait until the process is completed and then check if the problem’s now fixed.
Read More
Free Quake upgrade comes to Steam and more
quake remaster
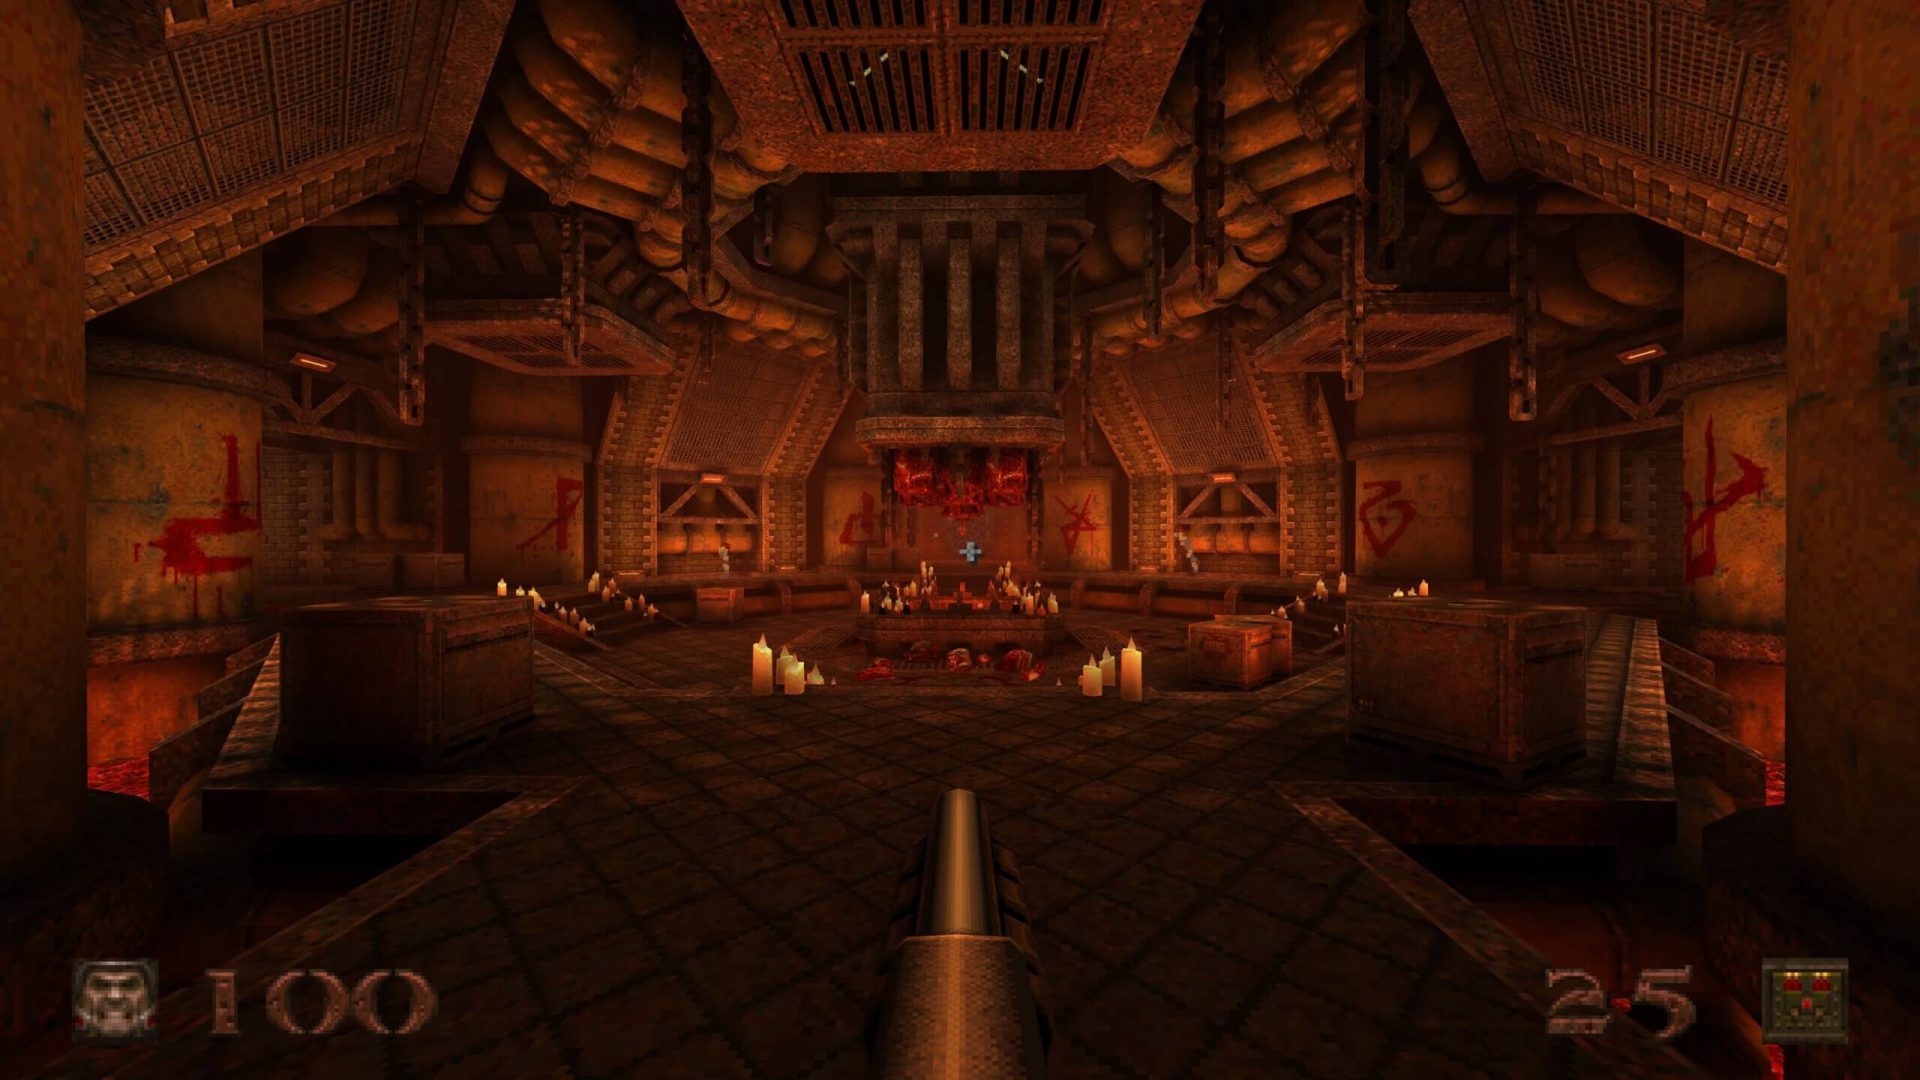
Without any fanfare, news, or information Bethesda has released a completely free upgrade for legendary Quake 1. Free upgrade is automatically applied to all users who possess the original game and it has already been rolled out.

What has changed for good?

New textures, effects, and resolutions are one thing that will come first into your focus when you start the game. From the moment game is started it feels and looks like a game you remember from a long time ago. Models are also upgraded with a higher polygon count. Another thing that will hit you right away is the legendary OST by Trent Reznor in its full glory. If you have the original Quake and played it you will know that OST was missing from the Steam release and having it fully back is a great feature. I would argue that placing just OST alone in the steam release is enough for people to play it again since it adds so much atmosphere. Deathmatch and other multiplayer goodies are all here as well and there is a completely free new episode in the game with several levels. Yes, you get a free Quake upgrade in HD with an extra episode completely free.

The bad side of Quake coin

So this might come as a purist or obsessive nit-picking but there were two things that I, personally am not a fan of and have noticed during my gameplay. Please know that this is personal preference and by no other chance reflects the quality of the game itself but I just had to talk about it. Quake remake is made in a new engine and as such dynamic and gunplay feel different from the original, granted they have done the best they could to replicate the authentic feeling of the original game but there are parts of the game where I have felt that simply put, it feels different. Another thing is also tied to technology and the overall game is somewhat a little brighter and in some areas little softer in dark areas. Like I said this is purely personal preference and might come as nitpicking but I preferred the darker and grittier look of the original game. Darkplaces, the free custom-made upgrade did this in my opinion better.
Read More
No Audio Device Error – Fix Tricks

No Audio Device Error

What exactly is no audio device malfunction?

No audio device error is among the malfunctions that many Computer consumers run into. No sound or audio can be heard from the computer when the error occurs.

Solution

driverfix boxError Causes

There are numerous elements that may be the basis of this malfunction. Corrupted or broken sound card drivers, incorrect Device Manager Options for example, or even incorrect BIOS configurations.

Further Information and Manual Repair

How could you recover the standard production of audio by your personal computer and solve this malfunction? Like a number of additional malfunctions, the method of the repair depends on its trigger. To properly solve this dilemma, you are required to run through an evaluation of the pc system so that you can pinpoint the cause. This is because there are numerous variables, which alone, or concurrently may trigger this dilemma. These measures will allow you to work out the no sound device error in your personal computer programs, identify the trigger and fix it. Follow the directions in step 1 if your computer has an onboard audio device installed in it and assess the BIOS settings. You can jump step 1 and move to step two if you utilize a separate sound card.

STEP #1 - Assess the BIOS options.

No sound device error can be caused by incorrect BIOS configurations in your Personal Computer. By fixing these settings if they are the cause of the malfunction, you can easily solve it. Make Sure you restart the pc and immediately access the BIOS options. By locating the Sound card, which is usually known as the AC97 Audio, you should subsequently open the Integrated Peripherals. As soon as you locate it, set it to Allow or Auto. Finally, you should access the On-Board Audio AC97 Control and set it to Allow or Auto as well. If it doesn't solve the situation, proceed to Step Two.

STEP #2 - Analyze the Device Manager

No sound device malfunction can be additionally caused by malfunctions with the Device Manager. To solve this issue, go to My Computer, right-click it, select properties, click on the Hardware tab, then click on Device Manager. At this windowpane, analyze the movie, audio, and game controllers. If you learn that there is a cross on any of the sub things, right-click it subsequently and set it to Enable. The sound card driver may have not been correctly installed or may be damaged if there is Exclamatory Mark or Question Mark on the device manager menu. This does not mean that the sound card driver is ok. It may have malfunctioned even though you do not locate anything unusual. This is because the Device Manager doesn't always recognize errors in audio hardware. After this, you can proceed to step 3.

STEP #3 - Upgrade or reinstall the Sound Card Driver.

About 80% of "no sound system discovered/installed" malfunctions come from broken and/ or out-of-date card drivers. The sound card will not be detected by the Windows Operating System, when the audio card driver is corrupted, damaged, or out-of-date and therefore no sound will be produced by your computer. If this is the cause of the no sound device malfunction, you should reinstall the Audio Card Driver on your computer. Still, you can utilize driver upgrade applications on the web that will help you upgrade out-of-date drivers.
Read More
1 2 3 162
Logo
Copyright © 2022, ErrorTools. All Rights Reserved
Trademarks: Microsoft Windows logos are registered trademarks of Microsoft. Disclaimer: ErrorTools.com is not affiliated with Microsoft, nor claim direct affiliation.
The information on this page is provided for information purposes only.
DMCA.com Protection Status