How to Fix 0x0000007B Error

[vc_row][vc_column][vc_column_text]

Troubleshoot 0x0000007B Error

What is 0x0000007B Error?

0x0000007B is the most common Windows stop error.

The error is displayed on the blue-colored screen which is also called the blue screen of death. You may receive a 0x0000007B error message during Windows XP setup or while running the setup program.

The message is often displayed as ‘a problem has been detected and Windows has been shut down to prevent damages’ or ‘inaccessible boot device error’.

Solution

Restoro box imageError Causes

The 0x0000007B error code is usually triggered by:

  • Poor Window XP installation
  • Registry corruption
  • Device Drivers Issues
  • Boot sector viruses

Further Information and Manual Repair

The 0x0000007B error makes your system vulnerable and reduces its speed significantly. And besides, you can’t run the programs smoothly on your PC either. Therefore, it’s advisable to fix the error right away.

To fix and repair the 0x0000007B error successfully, you must first understand the cause of the error. Let’s take a look at all the solutions available to fix the 0x0000007B error.

Cause: Boot Sector Viruses

Solution: If your computer is infected with boot sector viruses, then you will first have to download a powerful antivirus. After downloading the antivirus program, run it on your PC to check your computer for viruses. Delete the viruses found and click the repair option.

Sometimes even an antivirus program may fail to remove the virus and repair the system. In such cases, you must repartition and format your hard disk and also reinstall Windows XP.

Cause: Device Driver Issues

Solution: Device driver issues may occur if the boot controller is not properly configured or the driver is not up to date. If device driver configuration is the cause of the 0x0000007B error on your PC, then all you need to do is restart your PC, and while restarting press F8 to go to the advanced boot options.

Now choose the ‘Last Known Good Configuration’ option. After selecting it, boot into windows and then perform a system restore. Now go to Device Manager and perform a driver rollback to reinstall the drivers. This will resolve the configuration issues.

However, if you need an updated driver, all you need to do go on the web and download software to update the driver. It is advisable to download software from the manufacturer’s website in order to successfully update the device driver.

Cause: Poor Windows Installation

Solution: In this case, you will have to perform a Windows start-up repair. To do this: boot Windows XP from CD. Press ‘enter’ at setup Windows Screen when prompted. Then press R to repair Windows Installation.

This procedure will not delete any user data and files. In fact, it will copy only the original Windows files over the bad or existing ones.
Some of the best ways to avoid Ox0000007B blue screen error are

  • To scan for viruses every time you use your PC
  • Never open web pages, emails, or download content that you think looks suspicious because that’s probably a virus.
  • Always keep your computer updated.

[/vc_column_text][/vc_column][/vc_row]

If you like to learn and find out more about various Windows errors, and how to repair them go to our vast archive or use search to find articles that will explain and help you in solving your issue.
However, if you prefer to do things fast and with automatization then we are proposing to use an automated solution for your issues. The application that we are recommending is Advanced System Repair Pro
Advanced System Repair utilizes multiple tools all in one to give you a quick, simple, reliable, and very thorough diagnosis of your PC. It brings you all the tools you need in one program to clean, fix, protect, optimize and boost your PC!
1-Click Maintenance
All the tools to make it simple and easy! It's like having a professional technician at the click of a mouse.

Junk Cleaner
Keeping your computer free from unnecessary clutter also helps make your computer last longer. Like any other machine, if you keep it clean and take care of it, it will serve you better for longer!

Optimize background apps
Optimize applications background activity with the built-in Application Optimizer feature.

Disk Defrag
With a simple 1-click, Advanced System Repair speeds up your PC by assembling fragmented files on your machine and organizing them more efficiently.

Malware Removal
Finds and removes all types of harmful malware including trojans, worms, bots, adware, spyware, PUPs, and more!

Privacy Cleaner
The all-in-one privacy suite to Clean Your Tracks & Protect Your Privacy! Make your computer safe, secure, and more efficient!

System Tweak/Optimizer
ASR will analyze your complete system and settings to adjust your PC to function at its maximum performance.

Registry Cleaner
Over time, as you install and uninstall applications, the registry can become cluttered with old entries and broken settings which can result in program crashes, and annoying messages and slow the computer down.
Visit our Advanced System Repair Pro Download page to inform yourself about all the benefits of this software and get a free trial copy of it.
advanced system repair pro

Advanced System Repair Pro

One-click automated PC repair solution
ASR logo
With Advanced System Repair Pro you can easily
Replace damaged files
Restore performance
Free disk space
Remove Malware
Protects WEB browser
Remove Viruses
Stop PC freezing
DOWNLOAD
Privacy Policy | Terms of Use | Uinstall
Advanced System Repair Pro is compatible with all versions of Microsoft Windows including Windows 11

Share this article:

You might also like

How to Fix UNEXPECTED_KERNEL_MODE_TRAP error
It is a fact that Blue Screen of Death errors can give you a headache for you will have a hard time fixing it as it is one of the most difficult errors you can encounter on your Windows computer. One of these BSOD errors is the UNEXPECTED KERNEL MODE TRAP error. If you receive this kind of error then it means that the operating system was not able to catch a trap or an exception generated by the CPU. This BSOD error has an error code 0x00000007F and indicates that the Intel CPU generated a trap that the kernel failed to catch. One of the most likely causes is hardware failure due to faulty memory. Aside from this cause, you also have to track down other probable causes for this problem like corrupted system files, incompatible drivers or programs, faulty hardware, and even dusty components, and so on. To fix the UNEXPECTED KERNEL MODE TRAP BSOD error, here are some suggestions that might help.

Option 1 – Uninstall the programs you installed recently

Chances are, some programs that you just installed might be the one that’s causing the BSOD error. Thus, you need to uninstall the program to resolve the problem.
  • In the search box, type in “control” and then click on Control Panel (desktop app) among the search results.
  • After that, select Programs and Features from the list which will give you a list of all the programs installed on your computer.
  • From there, look for the concerned program and select it and then uninstall it.
Note: If you have downloaded the app from the Windows Store, you can simply right-click on it from the application list and then uninstall it. In addition, you might also want to check the hardware components of your computer that might not support the operating system itself. You can disconnect all the external devices like USB drives, scanners, printers, etc., and then reboot your PC. After that, add the devices again one after the other and check if the BSOD error is now fixed or not. Moreover, you can also perform a clean boot to make things easier for you.
  • Log onto your PC as an administrator.
  • Type in MSConfig in the Start Search to open the System Configuration utility.
  • From there, go to the General tab and click “Selective startup”.
  • Clear the “Load Startup items” checkbox and make sure that the “Load System Services” and “Use Original boot configuration” options are checked.
  • Next, click the Services tab and select the “Hide All Microsoft Services” checkbox.
  • Click Disable all.
  • Click on Apply/OK and restart your PC. (This will put your PC into a Clean Boot State. And configure Windows to use the usual startup, just simply undo the changes.)

Option 2 – Update your device drivers

  • Tap the Win + R keys to launch Run.
  • Type in devmgmt.msc into the box and tap Enter or click OK to open the Device Manager.
  • After that, a list of device drivers will be displayed. Look for the device driver you and then select either “Update driver” or “Uninstall device”. And if you find any “Unknown device”, you need to update it as well.
  • Select the “Search automatically for updated driver software” option and then follow the instructions to complete the process.
  • If you have chosen to uninstall the driver, follow the screen options to complete the process and then restart your PC.
  • Connect the device and Scan for hardware changes – you can see this option under Device Manager > Action.

Option 3 – Use the Blue Screen Troubleshooter

The Blue Screen troubleshooter is a built-in tool in Windows 10 that helps users in fixing BSOD errors like UNEXPECTED KERNEL MODE TRAP. It can be found on the Settings Troubleshooters page. To use it, refer to these steps:
  • Tap the Win + I keys to open the Settings panel.
  • Then go to Update & Security > Troubleshoot.
  • From there, look for the option called “Blue Screen” on your right-hand side and then click the “Run the troubleshooter” button to run the Blue Screen Troubleshooter and then follow the next on-screen options. Note that you might have to boot your PC into Safe Mode.

Option 4 – Run the Windows Memory Diagnostic tool

You can use the Memory Diagnostic tool in Windows to check RAM. Before you use this tool, make sure you save all your important work.
  • Tap the Win + R keys to open the Run dialog box.
  • Next, type in “mdsched.exe” in the field and hit Enter to open Memory Diagnostic.
  • After that, the Windows Memory Diagnostic will give out two options such as:
  1. Restart now and check for problems (recommended)
  2. Check for problems the next time I start my computer
  • Select any of the given options. After that, your computer will restart and check for memory-based issues upon the restart. If there are any issues, it will automatically them.

Option 5 – Disable Memory caching in the BIOS

You can also disable memory caching in the BIOS to fix the UNEXPECTED KERNEL MODE TRAP error.
  • Open the BIOS Setup screen.
  • Next, go to Advanced > Cache Memory and then disable it.
  • Tap the F10 key to save the changes made and restart your computer.

Option 6 – Run System File Checker

  • Tap Win + R to launch Run.
  • Type in cmd in the field and tap Enter.
  • After opening Command Prompt, type in sfc /scannow
  • Restart your computer once the scan is completed.

Option 7 – Clean your hardware components for dust

Cleaning your computer’s hardware components for dust might also help in resolving the UNEXPECTED KERNEL MODE TRAP error. Make sure to use a soft cloth in cleaning the hardware as well as a small blower. Moreover, ensure that you do not damage any parts with moisture or cause harm to any circuits while you’re at it.
Read More
Fix 0x80070079: The semaphore timeout ...
This post will guide you on how you can fix the Error 0x80070079. This kind of error mostly occurs during the transfer of files across the networks. It could be caused by several factors which include the incorrect configuration of drivers or the network, as well as deadlock state or the server is loaded with a lot of tasks and if any location is not available. This error could also appear when you try to create a System Image or copy or move files on your computer. Here’s the full context of the error message:
“Error 0x80070079: The semaphore timeout period has expired.”
To fix this error, you can try to run the three built-in Network-related troubleshooters or update or reinstall the network adapter drivers or perform a network reset. For more details, follow the options laid out below.

Option 1 – Try to run the three built-in Network-related troubleshooters

The first thing you could do to fix the problem is to run any of the three built-in troubleshooters related to Networks such as Incoming Connections, Network Adapter, and Shared Folders troubleshooters. To access them, just open the Windows Settings app, and go to Update & security > Troubleshoot. From there, run any or each one of the aforementioned troubleshooters.

Option 2 – Update the Network Adapter drivers

You might also want to update the Network Adapter drivers by following these steps:
  • Tap the Win + R keys to launch the Run window and then type in the “MSC” command and hit Enter to open the Device Manager window.
  • Under the Device Manager, you will see a list of drivers. From there, look for the Network Adapters and expand them.
  • Then right-click on each one of the Network drivers and update them all.
  • Restart your PC and see if it helped in fixing the BSOD error.
Note: If updating the network drivers didn’t help in fixing the “Windows could not find a driver for your network adapter” error, you can also try to uninstall the very same drivers and restart your Windows 10 PC. After that, the system itself will reinstall the drivers you just uninstalled. Alternatively, you can also download and install the drivers from the manufacturer’s website directly. To reinstall the network adapter driver, refer to these steps:
  • Open the Devices Manager from the Win X Menu.
  • Then locate the device drivers and right-click on them to open the Properties.
  • After that, switch to the Driver tab and click on the Uninstall Device button.
  • Follow the screen option to completely uninstall it.
  • Finally, restart your computer. It will just reinstall the device drivers automatically.

Option 3 – Perform a Network Reset

Network Reset is a feature in Windows 10 that will help you reinstall the Network adapters as well as reset the Networking Components back to their original settings.
  • Open the Start Menu and click on the Settings icon.
  • Next, click on the Status link on the left side where you should see the status of your Network. Aside from that, you should also see a link that will let you open the Network Troubleshooter – click on that link to expand Network Troubleshooter.
  • Under Network Troubleshooter, select the link for “Network reset”.
  • After you click on Network reset, it should redirect you to the following page. From there, click on the Reset now button.
Read More
How to Fix DLL Errors in Windows?
A general rule of thumb, which is followed by most users, is to download the specific missing DLL file and place it within the software’s installation directory. However, this can be harmful to your system as hackers often upload popular malicious DLL files to target systems. Thus, you should avoid downloading DLLs from the internet. And follow these steps to fix the DLL error:
  • Restart your computer
  • Recover the .DLL file using the RESTORO; it helps to recover lost data
  • System restore to an earlier state
  • Run a malware/virus scan
  • Update all the hardware drivers
  • Running SFC /scannow command in command prompt
  • Then do as the error suggests, reinstall the program if it’s feasible. Game files can take several hours to install and therefore, reinstallation can be a cumbersome job. Also, frustrating if the error appears after reinstallation.
  • Update device drivers manually, such as graphics drivers, DirectX software if you see DLL missing error while running game
Read More
How to Fix Remote Computer requires network level authentication Error in Windows 10
A couple of Windows 10 users have reported an error on domain-connected systems when they tried accessing their computer systems remotely. This occurs when the network level authentication or NLA is enabled on the computer. If you are one of these users, you better keep reading as this post will guide you on how you can fix this error. To resolve this issue, there are several workarounds you can try. You can either disable this option directly via properties or you can also modify some registry entries or sub-keys and restart the system. When you encounter this problem, an error message pops up that states:
“The remote computer that you are trying to connect to requires network level authentication (NLA), but your windows domain controller cannot be contacted to perform NLA. If you are an administrator on the remote computer, you can disable NLA by using the options on the Remote tab of the System Properties dialog box.”
Or you could also see this error message instead:
“The remote computer requires Network Level Authentication, which your computer does not support. For assistance, contact your system administrator or technical support.”
Before you proceed in troubleshooting the problem using the options provided below, you need to create a backup for your data or system restore point as well as make a copy of any registry entries you are going to modify.

Option 1 – Disable Network Level Authentication via Properties

The NLA is a useful tool that provides your computer with extra security and helps network administrators in controlling who can log into the system with just a click of a single box. However, there are times when it can become a disadvantage and could prevent you from accessing your system remotely. Thus, you need to disable it using Properties.
  • Tap the Win + R keys to open the Run dialog box.
  • After that, type in “sysdm.cpl” and tap Enter to open System Properties.
  • Next, go to the remote tab and uncheck the checkbox for the “Allow connections only from computers running Remote Desktop with Network Level Authentication (recommended)” option.
  • Now click the Apply button to save the changes made and exit System Properties and then try logging into the remote computer again and see if the problem is fixed or not.

Option 2 – Disable NLA via Registry Editor

Note that you can only use this option if the first one didn’t work for you. Take note that this option will require you to restart your PC completely which could mean some downtime if your computer is running a production server. So make sure to save all your work.
  • Tap the Win + R keys to open the Run dialog box and then type in “Regedit” in the field and tap Enter to open the Registry Editor.
  • From there, click on File > Connect Network Registry and input the details of the remote computer and then try to connect.
  • Navigate to the path below after you’re connected:
HKLM >SYSTEM > CurrentControlSet > Control >Terminal Server > WinStations > RDP-Tcp
  • After that, change the values given below to “0”
    • SecurityLayer
    • UserAuthentication
  • The navigate to PowerShell and execute this command – restart-computer

Option 3 – Disable NLA via PowerShell

PowerShell allows you to tap into the remote computer and once you’ve targeted the machine, you can execute the commands given below to disable NLA.
  • Tap the Win + S to open Search and then type in “PowerShell” in the field. Right-click on the related result and select the “Run as administrator” option.
  • After opening PowerShell, execute the command below:
  1. Once in the PowerShell, execute the following command:
$TargetMachine = “Target-Machine-Name” (Get-WmiObject -class “Win32_TSGeneralSetting” -Namespace rootcimv2terminalservices -ComputerName $TargetMachine -Filter “TerminalName=’RDP-tcp'”).SetUserAuthenticationRequired(0) Note: In the command given, the “Target-Machine-Name” is the name of the machine you are targeting.

Option 4 – Use the Group Policy Editor to disable NLA

Another option you can use to disable NLA is via the Group Policy Editor. This is ideal for you if you are blanket disabling. Just take note that the Group Policy Editor is a powerful tool and that if you make some mistakes by changing values you have no clue about, you can render your computer useless so make sure that you create a backup for all the values before you proceed.
  • Tap the Win + R keys to open the Run dialog box.
  • Then type in “gpedit.msc” and tap Enter to open the Group Policy Editor.
  • From there, go to this path – Computer Configuration > Administrative Templates > Windows Components > Remote Desktop Services > Remote Desktop Session Host > Security
  • After that, search for “Require user authentication for remote connections by using Network Level Authentication” and set it to disabled.
  • Now check if the error is fixed or not.
Read More
Fix Windows Upgrade Error 0x800F081E – 0x20003
If you are trying to run Windows Upgrade on your Windows 10 computer but suddenly interrupted by the error 0x800F081E – 0x20003, worry not for this post will guide you on how you can fix this Windows Upgrade error. This particular Windows Upgrade error is a Windows status code for CBS_E_NOT_APPLICABLE which indicates that some of the update requirements are missing or the files that are installed are already of a higher version compared to the ones that are still pending. In most cases, this error occurs when you try to upgrade to earlier versions of the Windows 10 N edition to a later version. Here’s the full content of the error message:
“0x800f081E-0x20003, The installation failed in the SECOND_BOOT phase with an error during BOOT operation”
In case you don’t know, Microsoft distributes special “N” editions of Windows in Europe and the “KN” editions in Korea. These editions are the same as the standard editions of Windows except that they do not have the Windows Media Player as well as the multimedia playback features. Thus, when the Windows Upgrade fails with the error code and error message and it doesn’t provide much information as to why the update couldn’t be installed, there is something you can do about it to fix the error. Since Windows uses generic error codes and so if you see the error code 0x800f081e, you have to check the error log first. For more details, follow the instructions laid out below. Step_1: You need to navigate to C:$WINDOWS.~BTSourcesPanther and from there look for the text file named “setuperr.log” and open it with a text viewer/editor program like Notepad. Step_2: After opening the setuperr.log file, you should see content that’s similar to this:
C:WINDOWSSoftwareDistributionDownload80b2677d6e15a2a206625bb25a7124feamd64_Microsoft-Windows-MediaPlayer-Package~~AMD64~~10.0.17134.1. Error: 0x800F081E 2019-09-10 20:26:57, Error SP Operation failed: Add [1] package C:WINDOWSSoftwareDistributionDownload80b2677d6e15a2a206625bb25a7124feamd64_Microsoft-Windows-MediaPlayer-Package~~AMD64~~10.0.17134.1. Error: 0x800F081E[gle=0x000000b7]
Note: From the content above, it is clear that the Windows Upgrade failed due to complete due to the Windows Media Player. It could be that the log file may contain other error messages and other error codes and if you see the error code 0x800f081e from the list, then you need to uninstall the Media Feature Pack. Step_3: You have to uninstall the Media Feature Pack.
  • Tap the Win + R keys to launch the Run dialog box and type “optionalfeatures.exe” in the field and hit Enter to open the Windows Features wizard.
  • Next, you need to wait until the list of Windows Features populates and then click on the + sign to collapse the folder of the Media Features.
  • After that, uncheck the “Windows Media Player” option from the Media Features folder.
  • Now click on the Yes and OK buttons to save the changes made and then close the Windows Features dialog box.
  • Restart your computer and boot, try to run the Windows Upgrade process again, and check if the error is fixed or not.
Note: If the installation has been successfully completed, you have to go back to the Windows Features and enable the Windows Media Player again. And if you are using the Windows 10 N Edition, then you can just download and install the latest version of the Media Feature Pack for your Windows 10 N edition. On the other hand, running the built-in Windows Update troubleshooter could also help you resolve any Windows Update-related problems, including the error 0x800F081E – 0x20003. To run it, go to Settings and then select Troubleshoot from the options. From there, click on Windows Update and then click the “Run the troubleshooter” button.
Read More
Operation did not complete successfully
It is common knowledge that when you open a file that contains viruses, it will automatically infect the operating system. This is why most antivirus programs like Windows Defender won’t allow the opening of a file or execution of any associated program if they detected that the file or program could potentially harm the computer. In situations like this, you may get an error stating, “Operation did not complete successfully because the file contains a virus”. In addition, it is also possible that this error message can pop up even for known programs. To open the program or file that triggered the error, you will be given a couple of options in this post but make sure that the program or file is really safe to open and does not contain any virus. You can open the file or execute the program by disabling the Windows Defender or any antivirus program temporarily. You could also try to add an exclusion in your antivirus program or repair File Explorer or run the Disk Cleanup tool. For more details, refer to each one of the options provided below.

Option 1 – Try to temporarily disable the Windows Defender program

Although you could encounter this error with any antivirus program, it is more common in Windows Defender. Thus, you can try to disable it for a while when you open the file or execute the program. To do so, follow these steps:
  • First, click on the Start button and go to Settings > Update and Security > Windows Security.
  • Here, select the “Open Windows Security” option located in the right pane.
  • After that, click on the “Virus and threat protection” option.
  • Next, click on Manage settings under the Virus and threat protection settings.
  • Then turn off the switch for both Real-time protection and Cloud-delivered protection.
  • Now restart your computer and try to open the file or execute the program again and see if it works.
  • Note: Do not forget to enable the Real-time protection and Cloud-delivered protection back in Windows Defender.

Option 2 – Try adding an exclusion in the Windows Defender program

  • Open the Windows Defender Security Center from the system tray area.
  • Next, click the “Virus & threat protection” option and then open the “Virus and threat protection settings”.
  • After that, scroll down until you find the “Exclusions” and click on the “Add or remove exclusions” option.
  • Then click the plus button and select the type of exclusion you want to add and from the drop-down list, select Folder.
  • Next, navigate to the path where the file or program is located.
  • When a User Account Control or UAC prompt, just click on Yes to proceed.
  • Now try to run the program or file again and see if it worked. If it did, then make sure to turn on your antivirus. However, if it didn’t work, proceed to the next given options below.

Option 3 – Try to run a System File Checker scan

System File Checker or SFC is a built-in command utility that helps in restoring corrupted files as well as missing files. It replaces bad and corrupted system files with good system files that might be the cause why you’re getting the errors 0x8024a11a and 0x8024a112. To run the SFC command, follow the steps given below.
  • Type “cmd” in the Start search and then right-click on the appropriate search result.
  • Next, select “Run as administrator” to open Command Prompt with admin privileges.
  • After opening Command Prompt, type in sfc /scannow
The command will start a system scan which will take a few whiles before it finishes. Once it’s done, you could get the following results:
  1. Windows Resource Protection did not find any integrity violations.
  2. Windows Resource Protection found corrupt files and successfully repaired them.
  3. Windows Resource Protection found corrupt files but was unable to fix some of them.
 Now restart your computer and see if the problem is fixed or not.

Option 4 – Run the Disk Cleanup tool

You can also try using the Disk Cleanup tool. To use it, refer to these steps:
  • Tap the Win + R keys to open the Run dialog box and then type “cleanmgr” in the field and hit Enter to open the Disk Cleanup window.
  • After that, select the drive you want to clean.
  • Now click OK to clean the disk and restart your computer.
Read More
How to Fix Htmlayout.dll Error

Repair Htmlayout.dll Error

What Is Htmlayout.dll Error?

Htmlayout.dll is a linked library which is also known as HTMLayout. In simple words, it is an embeddable HTML layout and rendering component. htmlayout.dll is generally associated with Avast Internet Security, Bit Defender Internet Security 2011, and other similar programs. If you’re noticing that a continuous popup that reads:-
‘HTMLayout.dll cannot be loaded to properly start GUI. Therefore process cannot continue’, ‘Htmlayout.dll not found’, ‘The file htmlayout.dll is missing’,
and so on, then your system may be exposed to serious privacy and security threats.

Solution

Restoro box imageError Causes

To begin with, DLL files are shared files, and they can and do exist outside the software applications. While these files do provide benefits to software developers, once they are separated, they can only spell trouble. Hence, you start seeing the HTMLayout error, which will most probably occur at system startup, program startup, or when trying to use specific functions in a program. There are a number of reasons why the HTMLayout errors occur, and some of the common ones include:
  • The file is missing because it was accidentally deleted from the system.
  • The file was damaged by a virus and as a result, your system cannot access it.
  • The file was related to the registry and is now corrupt or obsolete.
  • The program that was related to the file was not uninstalled properly.
  • The file was overwritten by a corrupt or outdated version.
  • The spyware or malware deleted the original file and disguised it as the HTMLayout.

Further Information and Manual Repair

While the HTMLayout DLL error may sound like too much trouble, it is rather easy to resolve with a few steps. If you are getting the error because of a specific program or file, then you should reinstall to make sure the error does not pertain. For that, follow these steps:
  1. Go to Start and select the Control Panel.
  2. Click on the Add/Remove Programs icon and select the programs that show the error on the list.
  3. Select Remove/Uninstall to safely remove the program from your system.
  4. Restart the system and reinstall the program again.
This is the easy way out if the HTMLayout DLL error is occurring as a result of the file missing. However, there can be cases when the file has been tampered with by virus or registry issues. For that, the safest bet is to download Restoro. Restoro is not just another registry cleaner. Instead, it is a multi-functional PC Fixes that works as an antivirus, registry cleaner, system optimizer, and much more. What’s more interesting about Restoro is that it provides real-time results as opposed to other registry cleaners. In other words, you will actually feel a difference in PC performance and security after installing and using the program. The software is compatible with all Windows versions. So just click here and download Restoro to get rid of HTMLayout error and other issues in your system!
Read More
Potential issues with DRM and Alder Lake
We are all waiting for the release of Intel’s Alder Lake series of processors and real-world results on its performance. Sadly lately it came to our attention that some games might have issues with the processor. alder lake cpu
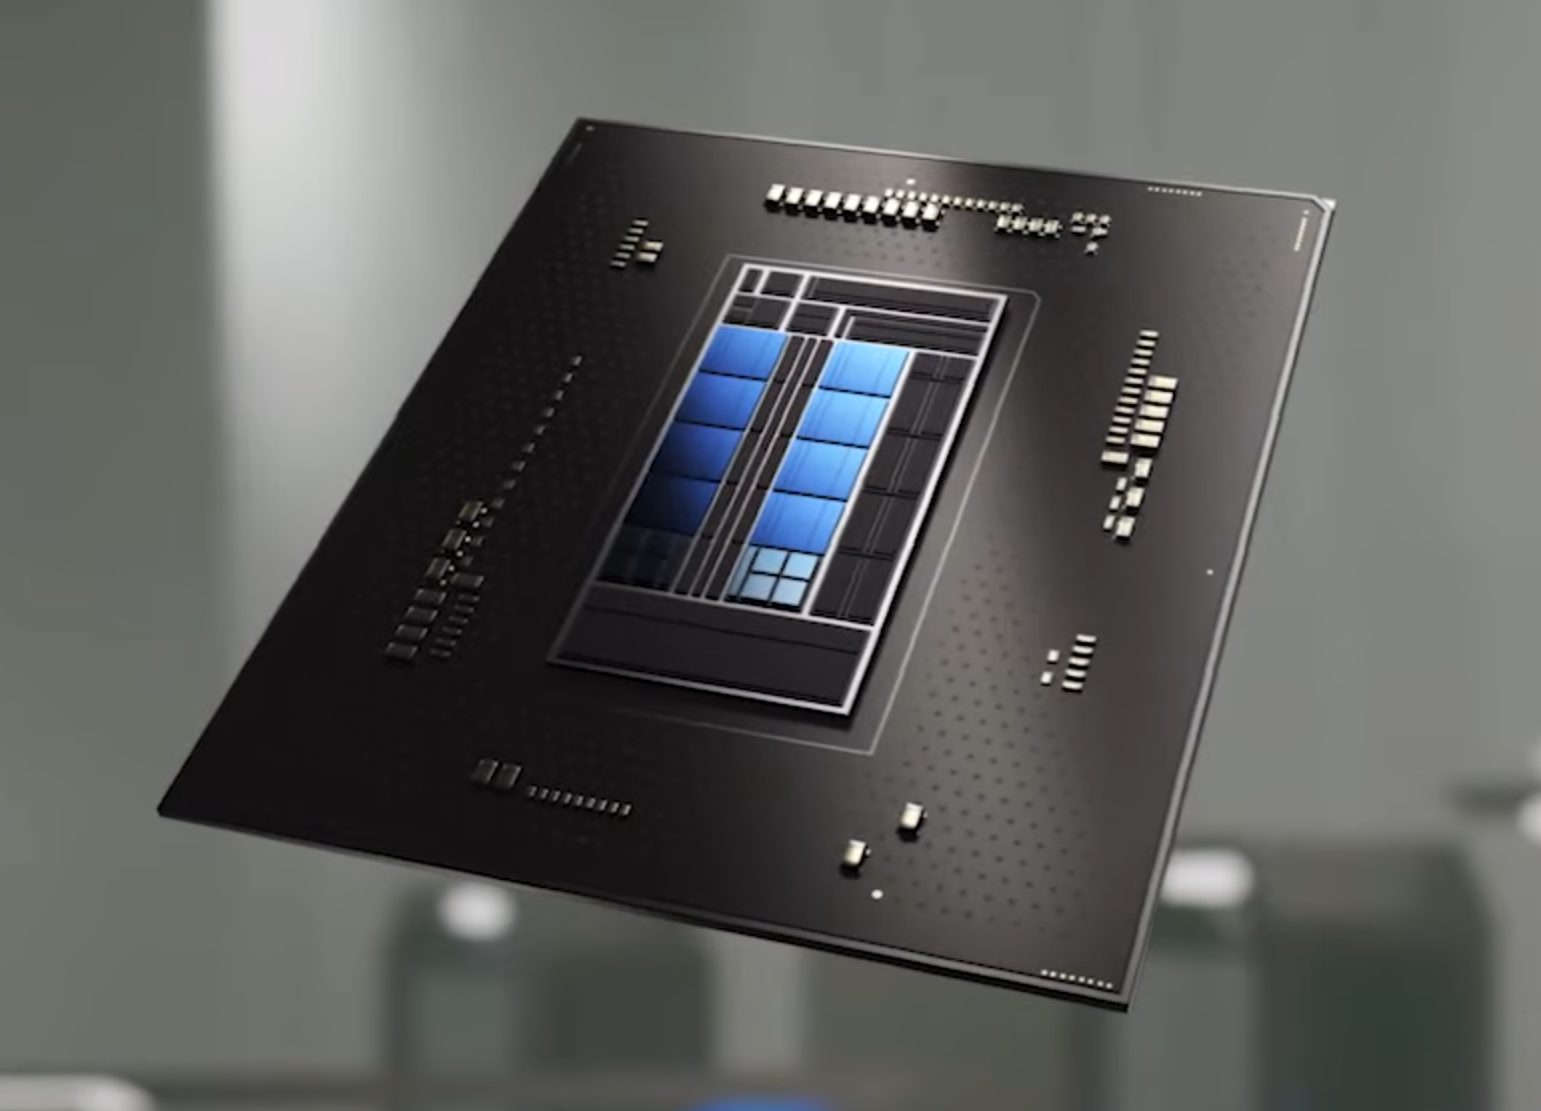
Now before you go on the bandwagon on bashing Intel itself take note that it is not Intel’s fault at all. The issue that arises is mostly due to DRM software and how it works. As you might know or not, Alder Lake has two sets of cores, standard performance cores, and power cores, and with Intel’s Thread Director on-chip right cores will be used for the right tasks, and here lies the issue. DRM software might detect Thread Director as something suspicious and malicious, and then cut access to the game because of this. Intel, of course, has reached DRM manufacturers and places documentation about how software should be developed with this hybrid technology in mind. Of course, newer games will be updated if needed and everything will work fine, also games on GOG will work fine because of GOG’s policy of no DRM store but some older ones might be left in limbo. They could work fine but DRM might be triggered and prevent them from loading, usually, game developer itself removes DRM protection after some time but that is not really always the case and there is a chance that some games might simply just not work on Alder Lake CPU only because of DRM protection.

Conclusion

I will admit that I have not been a great fan of DRM in general, I understand that game developer want to protect themselves from piracy but how it looks they were not really successful with it. Even today single-player games get pirated on the day they are released and legally bought ones always make trouble for people that actually paid for them. I remember times when DRM was awful and you could install a game a limited number of times, luckily this was removed but it seems that many old habits still remain sadly and DRM is present even today in various forms. GOG is proof that people will buy DRM-free games and that they will support this kind of model. Maybe it is time to forget about fighting against piracy, you will not make it go away and people who do not want to buy games will not buy them, on other hand many users that do buy games, if they cannot use them they will rest to pirated version since that one will work. It is sad to see that pirated software can work better than a legal one and offer a more pleasant experience.
Read More
Can’t pair Bluetooth keyboard, Check the PIN
If you have suddenly run into a problem when trying to connect or pair your Bluetooth keyboard with your Windows 10 computer, read on as this post will guide you on how exactly you can resolve the problem. This kind of problem typically occurs when you’ve disabled the Bluetooth option. However, this option is already enabled and you still encountered the same error message saying, “Check the PIN and try connecting again”, then you need to troubleshoot the problem further. In most cases, this kind of issue can be fixed when you restart your computer and go to the Windows Settings and select the “Add Bluetooth or other devices” option and then put the keyboard into pairing mode. And when the keyboard appears in the “Add a device” dialog box, just select it. On the other hand, if your Bluetooth keyboard won’t get connected to your Windows 10 computer and you encounter an error that says, “Can’t pair Bluetooth keyboard, Check the PIN and try connecting again”, then you need to check out the options provided below but before you do so, make sure that you create a System Restore point first as some of the troubleshooting options provided involves the Windows Registry.

Option 1 – Try to use the Device Pairing Wizard

The Device Pairing Wizard is the one that allows your computer to look for any new devices and display them underneath it. All you have to do to use this wizard is to follow its instructions to connect your Bluetooth device to Windows 10. To get started, follow these steps:
  • First, tap the Win + R keys to launch the Run utility and type “devicepairingwizard” in the field, and then hit Enter to run the Device Pairing Wizard.
  • After that, wait for a couple of seconds until the devices appear. Once they do, select the Bluetooth device you wish to add.
  • A new screen with a passcode should appear instantly. You need to take note of the given passcode and type them on your Bluetooth keyboard.
  • Once done, tap Enter. This should help in pairing your computer to your Bluetooth keyboard.

Option 2 – Try to use the Registry Editor

The next thing you can do to resolve the pairing issue with your Bluetooth keyboard is to use the Registry Editor by following these steps:
  • Tap the Win + R keys to open the Run utility and type “Regedit” in the field and then hit Enter to open the Registry Editor.
  • Next, navigate to this registry path: HKEY_USERS/.DEFAULT/Software/Microsoft/Windows/CurrentVersion/Bluetooth/ExceptionDB
  • From there, look for the folder named “Addrs” and expand it. If you see any folders or keys under it, select them and delete them. These keys represent the MAC address of your Bluetooth devices.
  • Once you’re done, restart your computer and try to pair your Bluetooth keyboard once more.

Option 3 – Try running the Bluetooth Troubleshooter

As you know, Windows 10 has various troubleshooters with user-friendly interfaces where you can utilize them to fix issues in your PC. And since you’re dealing with some Bluetooth problem, you have to run the Bluetooth Troubleshooter.
  • Open the Windows 10 Settings.
  • Then go to Update & Security > Troubleshoot.
  • You should find the option for Bluetooth on your right-hand side – click on it then click on the “Run the troubleshooter” option.
  • Now follow the next screen options.

Option 4 – Try to reinstall or update the Bluetooth driver

The issue might have something to do with the Bluetooth drivers. It could be that it is outdated and needs to be updated or that you recently updated it and since you have trouble pairing your Bluetooth keyboard, you can update, rollback, or uninstall the Bluetooth drivers. How? Follow the steps below.
  • Tap the Win + X keys to open the Device Manager.
  • Next, look for the Bluetooth device and right-click on it.
  • Select the option “Update driver”.
  • After that, a new popup window will appear. In there, select the option, “Search automatically for updated driver software”.
Note: Checking the update may take a few minutes so you’ll have to wait until it finishes. If it is able to find an update, you must install it.
Read More
Disable Facebook face recognition
Facebook has an algorithm inside it that can recognize your face in pictures and videos which is meant to help people tag friends when they upload media into Facebook. It is a neat feature meant to help all Facebook users but what if we do not want to be detected in pictures and videos? What if we do not want to be tagged? If you are one of the Facebook users that do not wish to be detected and recognized by Facebook in media keep on reading to find out how you can disable this option.
  1. Open the Facebook website and log into your account.
  2. Click on the arrow visible in the top menu bar.
  3. Select the Settings & privacy option.
  4. Click on the Settings option.
  5. Switch to the Face recognition tab on the left-hand side.
  6. Click the Edit button.
  7. Select No from the drop-down list.
And you are done, you do not need to log out or restart facebook in order for changes to have an effect. Now you are free from face recognition and detection.
Read More
1 2 3 162
Logo
Copyright © 2022, ErrorTools. All Rights Reserved
Trademarks: Microsoft Windows logos are registered trademarks of Microsoft. Disclaimer: ErrorTools.com is not affiliated with Microsoft, nor claim direct affiliation.
The information on this page is provided for information purposes only.
DMCA.com Protection Status