Fix Error 0xe0434f4d

[vc_row][vc_column][vc_column_text]

How To Fix Error 0xe0434f4d

What is Error 0xe0434f4d?

Error 0xe0434f4d displays when a remote computer runs an instance of the SQL Server 2005 but it fails to initialize. When the plan is started, this error displays in a status window on the SQL Server. Also, when the Update-OffilineAddressBook cmdlet is started in Microsoft Exchange Server, this error can occur.

Solution

Restoro box imageError Causes

Error 0xe0434f4d can occur for possibly two main reasons. The first one is when the System Attendant Service is not properly running, and the second when you don’t have the permission to run the update. Other causes are when the .NET Framework 2.0 security does not allow sqlplanlaunch access to run from a shared network. Another cause is when the Offline Address Book (OAB) is not found in the Configuration Domain Controller server that the server of OAB generation uses.

Further Information and Manual Repair

In case you didn’t know, the Offline Address Book generation server is a mailbox server, and in order to resolve error 0xe0434f4d, you will have to replicate the OAB object to the Configuration Domain Controller server. In order to do so, follow steps:

  • Go to start and click on All Programs, then go and click on Microsoft Exchange Server 2010. Click on Exchange Management Console
  • In Exchange Management Console, go to Server Configuration and click on Mailbox
  • In the details, go to mailbox server that generates Offline Address Book and right-click it, then go to Properties
  • In the Properties, click on System Setting and locate the domain controller name in the box that reads Domain controller servers being used by Exchange

Make sure the OAB object is reproduced in the Configuration Domain Controller Server. Follow these steps to do that:

  • Go to Start and click on Run. Type Adsiedit.msc in Open box and press Enter. Right-click on ADSI Edit and click on Connect to
  • Locate a list reading Select a well-known naming context, and from there select Default naming context. In a Select or type a domain or server window, type FQDN (fully qualified domain name) of the Configuration Domain Controller server which was determined in step 1, and click OK
  • Expand Configuration [dc.domain.com], expand CN=Configuration, DC=domain, DC=com, expand CN=Services, expand CN=First Organization, and expand CN=Address Lists Container
  • Click on CN=Offline Address Lists and make sure the OAB object is listed on the details pane

When the OAB generation server receives this, then it will connect to the Configuration Domain Controller server and will locate the OAB object. If the OAB generation server is unable to find the OAB object, then the error will return on the cmdlet.

On SQL Server, you should change the .NET permissions to allow sqlplanlaunch application access to run from shared administration. For that, follow these steps:

  • On ArchiveIQ Server, open System from the Control Panel and note down the computer name
  • On SQL Server, log in as administrator and open the command prompt
  • On the command prompt type, ‘C:windowsmicrosoft.netframeworkv2.0.50727caspol.ece –m –ag l – url file:\[Archive IQServer Computer Name]AlQRemote$*FullTrust and Press Enter. Type yes and press Enter again to confirm the permission changes.

[/vc_column_text][/vc_column][/vc_row]

If you like to learn and find out more about various Windows errors, and how to repair them go to our vast archive or use search to find articles that will explain and help you in solving your issue.
However, if you prefer to do things fast and with automatization then we are proposing to use an automated solution for your issues. The application that we are recommending is Advanced System Repair Pro
Advanced System Repair utilizes multiple tools all in one to give you a quick, simple, reliable, and very thorough diagnosis of your PC. It brings you all the tools you need in one program to clean, fix, protect, optimize and boost your PC!
1-Click Maintenance
All the tools to make it simple and easy! It's like having a professional technician at the click of a mouse.

Junk Cleaner
Keeping your computer free from unnecessary clutter also helps make your computer last longer. Like any other machine, if you keep it clean and take care of it, it will serve you better for longer!

Optimize background apps
Optimize applications background activity with the built-in Application Optimizer feature.

Disk Defrag
With a simple 1-click, Advanced System Repair speeds up your PC by assembling fragmented files on your machine and organizing them more efficiently.

Malware Removal
Finds and removes all types of harmful malware including trojans, worms, bots, adware, spyware, PUPs, and more!

Privacy Cleaner
The all-in-one privacy suite to Clean Your Tracks & Protect Your Privacy! Make your computer safe, secure, and more efficient!

System Tweak/Optimizer
ASR will analyze your complete system and settings to adjust your PC to function at its maximum performance.

Registry Cleaner
Over time, as you install and uninstall applications, the registry can become cluttered with old entries and broken settings which can result in program crashes, and annoying messages and slow the computer down.
Visit our Advanced System Repair Pro Download page to inform yourself about all the benefits of this software and get a free trial copy of it.
advanced system repair pro

Advanced System Repair Pro

One-click automated PC repair solution
ASR logo
With Advanced System Repair Pro you can easily
Replace damaged files
Restore performance
Free disk space
Remove Malware
Protects WEB browser
Remove Viruses
Stop PC freezing
DOWNLOAD
Privacy Policy | Terms of Use | Uinstall
Advanced System Repair Pro is compatible with all versions of Microsoft Windows including Windows 11

Share this article:

You might also like

Microsoft removed password as a requirement
ms password gone
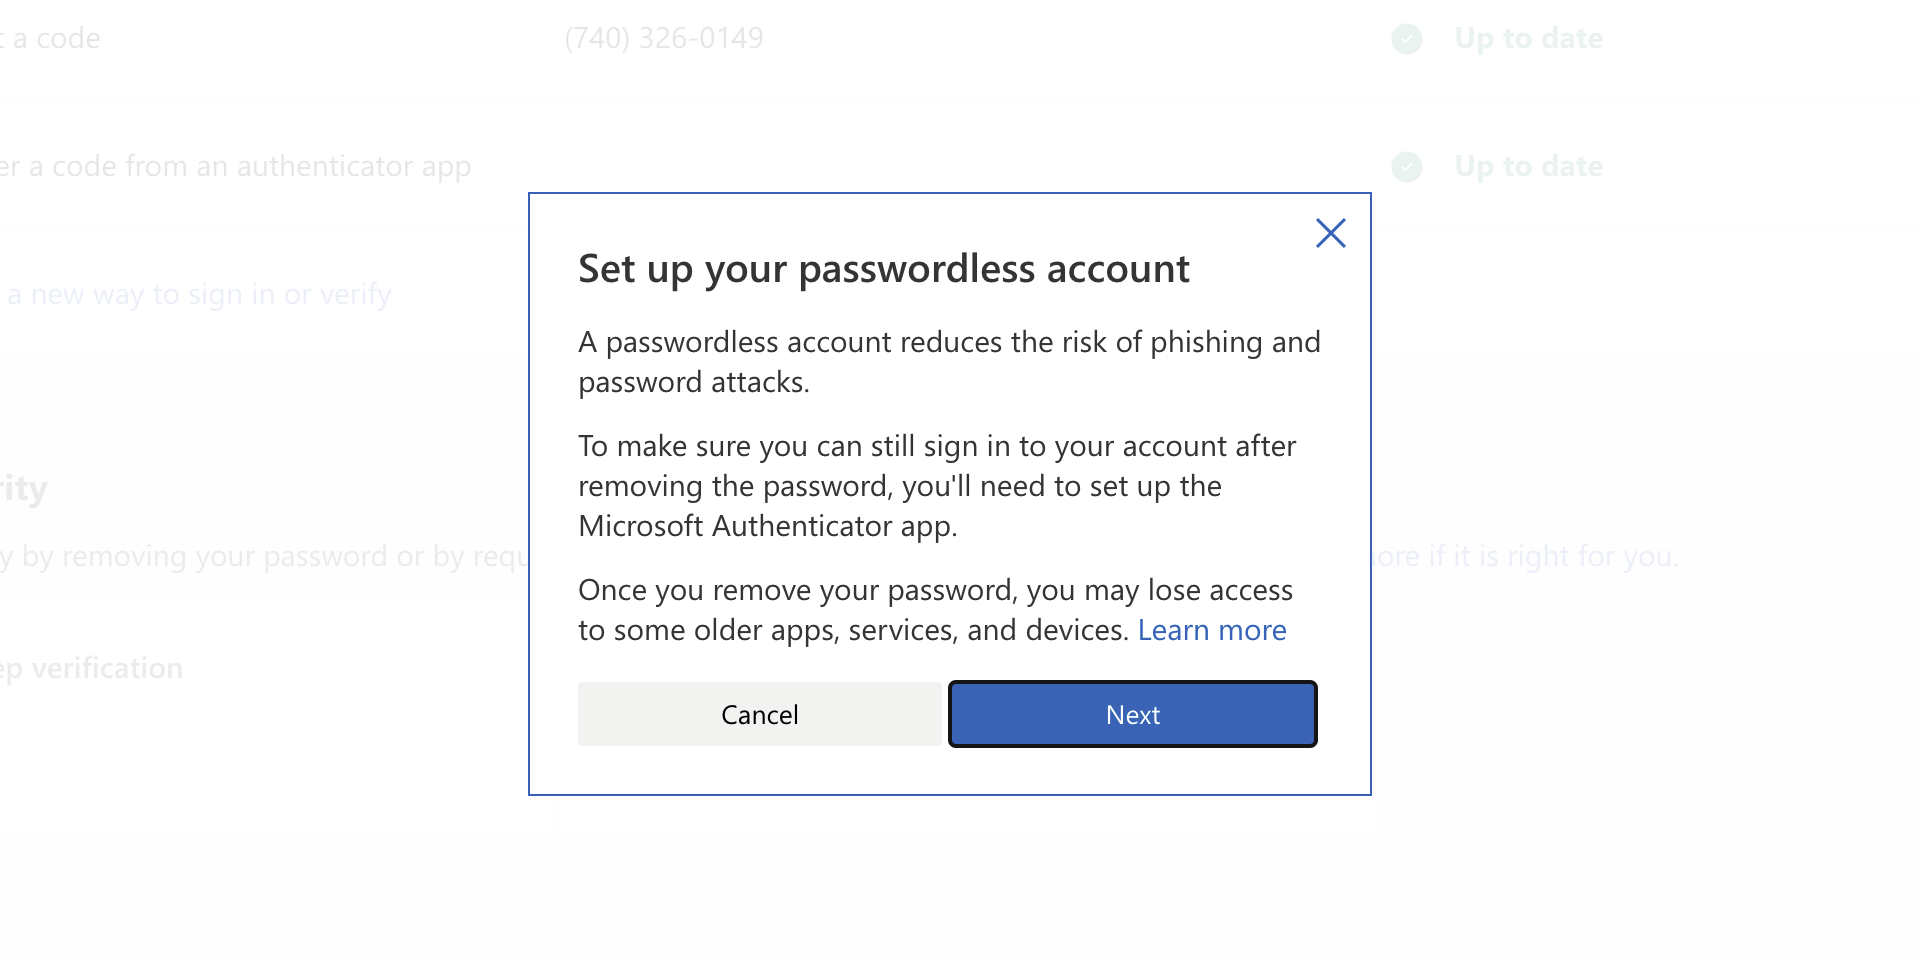
As of the time of writing this article you no longer need or are required to have a password if you plan to log in to your Microsoft account. Microsoft explored various options for account security and came to the conclusion that passwords are obsolete. Microsoft is letting you access your account through the Microsoft Authenticator app, Windows Hello, a security key, SMS verification, or email verification code. All of these methods are way better in terms of security than passwords.

How to turn these features on?

To get rid of your Microsoft password, the process is simple. You simply need to go to your Microsoft account, click “advanced security options,” then “enable passwordless accounts” under the Additional security section.
Read More
The boot configuration data store can not open
The Boot Configuration Data or BCD files have the instructions required by the Windows operating system in order to properly boot the computer. So if you experience any trouble when you boot your computer, then it is possible that it is due to some misconfiguration or even corrupted Boot Configuration Data files. And if you also encounter an error saying,
“The boot configuration data store could not be opened”
while you try to carry out any command on the bcedit.exe, then you’ve come to the right place as this post will guide you on how you can fix this error in Windows 10. This kind of error could pop up if the system is not able to locate the specified file. It is also possible that the requested system device can’t be found or that the boot configuration data store could not be opened. In addition, when you open the System Configuration or MSConfig, you might notice that there is no Boot data, and according to the reports, is that when you try to dual boot the computer, the installer will replace the default bootloader.

Explanation

In case you don’t know, Windows’ earlier versions were stored in the “Boot.ini” file. You can find the entry in the EFI firmware boot manager of the EFI-based operating system which is located at EFIMicrosoftBootBootmgfw.efi. Whatever the cause of the error is, there are several suggestions you can check out to resolve the problem. You can try to set an entry option value in BCD or enable the Advanced options menu, as well as rebuild the BCD. Before you proceed with the troubleshooting options provided below, make sure that you boot your computer into the Advanced Recovery Mode first since that’s where you can find Command Prompt under the Advanced Options. In addition, you also have to suspend or disable BitLocker and Secure Boot on your PC.

Option 1 – Try to set an entry option value in BCD

  • Once you’re in the Advanced Options, select Command Prompt.
  • Next, execute this command to set an entry point: bcdedit /set {current} Description "TheNameYouWant"
  • After the command has been executed, it will enable the system to trust a version of Windows that is not trusted by default. This should fix the problem, if not, follow the next given options below.

Option 2 – Try to specify the BCD file

  • In the elevated Command Prompt, execute this command: bcdedit /store c:BootBCD
  • Once done, the command will give you a list of options and then execute this next command: bcdedit /store c:BootBCD /set bootmenupolicy legacy
  • After that, restart your computer and select your Windows and then tap the F8 key right away.
Note: When you select the legacy option, the Advanced Options menu will be available during the computer boot up and then you can select into which operating system you can boot your computer into.

Option 3 – Try to rebuild the BCD files

The first thing you can do to resolve the issue is to Rebuild Boot Configuration Data or BCD files.
  • You can start by booting into the installation environment for Windows 10 from an installation media.
  • After that, click on Repair your computer and on the blue screen, select Troubleshoot and then select the Advanced options menu.
  • From there, select Command Prompt and once you open it, enter each one of the commands given below by sequence.
    • bootrec /FixMbr
    • bootrec /FixBoot
    • bootrec /ScanOS
    • bootrec /RebuildBcd
  • Once you’re done executing the commands given above, type “exit” to close the Command Prompt window and then restart your computer and see if it fixed error code 0xc000014c.
Read More
Fixing Your Firefox profile cannot be loaded
Caching is used to enhance the performance of applications in Windows and other operating systems. It helps applications to load faster but there are times when the cache can get damaged or corrupted and as a result, you might encounter some issues. One of them is in the Firefox browser where the “Your Firefox profile cannot be loaded, It may be missing or inaccessible” error message may appear. You could also encounter this kind of error when Firefox is unable to access or find the profile folder. In case you don’t know what the profile folder is, it is where Firefox stores your user data and settings by default. Firefox pulls information from this folder each time you choose to open it. You can find this default Firefox profile folder under the %APPDATA%MozillaFirefoxProfiles folder. If you experience issues when trying to access the Profile Manager, you have the option to create a new default Firefox profile folder. This will fix the “Your Firefox profile cannot be loaded, It may be missing or inaccessible” error. How? Simply follow the given steps below. Step 1: Tap the Win key or click the Windows Start button to open the Start menu. Step 2: Next, type “%appdata%” in the field and hit Enter to open the hidden AppDataRoaming folder. Step 3: Now double click the Mozilla folder as well as the Firefox folder. Step 4: From there, look for the “profiles.ini” file and delete it. Make sure that you don’t delete the Profiles folder which should have the icon of a file folder. Note: Keep in mind that the .ini file extension is identified as the file that features a gear icon beside the “Configuration settings” or “Application settings”. Step 5: Once you open Firefox, a new profile will be created. On the other hand, if you know where your profile exists, you can try the following steps below to help Firefox locate it.
  • First, you need to move the profile folder back to its original location.
  • Next, restore the profile folder’s original name if you have modified it.
  • Then create a new profile using the Profile Manager and give it an appropriate name.
  • Now click on the Choose Folder button and select the profile folder you have moved or renamed before you exit the Create a new profile wizard.
Read More
Fix intelppm.sys error in Windows 10
intelppm.sys blue screen of death is linked to an outdated driver, if you received this error do not sweat we have simple solutions for you. Please keep on reading in order to find out what can you do to fix this error.
  1. Update driver Go to the device manager and manually update old-dated drivers. Note that this will take some time because you will need to update each device manually through the device manager but in the end, it will fix the issue.
  2. Use automated application Instead of going through each device one by one manually get a dedicated driver fixing device like DRIVERFIX and update all drivers automatically.
Read More
A Quick Guide to Fixing Error 2046

Resolve Error 2046

Error 2046 - What is it?

Error 2046 is an error code related to Adobe Flash Player. It usually occurs while watching movies or videos on the web browser. This error code may interrupt video display and hamper you from watching your favorite movies and videos.

Solution

Restoro box imageError Causes

Narrowing down the reason for the occurrence of this error code is quite difficult virtually because it may trigger due to several reasons such as:
  • There might be issues with Adobe Flash Player settings
  • Ad-blocking products
  • Windows not updated
  • Registry issues
  • Malware infection
  • Flash Player Add on not properly installed

Further Information and Manual Repair

The good news is that the error 2046 is not fatal. It is easy to fix. In fact, it is so easy to repair that you can do it all by yourself even if you are not a computer whiz. You don’t have to hire a professional and spend hundreds of dollars on repairs. Here are some of the many manual solutions that you can try to fix this issue on your computer screen:

Reinstall Adobe Flash Player

Since this error code is largely related to Adobe Flash Player, it is advisable to start by reinstalling the Flash Player. Here is a step-by-step guide to help you work through it.
  1. First, click start and then select the control panel.
  2. Now click on programs and then uninstall Flash Player from the program list.
  3. After that’s done, reboot your computer.
  4. Now download Adobe Flash Player from a reliable website and run it.
If it works perfectly, then the issue is resolved. If not, then try other methods given below.

Re-Enable Flash Player Add-on

Adobe Flash Player add-on is basically installed in IE (Internet Explorer) which is loaded each time you load IE. Sometimes the problem with this add-on can also generate error 2046.
  1. To resolve this, open Internet Explorer and press Alt-Key.
  2. Select tools and then manage add-ons.
  3. Now select Adobe Flash Player Active X and then click disable tab.
Once that’s done, restart the web browser and repeat the same steps but this time click enable button. This will hopefully resolve the issue.

Unblock Ad Blocking Products

Sometimes error 2046 may pop up on your screen if you use ad-blocking products like AdBlock Plus. If so, then try uninstalling ad-blocking products installed on your PC to fix the issue.

Install Window Update

Microsoft releases new updates every now and then. These updates are made with the objective of solving bugs and run-time errors like error 2046. Therefore if the error code is related to Windows updates then to resolve it is it advisable to launch the Windows update program and update your operating system. For this, click Start, All Programs, and then click Windows Update. Now click the Check for updates button and download and install the new updates. Once that is complete, restart your PC to bring changes into effect.

Scan for Malware and Look For Registry issues

Whether the issue is related to malware or the registry, it is recommended to download Restoro. This is a next-generation and a multi-functional PC Fixer embedded with a powerful antivirus and a registry cleaner. Run it on your PC and scan for viruses and registry issues and click repair to resolve. It is user-friendly and compatible with all Windows versions. Click here to download Restoro to resolve error 2046.
Read More
A Quick Guide to Resolving Error 1512

How to Fix Error 1512

Error 1512 - What is it?

Error 1512 is a type of runtime error code. This error may hamper your ability to run and load your desired programs on Windows PC. There are increased chances of runtime error 1512 occurring when system files go missing or get corrupt. Symptoms of this error code include:
  • Slow PC speed
  • Window System freeze

Solution

Restoro box imageError Causes

There are several for the occurrence of runtime error 1512. These include:
  • Faulty or outdated drivers
  • Poor Program installation
  • Damaged Windows Registry
  • Viruses tampering the system settings/memory
  • Broken or incorrect Registry entries
  • Damaged Windows registry

Further Information and Manual Repair

To resolve this issue you don’t have to hire a professional and spend hundreds of dollars to get it fixed. Here are some of the best and easy do-it-yourself methods to repair error 1512 on your system in a few minutes. These methods are very easy to work around and do not require any kind of technical expertise.

Method 1 - Uninstall and then reinstall the Same Program

Sometimes this runtime error may pop up due to poor program installation. In such an event, it is advisable to uninstall the program and then reinstall it again properly. To do so, go to the start menu, and click on control panel. Now select the program & features option. Here you will find the option Add/Remove Program. Remove the program causing error 1512. Once the program is removed, reinstall it again.

Method 2 - Run an Antivirus Program

Computer viruses are capable of tampering with system settings. Due to this reason you might experience runtime errors like 1512 on your PC. These malicious programs usually enter the system through phishing emails or website downloads. To resolve the issue, you need to run a powerful antivirus program. An antivirus removes all sorts of malicious programs hiding in your PC like malware, spyware, and malware that are responsible for generating runtime errors.

Method 3 - Update the Outdated Drivers on your PC

If the error still persists, then it is suggested to update outdated drivers. Faulty and outdated drivers can also trigger runtime error 1512. To do this, go to the Device Manager. Here use the Driver update wizard to make updates.

Method 4 - Remove the Invalid Registry Entries and Repair the Damaged Registry

The best way to perform both tasks is to download Restoro. It is embedded with a registry cleaner that is quite easy to use. The registry cleaner removes all invalid entries in seconds, cleans the cluttered registry by wiping out all the redundant and unnecessary files. The damaged registry is then repaired and resumes its normal function. Click here to download Restoro and resolve runtime error 1512.
Read More
How to remove EasyDocMerge from your System

EasyDocMerge Toolbar is a Browser Hijacker for Google Chrome. Usually, such browser extensions are installed without your knowledge. These types of Browser Hijackers are often the cause of many problems while surfing the Internet. The most common problems are unwanted pop-ups, underlined words, additional ads, sponsored links, to generate web traffic and earn revenue of the advertising networks by gathering the users browsing data and sending it back to the Mindspark ads network.

When installed this extension will hijack your home page setting it to MyWay.com, it will also change your new tab page to EasyDocMerge (Powered by MyWay.com Search).

About Browser Hijackers

Browser hijacking is a form of an unwanted program, commonly a web browser add-on or extension, which then causes modifications in the browser’s settings. Browser hijacker malware is developed for a variety of reasons. It redirects you to the sponsored internet sites and inserts adverts on your browser that assist its creator to generate earnings. A lot of people think that the browser hijacker is only a harmless website but that is not the case. Nearly every browser hijacker poses an existent threat to your online safety and it’s important to classify them under privacy dangers. They don’t just mess up your browsers, but browser hijackers can even modify the computer registry, leaving your computer susceptible to various other types of attacks.

Key symptoms that your web browser has been hijacked

There are various signs of web browser hijacking: the home page of the web browser is changed unexpectedly; new bookmarks pointing to porn websites are added to your favorite pages; the essential web browser settings are modified and unwanted or insecure resources are added to the trusted sites list; you’ll see many toolbars on your web browser; you see a lot of pop-up ads on your computer screen; your web browser has become unstable or starts running sluggishly; Inability to navigate to particular sites, particularly anti-malware and other computer security software sites.

How they infect computers

Browser hijackers infect computer systems by numerous means, including via a file-share, a drive-by download, or an infected e-mail attachment. They can also originate from any BHO, extension, add-on, toolbar, or plug-in with malicious intent. A browser hijacker may also come bundled up with some free software that you unintentionally download to your computer, compromising your internet security. Typical examples of browser hijackers include CoolWebSearch, Conduit, Coupon Server, OneWebSearch, RocketTab, Searchult.com, Snap.do, and Delta Search. Browser hijackers may record user keystrokes to gather potentially important information that leads to privacy issues, cause instability on computers, drastically disrupt user’s browsing experience, and finally slow down the system to a point where it will become unusable.

Removal

Certain browser hijacking could be simply reversed by discovering and eliminating the corresponding malware software from your control panel. In some cases, it can be a difficult job to identify and eliminate the malicious component because the associated file might be running as part of the operating system process. You should consider carrying out manual fixes only if you are a tech-savvy person, as potential risks are associated with tinkering with the system registry and HOSTS file. Installing and running antivirus programs on the affected computer could automatically erase browser hijackers and other malicious applications. Safebytes Anti-Malware contains a state-of-the-art anti-malware engine to help you prevent browser hijacking in the first place, and clean up any pre-existing issues

What you can do if Virus Prevents You From Downloading Or Installing Anything?

Practically all malware is bad, but certain kinds of malware do a lot more damage to your computer than others. Some malware sits in between your computer and the internet connection and blocks a few or all internet sites that you would like to visit. It will also prevent you from adding anything to your PC, especially antivirus software. If you’re reading this now, you might have probably recognized that a malware infection is the real cause of your blocked web connectivity. So how to proceed if you need to install an antivirus application such as Safebytes? Although this kind of problem can be difficult to get around, there are a few steps you can take.

Eliminate viruses in Safe Mode

If any virus is set to run automatically when Microsoft Windows starts, stepping into Safe Mode could block this attempt. Only minimal required programs and services are loaded when you boot your laptop or computer in Safe Mode. You will need to do the following to eliminate malware in Safe mode. 1) At power on/start-up, hit the F8 key in 1-second intervals. This should bring up the Advanced Boot Options menu. 2) Select Safe Mode with Networking using arrow keys and press ENTER. 3) When this mode loads, you should have the internet. Now, utilize your browser normally and navigate to https://safebytes.com/products/anti-malware/ to download and install Safebytes Anti-Malware. 4) Once the software is installed, allow the diagnostic scan to run to eliminate viruses and other threats automatically.

Obtain the security program using an alternate web browser

Some malware might target vulnerabilities of a specific web browser that obstruct the downloading process. The best way to avoid this problem is to pick a web browser that is renowned for its security features. Firefox has built-in Phishing and Malware Protection to help keep you secure online.

Run anti-malware from your USB drive

To effectively get rid of the malware, you need to approach the problem of running antivirus software on the infected computer from a different angle. Abide by these steps to run the anti-virus on the affected computer. 1) On a virus-free PC, download and install Safebytes Anti-Malware. 2) Plug the Flash drive into the clean computer. 3) Double-click the Setup icon of the antivirus program to run the Installation Wizard. 4) Choose the flash drive as the destination for saving the file. Follow the on-screen instructions to finish the installation process. 5) Remove the pen drive. You can now utilize this portable anti-virus on the infected computer system. 6) Double-click the antivirus program EXE file on the USB flash drive. 7) Simply click “Scan Now” to run a complete scan on the affected computer for viruses.

Protect Your Computer Against Viruses and Malware With SafeBytes Security Suite

Today an anti-malware program can protect your laptop or computer from different types of internet threats. But how to select the best one amongst countless malware protection software that is available out there? As you might be aware, there are several anti-malware companies and tools for you to consider. A few are really worth your money, but many aren’t. You need to choose one that is dependable, practical, and has a strong reputation for its malware source protection. Among few good applications, SafeBytes Anti-Malware is the strongly recommended software program for the security-conscious user. SafeBytes anti-malware is a powerful, highly effective protection application made to help end-users of all levels of computer literacy in detecting and removing harmful threats from their computer. After you have installed this software, SafeByte's sophisticated protection system will ensure that no viruses or malicious software can seep through your personal computer.

SafeBytes has fantastic features when compared to various other anti-malware programs. Listed below are some of the great features included in the software.

Real-time Active Protection: SafeBytes gives you round-the-clock protection for your personal computer limiting malware intrusions instantly. It will examine your PC for suspicious activity at all times and safeguards your PC from illegal access. Antimalware Protection: Safebytes is made on the best virus engine in the industry. These engines can identify and get rid of threats even during the initial phases of a malware outbreak. “Fast Scan” Features: SafeBytes’s high-speed malware scanning engine minimizes scanning times and extends the life of the battery. Simultaneously, it will effectively find and get rid of infected files or any internet threat. Web Protection: SafeBytes checks and gives a unique safety rating to every website you visit and block access to webpages known to be phishing sites, thus protecting you against identity theft, or known to contain malicious software. Low CPU Usage: SafeBytes is a lightweight application. It consumes an extremely small amount of processing power as it runs in the background so you are free to use your Windows-based computer the way you want. 24/7 Premium Support: Professional technicians are at your disposal 24/7! They will immediately fix any technical issues you may be encountering with your security software. Simply put, SafeBytes has formulated a meaningful anti-malware solution that is aimed to protect your computer against various malware. Malware trouble will become a thing of the past once you put this software to use. For top protection and the best value for money, you can’t get better than SafeBytes Anti-Malware.

Technical Details and Manual Removal (Advanced Users)

If you want to manually remove EasyDocMerge without using an automated tool, it may be possible to do so by removing the application from the Microsoft Windows Add/Remove Programs menu, or in cases of browser plug-ins, going to the browsers AddOn/Extension manager and removing it. You’ll likely also want to totally reset your browser to its default configuration settings. To be certain of complete removal, find the following registry entries on your computer and remove them or reset the values appropriately. However, this is a tricky task and only computer experts can perform it safely. Moreover, some malicious programs are capable to defend against its removal. It is highly recommended that you do the removal process in Windows Safe Mode.
Files: %UserProfile%\Local Settings\Application Data\EasyDocMergeTooltab %LOCALAPPDATA%\Google\Chrome\User Data\Default\Extensions\mabloidgodmbnmnhoenmhlcjkfelomgp %UserProfile%\Local Settings\Application Data\Google\Chrome\User Data\Default\Extensions\mabloidgodmbnmnhoenmhlcjkfelomgp %PROGRAMFILES(x86)%\EasyDocMerge_ex %PROGRAMFILES%\EasyDocMerge_ex %USERPROFILE%\Application Data\EasyDocMerge_ex %USERPROFILE%\AppData\LocalLow\EasyDocMerge_ex %UserProfile%\Local Settings\Application Data\EasyDocMerge_ex Registry: HKEY_CURRENT_USER\Software\AppDataLow\Software\EasyDocMerge_ex HKEY_CURRENT_USER\Software\EasyDocMerge_ex HKEY_LOCAL_MACHINE\SOFTWARE\Wow6432Node\Microsoft\Internet Explorer\Low Rights\ElevationPolicy\5e3ee57e-7d53-458f-a124-16aab06de2d6 HKEY_LOCAL_MACHINE\SOFTWARE\Wow6432Node\Microsoft\Internet Explorer\Low Rights\ElevationPolicy\64366ff9-336f-4002-a665-406a1d259cd3 HKEY_LOCAL_MACHINE\SOFTWARE\Wow6432Node\Microsoft\Internet Explorer\Low Rights\ElevationPolicy\87008eb3-6282-4075-9889-62f381451926 HKEY_LOCAL_MACHINE\SOFTWARE\Wow6432Node\Microsoft\Internet Explorer\Low Rights\ElevationPolicy\96107269-cd2e-4175-a61a-5c2e8540e8a5 HKEY_LOCAL_MACHINE\SOFTWARE\Microsoft\Internet Explorer\Low Rights\ElevationPolicy\2741d16e-6298-4345-8988-7979ffd45266 HKEY_LOCAL_MACHINE\SOFTWARE\Microsoft\Internet Explorer\Low Rights\ElevationPolicy\5e3ee57e-7d53-458f-a124-16aab06de2d6 HKEY_LOCAL_MACHINE\SOFTWARE\Microsoft\Internet Explorer\Low Rights\ElevationPolicy\64366ff9-336f-4002-a665-406a1d259cd3 HKEY_LOCAL_MACHINE\SOFTWARE\Microsoft\Internet Explorer\Low Rights\ElevationPolicy\87008eb3-6282-4075-9889-62f381451926 HKEY_CURRENT_USER\Software\Microsoft\Internet Explorer\DOMStorage\easydocmerge.dl.tb.ask.com HKEY_CURRENT_USER\Software\Microsoft\Internet Explorer\SearchScopes\8bf0dd5e-ea06-48db-97a4-df286e054079 HKEY_CURRENT_USER\Software\Microsoft\Internet Explorer\Approved Extensions, value: 389672DB-CD13-4CF2-AED1-3170BC0DD6EC HKEY_LOCAL_MACHINE\SOFTWARE\Wow6432Node\Microsoft\Internet Explorer\SearchScopes\8bf0dd5e-ea06-48db-97a4-df286e054079 HKEY_CURRENT_USER\Software\EasyDocMerge HKEY_CURRENT_USER\Software\Microsoft\Internet Explorer\LowRegistry\DOMStorage\easydocmerge.dl.myway.com
Read More
Malware Guide: How to Remove BitCoinMiner

How to Easily and Quickly Remove BitCoin Miner

What is BitCoinMiner Malware?

BitCoinMiner is a Malware created with the intent to force computer systems to generate crypto-currency, namely Bitcoin. This is done without the consent and knowledge of a computer/system holder. This unwanted file bears no digital signature or publisher since the creators of such a heinous invention do not wish to be known. Technical details about BitCoinMiner Malware include:
Product Version: 1.0.0.0 Original File Name: crss.exe Entry Point:  0x000C5AAE

Assessment of BitCoinMiner Malware

After installation of the BitCoinMiner Malware, there were no visible signs of an infection or program files installed. However, based on research, BitcoinMiner Malware utilizes the CPU’s resources (est. to be about 50%). Computer users have reported that they recognized an unknown process utilizing the majority of their processing space. the bitcoin miner is used by the creators to penetrate a user’s system, in effect coercing each infected system to mine Bitcoins covertly. After years of mining, a user might discern that their computer is moving slouchy and may even encounter various forms of BSODs.   After Bitcoins have been mined in the infiltrated system, the cyber currency is then returned/ sent to the creator of the malware. This venture is a sly and deceptive way to earn Bitcoins since the currency is gaining much popularity.

Further Information on BitCoinMiner

BitCoinMiner works covertly. There are no obvious traces of this program running on a computer system. However, once a computer system is infiltrated, the computer user will realize that their CPU resources are strangely being used up, even while the computer idles. Another expression of BitCoinMiner is the addition of cookies of various sorts to a computer system. These include:
  • Tracking cookies
  • Advert (Adware) cookies
  • Casale Media (Spyware) cookies
  • Atwola (Spyware) cookies
  • Adtech (Spyware) cookies
Once BitCoinMiner is present on a computer system, it can potentially slow it down and also create back doors as a means to install other unwanted and harmful programs. To completely remove BitCoinMiner Malware from your computer, click here to download and install Spyhunter.
Read More
Calculator is not working in Windows
As you know, one of the basic apps in the Windows 10 operating system is the calculator and it can even be extended to a scientific calculator which makes it really useful for users. However, there are instances when you might encounter some issues while using this app. One of the issues about the Calculator app that’s been reported recently is that the Calculator app is not working. If you encounter the same problem, then you’ve come to the right place as this post will guide you on what you can do to fix the problem. Based on the reports, users claimed that the issue with the Calculator app occurred right after they’ve installed a feature update, while other users claimed that the Calculator app never really worked on their computers and there are also cases where the app opens but it either freezes or crashes. According to researchers, the main causes of the problem include a feature update that could’ve altered the settings. It could also be due to problems with the login account or corrupted and missing files, or the problem could also with the calculate app itself. To resolve this problem, here are some suggestions you can follow.

Option 1 – Run the System File Checker Scan

System File Checker or SFC is a built-in command utility that helps in restoring corrupted files as well as missing files. It replaces bad and corrupted system files to good system files that might be the reason why the calculator app is not working properly. To run the SFC command, follow the steps given below.
  • Tap Win + R to launch Run.
  • Type in cmd in the field and tap Enter.
  • After opening Command Prompt, type in sfc /scannow
The command will start a system scan which will take a few whiles before it finishes. Once it’s done, you could get the following results:
  1. Windows Resource Protection did not find any integrity violations.
  2. Windows Resource Protection found corrupt files and successfully repaired them.
  3. Windows Resource Protection found corrupt files but was unable to fix some of them.
  • Reboot your computer.

Option 2 – Run the DISM tool

You can also run the DISM Tool as it helps in repairing the Windows System Image as well as the Windows Component Store in Windows 10. Using this built-in tool, you have various options such as the “/ScanHealth”, “/CheckHealth”, and “/RestoreHealth” that could help in fixing the Calculator app.
  • Open the Command Prompt with admin privileges.
  • Then type in the following commands and make sure to hit Enter right after you type each one of them:
    • Dism /Online /Cleanup-Image /CheckHealth
    • Dism /Online /Cleanup-Image /ScanHealth
    • Dism (.)exe /Online /Cleanup-image /Restorehealth
  • Do not close the window if the process takes a while as it will probably take a few minutes to finish.

Option 3 – Try logging into your computer using a different User Account

You might want to try logging into a different User Account since it is possible that the issue could have something to do with your log-in account. Thus, you can isolate this possibility by logging into a different user account. If you don’t have any other user account, simply create a new one by clicking on the Start icon and then go to Settings > Account > Family & other users. From there, go to the Other user's section and click on the Add someone else to this PC option, and then inputs all the needed information and restarts your computer. Once your computer has restarted, log into your computer using the newly created user account.

Option 4 – Try to reset or reinstall the Calculator app

If the first three given options didn’t work, you might want to reset or reinstall the Calculator app. To do that, follow these steps:
  • Click on the Start button and go to Settings > Apps > Apps and features.
  • Next, look for the Calculator app from the app list and click on it to see its other options.
  • After that, select the Advanced options and go to the Reset section and then click on the Reset button to reset the Calculator app.
Note: You also have the option to reinstall the Calculator app. All you have the option to visit Microsoft Store and from there, uninstall the Calculator app.
Read More
A Quick Guide to Resolving Error Code 707

Fixing Error Code 707

Error Code 707 - What is it?

Error code 707 is a typical Gmail error. Gmail is an email service provided by the largest internet giant Google Inc. It is an email service that is most widely used by web-based email providers with more than 425 million active users worldwide. The error code 707 is usually displayed in any one of the following formats:
“Oops... the system encountered a problem (#707)” “Server error occurred and your email was not sent (error 707)”

Solution

Restoro box imageError Causes

The error code 707 may be triggered due to many reasons. These include:
  • Enabled Lab ‘Background Send’ feature on Gmail
  • Web browser history and cache is full of junk content
  • Outdated browser
Though this error code is not fatal it is advisable to fix it right away to avoid inconvenience and to ensure your email is sent right away without any delays.

Further Information and Manual Repair

Here are some of the easy DIY methods to repair and fix the error code 707 on your PC. These methods are simple and do not require any kind of technical expertise. So, even if you are not technically sound, you can repair the error code 707 on your system in no time.

Method 1

Sometimes you may experience error code 707 while sending email via Gmail because of the enabled Background send labs feature. To fix this error here’s what you must do: Log in to your Gmail account, click on the Gear Box, and select settings. Now simply switch to the lab tab under the settings. Here search for Background Send. If you can’t locate it, then scroll down and insert background Send in the find box. Once you find this lab feature, disable it. After disabling this feature, try resending the email. Hopefully, this will resolve the issue. Nonetheless, if the error 707 still persists, then try method 2 given below.

Method 2

The error 707 may also be triggered if your web browser becomes outdated. If so, then it is advisable to update the browser to resolve the issue. Simply download the latest browser version from a reliable website. After the installation is complete, log on to your Gmail account and then try to send an email. If the email is sent successfully, then the issue is fixed.

Method 3

Try clearing cache and web browser history.  When the web browser history and cache are full of junk files, then you might experience this error on your system. Sometimes this can also lead to registry issues. To remove the error and repair the registry immediately, download Restoro. This is a multi-functional and user-friendly PC Fixer compatible with all Windows versions and embedded with multiple powerful scanners including a registry cleaner. It scans your entire PC for such errors. It clears the registry, removes all obsolete and unnecessary files including cookies, web browser history, junk files, and invalid entries, and cleans it right away thereby fixing the error immediately. Click here to download Restoro and resolve error code 707.
Read More
1 2 3 162
Logo
Copyright © 2022, ErrorTools. All Rights Reserved
Trademarks: Microsoft Windows logos are registered trademarks of Microsoft. Disclaimer: ErrorTools.com is not affiliated with Microsoft, nor claim direct affiliation.
The information on this page is provided for information purposes only.
DMCA.com Protection Status