How to Fix Error Code HPQTRA08.exe

How to Fix Error Code HPQTRA08.exe

HPQTRA08.exe - What is it?

HPQTRA08.exe (Hewlett Packard Tray 08) is the Hewlett Packard Digital Imaging Monitor task. It is installed with the drivers of HP imaging products like PhotoSmart Printers.

It incessantly monitors and indicates the connectivity status with any recognizable HP product.

Simply put, HPQTRA08.exe is an exe (executable) file that contains step-by-step instructions that a computer follows to carry out a function.

HPQTRA08.exe error code is displayed in any of the following formats:

  • "Hpqtra08.exe Application Error."
  • "Cannot find hpqtra08.exe."
  • "Hpqtra08.exe not found."
  • "Error starting program: hpqtra08.exe."
  • "Hpqtra08.exe is not a valid Win32 application."
  • "Hpqtra08.exe failed."
  • "Faulting Application Path: hpqtra08.exe."
  • "Hpqtra08.exe has encountered a problem and needs to close. We are sorry for the inconvenience."
  • "Hpqtra08.exe is not running."

Solution

Restoro box imageError Causes

Error code HPQTRA08.exe can be triggered for several reasons. However, some of the most common causes include:

  • Corrupt Windows registry keys
  • Virus infection
  • Deleted, damaged, or corrupted HPQTRA08.exe file
  • HPQTRA08.exe file conflict
  • Corrupt or incomplete installation of Hp Digital Imaging

It is advisable to repair the error code HPQTRA08.exe on your PC immediately. Delays can lead to serious problems especially if the underlying cause of the error is related to registry corruption.

Further Information and Manual Repair

To resolve this error on your PC, you don’t need to hire a professional and pay hundreds of dollars for the repair. Simply try the DIY methods listed below to fix the problem right away.

Method 1 - Download and Install HPQTRA08.exe File

If the error cause is related to deleted, corrupted, or damaged HPQTRA08.exe file, then the best way to fix the problem is to install the HPQTRA08.exe file on your PC.

However, first, make sure the site you select to download the file from is reliable and trusted.

By downloading from an unreliable website you can expose your PC to potential malicious programs and risk your data security.

Method 2 - Remove all Viruses

Sometimes viruses and malware tend to disguise in the form of exe files such as the HPQTRA08.exe file.

In such a situation scan your entire PC for viruses and malware using a powerful antivirus. Remove all the malicious programs found to fix the issue.

Method 3 - Clean and Repair the Registry

The registry saves all PC-related activities and information including both important and obsolete files such as cookies, bad registry entries, invalid keys, internet history, and junk files.

If these files are not removed from the registry frequently, these accumulate in the registry and corrupt thereby triggering error codes. Error code HPQTRA08.exe is generated when the corrupt Windows registry keys are associated with the HPQTRA08.exe file.

To resolve, clean the registry and repair it. Although this can be done manually it can be time-consuming and tricky especially if you are not technically sound, therefore it is advisable to download Restoro.

Click here to download Restoro and resolve error HPQTRA08.exe.

Method 4 - Locate and Install the Driver

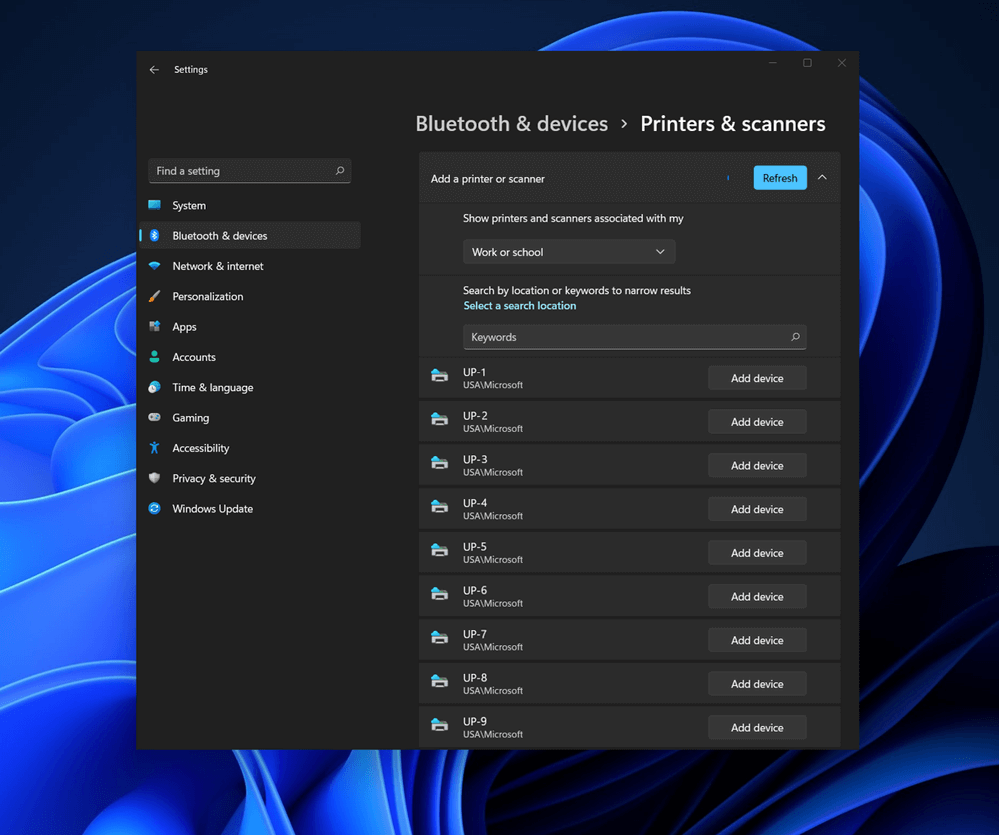
As was pointed out, you might need to reinstall the printer driver again. Using DriverFIX, you’ll be able to automatically update your computer system and install the drivers your computer needs to operate smoothly.

If you like to learn and find out more about various Windows errors, and how to repair them go to our vast archive or use search to find articles that will explain and help you in solving your issue.
However, if you prefer to do things fast and with automatization then we are proposing to use an automated solution for your issues. The application that we are recommending is Advanced System Repair Pro
Advanced System Repair utilizes multiple tools all in one to give you a quick, simple, reliable, and very thorough diagnosis of your PC. It brings you all the tools you need in one program to clean, fix, protect, optimize and boost your PC!
1-Click Maintenance
All the tools to make it simple and easy! It's like having a professional technician at the click of a mouse.

Junk Cleaner
Keeping your computer free from unnecessary clutter also helps make your computer last longer. Like any other machine, if you keep it clean and take care of it, it will serve you better for longer!

Optimize background apps
Optimize applications background activity with the built-in Application Optimizer feature.

Disk Defrag
With a simple 1-click, Advanced System Repair speeds up your PC by assembling fragmented files on your machine and organizing them more efficiently.

Malware Removal
Finds and removes all types of harmful malware including trojans, worms, bots, adware, spyware, PUPs, and more!

Privacy Cleaner
The all-in-one privacy suite to Clean Your Tracks & Protect Your Privacy! Make your computer safe, secure, and more efficient!

System Tweak/Optimizer
ASR will analyze your complete system and settings to adjust your PC to function at its maximum performance.

Registry Cleaner
Over time, as you install and uninstall applications, the registry can become cluttered with old entries and broken settings which can result in program crashes, and annoying messages and slow the computer down.
Visit our Advanced System Repair Pro Download page to inform yourself about all the benefits of this software and get a free trial copy of it.
advanced system repair pro

Advanced System Repair Pro

One-click automated PC repair solution
ASR logo
With Advanced System Repair Pro you can easily
Replace damaged files
Restore performance
Free disk space
Remove Malware
Protects WEB browser
Remove Viruses
Stop PC freezing
DOWNLOAD
Privacy Policy | Terms of Use | Uinstall
Advanced System Repair Pro is compatible with all versions of Microsoft Windows including Windows 11

Share this article:

You might also like

Outlook 2013 Preview

Outlook 2013 preview and sneak peek

Hello and welcome to our Outlook 2013 Preview. Everyone has heard of sneak peeks when it comes to new movies and games that are coming out soon. That is what advertisements and test reels are for to get the audience interested and excited before the piece of media even comes out. It serves to entertain the target audience in the months, maybe even years, up until the release date of this thing they want to play or see and it keeps it in the public mind. It is also great for the viewers because it is a hint to what they will expect when it comes out and it keeps them wanting more excitedly. However, did you know that sometimes computer software’s release previews and sneak peeks too?

Outlook 2013

Well, they do and Microsoft has released some sneak peeks and previews of their new Outlook, Outlook 2013! This is probably to get consumers ready for when it comes out next year; people are going to be getting excited about this new makeover that Microsoft Office, with Outlook, has given itself, people from Microsoft even saying it is ‘the most ambitious’ version of Office yet! The new orange color scheme and logo design look promising enough for the consumer without even checking the new features and special things that have been revealed about it yet!

Outlook 2013 Features

The best part of this new Outlook is that you can move widgets around in it. If you don’t like the fact that your inbox is placed over your outbox, you can move it- simple as that! It will be really handy for people who like messing around with layouts and will also be handy for people who tend to overlook things at the bottom of the pile like spam and trash if they can move them to a more noticeable location for themselves. Another great thing is that the new Microsoft Office that Outlook comes with has a cool new stylus option, allowing you to personalize things with your own handwriting or even drawings. This can then be used as your email signature on Outlook which can give a really nice and personal feel to emails you are sending. Another new thing is their labeling of drafts. Like Gmail, Google’s own email service, a red-lettered ‘draft’ will now appear over composing messages you have not yet sent.

Handy Email Tools in Outlook 2013

This is handy because you know where your message has been saved as opposed to how it could be saved in your outbox or be sent to the trash. Also, there are new links with Facebook that allow you to see what your friends are doing through Outlook. You can also converse with Facebook friends through Outlook now, which is a big step forward in this age of social media. You can get an email from a person and, at a click of a button, also read all their Facebook posts. However, there is not an option for Twitter or Tumblr or even Myspace, which is a shame I suppose, but maybe in the next update. So, I think Outlook 2013 will be worth looking at, don’t you?
Read More
Rapid Media Converter Removal from Windows

Rapid Media Converter is a Potentially Unwanted Program that usually comes bundled with other unwanted software. Many users reported being unaware they had installed the application. It also generates additional advertising, and for this reason, it is classified as Adware and flagged for optional removal by several AVs.

From the Author: Howard Software / Applon runs off an ad-supported platform. During general internet usage on sites where Applon Support operates, users may see advertisements in form of shopping results and new tabs. The type of ad is dependent on the content of the page as you generally browse the internet. Applon is not related to or endorsed by the underlying website. These advertisements will be identified with the Applon Name or Logo.

About Browser Hijackers

Adware is programs created to show advertisements on users’ PCs with or without their consent. A kind of malware, it comes bundled up with the software application that a person either installs or accesses. Shareware or free software programs are generally packaged with adware. When adware penetrates your computer without you knowing and transfers information about you or your PC to 3rd parties, then it happens to be spyware. Other sorts of adware might take control of your internet browser and redirects you to websites that you don’t really want to check out. Adware is a common problem in most computer systems and these are really detrimental to your device. Adware/Spyware is usually downloaded and/or installed accidentally by users while exploring the net and people face lots of difficulties at the same time when it comes to removing adware from their computers. Adware could be dangerous for computer users in numerous ways. It could cause advertisements (popups, ad banners, and in-text) to show up constantly when you’re online or perhaps disrupt your computer experience when not connected to the net. When infected with adware for a long time, your computer will perform at slow processing speed, take a longer time to start up and shut down, easily get frozen up while loading websites, and even get the blue screen of death (BSOD). More often than not, adware is a legitimate revenue source for many companies that offer software to customers at zero cost. But adware generated advertisements tends to be more aggressive than normal ads which can greatly impair system performance or possibly result in a total crash. The adware will damage your PC should you allow it on your personal computer for a long period. A sensible way to block adware from corrupting your PC is to employ a reliable antimalware program such as Safebytes Anti-Malware on your computer. This software will give complete all-around protection to make sure that your laptop or computer doesn’t get infected again with spyware and adware. Take the following measures to prevent adware from overtaking your system: Downloading software online should come from trustworthy websites and also be selective about what you install on your computer; Always read the end-user license agreement (EULA) of any application you plan to install; Beware of clickable ads particularly those that advertise special deals, coupons, or any other suspicious deals.; Avoid installing toolbars, because toolbars from less reputable websites always contain adware, which might slow your PC and in some cases infect your computer outright.

What to Do if Malware Stops You From Downloading Antivirus?

Every malware is bad and the extent of the damage will vary greatly with regards to the type of infection. Certain malware goes to great lengths to prevent you from installing anything on your computer system, especially antivirus software. So what you should do when malware prevents you from downloading or installing Anti-Malware? There are a few fixes you could try to get around with this particular obstacle. Start Windows in Safe ModeIf any virus is set to load immediately when Windows starts, getting into Safe Mode may block the attempt. Since just the minimum programs and services launch in Safe Mode, there are hardly any reasons for conflicts to happen. Listed here are the steps you have to follow to start into the Safe Mode of your Windows XP, Vista, or 7 computers (visit Microsoft website for instructions on Windows 8 and 10 PCs). 1) At power-on/startup, tap the F8 key in one-second intervals. This should bring up the Advanced Boot Options menu. 2) Use the arrow keys to select Safe Mode with Networking and hit ENTER. 3) As soon as this mode loads, you should have the internet. Now, make use of your web browser normally and go to https://safebytes.com/products/anti-malware/ to download and install Safebytes Anti-Malware. 4) Following installation, do a complete scan and allow the software program to delete the threats it detects.

Obtain the anti-malware software using an alternate browser

Some malware only targets specific web browsers. If this is your situation, utilize another browser as it could circumvent the computer virus. If you appear to have a trojan attached to Internet Explorer, then switch to an alternate web browser with built-in security features, such as Firefox or Chrome, to download your preferred anti-malware program – Safebytes.

Create a bootable USB anti-virus drive

Here’s another solution which is using a portable USB antivirus software that can scan your computer for malware without the need for installation. Adopt these measures to run the anti-virus on the affected computer system. 1) On a clean computer, download and install Safebytes Anti-Malware. 2) Connect the USB flash drive to a USB slot on the clean computer. 3) Double-click on the downloaded file to run the installation wizard. 4) Choose the USB flash drive as the destination for saving the software file. Follow the on-screen instructions to finish the installation. 5) Transfer the USB drive from the uninfected computer to the infected computer. 6) Double-click the EXE file to open the Safebytes program from the thumb drive. 7) Click on the “Scan Now” button to begin the malware scan.

SafeBytes AntiMalware Overview

Are you looking to download the best anti-malware software program for your laptop or computer? You can find many applications in the market which come in paid and free versions for Microsoft Windows systems. A few of them do a great job in eliminating malware threats while some will harm your PC by themselves. You must be careful not to choose the wrong application, especially if you buy premium software. While considering the trustworthy programs, Safebytes Anti-Malware is certainly the highly recommended one. Safebytes is among the well-established computer solutions firms, which provide this all-inclusive anti-malware application. With its most advanced virus detection and repair technology, this software will help you protect your PC against infections brought on by different kinds of malware and similar internet threats, including adware, spyware, computer viruses, worms, trojan horses, keyloggers, ransomware, and potentially unwanted program (PUPs).

SafeBytes has fantastic features when compared with various other anti-malware programs. The following are some of the good ones:

Robust, Anti-malware Protection: Built on a highly acclaimed anti-virus engine, this malware removal application has the capacity to find and remove several stubborn malware threats like browser hijackers, PUPs, and ransomware that other common antivirus software will miss. Live Protection: SafeBytes provides totally hands-free live protection and is set to observe, prevent and eliminate all threats at its first encounter. It’ll regularly monitor your pc for hacker activity and also provides end-users with sophisticated firewall protection. High-Speed Malware Scanning Engine: SafeBytes Anti-Malware has a multi-thread scan algorithm that works up to 5x faster than any other anti-malware software. Safe Web Browsing: SafeBytes checks the links present on a webpage for possible threats and informs you whether the website is safe to check out or not, through its unique safety ranking system. Light-weight: This program is light-weight and can work quietly in the background, and that does not have an effect on your PC efficiency. 24/7 Customer Support: For any technical queries or product support, you can obtain 24/7 expert assistance through chat and email. To sum it up, SafeBytes Anti-Malware is really great for securing your computer against all sorts of malware threats. There is no doubt that your computer will be protected in real-time as soon as you put this software program to use. For top protection and the best value for your money, you can’t get better than SafeBytes Anti-Malware.

Technical Details and Manual Removal (Advanced Users)

If you don’t want to use malware removal software and prefer to get rid of Rapid Media Converter manually, you might do so by going to the Add/Remove Programs menu in the control panel and removing the offending software; in cases of web browser extensions, you can remove it by going to the browser’s Add-on/Extension manager. You will definitely also want to reset your web browser. To be certain of complete removal, find the following Windows registry entries on your system and delete it or reset the values appropriately. Please keep in mind that this is for advanced users only and could be difficult, with incorrect file removal causing additional system errors. Additionally, certain malicious programs have the capability to defend against its removal. Doing this in Safe Mode is advised.
Files: Search and Delete: RapidMediaConverter.exe ffmpeg.exe unins000.exe SQLite.Interop.dll RFolders: C:\Program Files\RapidMediaConverter\
Read More
Fix BAD_SYSTEM_CONFIG_INFO error in Windows
If you encounter the BAD_SYSTEM_CONFIG_INFO Blue Screen error in your Windows 10 PC, then read on as this post will guide you in fixing this issue. Usually, this kind of Blue Screen error is caused by some issues with the Boot Configuration Data file. The main issue inside of the Boot Configuration Data file is that either some boot order files or older files might be in conflict with the newer ones or the stable ones and thus triggering the BAD SYSTEM CONFIG INFO Blue Screen error. This kind of Stop error also indicates that there is an error in the Windows Registry which is why you need to update potential culprit drivers as well as edit some entries in the Registry if need be. But before you get started, make sure that you create a System Restore Point first. After creating a System Restore Point, try to boot your computer into Safe Mode and then restart your computer normally. However, if it doesn’t work, proceed to the given options below.

Option 1 – Run System Restore

Performing System Restore might help you in fixing the BAD SYSTEM CONFIG INFO Blue Screen error. You can do this option either by booting into Safe Mode or in System Restore. If you are already in the Advanced Startup Options, just directly select System Restore and proceed with the next steps. And if you have just booted your PC into Safe Mode, refer to the steps below.
  • Tap the Win + R keys to open the Run dialog box.
  • After that, type in “sysdm.cpl” in the field and tap Enter.
  • Next, go to the System Protection tab then click the System Restore button. This will open a new window where you have to select your preferred System Restore point.
  • After that, follow the on-screen instructions to finish the process and then restart your computer and check if the problem is fixed or not.

Option 2 – Update or rollback your device drivers

If the first option didn’t work for you, then it’s time to either update or roll back the device drivers. It is most likely that after you updated your Windows computer that your driver also needs a refresh. On the other hand, if you have just updated your device drivers then you need to roll back the drivers to their previous versions. Whichever applies to you, refer to the steps below.
  • Open the Devices Manager from the Win X Menu.
  • Then locate the device drivers and right-click on them to open the Properties.
  • After that, switch to the Driver tab and click on the Uninstall Device button.
  • Follow the screen option to completely uninstall it.
  • Finally, restart your computer. It will just reinstall the device drivers automatically.
Note: You can install a dedicated driver on your computer in case you have it or you could also look for it directly from the website of the manufacturer.

Option 3 – Try fixing the Windows Registry files

In order to fix the Windows Registry files, you need to make a bootable Windows 10 USB drive and then boot your PC using it. To do so, refer to the steps below.
  • Once you see the Welcome Screen, click on Next.
  • Then click on the “Repair your computer” option located on the bottom-left section of the window.
  • Next, click on Troubleshoot > Advanced Options > Command Prompt.
  • After opening Command Prompt, execute each one of the commands listed below in the sequence that they are given:
    • CD C:WindowsSystem32config
    • ren C:WindowsSystem32configDEFAULT DEFAULT.old
    • ren C:WindowsSystem32configSAM SAM.old
    • ren C:WindowsSystem32configSECURITY SECURITY.old
    • ren C:WindowsSystem32configSOFTWARE SOFTWARE.old
    • ren C:WindowsSystem32configSYSTEM SYSTEM.old
  • After executing the commands given above, type in the next ones below and make sure to execute them in the given sequence below.
    • copy C:WindowsSystem32configRegBackDEFAULT C:WindowsSystem32config
    • copy C:WindowsSystem32configRegBackSAM C:WindowsSystem32config
    • copy C:WindowsSystem32configRegBackSECURITY C:WindowsSystem32config
    • copy C:WindowsSystem32configRegBackSYSTEM C:WindowsSystem32config
    • copy C:WindowsSystem32configRegBackSOFTWARE C:WindowsSystem32config
  • Now type “exit” to close Command Prompt.
  • Restart your PC for the changes to take effect.

Option 4 – Run a Memory Check to test RAM

On the other hand, you can also fix the BAD SYSTEM CONFIG INFO Blue Screen error by running a Memory Check using the Windows Memory Diagnostic. Refer to these steps to do so.
  • Tap the Win + R keys to open the Run dialog box.
  • Then type “mdsched.exe” in the field and hit Enter to open the Windows Memory Diagnostic.
  • After that, the Windows Memory Diagnostic will give out two options such as:
  1. Restart now and check for problems (recommended)
  2. Check for problems the next time I start my computer
  • Select any of the given options. After that, your computer will restart and check for memory-based issues upon the restart. If there are any issues, it will automatically them.

Option 5 – Rebuild BCD files and repair MBR files

Like what you did on the third option above, you also have to make a bootable Windows 10 USB drive for this option and then boot your Windows 10 PC using it.
  • Once you get to the Welcome Screen part, click on Next.
  • Afterward, click on the Repair your computer option located on the bottom-left part of the window.
  • Then click on Troubleshoot.
  • Next, select the Advanced Options and then Command Prompt.
  • Once Command Prompt has been pulled up, enter each one of the following commands and in the sequence that they are given to rebuild BCD files and repair MBR files:
    • bootrec /repairbcd
    • bootrec /osscan
    • bootrec /repairmbr
  • Now type “exit” to close Command Prompt and then restart your computer to successfully apply the changes made.
Read More
Quick Fix For 0x80004005 Outlook Error

What Is 0x80004005 Outlook Error?

0x80004005 Outlook is an error that users commonly encounter while attempting to send or receive emails on Outlook.

The message that appears usually states “This message could not be sent. Try sending the message again or contact your network administrator."

The client operation failed. Error is [OX80004005- 0X0004B9-OXOO501].

Error Causes

This error is usually caused by a problem in the Local Area Network or LAN. What actually happens is that signals with the wireless LAN are lost or a connection problem occurs within the network cable.

As a result, the 0x80004005 Outlook error is triggered while sending or receiving an email. Sometimes the problem goes away on its own. However, if it recurs after a few hours, it shows that some problem exists within the network.

Also, it is important to understand that different factors can affect the quality of wireless connections in a network.

For instance, garage door openers, microwave ovens, and Bluetooth devices can easily become obstacles, disrupting the connection and causing the quality to degrade. Other causes are listed below as follows.

  • Missing, corrupt, or damaged registry keys
  • Existence of viruses
  • Outdated drivers

It is a must to fix this error otherwise potential risks associate with this error such as permanent damage and blue screens.

Further Information and Manual Repair

There are two ways to fix this error and both are listed below as follows.

  • One solution is to disable script blocking in Norton Antivirus. Most users encountering this problem have Norton Antivirus installed on their PCs. To correct this problem, simply turn off the ‘Enable Script Blocking’ feature. However, there is a downside associated with this solution. Enabling script blocking will make your network or computer vulnerable to viruses and malware. That’s why it is not advised to implement this solution.
  • The alternative solution is to simply disable the new-mail notification feature offered in Outlook. To disable notifications of any new emails, the steps go as follows. Open Outlook and go to the Tools menu. Here you will come across ‘Options’.Click on it and then select the ‘Preferences’ tab. Here you will find the ‘Email Options’. Click on it and then uncheck the checkbox against the option, ‘Display a notification message when new mail arrives’. Click Ok two times.

Both these workarounds will work. Therefore, it is advised that you employ any one of them as per your needs.

Read More
How to get rid of EverydayLookup Toolbar

EverydayLookup is a browser extension for Google Chrome developed by Mindspark Inc. This extension allows users to find what mobile network a certain number belongs to, to find out an area code of a country/town, or locate a town by zip code. While these features look promising and interesting, this extension comes with a downside.

When installed, this extension will change your default search engine, the home page, and new tab to search from MyWay.com, it will monitor user browsing activity, log searches, visited links, opened websites, and other information. This information is forwarded to Mindspark ad servers, then later sold/used to better target ads.

While browsing the internet with this extension you will see additional injected ads and sponsored content throughout your browsing sessions (even if the ads do not match your search queries). It can inject banners to websites, and sometimes even put an ad above website content making it extremely annoying to deal with.

About Browser Hijackers

Browser hijacking means that a malicious code has taken power over and modified the settings of your web browser, without your permission. Browser hijackers are capable of doing many different things on your computer. Typically, browser hijacking is used for earning ad revenue that comes from forced advert mouse clicks and site visits. Even though it might seem naive, all browser hijackers are damaging and thus always classified as security threats. Browser hijackers can also permit other destructive programs without your knowledge to further damage the computer. How one can determine if your browser is hijacked Signs that a browser is a hi-jacked include: 1. your home page is reset to some unknown webpage 2. new bookmarks pointing to pornographic websites have been added to your favorite pages 3. the essential web browser settings are modified and unwanted or unsafe resources are added to the trusted sites list 4. find new toolbars that you simply did not add 5. you find lots of pop-ups on your screen 6. your web browser starts running slowly or presents frequent errors 7. Inability to navigate to certain websites, particularly antivirus and other security software webpages.

Exactly how browser hijacker finds its way to your computer

Browser hijackers can get into a computer in some way or other, for instance via file sharing, downloads, and e-mail too. Many web browser hijackings come from add-on programs, i.e., browser helper objects (BHO), toolbars, or extensions added to browsers to give them additional features. Sometimes you may have mistakenly accepted a browser hijacker as part of a software bundle (generally freeware or shareware). A good example of some well-known browser hijackers includes Conduit, Anyprotect, Babylon, DefaultTab, SweetPage, Delta Search, and RocketTab, but the names are continually changing. Browser hijackers can record user keystrokes to gather potentially invaluable information leading to privacy concerns, cause instability on computers, severely disrupt user’s browsing experience, and eventually slow down the computer to a stage where it becomes unusable.

How to get rid of a browser hijacker

Certain browser hijacking could be simply stopped by discovering and removing the corresponding malware application through your control panel. Many times, it could be a tough job to find and delete the malicious program because the associated file will be running as part of the operating system process. Moreover, manual removal requires you to perform many time-consuming and tricky procedures that are very hard to conduct for new computer users. Industry experts always suggest users eliminate any malware including browser hijacker by using an automatic removal tool, which is easier, safer, and faster than the manual removal solution. If you’d like to eliminate persistent hijackers effectively, install the award-winning anti-malware software Safebytes Anti-Malware. And employ a system optimizer, such as Total System Care, to erase all related files from the registry and fix browser issues.

Can't Install Safebytes Anti-malware because of a Virus? Try This!

Practically all malware is inherently harmful, but certain types of malware do a lot more damage to your computer than others. Some malware types modify browser settings by adding a proxy server or modify the computer’s DNS configuration settings. In such cases, you will be unable to visit some or all sites, and thus unable to download or install the required security software to remove the infection. So what to do if malicious software prevents you from downloading or installing Anti-Malware? There are some fixes you could try to get around with this problem.

Install in Safe Mode with Networking

In the event the malware is set to load at Windows startup, then booting in safe mode should avoid it. Since only the bare minimum applications and services launch in “Safe Mode”, there are rarely any reasons for issues to take place. To start your Windows XP, Vista, or 7 computers in Safe Mode with Networking, do as instructed below. 1) At power on, press the F8 key while the Windows splash screen starts to load. This will conjure up the Advanced Boot Options menu. 2) Choose Safe Mode with Networking with arrow keys and hit Enter. 3) Once you get into this mode, you should have an internet connection once again. Now, utilize your browser to download and install Safebytes Anti-malware. 4) After installation, run a full scan and let the program delete the threats it discovers.

Obtain the security software using an alternate browser

Malicious program code may exploit vulnerabilities on a specific browser and block access to all anti-malware software sites. In the event you suspect that your Internet Explorer has been hijacked by a computer virus or otherwise compromised by online hackers, the ideal approach would be to switch to a different internet browser like Mozilla Firefox, Google Chrome, or Apple Safari to download your chosen security software – Safebytes Anti-Malware.

Install and run anti-virus from your Thumb drive

Another way is to download and transfer anti-malware software from a clean PC to run a scan on the affected computer. Abide by these steps to run the anti-malware on the infected computer. 1) On a clean computer, install Safebytes Anti-Malware. 2) Insert the USB drive into the uninfected computer. 3) Double-click the executable file to open the installation wizard. 4) Pick the USB drive as the location when the wizard asks you exactly where you want to install the application. Follow the directions to complete the installation process. 5) Now, transfer the pen drive to the infected PC. 6) Double-click the EXE file to open the Safebytes software right from the pen drive. 7) Hit the “Scan Now” button to start the virus scan.

A Look at the Best AntiMalware Program

Today an anti-malware tool can protect your computer or laptop from different types of internet threats. But how to choose the right one amongst various malware protection application that’s available on the market? Perhaps you might be aware, there are numerous anti-malware companies and tools for you to consider. A few are well worth your money, but most aren’t. You need to be careful not to select the wrong application, particularly if you purchase a premium program. One of the highly recommended tools by industry leaders is SafeBytes Anti-Malware, the most dependable program for Windows computers. SafeBytes anti-malware is a trustworthy tool that not only secures your computer permanently but is also quite easy to use for people of all ability levels. This program can easily identify, remove, and protect your personal computer from the latest malware attacks such as spyware, adware, trojan horses, ransomware, PUPs, worms, parasites along other potentially harmful software programs.

SafeBytes has excellent features when compared to various other anti-malware programs. Listed here are some of the great ones:

Anti-Malware Protection: Using its advanced and sophisticated algorithm, this malware elimination tool can detect and eliminate the malware threats hiding in your computer system effectively. Active Protection: SafeBytes provides round-the-clock protection for your computer limiting malware attacks instantly. This software will constantly keep track of your computer for suspicious activity and updates itself continuously to keep current with the latest threats. Web Protection: Through its unique safety rating, SafeBytes alerts you whether a website is safe or not to access it. This will assure that you’re always certain of your online safety when browsing the internet. High-Speed Malware Scanning Engine: SafeBytes’s high-speed malware scanning engine lessens scan times and extends battery life. At the same time, it’ll effectively find and eradicate infected computer files or any internet threat. Low Memory/CPU Usage: SafeBytes is renowned for its minimal influence on computer resources and great detection rate of diverse threats. It runs quietly and efficiently in the background so you’re free to use your computer or laptop at full power all of the time. Premium Support: For any technical inquiries or product guidance, you can obtain 24/7 professional assistance via chat and e-mail. To conclude, SafeBytes Anti-Malware is really great for securing your computer against all sorts of malware threats. Malware trouble will become a thing of the past once you put this software program to use. If you’re looking for the very best malware removal application out there, and when you don’t mind shelling out some dollars for it, go for SafeBytes Anti-Malware.

Technical Details and Manual Removal (Advanced Users)

If you’d like to manually get rid of EverydayLookup without using an automated tool, it might be possible to do so by removing the application from the Microsoft Windows Add/Remove Programs menu, or in cases of browser plug-ins, going to the browsers AddOn/Extension manager and uninstalling it. You will likely also want to reset your internet browser. To be certain of complete removal, find the following registry entries on your computer and delete them or reset the values appropriately. However, this is a complicated task and only computer experts can perform it safely. Furthermore, certain malware is capable of replicating or preventing removal. It is recommended that you carry out the removal procedure in Windows Safe Mode.
Files: %LOCALAPPDATA%\EverydayLookup_d9 %UserProfile%\Local Settings\Application Data\EverydayLookup_d9 %UserProfile%\Local Settings\Application Data\Google\Chrome\User Data\Default\Extensions\fpeepicldbpmefboahpolegllmiglnai %LOCALAPPDATA%\Google\Chrome\User Data\Default\Extensions\fpeepicldbpmefboahpolegllmiglnai %PROGRAMFILES%\EverydayLookup_d9 %PROGRAMFILES(x86)%\EverydayLookup_d9 %UserProfile%\Local Settings\Application Data\EverydayLookupTooltab Registry: HKEY_LOCAL_MACHINE\SYSTEM\ControlSet001\services\EverydayLookup_d9Service HKEY_LOCAL_MACHINE\SOFTWARE\Microsoft\Windows\CurrentVersion\Run, value: EverydayLookup EPM Support HKEY_LOCAL_MACHINE\SOFTWARE\Wow6432Node\Microsoft\Windows\CurrentVersion\Run, value: EverydayLookup EPM Support HKEY_LOCAL_MACHINE\SOFTWARE\Microsoft\Internet Explorer\Toolbar, value: 0a7d3c2c-131d-4b0a-9c1b-2045f6bae42a HKEY_LOCAL_MACHINE\SOFTWARE\Wow6432Node\Microsoft\Internet Explorer\Toolbar, value: 0a7d3c2c-131d-4b0a-9c1b-2045f6bae42a HKEY_LOCAL_MACHINE\SOFTWARE\Wow6432Node\Microsoft\Internet Explorer\SearchScopes\3eb9a50f-f2ab-4d63-8e33-96d71f659640 HKEY_CURRENT_USER\Software\Microsoft\Internet Explorer\SearchScopes\3eb9a50f-f2ab-4d63-8e33-96d71f659640 HKEY_CURRENT_USER\Software\Microsoft\Internet Explorer\Approved Extensions, value: 0A7D3C2C-131D-4B0A-9C1B-2045F6BAE42A HKEY_LOCAL_MACHINE\SOFTWARE\Wow6432Node\EverydayLookup_d9 HKEY_CURRENT_USER\Software\EverydayLookup_d9 HKEY_CURRENT_USER\Software\AppDataLow\Software\EverydayLookup_d9 HKEY_CURRENT_USER\Software\EverydayLookup
Read More
Fix error code 16 in Windows 10
Access denied error code 16 is tied to websites, it is an error which you will encounter when trying to visit some specific website or if you are unlucky on all of the websites. Lucky for us this error is fixable and in order for us to do this, follow this guide for possible solutions.
  1. Check Date and Time, Incorrect date and time can often interfere with services in your Windows, browsers are not different and this can cause some websites not to be shown. Check your date and time and set it correctly if needed.
  2. Try to access the website from another device. If you manage to open a website on another PC or some other device then keep reading in order to find the solution, if you can not, then the problem is on the website itself.
  3. Turn off Firewall or antivirus. New antivirus and firewall applications can sometimes mark certain websites as malicious and will cut contact with them rendering them unable to be accessed or opened. Try turning the firewall and antivirus temporarily off and then try to access the website.
  4. Try opening web site in another browser. To eliminate browser-specific issues and their configuration, try opening the website in another browser.
  5. Disable PROXI server. Some applications, especially malicious ones can change your proxi setting in LAN. go to your LAN settings and turn off proxi if it is enabled.
  6. Reset your Browser. If this issue is caused by bad data in your browser or by its settings and preferences, resetting the complete browser will solve the issue.
  7. Use VPN. Sometimes the reason for you was not able to access some website might be because the site is not available for your region, to bypass this issue use VPN and reroute your location.
Read More
Software review series: Wolfram Mathematica
For three decades, Wolfram Mathematica has defined the state of the art in technical computing and provided the principal computation environment for millions of innovators, educators, students, and others around the world. Widely admired for both its technical prowess and elegant ease of use, Mathematica provides a single integrated, continually expanding system that covers the breadth and depth of technical computing—and seamlessly available in the cloud through any web browser, as well as natively on all modern desktop systems. With energetic development and consistent vision for three decades, Mathematica stands alone in a huge range of dimensions, unique in its support for today's technical computing environments and workflows.

A Vast System, All Integrated

Mathematica has nearly 5,000 built-in functions covering all areas of technical computing—all carefully integrated so they work perfectly together, and all included in the fully integrated Mathematica system.

Not Just Numbers, Not Just Mathematica But Everything

Building on three decades of development, Mathematica excels across all areas of technical computing—including neural networks, machine learning, image processing, geometry, data science, visualizations, and much more.

Unimaginable Algorithm Power

Mathematica builds in unprecedentedly powerful algorithms across all areas—many of them created at Wolfram using unique development methodologies and the unique capabilities of the Wolfram Language.

Higher Level Than Ever Before

Superfunctions, meta-algorithms... Mathematica provides a progressively higher-level environment in which as much as possible is automated—so you can work as efficiently as possible.

Everything Is Industrial Strength

Mathematica is built to provide industrial-strength capabilities—with robust, efficient algorithms across all areas, capable of handling large-scale problems, with parallelism, GPU computing, and more.

Powerful Ease of Use

Mathematica draws on its algorithmic power—as well as the careful design of the Wolfram Language—to create a system that's uniquely easy to use, with predictive suggestions, natural language input, and more.

Documents As Well As Code

Mathematica uses the Wolfram Notebook Interface, which allows you to organize everything you do in rich documents that include text, runnable code, dynamic graphics, user interfaces, and more.

The Code Makes Sense

With its intuitive English-like function names and coherent design, the Wolfram Language is uniquely easy to read, write, and learn.

Make Your Results Look Their Best

With sophisticated computational aesthetics and award-winning design, Mathematica presents your results beautifully—instantly creating top-of-the-line interactive visualizations and publication-quality documents.

150,000+ Examples

Get started with almost any project with help from 150,000+ examples in the Documentation Center, over 10,000 open-code Demonstrations in the Wolfram Demonstrations Project—and a host of other resources.

Instant Real-World Data

Mathematica has access to the vast Wolfram Knowledgebase, which includes up-to-the-minute real-world data across thousands of domains.

Seamless Cloud Integration

Mathematica is now seamlessly integrated with the cloud—allowing sharing, cloud computing, and more in a unique and powerful hybrid cloud/desktop environment

Connected to Everything

Mathematica is built to be connected to everything: file formats (180+), other languages, Wolfram Data Drop, APIs, databases, programs, the Internet of Things, devices—and even distributed instances of itself. If you would like to read more helpful articles and tips about various software and hardware visit errortools.com daily.
Read More
Fix Shell Infrastructure Host stopped working
The Windows 10 operating system supports the logging in of multiple users at the same time. Aside from that, it also allows administrators to create a Guest Account that has limited rights. However, there are some instances when you could encounter an error when you use the Guest Account. The error may state:
“Shell Infrastructure Host has stopped working. A problem caused the program to stop working correctly. Please close the program”.
This error indicates that the Shell Infrastructure Host or SiHost.exe process that is used for handling graphical elements, has crashed. And to fix this error, there are several options you can check out. You can try to reinstall the Microsoft Redistributable Packages or run a System File Checker scan. In addition, you can also use a new Guest Account or troubleshoot the problem in a Clean Boot State.

Option 1 – Try to install or repair Microsoft Visual C++ Redistributable 2013

A corrupted Microsoft Visual C++ Redistributable package or the absence of it can trigger the “Shell Infrastructure Host has stopped working” error – so if you do not have this package yet, you have to install it but if you already have it, follow the steps below to repair it.
  • Open Control Panel and proceed to Program and Features.
  • Under Programs and Features, look for Microsoft Visual C++ Redistributable package among the list.
  • Then right-click on it and click the Change button.
  • Next, you should see the Repair option – click on it to repair the installation of the Microsoft Visual C++ Redistributable package.
  • The process may take a couple of minutes before it finishes so once it does, you have to restart your PC.
After doing all these steps and you still encounter the problem, you might have to uninstall this package and download it directly from Microsoft’s website. However, if you are using Windows 10, you might not be able to do so since it only supports Windows versions up to Windows 8.1 so just proceed to the next option below.

Option 2 – Try to run a System File Checker scan

  • In the Windows Start Search, type “command prompt” and right-click on Command Prompt from the search results, and then select the “Run as administrator” option.
  • After opening Command Prompt with admin privileges, type the “sfc /scannow” and tap Enter to execute it.
  • Once the scan is finished, restart your computer and see if the Windows Script Host error.

Option 3 – Try using a new Guest Account

You might want to use a new Guest Account as it could help get rid of the error. All you have to do is have your admin delete the old Guest Account and create a new one and see if it helps in fixing the error.

Option 4 – Try troubleshooting the problem in a Clean Boot State

Setting your computer in a Clean Boot State can help you diagnose and later troubleshoot the problems in your computer. During this state, the system will start with a minimal number of drivers and startup programs that help in isolating the problem with the interfering software. To put your computer in a Clean Boot State, follow the given steps below.
  • Log onto your computer as an administrator.
  • Type in MSConfig in the Start Search to open the System Configuration utility.
  • From there, go to the General tab and click “Selective startup”.
  • Clear the “Load Startup items” check box and make sure that the “Load System Services” and “Use Original boot configuration” options are checked.
  • Next, click the Services tab and select the “Hide All Microsoft Services” check box.
  • Click Disable all.
  • Click on Apply/OK and restart your PC. (This will put your PC into a Clean Boot State. And configure Windows to use the usual startup, just simply undo the changes.)
  • From there, start to isolate the problem by checking which one of the programs you installed recently is the root cause of the problem.
Read More
How to fix windows 10 error code 0x80073712
Windows 10 has displayed one of the most efficient and user-friendly interfaces. However there have been many issues on the backend of this commonly praised operating system: For example, Windows Update is still a wonky and error-laded system application. One example of this error is Windows Update Error 0x80073712 which stands in the way of users just wanting to keep their PCs updated hassle-free. The error code 0x80073712 signifies that a file needed by Windows Update to function is either damaged, missing, or corrupted. However, this does not mean that your Windows version will forever stay as-is with no mode to update it. Windows Update Error 0x80073712 is perfectly fixable with the set of provided steps below and some of Windows’ built-in troubleshooting steps:

Solution 1: Open Windows Update Troubleshooter

  1. Open the Windows Update Troubleshooter by pressing the Window Key and  “S” keys simultaneously.
  2. Enter the word “Troubleshoot” in the search box and select the Troubleshoot result
  3. On the new window, select “Windows Update” to troubleshoot.
  4. Run the troubleshooter, then open Windows Update and try to install the update again.

Solution 2: Run the DISM tool

  1. Open the command prompt by pressing Windows Key and “S” key simultaneously
  2. Enter “cmd” in the search box. Right Click command prompt among the results and select “Run as administrator”
  3. In the Command Prompt window type the following and press the Enter key after every command
DISM.exe /Online /Cleanup-image /Scanhealth DISM.exe /Online /Cleanup-image /Restorehealth
  1. To close the Administrator: Command prompt window, type Exit, and then press Enter.
  2. Run Windows Update again.

Solution 3: Rename the Software Distribution folder

  1. Open the command prompt as previously mentioned
  2. Input the following command pressing Enter after every line net stop wuauserv net stop cryptSvc net stop bits net stop msiserver rename c:windowsSoftwareDistribution softwaredistribution.old net start wuauserv net start cryptSvc net start bits net start msiserver exit
  3. Restart the PC and run the updater if it works again.

Solution 4: Restart Windows Update Services

  1. Press the Windows logo key and R together to open Run -> Input services.msc -> and press Enter
  2. Search for the Windows Update service -> Check its status
  3. If it is not indicated, right-click on the service and select Start to force start your Windows Update
  4. If you see an error, locate the Startup Type option and set it to Automatic
  5. Now you should reboot your computer and see if your Windows Update is OK

Solution 5: Fix Registry Issues

If after all the aforementioned solutions, you still experience problems with Windows Update, the problem may lie in the registry that is either damaged or corrupted. You may choose to do manual editing of your Windows registry by opening your Windows registry editor. But doing so is risky as one wrong letter may do incalculable damage to your system. To do so safely for more inexperienced users., we recommend using a third-party registry cleaner/tools, many of which can be found online.
Read More
How to Turn Bluetooth ON in Windows 11
Windows 11 BluetoothBluetooth perhaps is slowly becoming an outdated feature but sometimes you can really used it and need it. By default, in Windows 11 Bluetooth is turned OFF so if you need it, you will need to turn it ON first. Luckily turning it ON is easy and we will guide you through the process

Turning Bluetooth using the Quick Settings menu

The easiest and fastest way to turn the Bluetooth ON is using the quick setting menu:
  1. Click on indicator icons located left of date and time in Taskbar
  2. Click on the Bluetooth icon (if the icon is not displayed, click on the pencil icon, then click on Add and add Bluetooth icon from the list)
  3. Right-click on the Bluetooth icon and select go to Settings
  4. Go to Adding a Bluetooth Device to Windows 11 section

Switch it ON via Windows Settings

  1. Open Windows settings by using ⊞ WINDOWS + I combination
  2. Click on Bluetooth & Devices
  3. Inside settings turn Switch to ON beside Bluetooth
  4. Click + Add Device large button on top
  5. Click Bluetooth
  6. Select device in the list of found devices (make sure device is turned ON, it has Bluetooth sharing ON, and that it is in pairing mode)
  7. If the device needs the password, type it in
  8. When the message Your device is ready to go is showed on the screen click on the Done

Advice on Bluetooth devices

Note that the Bluetooth devices you connect to Windows 11 stay linked to your PC unless you pair them with a different PC, smartphone, or tablet later. After a time, most Bluetooth devices power down automatically to save battery life. To continue where you left off, either power the Bluetooth device up (if it has a power button) or press a button on a keyboard or mouse, and it should automatically turn on and reconnect with your PC. If you’re having trouble connecting your Bluetooth device, make sure that Windows 11 is fully updated and that you’ve installed any drivers that came with your device. Make sure that the device is fully charged or that it has a fresh set of batteries. while Windows is searching. You’ll need to remove the device from Windows 11 first and then attempt to pair it with your PC again.

Removing devices

If you need to remove (un-pair) a Bluetooth device, just open Windows Settings and navigate to Bluetooth & Devices. Locate the name of the device that you want to remove, click the three dots button in the corner of its square and select Remove Device.
Read More
1 2 3 162
Logo
Copyright © 2022, ErrorTools. All Rights Reserved
Trademarks: Microsoft Windows logos are registered trademarks of Microsoft. Disclaimer: ErrorTools.com is not affiliated with Microsoft, nor claim direct affiliation.
The information on this page is provided for information purposes only.
DMCA.com Protection Status