Steam beta introduces no rollback game updates

The latest steam beta update has introduced code that will prevent downloading and installing previous game versions via the steam client.

steamFor many people that are playing online games, this is not such a big deal since they always must have the latest version in order to play their games but for other ones, this has arrived as a bit of a problem. Many people preferred older game versions since often updates can change certain mechanics inside the game making it different as an experience or introduce some elements that not everyone likes.

So far, people could use the steamDB site to find depo of the game versions you would like to play and download it but if this beta code goes live that will not be an option anymore. Now, playing old games without updates could also be used for nostalgic reasons and these people have also been cut off with this update.

It is important to point that update is still in beta client only but users have already started to voice their opinions asking Valve not to place it live. In the end, it will all depend on Valve’s decision will they listen to their customers or decide to push updates on live service.

If you like to learn and find out more about various Windows errors, and how to repair them go to our vast archive or use search to find articles that will explain and help you in solving your issue.
However, if you prefer to do things fast and with automatization then we are proposing to use an automated solution for your issues. The application that we are recommending is Advanced System Repair Pro
Advanced System Repair utilizes multiple tools all in one to give you a quick, simple, reliable, and very thorough diagnosis of your PC. It brings you all the tools you need in one program to clean, fix, protect, optimize and boost your PC!
1-Click Maintenance
All the tools to make it simple and easy! It's like having a professional technician at the click of a mouse.

Junk Cleaner
Keeping your computer free from unnecessary clutter also helps make your computer last longer. Like any other machine, if you keep it clean and take care of it, it will serve you better for longer!

Optimize background apps
Optimize applications background activity with the built-in Application Optimizer feature.

Disk Defrag
With a simple 1-click, Advanced System Repair speeds up your PC by assembling fragmented files on your machine and organizing them more efficiently.

Malware Removal
Finds and removes all types of harmful malware including trojans, worms, bots, adware, spyware, PUPs, and more!

Privacy Cleaner
The all-in-one privacy suite to Clean Your Tracks & Protect Your Privacy! Make your computer safe, secure, and more efficient!

System Tweak/Optimizer
ASR will analyze your complete system and settings to adjust your PC to function at its maximum performance.

Registry Cleaner
Over time, as you install and uninstall applications, the registry can become cluttered with old entries and broken settings which can result in program crashes, and annoying messages and slow the computer down.
Visit our Advanced System Repair Pro Download page to inform yourself about all the benefits of this software and get a free trial copy of it.
advanced system repair pro

Advanced System Repair Pro

One-click automated PC repair solution
ASR logo
With Advanced System Repair Pro you can easily
Replace damaged files
Restore performance
Free disk space
Remove Malware
Protects WEB browser
Remove Viruses
Stop PC freezing
DOWNLOAD
Privacy Policy | Terms of Use | Uinstall
Advanced System Repair Pro is compatible with all versions of Microsoft Windows including Windows 11

Share this article:

You might also like

Fix an Unformattable and Unusable USB Drive
If you have a USB that has stopped working and does not show any signs of life do not throw it away just jet. Hello and welcome to another great tutorial on errortools.com, today we will explore how to bring back to life dead USB memories.

Detect a Corrupted  Drive:

If your computer is still able to detect your USB drive, you might want to know if it’s been corrupted. Select the Properties of the drive folder and check the device status. If it says This device is working properly this USB drive is worth saving. There’s no need to worry if you can’t see the USB drive folder.

Erase the USB Drive with Diskpart Tool

Press ⊞ WINDOWS + X top open start menu and choose Command prompt (admin) Type diskpart and press ENTER Type in list disk and press ENTER Locate your USB drive by size and type in select disk#, where # is the number of removable disks.

Reallocate the USB Drive Volume

Press ⊞ WINDOWS + R to open the run dialog and type in diskmgmt.msc Select the USB drive and Right-click on it and select create simple volume. It will lead to a new simple volume wizard window. Once you click next, you can specify the volume size for the pen drive. Select the maximum volume, which is shown as a default unit in MB. As soon as you see the next step, select assign drive letter which will help you view your pen drive once again. Format the partition in the next step. This may be just an extra step because you have already wiped the data clean. But it is always better to be sure. Click Finish to complete the new simple volume wizard which will now be allocated to the USB drive. After you reallocate the unallocated USB drive space, you will be able to view the USB drive storage once again.
Read More
How to move Taskbar to the left in Windows 11
The standard icon place in the Taskbar inside Windows 11 is in the center. Some users welcomed this change, some not so much. If you are part of the user base that is not so much thrilled with this Microsoft’s idea of innovation, do not worry, there is an easy way to move all icons and start button on the left inside Taskbar.

Taskbar icons on leftMoving icons in Taskbar

  1. Open Windows settings by using ⊞ WINDOWS + I key combination
  2. Click on Personalization
  3. Select Taskbar
  4. Click on Taskbar Behaviors
  5. Click on the drop-down menu beside Taskbar Alignment
  6. Select your desired option of icon alignment
  7. Close settings
Your options will be active right away and you will see icons switching to the position of your choosing.
Read More
Business Email Etiquette
[vc_row][vc_column][vc_column_text]

Business Email Etiquette

Hello and welcome to our Business Email Etiquette. Most people have experience in writing emails at some point before in their lives. However, the emails an average person writes are probably personal emails and not mails for work purposes. Emails you send to friends are incredibly different in content and context to business emails you would send to customers or employers or even other colleagues in your workforce. So, if you have a job that involves you writing emails to people in business style, learning business email etiquette is an absolute must for you.

 1. Heading layouts

When you are sending emails to friends, you generally lay them out like a memo. This means there is very little detail in the layout besides basic greetings and paragraphs, usually starting with the greetings. However, with a business email, it is best to lay it out exactly like you would lay out a formal letter. You need to put the company’s address in the right-hand corner and the date as well. Only then must you go on to the greetings. This will make your email look more formal, making you seem like a professional who knows what they are doing as opposed to someone who just couldn’t be bothered spending the extra time to get the layout right.

 2. Proper greetings

 When you are sending an email to a friend, you usually greet them informally. If their name was Mary Johnson, you’d probably start your letter with a ‘Hey Mary’ or a ‘Hello Mary.’ However, this is not considered a professional way to write an email to a customer or other important person in your business. Again, you must use the proper method that you would greet someone with were you writing them a formal letter instead. If your customer is Mary Johnson again, you should greet her with respect. ‘Dear Ms. Johnson’ would be the most appropriate way to start off your letter’s actual body in this case. If you do not know the recipient’s name, then you should start with a simple ‘Dear Sir or Madam.’ Politeness will always get you incredibly far, no matter what line of work you are in.

 3. Informal language

 You should get straight to the point with your email. Don’t dawdle on with it like you would if chatting to a friend and don’t write it how you would speak either. You use language that sounds impressive and smart while not using such obscure language that your recipient doesn’t know what you are saying. All the time, you must keep it informal where possible, possible even impersonal as well. It will make you seem very professional in the long run.

 4. Signing off

When you are ending your email, you must end it as you would with a letter also. Don’t just say ‘Bye’ and your first name; that is too personal. You need to say ‘yours sincerely if you know the name of the recipient and ‘yours faithfully’ if you do not. Then you should end with your full name and whatever position you have at the company. (CEO, technical staff etc.) So there you have it! All you need to do now is to show your boss that you can handle the emails from now on![/vc_column_text][/vc_column][/vc_row]
Read More
How to Unmerge the User folder in Windows 10
The Windows 10 system allows users to change the default location of the User folders to another drive. This is probably to make sure that the files stay safe in case the system suddenly crashes. However, in some cases, while changing the path to another drive, for instance, the D drive or any folder, the Windows system recognized it as a hard drive as well so even though the files will be saved on that folder, it will appear as a hard drive in the Windows Explorer or look merged with another folder. It could also be that you had dragged and dropped a user folder to another user folder by accident. So if you’re wondering how you can unmerge the User folders, read on as this post will guide you on how exactly you can do that. Take note that even if you try to use the File History to restore the User folders, it still won’t work and you won’t be able to move them back to their previous locations nor restore the folders back to their previous versions and it would only state that they are not available. In the instructions given below, we are using the Downloads folder as an example.
  • Step 1: Tap the Win + R keys to open the Run dialog box.
  • Step 2: Next, type “Regedit” in the field and hit Enter to open the Registry Editor.
  • Step 3: After opening the Registry Editor, navigate to the following registry key:
ComputerHKEY_CURRENT_USERSoftwareMicrosoftWindowsCurrentVersionExplorerUser Shell Folders
  • Step 4: Then double-click on the multi-string value {374DE290-123F-4565-9164-39C4925E467B} located in the right hand pane. And in the Value Data, copy and paste the following value:
%USERPROFILE%Downloads
  • Step 5: Now click OK and close the Registry Editor.
Note: Look close enough and you’ll see that the multi-string values belong to each one of the folders. From there, you have a Desktop, Favorites, Skydrive, Music, Pictures, and many more.
  • Step 6: Restart your computer. After that, the operating system will pick up the new folder location during the startup. Here are the values for the other folders:
Music – {1CF1260C-4DD0-4ebb-811F-33C572699FDE} Pictures – {3ADD1653-EB32-4cb0-BBD7-DFA0ABB5ACCA} Videos – {A0953C92-50DC-43bf-BE83-3742FED03C9C} Documents – {A8CDFF1C-4878-43be-B5FD-F8091C1C60D0} Desktop – {B4BFCC3A-DB2C-424C-B029-7FE99A87C641}
  • Step 7: Now all you have to do is to change the location correctly. Start by tapping the Win + E keys to open the Windows File Explorer.
  • Step 8: After that, right-click on the Downloads folder located in the right-hand pane.
  • Step 9: Then click on Properties and go to the Location tab then type “D:\Downloads” in the location box.
  • Step 10: Click the Apply button and then the OK button to save the changes made. Doing so would ensure that not only the Downloads folder is restored but also that it does not stay merged to another folder or appear as a drive.
Read More
Fix Copy & Paste issue in Windows 10
Copy & Paste function is an essential option in properly working Windows, from copying text to weblinks and many other sources like pictures and files it is one of the crucial features in Windows. When the copy and paste feature is not working we are somewhat left in Windows limbo, essentially Windows itself is working but without this specific feature it is very hard, almost impossible to get any work done, if you are an unfortunate user who has faced this particular issue do not worry, we have solutions for you.
  1. Update Windows

    Glitches come in various forms and sometimes they are introduced in updates, check to see if it is available Windows update and if it, download and install it, there is a very high chance that the next update will bring fixes for known glitches.
  2. Disable antivirus

    A good antivirus is an essential piece of software for any PC, however, sometimes it can interfere with the basic operations of windows itself. Disable it completely to see if copying and pasting will start to work, if this is a case, see can you somehow turn options off in antivirus or switch to another one.
  3. Run Check disc

    Corrupted applications and system files can cause issues with Windows functioning, the easiest way to solve this issue is to run build-in Windows Check disk utility and let it scan and fix potential issues.
  4. Run SFC

    If the check disk failed to fix the issue, run command prompt as administrator and type in sfc /scannow, file checker will go through all files and fix if it finds anything including corrupted system files. Reboot your system after the operation completes. Please note that an SFC scan can take a long time sometimes, do not interrupt the scanning process and leave it to finish.
  5. Restart rdpclip process

    Restarting rdpclip.exe can solve the issue. Open task manager and under process find rdpclip.exe, right-click on it and end it, then go to windows/system32 and search for rdpclip.exe and double click it. Please note that you will be able to find this process only if you are on a remote PC machine, on a local user machine rdpclip is not running.
  6. Rollback to the previous system restore point

    If this particular issue was introduced in the latest update and previous solutions have not worked, roll back to the restore point where everything was working as it should.
  7. Stop virtualization

    if you are using virtual software there is a chance that the shared clipboard feature is interfering with Windows, turn the Virtual machine off and try copy & paste again.
Read More
How to Fix Jp2klib.dll Error Code

How to Fix Jp2klib.dll Error Code

Jp2klib.dll Error - What is it?

Jp2klib.dll is a type of Dynamic Link Library. This file is developed by Adobe Systems Inc and associated with CS2 (Creative Suite 2 Premium). Like all DLL files, this file also contains small programs that support programs developed by Adobe Systems on your PC. The function of Jp2klib.dll is to load and run programs. Jp2klib.dll error occurs when it fails to do so. It occurs during program startup. Jp2klib.dll error is displayed in several different formats depending on the cause of the error. Here are some common error messages that you may come across:
  • "JP2KLib.dll not found."
  • "Cannot find C:\WindowsSystem32\JP2KLib.dll."
  • "Cannot start Creative Suite 2 Premium. A required component is missing: JP2KLib.dll. Please install Creative Suite 2 Premium again."
  • "Cannot register JP2KLib.dll."
  • "The file JP2KLib.dll is missing."
  • "This application failed to start because JP2KLib.dll was not found. Re-installing the application may fix this problem."
  • JP2KLib.dll Access Violation."

Solution

Restoro box imageError Causes

There are several causes for the Jp2klib.dll error code pop-up. These include:
  • Hardware failure
  • Jp2klib.dll file not properly registered
  • Viral infection
  • Deleted, missing, or corrupted Jp2klib.dll file
  • Registry problems
  • Another program overwrote the Jp2klib.dll file
The good news is that this is not a fatal error code like the blue screen of death errors. However, it is still advisable to resolve it right away to avoid inconvenience.  This error may limit your ability to access your desired program.

Further Information and Manual Repair

Follow these methods to resolve Jp2klib.dll error code on your PC in a few minutes without any professional assistance or technical know-how:

Method 1 - Re-register the Jp2klib.dll file

Sometimes Jp2klib.dll error may occur if the DLL file is not registered properly. In such a situation "JP2KLib.dll not registered" error message will pop on your computer screen. To resolve, all you need to do is register this file. Follow these steps to register the Jp2klib.dll file on your PC:
  1. Go to the start menu, type the command in the search box. Don’t press enter yet.
  2. First, hold CTRL-SHIFT and then press it. This action will prompt a permission dialog box. Click yes to proceed.
  3. You will be asked to enter a command, here simply type regsvr32 /u JP2KLib.dll and then press enter.
  4. This will first unregister the previous Jp2klib.dll file. Now type regsvr32 /i JP2KLib.dll and press enter to re-register the same file.
  5. After this, close the command window and reboot your PC to activate changes.

Method 2 - Check the Recycle Bin and Restore the Jp2klib.dll file

If you come across this error message "JP2KLib.dll not found”, this indicates a missing Jp2klib.dll file. This usually happens if you recently uninstalled a program on your system which was also supported by the Jp2klib.dll file due to which the file was also deleted. But don’t worry! Check your recycle bin to retrieve the accidentally deleted file on your system. If you find it restore, but if you don’t then simply download it from a reliable DLL website.

Method 3 - Scan for Viruses

Install and run an antivirus to detect viruses. Viruses are malicious programs that damage and corrupt DLL files like the Jp2klib.dll file. Scan for all viruses on your PC and remove them to fix the problem.

Method 4 - Repair the Registry

If you don’t clean the registry often it becomes accumulated with obsolete files like bad and broken entries, cookies, and junk files. These files corrupt the registry and damage system and DLL files also stored in the same location. It then leads to such error message pop-ups. To resolve, download Restoro. This is an advanced PC Fixer deployed with a registry cleaner. It is easy to use and in just a few clicks can repair the Jp2klib.dll error on your PC. The registry cleaner scans and removes all obsolete files. It cleans the registry and repairs the damaged system and DLL files. Click here to download Total System Care and fix the Jp2klib.dll error.
Read More
Fix fatal error C0000034 applying update
Fatal error C0000034 happens during the installation of the Windows update and if you are one of the unlucky users who sadly run into this, keep reading as we will provide solutions to this error and how to get around it. Start from point 1 to the bottom and hopefully you will have your PC back into working order in no time.
  1. Run Windows Update troubleshooter

    Usually, a built-in Windows troubleshooter can solve issues painlessly and fast, my advice is to try this as the first option, it is a simple and clean solution worth trying and in 90% it solves the issue all by itself.
  2. Do a clean boot

    Using task manager, remove all nonessential applications and services from starting up, reboot your computer, and once it is cleanly booted try re-running the update process again, if the issue was running the application this time everything will work since the problematic application is not running.
  3. Reset Windows update components to the default

    This solution requires you to use the Reset Windows Update Agent Tool to reset Windows Update components to default or use this PowerShell script to reset Windows Update Client. You can also manually reset each Windows Update component to default and then re-run the update.
  4. Disable firewall and antivirus

    Altho not likely it is still a possibility that some firewalls and antivirus can detect windows updates as malicious software and cut them off. If everything else failed, disable the firewall and your PC protection and when it is fully disabled try updating.
  5. Do automatic startup repair

    This should be the last thing to do but if everything else failed, do it. Perform Windows 10 Startup Repair. Once the startup repair completes successfully, you can re-run the update. The update should install without errors.
Read More
Power Calibration Error or Medium Speed Error when burning CD/DVD
If you are one of the few users who is still burning CDs and DVDs, you might have come across an error that says, “Medium Speed Error” or “Power Calibration Error”. There are several factors that could cause this error but it’s most likely that the CD/DVD burner wasn’t able to determine the Optimum Power Calibration rate properly. So what is Optimum Power Calibration rate? It is a test that runs before the burning process to regulate the optimal laser power needed to complete the job. And if this process malfunctions, obviously, you won’t be able to burn the content on your CD or DVD. There are also cases when the Power Calibration error pops up for some small issues that have nothing to do with the regulation of laser power. Here are some quick fixes you can try to resolve the Power Calibration error when burning a CD or DVD.

Option 1 – Make sure you’re using good quality CD or DVD

A lot of burning issues stem down to the purchase of low CDs or DVDs to make sure that what you are using has good quality for it is not always a good idea to purchase cheap products as cheap products could also mean cheap quality.

Option 2 – Try burning at lower speeds

If you’re certain the problem is not with the CD or DVD you are using then you can try burning again, this time at lower speeds. There are instances when doing things quickly can end in a disaster such as the “Medium Speed Error” or “Power Calibration Error” you’re getting.  To fix the problem, you have to burn at a slower speed and just take the time to wait until the burning process is done.

Option 3 – Try updating your burning software

It’s always a good idea to check if the burning software you’re using requires an update especially if it’s throwing up “Medium Speed Error” or “Power Calibration Error”. Thus, you need to update your burning software right away and then try to burn your CD or DVD once the update has been completed.

Option 4 – Try cleaning the disk drive

You might want to consider cleaning the disk drive using several tools in the market that is designed to clean the disk drive. These tools work on removing dust particles from the lens which helps a lot in the burning quality. Aside from that, it also helps in reducing errors like “Medium Speed Error” or “Power Calibration Error”. So give this option a try as it might time for a disk drive cleanup.

Option 5 – Try to disable the IMAPI

If none of the options given above worked, you might want to disable the IMAPI or Image Mastering Applications Programming Interface. How? Refer to the steps below.
  • Open Control Panel by simply clicking the Start button and then typing “control panel” in the field.
  • Control Panel should pop up in the search results. Once you found it, click it to open it.
  • Next, select System Security > Administrative Tools and then click Services.
  • After that, you’ll have to search for the “IMAPI CD-Burning COM Service” option.
  • Then right-click on it and select Properties.
  • From there, switch the Startup Type from “Enabled” to “Disabled”.
  • Now click on Apply and then restart your PC.
Read More
Change default audio output for Narrator
For PC users that are blind or have low vision, the Narrator accessibility feature in Windows 10, lets you use your PC without a display or mouse to complete common tasks – it reads and interacts with things on the screen, like text and buttons. The narrator can be used to read and write an email, browse the internet, and work with documents. In Windows 10, there are a lot of options for Narrator that you can customize. You can change its keyboard shortcuts, personalize Narrator’s voice, enable Caps Lock warnings, and more. You can choose the voice for the Narrator, adjust the speaking rate, pitch, and volume. To change the default audio output device used to play the voice of the Narrator in Windows 10:
  • Press the ⊞ WINDOWS + I
  • From the Settings menu, click Ease of Access.
  • Click Narrator on the left pane.
  • In the Narrator window, on the right pane, toggle the button to On to enable Narrator if required.
  • Scroll down to the Personalize Narrator’s voice section.
  • For the Select where you hear Narrator’s voice option, click the drop-down and select the audio output device you want from the list. Please know that you will not be able to choose if you do not have multiple audio output devices connected to your Windows 10 computer.
  • Exit Settings when done.
If you would like to read more helpful articles and tips about various software and hardware visit errortools.com daily.
Read More
What is Trojan Kryptik and what does it do
Trojan. Kryptik is a malicious computer infection known as a Trojan horse. Trojan. Kryptik can load at startup and recreate itself which makes it difficult to manually remove from the infected computer. Trojan. Kryptik can compromise the infected system by allowing a remote hacker to gain access without the user's permission or knowledge. Trojan. Kryptik can also lead to the infection of other unknown malware parasites.

trojan kryptic
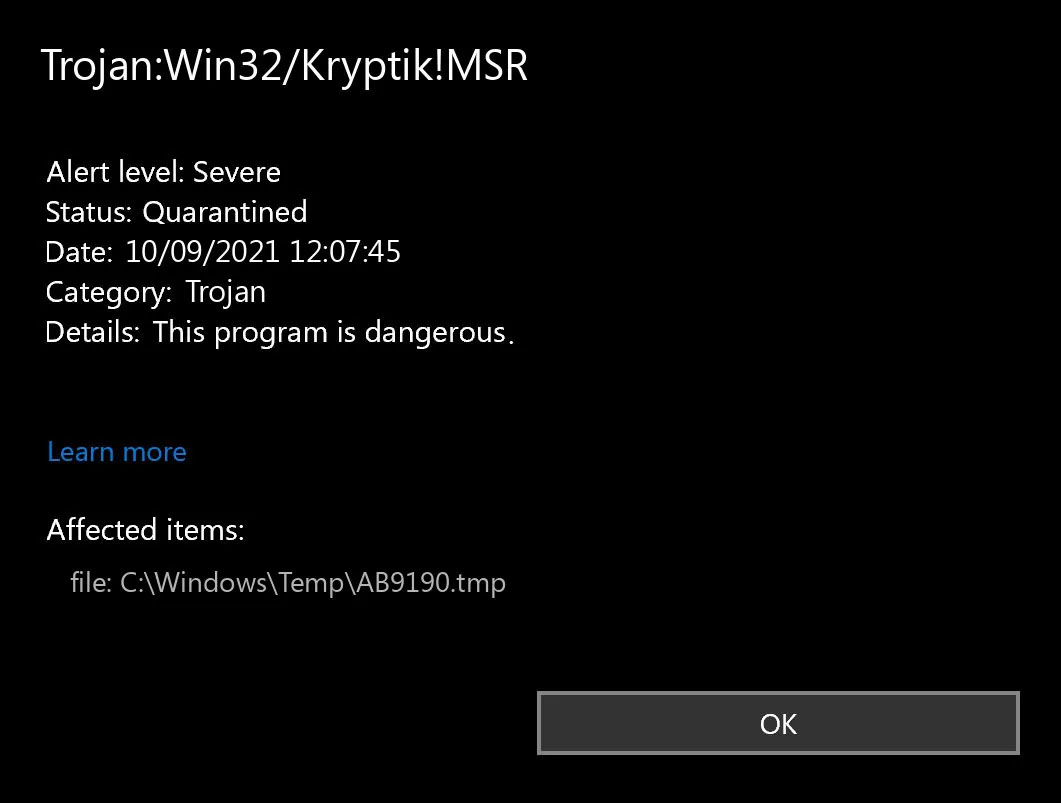
Trojan.Kryptik creates the following registry entry or registry entries:

Directory %ALLUSERSPROFILE%\windrivgr 19.7 %LOCALAPPDATA%\DsHcaJnIIz File name without path scaalqtw.exe Regexp file mask %ALLUSERSPROFILE%\sqldump.exe %APPDATA%\b[NUMBERS].exe %APPDATA%\Microsoft\Windows\Start Menu\Programs\Startup\[RANDOM CHARACTERS].com.url %APPDATA%\Origin\update.vbe %APPDATA%\Stanfind.exe %APPDATA%\vpn gui.exe %LOCALAPPDATA%\Microsoft\Windows\Symbols\wvfilters.sys %TEMP%\nvc.exe %TEMP%\system.exe %TEMP%\winsrvcs32.exe
Read More
1 2 3 162
Logo
Copyright © 2022, ErrorTools. All Rights Reserved
Trademarks: Microsoft Windows logos are registered trademarks of Microsoft. Disclaimer: ErrorTools.com is not affiliated with Microsoft, nor claim direct affiliation.
The information on this page is provided for information purposes only.
DMCA.com Protection Status