Alt-tab that is broken with KB5005033 update

Alt-tab
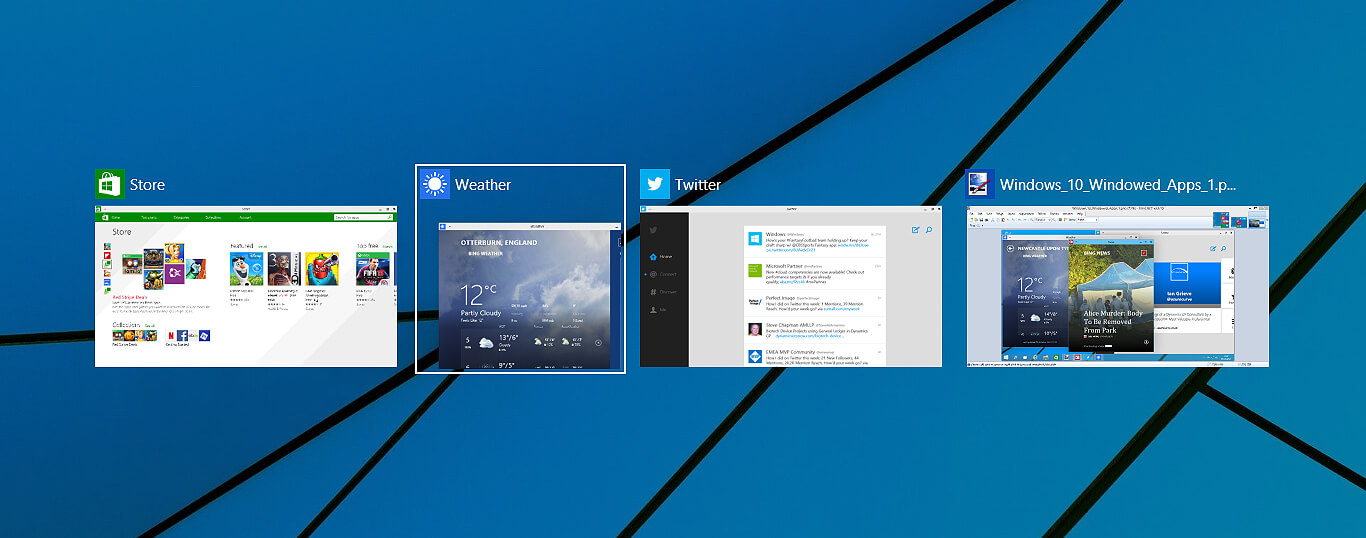
Lately, Microsoft has trying to fix Print Nightmare with various methods and patches. The last patch has seemingly fixed Print Nightmare but it has broken the Alt-tab key combination.

It has been reported that the latest patch has broken famous key combinations for quickly switching from window to window. It seems that combination is not working or it is switching to desktop, even going to blank screen if switching from the full-screen game.

Fixing the issue

Luckily this issue is easily fixable.

The first and easier fix for this issue is surprising to turn off the news and info widget, right-click on it and choose News and interests and then click on turn off.

The second solution would be to uninstall the update. Go to Settings, then to Update & Security, and from there view Update History and remove the update.

If you like to learn and find out more about various Windows errors, and how to repair them go to our vast archive or use search to find articles that will explain and help you in solving your issue.
However, if you prefer to do things fast and with automatization then we are proposing to use an automated solution for your issues. The application that we are recommending is Advanced System Repair Pro
Advanced System Repair utilizes multiple tools all in one to give you a quick, simple, reliable, and very thorough diagnosis of your PC. It brings you all the tools you need in one program to clean, fix, protect, optimize and boost your PC!
1-Click Maintenance
All the tools to make it simple and easy! It's like having a professional technician at the click of a mouse.

Junk Cleaner
Keeping your computer free from unnecessary clutter also helps make your computer last longer. Like any other machine, if you keep it clean and take care of it, it will serve you better for longer!

Optimize background apps
Optimize applications background activity with the built-in Application Optimizer feature.

Disk Defrag
With a simple 1-click, Advanced System Repair speeds up your PC by assembling fragmented files on your machine and organizing them more efficiently.

Malware Removal
Finds and removes all types of harmful malware including trojans, worms, bots, adware, spyware, PUPs, and more!

Privacy Cleaner
The all-in-one privacy suite to Clean Your Tracks & Protect Your Privacy! Make your computer safe, secure, and more efficient!

System Tweak/Optimizer
ASR will analyze your complete system and settings to adjust your PC to function at its maximum performance.

Registry Cleaner
Over time, as you install and uninstall applications, the registry can become cluttered with old entries and broken settings which can result in program crashes, and annoying messages and slow the computer down.
Visit our Advanced System Repair Pro Download page to inform yourself about all the benefits of this software and get a free trial copy of it.
advanced system repair pro

Advanced System Repair Pro

One-click automated PC repair solution
ASR logo
With Advanced System Repair Pro you can easily
Replace damaged files
Restore performance
Free disk space
Remove Malware
Protects WEB browser
Remove Viruses
Stop PC freezing
DOWNLOAD
Privacy Policy | Terms of Use | Uinstall
Advanced System Repair Pro is compatible with all versions of Microsoft Windows including Windows 11

Share this article:

You might also like

Quick Fix Guide To Runtime Error r6034

Troubleshoot Runtime Error r6034

What Is Runtime Error R6034?

Runtime Error r6034 is one of the most commonly occurring errors.  This error usually arises in Windows Vista and Windows 7. The message that appears to the user states ‘An application has made an attempt to load C runtime library incorrectly, please contact the support team for more information’. As the message suggests, this problematic error occurs simply because an application attempts to load the C runtime library without a manifest.

Solution

Restoro box imageError Causes

Runtime Error r6034 occurs when the system compiler fails to compile the working application. While this is the primary reason, there are some other conditions that trigger Runtime Error r6034 which are outlined below.
  • Existence of viruses and malware in the system.
  • Corrupt or missing system files.
  • Power outages.
  • Hardware problems.
  • Hardware driver problems.
There are several other reasons that may trigger Runtime Error r6034 that are beyond the scope of this article. Regardless of what triggers this error, it is crucial to ensure that it is fixed as soon as possible.

Further Information and Manual Repair

There are several ways to deal with Runtime Error r6034. However, one of the most effective ways is listed below as follows.
  • When this error occurs, restart your computer. Make sure you press F8 before the windows logo is displayed.
  • Choose safe mode and press enter.
  • Go to the ‘Start’ button and type ‘msconfig’ in the search box. Press enter.
  • The MSConfig program will now open.
  • Choose ‘Start up’ in the general tab and then click on the ‘Load Start Up’ item.
  • Click on the ‘Services’ tab. Now click ‘Hide all Microsoft Services’ and then choose ‘Disable All’.
  • Close the system configuration window.
  • Restart the computer.
After restarting your computer, you will notice that the Runtime Error r6034 has been removed. If this approach fails to deliver the desired results, it is advised to follow the steps listed below.
  • Go to the start button. In the search box, type ‘System Restore’.
  • When System Restore appears, click on it.
  • The system restore window will open. Make sure any process or application that’s open is now closed.
  • In the System Restore window, if a calendar list appears, it means the restore point is open. Now choose the point from where the error appeared and click Next.
  • This process may take some time. Your system will restart automatically and the Runtime Error r6034 will disappear.
Read More
Fix Windows Updates Error code 0x80246007
Downloading Windows Updates does not always go smoothly as you can encounter several issues like the “Some updates did not finish downloading, We will keep trying, Error code 0x80246007” error. In fact, this error can also occur on other Windows applications like OneNote. According to security experts, this error happens for many reasons. For one, it could be that the Windows Update database is corrupted. It could also be that there is another process that’s in conflict with the Windows Update components or there might be some issue with the Background Intelligent Transfer Service (BITS). Whichever the cause may be, you can fix it by following the solutions given below.

Option 1 – Delete the contents in the Temporary folder

You can also try deleting the contents in the Temporary folder – all the downloaded, pending, or failed Windows 10 updates. You can do that using the simple and easy steps below.
  • Tap the Win + R keys to open the Run dialog box.
  • Then type “%temp%” in the field and press Enter to open the Temporary folder.
  • After that, select all the folders and files within the Temp folder and delete all of them.

Option 2 – Try running the Windows Update Troubleshooter

Running the built-in Windows Update troubleshooter is one of the things you can first check out as it is known to automatically resolve any Windows Update errors like Error code 0x80246007. To run it, go to Settings and then select Troubleshoot from the options. From there, click on Windows Update and then click the “Run the troubleshooter” button. After that, follow the next on-screen instructions and you should be good to go.

Option 3 – Try renaming or removing the pending .xml file

The problem might be due to some pending .xml file so you need to rename or remove it. To do so, just go to C:/Windows/WinSxS folder. From there, look for a pending .xml file – you can either rename it or delete it. This will allow the Windows Update to delete any pending tasks and build a new and fresh update check.

Option 4 – Restart the Background Intelligent Transfer Service (BITS)

The Background Intelligent Transfer Service or BITS is a part of the Windows Update service that manages the background download of Windows Update, as well as scans for new updates and so on. Thus, if your Windows Update fails a couple of times, you might want to restart BITS. For you to do that, make sure that you have admin privileges.
  • Press the Win + R keys to open the Run dialog box.
  • Then type “msc” in the field and hit Enter to open Services.
  • After opening Services, look for the Background Intelligent Transfer Service from the list of services and then double click on it to open Properties.
  • Next, set the Startup type to Manual and click on the Start button. If it doesn’t help, you can try setting it to Automatic (Delayed) and then reboot your PC.

Option 5 – Run the DISM tool

Running the DISM Tool helps in repairing the Windows System Image as well as the Windows Component Store in Windows 10. Using this built-in tool, you have various options such as the “/ScanHealth”, “/CheckHealth”, and “/RestoreHealth”.
  • Open the Command Prompt with admin privileges.
  • Then type in the following commands and make sure to hit Enter right after you type each one of them:
    • Dism /Online /Cleanup-Image /CheckHealth
    • Dism /Online /Cleanup-Image /ScanHealth
    • exe /Online /Cleanup-image /Restorehealth
  • Do not close the window if the process takes a while as it will probably take a few minutes to finish.

Option 6 – Delete the files from the Software Distribution folder

The downloaded Windows Updates are placed in a folder called “SoftwareDistribution”. The files downloaded in this folder are automatically deleted once the installation is completed. However, if the files are not clean up or if the installation is still pending, you can delete all the files in this folder after you pause the Windows Update service. For complete instructions, refer to the steps below.
  • Open the WinX Menu.
  • From there, open Command Prompt as admin.
  • Then type in the following command – don’t forget to hit Enter right after typing each one of them.
net stop wuauserv net start cryptSvc net start bits net start msiserver
  • After entering these commands, it will stop the Windows Update Service, Background Intelligent Transfer Service (BITS), Cryptographic, and the MSI Installer
  • Next, go to the C:/Windows/SoftwareDistribution folder and get rid of all the folders and files thereby tapping the Ctrl + A keys to select them all and then click on Delete. Note that if the files are in use, you won’t be able to delete them.

Option 7 – Reset the Catroot2 folder

After resetting the SoftwareDistribution folder, you need to reset the Catroot2 folder to restart the services you just stopped. To do that, follow these steps:
  • Type each one of the following commands.
net start wuauserv net start cryptSvc net start bits net start msiserver
  • After that, exit Command Prompt and restart your computer, and then try to run Windows Update once more.
Read More
Every new movie & show on Netflix in September
netflixNetflix was one that made streaming service standard and even after some stumbles even today it is still a respected service. So in that spirit, we are bringing you the list of all new and old movies and TV series releasing to NETFLIX this September.

September 1

Turning Point: 9/11 and the War on Terror — NETFLIX DOCUMENTARY How to Be a Cowboy — NETFLIX ORIGINAL Agatha Christie’s Crooked House (2017) Anjaam (1994) Barbie: Big City Big Dreams (2021) Brave Animated Series (Season 1) Crocodile Dundee in Los Angeles (2001) Green Lantern (2011) House Party (1990) El Patron, radiografia de un crimen / The Boss: Anatomy of a Crime (2014) HQ Barbers (Season 1) Letters to Juliet (2010) Level 16 (2018) Los Carcamales / Oldsters (Season 1) Kid-E-Cats (Season 2) Kuroko’s Basketball (Season 3) Marshall (2017) Welcome Home: Roscoe Jenkins (2008)

September 2

Afterlife of the Party — NETFLIX FILM Q-Force — NETFLIX ORIGINAL The Guardian

September 3

Dive Club (Season 1) — NETFLIX ORIGINAL Money Heist (Season 5) — NETFLIX ORIGINAL Sharkdog (Season 1) — NETFLIX FAMILY Worth (2021) — NETFLIX ORIGINAL

September 5

Bunk’d (Season 5)

September 6

Countdown: Inspiration 4 Mission to Space (Season 1 – Episodes 1 & 2) — NETFLIX DOCUMENTARY Shadow Parties (2021)

September 7

Kid Cosmic (Season 2) — NETFLIX ORIGINAL Octonauts: Above & Beyond (Season 1) — NETFLIX ORIGINAL On The Verge (Season 1) — NETFLIX ORIGINAL UNTOLD: Breaking Point — NETFLIX DOCUMENTARY If I Leave Here Tomorrow: A Film About Lynyrd Skynyrd (2018)

September 8

Into the Night (Season 2) — NETFLIX ORIGINAL JJ + E — NETFLIX FILM The Circle (Season 3) — NETFLIX ORIGINAL Show Dogs (2018)

September 9

Blood Brothers: Malcolm X & Muhammad Ali — NETFLIX DOCUMENTARY The Women and the Murderer (2021) — NETFLIX DOCUMENTARY

September 10

Firedrake the Silver Dragon (2021) — NETFLIX ORIGINAL Metal Shop Masters — NETFLIX ORIGINAL Kate — NETFLIX FILM Pokemon Master Journey: The Series (Part 1) — NETFLIX ANIME Prey — NETFLIX FILM Lucifer (Season 6) — NETFLIX ORIGINAL Lucifer season 6 poster cast

September 13

Crime Stories: India Detectives (Season 1) — NETFLIX DOCUMENTARY

September 14

You vs. Wild: Out Cold — NETFLIX FILM The World’s Most Amazing Vacation Rentals — NETFLIX ORIGINAL

September 15

Countdown: Inspiration4 Mission to Space (Season 1 – Episodes 3 & 4) — NETFLIX DOCUMENTARY Too Hot to Handle Latino — NETFLIX ORIGINAL Nailed It! — NETFLIX ORIGINAL Schumacher — NETFLIX DOCUMENTARY

September 16

Safe House (2012) Birth of the Dragon (2017) He-Man and the Masters of the Universe (Season 1) — NETFLIX ORIGINAL My Heroes Were Cowboys (2021) — NETFLIX DOCUMENTARY

September 17

Chicago Party Aunt — NETFLIX ORIGINAL Sex Education (Season 3) — NETFLIX ORIGINAL Tayo and Little Wizards (Season 1) — NETFLIX FAMILY The Stronghold (2020) — NETFLIX FILM

September 22

Dear White People (Season 4) — NETFLIX ORIGINAL Confessions of an Invisible Girl — NETFLIX FILM

September 23

A StoryBots Space Adventure (2021) — NETFLIX ORIGINAL

September 24

Ganglands (Season 1) — NETFLIX ORIGINAL Midnight Mass — NETFLIX ORIGINAL My Little Pony: New Generation — NETFLIX FAMILY

September 28

Aba Twist, Scientist — NETFLIX FAMILY

September 29

Sounds Like Love — NETFLIX FILM
Read More
What to do if you can’t find Recycle Bin
The Recycle Bin is undeniably an important place to make files ready for deletion. To put it simply, it assumes some importance but there are times when it displays an unpredictable behavior. For instance, it just suddenly goes missing and even Cortana is unable to find it. A lot of users have experienced the missing Recycle Bin issue in their Windows 10 computers. If you are one of these users, you might have wondered where the Recycle Bin icon has gone and how you can get it back. Worry not, as this post will provide you a couple of options you can try to bring back Recycle Bin in your Windows 10 computer. Follow the given options below to get started.

Option 1 – Try to restore Recycle Bin

It could be that you have disabled the Recycle Bin by accident which is why Windows was not able to show it on your desktop. To restore Recycle Bin, follow these steps:
  • First, click on the Start button and select Settings.
  • Next, select the Personalization setting and then select Themes from the left pane.
  • After that, click on the “Desktop icon settings” link under the “Related Settings” heading. This will display a list of icons in the Desktop Icons window.
  • From there, make sure that you check the checkbox for “Recycle Bin” to make it appear on your Desktop screen once again.

Option 2 – Try to recreate the Recycle Bin

If the first option didn’t work, then it could be that Recycle Bin might have been deleted which is why you fail to restore it. And to resolve this problem, you need to recreate Recycle Bin. Refer to the following steps to do so:
  • You need to launch the Windows File Explorer first and go to the View tab.
  • From this tab, select Options and click on the drop-down arrow and then select the “Change folder and search option”.
  • Afterward, switch to the View tab when the Folder Options window appears on your screen and select the “Show hidden files, folders, and drives” option.
  • And then unmark the checkbox next to the “Hide protected operating system files (Recommended)” option and click on both the Apply and OK buttons, respectively.
  • Next, go back to the File Explorer and click on “This PC” located on the left bar and go to the C: drive.
  • From there, you will find a file named “$Recycle.Bin” located at the top.
  • Open this folder to access its contents and you should see the Recycle Bin icon located at the top.
  • After that, right-click on the Recycle Bin icon and click on the “Send To” option and then click on “Desktop (create shortcut)”.
  • It will then confirm and recreate the Recycle Bin icon on your Desktop screen.
Note: Even though this icon is quite similar to the original one, it actually differs from it. The difference is that you won’t see if fill up when you delete files and you can’t simply empty it by right-clicking on the shortcut. On the other hand, you can still drag items into it just like with the original one. So when you want to empty the content of the newly restored Recycle Bin, you just have to double-click on the shortcut and right-click on the recycle bin in the window that appears, and select the “Empty Recycle Bin” option. In addition, now that you’ve set up the Recycle Bin shortcut, you have to re-activate the “Hide protected operating system files” to keep the important files and folders in your computer hidden.

Option 3 – Try to repair the Recycle Bin

If both the first two options failed to restore the missing Recycle Bin, then you can try repairing it instead. There are times when the Recycle Bin is removed from the Desktop screen due to some corrupted Windows system files. To fix these corrupted system files, you can run the DISM tool. This tool is known to repair potentially corrupted files in your system as having them could also system issues like the missing Recycle Bin. To repair these corrupted system files, you can run the DISM commands:
  • Tap the Win + X keys and click on the “Command Prompt (Admin)” option.
  • After that, input each one of the commands listed below sequentially to execute them:
    • Dism /Online /Cleanup-Image /CheckHealth
    • Dism /Online /Cleanup-Image /ScanHealth
    • Dism /Online /Cleanup-Image /RestoreHealth
  • Once you’ve executed the commands given above, restart your computer and check if the problem is now fixed.

Option 4 – Make sure that you are not in Tablet Mode

Since Windows 10 is designed to work on both desktop and mobile devices, it could be that your computer has slipped into Tablet Mode which explains why you’re not seeing the Recycle Bin. To check if your computer is really in Tablet Mode, follow these steps:
  • Go to the Start menu and select Settings.
  • Next, select the System setting and from the left pane select the Tablet Mode.
  • From there, make sure that the buttons next to the options given below are set to the off position:
    • Hide app icons on the taskbar in tablet mode
    • Automatically hide the taskbar in tablet mode
Read More
How to Fix Internal Error 2771

How to Fix Internal Error 2771

Internal Error 2771 - What is it?

Internal Error 2771 is an internal error code associated with Kaspersky Internet Security and Antivirus software. This error pops up when Kaspersky Internet Security software fails to install on your PC successfully. Installation of the software is interrupted and therefore it ends prematurely. This happens mostly when you try to install a new build on an existing installation. Internal Error 2771 is displayed in one of the following formats:
Internal Error 2771, Sandbox Feature or Internal Error 2771, WholeProduct Feature

Solution

Restoro box imageError Causes

This error may result on your computer screen due to several reasons. Some of the most common underlying causes include:
  • A leftover Registry Key
  • Bad entries from previous Security Package
  • INFCACHE.1 file corrupted
  • Conflicts with other security software installed on your system

Further Information and Manual Repair

To successfully overcome this problem and ensure the successful installation of Kaspersky Internet Security software on your system, try the methods given below.

Method 1- Remove the Leftover Registry Key

Sometimes Internal error code 2771 may appear during installation due to the leftover registry key from the previous Kaspersky software removal. A registry key is often created when uninstalling the previous Kaspersky version from the PC. This key is left behind even after you reboot your system. This key is called AVP**_post_ uninstall, you need to delete it to ensure the new version of the Kaspersky program is installed successfully on your PC.  For this, simply go to the start menu and type Regedit in the search bar. Now navigate to HKEY_LOCAL_MACHINESOFTWAREMicrosoftWindowsCurrentVersionRun and then look here for the registry key called AVP**_post_ uninstall. In order to delete this file, right-click it and then select delete. Once uninstalled, reboot your PC and then try installing the Kaspersky Internet Security program again. Hopefully, this will resolve the issue. If the software installs smoothly, then the error is fixed, in case it still persists, then try other methods illustrated below.

Method 2 - Remove the INFCAHCE.1  Corrupt File

Another reason for the error pop-up may be INFCAHCHE.1 corruption. This file is basically used to store driver information and inf file locations. However, if it contains corrupted information, then you must remove it. To do this, go to the start menu and type cmd into the search bar. This will open a command prompt. Here type del C:\Windows\infinfcache.1. Now reboot your PC and try installing Kaspersky software on again.

Method 3 - Fix Software Conflict

Security software conflict can also result in internal error 2771 code display. And when this happens, the installation of Kaspersky prematurely ends. Security software conflict may occur if you have Comodo Firewall installed on your PC. A firewall is known to cause issues with Kaspersky software programs. The best way to resolve this issue is to uninstall all security software programs on your PC. Once all security software is removed, then install Kaspersky on your system. If the installation is successfully completed, then reinstall the other software again.

Method 4 - Download Restoro

Error 2771 can also result on your computer screen if traces of the previously installed Kaspersky software still remain in the registry despite the program removal. In such an event it is advisable to download Restoro. This is a cutting-edge and user-friendly PC Repair Tool deployed with an intuitive interface and a powerful registry cleaner. The registry cleaner scans your entire PC in seconds and detects all registry-related problems. It removes all the bad entries, invalid registry keys, traces of previously uninstalled programs, junk files, and cookies that are known for registry corruption. It takes just a few clicks to perform this process. Once all traces are removed, you can install the new version of the Kaspersky Internet Security program on your PC without interruption. Click here to download Restoro and be on your way to resolve Internal Error 2771 on your computer!
Read More
Preventing installation of Removable Devices
In case you don’t know, Windows 10 supports installation and use of a number of removable devices which includes plug and plays mouse, keyboard, and other USB-based devices. But this could actually pose a threat to the integrity of a computer system and thus, some organizations pose a restriction in using these kinds of devices. the restriction on these devices is also useful especially if you keep on leaving your computer idle and someone tries to mess it up by plugging in a removable device. In such situations, the restriction will defend the user against data theft. Thus, in this post, you will be guided on how you can prevent the installation of removable devices on your Windows 10 computer. There are two options that can help you in preventing the installation of any removable devices on your computer – you can either try to use the Registry Editor or use the Group Policy Editor instead. Follow whichever option you want to use the instructions given below but before you start, don’t forget to create a System Restore Point first.

Option 1 – Prevent installation of Removable Devices via Registry Editor

  • Tap the Win + R keys to open the Run dialog box and type “Regedit” in the field and hit Enter to open the Registry Editor.
  • Next, navigate to this registry path: HKEY_LOCAL_MACHINESOFTWAREPoliciesMicrosoftWindowsDeviceInstallRestrictions
  • From there, look for a DWORD named “DenyRemovableDevices” and set its value to “0”. On the other hand, if you can’t find this DWORD, just simply create it and set its value to 0.
  • Once done, exit the Registry Editor and reboot your PC to apply the changes made.

Option 2 – Prevent installation of Removable Devices via Group Policy Editor

Keep in mind that the Group Policy Editor is not available in the Home Edition of the Windows operating systems. Thus, if you are using one, just stick to the first option, otherwise, proceed to the following steps.
  • Tap the Win + R keys to open the Run utility and type “gpedit.msc” and click OK or tap Enter to open the Group Policy Editor.
  • After that, go to this policy setting: Computer ConfigurationAdministrative TemplatesSystemDevice InstallationDevice Installation Restrictions
  • Next, look for the “Prevent installation of removable devices” entry and once you find it, set it as “Enabled”. From this window, you should see the following description of this policy setting:
“This policy setting allows you to prevent Windows from installing removable devices. A device is considered removable when the driver for the device to which it is connected indicates that the device is removable. For example, a Universal Serial Bus (USB) device is reported to be removable by the drivers for the USB hub to which the device is connected. This policy setting takes precedence over any other policy setting that allows Windows to install a device. If you enable this policy setting, Windows is prevented from installing removable devices and existing removable devices cannot have their drivers updated. If you enable this policy setting on a remote desktop server, the policy setting affects redirection of removable devices from a remote desktop client to the remote desktop server. If you disable or do not configure this policy setting, Windows can install and update device drivers for removable devices as allowed or prevented by other policy settings.”
  • Then click the Apply and OK buttons to save the changes made.
  • Now restart your computer to save the changes made. This should prevent the installation of any removable devices in your Windows 10 computer.
Read More
Animated background on desktop on Windows 10
Windows Vista had in it animated wallpapers on desktop but sadly how they were heavy on system resources Microsoft abandoned the idea. Moving forward a couple of years later we have Windows 10 but still, we do not have live animated wallpapers. Since I am the kind of person who does not want to wait on Microsoft and now it is time to bring animated wallpapers back I am going to make one all by myself and you are welcome to join the ride and do the same for you as well. Enough talk, let's dive into how we can make animated wallpaper for our Windows 10.

Choosing the application

First, we will need some form of application which can we look at our animated wallpapers and since they are animations it means video, so we will need a video player and what better choice than a VLC player, an open-source light weighs all-format player. Get a VLC player from here and install it.

Finding video source

The next thing is to of course have some looping video that we will use as background. There are many sites and ways to get seamless loop videos, I use this youtube channel for my backgrounds. Altho you can use any video footage you want it is recommended that it is not too long, that it is hi-resolution so we do not have pixels on-screen, and if you can, get it as seamless since we do not want to see stutter when the video is lopped from the beginning. So hopefully you have desired video and VLC player installed.

Putting it all together

Copy the following code and paste it into your search bar in Windows to open the Startup folder, or navigate to the Startup folder yourself via file explorer if you know where it is. %appdata%\Microsoft\Windows\Start Menu\Programs\Startup Now, next thing is to copy and past the VLC shortcut into this folder so it is started when Windows is first time booted. Right-click on the shortcut and in the edit field paste this: "C:\Program Files\VideoLAN\VLC\vlc.exe" --video-wallpaper --qt-start-minimized --no-qt-fs-controller --repeat --no-video-title-show --qt-notification=0 "C:\videopath\filename.mp4" where "C:\Program Files\VideoLAN\VLC\vlc.exe" is the path where VLC is installed, point this to where you have installed it "C:\videopath\filename.mp4" is the path where you have your video that you wish to use as animated wallpaper. Please note also that in my case there is mp4 as an extension but it does not need to be mp4, just use any extension VLC can open and play.

Conclusion

And that's it, you have successfully made an animated background or live wallpaper on your Windows 10 computer. You can change your wallpaper anytime by editing shortcut and giving it a new path to a new video or simply overwrite the existing one with a new baring same name.
Read More
How To Fix Error 0x00000050

How To Fix Error 0x00000050

0x00000050 - What is it?

0x00000050 is a type of stop error code. It is also known as a Blue Screen of Death error. It usually occurs when you try to start your PC or load a program. It can also occur while running a program. This error may also pop up when you restart your PC after installing Windows XP Service Pack (SP1) on your computer. Unlike some PC related errors, 0x00000050 error code occurs without any warning. The stop 0x00000050 error is displayed in a blue screen and interrupts you from carrying your desired activities on your PC smoothly. This error message is prompted in the following format:

Stop 0X00000050 (parameter1, 0, parameter3, parameter4) PAGE_FAULT_IN_NONPAGED_AREA”

Solution

Restoro box imageError Causes

Stop 0x00000050 error code may pop up on your Windows computer screen due to multiple causes. The most common causes for this error code include:
  • Poor PC maintenance
  • Registry issues- Bad registry keys, invalid entries, corrupt and damaged registry
  • Incompatible DLL files
  • Corruption of system files- Pool corruption in the Srvnet.sys file
  • Spyware and viruses
  • Overheating of PC components
  • The conflict between Windows XP SP1 and the display adapter drivers that are currently installed on your PC.
It is advisable to resolve 0x00000050 error code on your PC right away. BSOD errors are fatal errors and can pose serious threats to your PC. If not fixed timely it can lead to system crash, failure and valuable data loss.

Further Information and Manual Repair

To prevent data loss and system failure, there are some effective methods to resolve Stop 0x00000050 error code on your PC.  To implement these solutions on your PC, you don’t need to be a technical whiz or a computer programmer.

Method One

If the error cause is the conflict between Windows XP SP1 and the display adapter drivers then here’s what you need to do to resolve it:
  1. First start Windows in safe mode. To do this, restart your computer and press F8. On the Windows Advanced Options Menu, use the arrow keys to select Safe Mode.
  2. Once you select it press enter. Now use the arrow keys to select the operating system, press enter to start your computer in safe mode.
  3. Go to Start, click Run and then type ’msinfo32’ in the open box and press OK to continue. Then under the System Summary option, expand Components and then click Display to note the information that corresponds to the INF File Item. And then simply quit the utility.
  4. After that, go to the start menu again and then the My Computer and Properties option.
  5. Press the Hardware Tab and then click the Device Manager tab. Go to the ‘Display Adapters’ option and press the option ‘Uninstall. To confirm action press OK.
  6. Once again, go to the start menu and run and then type the following commands as illustrated below and after each command press enter.
  • ren %systemroot%infINF file name from Step 5.inf *inf.old
  • ren %systemroot%infINF file name from Step 5.pnf *pnf.old
This procedure may look pretty lengthy but it is worth it. Once you insert the commands, close all open windows and then reboot your system. Now download the latest drivers for your display adapter and install them. This will hopefully resolve the 0x00000050 error code on your system.

Method Two

Sometimes 0x00000050 BSOD error may occur due to temporary issues like overheating PC components. In times like these, all you need to do to fix the issue is to switch off your computer and allow the components to cool down. Try starting your PC after a few hours.

Method Three

If the issue is triggered by malware, then it is advisable to download a powerful antivirus. Scan your entire PC to detect and remove viruses affecting your PC and generating BSOD errors on your system.

Method Four

However, if the error still persists after trying all the methods stated above, then this means the cause of the error is deep-rooted. It is related to the Windows registry. Registry stores all your system files and activities performed on your PC. It usually gets damaged and corrupt if it is not cleaned frequently. The registry loads with unnecessary and obsolete files like junk files, cookies, internet history, bad registry keys and invalid entries. These files if not removed, accumulate and damage the registry, DLL files, and system files too thereby generate BSoD errors like 0x00000050 error messages. You can clean and repair the registry manually but it requires a great deal of expertise. The ideal and easiest way to clean it is to download Restoro. This is highly functional and easy-to-use software. It is embedded with multiple powerful utilities including such as a registry cleaner, an antivirus and a system optimizer. The registry cleaning feature scans for all errors related to the registry. It removes obsolete files, invalid entries, restores damaged DLL and system files. The antivirus feature simultaneously detects and removes all kinds of malware. These include viruses, Trojans, spyware, and adware affecting your PC. While the system optimizer feature ensures that your PC functions at its optimum speed. It is a safe and powerful PC Fixer. It has a user-friendly interface and compatible with all Windows versions. Click here to download Restoro and Fix Error 0x00000050
Read More
Fix Windows Update Error 0x800F081F – 0x20003
If you are trying to upgrade your computer but encounter the Windows Update Error 0x800F081F – 0x20003 instead, then read on as this post will guide you in fixing this Windows Update error. This kind of error is commonly encountered when upgrading your copy of Windows 10 and is caused by errors with various developer-related settings that are being enabled in the system. When you encounter Windows Update Error 0x800F081F – 0x20003, you will see either of these error messages:
“We couldn’t install Windows 10. The installation failed in the SAFE_OS phase with an error during INSTALL_UPDATES operation: Error 0x800F081F”  “The installation failed in the Safe_OS phase with an error during apply_image operation: Error: 0x800f081f – 0x20003”
To fix this kind of Windows Update error, you need not use external programs but you can try to disable the Developer Mode, run the Windows Update troubleshooter or restart all the Windows Update-related services and components. For more details, refer to the options provided below.

Option 1 – Try to disable Developer Mode

You might have to disable Developer Mode to fix the Windows Update Error 0x800F081F – 0x20003. How? Refer to these steps:
  • Tap the Win + I keys on your keyboard to open the Settings app.
  • Next, go to Update & Security > For Developers.
  • From there, select the toggle for Sideload apps or Microsoft Store apps located on the right-side panel.
  • If you get any prompt, just click on Yes.
  • After that, navigate to Apps > Apps & features and then click on Optional features on the right-side panel.
  • Then scroll down to locate the Windows Developer Mode entry and select it and click on Uninstall.
  • Once you’re done uninstalling the Windows Developer Mode component, close the Settings app and restart your computer to apply the changes made.

Option 2 – Try to run the Windows Update Troubleshooter

You should also try to run the built-in Windows Update troubleshooter as it could help you resolve the Windows Update Error 0x800F081F – 0x20003. To run it, go to Settings and then select Troubleshoot from the options. From there, click on Windows Update and then click the “Run the troubleshooter” button. After that, follow the next on-screen instructions and you should be good to go.

Option 3 – Try restarting various Windows Update-related services and components

  • Tap the Win + X key combination and select Command Prompt (Admin) to open Command Prompt with admin privileges.
  • After opening Command Prompt, copy and paste each one of the commands listed below one by one and tap Enter right after you enter each command.
    • net stop wuauserv
    • net stop bits
    • net stop appidsvc
    • ren %systemroot%SoftwareDistribution SoftwareDistribution.bak
    • ren %systemroot%system32catroot2 catroot2.bak
  • Once you’ve entered all the commands given above, they will stop all the Windows Update services that are running on your computer as well as clear the SoftwareDistribution folder, and reset the Catroot2 folder. Now you have to start all these Windows Update services you’ve just stopped by executing the following commands:
    • net start wuauserv
    • net start bits
    • net start appidsvc
    • net start cryptsvc
  • After that, restart your computer and try to run the setup again, and see if the error is now fixed.
Read More
Quick Fix Guide to Error 2032

Repair Error 2032

What Is Error 2032?

Error 2032 is essentially the hexadecimal format of the error caused. This error code is actually a code format used by the Windows operating system. Manufacturers use this code to determine the cause behind the problem. This error is usually the result of the issues that arise with different applications. When this error occurs, individuals are not able to view multimedia content on their PC. They may also experience system crashes and this makes it crucial to resolve it.

Solution

Restoro box imageError Causes

Error 2032 is caused by problems in Windows system files. Improper registry entries may also cause this problem. Some of the common causes that trigger Error 2032 are improper deletion of hardware or applications. Similarly, incomplete hardware or application installations or uninstallations may also cause issues. These file errors are actually caused when a computer has recently been attacked by a virus, spyware, or malware or if the system is trying to recover from an unanticipated shutdown. Such activities often result in the corruption or deletion of registry entries in Windows system files. The corrupt files will obviously cause problems and the application will fail to perform correctly.

Further Information and Manual Repair

While there are several ways to solve this problem, some of the most useful and practical solutions are listed below as follows.
  • If you are an advanced user, this workaround is for you. First and foremost, restart your computer and log on to it as the administrator. Now click on the ‘Start’ button.  Now follow this path: All programs ->Accessories-> System Tools->System Restore. Once you choose to perform System Restore, you will come across options where you can select to ‘Restore your computer to an earlier time’. This option will appear in a new window. Click on it and then click Next. Click on the Next button again that appears in the confirmation window. Restart your computer after the restoration is finished. You have just resolved the error.
  • Another easier alternative to fix Error 2032 is for novice users. Download an Error 2032 repair utility. Install this program as you are most likely to come across a Scan button. If there is an option to fix and repair an error, select it after the scan is complete. You can then restart your computer again. Look for the error and you will realize that it has disappeared and that your system is now ready to use.
Read More
1 2 3 162
Logo
Copyright © 2022, ErrorTools. All Rights Reserved
Trademarks: Microsoft Windows logos are registered trademarks of Microsoft. Disclaimer: ErrorTools.com is not affiliated with Microsoft, nor claim direct affiliation.
The information on this page is provided for information purposes only.
DMCA.com Protection Status