Intel’s GPU ARC coming aimed at AMD & Nvidia

intel ARCThis is not the first time that Intel is trying to enter the GPU field but its adventures so far were, well let us agree not so good. All of that is hoping to be changed with the upcoming ARC GPU. The first generation of Arc graphics, code-named Alchemist and previously known as DG2, will support desktop PCs and laptops and is set to arrive in the first quarter of 2022.

Alchemist will have hardware-based Ray tracing and AI-driven supersampling. This indicates that GPU is aimed to compete in the Hi-end spectrum and battle side by side with Nvidia and AMD on the market. Alchemist will also pack full DirectX 12 Ultimate support.

Intel also released names for the next upcoming future generations of ARC GPUs: Battlemage, Celestial & Druid. More information about ARC products will be released later this year.

“Today marks a key moment in the graphics journey we started just a few years ago. The launch of the Intel Arc brand and the reveal of future hardware generations signifies Intel’s deep and continued commitment to gamers and creators everywhere,” Roger Chandler, Intel vice president, and general manager of client graphics products and solutions.

If you like to learn and find out more about various Windows errors, and how to repair them go to our vast archive or use search to find articles that will explain and help you in solving your issue.
However, if you prefer to do things fast and with automatization then we are proposing to use an automated solution for your issues. The application that we are recommending is Advanced System Repair Pro
Advanced System Repair utilizes multiple tools all in one to give you a quick, simple, reliable, and very thorough diagnosis of your PC. It brings you all the tools you need in one program to clean, fix, protect, optimize and boost your PC!
1-Click Maintenance
All the tools to make it simple and easy! It's like having a professional technician at the click of a mouse.

Junk Cleaner
Keeping your computer free from unnecessary clutter also helps make your computer last longer. Like any other machine, if you keep it clean and take care of it, it will serve you better for longer!

Optimize background apps
Optimize applications background activity with the built-in Application Optimizer feature.

Disk Defrag
With a simple 1-click, Advanced System Repair speeds up your PC by assembling fragmented files on your machine and organizing them more efficiently.

Malware Removal
Finds and removes all types of harmful malware including trojans, worms, bots, adware, spyware, PUPs, and more!

Privacy Cleaner
The all-in-one privacy suite to Clean Your Tracks & Protect Your Privacy! Make your computer safe, secure, and more efficient!

System Tweak/Optimizer
ASR will analyze your complete system and settings to adjust your PC to function at its maximum performance.

Registry Cleaner
Over time, as you install and uninstall applications, the registry can become cluttered with old entries and broken settings which can result in program crashes, and annoying messages and slow the computer down.
Visit our Advanced System Repair Pro Download page to inform yourself about all the benefits of this software and get a free trial copy of it.
advanced system repair pro

Advanced System Repair Pro

One-click automated PC repair solution
ASR logo
With Advanced System Repair Pro you can easily
Replace damaged files
Restore performance
Free disk space
Remove Malware
Protects WEB browser
Remove Viruses
Stop PC freezing
DOWNLOAD
Privacy Policy | Terms of Use | Uinstall
Advanced System Repair Pro is compatible with all versions of Microsoft Windows including Windows 11

Share this article:

You might also like

Fix missing files in Recycle bin
Have you ever deleted a file by mistake? Do not feel bad, we all have, but what if you deleted the file by mistake and then you went to Recycle bin to restore it only to find out that the bin is empty? If you experienced this kind of issue then you know how unpleasant and frustrating it is but do not worry, we are here to help and provide you with solutions to this problem and hopefully get your file back. Follow the next steps from first to last since they are organized in a way to minimalize the permanent deletion of lost files.
  1. Refresh Recycle bin view

    If you spend any amount of time on this site reading through articles, you know I am a big fan of simple and effective solutions and there is nothing simpler than a single press of a button. Open your recycle bin and press F5 to refresh view or right-click anywhere inside and choose refresh. If your file does not appear with this method go to the next step.
  2. Set Windows to show hidden system files

    In order for this to work first, you will need to open File Explorer by pressing ⊞ WINDOWS + E Keyboard with windows and e markedWhen File Explorer opens go to VIEW > OPTIONS. Inside options select “Show hidden files, folders, and drives”, uncheck “Hide protected operating system files (Recommended)”, and click APPLY > OK Go to the recycle bin and check to see if files have managed to show up.
  3. Check if Don't move the file to the recycle bin is enabled

    Right-click on recycle bin and choose properties, under properties, there is the option that says Don’t move files to the Recycle Bin, Remove files immediately when deleted. This option is not selected by default, but it could be turned on by someone else or by mistake. If you see that this option is enabled sadly your file is gone and you will have to get the file back by using some third-party undelete application, uncheck this option to prevent future deletion of files by mistake.
  4. Increase recycle bin size

    This will not help you to get your file back sadly but it will help you in storing more files in recycle bin. This is helpful since if you reach your recycle bin limit all further files will be permanently deleted and not been able to get them back. So by increasing bin size you will have more space for deleted files to be saved. To do that, right-click on Recycle Bin, select Properties. Now, increase the Maximum size from the Custom size option, and click Apply and OK.
  5. Reset recycle bin

    To reset and fix corrupted recycle bin do the following: Press ⊞ WINDOWS + X to open the secret Windows menu and click on command prompt (admin) keyboard with windows and x markedIn the command prompt type in the following: rd /s /q C:\$Recycle.bin Reboot your system
Read More
Connecting a Wireless Printer to a Windows PC
Although it’s easy to set up wired printers in most cases and they have their charm, you don’t have to be around the printer if you are connected to the same network. So in this post, you will be guided on how you can install and set up a wireless printer on your Windows 10 computer. The idea here is to ensure that your Wi-Fi printer and your Windows 10 computer are connected on the same network and to do that, you need to carry out the following steps:
  • You have to connect the printer to the Wi-Fi network.
  • You have to add the printer or scanner to Windows 10.
  • You have to install the printer software.
  • You have to change the default printer.
  • And troubleshoot the printer.

For more details, follow the instructions below.

Step 1: Connect your printer to the Wi-Fi network. In this step, you need to turn on your printer and look for the option to connect to a Wi-Fi network. Note that the step to connect to the Wi-Fi network depends on what kind of printer you use as well as its OEM since there will be a user interface or a Wi-Fi button that will get the job done for you. Once your printer is connected to the Wi-Fi network, you need to keep it turned on until the setup is completed. Step 2: Next, add a printer or scanner to Windows 10
  • Since you’re already connected to the Wi-Fi network, you now have to go to Settings > Devices > Printers & scanners.
  • From there, click on the Add a printer or scanner option.
  • After that, the scanning process will begin as Windows 10 looks for the printer and once it finds it, it will display the printer in the result.
  • Choose the Wi-Fi printer from the results and click on the Add device option. Once you click this option, Windows will install the drivers via Windows 10 update. Note that this process will apply to all the printers – connected, wireless, and so on.
Step 3: You have to install a printer software In this step, you need to use the driver software from the OEM even though the default printer software works since in most cases, the driver software from OEM works better compared to the default ones and offers much better functionality like ink-saving modes, and many more. Step 4: You now have to change the default printer After installing the printer software, you now have to set or change the default printer in your computer. If you have not installed any printer, the default printer in Windows is the one that saves the files. Now since you have already installed your printer, all that’s left for you to do is to change the default printer of Windows 10 to the one you installed earlier. To do that, follow these sub-steps:
  • Go to Settings and navigate to Devices > Printers & scanners.
  • From there, check the checkbox labeled, “Let Windows manage my default printer” if there are many printers. This will recommend you to use the most used printer. But if you don’t want to switch to the most used printer, then uncheck the checkbox.
  • Once done, click on the printer you want to set as the default one and go to Manage, and then click on the Set as default button.
Step 5: If you have any issues with your newly installed printer, then you need to troubleshoot it One of the first basic troubleshooting you can perform to resolve the printer issue is running the Printer Troubleshooter. This built-in troubleshooter can detect and automatically fix the problem for you. To use it, follow these steps:
  • Tap the Win + R keys to open the Run dialog box.
  • Next, type “exe /id PrinterDiagnostic” in the field and click OK or hit Enter to open the Printer Troubleshooter.
  • Then click the Next button and follow the next on-screen instructions to fix the issue with the printer.
Read More
How to Fix Windows Update Error 0x80070103

How to Fix Windows Update Error 0x80070103

What is error code 0x80070103?

When visiting the Windows Update Website or the Microsoft Update Website to download the latest update for hardware drives, you could possibly receive Error Code 0x80070103 when clicking on the update driver. This error code occurs when Windows tries to download a piece of identical hardware for a second time. It could also occur when Windows tries to update a currently installed driver to an unsuitable version of that driver.

Solution

Restoro box imageFurther Information and Manual Repair

There aren’t many ways to handle this issue. Below are two methods of fixing Error Code 0x80070103.

Method 1:

  • Visit the Microsoft Update Website
  • After the "scan for updates" is complete, click the Welcome or Custom page.
  • Next, click Hardware, in the navigation panel, and then on the tab for "optional hardware Updates", the Update client will display the available updates.
  • For the graphics card, scan the second update after which you'll click to select the option that says "do not show this update again".
  • Hit the "Review and install updates" button.
  • Confirm that the second update for the graphics card is not present, then move on the installing the updates.
  • Click on the start button, go to All Programs, and then click on Windows Update.
  • Hit the "Check for updates" tab.
  • After the "scan for updates" is over, click the"Optional updates" link.
  • In the "Select the updates you want to install" section, right-click the update that is not needed and hide them.
  • Hit the OK button.
  • To install any additional updates that are selected, click "Install Updates". Close Windows Update if no other updates are selected,
  • For touch screens, swipe in from the right edge of the screen, tap Search (or point to the upper-right corner of the screen if you're using a mouse, moving the pointer down, before clicking Search). Enter "Windows Updates" in the search box, click Settings, and then click "Check for updates".
  • After the scan is complete, click the"Optional updates are available" link.
  • Right-click or Tap and hold the update you want to hide, select"Hide update", and then select OK.
  • If any other updates are available, save all work in "other programs", then restart the computer to the install updates; otherwise, opt out of the Windows Update window.
Open the search window and type “Windows Update” in the search box.

Method 2:

When trying to repair error code 0x80070103, if you find method one hard to follow, can contact Microsoft directly. Call up the help center number listed on their website, and a technician will be able to walk you through the process of ensuring the updater is not attempting to download multiple copies of hardware or trying to install unusable updates on your computer. Because the Windows Updater is set to a generic method of searching for updates, it may not be set to optimize the personal computer's settings. This is why you must select all of the optional update options and why this process is so long. It may be made easier by having a computer repairs technician walk you through it. However, if you want to automate the process of getting that problem solved, you can use a powerful tool to get the job done.
Read More
Fix Windows Update Error 0x8024A10A
The Windows Update service, just like other services in Windows 10 may sometimes experience some issues and stop behaving properly. One of the issues you might encounter as you use the Windows Update service is the Windows Update error 0x8024A10A. This kind of error code signifies that the Windows Update service is shutting down. So if you encounter this error, read on as this post will guide you on how you can fix it. When you receive the Windows Update error 0x8024A10A, you may see this error message on your screen: “USO_E_SERVICE_SHUTTING_DOWN indicates that the WU Service is shutting down. This may happen due to a very long period of time of inactivity, a system hang leading to the service being idle and leading to the shutdown of the service. Ensure that the system remains active and the connections remain established to complete the upgrade.” You could try to restart your computer to resolve the problem since there are instances when a simple restart can fix errors. However, if it does not work, you might find the options provided below useful.

Option 1 – Try to restart the Windows Update Service

The first thing you can do to fix Windows Update error 0x8024A10A is to restart the Windows Update Service from the Services Manager. To do so, follow these steps:
  • In the Cortana search box, type “services” and click on the Services icon to open the Services Manager. Alternatively, you can also tap the Win + R keys to launch the Run prompt and then type “services.msc” in the field and hit Enter to open the Services Manager.
  • After opening the Services Manager, look for the Windows Update Service.
  • Once you found it, right-click on it and check if the Service is stopped. If it is, then select the Start option. On the other hand, if the Windows Update Service is already started, just select the Restart option.
  • After that, try to run the Windows Update again and see if the error 0x8024A10A is now fixed.

Option 2 – Run the Windows Update Troubleshooter

Since the Windows Update troubleshooter reviews the status of the services that support the process, it would prompt and fix it if there is anything that’s not right. Thus, you might want to run a built-in Windows Update troubleshooter to resolve the Windows Update error. It is one of the things you can check out as it is known to automatically resolve any Windows Update errors like error 0x8024A10A. To run this troubleshooter, go to Settings and then select Troubleshoot from the options. From there, click on Windows Update and then click the “Run the troubleshooter” button. After that, follow the next on-screen instructions and you should be good to go.

Option 3 – Run Microsoft’s online troubleshooter

Aside from the Windows Update troubleshooter, running Microsoft’s online troubleshooter might also help you fix the Windows Update Error 0x8024A10A. This online troubleshooter is known to help in fixing Windows Update errors, it scans your computer for issues that might be causing the problem and then fixes them automatically.

Option 4 – Try to run the Windows Update Service in a Clean Boot State

There are some instances that some conflicting programs installed in your computer might be the one that’s causing Windows Update error code 0x8024A10A. To identify which program is causing the problem, you need to put your computer in a Clean Boot State. To do so, follow the steps below.
  • Log onto your PC as an administrator.
  • Type in MSConfig in the Start Search to open the System Configuration utility.
  • From there, go to the General tab and click “Selective startup”.
  • Clear the “Load Startup items” check box and make sure that the “Load System Services” and “Use Original boot configuration” options are checked.
  • Next, click the Services tab and select the “Hide All Microsoft Services” check box.
  • Click Disable all.
  • Click on Apply/OK and restart your PC. (This will put your PC into a Clean Boot State. And configure Windows to use the usual startup, just simply undo the changes.)
  • Now try to run the Windows Update Service again and see if Windows Update error 0x8024A10A is now gone.
Read More
Fix Mfplat.dll missing on Windows 10
Recently, a number of users reported that they were not able to run PLEX and other similar streaming services ever since a Windows Update was automatically installed in the system. The error in these streaming services has something to do with a missing Mfplat.dll DLL file from the Windows Media Feature Pack. On the other hand, some users also reported that the mfplat.dll error occurred on several games as well which used the Media Feature Pack. Usually, the mfplat.dll error is caused by the missing Media Feature Pack in Windows 10. Although most of the time the Media Feature Pack is installed by the application that needs it or through Windows Update automatically, there are just certain installers that do not have it. It could be that the Media Playback service was disabled by a particular Windows Update. Aside from that, the error might be because your computer is using Windows 10 N – a Windows 10 version that does not include the Media Feature Pack by default. Whatever the cause may be, you can troubleshoot the problem with the help of the options given below. But before you go on, keep in mind that downloading the missing DLL file and copying it to the folder of the program where you encounter the error won’t really help and will only make things even more complicated.

Option 1 – Install the Media Feature Pack for Windows 10 N version

As mentioned, the Windows 10 N version does not come with Windows Media Player. Meaning to say, the Media Feature Pack is also not installed by default or won’t be updated by the Windows Update component. So if you are not quite sure what Windows 10 version you currently have installed, refer to these steps:
  • Tap the Windows key + S and then type “about” in the search box.
  • From the search results, click on the “About your PC” to open the About tab of the Settings app.
  • Afterward, scroll down to the Windows specifications and check your Windows version under Edition.
Note: If you’ve determined that your computer is using the Windows 10 N version, you need to install the appropriate Media Feature Pack for your computer. How? Refer to the steps below:
  • Click this link to download and install the Media Feature Pack from Microsoft’s official website.
  • Upon installation, select the edition you want to install using the drop-down menu and then click on Confirm. Take note that there are few reasons why you’d want to install the older version since most streaming services like PLEX and most games usually require version 1803.
  • After that, wait until the request is validated. The download should begin in a few minutes automatically.
  • Once the download is completed, open the installation executable file and follow the next on-screen instructions to install the Media Feature Pack on your computer.
  • Restart your computer. After your computer has rebooted, open the application where you’re getting the mfplat.dll missing error and then check if the problem is now fixed.

Option 2 – Enable Media Playback via Command Prompt

If you encounter the mfplat.dll missing error when you attempt to run PLEX or other similar streaming service and you’ve already verified that the Media Feature Pack is indeed installed, you might want to try enabling it using an elevated Command Prompt. There are cases when a particular Windows Update ends up disabling the feature and creates the grounds which results in the mfplat.dll missing error. Thus, you can have to enable the feature via Command Prompt.
  • Tap the Win + R keys to open the Run dialog box.
  • Then type “cmd” in the field and hit Enter to open an elevated Command Prompt.
  • Next, click on Yes if a User Account Control prompt pops up.
  • After opening Command Prompt, copy and paste the following command and hit Enter to execute it:
dism /online /enable-feature /featurename:MediaPlayback
  • Close Command Prompt and then open the app once again to check if the problem is now fixed.

Option 3 – Try extracting a copy of the mfplat.dll file from the windows.old directory

If you encounter the error shortly after you just upgraded to Windows 10 from an older version, the best thing you can do to resolve the problem is to use windows.old directory to fetch an old copy of the mfplat.dll file. To do so, follow the steps below.
  • Go to the Windows drive and then look for the windows.old directory where it preserves a copy of your old operating system as well as associated files in case something goes out of hand during the upgrade process.
  • After that, open the windows.old folder and then go to the syswow64 folder.
  • Next, from the syswow64 folder, copy the mfplat.dll file and paste it to C: windows syswow64.
  • Restart your computer and check if the error is now resolved or not.
Read More
Free Quake upgrade comes to Steam and more
quake remaster
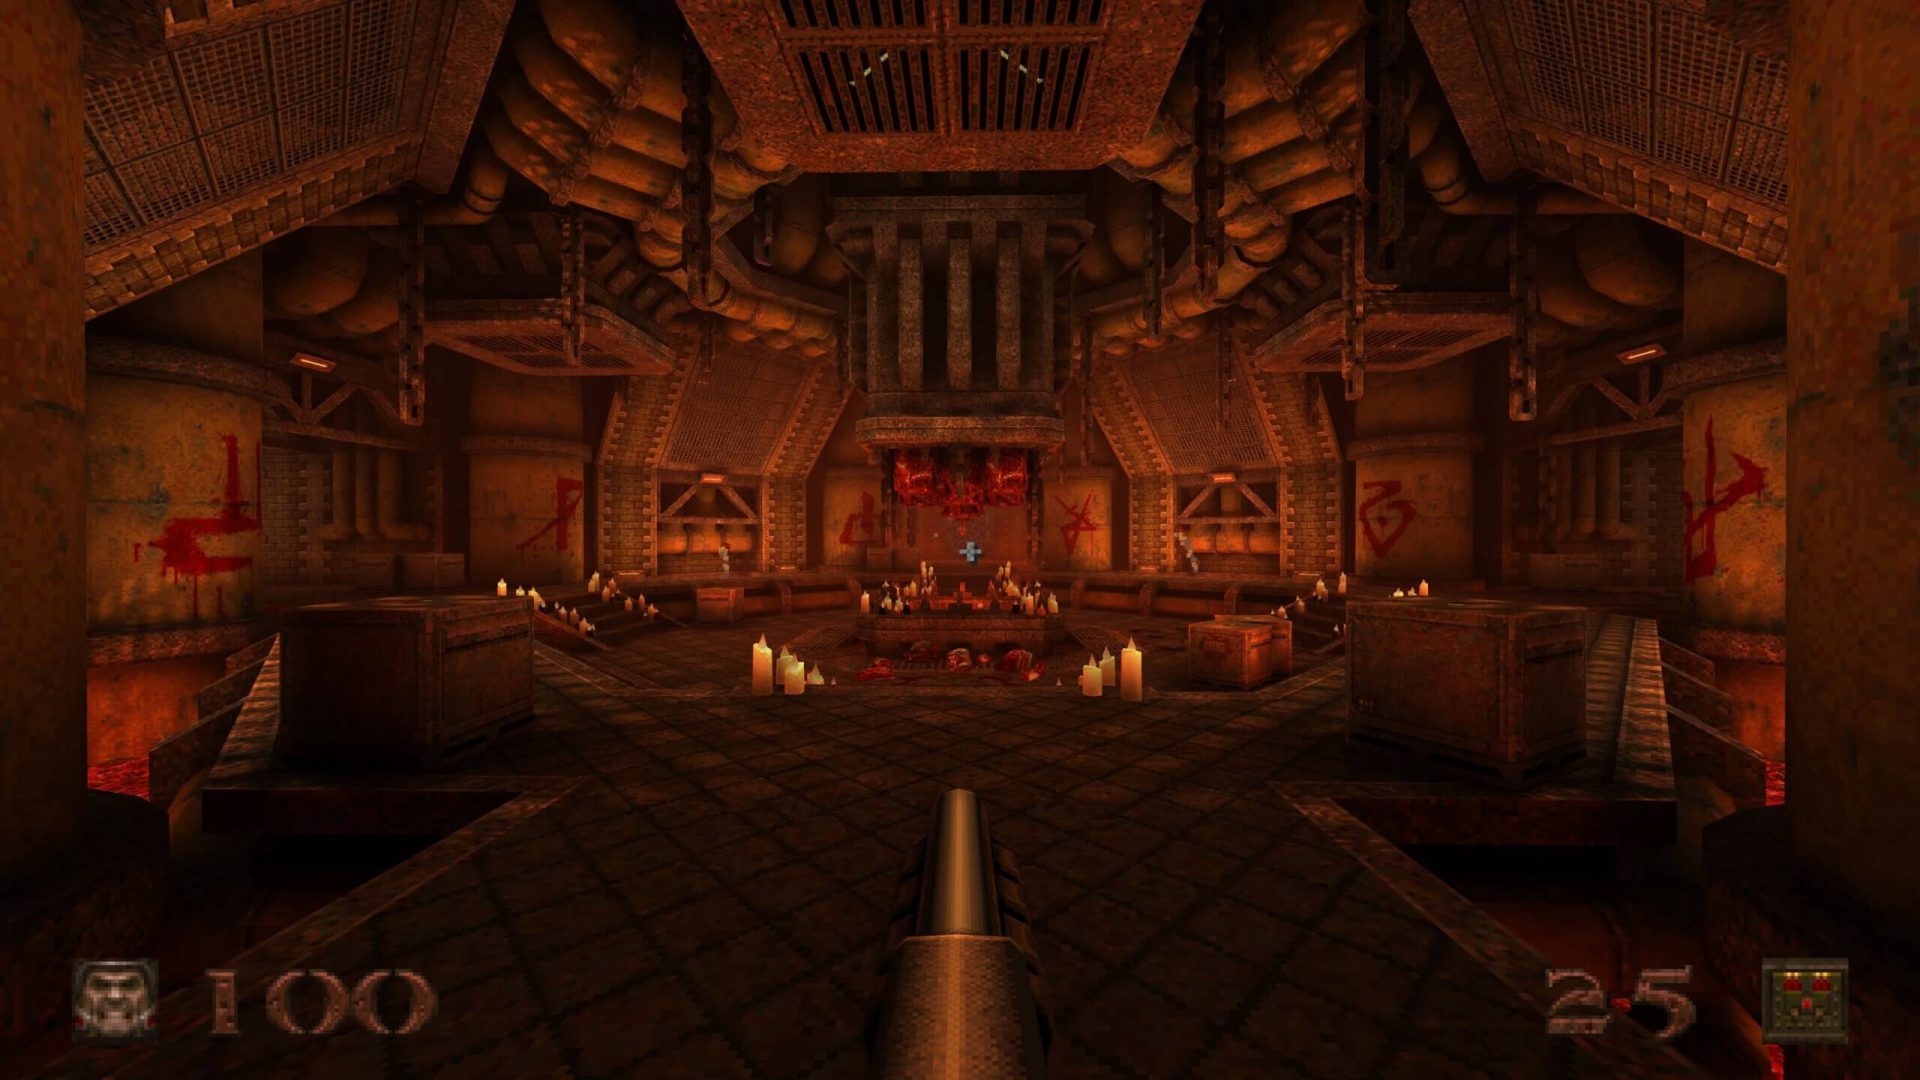
Without any fanfare, news, or information Bethesda has released a completely free upgrade for legendary Quake 1. Free upgrade is automatically applied to all users who possess the original game and it has already been rolled out.

What has changed for good?

New textures, effects, and resolutions are one thing that will come first into your focus when you start the game. From the moment game is started it feels and looks like a game you remember from a long time ago. Models are also upgraded with a higher polygon count. Another thing that will hit you right away is the legendary OST by Trent Reznor in its full glory. If you have the original Quake and played it you will know that OST was missing from the Steam release and having it fully back is a great feature. I would argue that placing just OST alone in the steam release is enough for people to play it again since it adds so much atmosphere. Deathmatch and other multiplayer goodies are all here as well and there is a completely free new episode in the game with several levels. Yes, you get a free Quake upgrade in HD with an extra episode completely free.

The bad side of Quake coin

So this might come as a purist or obsessive nit-picking but there were two things that I, personally am not a fan of and have noticed during my gameplay. Please know that this is personal preference and by no other chance reflects the quality of the game itself but I just had to talk about it. Quake remake is made in a new engine and as such dynamic and gunplay feel different from the original, granted they have done the best they could to replicate the authentic feeling of the original game but there are parts of the game where I have felt that simply put, it feels different. Another thing is also tied to technology and the overall game is somewhat a little brighter and in some areas little softer in dark areas. Like I said this is purely personal preference and might come as nitpicking but I preferred the darker and grittier look of the original game. Darkplaces, the free custom-made upgrade did this in my opinion better.
Read More
Fix Error 1061 The service cannot accept control messages at this time Error in Windows 10
If you are trying to run or starting a program on your Windows 10 computer and you suddenly get an error message saying, “Error 1061 The service cannot accept control messages at this time”, read on as this post will show you what you can do to fix the problem. This kind of error pops up since the Application Information Service does not respond to the requests to raise applications to Administrator in Windows 10 like the Task Manager, Service updates, and so on. Thus, you won’t be able to run or open apps and will only get stuck with this error. The “Error 1061 The service cannot accept control messages at this time” message is a type of network error that typically occurs when there is a temporary mismatch between the requested control and the state of the service to be controlled. It’s most likely that the service is in a state of start-pending, stop-pending, stopped or it may already be used by another user which explains why this error message suddenly appears. You can encounter this error message on any Windows operation. Here are some of the most common occurrences:
  • Debugging a Windows service
  • Starting Task Manager
  • Starting Registry Editor
  • Starting Firewall
  • Starting services.msc
  • Starting dsm.exe
  • Updating services
  • Asking for file permissions, etc.

According to Microsoft MSDN, the error occurs because:

“There is a temporary mismatch between the requested control and the state of the service to be controlled. The service may be in a state of start-pending, stop-pending, or stopped. Wait a few minutes, then retry your operation.” If after a few minutes, the error still appears, then you may have to follow the options prepared below.

Option 1 – Try to restart the Credential Manager Service

  • Go to the Start menu.
  • Then type in “services” in the search box.
  • From the search results, right-click on “Services” and select the “Run as Administrator” option.
  • Next, look for the Credential Manager Service in the Services window.
  • Once you found it, double-click on it to open its Properties. From there, you need to click on the Stop button.
  • After that, set the Credential Manager Service to “Automatic” and click on the Start button to restart it.

Option 2 – Try to start the Application Information Service

You can also try starting the Application Information Service to fix the “Error 1061 The service cannot accept control messages at this time”. Just open the Windows Services Manager and make sure that Application Information Service is Started. And if you find that it’s already started, you need to restart it.

Option 3 – Try killing the IIS Worker Process via Task Manager

  • Tap the Ctrl + Alt + Del keys and select the Task Manager.
  • Next, click on More details to expand the Task Manager and then look for the IIS Worker Process entry which should be displayed in the list under the Processes tab. From there, you can see it in the Background processes. Once you find it, kill its process.
  • You can also try to look for the “w3wp.exe” entries and end its process. if you find many entries, right-click on some of them and select the End task option from the context menu.
  • Now restart your PC. That should fix the problem.
Read More
Fix Some apps need to be uninstalled
When you update or upgrade your computer to Windows 10, the setup will look for the compatibility of both the hardware and software. And in this process, if suddenly got an error message saying, “Some apps need to be uninstalled” or “You need to uninstall a program in order to continue”, you have to look for the program(s) that might be causing the compatibility issues. But worry not as this post will help you resolve the issue. Simply follow the given suggestions below.

Option 1 – Look for the incompatible programs

There are times when Windows 10 will point out the programs that are incompatible with Windows 10. In this situation, just click on the Uninstall and continue button and then wait for the process to be completed. For more information, you can check out the official site Ready for Windows by Microsoft. This site can help you determine which software versions are compatible with Windows 10 and which ones are not. All you have to do is select the Windows 10 version and type your App name, after that, you will see the results about its compatibility. Thus, it’s now easier for you to figure out which software is causing an issue and if there is a new updated version available that you can install instead.

Option 2 – Try to install the Windows Update in a Clean Boot State

Putting your PC in a Clean Boot state can also help you install Windows Updates or Upgrades without any trouble because, during this state, you can start the system with a minimum number of drivers and startup programs that will surely help you in isolating the root cause of the issue.
  • Log onto your PC as an administrator.
  • Type in MSConfig in the Start Search to open the System Configuration utility.
  • From there, go to the General tab and click “Selective startup”.
  • Clear the “Load Startup items” checkbox and make sure that the “Load System Services” and “Use Original boot configuration” options are checked.
  • Next, click the Services tab and select the “Hide All Microsoft Services” check box.
  • Click Disable all.
  • Click on Apply/OK and restart your PC. (This will put your PC into a Clean Boot State. And configure Windows to use the usual startup, just simply undo the changes.)
  • After that, try to install the Windows Updates or upgrade again.

Option 3 – Try creating a new user account

Creating a new user account can resolve the “Some apps need to be uninstalled” error when upgrading or updating your Windows 10 PC. All you have to do is create a new admin account and initiate the setup. And this is a new user account, there will be no third-party applications installed on your computer. Thus, the installation should go through without any trouble. And in case you’ve already installed programs for that user, you just have to uninstall them all and then re-run the setup.

Option 4 – Perform a clean install

If none of the options worked, you can try to clean install Windows 10. Just make sure that you have the ISO from the official Microsoft Website and then a bootable USB drive to install Windows 10 again. Take note that this will delete all the data from your drive where Windows 10 was installed previously.
Read More
Fix Origin Error when loading the webpage
If you encounter a blank page with an error message saying, “Origin Error” when you try to load a webpage, then this post will surely help you resolve this error. As you can see, this error is a very uncommon one and it is not about the popular game known as Origin where all you have to do is reinstall the client. Although this error message is a very uncommon one, you will see a blank page with a message saying, “Origin Error” when you attempt to load a webpage. To fix this error, this post will provide you some potential fixes that might help. Follow the fixes given below carefully and see which one fixes the problem.

Option 1 – Use Ctrl + F5 keys to clear browser cache

The first thing you can try is to “Hard Refresh” to clear the cache of your browsers. You can do that by using the Ctrl + F5 keys on your keyboard. On the other hand, you can also clear the cache manually for Chrome, Edge, and Firefox.

Option 2 – Remove the Proxy

You might also want to try removing the Proxy as it could also help you in fixing the Origin error. Here’s how you can do it:
  • Tap the Win + R keys to open the Run dialog box.
  • Then type “inetcpl.cpl” in the field and hit Enter to pull up the Internet Properties.
  • After that, go to the Connections tab and select the LAN settings.
  • From there. Uncheck the “Use a Proxy Server” option for your LAN and then make sure that the “Automatically detect settings” option is checked.
  • Now click the OK and the Apply buttons.
  • Restart your PC.
Note: If you are using a third-party proxy service, you have to disable it.

Option 3 – Try to flush the DNS, reset Winsock and the TCP/IP

You might also want to flush the DNS and reset Winsock as well as reset TCP/IP as it could help in fixing the Origin error. To do so, refer to these steps:
  • Click the Start button and type in “command prompt” in the field.
  • From the search results that appear, right-click on Command Prompt and select the “Run as administrator” option.
  • After opening Command Prompt, you have to type each one of the commands listed below. Just make sure that after you type each command, you hit Enter
    • ipconfig /release
    • ipconfig /all
    • ipconfig /flushdns
    • ipconfig /renew
    • netsh int ip set dns
    • netsh winsock reset
After you key in the commands listed above, the DNS cache will be flushed and the Winsock, as well as the TCP/IP, will reset.
  • Now restart your computer and open Google Chrome then try opening the website you were trying to open earlier.

Option 4 – Try using Google Public DNS

You might want to try changing your current DNS to the Google Public DNS. All you have to do is change the DNS settings explicitly on your operating system by using the DNS IP addresses. Here’s are the steps to do that:
  • The first thing you have to do is right-click on the network icon in the Taskbar and select Network and Sharing Center.
  • Next, click on the “Change Adapter Settings” option.
  • After that, search for the network connection that you are using to connect to the internet. Note that the option might be “Wireless Connection” or “Local Area Connection”.
  • Right-click on your network connection and click on Properties.
  • Then select the new window to choose the “Internet Protocol 4 (TCP/IPv4)” option.
  • After that, click on the Properties button and click the checkbox in the new window for the option “Use the following DNS server addresses”.
  • Type in “8.8.8” and “8.8.4.4” and click OK and exit.
Read More
Fix NETWORK_FAILED error in Chrome
Although the Google Chrome browser is one of the most used browsers, a lot of things could still go wrong when browsing the web using it. One of the errors you might encounter is the “ NETWORK_FAILED ” error. This kind of error in Chrome indicates that Chrome wasn’t able to send your request through the network connection. It could be that your computer has trouble connecting to a stable internet connection or there is some plugin in your Chrome browser that is causing the issue. The worst-case would be malware. But worry not for this post will guide you on what you can do when you encounter the NETWORK_FAILED error in Google Chrome. Make sure to follow each one of the options given below and see which one of them worked best for you.

Option 1 – Disable or remove any unwanted extensions in Chrome

As you know, browser extensions help in enhancing the browsing experience but there are also times when it does exactly the opposite, and such is the case with the NETWORK_FAILED error in Chrome. It could be that one of the extensions in your browser is the one that’s causing the trouble. To disable or remove these unwanted extensions, here’s what you have to do:
  • Launch Google Chrome, press Alt + F, move to More tools, and click Extensions.
  • Look for Search.tb.ask.com or any other unwanted add-ons, click the Recycle Bin button, and choose Remove.
  • Restart Google Chrome, then tap Alt + F, and select Settings.
  • Navigate to the On Startup section at the bottom.
  • Select “Open a specific page or set of pages”.
  • Click the More actions button next to the hijacker and click Remove.

Option 2 – Run the Malware Scanner and Cleanup tool in Chrome

If removing or disabling the unwanted extension didn’t help in fixing the error, you can try using the built-in malware scanner and cleanup tool in Google Chrome. These tools help you get rid of any unwanted pop-ups, ads, unusual Startup pages, toolbars, and even malware.

Option 2 – Run the Malware Scanner and Cleanup tool in Chrome

  • Launch Google Chrome and then tap the Alt + F keys.
  • After that, click on Settings.
  • Next, scroll down until you see the Advanced option, once you see it, click on it.
  • After clicking the Advanced option, go to the “Restore and clean up the option and click on the “Restore settings to their original defaults” option to reset Google Chrome.
  • Now restart Google Chrome.

Option 3 – Try to disable the Proxy

If you are using a proxy, you might want to consider disabling it as it could have something to do with the NETWORK_FAILED error.
  • Tap the Win + R keys to open the Run dialog box.
  • Then type “cpl” and hit Enter or click OK to open the Internet Properties.
  • After that, go to the Connections tab where you should see the LAN settings. Click on it.
  • Next, uncheck the “Use a Proxy Server for your LAN” and ensure that the “Automatically detect settings” option is checked as well.
  • Then click Ok and then Apply to save the changes made.
  • Restart your PC.

Option 4 – Flush DNS and reset TCP/IP

  • Click the Start button and type in “command prompt” in the field.
  • From the search results that appear, right click on Command Prompt and select the “Run as administrator” option.
  • After opening Command Prompt, you have to type each one of the commands listed below. Just make sure that after you type each command, you hit Enter
    • ipconfig /release
    • ipconfig /all
    • ipconfig /flushdns
    • ipconfig /renew
    • netsh int ip set dns
    • netsh winsock reset
After you key in the commands listed above, the DNS cache will be flushed and the Winsock, as well as the TCP/IP, will reset.
  • Now restart your computer and open Google Chrome then try opening the website you were trying to open earlier.

Option 5 – Delete the WLAN Profiles

Deleting the WLAN Profiles might be a good idea if you are not able to connect to the internet on your computer and if you’re using Wi-Fi. It could be that the networks that were connected previously have gone rogue which is why it is not connecting properly. And so deleting the WLAN profiles would be for the best. That should do it.
Read More
1 2 3 162
Logo
Copyright © 2022, ErrorTools. All Rights Reserved
Trademarks: Microsoft Windows logos are registered trademarks of Microsoft. Disclaimer: ErrorTools.com is not affiliated with Microsoft, nor claim direct affiliation.
The information on this page is provided for information purposes only.
DMCA.com Protection Status