Download and Install Google Fonts on Windows

Google fonts are a free open-source font library made to enrich web content and present end-user with a smooth web experience while surfing. Fonts are completely free for both commercial and personal use and they are not limited to use in WEB only, you can use them also in other projects like business cards, flyers, etc.

In order to use google fonts first thing of course you will need to download them. In this guide, we will show you how to download and install google fonts.

  • Go to the Google Fonts page.
  • Select the font family that you wish to use. You can preview each font style to make double-sure it is the right one.
  • When you are ready, click on the Download family button.
Roboto Font
  • A File Explorer window will pop up, asking you where to save the font family.
  • The downloaded file will be compressed in .zip format to save bandwidth, so you will first need to uncompress/unzip it. Right-click on the file and select Extract all.
Extract All
  • You will then be asked where to unzip/extract the file. File Explorer will automatically create a new subfolder, named as the file name, so all you need to do is confirm it by clicking Extract.
Extract Files
  • Click on the Windows icon in the bottom-left corner of your desktop
Settings
  • Select the Personalization category and Fonts.
Available Fonts
  • Split the screen between File Explorer and Settings by dragging the windows to either the left or right edge of the screen. Select all the font files by pressing CTRL + A and drag them into the Add fonts box.
Add Fonts New
If you like to learn and find out more about various Windows errors, and how to repair them go to our vast archive or use search to find articles that will explain and help you in solving your issue.
However, if you prefer to do things fast and with automatization then we are proposing to use an automated solution for your issues. The application that we are recommending is Advanced System Repair Pro
Advanced System Repair utilizes multiple tools all in one to give you a quick, simple, reliable, and very thorough diagnosis of your PC. It brings you all the tools you need in one program to clean, fix, protect, optimize and boost your PC!
1-Click Maintenance
All the tools to make it simple and easy! It's like having a professional technician at the click of a mouse.

Junk Cleaner
Keeping your computer free from unnecessary clutter also helps make your computer last longer. Like any other machine, if you keep it clean and take care of it, it will serve you better for longer!

Optimize background apps
Optimize applications background activity with the built-in Application Optimizer feature.

Disk Defrag
With a simple 1-click, Advanced System Repair speeds up your PC by assembling fragmented files on your machine and organizing them more efficiently.

Malware Removal
Finds and removes all types of harmful malware including trojans, worms, bots, adware, spyware, PUPs, and more!

Privacy Cleaner
The all-in-one privacy suite to Clean Your Tracks & Protect Your Privacy! Make your computer safe, secure, and more efficient!

System Tweak/Optimizer
ASR will analyze your complete system and settings to adjust your PC to function at its maximum performance.

Registry Cleaner
Over time, as you install and uninstall applications, the registry can become cluttered with old entries and broken settings which can result in program crashes, and annoying messages and slow the computer down.
Visit our Advanced System Repair Pro Download page to inform yourself about all the benefits of this software and get a free trial copy of it.
advanced system repair pro

Advanced System Repair Pro

One-click automated PC repair solution
ASR logo
With Advanced System Repair Pro you can easily
Replace damaged files
Restore performance
Free disk space
Remove Malware
Protects WEB browser
Remove Viruses
Stop PC freezing
DOWNLOAD
Privacy Policy | Terms of Use | Uinstall
Advanced System Repair Pro is compatible with all versions of Microsoft Windows including Windows 11

Share this article:

You might also like

Office 2021 release date set for October 5th
Microsoft-Office-2021-1024x425Microsoft office has two major packages, an online one, and an offline version. The online version of the course is Office 365 that requires a monthly subscription and it is always regularly updated and maintained. Another version is more of a typical old school application, install it and use it, no constant internet connection is required and no monthly subscription is required, buy once and use it. The last version of buying it once and use it was Office 2019 and after two years we are going to receive a new version soon. Microsoft has set its release date for October 5th of this year and as always it will feature the current latest version of office applications and one-time purchase. The new office will support dark mode and other improvements tied to the new Windows 11 and some specific features tied to Office itself.
Read More
Fix Steam stuck on Allocating disk space
If you have been stuck on allocating disk space on steam you know how annoying this error could be. Here you are, with your new game eager to play it and relax a little and all of the sudden steam gets stuck on allocating disc space. Luckily this error is fixable, follow provided guide to fix the error and continue with installing the game.
  1. Restart computer

    An old age solution of turning it off and turning it back on but in this case, it works 90% of the time.
  2. Run Steam as administrator

    Allocating disk space when done by a third-party application can be a task that requires privileges higher than the normal user. Find the steam executable file in the installation folder, right-click on it and run it as an administrator
  3. Clear Steam cache

    Launch Steam in admin mode. Once in the client, click on Steam at the top left corner of the screen. From the drop-down box, click on Settings. Once in the Settings, navigate to the Downloads tab. Click the Clear Download Cache option. Click OK on the prompt to confirm your action. Wait for the process to complete. When done, save changes and exit the client.
  4. Change download server

    Launch Steam client in admin mode. Once in the client, click on Steam at the top left corner of the screen. From the drop-down box, click on Settings. Once in the Settings, navigate to the Downloads tab. Click the drop-down menu under the Download Region. Choose a different server to download from. Exit the Steam client.
  5. Refresh installation files

    • Kill a Steam process in Task Manager.
    • Navigate to your Steam folder
    • Inside the Steam folder, select everything except the steamapps folder and the Steam.exe executable file.
    • Tap the Delete key on your keyboard.
  6. Turn off firewall

    Firewall can prevent steam and cut access to system operations, disable firewall to fix this issue.
  7. Stop overclocking

    If you have overclocked your PC, you can simply reverse the change. The steps you will need to take depends on the overclocking software. Launch the software and look for the option to stop the overclocking. Once done, restart your computer, rerun the game installation.
Read More
A Guide to Quickly Fixing Error 103

DIY Troubleshooting Error 103

What Is Error 103?

Error 103 is an error that is usually encountered by those who use Google Chrome. This error is usually generated because of a conflict arising between Google Chrome and the antivirus program running on the user’s computer. Primarily, error 103 is an incompatibility issue. It is not critical in nature. However, since it will disrupt the smooth functioning of the browser, it is strongly advised to rectify this error that is generated due to any temporary conflicts between the logic of the two programs namely Google Chrome and antivirus. In layman's terms, it would be only justified to say that this error has a lot to do with the way programs react to each other in real-time.

Solution

Restoro box imageError Causes

When the error is displayed to the user, it usually states something like ‘chrome error 103 connection aborted’, ‘chrome error 103 err_connection_aborted’ or ‘Error 103 (net: ERR_CONNECTION_ABORTED): Unknown error. This begs the question, what triggers this error? Here it is important to understand that Google Chrome constantly applies to upgrade. In most instances, the upgrades almost go unnoticed. In the meanwhile, there are other programs running on any system such as firewall, Antispyware, or antivirus programs. All such programs govern the functionality of the web browser. Now, when the web browser attempts to update and any programs on the system view the update as a threat, the connection to the internet will be terminated. It is also important to understand that these programs will keep you from upgrading or from doing anything with your browser.

Further Information and Manual Repair

google chrome error 103Before we move on to the discussion of fixing the underlying causes for error 103, it is important to understand all those programs that are most likely to generate this error. A list of all such programs is outlined below as follows.
  • Kaspersky Pure 3.0
  • Kaspersky ONE
  • Kaspersky small office security 2013
  • Kaspersky internet security 2013
  • Kaspersky antivirus 2013
A downside associated with error 103 is that it won’t disappear on its own. That’s why it is important to make some manual changes as there are no tools available online to rectify this error automatically. Follow the steps listed below to easily fix the problem.
  • Click on the Start button.
  • In the search box, enter ‘expand.exe’.
  • Right-click on the file that appears and select the option ‘Open Folder Location’.
  • Now, copy the file and paste it at the destination ‘C:\Windows\System32’.
  • If you are not able to find the file, it is advised you copy it from Windows Installation Disk.
  • Now, click on the ‘Start’ button again.
  • Find and select ‘Run’.
  • Now enter ‘C: ’ in the search box and press Ok.
  • Now right-click anywhere on the screen, select new, and then select folder.
  • Rename this folder. Change the name from ‘New Folder’ to ‘Temp’.
  • Now go to the Start button again.
  • Select ‘Run’ once again.
  • Type ‘cmd.exe’ in the command prompt and press Ok.
  • Now type Command. Press enter.
  • Now type this code as it is: ‘set TMP=C:temp’ and press enter.
  • Now restart the browser.
  • If it fails, install Google Chrome once again.
  • Just make sure everything is in sync to avoid any data loss.
Read More
Fix Windows Activation error code 0xC004F078
As you know, Windows 10 has a complicated mechanism for Activation which helps in the verification of a genuine copy of Windows 10. However, there are times when you might encounter some errors during the activation process. One of these errors is the error code 0xc000f074. This kind of error could be due to the Key Management Service or KMS which is unreachable by the client computer or if the key used in the SLSetAuthenticationData function call is incorrect. This kind of error mostly affects surfaces on computers that are upgraded from either Windows 7 or Windows 8.1 to Windows 10. In such cases, you may encounter any of the following error messages:
“Windows is unable to reach your company’s activation service. Please connect to your corporate network. If you are connected and continue to see the error, contact your system administrator. You can also click on the error detail to find the exact error. Error code: 0xC004F074.” “Activating Windows(R), (Key hash)… Error: 0xC004F074 The Software Licensing Service reported that the computer could not be activated. No Key Management Service (KMS) could be contacted. Please see the Application Event Log for additional information.” “Error 0xC004F074, SL_E_AUTHN_MISMATCHED_KEY, The Software Licensing Service reported that the key is mismatched.”
To fix the Windows 10 Activation error 0xC004F078, you have to use the correct key for your type of Windows copy or use Command Prompt to reinstall the key or you could also try running the Activation troubleshooter.

Option 1 – Try running the Windows 10 Activation Troubleshooter

The first thing you can do to resolve the Activation error code 0xc000f074 is to run the Windows 10 Activation Troubleshooter. To do so, follow these steps:
  • Go to Settings and then select Activation.
  • After that, click on the Windows Activation and then troubleshoot. This will help you address most of the commonly found activation issues in Windows devices.
The Windows 10 Activation Troubleshooter will determine if your license key is a valid Windows 10 digital license for an edition that is not currently installed. If it turns out that it’s not, then the troubleshooter will show you how to install the correct edition.

Option 2 – Try to use the correct key for the type of Windows version you have

If the Windows Activation troubleshooter wasn’t able to resolve the error, then you can try using the correct key for your type of Windows version. All you have to do so is check the type of your Windows copy if it’s OEM, retail, or volume. And make sure that you have the correct, valid product key for your operating system.

Option 3 – Try to use Command Prompt to reinstall the key

  • In the Start Search, type “command prompt” and right-click on Command Prompt from the search results, and then select “Run as administrator”.
  • After that, execute this command to uninstall the existing key: vbs /upk
  • Next, you need to install the KMS product key by executing this command: vbs /ipk <The KMS Product Key>
  • Once you’re done, you will see a prompt that’ll tell you whether the operation was either successful or not.
  • To active, the KMS product key online, use this command: vbs /ato
  • Use this command to activate the key using the telephone: exe 4
  • After you’ve activated the KMS product key, restart the Software Protection Service. You can also verify the Activation Status to check if your fix was successful or not.

Option 4 – Contact Microsoft Support for assistance

If you’re at your wits’ end in trying to upgrade your computer, you should consider contacting Microsoft Support for help as they can offer you various options that would make fixing Windows Activation error code 0xc000f074 a lot easier and faster.
Read More
Stop showing browser tabs when alt+tab, Win11
windows browser tabs removed alt tab
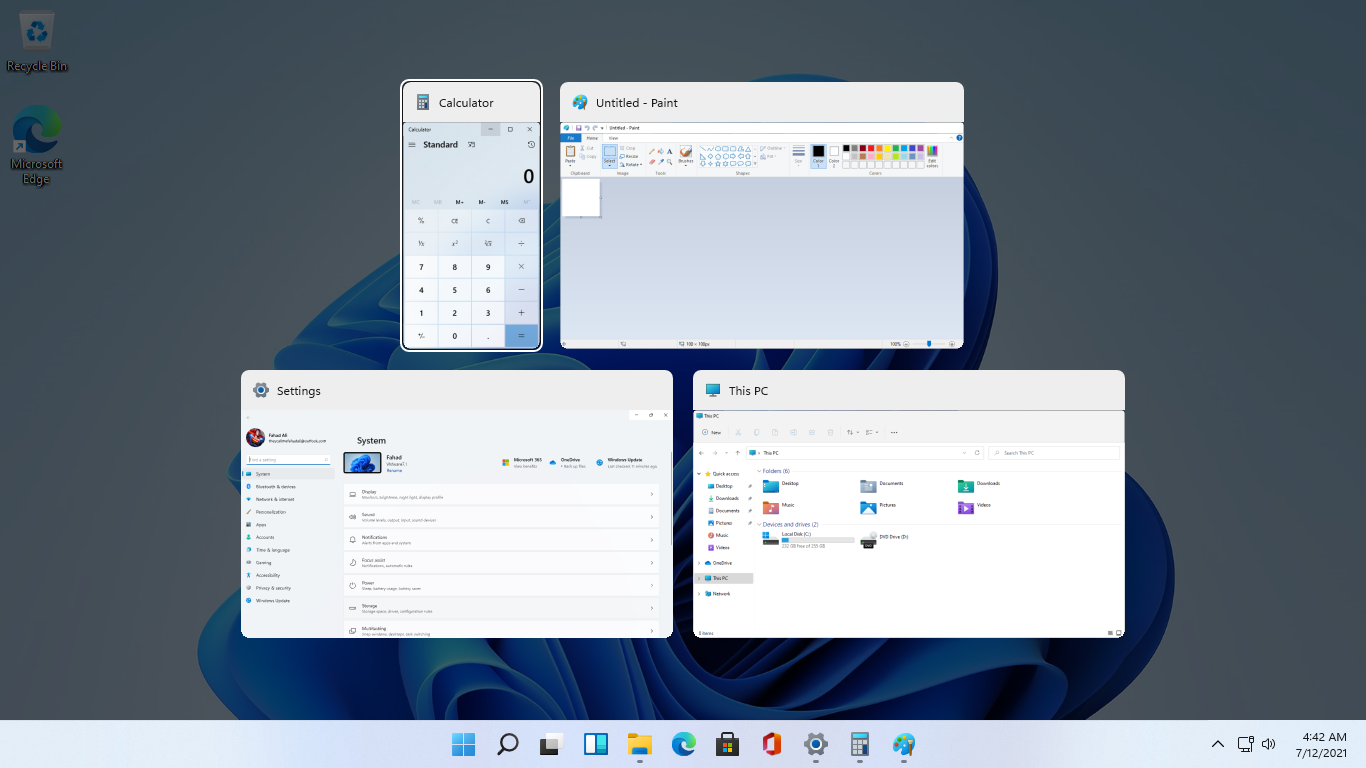
As in previous Windows 10, inside Windows 11 also when you press the ALT + TAB key combination you will get a preview of all running applications along with all Browser tabs so you can go through them and pick the one you want to switch to. Alto, I personally am a big fan of alt-tabbing, I must admit that I am not a big fan of having multiple browsers tabs on screen when I do press key combo. Luckily there is a very easy way to turn this feature off. Turning browsers tabs thumbnails off
  1. Press ⊞ WINDOWS + I to open settings
  2. Click on System in the sidebar
  3. Scroll down and select Multitasking
  4. Find Alt + Tab section and click on the drop-down menu
  5. Pick Open Windows Only
  6. Close settings
Now when you press the ALT + TAB key combination you will still see your browser but only an active tab in it instead of all tabs as different preview thumbnails.
Read More
Windows ImageAcquisition High CPU & Disk usage
What is Windows ImageAcquisition High CPU & Disk usage? The Windows Image Acquisition is the driver model in charge of the communication between the graphics hardware and the operating system. There are times when it causes high disk and CPU usage in Windows 10 systems which results in slow performance of the computer. To fix this issue, read on as this post will help you in addressing the problem. The cause of this problem might have something to do with the hardware or the drivers. And so if your computer becomes slow because of the Windows Image Acquisition process, here are some suggestions that might be of help. You can try to restart the Windows Image Acquisition service, run a System File Checker Scan, disconnect & reconnect imaging hardware as well as update and reinstall the drivers and updating the graphics drivers. For a complete set of instructions, follow the given options below.

Option 1 – Try restarting the Windows Image Acquisition Service

  • Tap the Win + R keys to open the Run dialog box.
  • Then type “services.msc” in the field and hit Enter to open the Windows Services Manager.
  • From there, look for the Windows Image Acquisition Service and check on its service Status.
  • If the Service Status is blank, right-click on it and select Start. And if the service Status is Running right-click on it and select Restart. After that, check if your computer’s performance is now back to normal.

Option 2 – Try running a System File Checker scan

As you know, running a System File Checker scan can help in replacing missing files as well as repair the corrupted ones which might be the reason behind the problem.
  • Tap Win + R to launch Run.
  • Type in cmd in the field and tap Enter.
  • After opening Command Prompt, type in sfc /scannow
The command will start a system scan which will take a few whiles before it finishes. Once it’s done, you could get the following results:
  1. Windows Resource Protection did not find any integrity violations.
  2. Windows Resource Protection found corrupt files and successfully repaired them.
  3. Windows Resource Protection found corrupt files but was unable to fix some of them.
  • Restart your computer after the scan is completed.

Option 3 – Try disconnecting and reconnecting the imaging hardware and then update and reinstall its drivers

It could be that the hardware that calls for the Windows Image Acquisition service has some issues which are why disconnecting and reconnecting the imaging hardware like scanners, printers, cameras can help in fixing the problem. In addition, you can also boot your computer in a Clean Boot State so that you can find the problematic hardware by hit and trial method. Refer to the steps below to do so:
  • Log onto your PC as an administrator.
  • Type in MSConfig in the Start Search to open the System Configuration utility.
  • From there, go to the General tab and click “Selective startup”.
  • Clear the “Load Startup items” check box and make sure that the “Load System Services” and “Use Original boot configuration” options are checked.
  • Next, click the Services tab and select the “Hide All Microsoft Services” check box.
  • Click Disable all.
  • Click on Apply/OK and restart your PC. (This will put your PC into a Clean Boot State. And configure Windows to use the usual startup, just simply undo the changes.)

Option 4 – Try updating the Graphics drivers

  • First, boot your computer into Safe Mode.
  • After that, tap the Win + R keys to launch Run.
  • Type in devmgmt.msc into the box and tap Enter or click OK to open the Device Manager.
  • After that, a list of device drivers will be displayed. From there, look for the Display Adapters and click on them.
  • After that, right-click on each entry under the Display Adapters and select the “Uninstall Device” option from the menu.
  • Now restart your computer.
  • After restarting your computer, go to the Settings app and Check for Updates in the Windows Update section.
Note: You also have the option to go directly to the website of your graphics card manufacturers like NVIDIA, Intel, or AMD and go to the section called Drivers then check if there’s a new available update – if there is, download and install it.
Read More
Fix Memory error 0x0000001A on Windows
One of the hardest issues you can encounter on your Windows computer is the Blue Screen of Death error. There are various kinds of BSOD or Stop errors and one of them is the “Memory Management Error 0x0000001A” error. This kind of Stop error might signify a hardware problem in your computer and is most likely caused by an issue with RAM or hard disk or even malware that takes up all your computer’s memory, thus, making it crash and display a BSOD error like the Memory Management Error 0x0000001A. Moreover, this kind of Stop error can also occur during the Windows upgrading process. So in this post, we’ll show you what you can do to fix the Memory Management error on your Windows 10 PC.

Option 1 – Run the Blue Screen Troubleshooter

The Blue Screen troubleshooter is a built-in tool in Windows 10 that can be found on the Settings Troubleshooters page. To use it, refer to these steps:
  • Tap the Win + I keys to open the Settings panel.
  • Then go to Update & Security > Troubleshoot.
  • From there, look for the option called “Blue Screen” on your right-hand side and then click the “Run the troubleshooter” button to run the Blue Screen Troubleshooter and then follow the next on-screen options. Note that you might have to boot your PC into Safe Mode.

Option 2 – Update the device drivers

  • Tap the Win + R keys to launch Run.
  • Type in devmgmt.msc into the box and tap Enter or click OK to open the Device Manager.
  • After that, a list of device drivers will be displayed. Look for the device driver you and then select either “Update driver” or “Uninstall device”. And if you find any “Unknown device”, you need to update it as well.
  • Select the “Search automatically for updated driver software” option and then follow the instructions to complete the process.
  • If you have chosen to uninstall the driver, follow the screen options to complete the process and then restart your PC.
  • Connect the device and Scan for hardware changes – you can see this option under Device Manager > Action.

Option 3 – Run the Windows Memory Diagnostics Tool to test RAM

Since the issue concerns the memory of your computer, you can also try running the Windows Memory Diagnostics Tool to find out if the RAM module of your computer has become corrupted. To run this tool, follow these steps:
  • Tap the Win + S keys to open Search.
  • Then type “Windows Memory Diagnostics Tool” in the field and hit Enter to open the Windows Memory Diagnostics Tool.
  • After that select any of the following option from the prompt that appears:
    • “Restart now and check for problems (recommended)”
    • “Check for problems the next time I start my computer”
  • After that, if you find that your RAM is corrupted, you might have to purchase a new one or change the motherboard of your computer.

Option 4 – Run the DISM tool

There are cases when the Memory Management Error 0x0000001A error is caused by the Windows System Image so you need to repair it using the DISM or Deployment Imaging and Servicing Management tool. The DISM tool is another command-line tool in the Windows operating system that could help users fix various corrupted system files. To use it, follow these steps:
  • Open the Command Prompt as admin.
  • Then type in this command: Dism /Online /CheckHealth
  • Do not close the window if the process takes a while as it will probably take a few minutes to finish.

Option 5 – Run the SFC scan

  • Tap Win + R to launch Run.
  • Type in cmd in the field and tap Enter.
  • After opening Command Prompt, type in sfc /scannow
The command will start a system scan which will take a few whiles before it finishes. Once it’s done, you could get the following results:
  1. Windows Resource Protection did not find any integrity violations.
  2. Windows Resource Protection found corrupt files and successfully repaired them.
  3. Windows Resource Protection found corrupt files but was unable to fix some of them.

Option 6 – Try using System Restore

You can also try to perform a System Restore as it can also help you fix the BSOD error. You can do this option either by booting into Safe Mode or in System Restore. If you are already in the Advanced Startup Options, just directly select System Restore and proceed with the next steps. And if you have just booted your PC into Safe Mode, refer to the steps below.
  • Tap the Win + R keys to open the Run dialog box.
  • After that, type in “sysdm.cpl” in the field and tap Enter.
  • Next, go to the System Protection tab then click the System Restore button. This will open a new window where you have to select your preferred System Restore point.
  • After that, follow the on-screen instructions to finish the process and then restart your computer and check if the problem is fixed or not.
Read More
Mouse automatically scrolls up or down
Microsoft has implemented a number of small features in Windows 10 to enhance user productivity. These features make a difference in the overall experience and productivity of users. However, there are times that instead of helping users, these small feature causes some issues instead which causes the computer to function in an unusual way. One of the issues caused by these features is where the Mouse automatically scrolls up or down even without any user intervention. This can get really annoying especially when you’re doing an important task on your computer. So if this bug takes place repeatedly, it can make your computer unusable. If you are currently facing this problem, worry not for this post will guide you on what to do to fix the mouse auto-scrolling issue in your Windows 10 computer. Use the options provided below to fix the mouse auto-scrolling issue.

Option 1 – Try to toggle the appropriate Mouse 10 setting

  • Tap the Win + I keys to open the Settings app.
  • After that, navigate to Devices > Mouse.
  • From there, toggle the “Scroll inactive windows when I hover over them” setting to off.
  • Now restart your computer and see if the issue is resolved.

Option 2 – Try to uninstall the installed Windows Updates recently

The mouse issue might have something to do with a recent update you have installed on your computer. It is possible that there are some recently installed updates that have messed up some settings in your computer. Thus, you can try to uninstall this recent Windows Update to try and fix the problem. Not that the best way to do this is in Safe Mode.
  • Boot your computer into Safe Mode first.
  • Once your computer has restarted, tap the Win + I keys to open the Settings app.
  • Next, click on Update and Security, and from the left side menu column, select Windows Update.
  • After that, select the “View installed update history” option on the right-side column.
  • Then click on Uninstall Updates. This will open a window where you’ll see the list of all the installed updates on your computer.
  • Select the update you want to uninstall and click on the Uninstall button located in the lower-right corner of the window.

Option 3 – Try to run System Restore

You might have made some adjustments in your computer’s settings that caused the issue with the mouse. You can undo those changes using System Restore.
  • Tap the Win + R keys to open the Run dialog box.
  • After that, type in “sysdm.cpl” in the field and tap Enter.
  • Next, go to the System Protection tab then click the System Restore button. This will open a new window where you have to select your preferred System Restore point.
  • After that, follow the on-screen instructions to finish the process and then restart your computer and then check if your mouse is now back to its normal state.
Read More
Fix The default gateway is not available Error
If you were having some problems with your internet connection and you tried to run the Internet Connections troubleshooter but it displays an error message instead that says, “The default gateway is not available”, read on as this post will show you what you can do to fix this error. The first thing you can do to fix this error is to restart your computer and then try to run the Internet Connections troubleshooter again. However, if you still see the same error message, then you might want to troubleshoot the problem further. You can try to install the Network driver or reinstall the Network adapter drivers. You could also verify the power saving mode or reset TCP/IP as well as disable the Firewall temporarily.

Option 1 – Try installing the Network driver

The very first thing you can do to resolve the error is to install the network driver. It is a common solution to this kind of problem and most users encounter it right after a fresh installation of Windows 10. So if you have done this, then you need to install the network driver so that the network adapters can start working. You can find the network driver in the motherboard CD. On the other hand, if you are using a laptop, you might have to use another computer or mobile to download the network driver from the manufacturer’s website.

Option 2 – Update the Network Adapter drivers

If the first option is not applicable to you since you already have network drivers in your computer, you might want to update the Network Adapter drivers by following these steps:
  • Tap the Win + R keys to launch the Run window and then type in the “msc” command and hit Enter to open the Device Manager window.
  • Under the Device Manager, you will see a list of drivers. From there, look for the Network Adapters and expand them.
  • Then right-click on each one of the Network drivers and update them all.
  • Restart your PC and see if it helped in fixing the BSOD error.
Note: If updating the network drivers didn’t help in fixing the “Windows could not find a driver for your network adapter” error, you can also try to uninstall the very same drivers and restart your Windows 10 PC. After that, the system itself will reinstall the drivers you just uninstalled. Alternatively, you can also download and install the drivers from the manufacturer’s website directly.

You could also try to reinstall the network adapter driver, refer to these steps:

  • Open the Devices Manager from the Win X Menu.
  • Then locate the device drivers and right-click on them to open the Properties.
  • After that, switch to the Driver tab and click on the Uninstall Device button.
  • Follow the screen option to completely uninstall it.
  • Finally, restart your computer. It will just reinstall the device drivers automatically.

Option 3 – Try to verify power-saving mode

If you are using a Windows 10 laptop, then you should know that the Power Options panel plays an important role. So if you’re getting an error in your laptop, you have to check some settings that are related to the Power Saving mode. To do so, follow these steps:
  • Open Control Panel and go to Hardware and Sound and click on Power Options.
  • Next, click on the “Change plan settings” option of your selected plan and then click the “Change advanced power settings” option.
  • After that, you should see the Power Options window, and here, expand the Wireless Adapter Settings and Power Saving Mode.
  • Now make sure that the Maximum Performance option is selected. If it’s not, select it and save the changes you’ve made.

Option 4 – Try to reset the TCP/IP

As you know, the TCP/IP or the Internet Protocol is the most important thing if you want to use the internet on your computer. That’s why if it ends up getting corrupted, you need to reset the TCP/IP to fix the problem. To reset TCP/IP, refer to these steps:
  • In the Windows start the search, type “command prompt” and right-click on Command Prompt from the search results.
  • Then select the “Run as administrator” option to open Command Prompt with admin privileges.
  • After that, execute this command: netsh int ip reset resettcpip.txt
  • Once it’s done, exit Command Prompt and restart your computer and then check if the error is now fixed.

Option 5 – Temporarily disable Firewall

On the other hand, the error could also be due to the Firewall software installed on your computer. Thus, disabling them or any security software installed on your computer is always a good idea you can try when you’re not able to access the shared drive on your computer. There are times when you encounter problems like the error “The default gateway is not available” due to interference of antivirus or security programs. Thus, you have to disable both your antivirus program and Windows Defender Firewall for the meantime and check if it fixes the error or not
Read More
Merge or Delete an OEM Partition in Windows
OEM Partition, also known as System Reserved Partition, is placed by the OEM to help users recover their computers or bring back the original state of the computer when it was bought. If you’ve observed that a part of your hard drive says “Healthy (OEM partition)” in the Disk Management and it occupies space in GBs, then this means that it’s normal and there’s nothing to worry about except that part of the storage space is not available and even when you right-click on it, the only thing it displays is the Help menu. Thus, in this guide, you will be guided on how you can merge as well as delete an OEM partition in your Windows 10 computer. Since the Disk Management tool in Windows won’t let you merge or delete the OEM partition, you can just use the built-in command-line tool known as Diskpart. Note that you have to be extra careful when you run the commands as it could mess your computer up and before you proceed with the instructions provided below, make sure that you create a System Restore point first. Once you have that covered, follow the instructions below. Step 1: Tap the Win + R keys to open the Run dialog box and type “cmd” in the field and tap Enter to open the Command Prompt. Step 2: Next, execute this command to launch the Diskpart tool: diskpart Step 3: Execute this second command to view the list of the disks in your computer: list disk Step 4: Now select the disk you want to manage by executing this command: select disk x Note: In the command above, replace “x” with the letter of your disk. Step 5: After that, execute this command to display all the volumes or partitions: list partition Step 6: Now execute this command to select the partition you want to delete: select partition x Note: You have to replace “x” with the partition you want to delete. Step 7: Once done, execute this command to delete the selected partition: delete partition override Step 8: Afterwards, execute this command to merge the OEM partition with the adjoining value: Extend Note: if you only want to merge part of the partition, you need to use this command “extend [size=<size>]”. For instance, you want to extend its size by 5GB, then you need to type “Extend size=5000”. The size you set is the size you select from the OEM partition. This will extend the selected volume by size in MB or megabytes.
Read More
1 2 3 162
Logo
Copyright © 2022, ErrorTools. All Rights Reserved
Trademarks: Microsoft Windows logos are registered trademarks of Microsoft. Disclaimer: ErrorTools.com is not affiliated with Microsoft, nor claim direct affiliation.
The information on this page is provided for information purposes only.
DMCA.com Protection Status