Windows 10 won't upgrade to a newer version

If when hovering over the upgrade icon on the taskbar you get:

Your version of Windows 10 would reach the end of service soon, Click to download a newer version of Windows 10 to stay supported.

or

An unsupported version of Windows will no longer receive software updates from Windows Update. These updates include security updates that can help protect your PC from harmful viruses, spyware, and other malicious software which can steal your personal information. Windows Update also installs the latest software updates to improve the reliability of Windows—such as new drivers for your hardware.

and you are unable to perform updates then this guide is for you. There are several things you can do to fix this issue presented here, it is advisable to follow them in a way how they are presented for best performance and system safety.

  1. Run setupdiag

    Download and run Setupdiag from the official MICROSOFT website. SetupDiag is a standalone diagnostic tool that can be used to obtain details about why a Windows 10 upgrade was unsuccessful. It works by examining Windows Setup log files to determine the root cause of a failure to update or upgrade the computer. Once the scan is completed, check the generated log files. The SetupDiagResults.log will be generated and saved in the same folder where you downloaded Setupdiag. Open SetupDiagResults.log using Notepad. You may need to take a look at these folders:

    • \Windows\Panther
    • \$Windows.~bt\sources\panther
    • \$Windows.~bt\Sources\Rollback
    • \Windows\Panther\NewOS

    If there are any issues or conditions that are blocking the upgrade, they will be listed here.

  2. Edit TargetReleaseVersionInfo Registry key

    Press ⊞ WINDOWS + R to open the run dialog
    In run dialog type Regedit and press ENTER
    Locate: HKLM\SOFTWARE\Policies\Microsoft\Windows\WindowsUpdate
    Locate two DWORD files, if they do not exist, create them as:
    TargetReleaseVersion
    TargetReleaseVersionInfo
    Set the value of TargetReleaseVersion to 1
    If you are stuck on Windows 10 1909 and want to upgrade to Windows 10 20H2 now, you need to set the value for TargetReleaseVersionInfo to 20H2
    Reboot the computer

  3. Use Windows 10 update assistant

    Visit Microsoft.com and hit the ‘Update now’ button visible on the page
    Download tool and run it
    Click on Update now to start the upgrade process

If you like to learn and find out more about various Windows errors, and how to repair them go to our vast archive or use search to find articles that will explain and help you in solving your issue.
However, if you prefer to do things fast and with automatization then we are proposing to use an automated solution for your issues. The application that we are recommending is Advanced System Repair Pro
Advanced System Repair utilizes multiple tools all in one to give you a quick, simple, reliable, and very thorough diagnosis of your PC. It brings you all the tools you need in one program to clean, fix, protect, optimize and boost your PC!
1-Click Maintenance
All the tools to make it simple and easy! It's like having a professional technician at the click of a mouse.

Junk Cleaner
Keeping your computer free from unnecessary clutter also helps make your computer last longer. Like any other machine, if you keep it clean and take care of it, it will serve you better for longer!

Optimize background apps
Optimize applications background activity with the built-in Application Optimizer feature.

Disk Defrag
With a simple 1-click, Advanced System Repair speeds up your PC by assembling fragmented files on your machine and organizing them more efficiently.

Malware Removal
Finds and removes all types of harmful malware including trojans, worms, bots, adware, spyware, PUPs, and more!

Privacy Cleaner
The all-in-one privacy suite to Clean Your Tracks & Protect Your Privacy! Make your computer safe, secure, and more efficient!

System Tweak/Optimizer
ASR will analyze your complete system and settings to adjust your PC to function at its maximum performance.

Registry Cleaner
Over time, as you install and uninstall applications, the registry can become cluttered with old entries and broken settings which can result in program crashes, and annoying messages and slow the computer down.
Visit our Advanced System Repair Pro Download page to inform yourself about all the benefits of this software and get a free trial copy of it.
advanced system repair pro

Advanced System Repair Pro

One-click automated PC repair solution
ASR logo
With Advanced System Repair Pro you can easily
Replace damaged files
Restore performance
Free disk space
Remove Malware
Protects WEB browser
Remove Viruses
Stop PC freezing
DOWNLOAD
Privacy Policy | Terms of Use | Uinstall
Advanced System Repair Pro is compatible with all versions of Microsoft Windows including Windows 11

Share this article:

You might also like

File is Too Large for the Destination Error
The file is too large for the destination file system is the error when you try to copy a file larger than 4GB on a drive formatted in the FAT32 file system. FAT32 is the old file system used in previous Windows versions and it was replaced by superior NTFS, altho FAT32 is still used because of its compatibility fact that it could be accessed in various operating systems its disadvantage among others is that it can not hold files larger than 4GB in size. This refers to the size of a single file, so if you have a file that is this large and when you try to copy or move it on a drive formatted in FAT32 you will get this message, and the operation will not be able to complete.

Format drive

In order to actually transfer the file in its glorious size, I am afraid that you will need to format destination drive in NTFS or if you have data on drive which you do not want to lose with formatting, use third-party software to convert file system from FAT32 to NTFS without losing data. I would recommend AOMEI partition assistant, it is a free and proven application letting you both manage your partitions and convert any one of them into another file system without data loss. You can get AOMEI here.

Split file

Another option if you are not keen on installing third-party tools or formating is to divide large files into smaller ones that are less than 4GB in size. You can use any archiving application since built-in Windows ZIP support will not let you split file into various different sizes. The best tool in my humble opinion is WinRAR, but you can choose any proven one. When file is split into parts less than 4GB in size, you will have no issues copying or move the file to the destination drive.
Read More
System32 Folder Keeps Popping up at Startup
The System32 folder contains vital configuration and information that are essential to the operating system. It is located inside the “Windows” folder and it consists of important DLL files as well as executable files. You probably have noticed some errors that have the “System32” word in them but that does not necessarily mean that the System32 folder is the one that triggers them as these kinds of errors have only occurred when some important files are corrupted or missing. Some users recently reported that each time they start their computers, the System32 folder will automatically open up in the File Explorer. If you encounter the same problem, read on as this post will guide you on what to do to fix it. This kind of issue is most likely caused by service or application interference – it is possible that there is a third-party application installed in your computer or a Windows service that triggers the System32 to pop up during startup. It is also possible that this is a result of system modification. Thus, you need to identify the third-party program or restore your computer to its previous state.

Option 1 – Put your computer in a Clean Boot State

As pointed out, it is possible that some third-party program or service is the one that’s behind the problem. To isolate this possibility and to identify the culprit, you have to put your computer into a Clean Boot State. To do so, follow the steps below.
  • Log onto your PC as an administrator.
  • Type in MSConfig in the Start Search to open the System Configuration utility.
  • From there, go to the General tab and click “Selective startup”.
  • Clear the “Load Startup items” check box and make sure that the “Load System Services” and “Use Original boot configuration” options are checked.
  • Next, click the Services tab and select the “Hide All Microsoft Services” check box.
  • Click Disable all.
  • Click on Apply/OK and restart your PC. (This will put your PC into a Clean Boot State. And configure Windows to use the usual startup, just simply undo the changes.)
After putting your PC in a Clean Boot State, try creating a system restore point and see if the problem still occurs. Clean Boot troubleshooting is designed to help you isolate the problem. For you to execute a clean boot troubleshooting, you must do a couple of actions (the steps given above) and then restart your PC after every action. You might have to disable one third-party app after the other to really isolate the issue. And once you’ve narrowed down the problem, you can either disable the third-party app that’s causing the problem or remove it. Note that you must switch your PC back into the Normal Startup mode after you’re done troubleshooting the problem. Here’s how you can do it:
  • From the “Start” menu, go to System Configuration.
  • After that, switch to the General tab and click the option for “Normal Startup”.
  • Next, go to the Services tab and clear the checkbox for “Hide all Microsoft services”.
  • Then find and click “Enable all” and if prompted, you have to confirm.
  • Afterward, go to the Task Manager and enable all the Startup programs and confirm the action.
  • Restart your PC when prompted.

Option 2 – Perform System Restore

  • First, press the Win + R keys to open the Run dialog box.
  • After that, type in “sysdm.cpl” in the field and tap Enter.
  • Next, go to the System Protection tab then click the System Restore button. This will open a new window where you have to select your preferred System Restore point.
  • After that, follow the on-screen instructions to finish the process and then restart your computer and check if the problem is fixed or not.

Option 3 – Run System File Checker scan

You might also try running the System File Checker or SFC scan to fix the issue. System File Checker is a command utility built into your computer that helps restore corrupted files and missing files. Refer to the following steps to run it:
  • Hit the Win + R keys to launch Run.
  • Type in cmd in the field and tap Enter.
  • After opening Command Prompt, type in sfc /scannow
The command will start a system scan which will take a few whiles before it finishes. Once it’s done, you could get the following results:
  1. Windows Resource Protection did not find any integrity violations.
  2. Windows Resource Protection found corrupt files and successfully repaired them.
  3. Windows Resource Protection found corrupt files but was unable to fix some of them.
 Restart your computer and see if the System32 folder still pops up at startup or not.
Read More
Setting Standard Desktop icons on Windows 11
Strangely enough, Windows 11 does not feature any typical icon on its desktop when installed. No My PC, no Recycle Bin, nothing, just plain and clean wallpaper. Personally, I like this clean look and feel but of course, there are a lot of users that are used to have some system-related icons on their desktop for easy access. windows 11 desktop iconsDo not sweat, we will turn them back on with ease. The best part is that you can choose which one would you like. So let’s dive right into it and get the icons back for the old Windows feel and look.

Showing selected Icons desktop

  1. Right-click on Desktop and select Personalize
  2. Select Themes from the list of personalization items
  3. Inside themes scroll down and click on Desktop Icon Settings
  4. Desktop Icon Settings will open and inside it, place checkmarks beside icons that you would like to appear on the desktop and click OK
  5. Close settings
As always settings and choices will be automatically applied and icons will appear right away on the desktop.
Read More
Win Firewall and third party Firewall are off
As you know, the Windows 10 operating system, as well as other Windows versions, comes with the Windows Firewall. In Windows 10, the firewall allows users to install and run a third-party firewall. This kind of firewall works independently to block any suspicious activity on your computer. However, recently, some users reported that they are getting a notification on the Startup saying,
“Windows Firewall and <Third party firewall name> Firewall are both turned off; tap or click to see available options”.
This particular error could be caused by a lot of factors but when you manually check the firewall, you’ll find that there really is nothing wrong with both the Windows Firewall and the third party firewall. So if both the Windows Firewall and third-party firewalls like McAfee, Comodo, and many others are both turned off in Windows 10, then you need to do several things to resolve the problem – you need to check the supporting services that are required and uninstall and then reinstall the third party firewall on your computer. For more instructions, refer to the options provided below.

Option 1 – Try enabling all the supporting services for the firewall

The first thing you can do to resolve the error with the firewall is to check all of its supporting services by following these steps:
  • Tap the Win + R keys to open the Run utility and type “services.msc” in the field and then hit Enter to open the Windows Services Manager.
  • Next, look for the Windows Defender Firewall service among the given list of services.
  • Once you found it, make sure that its Startup Type is set to Automatic and that the status of the service is Running. So if it’s not running, just click on the Start button.
  • In addition, you also have to make sure that the following services’ status is set as follows:
    • Xbox Live Networking Service: Manual
    • Base Filtering Engine: Automatic
  • Once done, start the firewall again and check if the error is now fixed or not.

Option 2 – Try to uninstall and reinstall the third-party firewall

It is possible that the firewall error might be due to an error with the compatibility of the installation in Windows 10 and the third-party firewall. Thus, the next thing you can do is to uninstall the third-party firewall and then reinstall it again. Once you have uninstalled the third-party firewall, you can download its latest version from its official website and install it again. This should fix the error with the firewall.
Read More
How to use Control Panel in Windows 11
Windows 11 has brought us a new and revamped settings application that will cover most personalization and overall settings for your operating system. But as much as the new settings app is tweaked and modified there are still some things that can be modified only inside Control Panel. windows 11 control panel
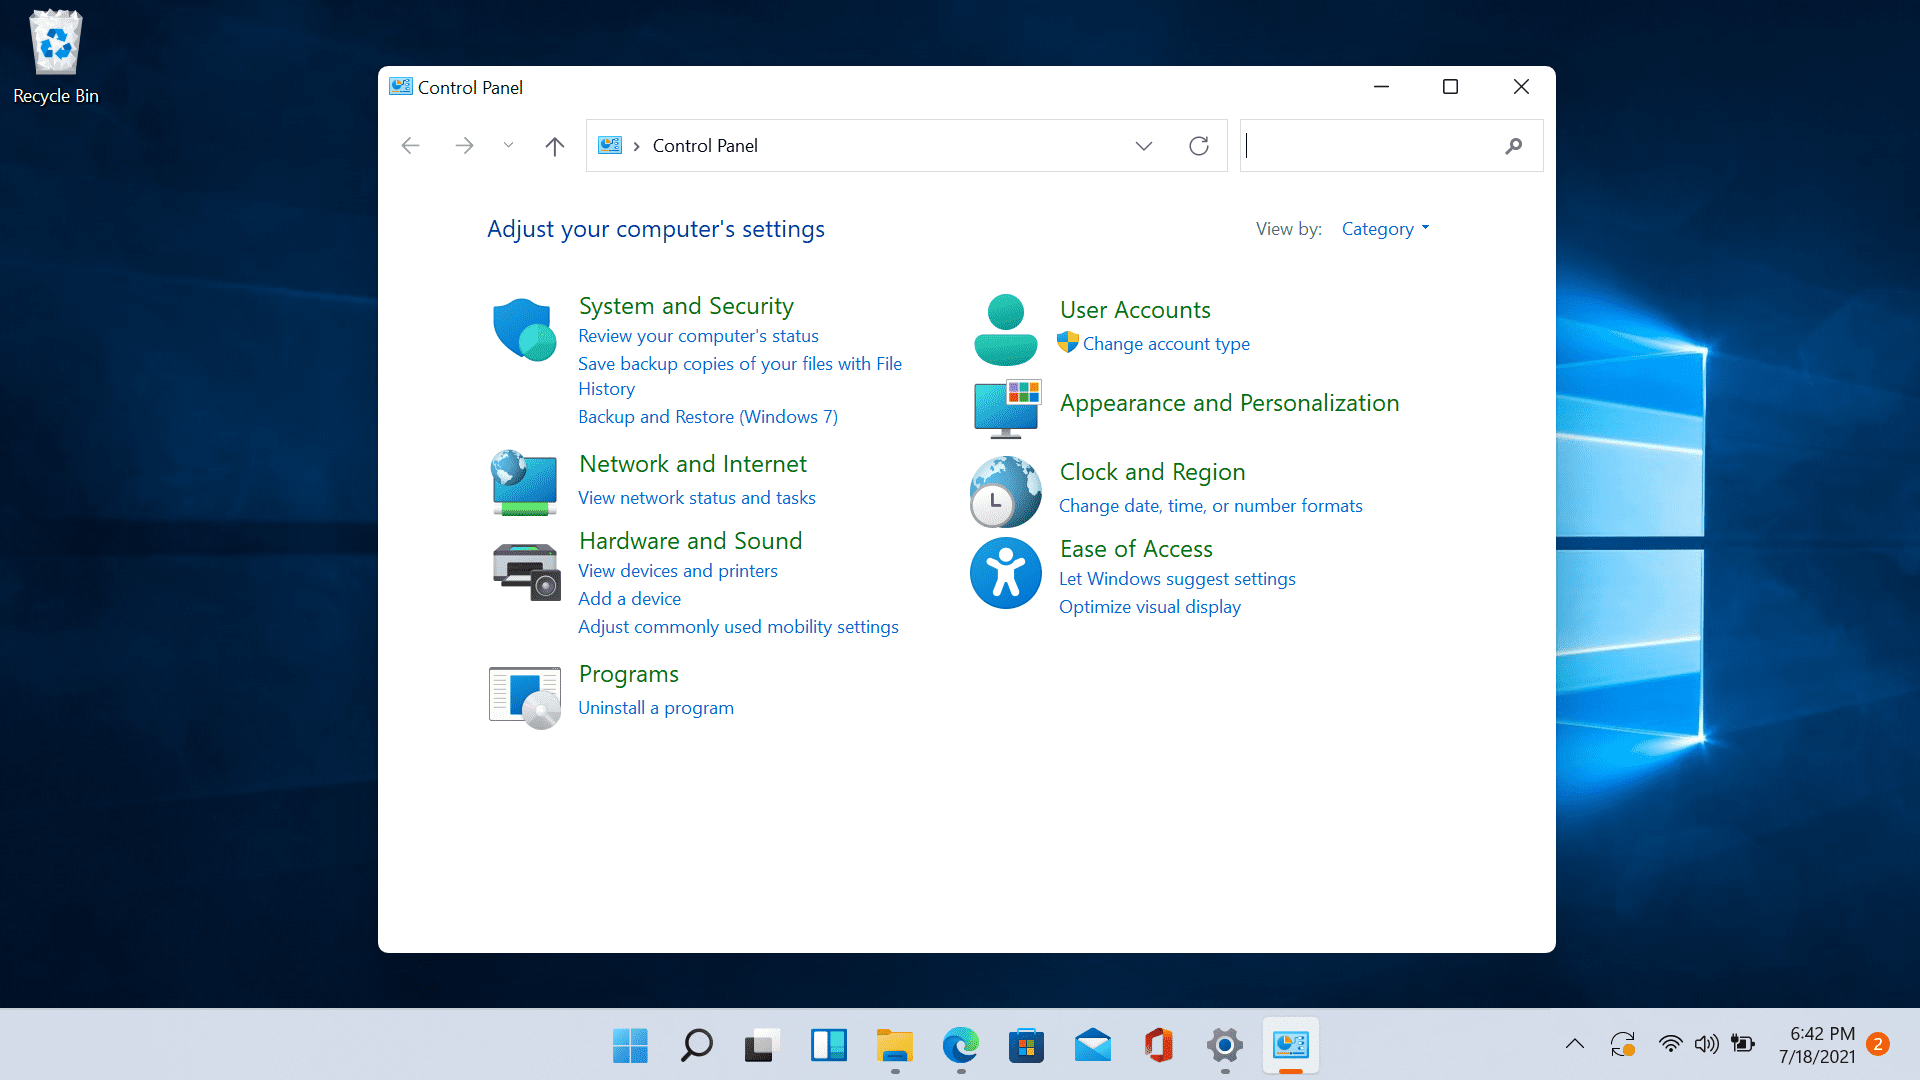
Since the Control Panel icon itself is somewhat not right away once clicked on the start button we are presenting you a couple of ways to open it so you can change each detail you want.

Via Start menu

The most straightforward and easiest way to reach and open the control panel is via the Start menu. In order to do it just click on the Start menu and type in the control panel. Then click on Control Panel Icon in the results.

Pin Control panel icon to the taskbar

In order to actually pin the control panel to Taskbar, you will need to open it first. Use the previous simple and fast steps in order to quickly open it then in the taskbar right-click on its icon. Choose Pin to Taskbar and close control panel. Now you can open the control panel quickly just by clicking it on its icon in the Taskbar.

Add Desktop icon

If you liked the idea to have an icon that you can click in order to fast open the control panel but you are not very fond of the icon being located in your Taskbar then let's place it on Desktop instead. In order to place a special control panel icon on the desktop, we will use Windows setting app. Open settings app with ⊞ WINDOWS + I and go to Personalization tab. Inside the personalization tab, go to Themes and click on Desktop Icon Settings. Check the box beside Control Panel and click on OK. The Control Panel icon will appear now on your Desktop and you can double click on it to launch it.

Run Control Panel from the Run dialog box

Same as in the previous version of Windows you can also open the Control Panel via Windows built-in run menu. This is mostly the preferred way to gain access to it by system administrators. Press ⊞ WINDOWS + R to open the run dialog. Inside dialog type in control and press ENTER. Control Panel will open right away.
Read More
Change Network from Public to Private error
You have the option to choose to configure the Network to Private or Public when you set it on Windows 10 PC. On the other hand, if the option to change the Network from Public to Private goes missing in Windows Settings then this post will surely help. You can find this setting under Settings > Network and Internet > Ethernet and appears when you click on it. If you are not able to see the option to change the network profile, then you either can’t open the settings, or the option to change it has been disabled. To resolve this issue, you can either use the Registry Editor or Windows PowerShell. Refer to the options given below for more details.

Option 1 – Change the Network Profile via Registry Editor

Changing the Network Profile can be done using the Registry Editor. But before you proceed, make sure that you create a System Restore Point first just in case. Refer to the steps below to do so.
  • Tap the Win + R keys to open the Run dialog box.
  • Then type “Regedit” in the field and hit Enter to open the Registry Editor.
  • After that, navigate to this key: HKEY_LOCAL_MACHINESOFTWAREMicrosoftWindows NTCurrentVersionNetworkListProfiles
  • Now expand the Profiles key folder located in the left pane to see one or more folders.
  • Next, expand each one of these folders and look for the “Description” sub-key which should match the name of your network.
  • After you find the Description sub-key, look for another sub-key named “Category” and double click on it to open it.
  • Now change its value from “0” to “1” to change the Network Profile from Public to Private.

Option 2 – Change the Network Profile via Windows PowerShell

Aside from the Windows Registry, you can also use Windows PowerShell in changing the Network Profile from Public to Private and so on. Take note that you have to use PowerShell with admin privileges. Just refer to the steps below to do so.
  • Tap the Win + X keys and then select the “PowerShell (Admin)” option.
  • Next, click on Yes if the User Account Control prompt appears.
  • After that, execute the commands listed below. Hit Enter right after you key in each one of them.
    • Get-NetConnectionProfile
    • Set-NetConnectionProfile -InterfaceIndex <index number> -NetworkCategory Private
Note: Since every Network Profile has an index number, you can check the label “Name” to identify the network that you want to change.
Read More
Seven Windows 10 security basics
Hello everyone and welcome to our Windows 10 security basics where we will provide you with common practices you should aim to follow in order not to cough some viruses, malware, keylogger, worm, etc. As you are all aware, we live in a digital age where we are surrounded by luxuries of unlimited information, video chats all over the globe, free calls via the internet, applications that track stuff for us, and many many more things that make our lives easier. Sadly with this kind of technology comes risks of cyber attacks that aim to steal your information, credit card numbers, or any other relevant stuff which could be used illegally in order to make purchases, loans, and other theft in your name so ones doing that could not get caught. Think of data stealers the same as you think of armed robbers in a dark alley, just this time their pray is data about your life so they can make purchases for themselves more than once. This article aims to provide you with some common logic, tips, and tricks of what should you do and where should you pay attention in order not to provide wrong people with your crucial information and data. we hope that you will find reading informative and helpful.
  1. Keep Windows updated.

    Microsoft is working hard on their Windows defender and firewall to provide protection to its users and fixing any introduced security leaks which are found in Windows itself. By updating and keeping Windows updated you make sure that every security leak that is found is patched and removed from Windows and that you have the latest database of known malware inside the firewall and defender. This common practice, however, should not be limited to Windows only, you should update every application you are using for the same reasons.
  2. Use antivirus, anti-malware, and firewall

    These applications exist for a reason and that reason is to protect your data. Dedicated applications specifically made for purposes of defending your data are better than any kind of I am careful mentality since sometimes is enough to just visit a website or just click on some link and you are compromised. You can use Windows Defender and firewall if you wish, they are already in Windows but if you are serious about your data and like to surf the internet some better protection is worth the investment.
  3. Get a dedicated password manager

    Your password is bad, if you use the same password everywhere then it is even worse. Computers have come a long way in the last 50 years and so have cyber attack applications which make your commonsense passwords extremely vulnerable and all of your accounts open to cyber attacks. Dedicated password managers that can hash passwords and automate them are your safest bet that your passwords will not be compromised, get one, and get it today.
  4. Do not click on anything inside emails

    Cyber attacks come in vast variety and one of them is sending you emails informing you that for example your Paypal or anything else has been hacked and that you must click this link to reset your password. These you do not click, no matter how convincing they sound or how good they look, if you need to update your information on a specific service or website, you delete email, open browser and go to that service and change stuff. The same goes with different offers, discounts, women seeking you, men seeking you, prince sending you 1 billion in gold. Only click on links in emails from a trusted and verified source.
  5. Do not click on pop-ups

    Similar to clicking on links in emails you should not click on pop-ups, the same rules, same stuff apply as with emails.
  6. Be careful what you are downloading

    Be careful from where you download your software and be careful what are you downloading and stop using pirated software, any kind of malicious applications, keyloggers, viruses, etc could be hidden in these downloads, and by downloading them you are opening doors to your private information. Only use legal software from trusted sources.
  7. Never leave your phone or computer unattended

    You can never tell who can implement malicious software or get some crucial information from unattended devices, lock them all time and take them with you.
There you go, 7 common tips and tricks for the basic security of your computer. Thank you for reading and I hope to see you again on our site.
Read More
Problem running preinstall.cmd scripts
Setting up the Windows operating system in a computer can be quite a complicated task since there are a couple of things that take place in the background to ensure a full and protected setup of the operating system which includes a number of programs, scripts, and so on. They work together in the background to guarantee the integrity of the Windows operating system. However, there are times when this piece of code could also go wrong. As a result, you might encounter errors like the “There was a problem running preinstall.cmd scripts” error. “Preinstall.cmd” is a type of CMD file associated with Applications & Drivers developed by Gateway for the Windows OS. To fix the “There was a problem running preinstall.cmd scripts” error, there are several things you can try. You can try to download a new Windows installation image or create a new bootable drive as well as uninstall conflicting or incompatible programs. In addition, you can also run the Windows Update troubleshooter or reset Windows 10.

Option 1 – Try to download a new Windows installation image

Your first option to fix the “There was a problem running preinstall.cmd scripts” error is to download a new Windows installation image. You can get the official ISO files for the latest release of Windows 10. After you’ve downloaded the ISO files, you can use them to upgrade to the latest Windows 10 version.

Option 2 – Try creating a new bootable drive

  • Insert your USB drive into your PC.
  • Tap the Win + R keys to open the Run dialog box and type in “cmd” and tap Enter to open the Command Prompt. Alternatively, you can also search for “cmd” in the Cortana search box to open Command Prompt.
  • Once you’ve opened CMD, type in this command to open the DISPART utility – diskpart
  • After that, you should see a new black and white window that would say, “DISKPART>”.
  • Next, type in “list disk” in the command line and tap Enter to see the list of all the Storage devices as well as your hard disk connected to your PC. Here, you have to identify your disk’s number.
  • Type in this command where “X” is the disk number you have identified and then tap Enter – disk X
  • Type in this command and hit Enter to clear the table records and all the visible data on the drive – clean
  • Now you have to recreate a new primary partition of the drive so you’ll have to type in this command and tap Enter right after – create part pri
  • A new primary partition has been created so you have to select it by typing this command and tapping Enter – select part 1
  • Now you have to format it to make it visible to normal users by typing – format fs=ntfs quick
Note: If your platform supports the Unified Extensible Firmware Interface or UEFI, replace the “NTFS” with “FAT32” in the command on Step 10.
  • After that, type in this command and tap Enter after – active
  • Finally, type this command and hit Enter to exit the utility – exit
  • After you prepare the image for the operating system, save it to the root of your USB Storage device.

Option 3 – Try to uninstall conflicting programs

If you are using a computer made by Dell and got Windows 10 preinstalled in it, then you can try to uninstall the programs listed below and see if it fixes the problem.
  • Dell Encryption Management service
  • Dell Digital Library service

Option 4 – Run the Windows Update Troubleshooter

You might also want to run the built-in Windows Update Troubleshooter in Windows that could help you in resolving the “There was a problem running preinstall.cmd scripts” error. All you have to do is go to Settings > Update& security > Troubleshoot > Windows Update. From there, click on the Run the troubleshooter button and follow the next one-screen instructions that appear. After that, restart your computer and check if the error is now fixed or not by trying to install the update once again.

Option 5 – Run Microsoft’s online troubleshooter

Running Microsoft’s online troubleshooter might also help you fix the error. This online troubleshooter is known to help in fixing Windows Update errors, it scans your computer for issues that might be causing the problem and then fixes them automatically.

Option 6 – Try to reset Windows 10

  • Tap the Win key or click on the Start button located in the Taskbar.
  • Then click on the Power button at the bottom right portion of the screen.
  • Next, press and hold the Shift key on your keyboard and then click on Restart. This will restart your Pc into the Advanced Startup options.
Note: Once you have access to the Advanced Startup options, you have to go to the setting which allows you to Reset your Windows 10 PC. All you have to do is select Troubleshoot > Reset this PC to reach the following screen Afterward, select either the “Keep my files” option and then proceed to the next on-screen instructions that follow to reset your Windows 10 computer without losing your files.
Read More
Disable Windows print spooler in PowerShell
The third time is charm saying goes but not when we are talking about Microsoft. Print spooler is again in focus, in a bad way. This is the third print spooler vulnerability to emerge in just five weeks. While a critical flaw was originally identified and patched in June, a similar flaw came to light shortly after and was subsequently patched (with mixed success). print spooler
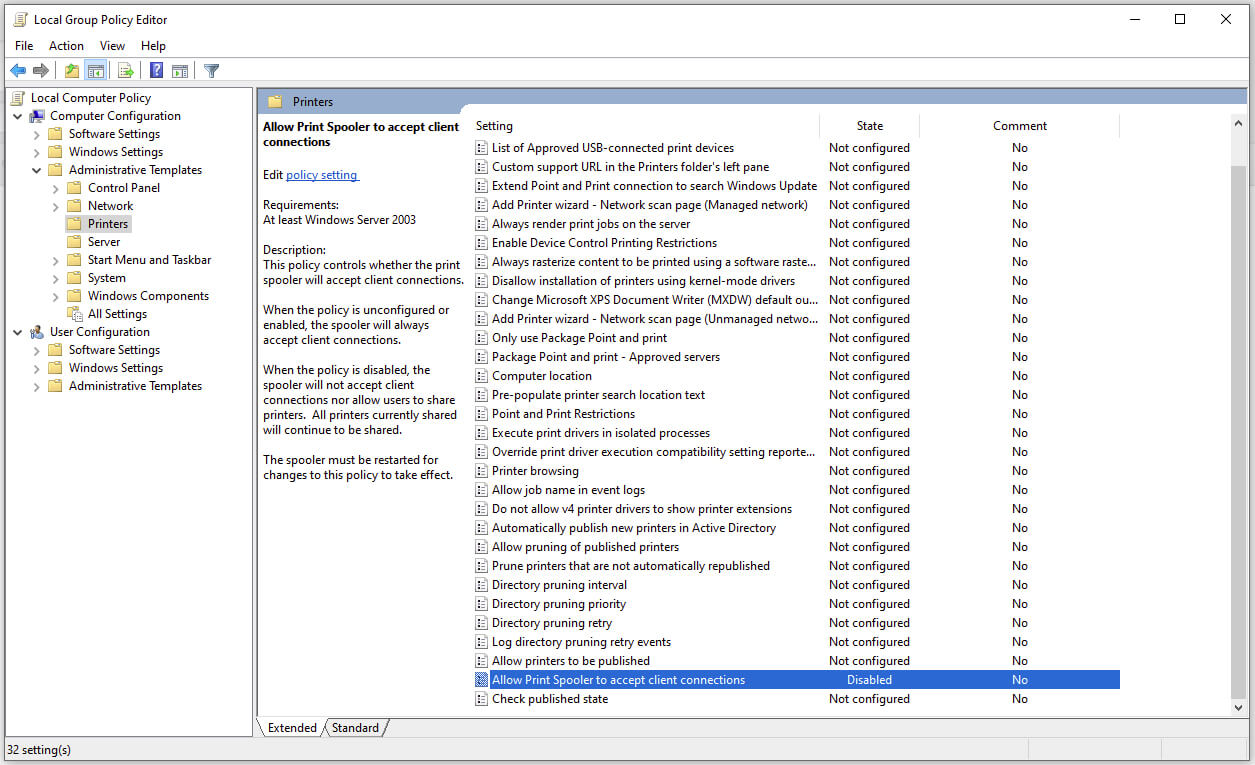
Microsoft is once again advising its customers to disable Windows print spooler after a new vulnerability that allows hackers to execute malicious code on machines has emerged. While a patch fixing the flaw will be released in due course, the most effective workaround currently on the table is to stop and disable the print spooler service entirely.
"An elevation of privilege vulnerability exists when the Windows Print Spooler service improperly performs privileged file operations. An attacker who successfully exploited this vulnerability could run arbitrary code with SYSTEM privileges. An attacker could then install programs; view, change, or delete data; or create new accounts with full user rights."

Stop this service right away or you are risking a potential attack.

  1. Press ⊞ WINDOWS + X to open the hidden menu
  2. Click on Power Shell (admin)
  3. In Power Shell type in the following command to check if spool service is running: Get-Service -Name Spooler followed by ENTER
  4. If spooler service is running type in the next command to stop it: Stop-Service -Name Spooler –Force and press ENTER
  5. Then follow with this command to disable it at startup: Set-Service -Name Spooler -StartupType Disabled followed with ENTER
That’s it, we hope a patch will come soon for all the people that are using network printing and indeed need this service running in order to do work.
Read More
How to Fix UNEXPECTED_KERNEL_MODE_TRAP error
It is a fact that Blue Screen of Death errors can give you a headache for you will have a hard time fixing it as it is one of the most difficult errors you can encounter on your Windows computer. One of these BSOD errors is the UNEXPECTED KERNEL MODE TRAP error. If you receive this kind of error then it means that the operating system was not able to catch a trap or an exception generated by the CPU. This BSOD error has an error code 0x00000007F and indicates that the Intel CPU generated a trap that the kernel failed to catch. One of the most likely causes is hardware failure due to faulty memory. Aside from this cause, you also have to track down other probable causes for this problem like corrupted system files, incompatible drivers or programs, faulty hardware, and even dusty components, and so on. To fix the UNEXPECTED KERNEL MODE TRAP BSOD error, here are some suggestions that might help.

Option 1 – Uninstall the programs you installed recently

Chances are, some programs that you just installed might be the one that’s causing the BSOD error. Thus, you need to uninstall the program to resolve the problem.
  • In the search box, type in “control” and then click on Control Panel (desktop app) among the search results.
  • After that, select Programs and Features from the list which will give you a list of all the programs installed on your computer.
  • From there, look for the concerned program and select it and then uninstall it.
Note: If you have downloaded the app from the Windows Store, you can simply right-click on it from the application list and then uninstall it. In addition, you might also want to check the hardware components of your computer that might not support the operating system itself. You can disconnect all the external devices like USB drives, scanners, printers, etc., and then reboot your PC. After that, add the devices again one after the other and check if the BSOD error is now fixed or not. Moreover, you can also perform a clean boot to make things easier for you.
  • Log onto your PC as an administrator.
  • Type in MSConfig in the Start Search to open the System Configuration utility.
  • From there, go to the General tab and click “Selective startup”.
  • Clear the “Load Startup items” checkbox and make sure that the “Load System Services” and “Use Original boot configuration” options are checked.
  • Next, click the Services tab and select the “Hide All Microsoft Services” checkbox.
  • Click Disable all.
  • Click on Apply/OK and restart your PC. (This will put your PC into a Clean Boot State. And configure Windows to use the usual startup, just simply undo the changes.)

Option 2 – Update your device drivers

  • Tap the Win + R keys to launch Run.
  • Type in devmgmt.msc into the box and tap Enter or click OK to open the Device Manager.
  • After that, a list of device drivers will be displayed. Look for the device driver you and then select either “Update driver” or “Uninstall device”. And if you find any “Unknown device”, you need to update it as well.
  • Select the “Search automatically for updated driver software” option and then follow the instructions to complete the process.
  • If you have chosen to uninstall the driver, follow the screen options to complete the process and then restart your PC.
  • Connect the device and Scan for hardware changes – you can see this option under Device Manager > Action.

Option 3 – Use the Blue Screen Troubleshooter

The Blue Screen troubleshooter is a built-in tool in Windows 10 that helps users in fixing BSOD errors like UNEXPECTED KERNEL MODE TRAP. It can be found on the Settings Troubleshooters page. To use it, refer to these steps:
  • Tap the Win + I keys to open the Settings panel.
  • Then go to Update & Security > Troubleshoot.
  • From there, look for the option called “Blue Screen” on your right-hand side and then click the “Run the troubleshooter” button to run the Blue Screen Troubleshooter and then follow the next on-screen options. Note that you might have to boot your PC into Safe Mode.

Option 4 – Run the Windows Memory Diagnostic tool

You can use the Memory Diagnostic tool in Windows to check RAM. Before you use this tool, make sure you save all your important work.
  • Tap the Win + R keys to open the Run dialog box.
  • Next, type in “mdsched.exe” in the field and hit Enter to open Memory Diagnostic.
  • After that, the Windows Memory Diagnostic will give out two options such as:
  1. Restart now and check for problems (recommended)
  2. Check for problems the next time I start my computer
  • Select any of the given options. After that, your computer will restart and check for memory-based issues upon the restart. If there are any issues, it will automatically them.

Option 5 – Disable Memory caching in the BIOS

You can also disable memory caching in the BIOS to fix the UNEXPECTED KERNEL MODE TRAP error.
  • Open the BIOS Setup screen.
  • Next, go to Advanced > Cache Memory and then disable it.
  • Tap the F10 key to save the changes made and restart your computer.

Option 6 – Run System File Checker

  • Tap Win + R to launch Run.
  • Type in cmd in the field and tap Enter.
  • After opening Command Prompt, type in sfc /scannow
  • Restart your computer once the scan is completed.

Option 7 – Clean your hardware components for dust

Cleaning your computer’s hardware components for dust might also help in resolving the UNEXPECTED KERNEL MODE TRAP error. Make sure to use a soft cloth in cleaning the hardware as well as a small blower. Moreover, ensure that you do not damage any parts with moisture or cause harm to any circuits while you’re at it.
Read More
1 2 3 162
Logo
Copyright © 2022, ErrorTools. All Rights Reserved
Trademarks: Microsoft Windows logos are registered trademarks of Microsoft. Disclaimer: ErrorTools.com is not affiliated with Microsoft, nor claim direct affiliation.
The information on this page is provided for information purposes only.
DMCA.com Protection Status