How to run old applications in Windows 10

Having the latest applications is often preferred for most users but sometimes we have some old applications which have not been updated or simply we just want to run oldie on our computer because it does everything we need and we do not want to upgrade in order to save some money.

The issue is presented sometimes when we try to run an old application in Windows 10 and some components are missing in Windows itself or the application is simply coded in a way to work on older Windows versions. If by any chance you have this issue then this guide is for you since we are going to show you how to run old applications in Windows 10.

This guide is made in a way to takes into account that the application itself is completely installed on your Windows 10 machine if you can not even install the application you will need to search solution for that particular application since that can not really be generalized and pinpointed issue, every application is different.

Running old applications using the compatibility option

All of that being said, let's start that old app you have. First thing is to locate an executable file or shortcut of the desired application. Once it is located, right-click on it to bring up the menu, and all the way to the bottom you will find properties. Left-click on properties.

file properties drop down menuThe application settings screen will open, in upper tabs locate Compatibility and left-click on it.

file properties compatibility tab markedAfter the click, you will find yourself in application compatibility settings.

File properties compatibility optionsIn this window, you will face different options to run the chosen application in various modes in order to make it run. How settings are self-explanatory and different applications will need different settings sadly we can not cover them all but your safest bet is to run them in an environment where they have worked.

For example, if the application was working fine in Windows XP and required administrator privileges, check Run this program as an administrator and Run this program in compatibility mode for Windows XP.

If you like to learn and find out more about various Windows errors, and how to repair them go to our vast archive or use search to find articles that will explain and help you in solving your issue.
However, if you prefer to do things fast and with automatization then we are proposing to use an automated solution for your issues. The application that we are recommending is Advanced System Repair Pro
Advanced System Repair utilizes multiple tools all in one to give you a quick, simple, reliable, and very thorough diagnosis of your PC. It brings you all the tools you need in one program to clean, fix, protect, optimize and boost your PC!
1-Click Maintenance
All the tools to make it simple and easy! It's like having a professional technician at the click of a mouse.

Junk Cleaner
Keeping your computer free from unnecessary clutter also helps make your computer last longer. Like any other machine, if you keep it clean and take care of it, it will serve you better for longer!

Optimize background apps
Optimize applications background activity with the built-in Application Optimizer feature.

Disk Defrag
With a simple 1-click, Advanced System Repair speeds up your PC by assembling fragmented files on your machine and organizing them more efficiently.

Malware Removal
Finds and removes all types of harmful malware including trojans, worms, bots, adware, spyware, PUPs, and more!

Privacy Cleaner
The all-in-one privacy suite to Clean Your Tracks & Protect Your Privacy! Make your computer safe, secure, and more efficient!

System Tweak/Optimizer
ASR will analyze your complete system and settings to adjust your PC to function at its maximum performance.

Registry Cleaner
Over time, as you install and uninstall applications, the registry can become cluttered with old entries and broken settings which can result in program crashes, and annoying messages and slow the computer down.
Visit our Advanced System Repair Pro Download page to inform yourself about all the benefits of this software and get a free trial copy of it.
advanced system repair pro

Advanced System Repair Pro

One-click automated PC repair solution
ASR logo
With Advanced System Repair Pro you can easily
Replace damaged files
Restore performance
Free disk space
Remove Malware
Protects WEB browser
Remove Viruses
Stop PC freezing
DOWNLOAD
Privacy Policy | Terms of Use | Uinstall
Advanced System Repair Pro is compatible with all versions of Microsoft Windows including Windows 11

Share this article:

You might also like

A Guide to Resolving Error Code 35

Guide on Resolving Error Code 35

Error Code 35 - What is it?

Error Code 35 is a typical Device Manager error. It indicates information missing to properly configure your device.  Error code 35 is usually displayed in the following format:

“Your computer's system firmware does not include enough information to properly configure and use this device. To use this device, contact your computer manufacturer to obtain a firmware or BIOS update. Code 35”

Solution

driverfix boxError Causes

The 2 common reasons for Device Manager error code 35 are:

  • Outdated BIOS
  • Mis-configured, corrupted, or outdated Drivers

No matter what the reason may be, it is advisable to resolve the problem immediately without any delay otherwise you will be unable to use your hardware device.

Further Information and Manual Repair

Below is the list of the most effective and easy to perform solutions to resolve error code 35 on your PC. These solutions do not require any technical knowledge or understanding. Simply follow the instructions to resolve this error code.

Method 1 - Update the BIOS

BIOS (Basic Input/Output System) is the embedded software on the computer’s motherboard.

Though not all PCs have the same BIOS manufacturer, but the steps for updating the BIOS are similar for all versions. Before you get started with the updating process, first identify your current BIOS version.

  • For this, go to the start menu and type msinfo32, and press enter.
  • Now click System Summary to view your BIOS version. Here you will see the version number and date.
  • Now check your PC motherboard manufacturer’s website to download the BIOS update for the model you own. Also, download any Read Me Files and documentation. These contain guidelines and precautions that you should know before you update.
  • Backup all your data and existing BIOS before you update the BIOS version. This will keep your data protected in case the attempt to update BIOS fails.
  • Also, when updating, make sure to use an uninterruptible power supply. Remember power outage or even a small power fluctuation can corrupt the BIOS which is something you don’t want.
  • Now it’s time to perform the update. Run the downloaded installer for the BIOS updating software. Double click on the executable file.
  • Look for a button names Update, Flash, or Run.
  • Click on it to start updating the new version
  • After the update is complete, your computer will restart automatically.

This will hopefully resolve the problem. However, if the error still persists then there is a possibility that the error code is related to outdated drivers. To resolve, try method 2.

Method 2 - Download Driver Assist to Update Drivers Automatically

Update drivers to repair error code 35 on your PC by simply downloading DriverFIX. This is a cutting-edge program deployed with an intelligent programming system.

It is compatible with all Windows versions.

It scans your PC for problematic drivers and updates them with the latest and compatible versions automatically and in a few seconds thereby repairing all Device Manager error codes including error code 35 generated due to outdated/corrupted drivers.

In addition to this, it updates all device drivers on a regular basis, so you don’t have to stress over and keep a track of what drivers on your PC need to be updated and when.

Click here to download DriverFIX to resolve Device Manager error code 35 today!

Read More
Watch old game intros in 4k or 8K hi-definition
AI and neural networks are more and more being used in all parts of our lives. From face detections to deep fakes it is both amusing and frightening to watch at the same time. From some really bad uses of neural networks and AI overall, looking at you deep fakes, upscaling videos or images are mostly harmless pieces of work not harming anyone. There is one cool YouTube channel, well there are more but this one seems to have most of the videos on it and if I am wrong I apologize. https://www.youtube.com/channel/UC33rC3GO1UZFAkMcCCwjyWg So upscale is like previously mentioned a YouTube channel that hosts old game trailers and into videos but in full 4K or 8K video resolution, fully upscaled using neural networks. There are some videos that are not maybe top-notch but the large quantity of them is pretty well upscaled and they do indeed look great. So if you have some time and want that old nostalgia fix, go and check it out. You might find something that will bring that old you out and you might even drop a smile or two remembering old good days, I know I have.
Read More
a New browser from DuckDuckGo is coming
DuckGoGo a popular private search engine is releasing its first browser soon that is focused on privacy like its search engine. duckduckgo browser
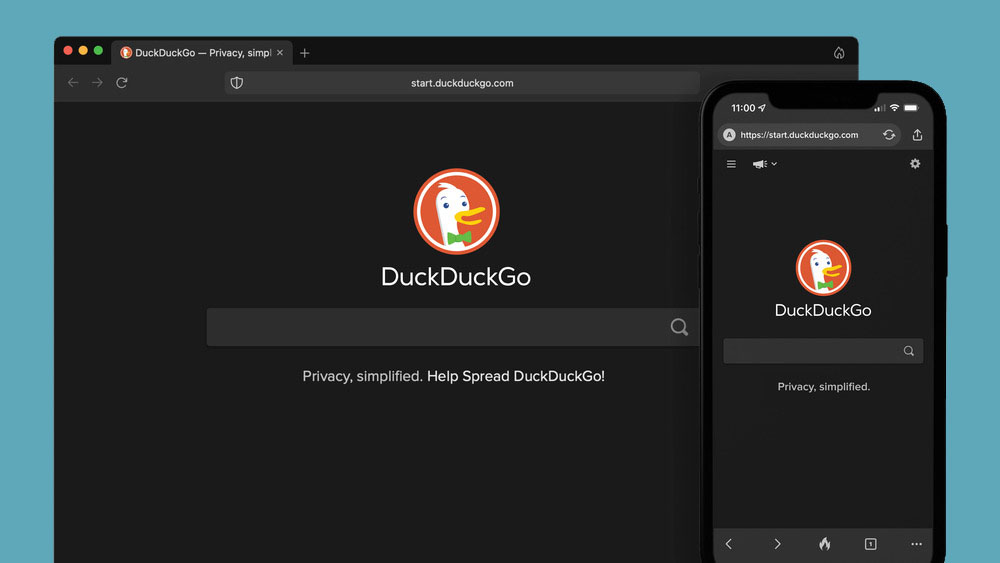
From the recent blog, Gabriel Weinberg, CEO of DuckDuckGo, has stated:
“Like we’ve done on mobile, DuckDuckGo for desktop will redefine user expectations of everyday online privacy,”
From everything that we have learned so far, the browser will be focused on making privacy super easy and simple, eliminating tons of different settings about privacy, and making the whole environment robust privacy protection all set by default. Settings will be applied in all fields, across search, browsing, email, and more. Gabriel also said that aim of the browser is not just a privacy browser, it is meant to be built and used as your everyday browser, for everyday use that protects your privacy as a bonus. One interesting thing that was stated is that browser itself is built upon OS-provided rendering engines instead of typical Chromium. DuckDuckGo says this approach will strip away a lot of the unnecessary cruft and clutter that's accumulated over the years in major browsers. Also, the company stated that when compared to Chrome, the DuckDuckGo app desktop is cleaner, way more private and that early tests have found out that it is significantly faster as well. Is this just corporate advertising or reality? We will see once the browser is released, or once it is released for public testing. Until then take care and happy holidays.
Read More
Fix Chassis Intruded…Fatal Error…System Halted
When you encounter an error message that says, Chassis Intruded…Fatal Error…System Halted on your monitor then it indicates that the Chassis or the cabinet that holds the CPU, GPU, motherboard, and many more is open. It is a security feature offered by OEMs wherein a connector that is found in the motherboard can detect if the chassis component has been replaced or removed. There are a few OEMs that offer onboard speaker or PC chassis speaker which goes off in this kind of situation. Obviously, the problem has something to do with the hardware and in most cases, you have to put the jumper back on the motherboard with the pin-labeled chassis signal and ground. There are times when some OEMs offer a simple switch that is armed automatically when you properly close the chassis. Thus, you need to check if this switch has something to do with the error. If there is no switch or if it doesn’t resolve the issue, although you may be able to get into Windows with a warm boot, the normal Windows boot won’t really work unless you fix the problem. It is rather false positive and has something to do with the RTC RAM state or the BIOS. You might need to completely disable the Chassis intrusion feature to fix the error. Refer to the suggestions given below to try and fix the “Chassis Intruded, Fatal Error … System Halted” error.

Option 1 – Try to clear CMOS

You can easily clear CMOS by shorting two pins which can be found side by side on the motherboard. Keep in mind that it may vary from OEM to OEM although the basics are still the same to clear CMOS. In addition, you might also have to download the manual from the OEM’s website so that you’ll know its exact location.

Option 2 – Try booting into the BIOS

You can also try booting into the BIOS. All you have to do is tap either the DEL or F2 keys to get there. Note that everything will be set back to their default setting after you reset the CMOS.

Option 3 – Try disabling Chassis intrusion

In this option, you have to look for the Chassis intrusion feature in your BIOS. It might be located under security. From there, disable it and check if the problem’s fixed.

Option 4 – Try to reconfigure the BIOS

Once you have disabled the Chassis feature, you need to reconfigure the BIOS the way you expect it to be or to what it was before the reset.
Read More
How to Repair Missing MSVCR100.dll Error

Fix Missing MSVCR100.dll Error

What is MSVCR100.dll Error?

Msvcr100.dll is a dynamic link library file. This file is loaded into the memory at runtime for successful program execution. This process is also referred to as runtime dynamic linking. The Msvcr100.dll belongs to the Microsoft Visual C++ Runtime Library. It is a core Windows component used by numerous Windows-based applications to load and run smoothly on Windows PC. Msvcr100.dll error occurs when the process of runtime dynamic linking fails. Due to this error, you are unable to access the desired application. The error code is displayed in either of the following formats:
  • “Msvcr100.dll Not Found"
  • "This application failed to start because msvcr100.dll was not found. Re-installing the application may fix this problem."
  • "Cannot find [PATH]msvcr100.dll"
  • "msvcr100.dll  is missing from your computer"
  • "XXX.exe - System Error - MSVCR100.dll is missing from your computer."

Solution

Restoro box imageError Causes

Narrowing down the cause of the Msvcr100.dll error is not possible as this error can occur on your PC due to multiple reasons. However, here are some of the most common causes of Msvcr100.dll error code on Windows PC:
  • Msvcr100.dll file corrupt and damaged
  • Missing Msvcr100.dll file
  • Corrupt runtime code library
  • Registry issues
  • Malware attack and viral infection

Further Information and Manual Repair

Here are some of the best ways to resolve this error on your system:

Reinstall the application causing the error

As dll are shared files used by multiple programs to load and run, there is the possibility of it getting deleted when uninstalling a certain program. If so, then the best way to fix it is to reinstall the application that is causing the error to pop up on your screen. This way you’ll be able to set up the program again and install the Msvcr100.dll file back on your system.

Download Microsoft Visual C++ 2010 Redistributable Package

Another way to resolve this error is to download Microsoft Visual C++ 2010 Redistributable Package. To do this, first, see if you are running a 32 bit or 64-bit copy of Windows. XP users go to the start menu and click run then type winver and press enter. In Vista and Windows 7, go to the start menu and type computer and click properties. The information you require is under Windows Edition. Once you find out whether you are using a 32 bit or a 64-bit version, accordingly, download the correct version of Microsoft Visual C++ 2010 Redistributable Package directly from Microsoft’s official website. Simply download and install the software. Then follow the prompts to add the toolbox to your PC. After that, restart your computer; most likely the error message will be gone. If it still persists, then this means the error is either related to the registry or malware.

Download and Run Restoro

Restoro can be used to resolve both malware infection and registry issues on your PC that could be triggering Msvcr100.dll errors. Restoro is a next-generation and multi-functional PC repair tool embedded with powerful utilities like an antivirus, a registry cleaner, and a system optimizer. The registry cleaning feature detects all registry issues and Msvcr100.dll errors. It removes unnecessary and obsolete files on the disk, like junk files, cookies, internet history, and temporary files cluttering the disk and damaging dll files. It repairs the damaged and corrupt dll files and restores the registry. Simultaneously the antivirus feature scans and removes all malicious software on your system. These include spyware, viruses, Trojans, adware, and malware that can damage dll files. This software is efficient and resolves the Msvcr100.dll error in seconds. It is easy to use and has a simple navigation. It is compatible with all Windows versions. Click here to download Restoro on your PC and resolve the Msvcr100.dll error today!
Read More
Valorant will enforce Windows 11 TPM 2.0
Valorant ingameBad or good news, depending on your view comes from RIOT for their game Valorant. It seems that Riot has decided to enforce Windows 11 TPM 2.0 feature into Valorant running on Windows 11 and there is a rumor that it will be de facto standard and that it will move to Valorant in general no matter on which system it runs. Furthermore, there is a rumor circling around that other developers are also talking about implementing TPM 2.0 requirements so they can harvest advanced security features of Windows 11 in order to prevent hacks and other cheats in their games. This is an interesting point to stand on, on one side, sure, advanced features that will prevent cheating and hacking is a great thing. On other hand denying access to many computers that do not support TPM 2.0 and removing them from the game can be a permanent loss of customers and therefore loss of money. It is a risk to be sure and I am not really sure that alienating gamers is a good choice for long-term income, especially when you will be able to install Windows 11 on an unsupported PC as stated by Microsoft. We will all see how this Riot decision will reflect on their business, as not a big Valorant player myself I am not impacted too much with this decision, but it will be interesting to see if others will indeed go with this trend or they will decide to wait a while until much more PC’s are upgraded.
Read More
Disable Touchscreen in Windows 11
The touchscreen feature inside Windows 11 is a pretty good thing but sometimes can be very impractical. The screen can easily and constantly get dirty due to fingers touching it all the time and there are users that do not wish or want to have this feature at all. touchscreen windows 11If you are one of the mentioned users and for any reason, you do not wish to have a touchscreen-enabled then sit back and relax, we have you covered in this tutorial on how to fully disable touchscreen inside Windows 11.

Turn off touchscreen via device manager

  1. Click on the Windows Search icon in the taskbar
  2. Type Device Manager
  3. Click on Device Manager from the list of results
  4. Inside locate Human Interface Devices and click on the right arrow
  5. In the list, find HID-Compliant Touch Screen and select Disable Device
  6. Click on Yes to confirm

Disable it via Windows Terminal

  1. Right-click on the Windows icon in the taskbar
  2. Click on Windows Terminal (admin)
  3. Inside run this command: Get-PnpDevice | Where-Object {$_.FriendlyName -like '*touch screen*'} | Disable-PnpDevice -Confirm:$false

Conclusion

No matter which method you prefer, both of them will disable the touch screen inside Windows 11. Thank you for reading trough article and I hope to see you again. Take care.
Read More
Fix Windows Update error 0xc1900130
If you suddenly encountered Error Code 0xc1900130 while trying to update your Windows 10 computer, read on for this post will help you fix the problem. This kind of Windows Update error may occur when the network connection between the Windows Update server and the client machine is interrupted and the install can’t continue since the instance hash was not found. In such cases, you will see the following error message in Settings:
“Failed install attempt – 0xc1900130”
Here are the technical details of the error:
“Error Code: 0XC1900130 Message: MOSETUP_E_INSTALL_HASH_MISSING Description: The install cannot continue because the instance hash was not found.”
If you are currently facing this problem when you tried to install a Feature Update, you might have to check your internet connection and then try to install the Windows Update again. However, if it didn’t work, then you can refer to each one of the given options below to fix the error.

Option 1 – Reset the Windows Update components

If by any chance that the second option didn’t work, resetting the Windows Update components could also help you resolve the problem. How? Refer to the following steps:
  • Open Command Prompt with admin privileges.
  • After that, type each one of the following commands and hit Enter after you key in one after the other.
    • net stop wuauserv
    • net stop cryptsvc
    • net stop bits
    • net stop msiserver
Note: The commands you entered will stop the Windows Update components such as Windows Update service, Cryptographic services, BITS, and MSI Installer.
  • After disabling WU components, you need to rename both the SoftwareDistribution and Catroot2 folders. To do that, type each one of the following commands below, and don’t forget to hit Enter after you type one command after the other.
    • ren C:WindowsSoftwareDistribution SoftwareDistribution.old
    • ren C:WindowsSystem32catroot2 Catroot2.old
  • Next, restart the services you’ve stopped by entering another series of commands. Don’t forget to hit Enter after you key in one command after the other.
    • net start wuauserv
    • net start cryptsvc
    • net start bits
    • net start msiserver
  • Close Command Prompt and reboot your PC.

Option 2 – Try configuring the Windows Update-related Services

  • Tap the Win + R keys to open the Run dialog box.
  • Then type “cmd” in the field and tap Enter to open an elevated Command Prompt.
  • Next, execute the following commands. Note that you have to type and enter each command one after the other.
    • SC config wuauserv start= auto
    • SC config bits start= auto
    • SC config cryptsvc start= auto
    • SC config trustedinstaller start= auto
  • The commands you executed will make sure that the Windows Update-related services are available. Once it’s done, restart your computer and see if the Windows Update error is now fixed.

Option 3 – Try downloading and installing the Windows Updates manually

Windows Upgrade Error Code 0xc1900130 might be due to a Windows Update that has failed. So if it is not a feature update and only a cumulative update, you can download the Windows Update and install it manually. But first, you need to find out which update has failed, and to do so, refer to the following steps:
  • Go to Settings and from there go to Update and Security > View Update History.
  • Next, check which particular update has failed. Note that Updates that have failed to install will be displayed under the Status column which has a label of “Failed”.
  • After that, go to the Microsoft Download Center and look for that update using its KB number and once you find it, download and then install it manually.
Note: You can also use the Microsoft Update Catalog, a service from Microsoft that provides a list of software updates that can be distributed over a corporate network. With the help of this service, it can be easier for you to find Microsoft software updates, drivers as well as fixes.

Option 4 – Try to run the Windows Update troubleshooter

Windows 10 have various troubleshooters that can help you resolve many system issues. So if you’re dealing with Windows Update errors like Error Code 0xc1900130, you can run the Windows Update troubleshooter to resolve it. To run it, go to Settings and then select Troubleshoot from the options. From there, click on Windows Update and then click the “Run the troubleshooter” button. After that, follow the next on-screen instructions and you should be good to go.

Option 5 – Try to flush the DNS cache

You could also try to flush the DNS cache as it might fix the problem. To do so, follow these steps:
  • Right-click on the Start button and click on Command Prompt (administrator) so you can pull up an elevated Command Prompt.
  • After that, execute the following command to flush the DNS cache
ipconfig /flushdns
  • Next, restart your PC and check if the problem’s fixed.
Note: You might also check your internet connection or reboot your router or plug out and then plug in your Ethernet connection manually to verify the reliability of your internet connection since intermittent connection could also cause Windows Update errors like Error Code 0xc1900130.
Read More
Microsoft vs Google & Facebook
microsoft hqMicrosoft wants to escalate the situation from Australia to the EU, what a surprise. Hello all and welcome to another news article, this time we are focusing on Microsoft pushing the EU to accept law proposition from Australia. For all of you who are not familiar with the given situation let me quickly explain. The feud began when the Australian government proposed a new law that targeted Facebook and Google specifically. The government said that it believed that both of the tech giants were using content from news outlets without paying. Have you ever seen the little news snippets that Google or Facebook sometimes show its users to keep them up to date? These are lifted directly from news websites, and the Australian government claimed that this practice meant that people didn't bother visiting the news website. This then staved news websites of revenue. As such, the government put forward a new law that would mean Google and Facebook would have to pay the source website for every time they displayed a news snippet. Facebook responded by removing its Australian news coverage in light of the law. Google, however, put up a fight. It argued that its snippets encouraged people to click on it to read more, thus driving more traffic to the news website. It also said that such a law would be too expensive to maintain in the long run. As such, Google threatened to remove itself from Australia if the law passed. This was likely a scare tactic, as 95 percent of Australian web users use Google; however, it actually opened the door for its rival, Microsoft. Microsoft saw how it could push its own search engine BING to replace google. It of course went and reached the Australian government to assure them that BING is more than capable to fulfill its needs and fully abide by the proposed law. Now Microsoft knows that if this law passes it could see a similar situation happening in Europe and it is pushing it. US News reported on how Microsoft plans to encourage EU countries to adopt this new law too. The company has teamed up with the European Publishers Council and News Media Europe to make the following statement: Publishers might not have the economic strength to negotiate fair and balanced agreements with these gatekeeper tech companies, who might otherwise threaten to walk away from negotiations or exit markets entirely
Read More
Guide to Quickly Fixing the Thorconnwndclass

Fix Thorconnwndclass

What Is Thorconnwndclass Error?

Thorconnwndclass error is an Outlook error that has recently reared its head. Known to create several problems in the proper functioning of the Outlook application, this error is essentially a constituent of the Norton Antivirus Crash Guard Symantec component. That’s why those using the Norton Antivirus program are most likely to encounter this error.

Solution

Restoro box imageError Causes

When the Thorconnwndclass error occurs, the Outlook closes unexpectedly, users encounter problems while sending or receiving emails and, performance of Outlook is degraded and this happens because issues arise while accessing the PST file. Because of this damaged PST file, stored data is unavailable for access. Other factors that trigger the Thorconnwndclass error are listed below.
  • Corrupt or damaged Outlook Add-ins
  • Corrupt or damaged Outlook bar
  • Unfinished Outlook installation
  • Faulty settings
  • Thorconnwndclass Norton is being used with Outlook
Regardless of the underlying factors that lead up to the occurrence of this error, it's of paramount importance that workarounds are implemented to ensure desired performance of Outlook in the long run.

Further Information and Manual Repair

While there are several ways to rectify this error, some of the most common ones are listed below as follows.
  • The most effective solution is the PST file repair tools available online. These tools use a complex algorithm and thoroughly scan the PST file and repair it as needed. This resolves the Thorconnwndclass error that one encounters in Outlook. Usually such software have an easy to use interface and can easily be used, without the need for the user to have a strong technical background. Another advantage of using these software available online is that they not only repair the file, but they often play a pivotal role in retrieving inaccessible or lost data.
Some other tips for manually resolving this problem are listed below as follows.
  • First and foremost, disable your Norton Antivirus program if it’s installed on your system. Now, open the Outlook application in Safe Mode. Since this problem may also be triggered by damaged or corrupt Outlook add-ins, it is strongly advised that you disable or uninstall them. Now, you will come across some .dat files. Rename them by changing the existing .dat files to new .dat.
  • Another useful approach is to employ the Inbox Repair tool offered by Outlook.
  • Finally, one can also use the scanpst.exe file to fix any problem or error that resides within the  Outlook application.
Read More
1 2 3 162
Logo
Copyright © 2022, ErrorTools. All Rights Reserved
Trademarks: Microsoft Windows logos are registered trademarks of Microsoft. Disclaimer: ErrorTools.com is not affiliated with Microsoft, nor claim direct affiliation.
The information on this page is provided for information purposes only.
DMCA.com Protection Status