Change system font in Windows 10

In previous versions of Windows changing the system, the font was a pretty straightforward process, but it seems Microsoft did not want this feature to keep for whatever reason and there is no option as of the time of the writing of this article to do it in standard options in Windows 10.

But do not worry, you are still able to customize your Windows and choose which font would you like to see inside it in all of its dialogs. You can choose whichever font you desire, the only prerequisite is it to be installed on your system.

This guide will require you to change values in the registry of Windows itself so please follow step-by-step instructions and always make a backup of the registry before changing it in order to prevent some permanent Windows issues.

All of that being said, let's start.

Setting new font

First thing is to open notepad, in the notepad paste the next block of code:

Windows Registry Editor Version 5.00

[HKEY_LOCAL_MACHINE\SOFTWARE\Microsoft\Windows NT\CurrentVersion\Fonts]

"Segoe UI (TrueType)"=""

"Segoe UI Bold (TrueType)"=""

"Segoe UI Bold Italic (TrueType)"=""

"Segoe UI Italic (TrueType)"=""

"Segoe UI Light (TrueType)"=""

"Segoe UI Semibold (TrueType)"=""

"Segoe UI Symbol (TrueType)"=""

[HKEY_LOCAL_MACHINE\SOFTWARE\Microsoft\Windows NT\CurrentVersion\FontSubstitutes]

"Segoe UI"="NEW_FONT"

Where in "Segoe UI"="NEW_FONT" instead of NEW_FONT you need to write the exact name of the font that you wish to use as a system font.

Once you have replaced the default system font with your desired one, go to File and save as, from file type drop-down menu, choose all files and save this file as .REG type giving it whatever name you wish.

When the file is saved, close notepad, right-click on the saved file and choose the merge option. Confirm with YES and click on OK. Reboot your system and your Windows will now use the font of your choice as its default system font.

Restoring default font

If you wish to return the old default system font as it was, follow the same steps but in your notepad paste this code:

Windows Registry Editor Version 5.00

[HKEY_LOCAL_MACHINE\SOFTWARE\Microsoft\Windows NT\CurrentVersion\Fonts]

"Segoe UI (TrueType)"="segoeui.ttf"

"Segoe UI Black (TrueType)"="seguibl.ttf"

"Segoe UI Black Italic (TrueType)"="seguibli.ttf"

"Segoe UI Bold (TrueType)"="segoeuib.ttf"

"Segoe UI Bold Italic (TrueType)"="segoeuiz.ttf"

"Segoe UI Emoji (TrueType)"="seguiemj.ttf"

"Segoe UI Historic (TrueType)"="seguihis.ttf"

"Segoe UI Italic (TrueType)"="segoeuii.ttf"

"Segoe UI Light (TrueType)"="segoeuil.ttf"

"Segoe UI Light Italic (TrueType)"="seguili.ttf"

"Segoe UI Semibold (TrueType)"="seguisb.ttf"

"Segoe UI Semibold Italic (TrueType)"="seguisbi.ttf"

"Segoe UI Semilight (TrueType)"="segoeuisl.ttf"

"Segoe UI Semilight Italic (TrueType)"="seguisli.ttf"

"Segoe UI Symbol (TrueType)"="seguisym.ttf"

"Segoe MDL2 Assets (TrueType)"="segmdl2.ttf"

"Segoe Print (TrueType)"="segoepr.ttf"

"Segoe Print Bold (TrueType)"="segoeprb.ttf"

"Segoe Script (TrueType)"="segoesc.ttf"

"Segoe Script Bold (TrueType)"="segoescb.ttf"

[HKEY_LOCAL_MACHINE\SOFTWARE\Microsoft\Windows NT\CurrentVersion\FontSubstitutes]

"Segoe UI"=-

Reboot your system and your Windows will now revert the font of your choice as its default system font.
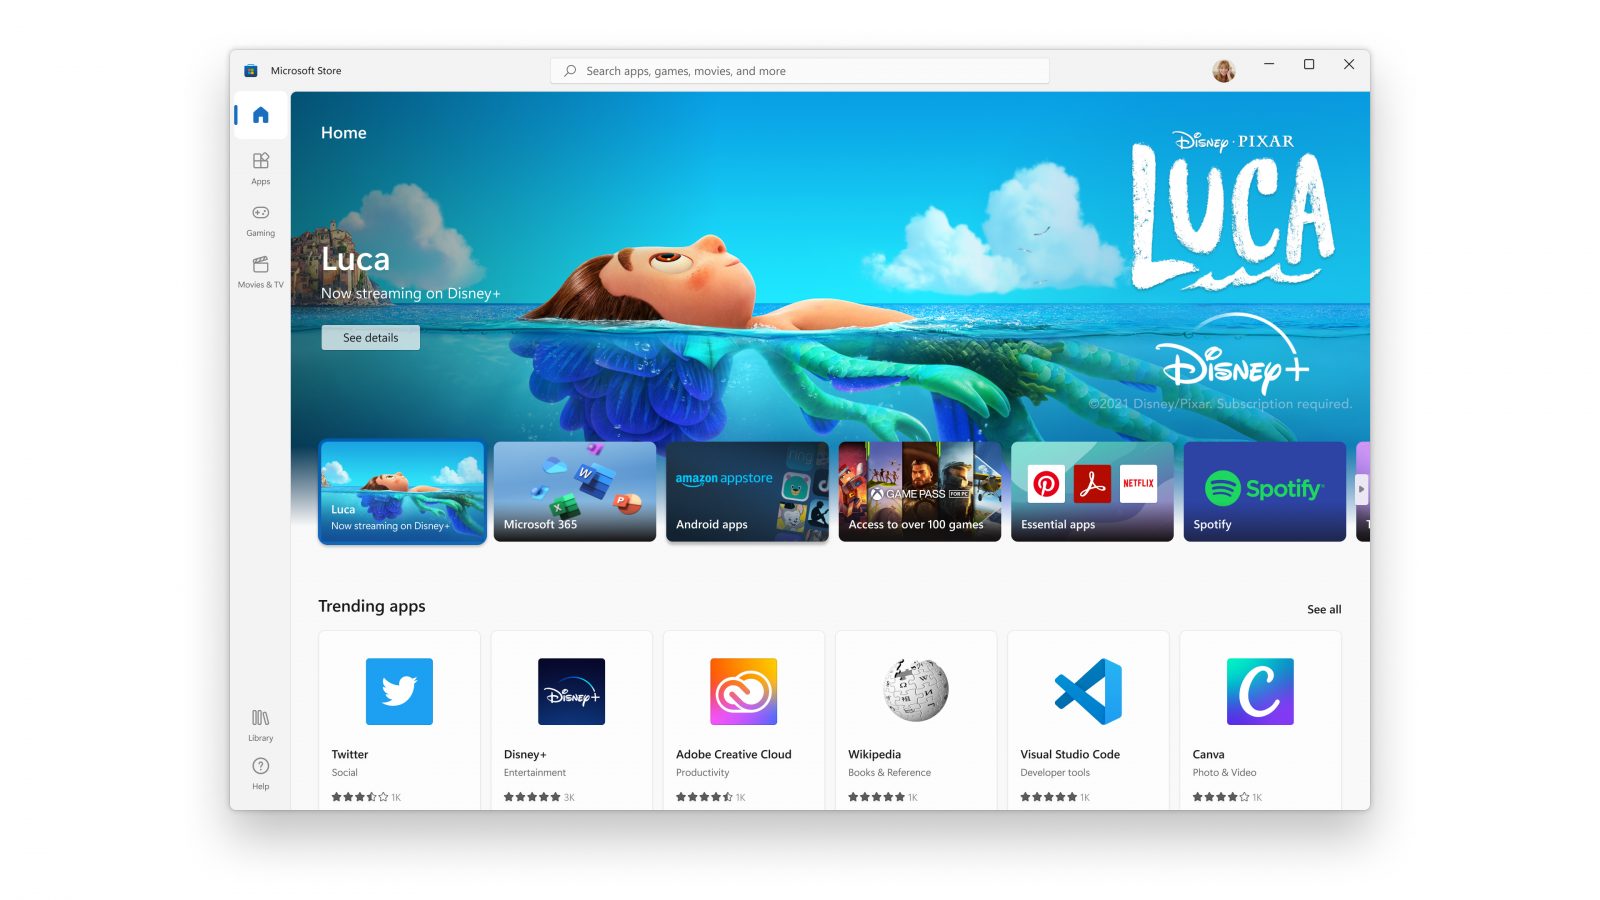
If you like to learn and find out more about various Windows errors, and how to repair them go to our vast archive or use search to find articles that will explain and help you in solving your issue.
However, if you prefer to do things fast and with automatization then we are proposing to use an automated solution for your issues. The application that we are recommending is Advanced System Repair Pro
Advanced System Repair utilizes multiple tools all in one to give you a quick, simple, reliable, and very thorough diagnosis of your PC. It brings you all the tools you need in one program to clean, fix, protect, optimize and boost your PC!
1-Click Maintenance
All the tools to make it simple and easy! It's like having a professional technician at the click of a mouse.

Junk Cleaner
Keeping your computer free from unnecessary clutter also helps make your computer last longer. Like any other machine, if you keep it clean and take care of it, it will serve you better for longer!

Optimize background apps
Optimize applications background activity with the built-in Application Optimizer feature.

Disk Defrag
With a simple 1-click, Advanced System Repair speeds up your PC by assembling fragmented files on your machine and organizing them more efficiently.

Malware Removal
Finds and removes all types of harmful malware including trojans, worms, bots, adware, spyware, PUPs, and more!

Privacy Cleaner
The all-in-one privacy suite to Clean Your Tracks & Protect Your Privacy! Make your computer safe, secure, and more efficient!

System Tweak/Optimizer
ASR will analyze your complete system and settings to adjust your PC to function at its maximum performance.

Registry Cleaner
Over time, as you install and uninstall applications, the registry can become cluttered with old entries and broken settings which can result in program crashes, and annoying messages and slow the computer down.
Visit our Advanced System Repair Pro Download page to inform yourself about all the benefits of this software and get a free trial copy of it.
advanced system repair pro

Advanced System Repair Pro

One-click automated PC repair solution
ASR logo
With Advanced System Repair Pro you can easily
Replace damaged files
Restore performance
Free disk space
Remove Malware
Protects WEB browser
Remove Viruses
Stop PC freezing
DOWNLOAD
Privacy Policy | Terms of Use | Uinstall
Advanced System Repair Pro is compatible with all versions of Microsoft Windows including Windows 11

Share this article:

You might also like

New Microsoft Windows 11 store
When Microsoft held Windows 11 presentation it took special time to present the upcoming new Windows 11 store as kind of a big deal. It was openly stated that with new Windows we will get a new store with a different attitude and new look.

microsoft storeNew Microsoft store

Microsoft has stated that both customer and developer feedback over time has contributed to their redesign and rethinking of the store itself. They want to be sure that policies for developers are more straightforward and clear so more developers will decide to bring their product to Windows. As for customers, they want more safety and more security so they feel protected when making a purchase. The new store will come in Windows 11 but also in Windows 10 as well via update.

Stories and collections

Introducing the new store will be curated stories. Microsoft believes that stores should be focused on user experience so stories from customers themselves will play a big role here. They are rich editorial content to keep you informed about the best apps and inspire you to achieve more with your device. This approach to information is aimed at bringing unknown applications to users via presenting them in a professional manner. Android apps in the store As stated in Windows 11 unveiling and presentation, Android apps will work inside Windows 11. Microsoft has teamed up with Amazon to bring you Android apps directly inside Windows via the new Microsoft store.

Pop up store from within a browser

When you are surfing on a certain webpage and want to save and install the application from there, a new pop-up store window will show allowing you to install the app directly. Microsoft has not said will this feature work outside their Edge browser so we will have to wait and see about that.

Support for multiple types of applications

Since now developers were tied to certain formats if they wanted to publish their application in any kind of environment. Microsoft wants to bridge this. Windows developers can publish any kind of app, regardless of app framework and packaging technology – such as Win32, .NET, UWP, Xamarin, Electron, React Native, Java, and even Progressive Web Apps. For Progressive Web Apps Microsoft has made open-source tool PWABuilder 3.

Flexibility and choice of commerce platform

Starting July 28, app developers will also have an option to bring their own or a third-party commerce platform in their apps, and if they do so they don’t need to pay Microsoft any fee. They can keep 100% of their revenue.
Read More
Configuring Snapping feature in Windows 11
The Snapping feature was introduced as an essential part of Windows 11 and I like it very much, it lets you organize your opened windows much faster and with more control. However, some people do not like the feature, worry not because you can turn it off, or if you prefer you can just remove the showing layout option that is shown when hovering over Minimize/Maximize button.

Snapping feature windows 11Removing options all together

To completely turn off Snap layout in Windows 11 follow these steps
  1. Open Windows 11 settings by pressing ⊞ Windows + I
  2. Select System on the left part of the screen
  3. In System options select Multitasking
  4. At the top of Multitasking Click on the switch next to Snap Windows
  5. Close settings
Changes will be automatically applied and you will no longer have Snap layout functionality.

Removing layout graphic from Snapping feature

If you like the snap Layouts feature but are not very fond of the layout graphic that is popping up each time you hover over Minimize/Maximize button do not worry, there is an option to turn just that off and keep the feature itself.
  1. Open Windows 11 settings by pressing ⊞ Windows + I
  2. Select System on the left part of the screen
  3. In System options select Multitasking
  4. Click on the Snap Windows menu
  5. Deactivate Show Snap Layouts When I Hover over a Window’s Maximize button
  6. Close settings
Now you will be able to use the Snap Layout feature without layout graphics showing. If you want to reverse any of these options and go back to standard-setting, just follow the steps and turn features ON.
Read More
Run Windows Updates from Command Line
As you know, one of the most highlighted features of Windows 10 is Windows Updates. It was offered to the customers as a service rather than a product with the release of Windows 10 under the scenario of Software as a Service which led to Windows Updates being set by default on Windows 10 and without an option for any users to disable it. Although not all users are happy with what Microsoft did, this is an ultimate step towards the greater good of all its customers since Windows Updates helps users in keeping their computers secured against all kinds of threats as well as provide them with the greatest and latest updates from Microsoft. So if you are one of those users who approved of the Windows Updates service, then read on as this post will guide you in running Windows Updates from Command Line either via Command Prompt or Windows PowerShell. For the complete set of instructions, refer to the options given below.

Option 1 – Run Windows Update via Command Prompt

Command Prompt in the Windows operating system exists for a very long time now compared to the comparatively new Windows PowerShell. That’s why it has similar capabilities to run Windows Updates. However, the highlighting point here is that you don’t have to download any module for Windows Updates. To get started running Windows Updates using Command Prompt, refer to the steps below.
  • First, type “cmd” in the Cortana search box, and from the search results, right-click on Command Prompt and select the Run as Administrator option to open it with Administrator privileges.
  • If a User Account or UAC prompt appears, just click on Yes to proceed.
  • Next, type in the commands listed below, and don’t forget to tap Enter right after you type each one of them.
    • UsoClient StartScan – use this command to start checking for updates.
    • UsoClient StartDownload – use this command to start downloading updates.
    • UsoClient StartInstall – use this command to start installing the downloaded updates.
    • UsoClient RestartDevice – use this command to restart your computer after you install.
    • UsoClient ScanInstallWait – use this command to check, download and install updates.
Note: Keep in mind that the commands in Command Prompt listed above are only meant for Windows 10. On the other hand, if you are using an older Windows version, you can try using the following commands instead:
  • wuauclt /detectnow – use this command to start checking for updates.
  • wuauclt /updatenow – use this command to start installing the updates detected.
  • wuauclt /detectnow /updatenow – use this command to check, download and install updates.

Option 2 – Run Windows Updates via Windows PowerShell

If you run Windows Updates in the Windows PowerShell, it will require you to install the Windows Update module manually. Hence, you have to get the Windows Updates downloaded and install Windows Updates.
  • Search for PowerShell in the Cortana search box and then run it with administrator privileges.
  • Once you’ve opened the Windows PowerShell, type the following command and hit Enter.
    • Install-Module PSWindowsUpdate – use this command to install the Windows Update module for Windows PowerShell.
    • Get-WindowsUpdate – use this command to connect to the servers of Windows Update and download the updates if found.
    • Install-WindowsUpdate – use this command to install the Windows Updates you’ve downloaded to your computer.
Read More
Every new movie & show on Netflix in September
netflixNetflix was one that made streaming service standard and even after some stumbles even today it is still a respected service. So in that spirit, we are bringing you the list of all new and old movies and TV series releasing to NETFLIX this September.

September 1

Turning Point: 9/11 and the War on Terror — NETFLIX DOCUMENTARY How to Be a Cowboy — NETFLIX ORIGINAL Agatha Christie’s Crooked House (2017) Anjaam (1994) Barbie: Big City Big Dreams (2021) Brave Animated Series (Season 1) Crocodile Dundee in Los Angeles (2001) Green Lantern (2011) House Party (1990) El Patron, radiografia de un crimen / The Boss: Anatomy of a Crime (2014) HQ Barbers (Season 1) Letters to Juliet (2010) Level 16 (2018) Los Carcamales / Oldsters (Season 1) Kid-E-Cats (Season 2) Kuroko’s Basketball (Season 3) Marshall (2017) Welcome Home: Roscoe Jenkins (2008)

September 2

Afterlife of the Party — NETFLIX FILM Q-Force — NETFLIX ORIGINAL The Guardian

September 3

Dive Club (Season 1) — NETFLIX ORIGINAL Money Heist (Season 5) — NETFLIX ORIGINAL Sharkdog (Season 1) — NETFLIX FAMILY Worth (2021) — NETFLIX ORIGINAL

September 5

Bunk’d (Season 5)

September 6

Countdown: Inspiration 4 Mission to Space (Season 1 – Episodes 1 & 2) — NETFLIX DOCUMENTARY Shadow Parties (2021)

September 7

Kid Cosmic (Season 2) — NETFLIX ORIGINAL Octonauts: Above & Beyond (Season 1) — NETFLIX ORIGINAL On The Verge (Season 1) — NETFLIX ORIGINAL UNTOLD: Breaking Point — NETFLIX DOCUMENTARY If I Leave Here Tomorrow: A Film About Lynyrd Skynyrd (2018)

September 8

Into the Night (Season 2) — NETFLIX ORIGINAL JJ + E — NETFLIX FILM The Circle (Season 3) — NETFLIX ORIGINAL Show Dogs (2018)

September 9

Blood Brothers: Malcolm X & Muhammad Ali — NETFLIX DOCUMENTARY The Women and the Murderer (2021) — NETFLIX DOCUMENTARY

September 10

Firedrake the Silver Dragon (2021) — NETFLIX ORIGINAL Metal Shop Masters — NETFLIX ORIGINAL Kate — NETFLIX FILM Pokemon Master Journey: The Series (Part 1) — NETFLIX ANIME Prey — NETFLIX FILM Lucifer (Season 6) — NETFLIX ORIGINAL Lucifer season 6 poster cast

September 13

Crime Stories: India Detectives (Season 1) — NETFLIX DOCUMENTARY

September 14

You vs. Wild: Out Cold — NETFLIX FILM The World’s Most Amazing Vacation Rentals — NETFLIX ORIGINAL

September 15

Countdown: Inspiration4 Mission to Space (Season 1 – Episodes 3 & 4) — NETFLIX DOCUMENTARY Too Hot to Handle Latino — NETFLIX ORIGINAL Nailed It! — NETFLIX ORIGINAL Schumacher — NETFLIX DOCUMENTARY

September 16

Safe House (2012) Birth of the Dragon (2017) He-Man and the Masters of the Universe (Season 1) — NETFLIX ORIGINAL My Heroes Were Cowboys (2021) — NETFLIX DOCUMENTARY

September 17

Chicago Party Aunt — NETFLIX ORIGINAL Sex Education (Season 3) — NETFLIX ORIGINAL Tayo and Little Wizards (Season 1) — NETFLIX FAMILY The Stronghold (2020) — NETFLIX FILM

September 22

Dear White People (Season 4) — NETFLIX ORIGINAL Confessions of an Invisible Girl — NETFLIX FILM

September 23

A StoryBots Space Adventure (2021) — NETFLIX ORIGINAL

September 24

Ganglands (Season 1) — NETFLIX ORIGINAL Midnight Mass — NETFLIX ORIGINAL My Little Pony: New Generation — NETFLIX FAMILY

September 28

Aba Twist, Scientist — NETFLIX FAMILY

September 29

Sounds Like Love — NETFLIX FILM
Read More
A Guide to Fixing Error 101

Easy Methods to Fix Error 101

Error 101 - What is it?

Error 101 is a Google Chrome error. You may experience this error if you browse the internet using Google Chrome. This error results when the existing HTTP connection between Chrome and the website is broken. The error is displayed in the following format: “Error 101 (net::ERR_CONNECTION_RESET): The connection was reset.”

Solution

Restoro box imageError Causes

The cause of Google Chrome error 101 cannot be narrowed down. This error can be triggered on your PC due to multiple reasons. These include:
  • The inability of the Google Chrome installer to create a temporary directory on your PC during the installation process
  • Enabled DNS Prefetching
  • Firewall
  • Viral Infection
  • Bad Registry Entries
  • Poor Internet Connection
Though this error code is not fatal, nonetheless it is advisable to fix it to ensure you are able to browse the internet using Google Chrome.

Further Information and Manual Repair

The good news is that this error is quite easy to resolve. Even if you are not a technical whiz you can still manage to fix it by trying these easy and effective DIY methods we have listed below:

Method 1: Reload the Website link on Chrome or Check Your Internet Connection

Sometimes refreshing the webpage can resolve the issue easily. Try doing it. Reload the link by pressing Ctrl +R. This will refresh the webpage. If it starts working then that’s great but if it doesn’t then it is advisable to check your internet connection. Disable and Enable the connection and then try browsing on Chrome again. If websites are accessible then the problem is resolved. If the error persists then try other methods.

Method 2: Disable DNS Pre-fetching

Sometimes this error may occur due to enabled DNS pre-fetching. To resolve the issue, open Chrome, then click on the wrench key. Go to setting and under the bonnet and Privacy section, look for the DNS perfecting option. If it is enabled, then uncheck it to disable DNS Pre-fetching. Save the changes and then close the browser. Now open it again and try browsing on Chrome. If error 101 does not appear and you are able to access websites then the issue is fixed.

Method 3: Scan for Viruses

Another way to fix this is to download and run a powerful antivirus. Scan and remove viruses to fix the problem.

Method 4: Check the permission for your temporary folder

As mentioned above, another underlying reason for error 101 can be Google Chrome installer was unable to create a temporary directory on your system during the installation process. To resolve it, check the permission for your temporary folder. Here’s how to do it: First go to the start menu and type Run. Now enter one of the following directories in the text fields 1. Windows XP: %USERPROFILE%Local Settings 2. Windows Vista: %USERPROFILE%AppDataLocal After that press OK. This will open a new window. In the Window that opens, right-click the temp folder. Now select properties and press the security tab to continue. In the group and user names section, select your user profile name. In the permissions, section verify that the checkboxes for READ, WRITE, and READ  & EXECUTE permissions in the DENY column are not selected. After you have verified, click apply and then ok. Now try reinstalling the Google Chrome browser again on your system.

Method 5: Remove Bad Entries by Cleaning the Registry

Bad entries and cookies saved in the registry can also lead to error 101. You can remove them manually but that will take a great deal of time and can be slightly difficult if you are not technically sound. Therefore, it is advisable to download Restoro. This is a user-friendly PC Fixer integrated with a registry cleaner that scans and removes all registry issues in a few clicks. It removes all the bad entries and junk files cluttering the registry and repairs it instantly. Click here to download Restoro.
Read More
Enable Windows Sandbox on Windows
One of the most common ways cybercriminals use to inject suspicious code into devices is by tricking users into installing a malicious program on a targeted device. Oblivious users are vulnerable to such tricks, which is why Microsoft has been working hard in the background to address this issue. Recently, Microsoft announced the availability of a sandboxed version of Windows 10 that runs inside Windows 10 in order to isolate suspected software to run inside it and protect the system from potential threats. This Windows Sandbox feature is a new feature that keeps your computer secure. It is a virtual disposable environment that you can enable. So if suspect any software of being malicious, you can run this software in an environment and ensure that it won’t interfere with any normal processes and would not jeopardize files on your computer. To simply put it, “Windows Sandbox is a new lightweight desktop environment tailored for safely running applications in isolation”. So if the Sandbox is closed, all the residual files, software, and other data are deleted permanently. To enable Windows Sandbox, refer to the instructions provided below. Step 1: You have to make sure that you are running either Windows 10 Enterprise Editions or Windows 10 Pro and that your computer is running build 18305 or newer. Step 2: After that, you have to enable Virtualization to let another instance of Windows 10 running in Sandbox mode. Step 3: Next, search for Windows Features on and off in the search box and then select the appropriate entry. Step 4: From the list, go to the mini window and check the Windows Sandbox and then click on OK. Step 5: Afterwards, in the Cortana Search box, search for “Windows Sandbox” and select the related entry to run it in an elevated window. Step 6: Then from your main computer (host), copy the executable file and paste it inside the Windows Sandbox environment. Step 7: Now run the executable file in the Sandbox environment and use it as you normally do. Step 8: Once you’re done, close the Windows Sandbox application and as mentioned, every data regarding the executable file and the temporary environment will be deleted. Step 9: And for the sake of safety, ensure that there are no modifications made to the host because of the executions in the Sandbox environment. You have the option to contact Microsoft for feedback related to Windows Sandbox. You can use the traditional Feedback Hub if you have any suggestions or any issues. Just fill in the appropriate details and select Windows Sandbox for the feature category under the Security and Privacy section. And if you have any issues related to the execution of and within Windows Sandbox, simply choose “Recreate my problem” then select Start capture to reproduce the issue, and once you’re done, select Stop capture.
Read More
Cortana can’t connect to the Internet
One of the most sophisticated Artificial Intelligence or AI assistants there is in the market is Cortana. However, no matter how sophisticated this AI assistant may be, there are still times when you encounter issues with it. So if your Cortana is not connecting to the internet, worry not for this post will guide you in fixing the problem. This connection issue in Cortana might have something to do with the settings, network connectivity, or your Microsoft account. In addition, it could also be that the Firewall or antivirus program interferes with its connection. Whichever the case is, here are some possible solutions that could help you resolve the problem.

Option 1 – Try to power cycle the modem, router, and computer

  • Connect the modem, router, and the PC hard-wired and then switch all of these three devices off.
  • Turn on the modem and wait for 30 seconds.
  • Turn on the router and wait for 30 seconds as well.
  • Finally, turn on the computer and check if you can now successfully connect to the internet.

Option 2 – Check if your router or ISP is properly working

Since the basis for this issue is that Cortana is not connecting to the internet even though you are able to access websites using your browser, you might want to check your router or ISP (Internet Service Provider) and see if they’re functioning properly.

Option 3 – Try changing your internet connection

You can also try changing your internet connection and see if it fixes the problem. If you are using Ethernet, you can try connecting to a Wi-Fi connection and see if Cortana is able to connect or not.

Option 4 – Try to run the Search and Indexing troubleshooter

You might also want to run the Search and Indexing troubleshooter in Windows 10 as it checks whether the settings for Cortana are in place and automatically corrects any issues if the update or software installation has changed the settings. To run it just click on the Start button and select Settings > Updates and Security > Troubleshoot. From there, select the Search and Indexing Troubleshooter. Note: You can also run the Network Troubleshooter as it can also help in resolving the issue especially if the problem is in the network.

Option 5 – Try to remove Proxy

Removing the Proxy might also help you in fixing the connection issue in Cortana. Here’s how you can do it:
  • Tap the Win + R keys to open the Run dialog box.
  • Then type “inetcpl.cpl” in the field and hit Enter to pull up the Internet Properties.
  • After that, go to the Connections tab and select the LAN settings.
  • From there. Uncheck the “Use a Proxy Server” option for your LAN and then make sure that the “Automatically detect settings” option is checked.
  • Now click the OK and the Apply buttons.
  • Restart your PC.
Note: If you are using a third-party proxy service, you have to disable it.

Option 6 – Verify your Microsoft account

In some cases, Cortana might not be able to connect to the internet because your Microsoft account is no longer verified. This usually happens when you use a two-step authentication system with your Microsoft account. To verify it, just open Settings and click on Accounts. After that, check if you have a Verify hyperlink under your Microsoft account or not then click on Verify. Afterward, follow the next on-screen prompts to verify your Microsoft account. Once your account is verified, restart your computer.

Option 7 – Try resetting Cortana

  • Open Cortana and go to the Settings section where you’ll see the “Turning off Cortana clears what Cortana knows on this device, but won’t delete anything from the Notebook. After Cortana is off, you can decide what you’d like to do with anything still stored in the cloud” option. Turn this option off.
  • Restart your PC.
  • After your computer boots, launch Cortana again and check.

Option 8 – Try to reinstall Cortana

If none of the options given above works, you must consider reinstalling Cortana.
  • First, right-click on the Start button and click on the Windows Powershell (Admin) option from the list.
  • Next, type the following command and hit Enter to execute it:
Get-AppXPackage -Name Microsoft.Windows.Cortana | Foreach {Add-AppxPackage -DisableDevelopmentMode -Register "$($_.InstallLocation)AppXManifest.xml"}
  • Restart your computer and check if Cortana is now able to connect.
Read More
Operation did not complete successfully
It is common knowledge that when you open a file that contains viruses, it will automatically infect the operating system. This is why most antivirus programs like Windows Defender won’t allow the opening of a file or execution of any associated program if they detected that the file or program could potentially harm the computer. In situations like this, you may get an error stating, “Operation did not complete successfully because the file contains a virus”. In addition, it is also possible that this error message can pop up even for known programs. To open the program or file that triggered the error, you will be given a couple of options in this post but make sure that the program or file is really safe to open and does not contain any virus. You can open the file or execute the program by disabling the Windows Defender or any antivirus program temporarily. You could also try to add an exclusion in your antivirus program or repair File Explorer or run the Disk Cleanup tool. For more details, refer to each one of the options provided below.

Option 1 – Try to temporarily disable the Windows Defender program

Although you could encounter this error with any antivirus program, it is more common in Windows Defender. Thus, you can try to disable it for a while when you open the file or execute the program. To do so, follow these steps:
  • First, click on the Start button and go to Settings > Update and Security > Windows Security.
  • Here, select the “Open Windows Security” option located in the right pane.
  • After that, click on the “Virus and threat protection” option.
  • Next, click on Manage settings under the Virus and threat protection settings.
  • Then turn off the switch for both Real-time protection and Cloud-delivered protection.
  • Now restart your computer and try to open the file or execute the program again and see if it works.
  • Note: Do not forget to enable the Real-time protection and Cloud-delivered protection back in Windows Defender.

Option 2 – Try adding an exclusion in the Windows Defender program

  • Open the Windows Defender Security Center from the system tray area.
  • Next, click the “Virus & threat protection” option and then open the “Virus and threat protection settings”.
  • After that, scroll down until you find the “Exclusions” and click on the “Add or remove exclusions” option.
  • Then click the plus button and select the type of exclusion you want to add and from the drop-down list, select Folder.
  • Next, navigate to the path where the file or program is located.
  • When a User Account Control or UAC prompt, just click on Yes to proceed.
  • Now try to run the program or file again and see if it worked. If it did, then make sure to turn on your antivirus. However, if it didn’t work, proceed to the next given options below.

Option 3 – Try to run a System File Checker scan

System File Checker or SFC is a built-in command utility that helps in restoring corrupted files as well as missing files. It replaces bad and corrupted system files with good system files that might be the cause why you’re getting the errors 0x8024a11a and 0x8024a112. To run the SFC command, follow the steps given below.
  • Type “cmd” in the Start search and then right-click on the appropriate search result.
  • Next, select “Run as administrator” to open Command Prompt with admin privileges.
  • After opening Command Prompt, type in sfc /scannow
The command will start a system scan which will take a few whiles before it finishes. Once it’s done, you could get the following results:
  1. Windows Resource Protection did not find any integrity violations.
  2. Windows Resource Protection found corrupt files and successfully repaired them.
  3. Windows Resource Protection found corrupt files but was unable to fix some of them.
 Now restart your computer and see if the problem is fixed or not.

Option 4 – Run the Disk Cleanup tool

You can also try using the Disk Cleanup tool. To use it, refer to these steps:
  • Tap the Win + R keys to open the Run dialog box and then type “cleanmgr” in the field and hit Enter to open the Disk Cleanup window.
  • After that, select the drive you want to clean.
  • Now click OK to clean the disk and restart your computer.
Read More
Signs of a dying graphic card
Can graphic cards wear out over a longer period of time? Recent studies and experience from crypto miners say no but they can die due to different reasons like improper use, low cleaning habits, factory mistakes, etc. Many gamers and people who use GPU intense applications tend to think that some glitches and hiccups in the software are a sign that graphic card is dying out and that it is time to be replaced. Altho this could be true in many cases these kinds of behavior are mostly due to old drivers and software issues. Older cards can produce these kinds of results due to their old age and new software is often more demanding than these cards can handle. So in order to diagnose and be sure that your GPU is indeed dying out lookout for these signs.

The Main Signs of a Dying GPU:

The Computer Crashes and Won’t Reboot

If your computer shutdown while working in the graphic application or while playing the game and the monitor loses signal there is a high chance the graphic card is soon going to be gone. Some motherboards have hardware detection failure and can signal immediate fail. If when turning your computer ON you are greeted with a blue screen with the message that the signal can not be found or you do not have picture at all it is most likely that GPU has failed.

Graphic Glitches While Playing Games

If you are playing the game and all of sudden you get off-color pixels, screen flickering, strange graphic behaviors, random artifacts, or similar and that keeps repeating in multiple games it is likely that GPU days are coming to an end.

Abnormal Fan Noise or Performance

Fans are an essential part of cooling the GPU and over time if they are intensively used they could wear out and need replacing. If however you have not noticed and have not replaced the fans card can sustain overheating damage. Many cards have cooling fans that are designed to spin at a higher RPM only when the GPU is under load. It prevents bearings in the fans from dying prematurely, so don’t worry if one of your fans is inactive while you are browsing the web. However, when you play games that utilize software that your card isn’t built to support, the bearings in the fans wear out faster. Once the fans stop working under load, the graphics card can quickly die.

How to Diagnose a Dying Graphics Card

Presented next are essential steps in order to recognize a dying graphic card.

Check Motherboard Error Codes

Many motherboards today completely shut down a component that is no longer working. If your graphics card has died completely, this may be one of the easiest ways to tell. If your motherboard doesn’t have display codes, you can try testing the card in a new system.
  • Open the computer case: Use your screwdriver to remove screws on the side panel and gently slide it back.
  • Locate the error code display on your motherboard: If you have a motherboard with error codes, they should appear near an outer corner.
  • Try to reboot your computer: Record each error number you see after you boot your computer.
  • Consult the motherboard manufacturer manual for error codes: Open the manual and locate the list for your error codes. If the code matches a graphics processing unit error, your video card could have died.

Check Hardware for Damage or Debris

A graphics card that has damage or debris on the physical parts might quickly overheat and kill the card.
  • Remove the screws holding the GPU in place: There are typically one or two screws holding the card to a bracket on the case.
  • Unhook the power cords from the GPU and pull the release tab: Remove the power cords from your GPU by pushing in their tabs and gently rocking them out. Once you remove each cord, gently push or pull up on the release tab near the motherboard.
  • Inspect the GPU for damage/debris: Check the card for any dirt or debris buildup and clean it out with a Q-tip. You can replace broken fan pieces from the manufacturer.

Test Your GPU Under Load

Download GPU stress-testing and heat-monitoring software.
  • With the card installed, run a stress test.
  • As you are running the stress test, run heat-monitoring software: With the stress test running, check your heat-monitoring software for GPU overheating. Any reading over 80 degrees Celsius is too hot.
  • Check device manager for outdated drivers: If your GPU is clean, but still running too hot, your software drivers are not installed correctly. To check, type in “device manager” at the bottom of your desktop and click on Device Manager. Find your display adapter and right-click on it to see if it’s working. If your drivers are not working correctly, it is indicated here usually. However, the driver may appear to be functioning even if it says otherwise in the properties.

Keep your graphic card drivers updated

When you don’t have the right driver installed, graphics cards can quickly burn up, and their cooling components may fail faster. That’s why you should always keep drivers updated for each new game you install or play. Older games may also release new software patches, so your GPU drivers should be updated accordingly.
Read More
Malware Guide: How to Remove WidgiToolbar

Malware Guide: How to Remove WidgiToolbar

What is WidgiToolbar?

The WidgiToolbar is an unscrupulous application designed to advertise other applications as a part of a bundle, steal financial information and penetrate the security of a computer system, making it open to other threats. In most cases, WidgiToolbar claims to center its installs on toolbars but that’s not always the case. Technical details about WidgiToolbar Malware include:
Digital Publisher: GreenTree Applications srl Product Version: YTD Video Downloader 4.8.9.7 Original File Name: YTDStub.exe Entry Point:  0x0000323C

Assessment of WidgiToolbar

Created by GreenTree Applications/ Spigot Inc., the WidgiToolbar is a list of nested toolbars. This application was in fact a bundle, installing several other applications upon installation. For this installation, WidgiToolbar installed only the YouTube Downloader toolbar and several other applications. Thereafter, the application appeared pretty harmless but is intended on distributing advertisements over the user’s computer, often without the user’s discretion. It’s all in the ads. Additionally, based on evaluations made by Security Analysts, the WidgiToolbar application is used for extracting personal and financial information from a user’s computer system. Financial information encapsulates banking and credit card details. Your passwords and other highly confidential information might be detected by the WidgiToolbar application if care is not taken. Overall, the WidgiToolbar installs and collects information from your computer system without your knowledge and permission. Furthermore, WidgiToolbar leaves a computer system vulnerable and susceptible to other threats and malware. The application is known for opening a portal or door into your computer system. This implies that other software can be installed on your computer via this avenue, once again without your knowledge. Responsible for wreaking havoc on your computer, it’s then pertinent that you remove it altogether. Manually removing the WidgiToolbar is not an option. Why? A manual removal procedure will not be able to remove the software in its entirety. An automated tool is the best option. Like all other programs offered as a bundle, several other programs were installed. These include:
  1. MS Build
  2. Reference Assemblies
  3. PRO PC Cleaner
Soon after the installation of WidgiToolbar was completed, there were a total of four (4) new applications installed on the computer. These were all found in the computer's Local Drive. After WidgiToolbar was installed, the application attempted to change the default search provider to search.yahoo.com. This was a clear indication that this was a promotion to get more Internet users to use the Yahoo search engine.

Why Use Spyhunter to Remove WidgiToolbar?

As a result of its nature, the WidgiToolbar is difficult to remove. You might be able to remove other programs that were manually installed within the bundle, but to remove WidgiToolbar completely; an automated tool is a necessity. This is to ensure that specific registry keys installed by WidgiToolbar are found and removed. To completely remove WidgiToolbar from your computer, click here to download and install Spyhunter. After a scan was done with Spyhunter, there were 330 threats detected. Spyhunter was able to remove all 330 threats with ease and success.
Read More
1 2 3 162
Logo
Copyright © 2022, ErrorTools. All Rights Reserved
Trademarks: Microsoft Windows logos are registered trademarks of Microsoft. Disclaimer: ErrorTools.com is not affiliated with Microsoft, nor claim direct affiliation.
The information on this page is provided for information purposes only.
DMCA.com Protection Status